The right-click on the iPad is pretty similar in concept and execution to the long-standing right-click on Mac. In this tutorial, we show you how to do that on iPad with your finger, mouse, or trackpad.
About the right-click
In personal computing, right-click has been used for ages to bring up contextual menus, which are handy pop-up menus that appear when the right-click action is performed on an on-screen item, providing a set of useful choices that are relevant to the user’s current context.
Right-click is referred to as a secondary click in iPadOS and Control-click in macOS (as you need to hold the Control key and click once). It can be performed with your finger or with a mouse or trackpad plugged into your iPad.
Just like with your Mac, the right-click on an iPad brings up the contextual menu, with the key benefit being that the menu pops up immediately, versus waiting for a long press to take effect.
You have a few different options to right-click on an iPad.
1. With your finger
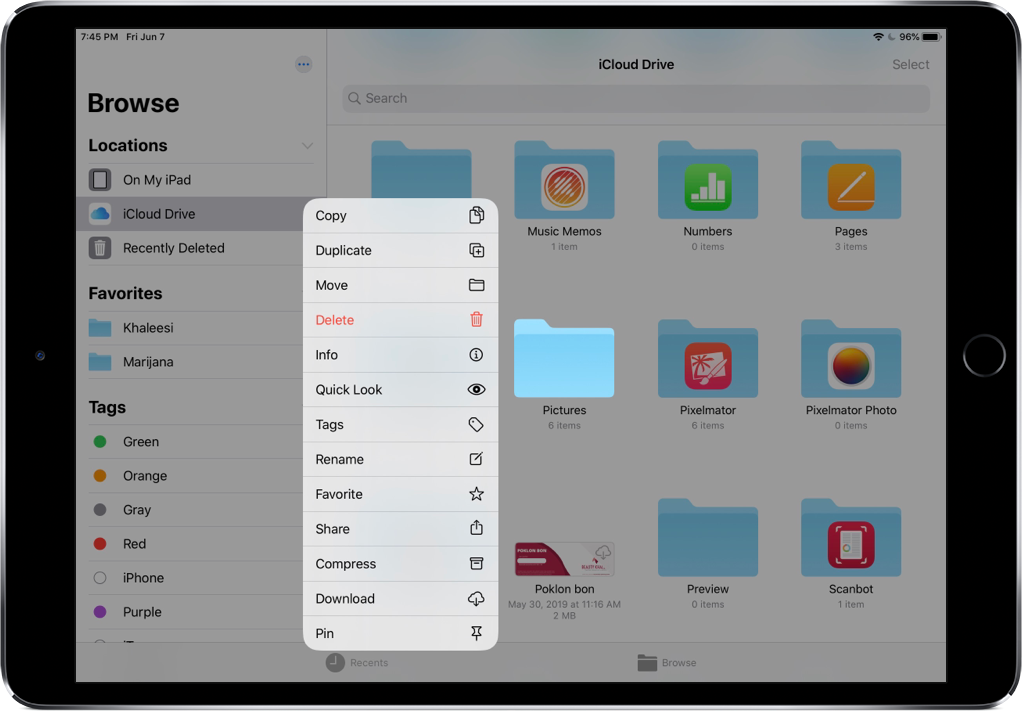
Simply touch and hold an interactive on-screen object with one finger. This will bring up the contextual menu with relevant options. As an example, you can perform the tap-and-hold gesture on things like chat bubbles in the Messages app, documents in the Files app, items in Notes, emails in the Mail app, and so forth.
2. With trackpad
iPadOS lets you not only right-click with your mouse or trackpad but also assign a different action to the right-click than the default contextual menu.
- Method 1: Click two fingers at the same time.
- Method 2: Click and hold with the trackpad to bring out the contextual menu.
- Method 3: Hold the Control key on your iPad’s physical keyboard and click once.
As you might have figured out, these methods are similar to how you right-click on Mac.
3. With mouse
Click the right mouse button in order to bring up the quick actions right-click menu.
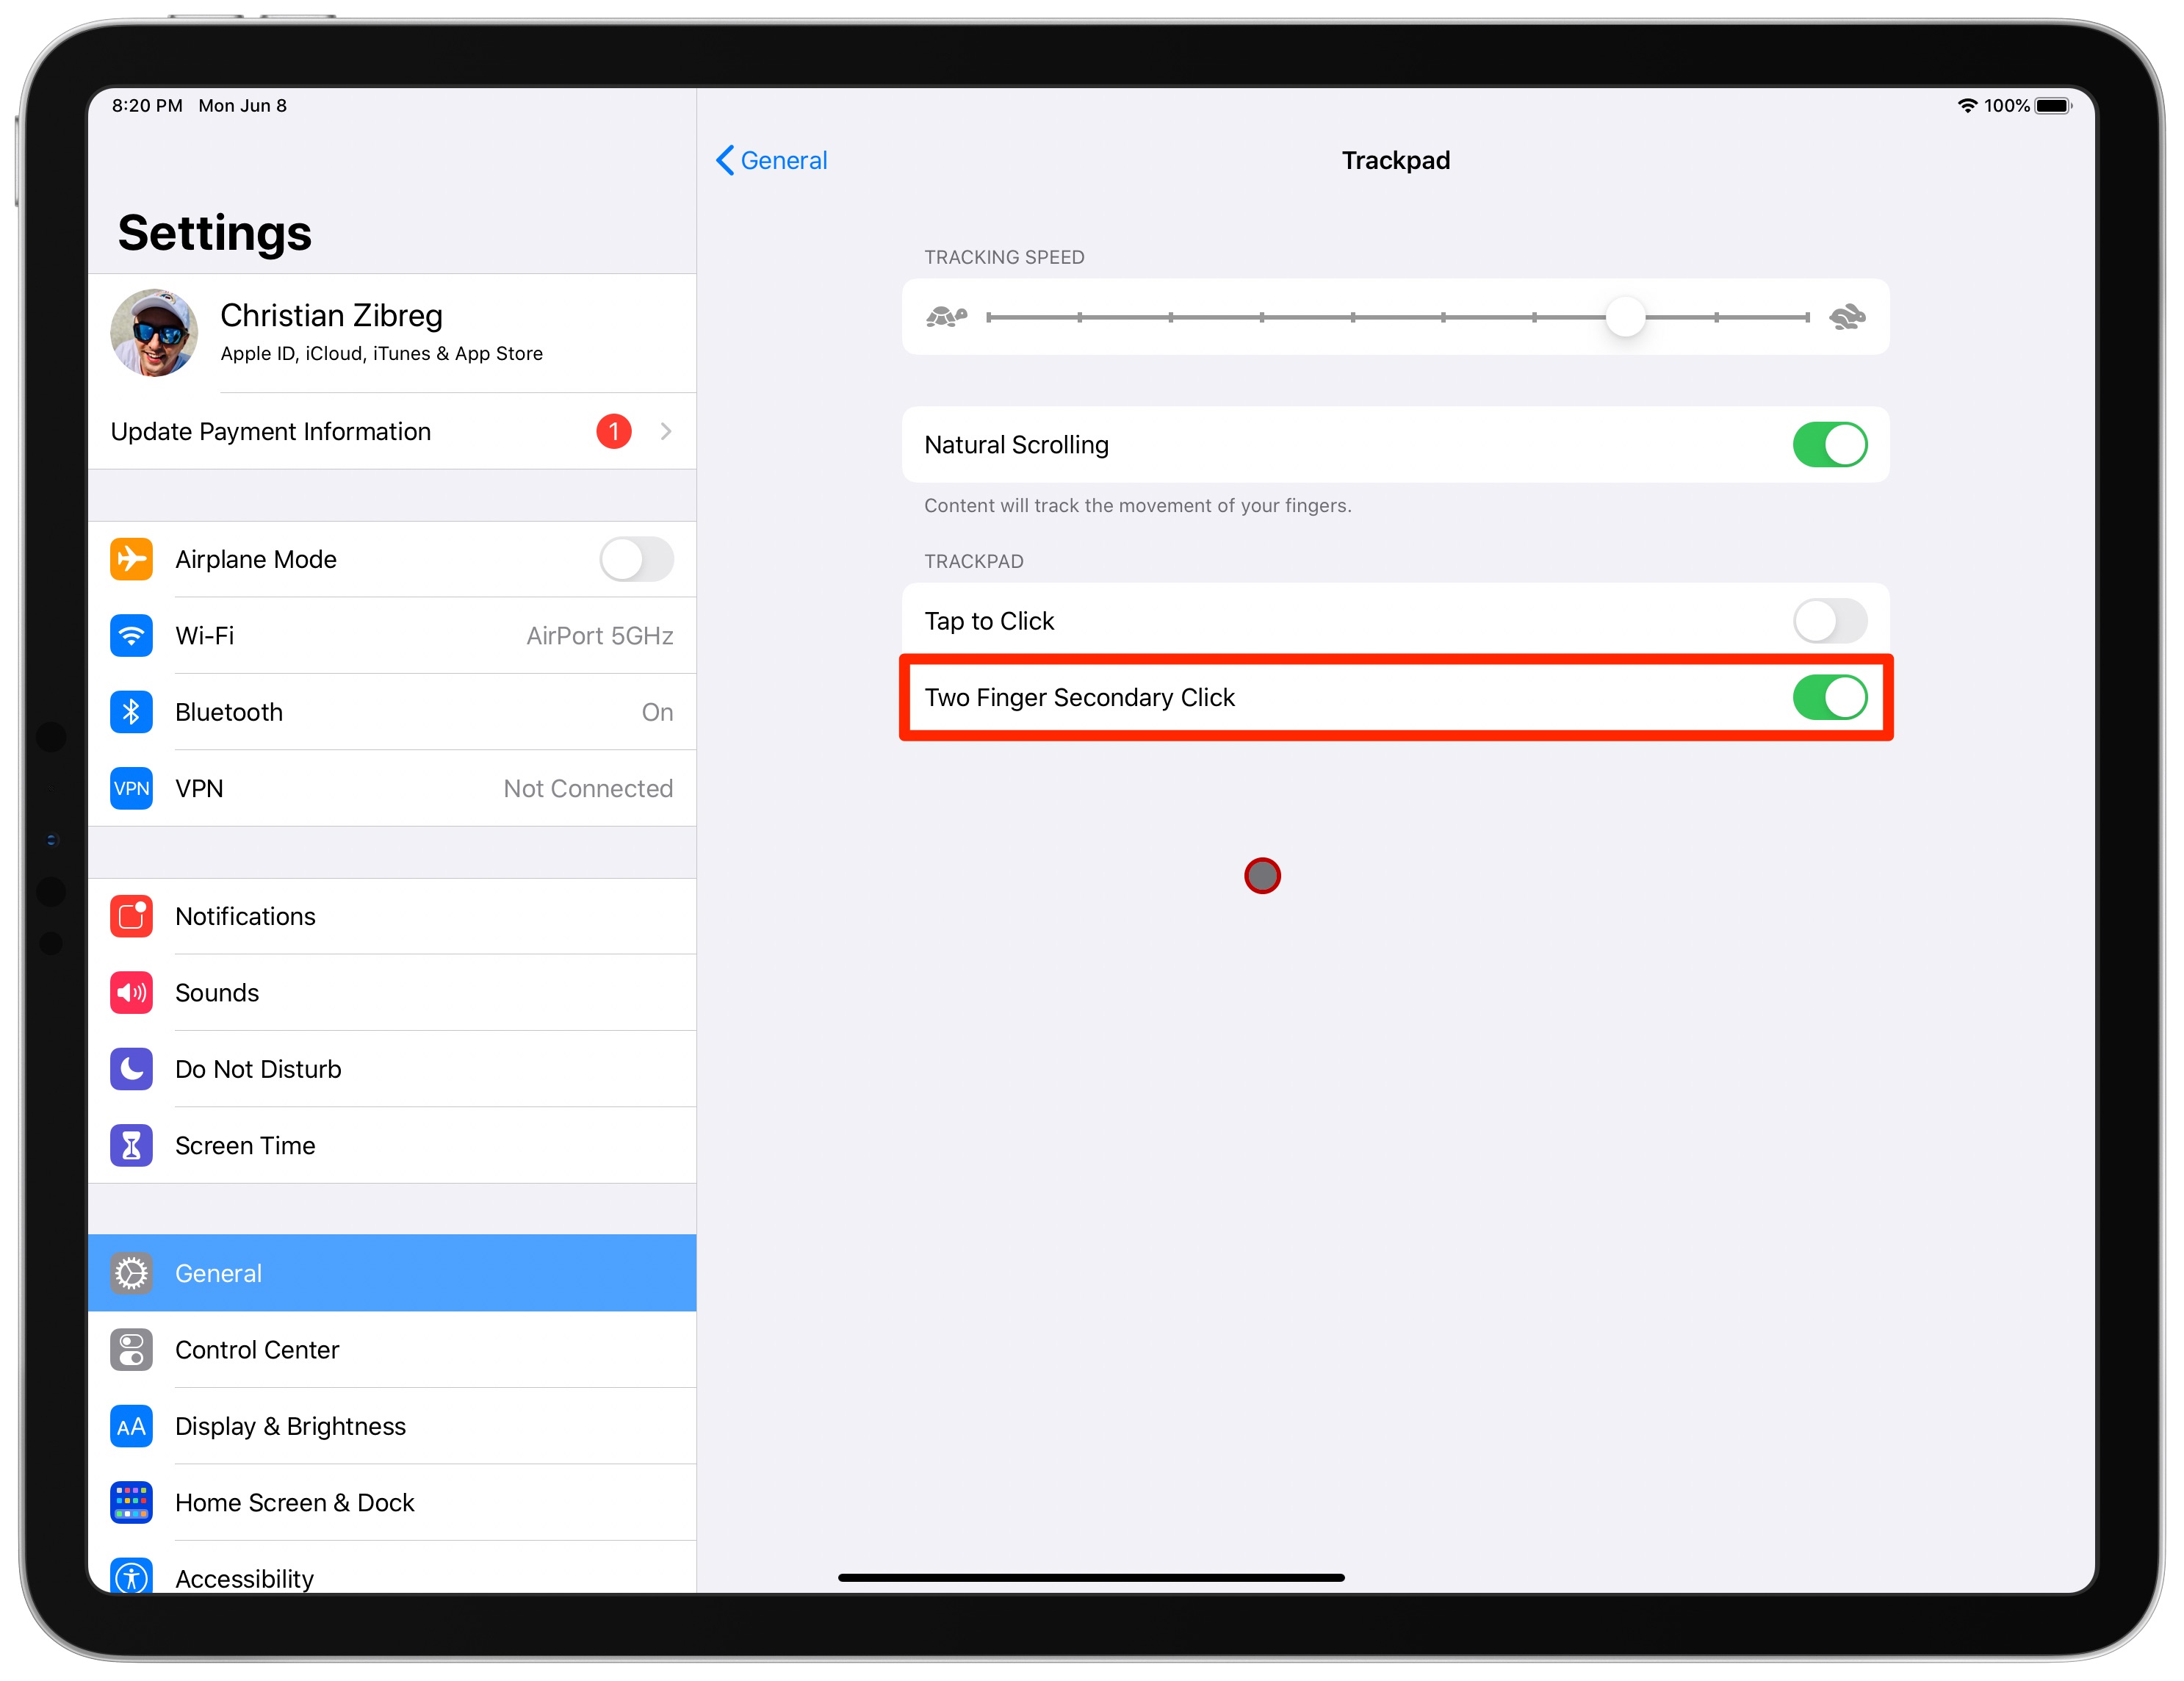
If you are not able to perform a right-click, go to iPad Settings > General > Trackpad or Trackpad & Mouse and enable Two Finger Secondary Click. A two-finger trackpad tap or mouse click will now behave as a secondary click. I also suggest turning on the Tap to Click option in your trackpad settings so that tapping the trackpad with one finger is the same as clicking.
Configure the right-click action for the mouse on iPad
Follow these steps if you’d like to assign a different action to the right-click on the mouse. Obviously, you must have a mouse paired with your iPad in order to do this.
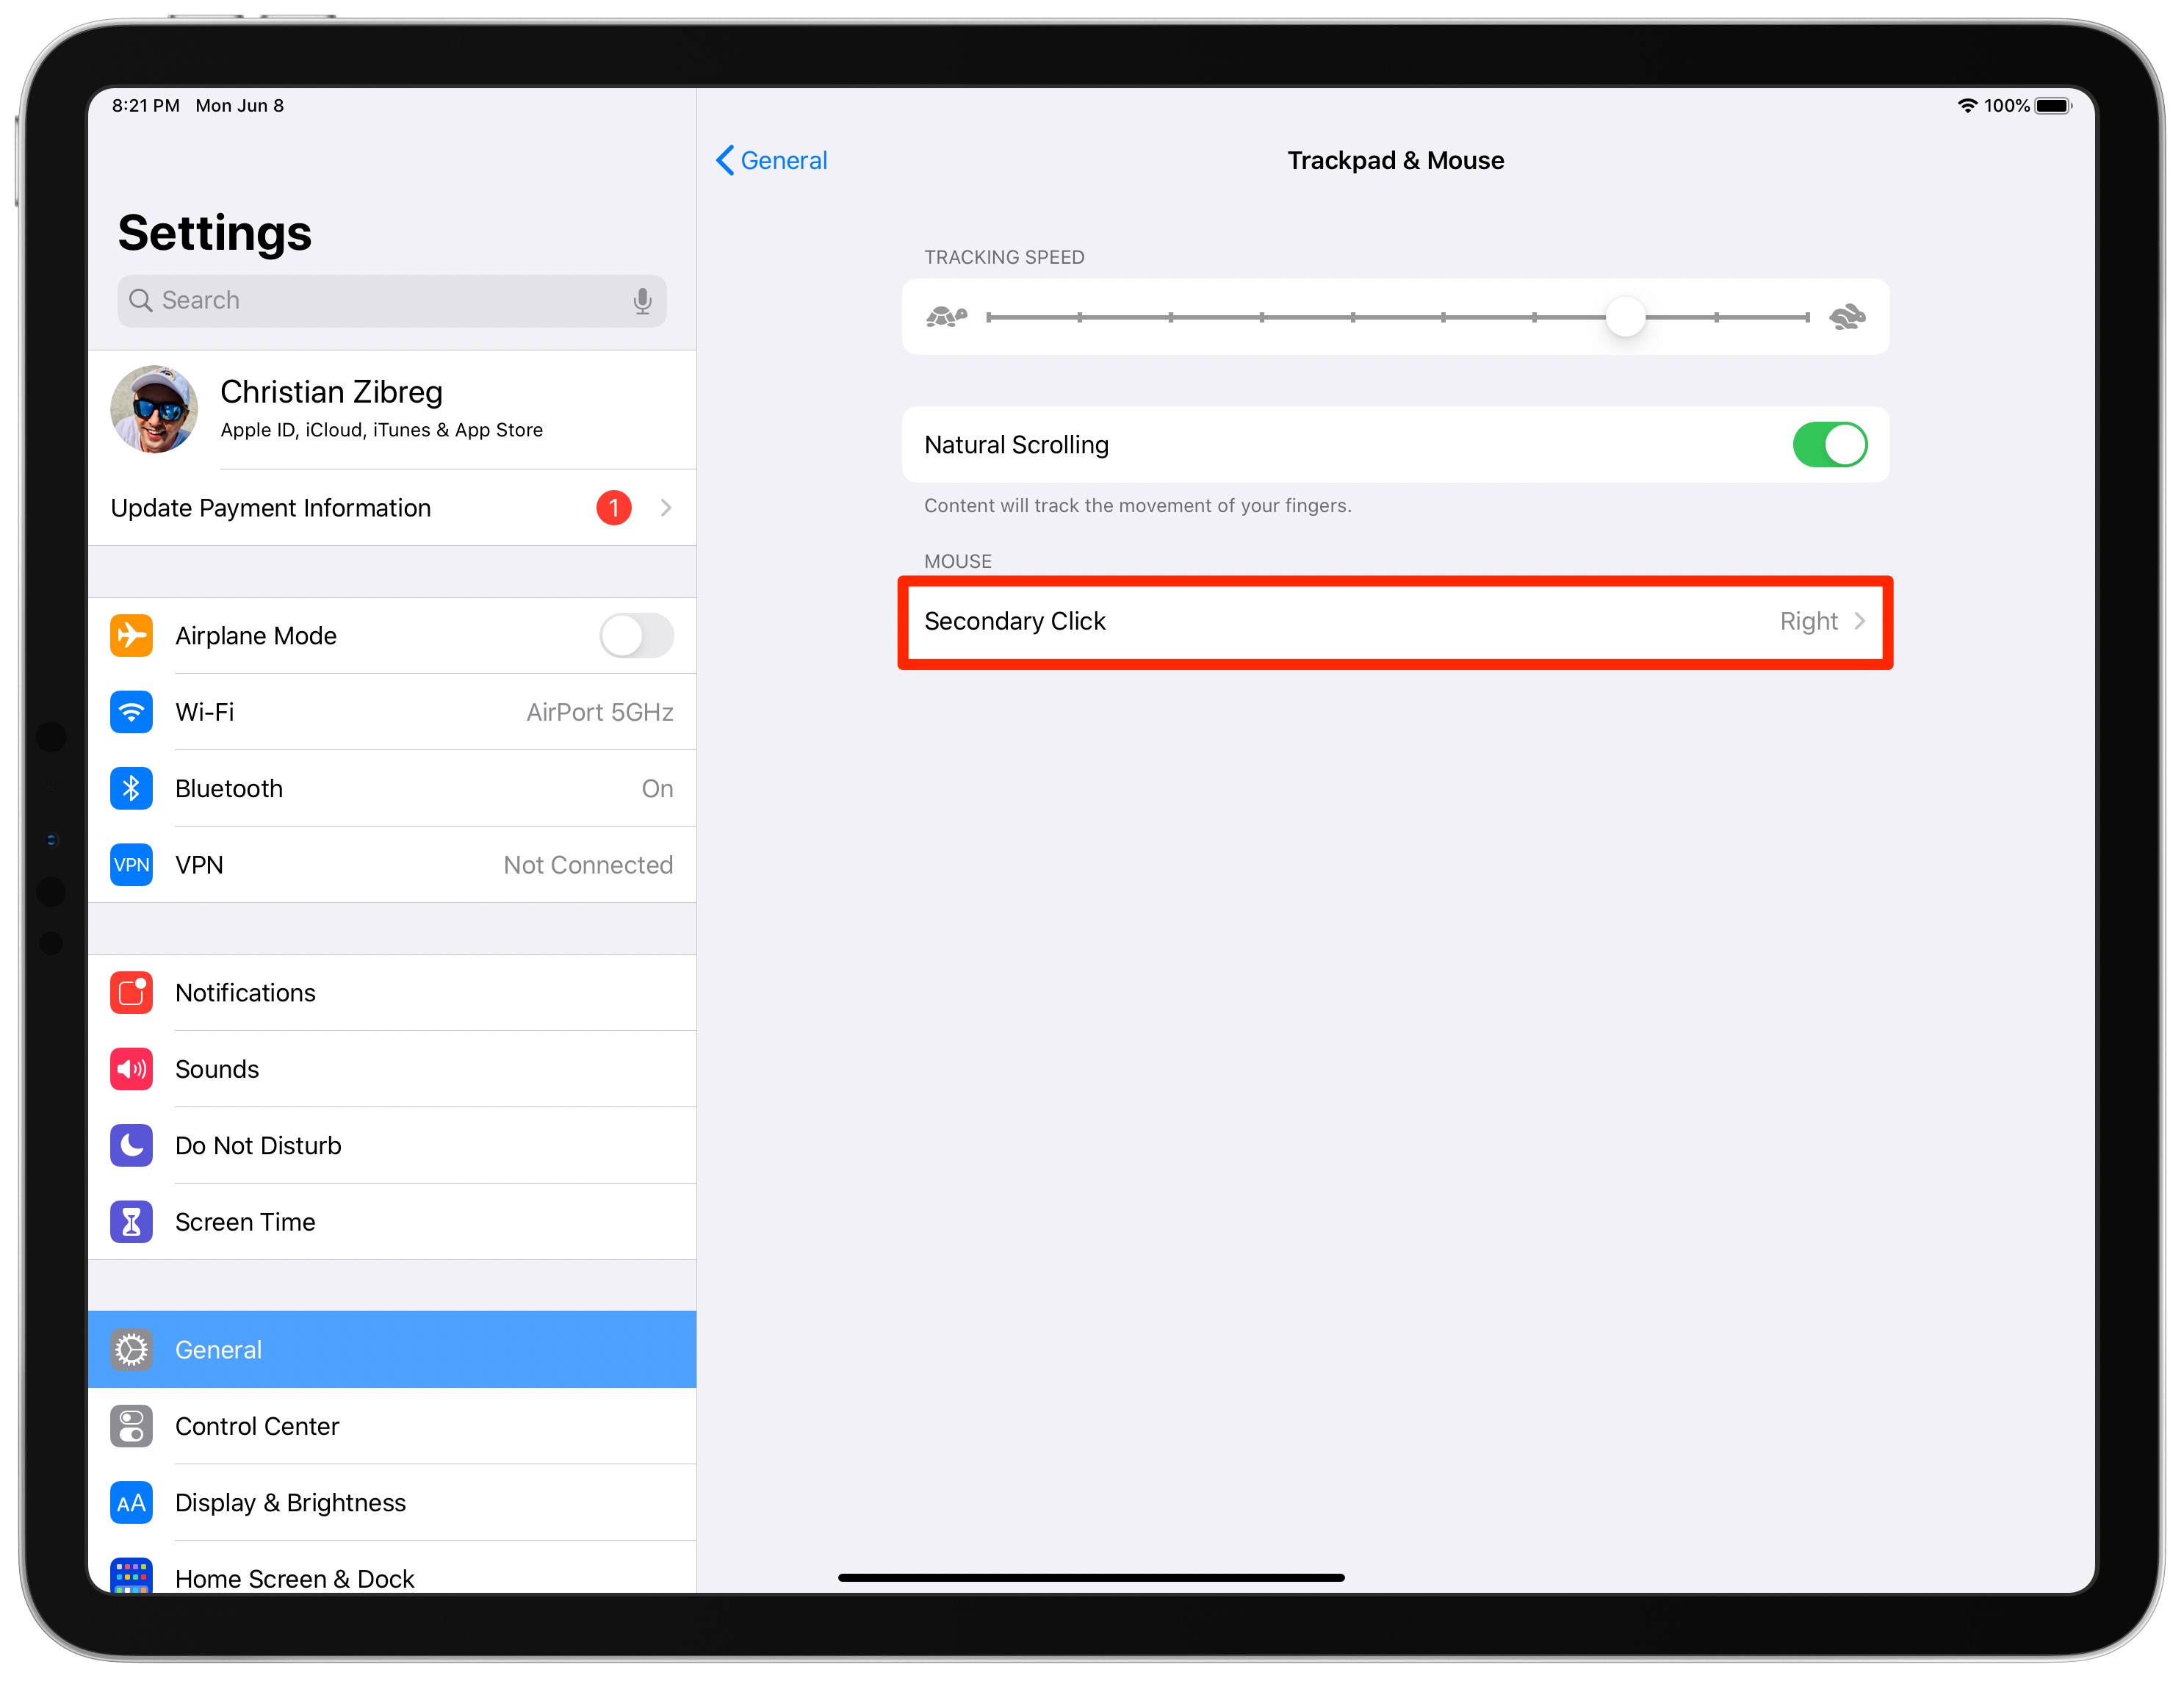
- Go to iPad Settings app > General > Trackpad & Mouse.
- Tap Secondary Click underneath the Mouse heading.
- Now, choose whether you want a secondary click action to happen when you click on the left or right side of your mouse or not at all.
Additional button customizations
You can customize button functions for pointer devices, such as your mouse or trackpad, in iPadOS accessibility settings. But be advised that you’ll need to enable AssistiveTouch for that:
- Go to iPad Settings > Accessibility > Touch > AssistiveTouch and enable AssistiveTouch.
- Then, tap Devices underneath the Pointer Devices heading.
- Select your mouse, trackpad, or another paired pointer device under the Connected Devices heading.
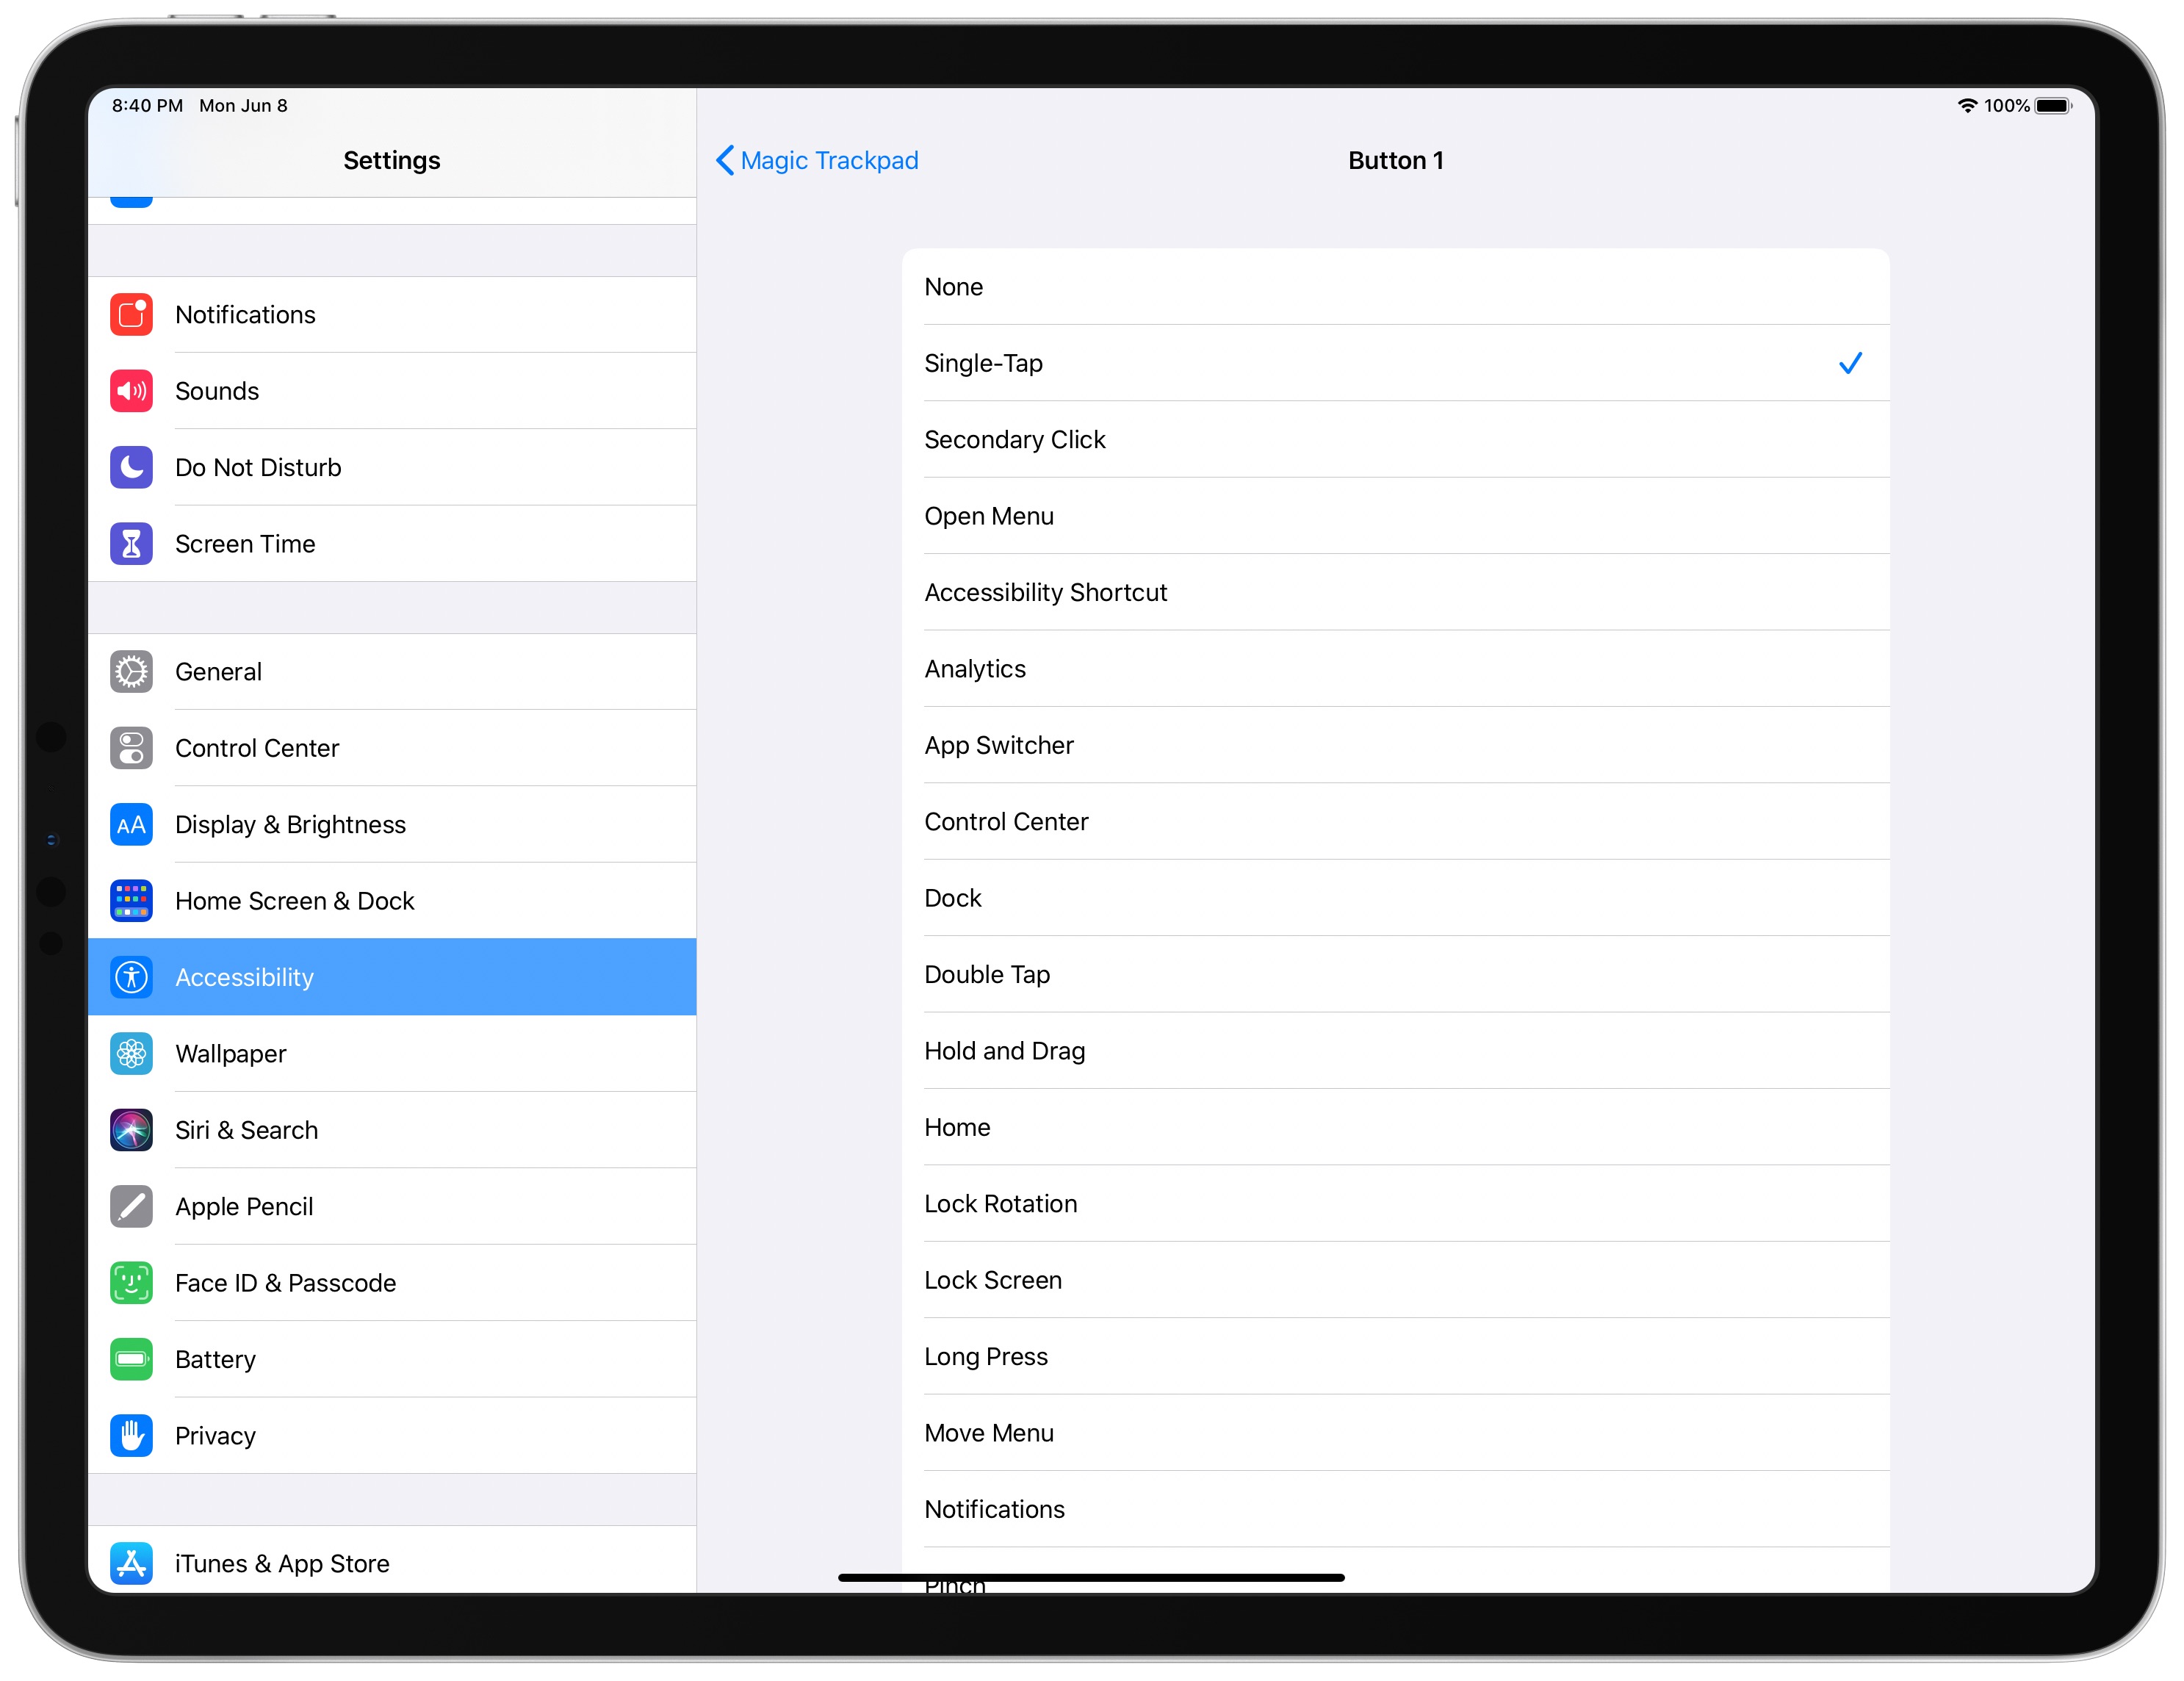
- Tap the button for your pointer device, then select a preferred action from the pre-populated list of available actions. If your device’s button is unlisted, tap Customize Additional Buttons, then press a button on your mouse to choose an action.
If I were you, I would start by first enabling the two-finger secondary click for my connected trackpad and assigning the secondary click action to my right mouse button.
Then, I would make sure to visit additional button customization in my AssistiveTouch settings to assign the Hold and Drag action to the third mouse button. That way, you could simply click an item in Photos, Files, or another app to instantly enter drag and drop mode instead of having to wait extra after tapping and holding in order for the selected item to become draggable.
Check out next: 10 iPad mouse, trackpad, and pointer tips to become more productive