Learn how to add, deactivate, and delete accounts used inside the Apple Notes app on your iPhone, iPad, and Mac.
The Notes app is a great note-taking app that syncs across your Apple Devices. And one of its standout features is that you can use it with various account types aside from iCloud, like Google or Outlook.
You can add accounts to the Notes app, and just as easily, you can remove them. Plus, you can temporarily deactivate an account from the Notes app and then reactivate it later if you like. This tutorial shows you how to do all that.
On iPhone or iPad
These settings are device-specific. So, you’ll have to follow them separately on each iPhone and iPad you own.
Add an account to Notes
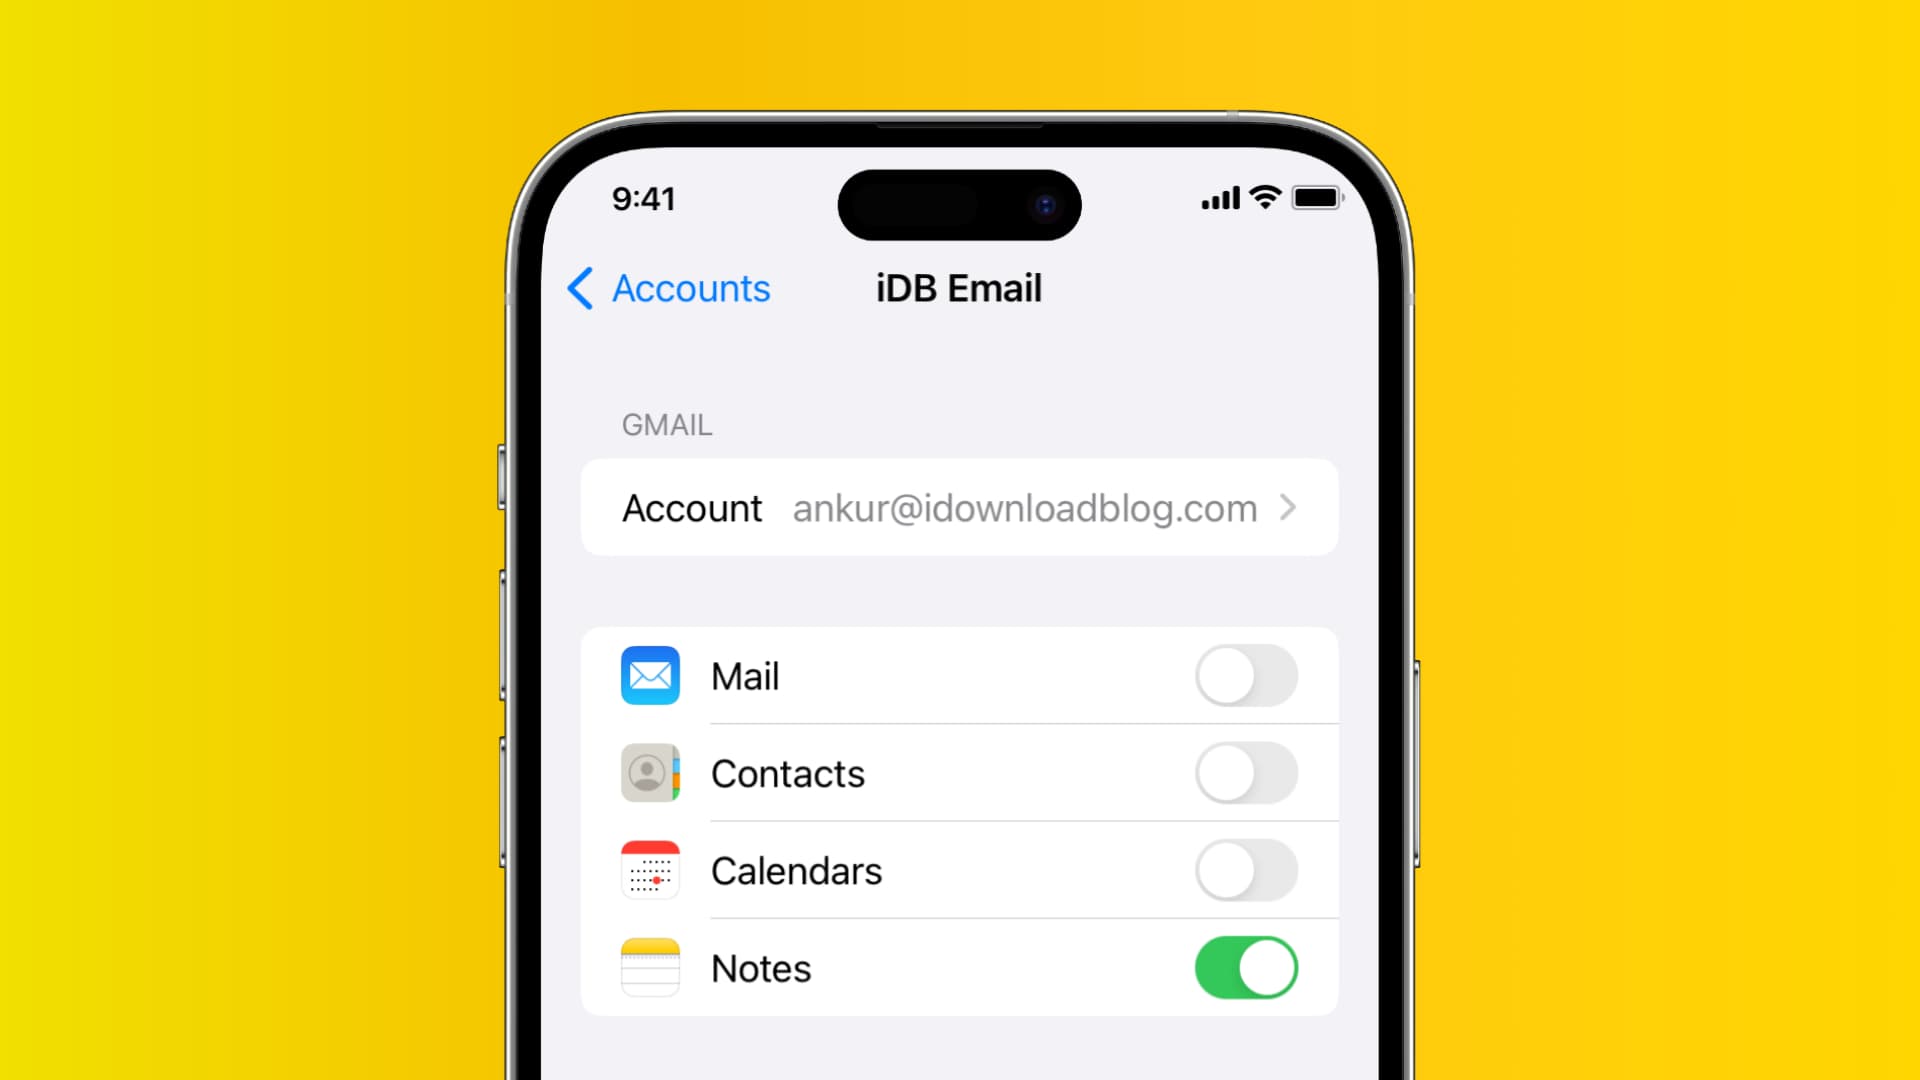
1) Open Settings and go to Notes > Accounts.
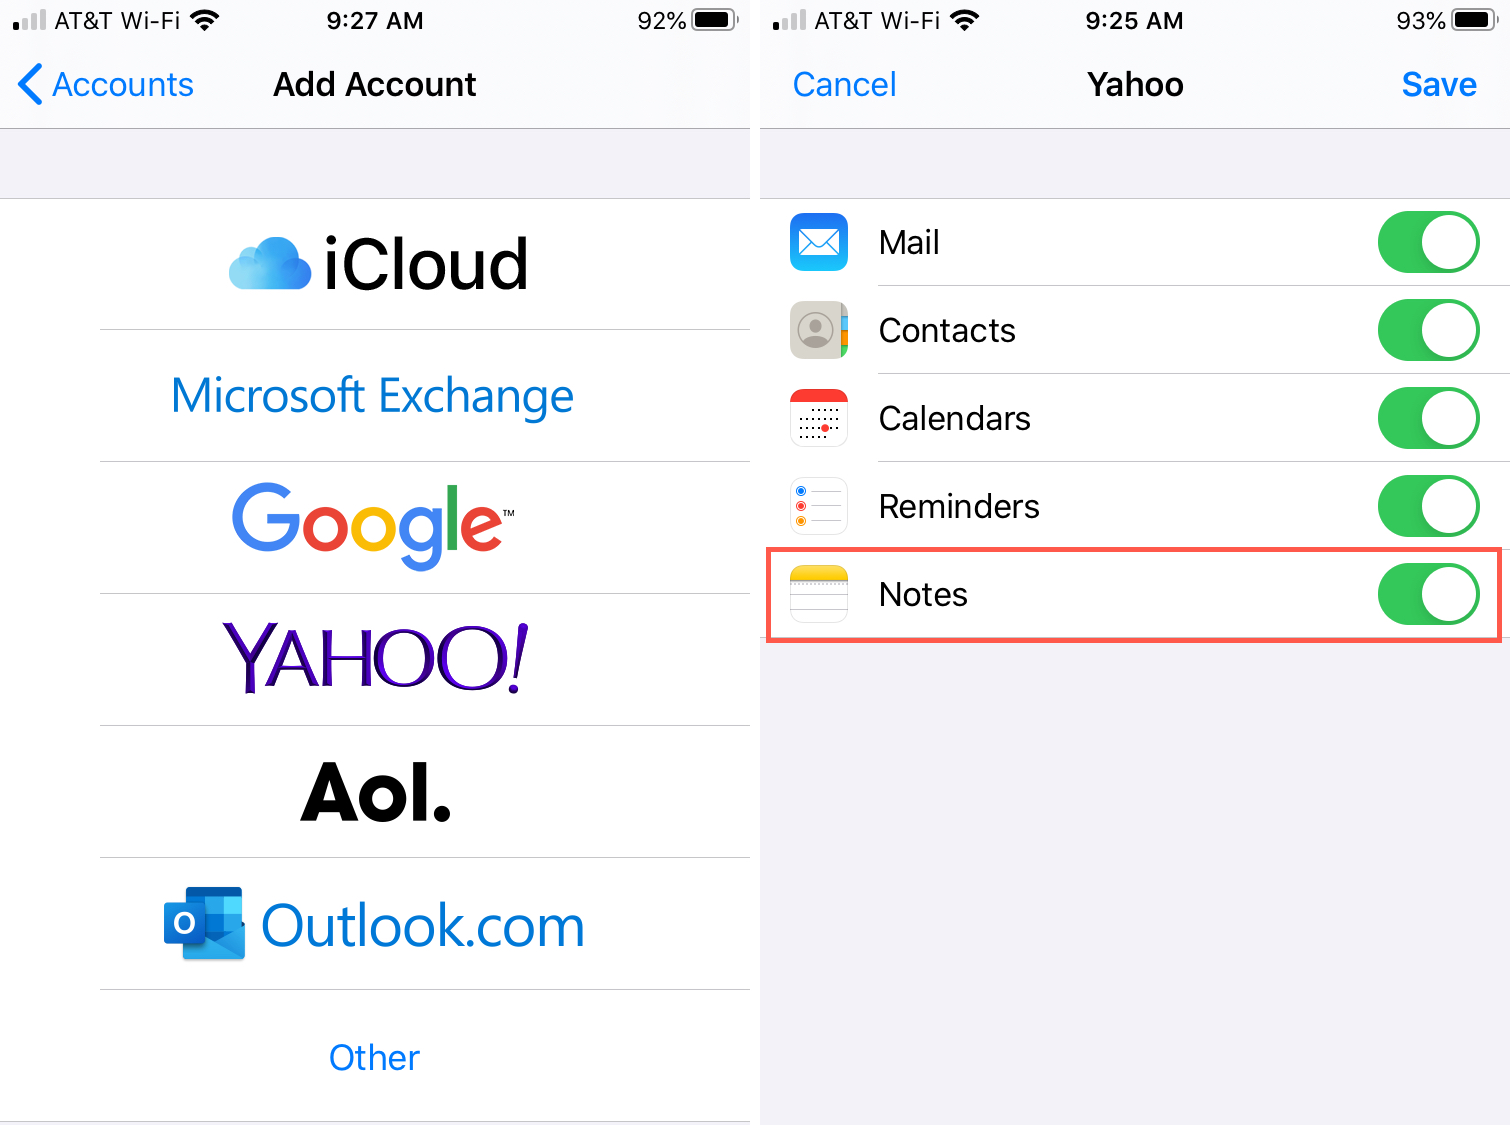
2) Tap Add Account.
3) Select your account type (or choose Other if yours isn’t listed) and follow the prompts to sign in, verify, and add the account.
4) When asked, enable the toggle for Notes along with any others you’d like to use the account for, like Mail or Calendar, and tap Save.
Deactivate an account in Notes
You can deactivate an account in Notes on iOS just as easily as on Mac; however, your notes for that account will be removed from your device.
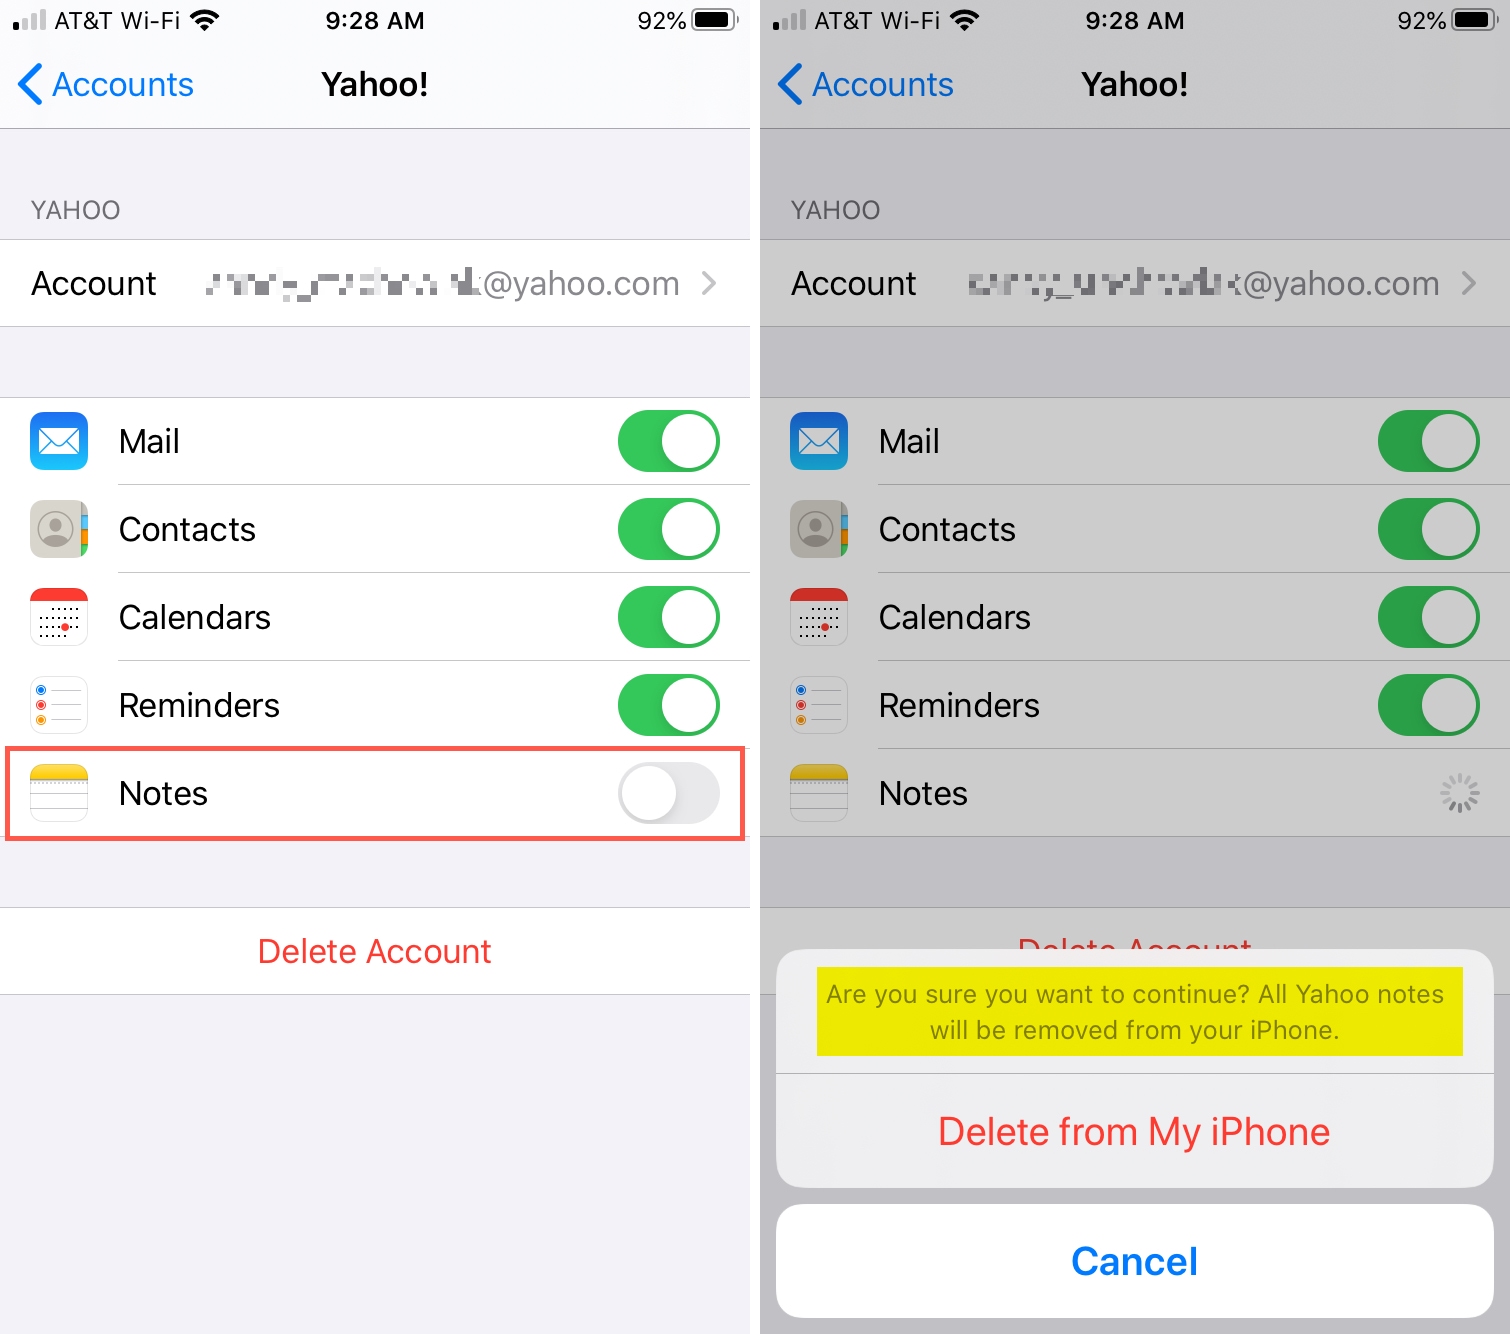
1) Open Settings and go to Notes > Accounts.
2) Select the account and turn off the toggle for Notes.
3) You’ll be asked to confirm this action because notes for the account will be deleted. If you’re sure, tap Delete from My iPhone/iPad.
Remove an account from Notes
If you have an account that you no longer use, you can remove it completely along with its saved notes from the Notes app.
Just be aware that this will remove that account completely from your device and from any other apps you enabled for it when you set it up, like Mail or Calendar.
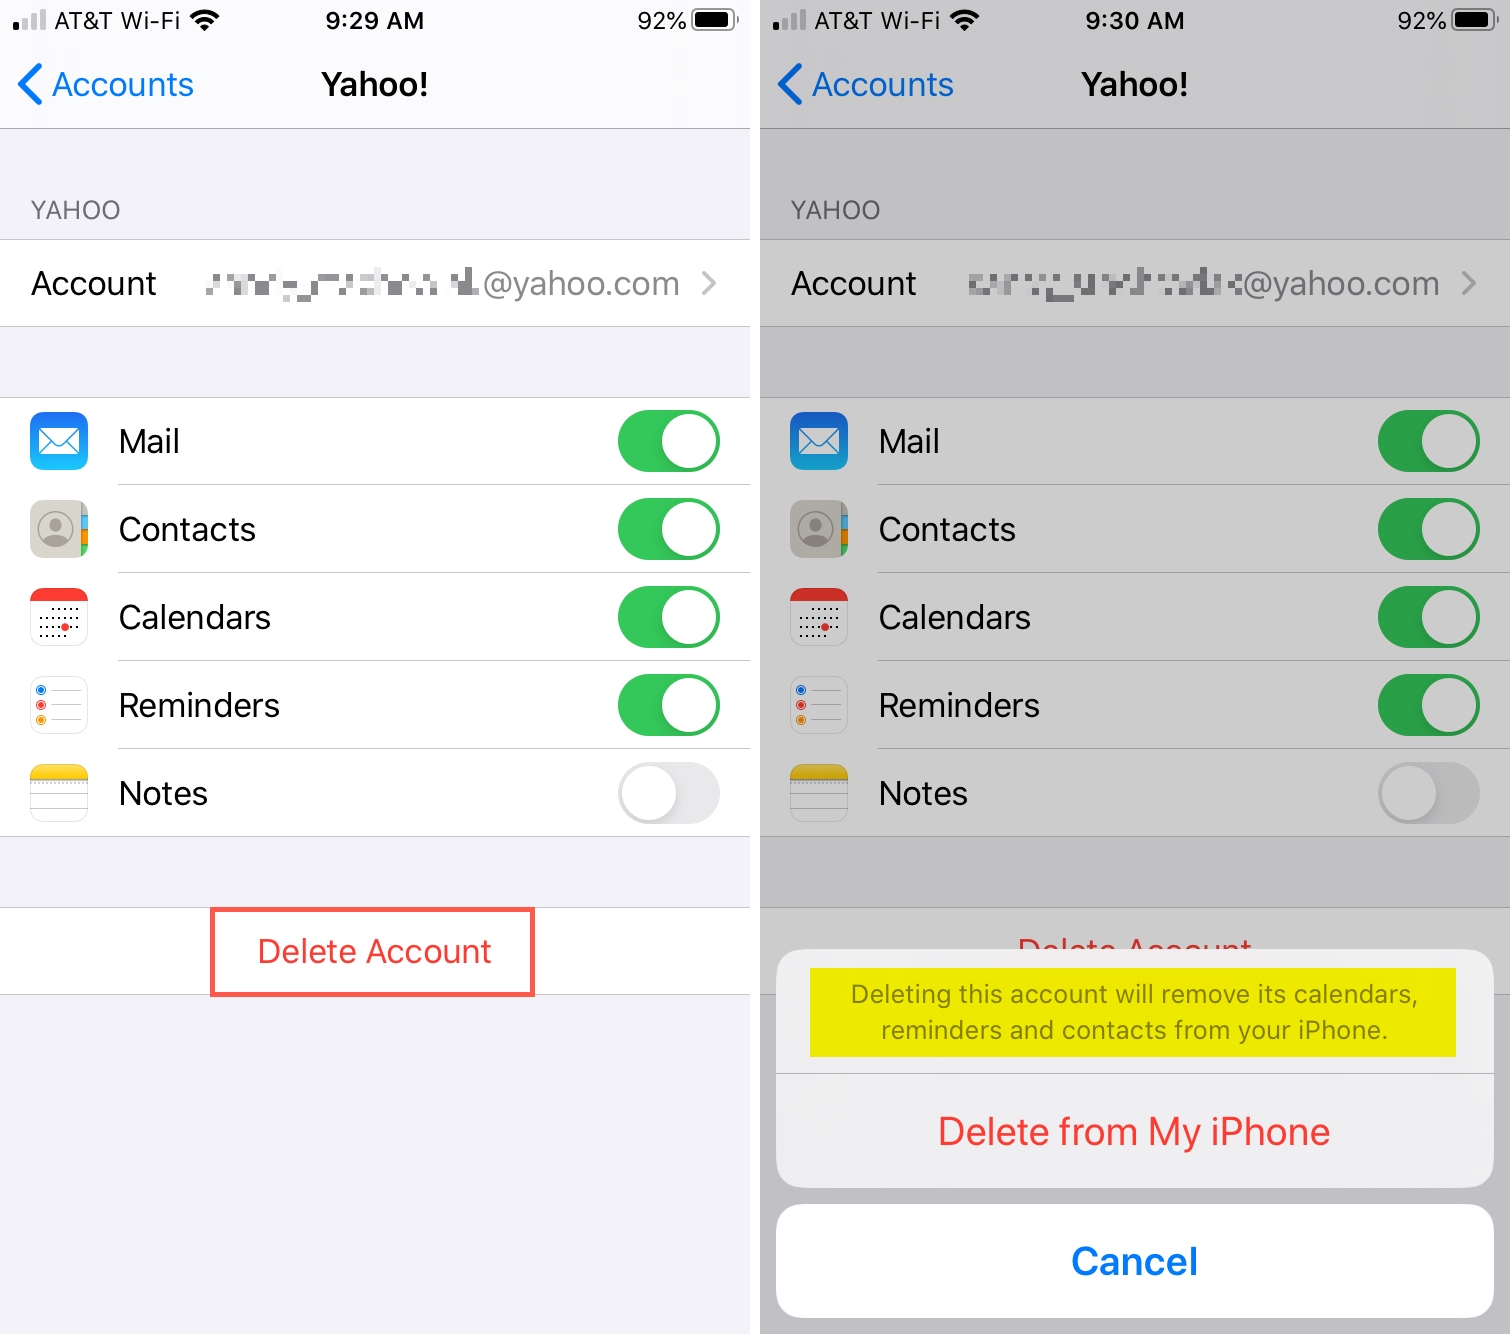
1) Go to the Settings app and select Notes > Accounts.
2) Select the account and tap Delete Account.
3) You’ll be asked to confirm this action, so if you’re sure, tap Delete from my iPhone/iPad.
On Mac
Just like iOS, managing the Notes account on your computer is super easy.
Add an account to Notes
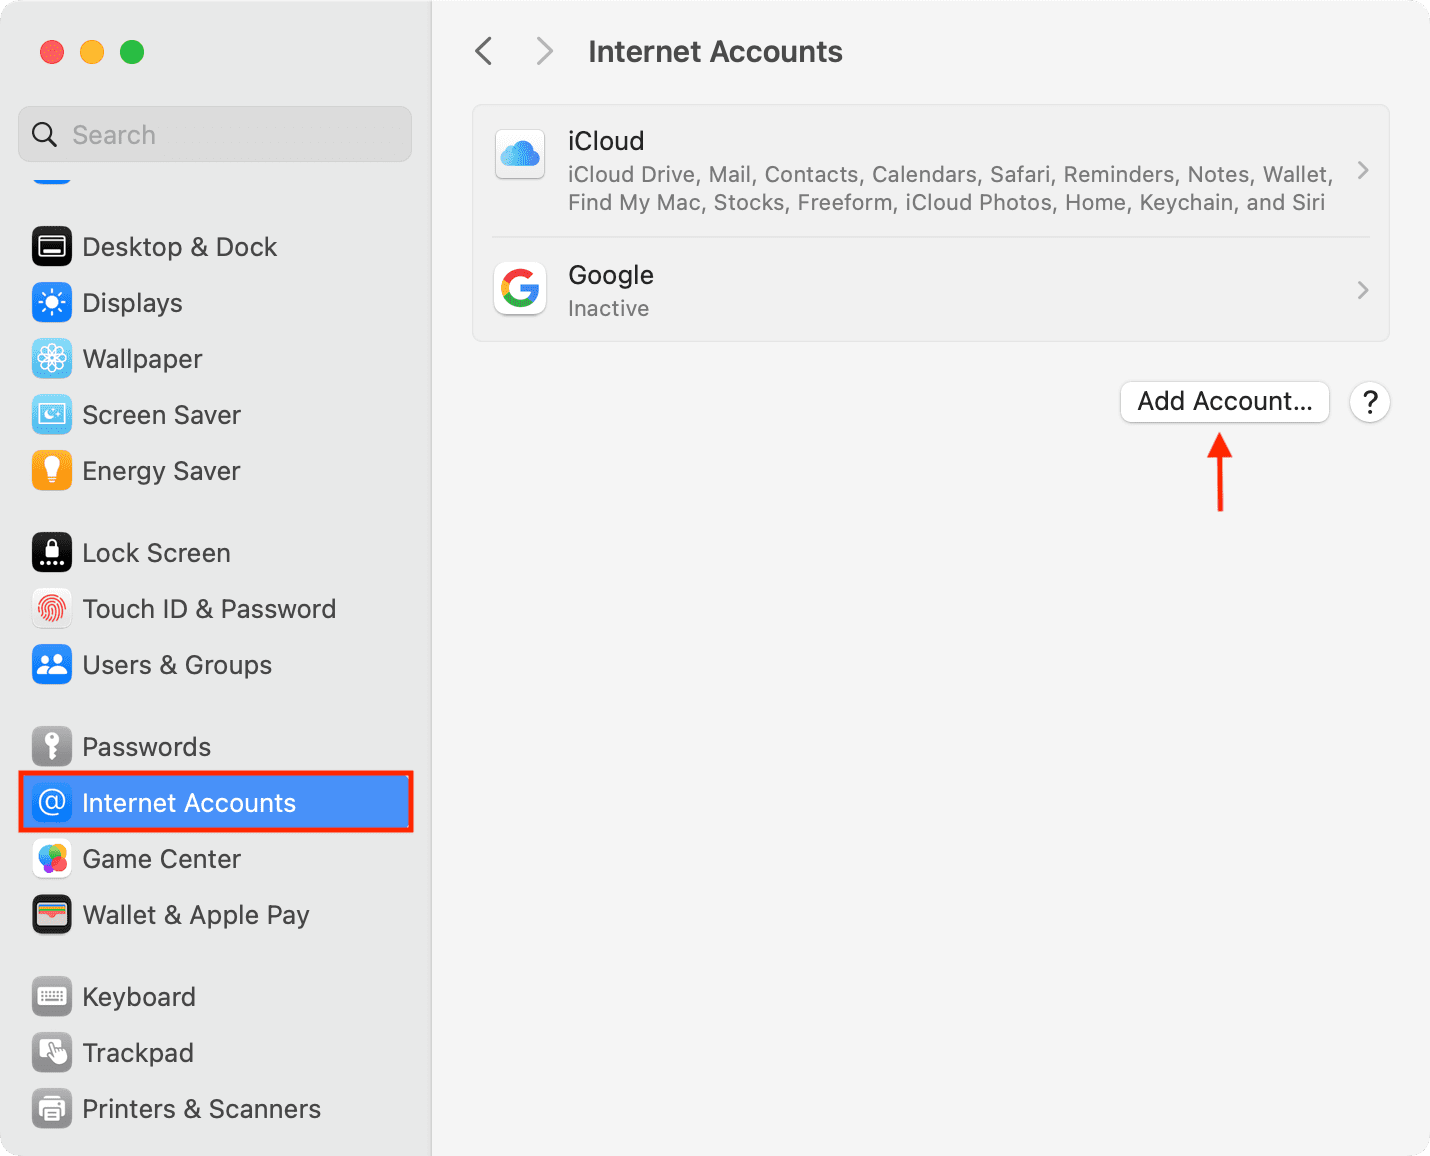
1) Open Notes and click Notes > Accounts. Or, go to System Settings > Internet Accounts.
2) Click Add Account and select a service like Google, Microsoft Exchange, Yahoo, etc.
3) Sign in with the right credentials to add the account.
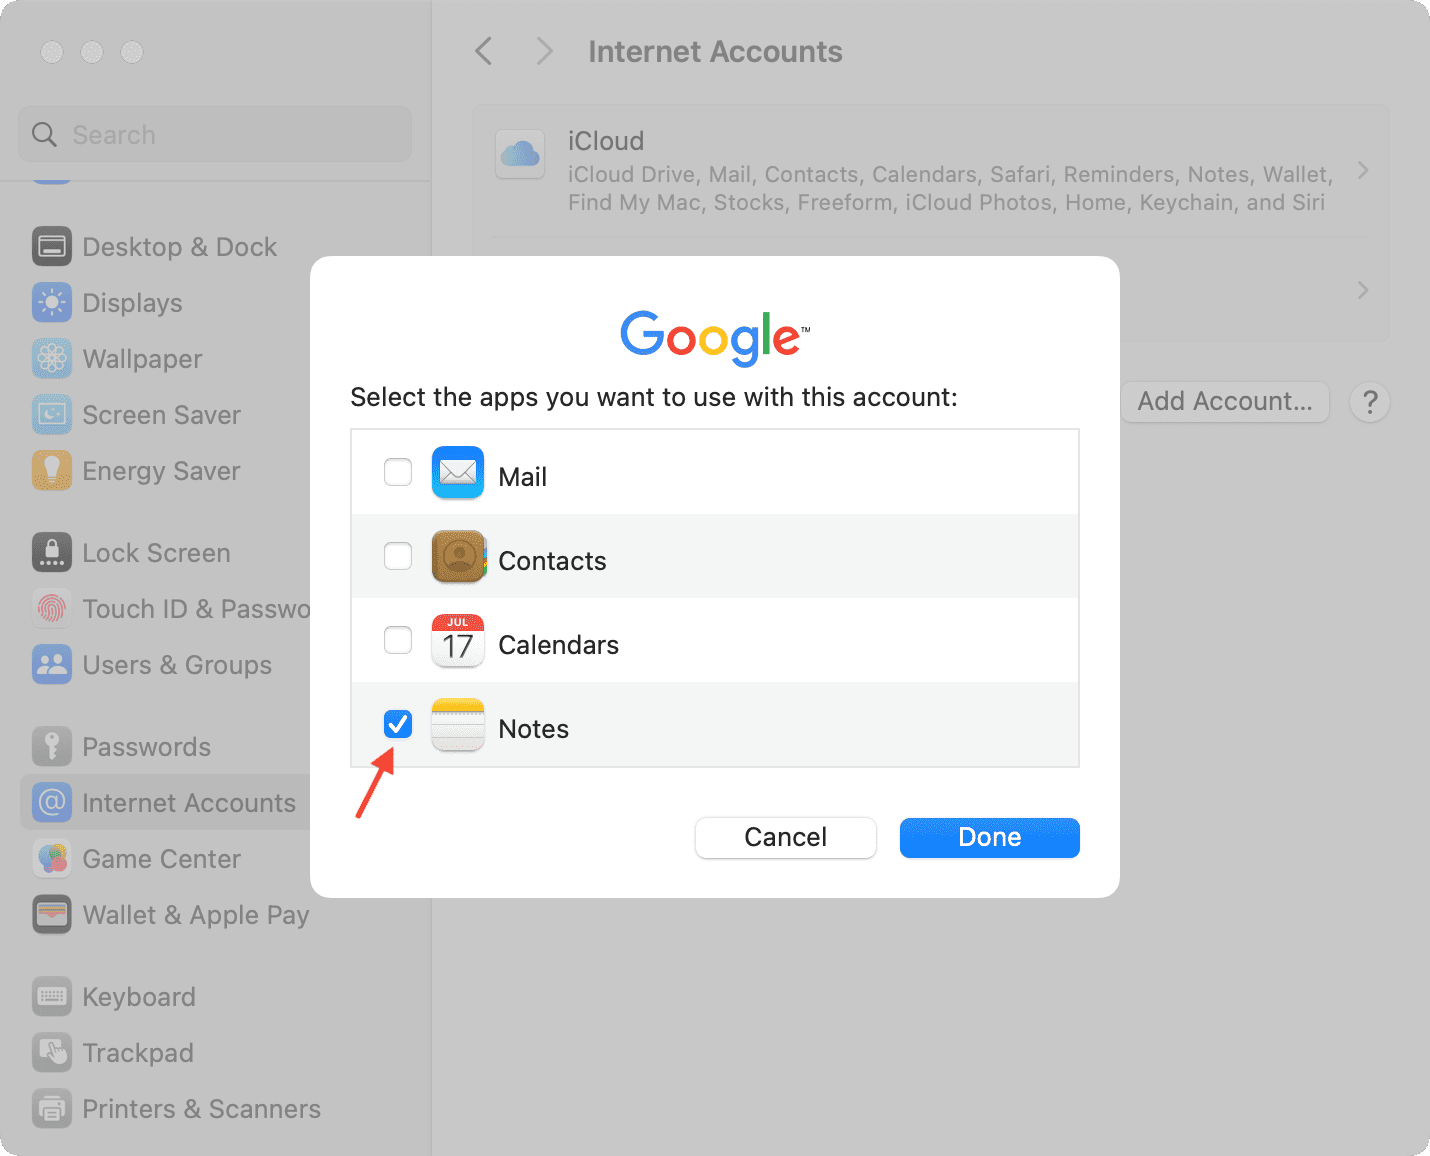
4) Once that’s done, you will see that the account is added and all services like Mail, Contacts, Calendars, and Notes are checked. You can leave all of them checked or unchecked others except Notes and click Done.
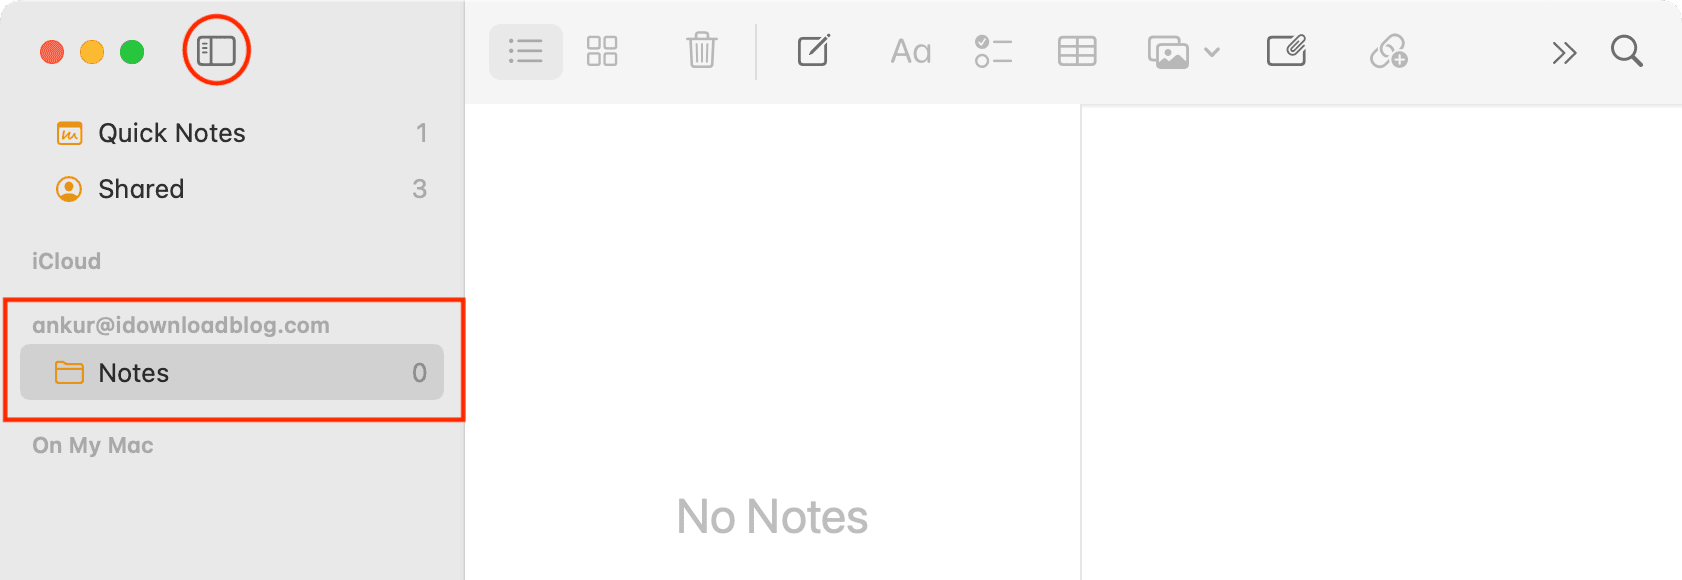
Now when you head back to the Notes app, you should see your new account in the left-hand sidebar. If the sidebar doesn’t display, click the Show Folders button in the toolbar.
Deactivate a Notes account
If you’d like to stop using Notes for one of your accounts but don’t want to delete the account, this is easy.
It’s the ideal solution if you still want to use that account for other apps like Mail and Calendar or think you may want to use it for Notes again down the road.
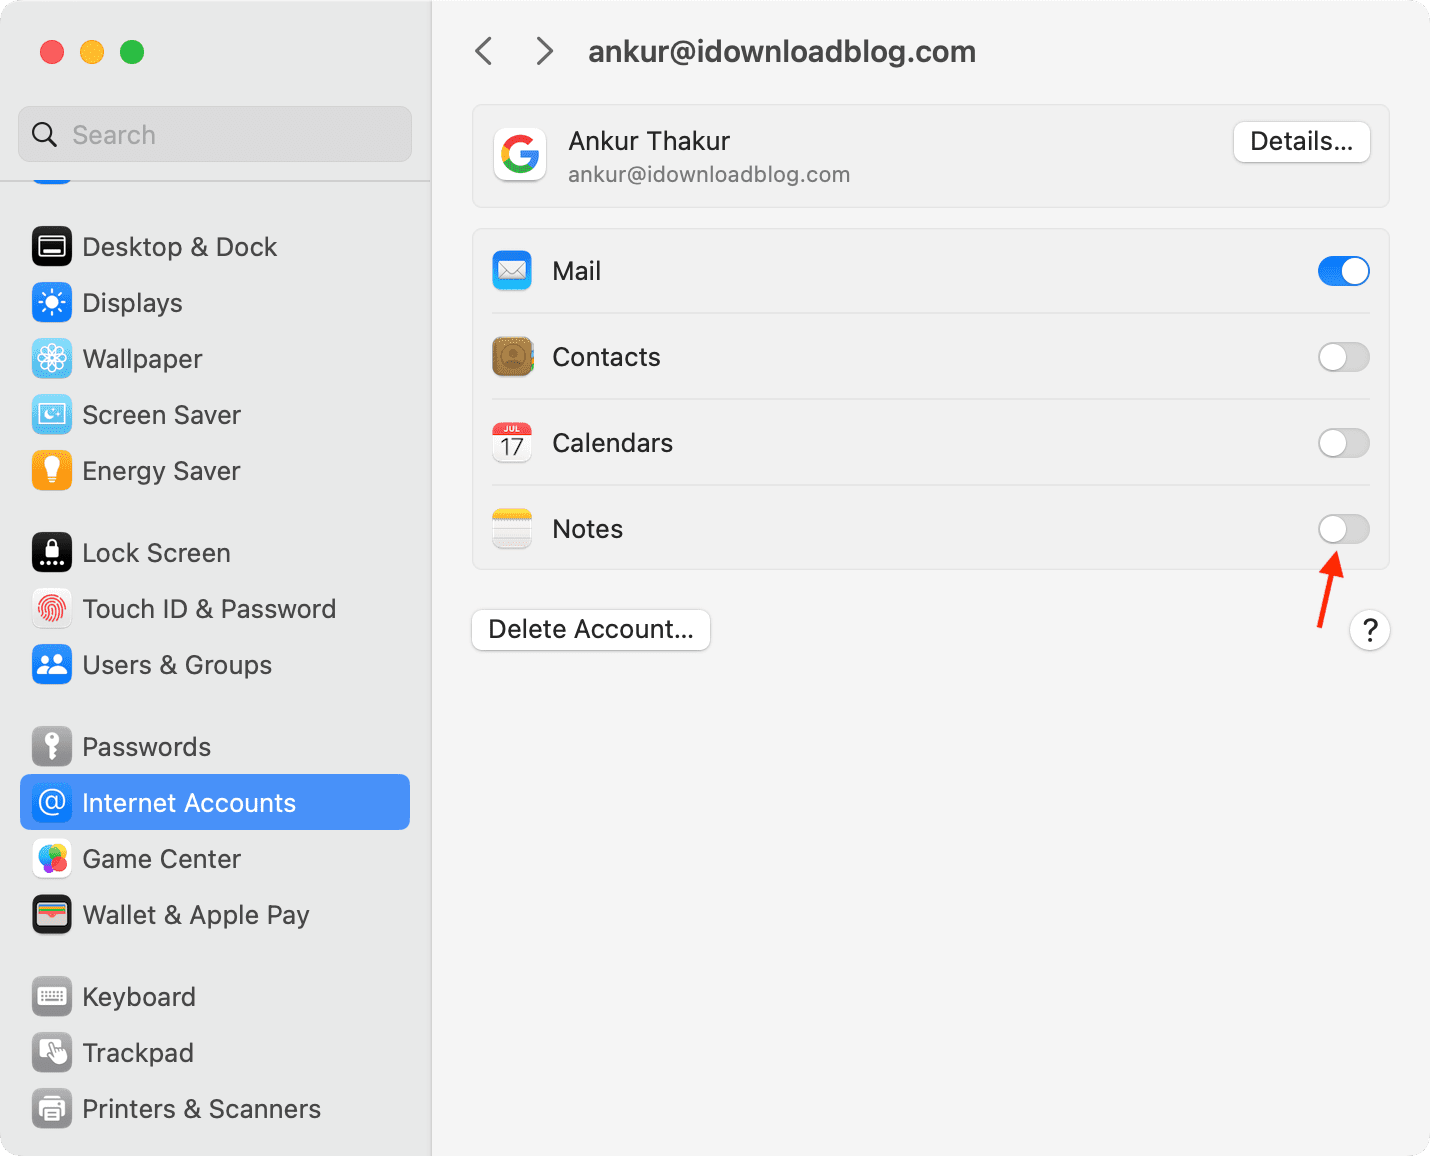
1) Go to System Settings > Internet Accounts.
2) Select the account from the list of added accounts.
3) Uncheck the box for Notes in the available apps and click Delete from My Mac.
Your account should no longer appear in the Notes sidebar. All the notes of this account will also disappear from the Notes app.
While your notes for that account no longer display in the app, they are still available if you reactivate the account.
To reactivate an account in Notes, follow the same steps as above and check the box for Notes once again.
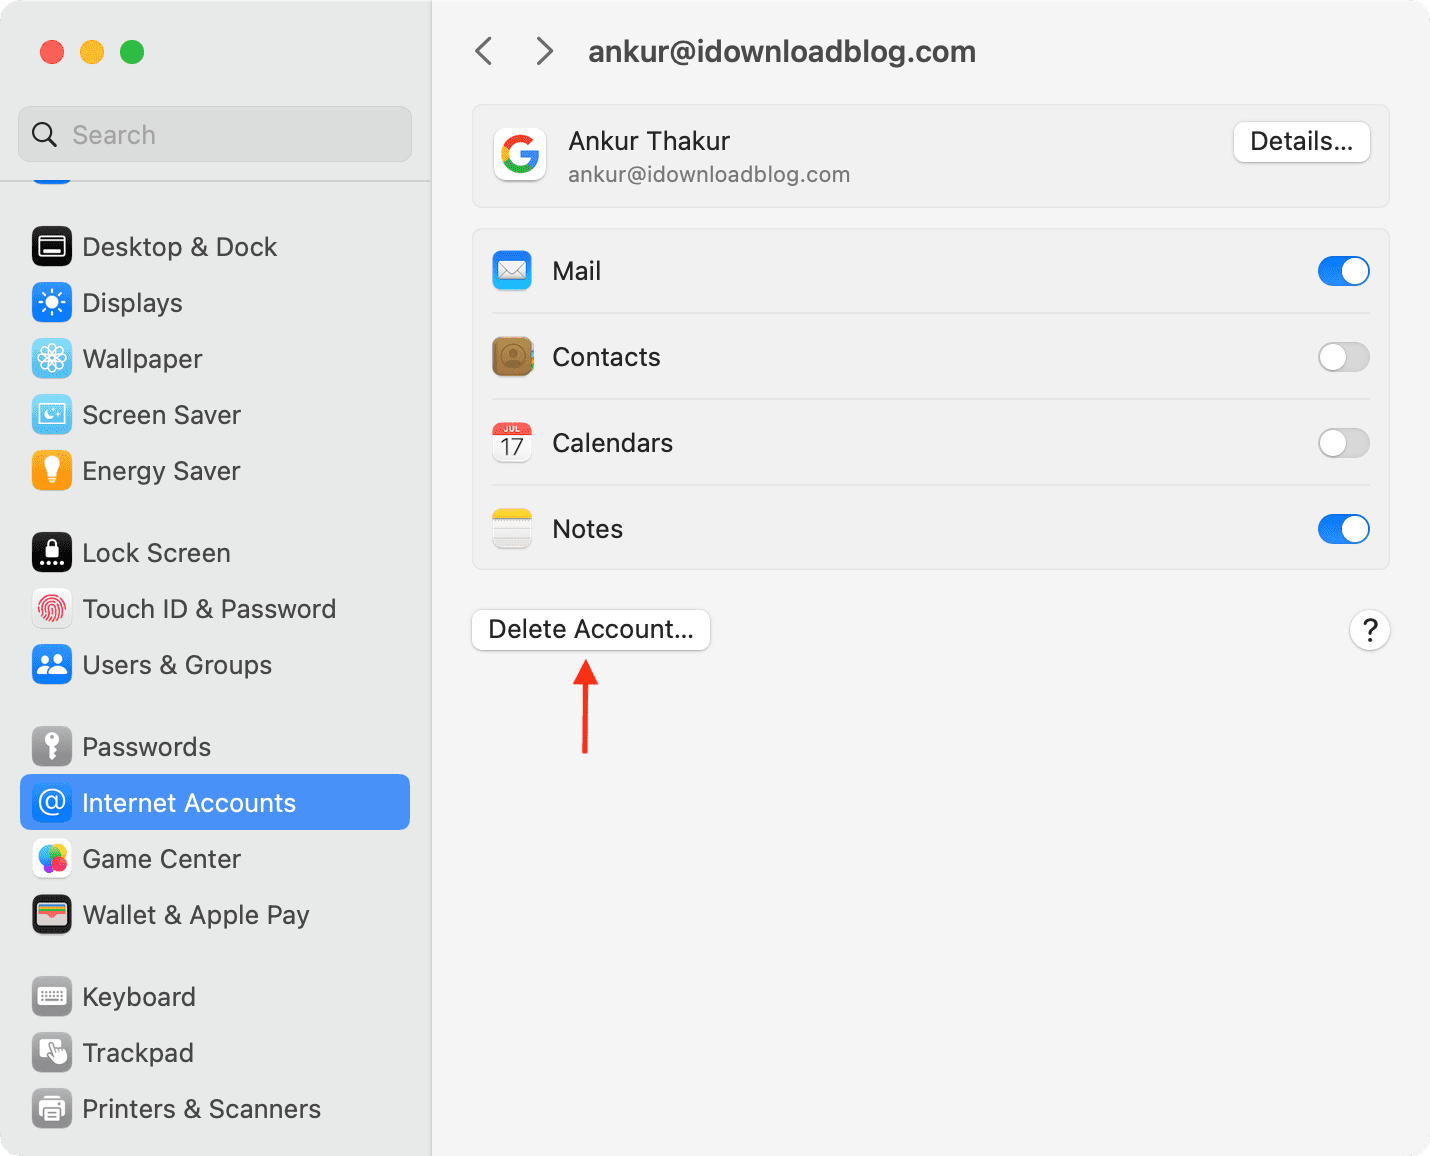
Delete an account from Notes
If you have an account that you no longer use, you can remove it completely along with its saved notes from the Notes app.
Just be aware that this will remove that account completely from your Mac and from any other apps you checked for it when you set it up, like Mail or Calendar.
1) Go to System Settings > Internet Accounts and select the account you want to remove.
2) Click Delete Account.
3) Confirm that you want to remove the account by clicking OK.
Adding the accounts that you want to use in the Notes app couldn’t be easier. And if you want to temporarily deactivate one or need to delete one completely, the steps are just as simple. Do you use several accounts in the Notes app, or do you prefer to just keep it to a minimum?
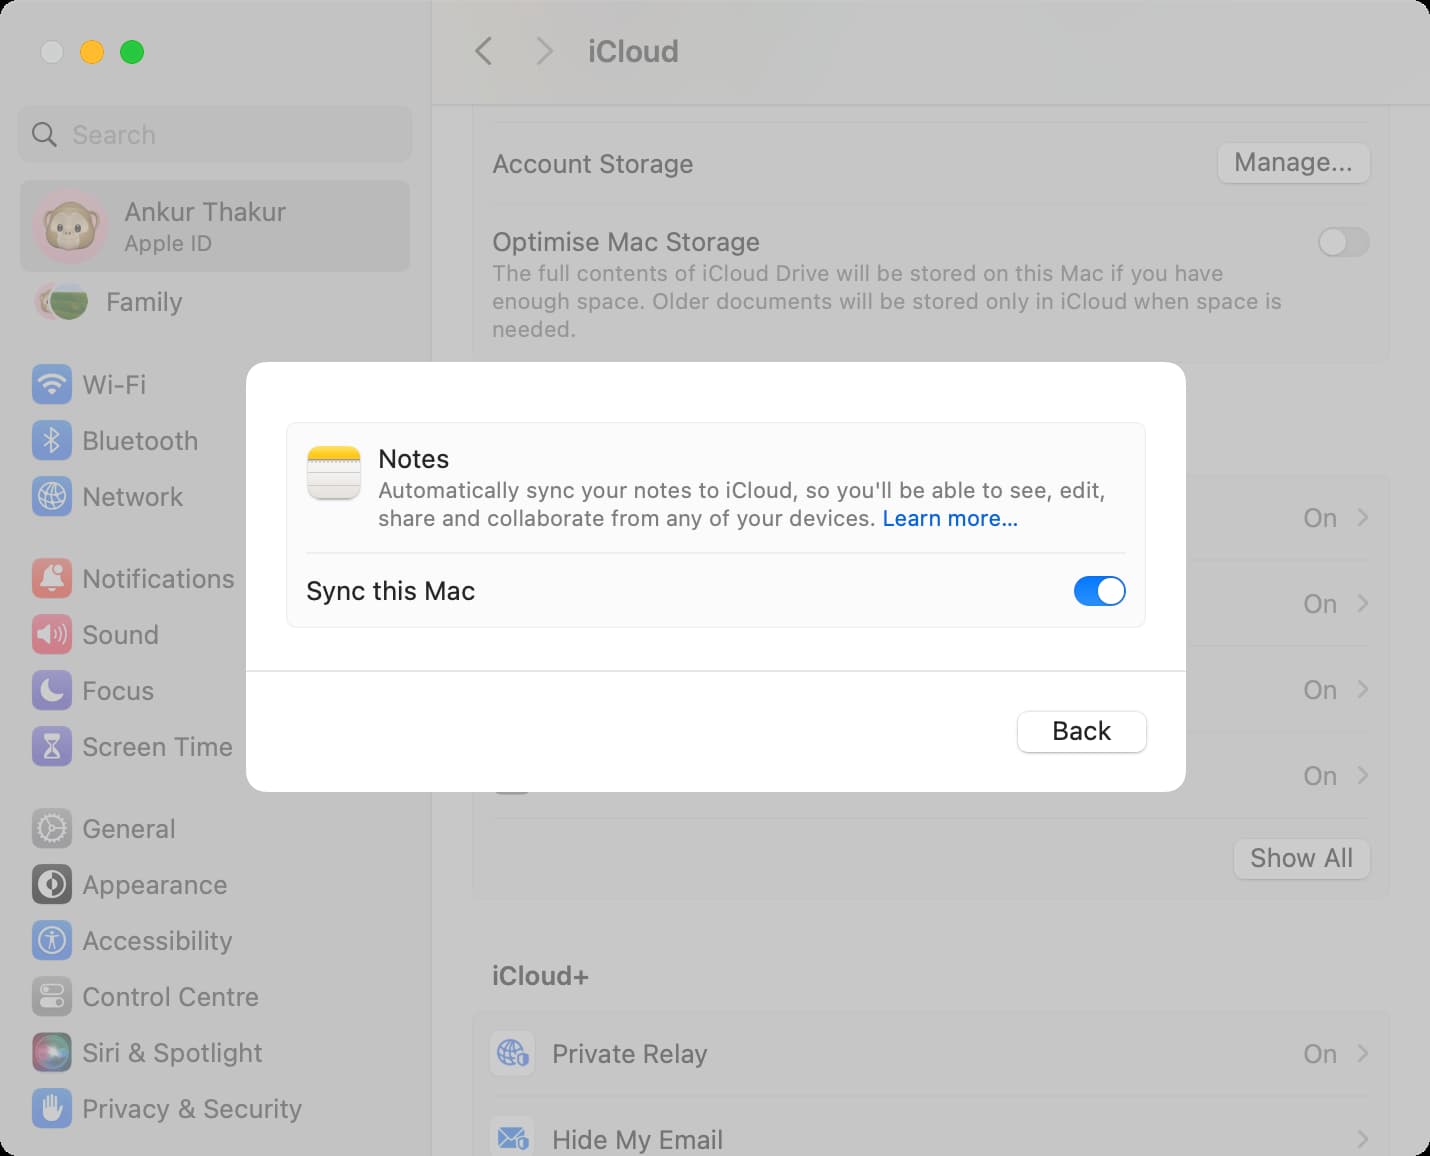
About using iCloud Notes
In this tutorial, we have not talked in detail about managing iCloud Notes account and focused on other accounts like Google or Outlook. But let me give you a quick rundown.
To use iCloud Notes, just make sure your iCloud/Apple account is signed in on your iPhone, iPad, and Mac and Notes is allowed to sync:
- On iPhone or iPad: Go to Settings > your name from the top > iCloud > Show All > Notes and make sure Sync this iPhone is turned on.
- On Mac: Open System Settings > your Apple ID from the top > iCloud > Show All > Notes and make sure Sync this Mac is enabled.
Similarly, you can follow the above steps and turn off the Sync this iPhone/iPad/Mac switch to stop using iCloud Notes in the Notes app.
And to completely remove the iCloud Notes account, you will have to sign out of your Apple ID on the device!
Useful Notes app tips: