
The stock Weather app is a simple pre-installed application that utilizes weather data from Yahoo. The Weather app makes it easy to quickly view weather conditions and forecasts for a variety of locations at once. It feature location awareness, meaning it can dynamically update to reflect weather conditions in your current area, even when jet-setting across the country or the world.
The Weather app isn’t the most robust or feature-filled app on the block, but it’s good enough to get you by in a pinch. Have a look as we walk through each of the features available in this stock application.
Table of contents
Basics
- Location details
- Hourly forecast
- 5-day forecast
- Switching between locations
- Weather rollup
- Adding, deleting, and rearranging locations
- Switching between Fahrenheit and Celsius
- Enabling and disabling local weather
Siri
Notification Center
Conclusion
Basics
The stock Weather app’s main view is broken up into three different sections: location details, hourly forecast, and 5-day forecast. There’s also a weather rollup available, which will show you a brief overview of all of your added weather locations simultaneously.
In this tutorial, we’ll show you how to add a new weather location, and how to enable or disable location awareness. By the end of this guide, you should know everything that there is to know about the stock Weather app.
Location details
The very top of the Weather app contains the location details for the current location selected. These details include the name of the city, the current weather status, and the current temperature. At the bottom of this section, you’ll see the day of the week, along with the low and high temperature for the day.
Tap to view additional location details
If you tap on the location details, you’ll gain additional weather information for the location. These details include the current humidity, chance of rain, wind direction and speed, and the “feels like” temperature, which takes into account things like the the wind chill factor.
The background of the location details will also reflect the current weather status. Sometimes you’ll see things like animated rain drops, snow flurries, or, if it’s nice in your current location, sunshine.
Hourly forecast
Below the location details rests the hourly forecast for the current location selected. The hourly forecast is a scrollable section that extends for the next 12 hours on the hour. The hourly forecast includes the hour, temperature predicted for that hour, and a glyph representing the predicted conditions.
You can scroll the hourly forecast
The hourly forecast features listings for both sunrise and sunset with exact times for each event. For hours with chances for precipitation, you’ll find a percentage representing the chance of said precipitation.
5-day forecast
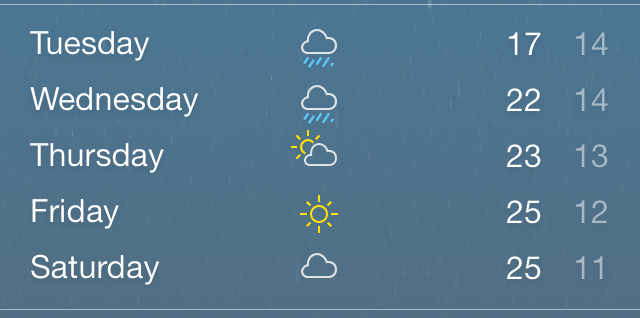
The 5-day forecast is static
The 5-day forecast is a static prediction of the next five days for a particular location. Here, you’ll find the day of the week, a glyph representing prediction conditions, and low and high temperatures for that day. Unlike the hourly forecast, precipitation chances aren’t represented by percentages, even if precipitation is expected for a given day.
Switching between locations
There are two ways to switch between the locations that you have configured in the stock Weather app. The easiest way to do so is to use a swipe gesture on any main weather view. You can gain context as to where you are within the app by looking at the page indicators at the bottom of the app. The dots represent pages, and the arrow indicator, which should always appear first, represents the location based aware page.
Swiping through multiple locations
You can also switch between pages by using the rollup feature. For more details on the rollup feature, see the next section of this tutorial.
Weather rollup
The weather rollup is a way to view all of the locations that you have configured in the stock Weather app, and it can be used to switch between locations. It’s also the only way to access the ability to add locations, remove locations, or switch between Fahrenheit and Celsius.
Using the list button or pinch-to-close
To access the weather rollup, you have two options: use a pinch-to-close gesture on any main weather view, or tap the list button located in the bottom right-hand corner. To switch back to any main view, tap the location that you wish to switch to, or use a pinch-to-open gesture on the cell containing your desired location.
Pinch-to-open
Adding, deleting, and rearranging locations
You may add, delete, or rearrange any of the cells appearing in the weather rollup view, except for the city that’s present due to location awareness. This cell cannot be deleted or moved. If you wish to remove the location aware cell, see the Enabling and disabling local weather section of this tutorial.
Adding locations
Adding a new weather location
To add a location to the Weather app, tap the ‘+’ button in the bottom right-hand corner of the weather rollup view. You’ll see a sheet that allows you to enter a city, zip code, or airport location. Enter the desired location details, and then tap on the result that you wish to add.
Deleting locations
Deleting a location
To delete a location, simply perform a swipe from right to left gesture on a location while in rollup view. Doing this will display a red Delete button, which, when tapped, will delete a location.
Rearranging locations
Rearranging locations
To rearrange a location, tap and hold on the cell you wish to move while in rollup view. This will cause the location to zoom in, which indicates that it’s ready to move. Drag the cell to the desired resting place, and lift your finger to finalize the move.
Switching between Fahrenheit and Celsius
Switching temperature measurements
To switch between Fahrenheit and Celsius temperature measurements, open the weather rollup view, and tap the C/F button located in the bottom left-hand corner.
Enabling and disabling local weather
The location aware feature is handy, because it allows you to see the weather in your current location with zero configuration. In other words, you don’t have to actually add a location, because it’s location aware; it knows where you are by using the iPhone’s GPS radio.
The location service weather toggle
Upon launching the Weather app for the first time, you’ll be asked to give the app permission to use your current location. If you opt out of this, the Weather app will not be able to provide you with local weather details.
To enable or disable the local weather feature, visit Settings > Privacy > Location Services > and enable or disable the weather toggle.
Siri
There are several weather commands that can be used with Siri. They are as follows:
- What’s the weather for today?
- What’s the weather for tomorrow?
- What’s the forecast for this evening?
- How’s the weather in Chicago right now?
- What’s the high for Orlando on Thursday?
- What’s the temperature outside?
- How windy is it out there?
- When is sunrise in Tokyo?
- Should I bring an umbrella today?
Notification Center
One of the biggest changes to Notification Center in iOS 7, was the inclusion of the Today View. The Today View provides users with a brief snapshot of current conditions.
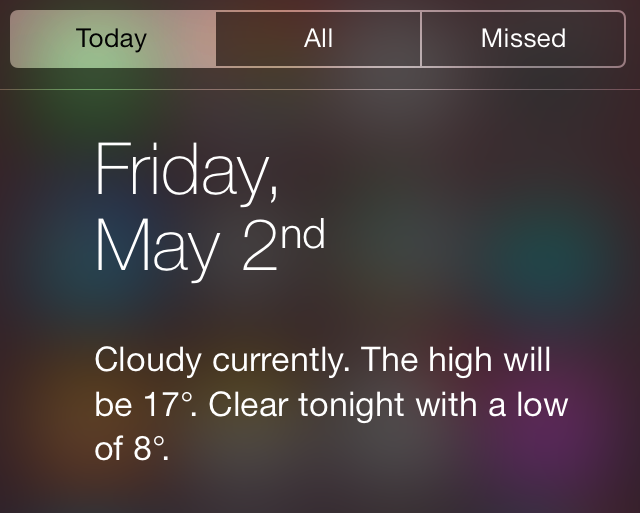
These conditions include the Today Summary, which lists current weather and traffic information. Keep in mind that you will need to have location services enabled to take advantage of the details that appear under the Today Summary. For more information on Notification Center, be sure to read our Ultimate Notification Center guide.
Conclusion
The stock Weather app is lacking in areas such as radar, weather alerts, and detailed forecasts. It’s a good app to get you by in a jam, but it’s definitely not the type of app that you’d want to rely on if weather is unpredictable in your area. If you’re looking for an app with more bells and whistles, have a look at our list of best weather apps.
Is there any feature that we neglected to mention in this guide? Is there anything that you learned? Sound off down below in the comments and let us know.