In this post, we will guide you through the steps of creating contact groups on your Mac using manual or smart group creation methods, and also teach you how to edit or delete these groups for efficient contact management.

Every day of the week, we have social connections with various groups of individuals. These groups of people can be family, friends, colleagues, clients, and any other group of people you interact with.
The contact book can be kind of a mess sometimes, though. How do you separate all your contacts into distinct groups? How can you quickly email your work colleagues without manually inputting each email address? The answer is contact groups. Just like you put a label on certain groups of contacts in your life, you can do the same with these same contacts in your address book.
A group list can be handy if you want to create a distribution list, for example, or simply if you want to quickly send messages to a group list.
Note: In older versions of macOS, it was called Groups, but in newer versions of macOS like macOS Ventura, it’s called Lists.
Related: How to create contact groups on iPhone & iPad
How to create a group of contacts on a Mac
1) Launch the Contacts app on your Mac.
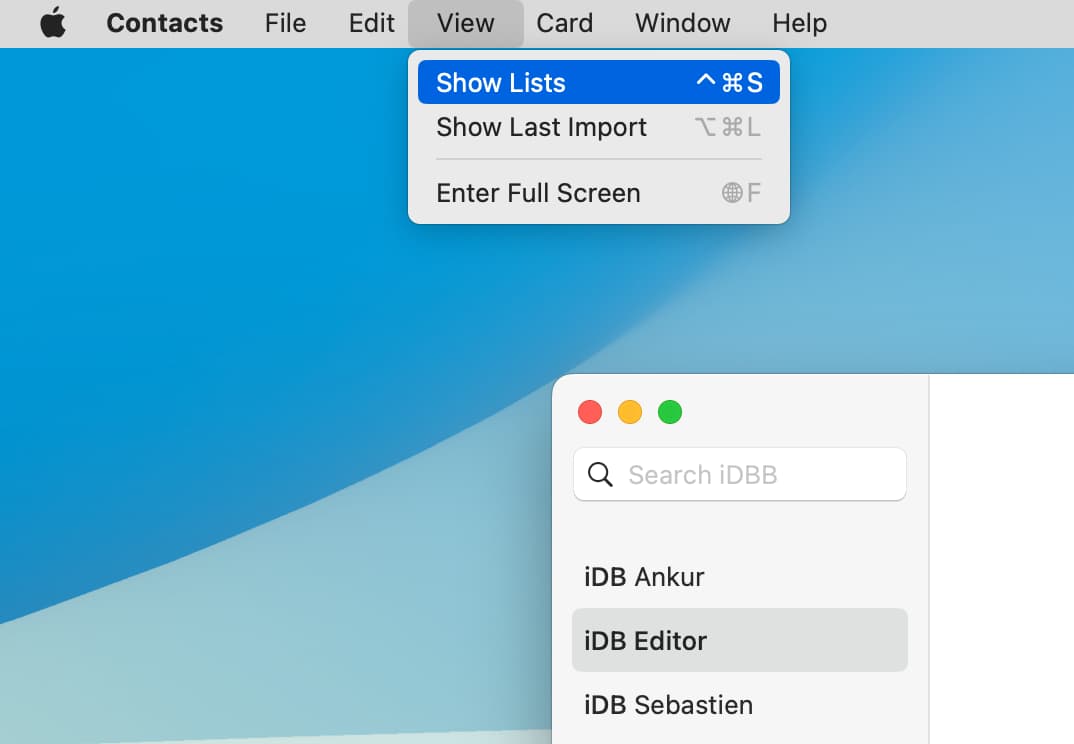
2) From the top menu bar, click View > Show Lists. This will bring up a sidebar in the Contacts app. If the sidebar is already visible, Show Groups will appear as Hide Groups, in which case, you can skip this step and move to the next one.
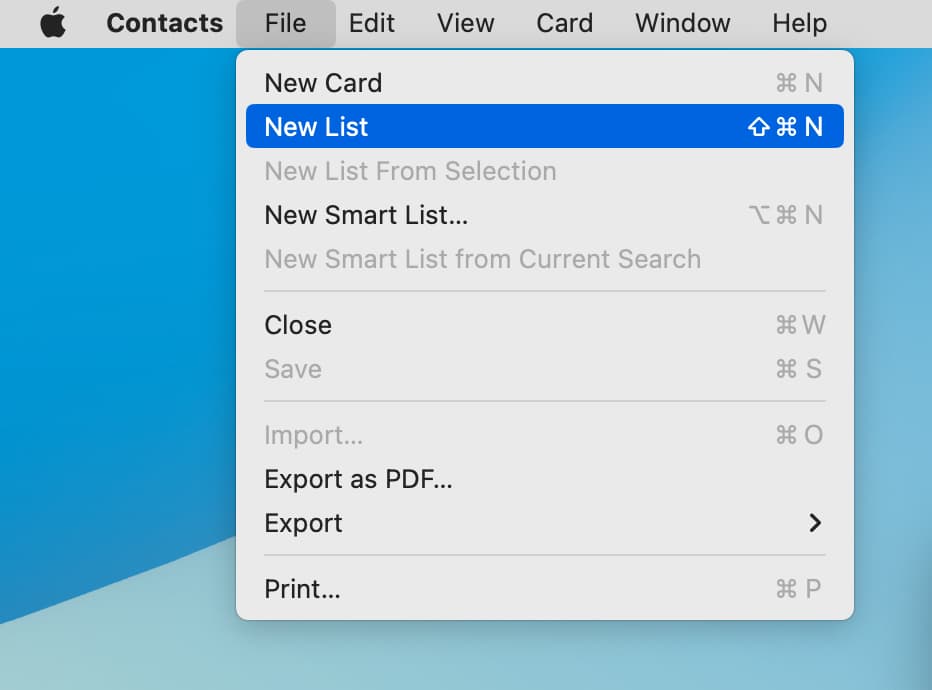
3) Go back to the menu bar, and click File > New List.
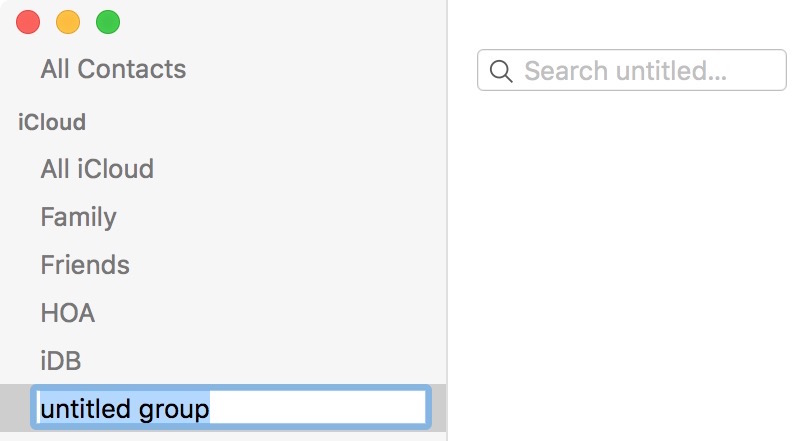
4) A new untitled group will then be created. Rename it to something more descriptive. For example, you can rename it “Colleagues.” You now have a new group, but as you can tell, it is empty.
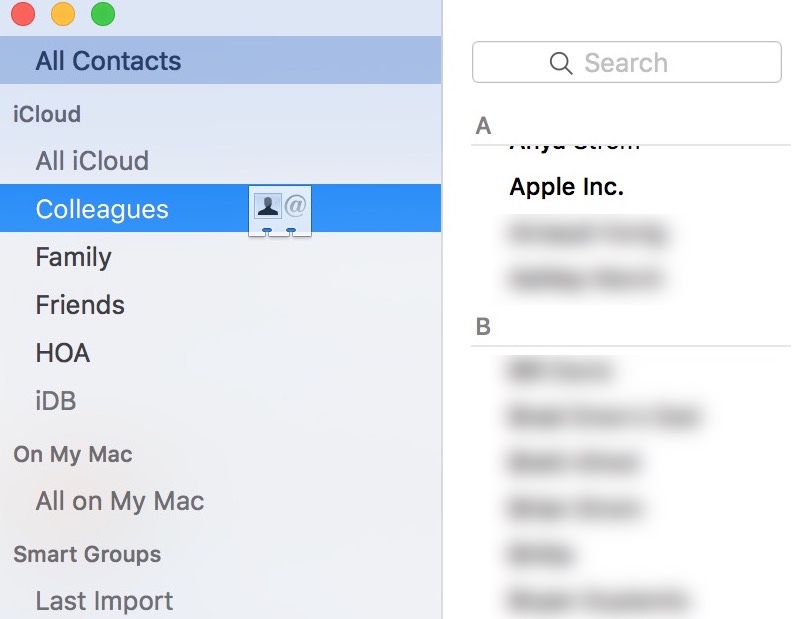
5) To populate your newly created group, click All Contacts, then find a contact you want to add to your group. Simply click a contact and then drag & drop it in the group to add to it. Repeat this process with every contact you want to add to specific groups.
Pro tip: You can add several contacts at a time to an existing group by holding the Command key of your keyboard while selecting multiple contacts with your mouse. Once you have selected several contacts, just drag them to the group you want to.
Quickly create a group from selected contacts
As an alternative to the method described above, you can quickly create a group by individually selecting several contacts at a time and adding them all to a newly created group.
1) Launch the Contacts app on your Mac.
2) In the menu bar, go to View > Show List.
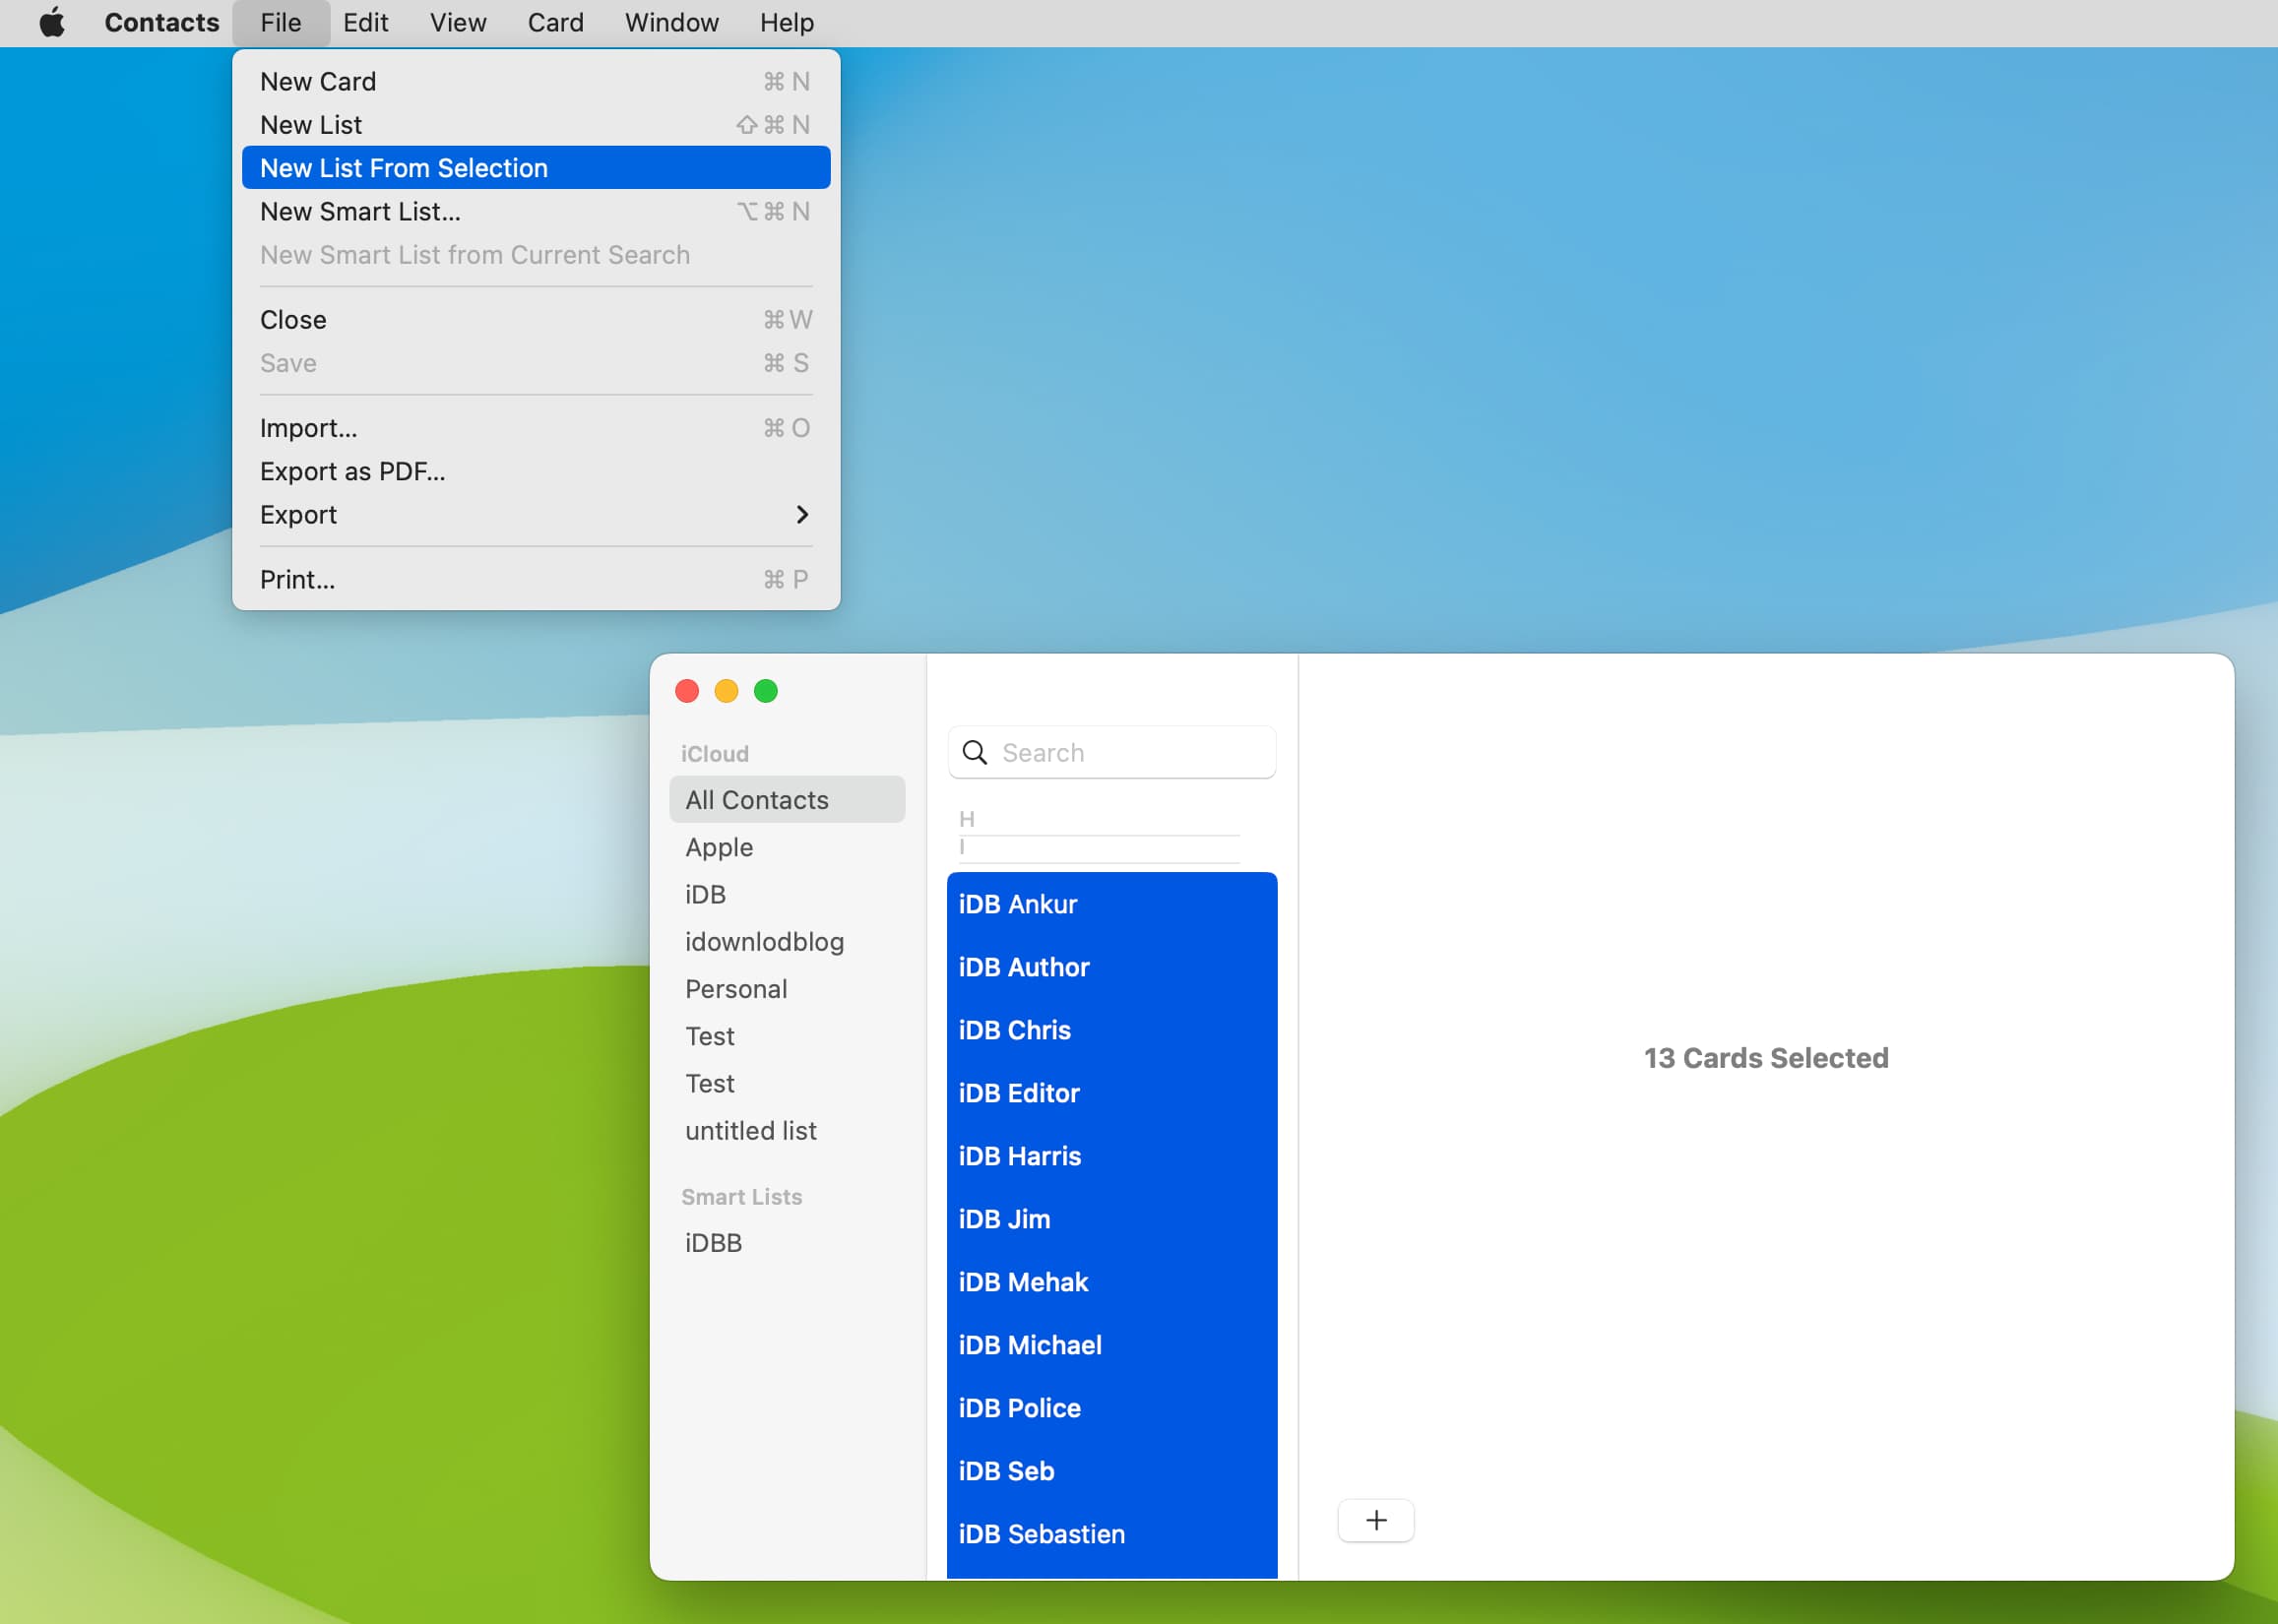
3) Click the All Contacts group to highlight it.
4) Hold the Command key of your keyboard while selecting several contacts with your mouse. The selected contacts will be highlighted in blue.
5) Go to File > New List From Selection. This will automatically add your selected contacts to a new group.
6) Rename the newly created “untitled group” to whatever you see fit.
Create Smart Groups of contacts
macOS has this great feature that allows you to quickly create contact groups based on predefined criteria that you select. For example, you can tell your Mac to create a group and include all contacts who work for XYZ company. Assuming you have this data in your contact cards, your Mac will be able to intelligently group these people together.
In the following example, I will create a contact group of iDownloadBlog staffers based on their email addresses:
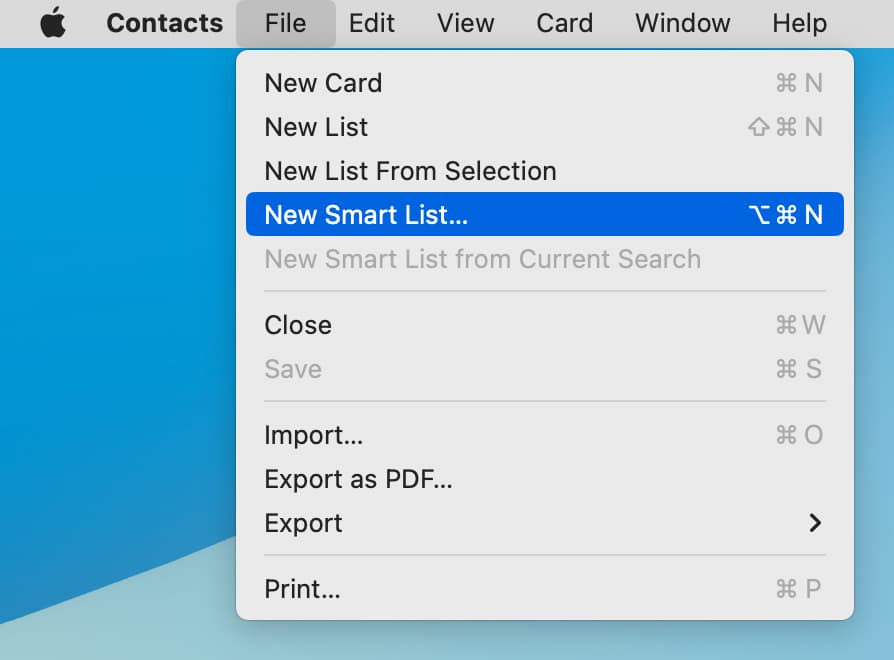
1) Go to File > New Smart List.
2) Name your smart group whatever you see fit. I chose to name it “iDownloadBlog.”
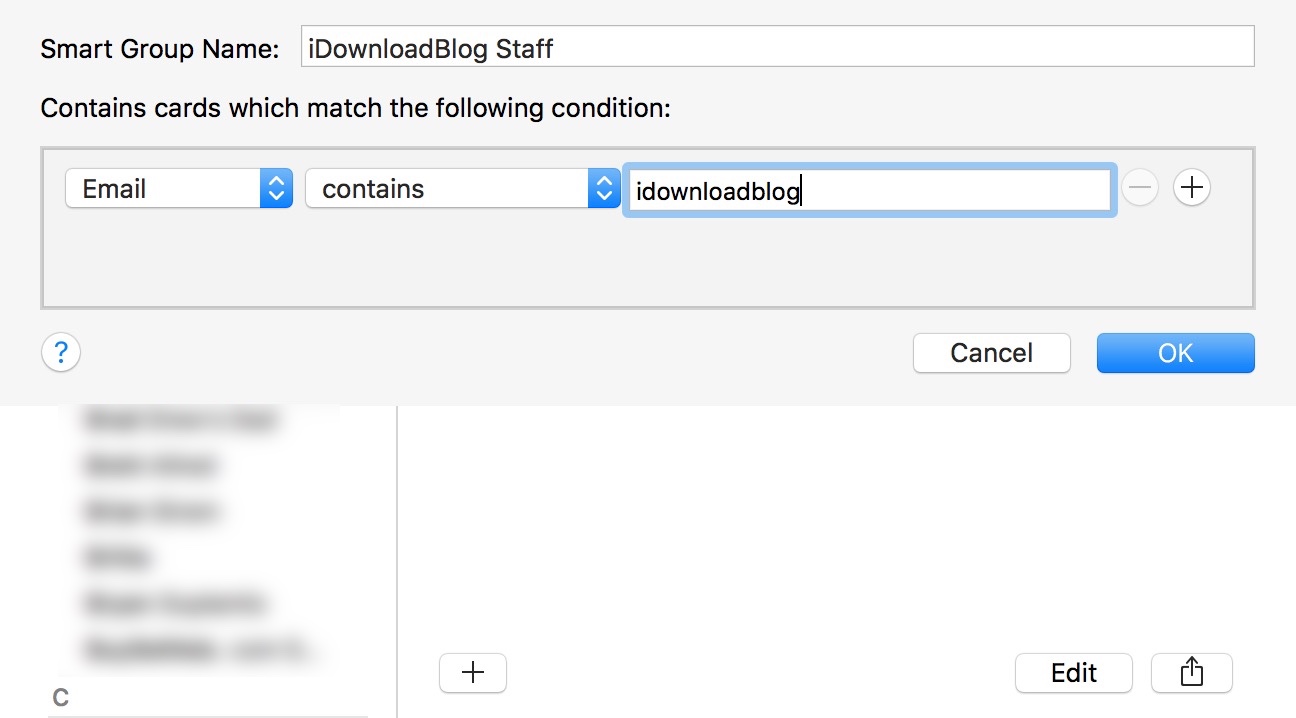
3) Select what piece of data you want to base your smart group on. I chose email, but you can choose from many data points, including company, name, city, etc.
4) Select the matching condition. I chose contains.
5) Select the condition. In my case, I typed idownloadblog as I want all contacts that have an email address that contains idownloadblog to be added to a new group.
5) Click OK. Your new group will then appear in your list of groups on the left side of the Contacts app in a newly created subcategory called Smart Lists.
Note that you can’t manually add or remove contacts from a Smart Group once it has been created. For instance, in my example above, I wouldn’t be able to add a specific contact to my iDownloadBlog smart group. However, and this is where smart grouping gets even smarter, if I add a new contact to my address book, and assuming this new contact has an @iDownloadBlog email address, he will automatically be added to the Smart Group without any manual input on my end.
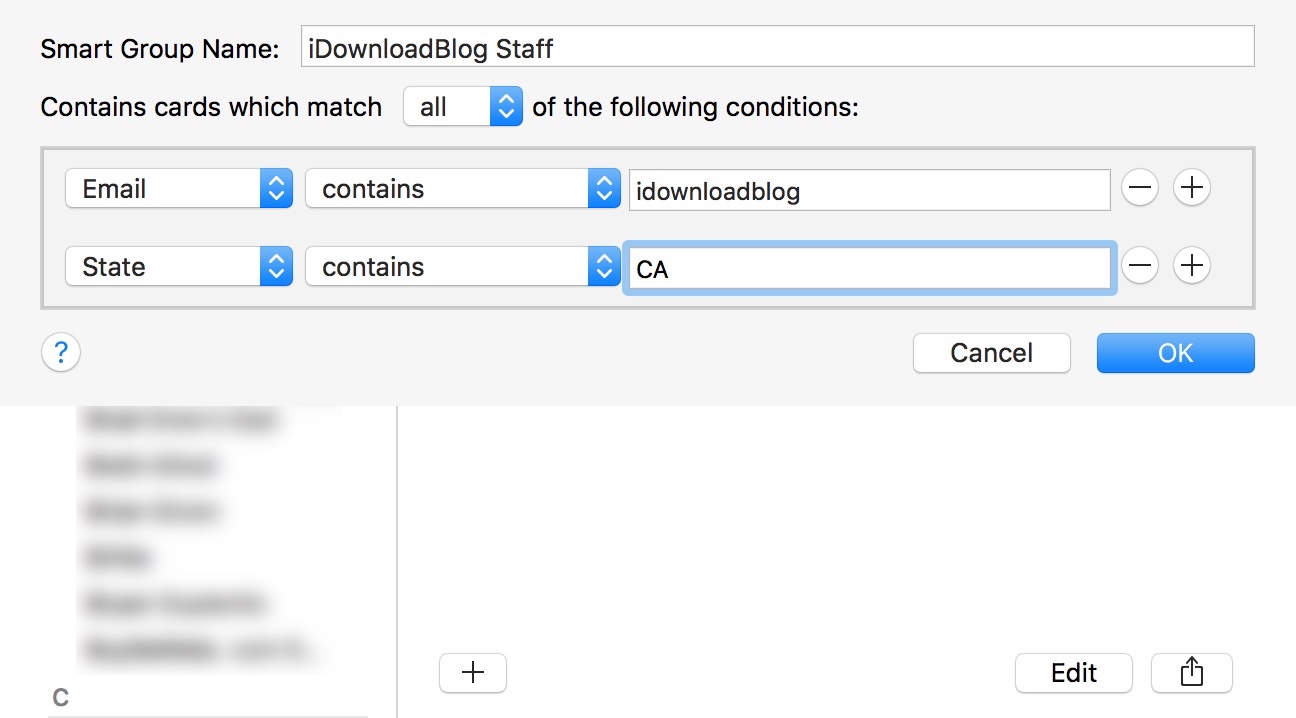
Pro tip: You can fine-tune your Smart Groups by adding up to two levels of conditions. In this example, I am creating a group of people who have an email address containing idownloadblog and who live in California. Simply click the round plus icon (+) icon to add a new condition.
Remove specific contacts from contact groups
1) Click to select the group from which you want to remove a contact.
2) Click on a contact from that group to select it.
3) Hit the Delete key on your keyboard once. A warning message will pop up asking you if you want to delete the contact or simply remove it from the list/group. Click “Remove from Group/List.” You can repeat the process with any contact you want to remove from a group.
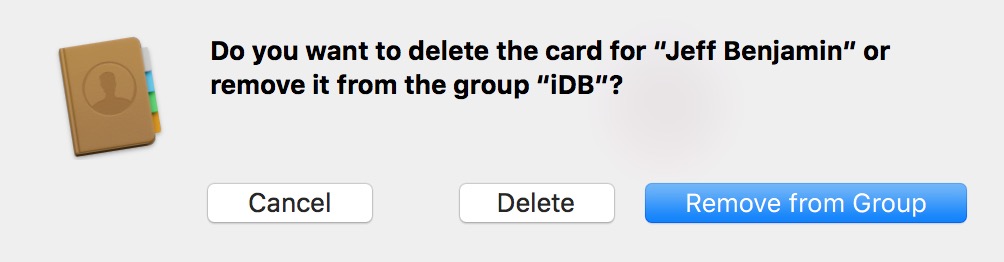
Alternatively, after selecting a contact you want to remove from a group, you can go to Edit > Remove from Group. This will remove the contact from your group, but it will keep it in your All Contacts group.
Delete a contact group on Mac
It is fairly quick and simple to delete a group. Note that even though the group itself will be deleted, none of the contacts inside this group will be deleted. All your contacts will remain intact in your All Contacts group, which you can’t delete.
1) Click to select a group you want to delete.
2) Go to Edit > Delete List. As an alternative, you can just hit the Delete key on your keyboard. A warning pop-up will ask you if you are sure you want to delete the group. Click Delete to confirm.
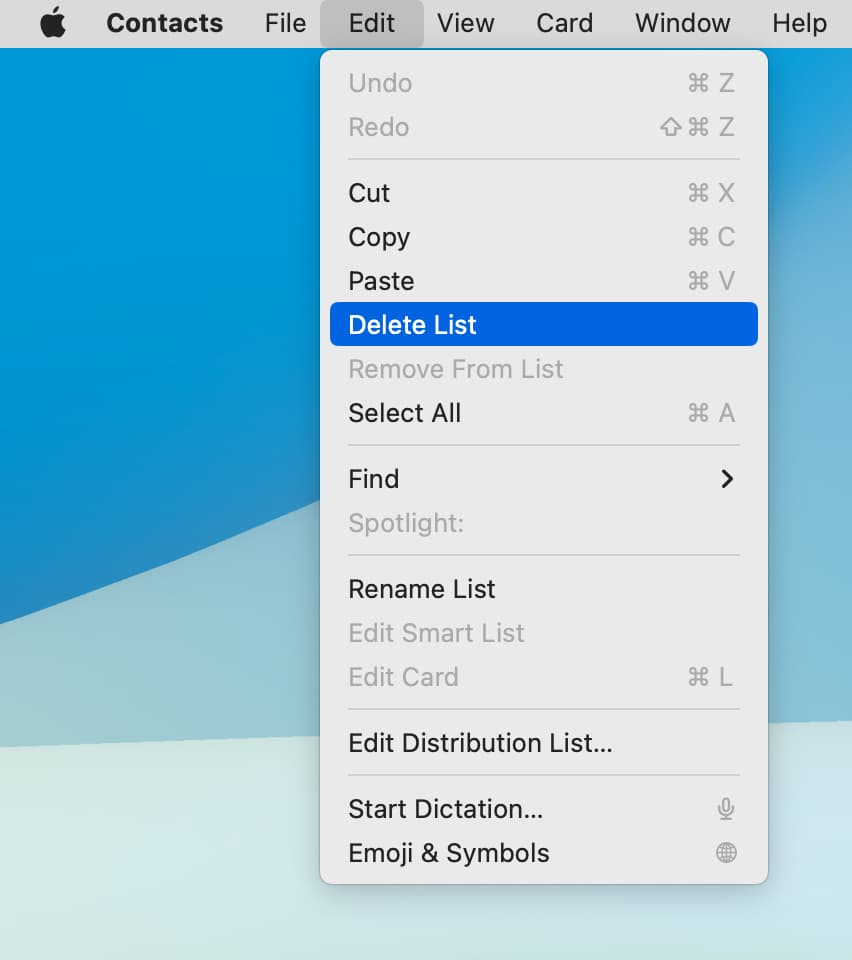
Again, none of your contacts from the deleted group will be deleted. Only the group label is deleted.
I believe this covers the various ways of creating contact groups on Mac. Now instead of having to manually add the email address of all your work colleagues, you can email them all in one scoop by just typing in the name of the group. This is a definite time saver but also a good way to keep your contacts organized.
Check out next: