Out of the box, every vibration you get from a text message, whether it’s an SMS or iMessage, or a phone call, vibrates the same way. In this tutorial, we’ll show you how you can create custom vibration patterns on your iPhone and use them for your ringtone, text tone, specific contact tone, alarm, and more.
Custom vibrations and why they’re useful
iOS comes with a wonderful feature that lets you make custom vibrations, which is perfect for giving friends one type of vibration, co-workers another, and your family another. This makes it even easier to tell who’s contacting you without even pulling your iPhone out of your pocket.
You can assign custom vibrations to individual people, which means you can give each person their own vibration, or you can assign one group of people with one type of vibration and another group of people with another vibration.
For messages that you consider more important, you may want to make a nice strong vibration that you know you’ll feel, and for messages that you consider less important, you may want to make a slightly calmer vibration that can be felt but may slip your attention until later on.
So here’s how you will do that.
Create the custom vibration
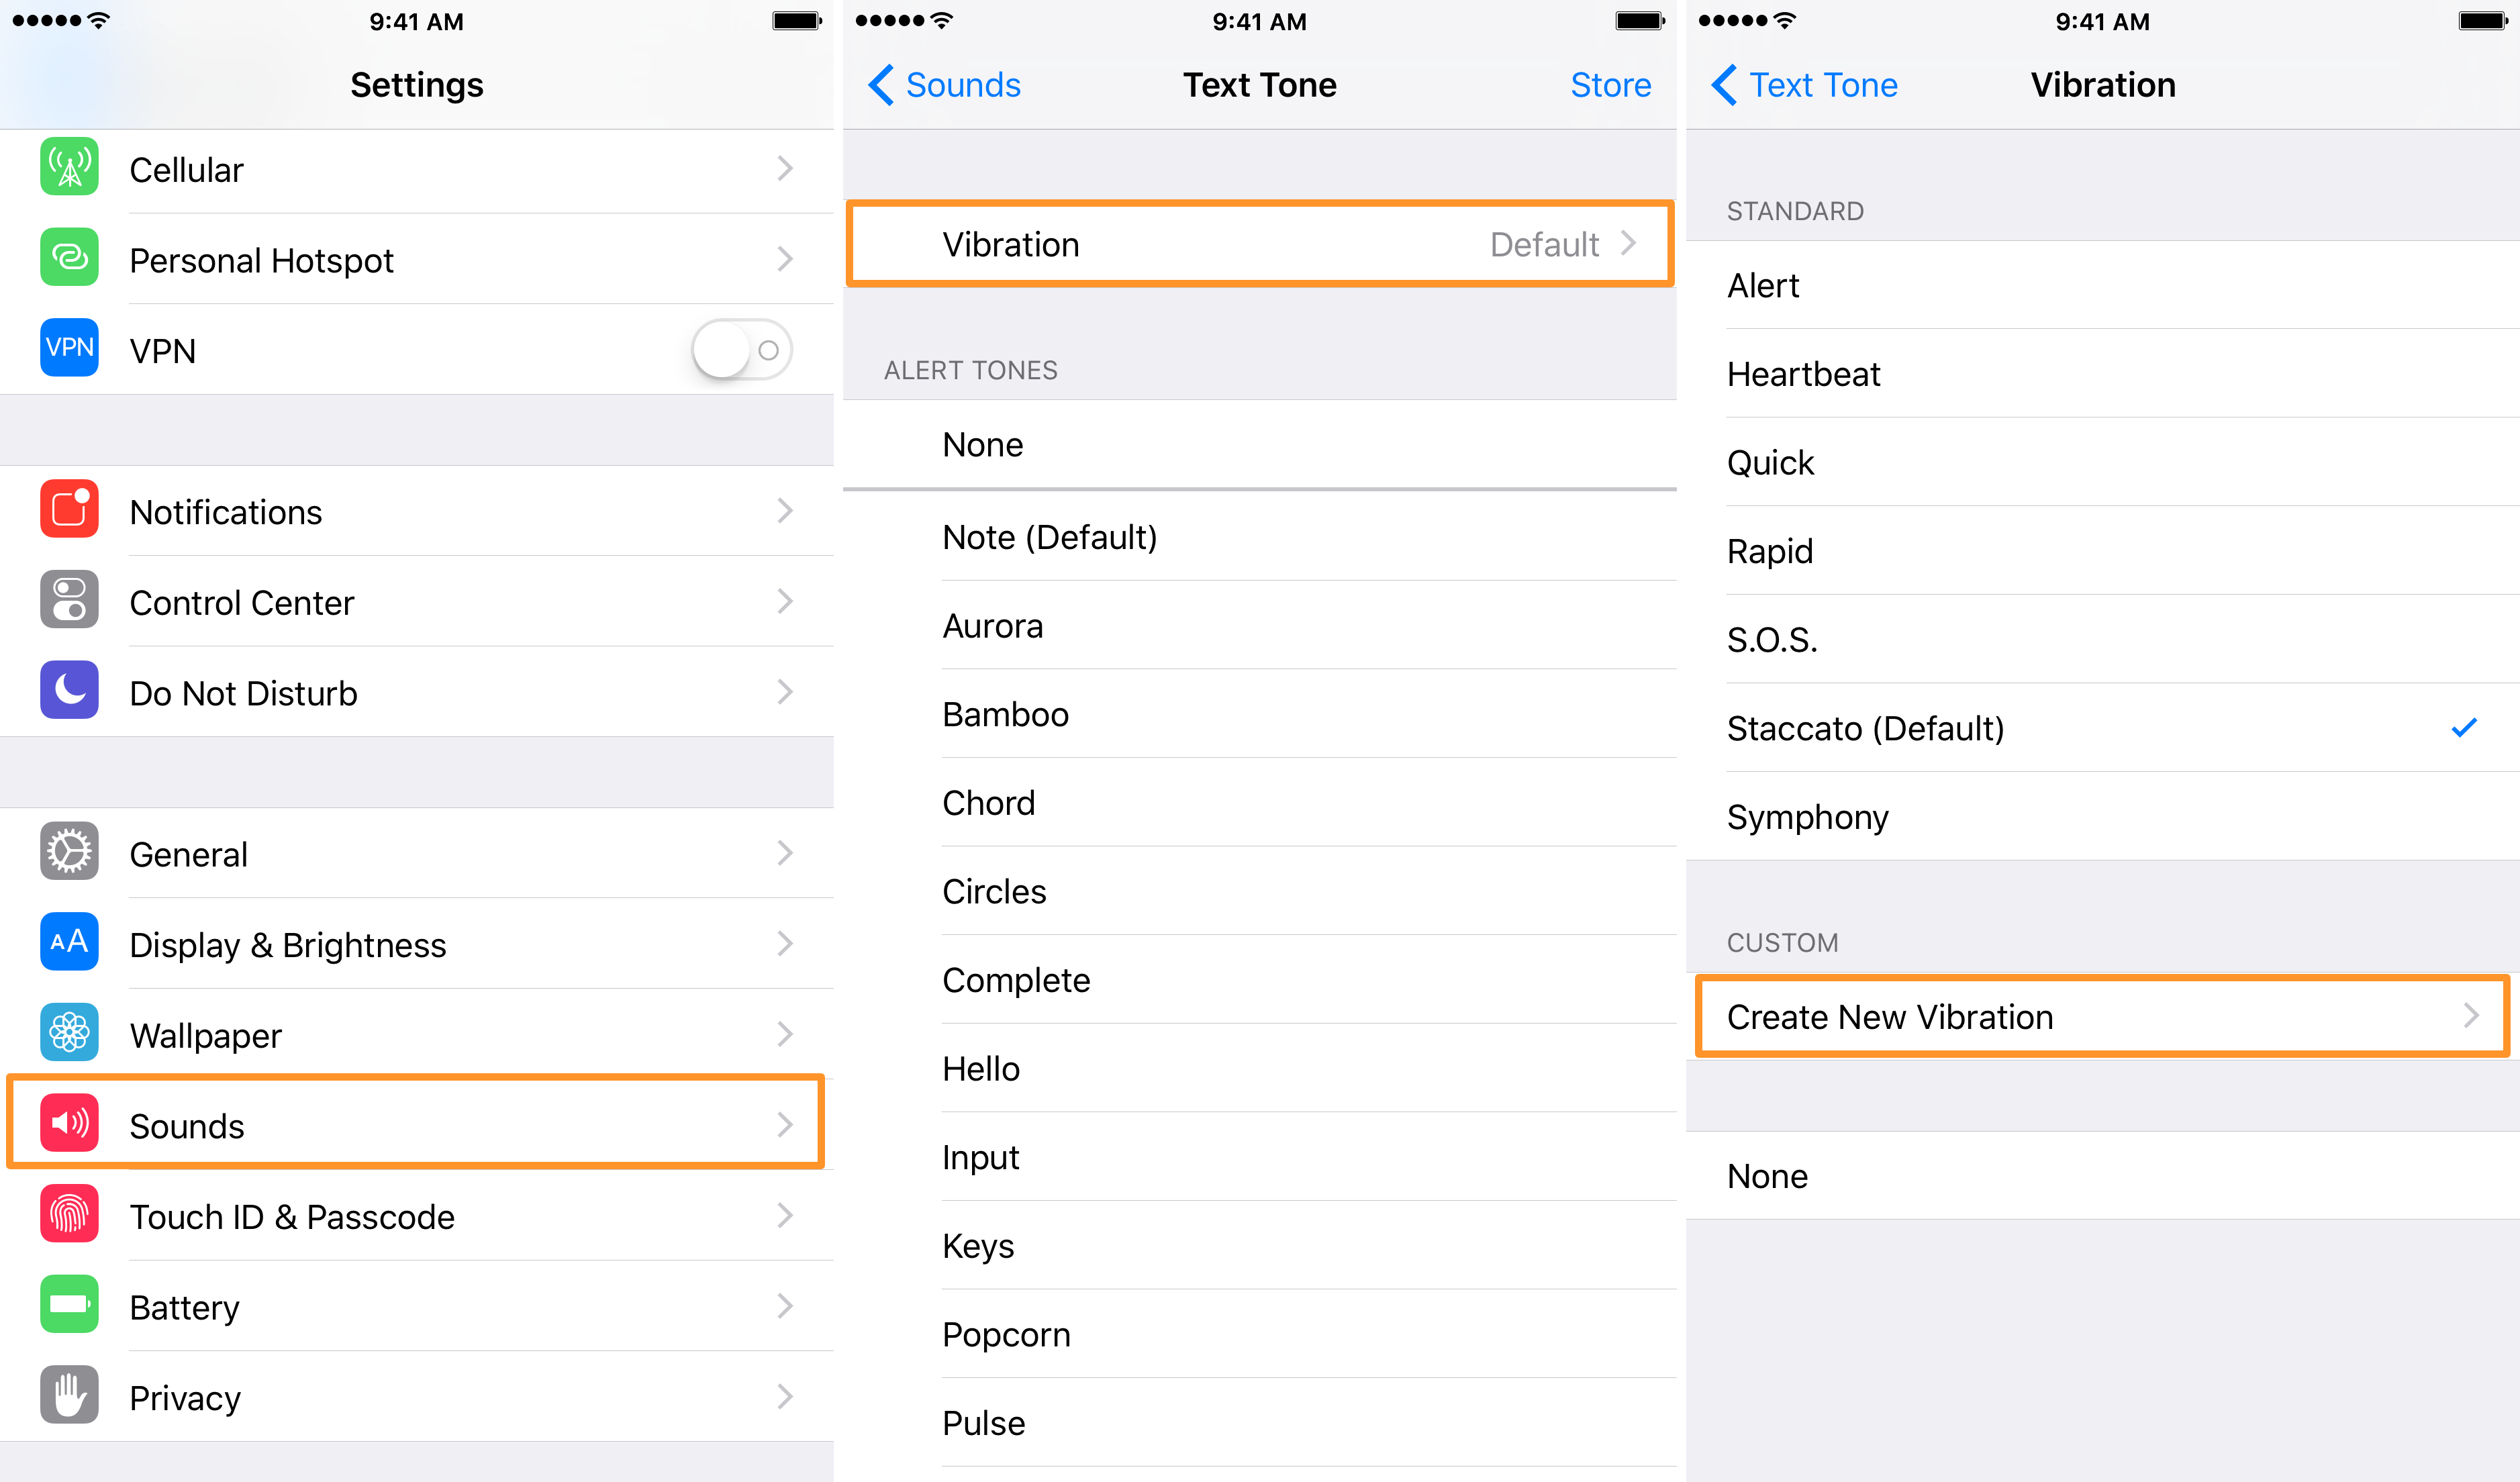
1) Open the iPhone Settings app and tap Sounds & Haptics.
2) Touch the Ringtone or Text Tone cell.
3) Next, tap Vibration to reveal all your available vibration patterns. iOS includes some pre-built options like Accent, Alert, Heartbeat, Quick, Rapid, S.O.S., Staccato, and Symphony. You can use them instead of using the default vibration option. But our goal is to have a custom pattern. So, read on.
4) Tap Create New Vibration to make a new one.
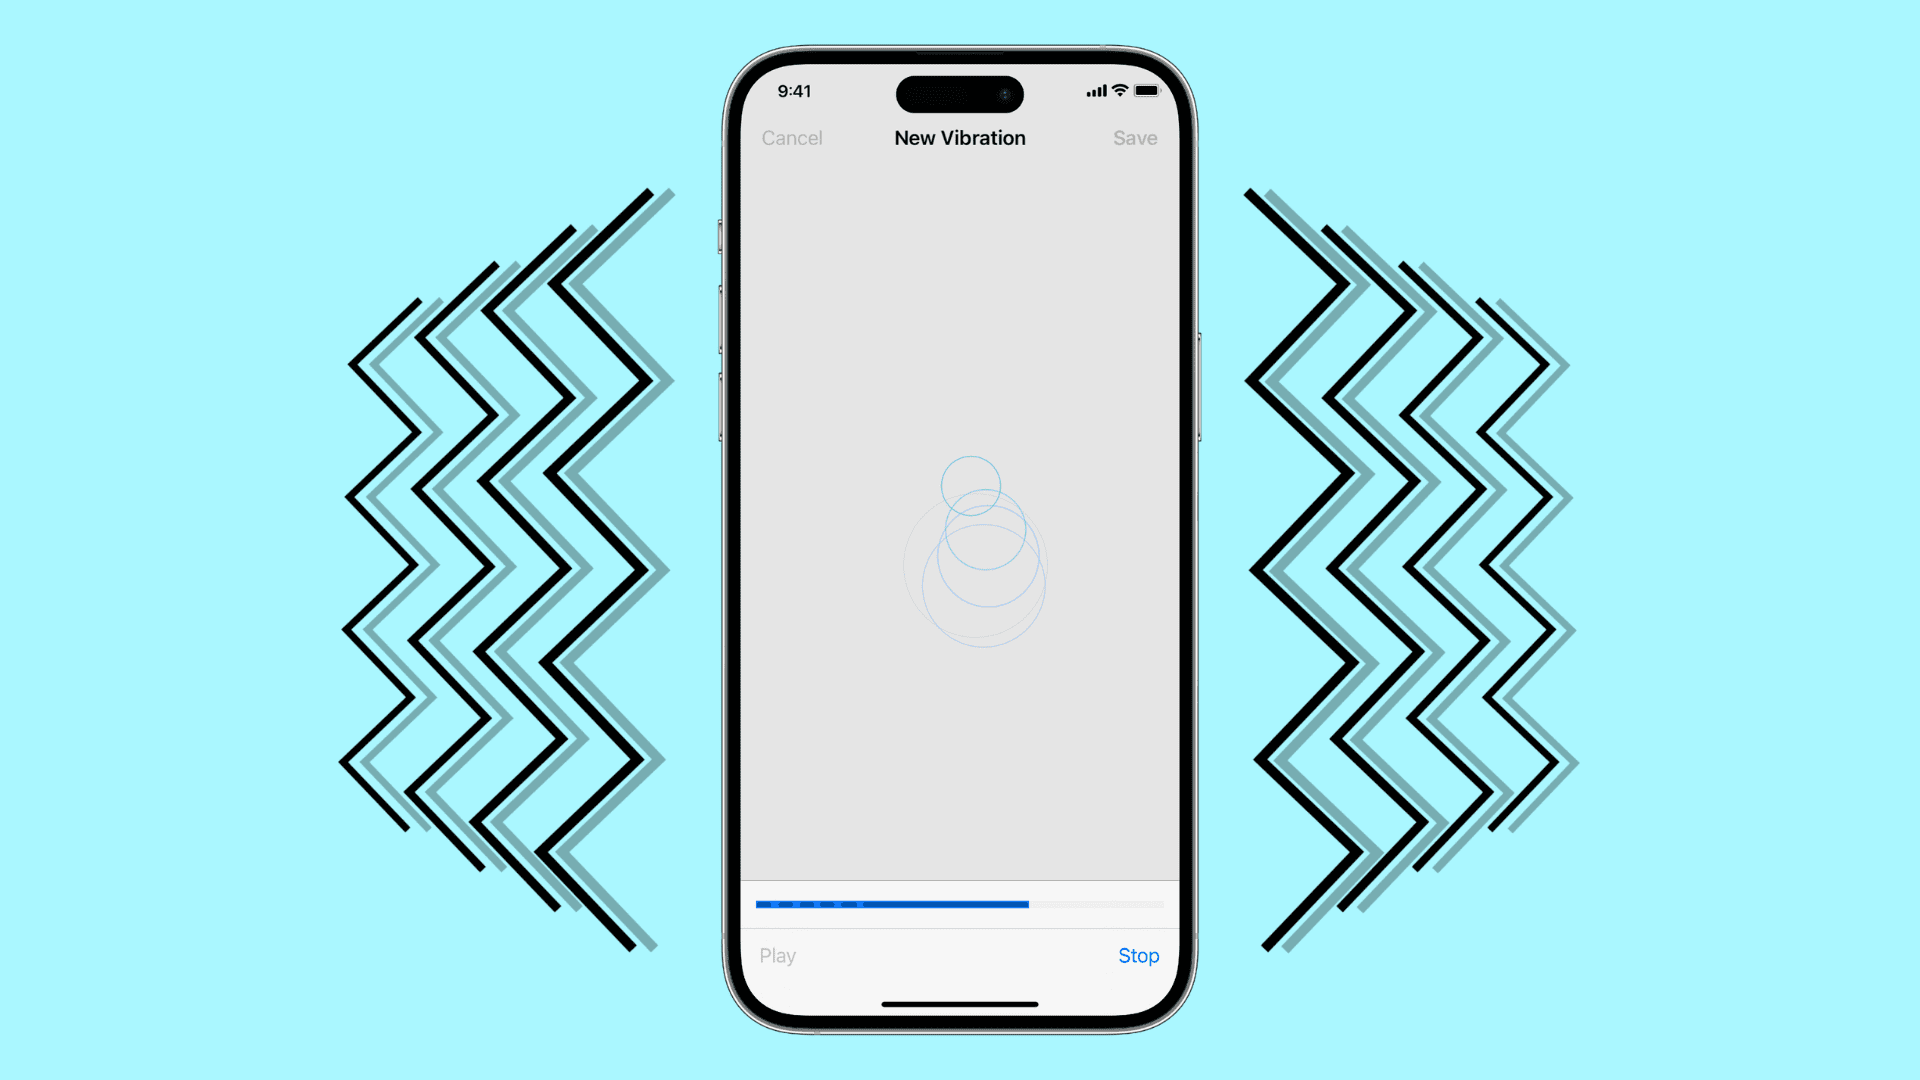
5) Now, you will be presented with the custom vibration creation interface. Tap and hold in the pattern you want to use for your vibration. You can use a series of light taps, long taps, and anything else you want.
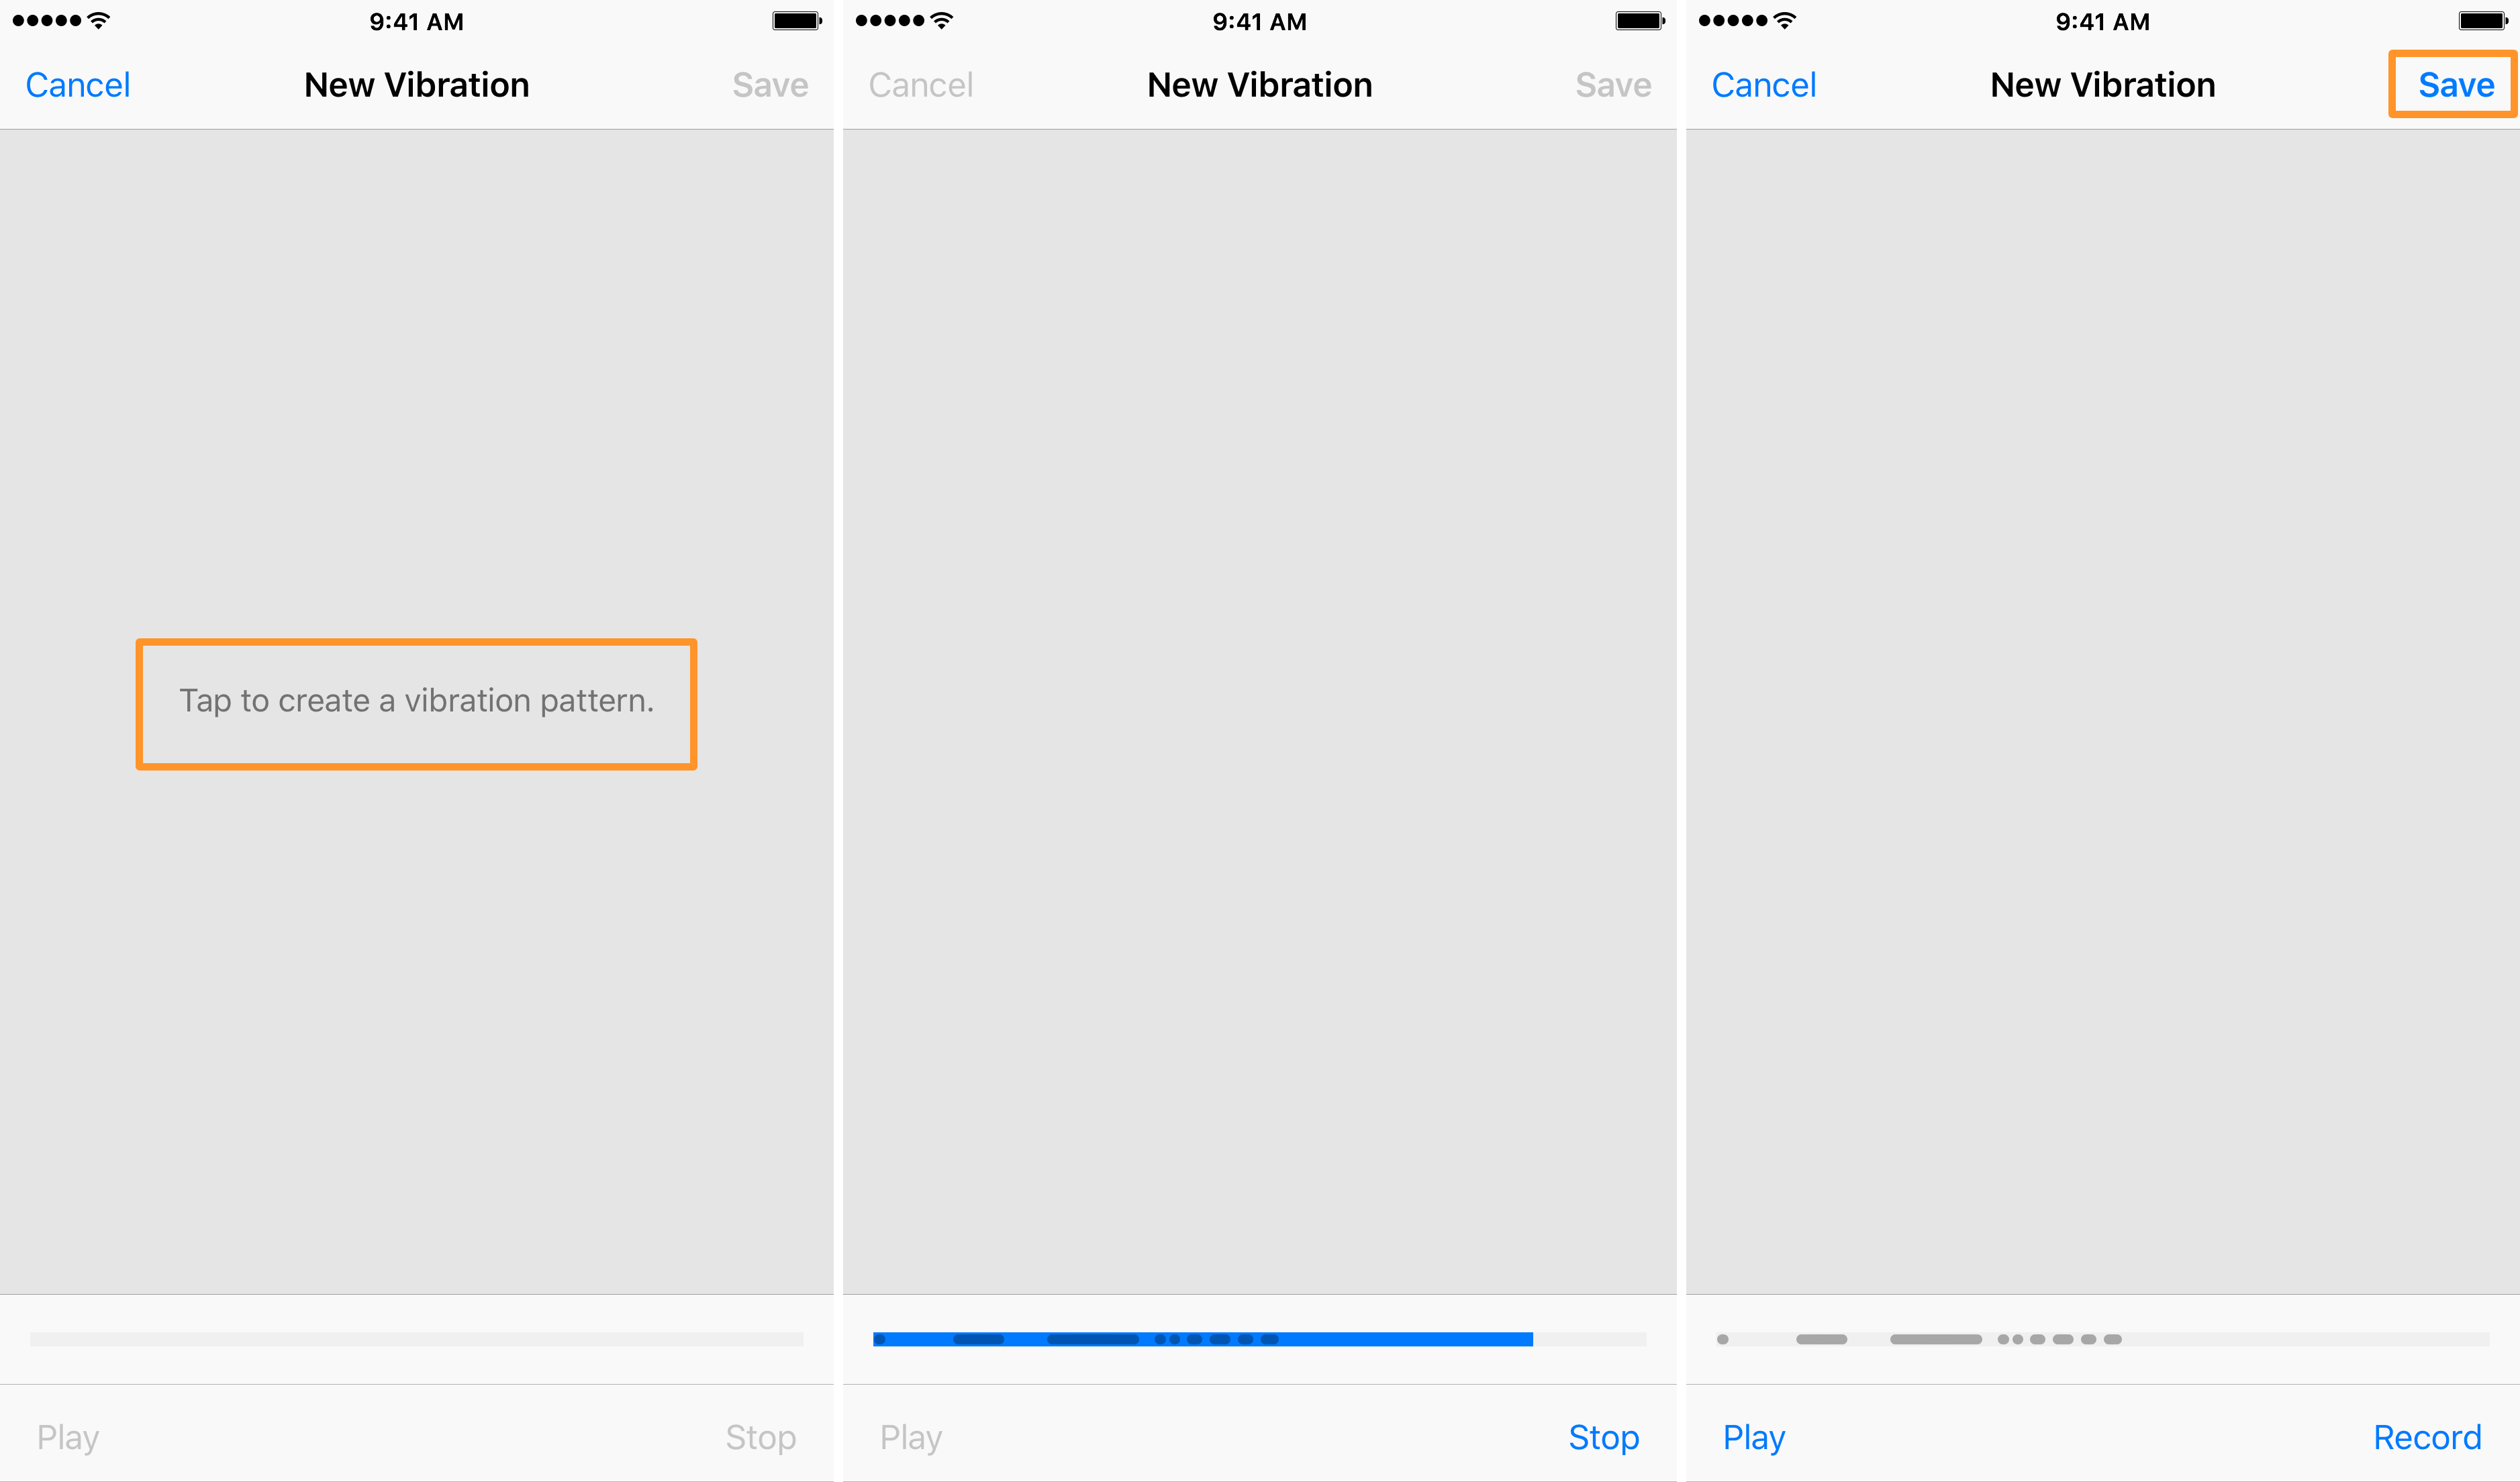
Note: As you do this, a blue bar will fill at the bottom, and the darker sections indicate where it will vibrate. You can use the Play button to test out the vibration you’ve made and see if you like it. If you want to have another try, tap Record, which will give you a fresh canvas to go at it again.
6) When finished, tap Save.
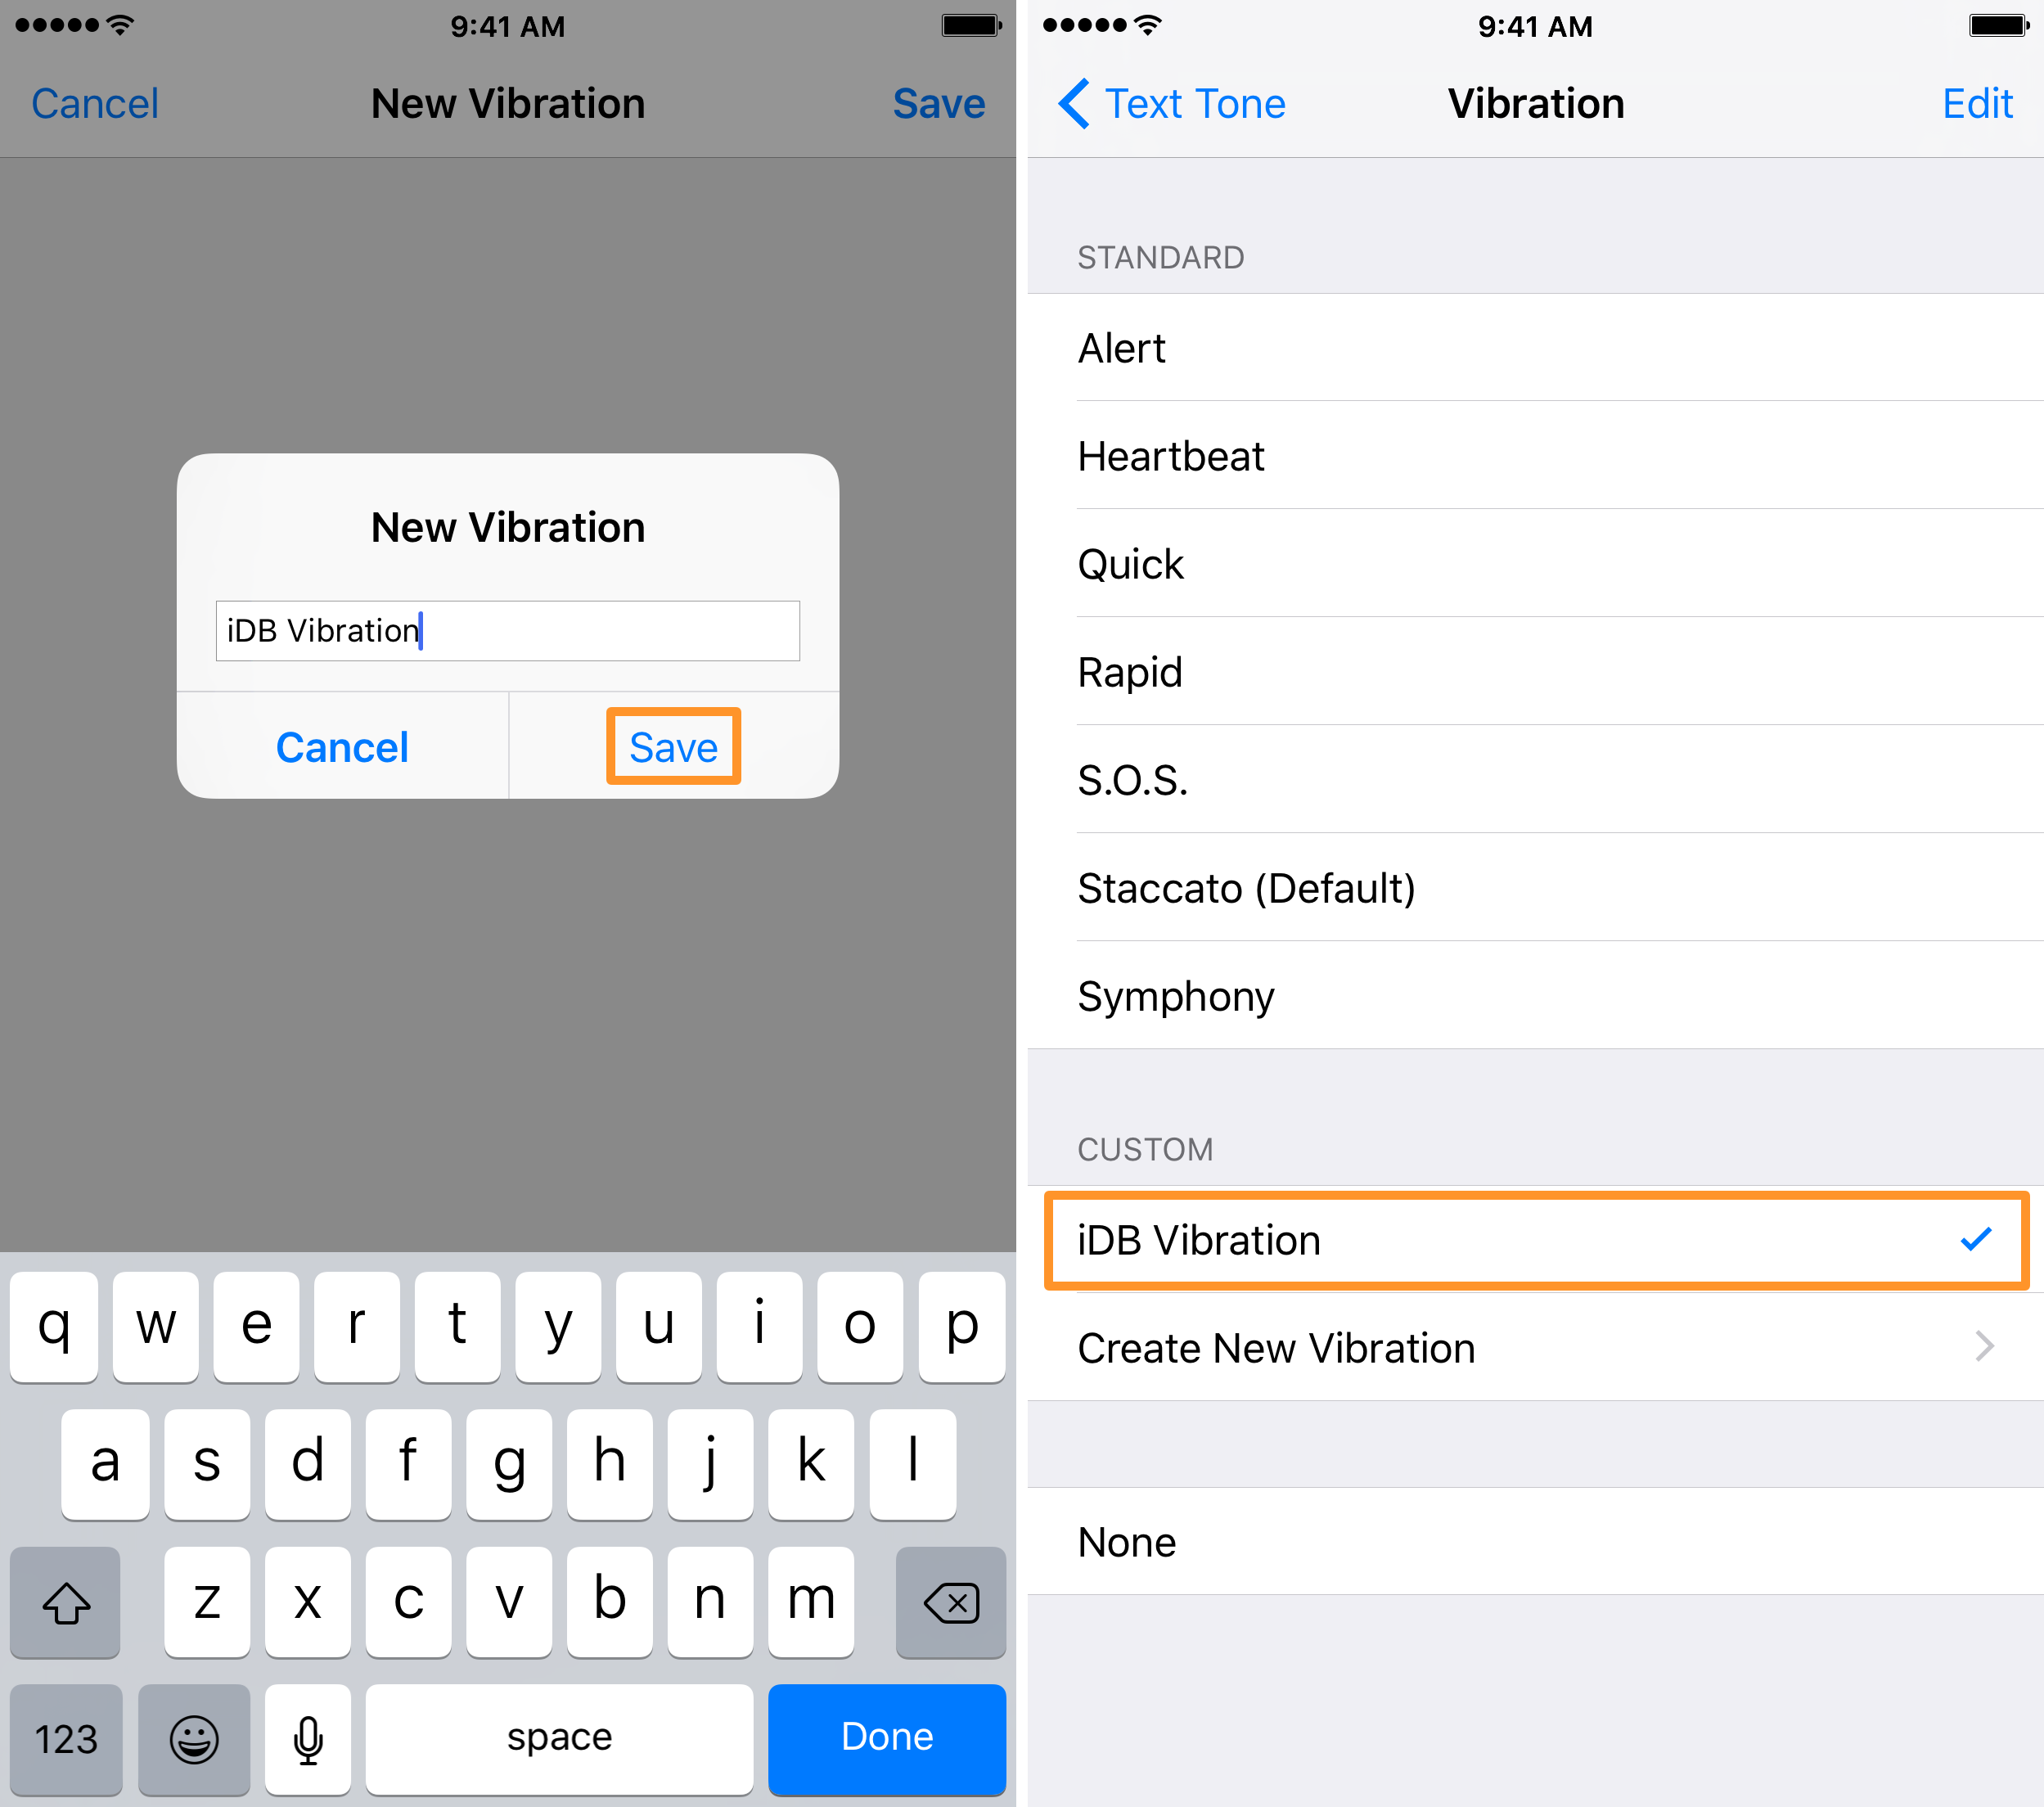
7) You can now give your vibration a name and then tap the Save button. You will see your custom vibration under the Custom header in your list of available vibration patterns.
Use custom vibrations on iPhone
After your vibration pattern is created, you can assign it to all settings where there is an option to pick a vibration. This includes the following:
1) Default iPhone ringtone: Go to Settings > Sounds & Haptics > Ringtone > Vibration and pick the custom vibration pattern. The same fundamental steps also let you set custom vibrations for the following options:
- Default iPhone text tone
- New Voicemail
- New Mail
- Sent Mail
- Calendar Alerts
- Reminder Alerts
2) Just like you can assign special ringtones and text tones for specific contacts, you can do the same with vibrations. For that, open the Contacts app > select the contact > Edit > Ringtone or Text Tone > Vibration and select the custom vibration pattern for that contact. Now, go back and tap Done.
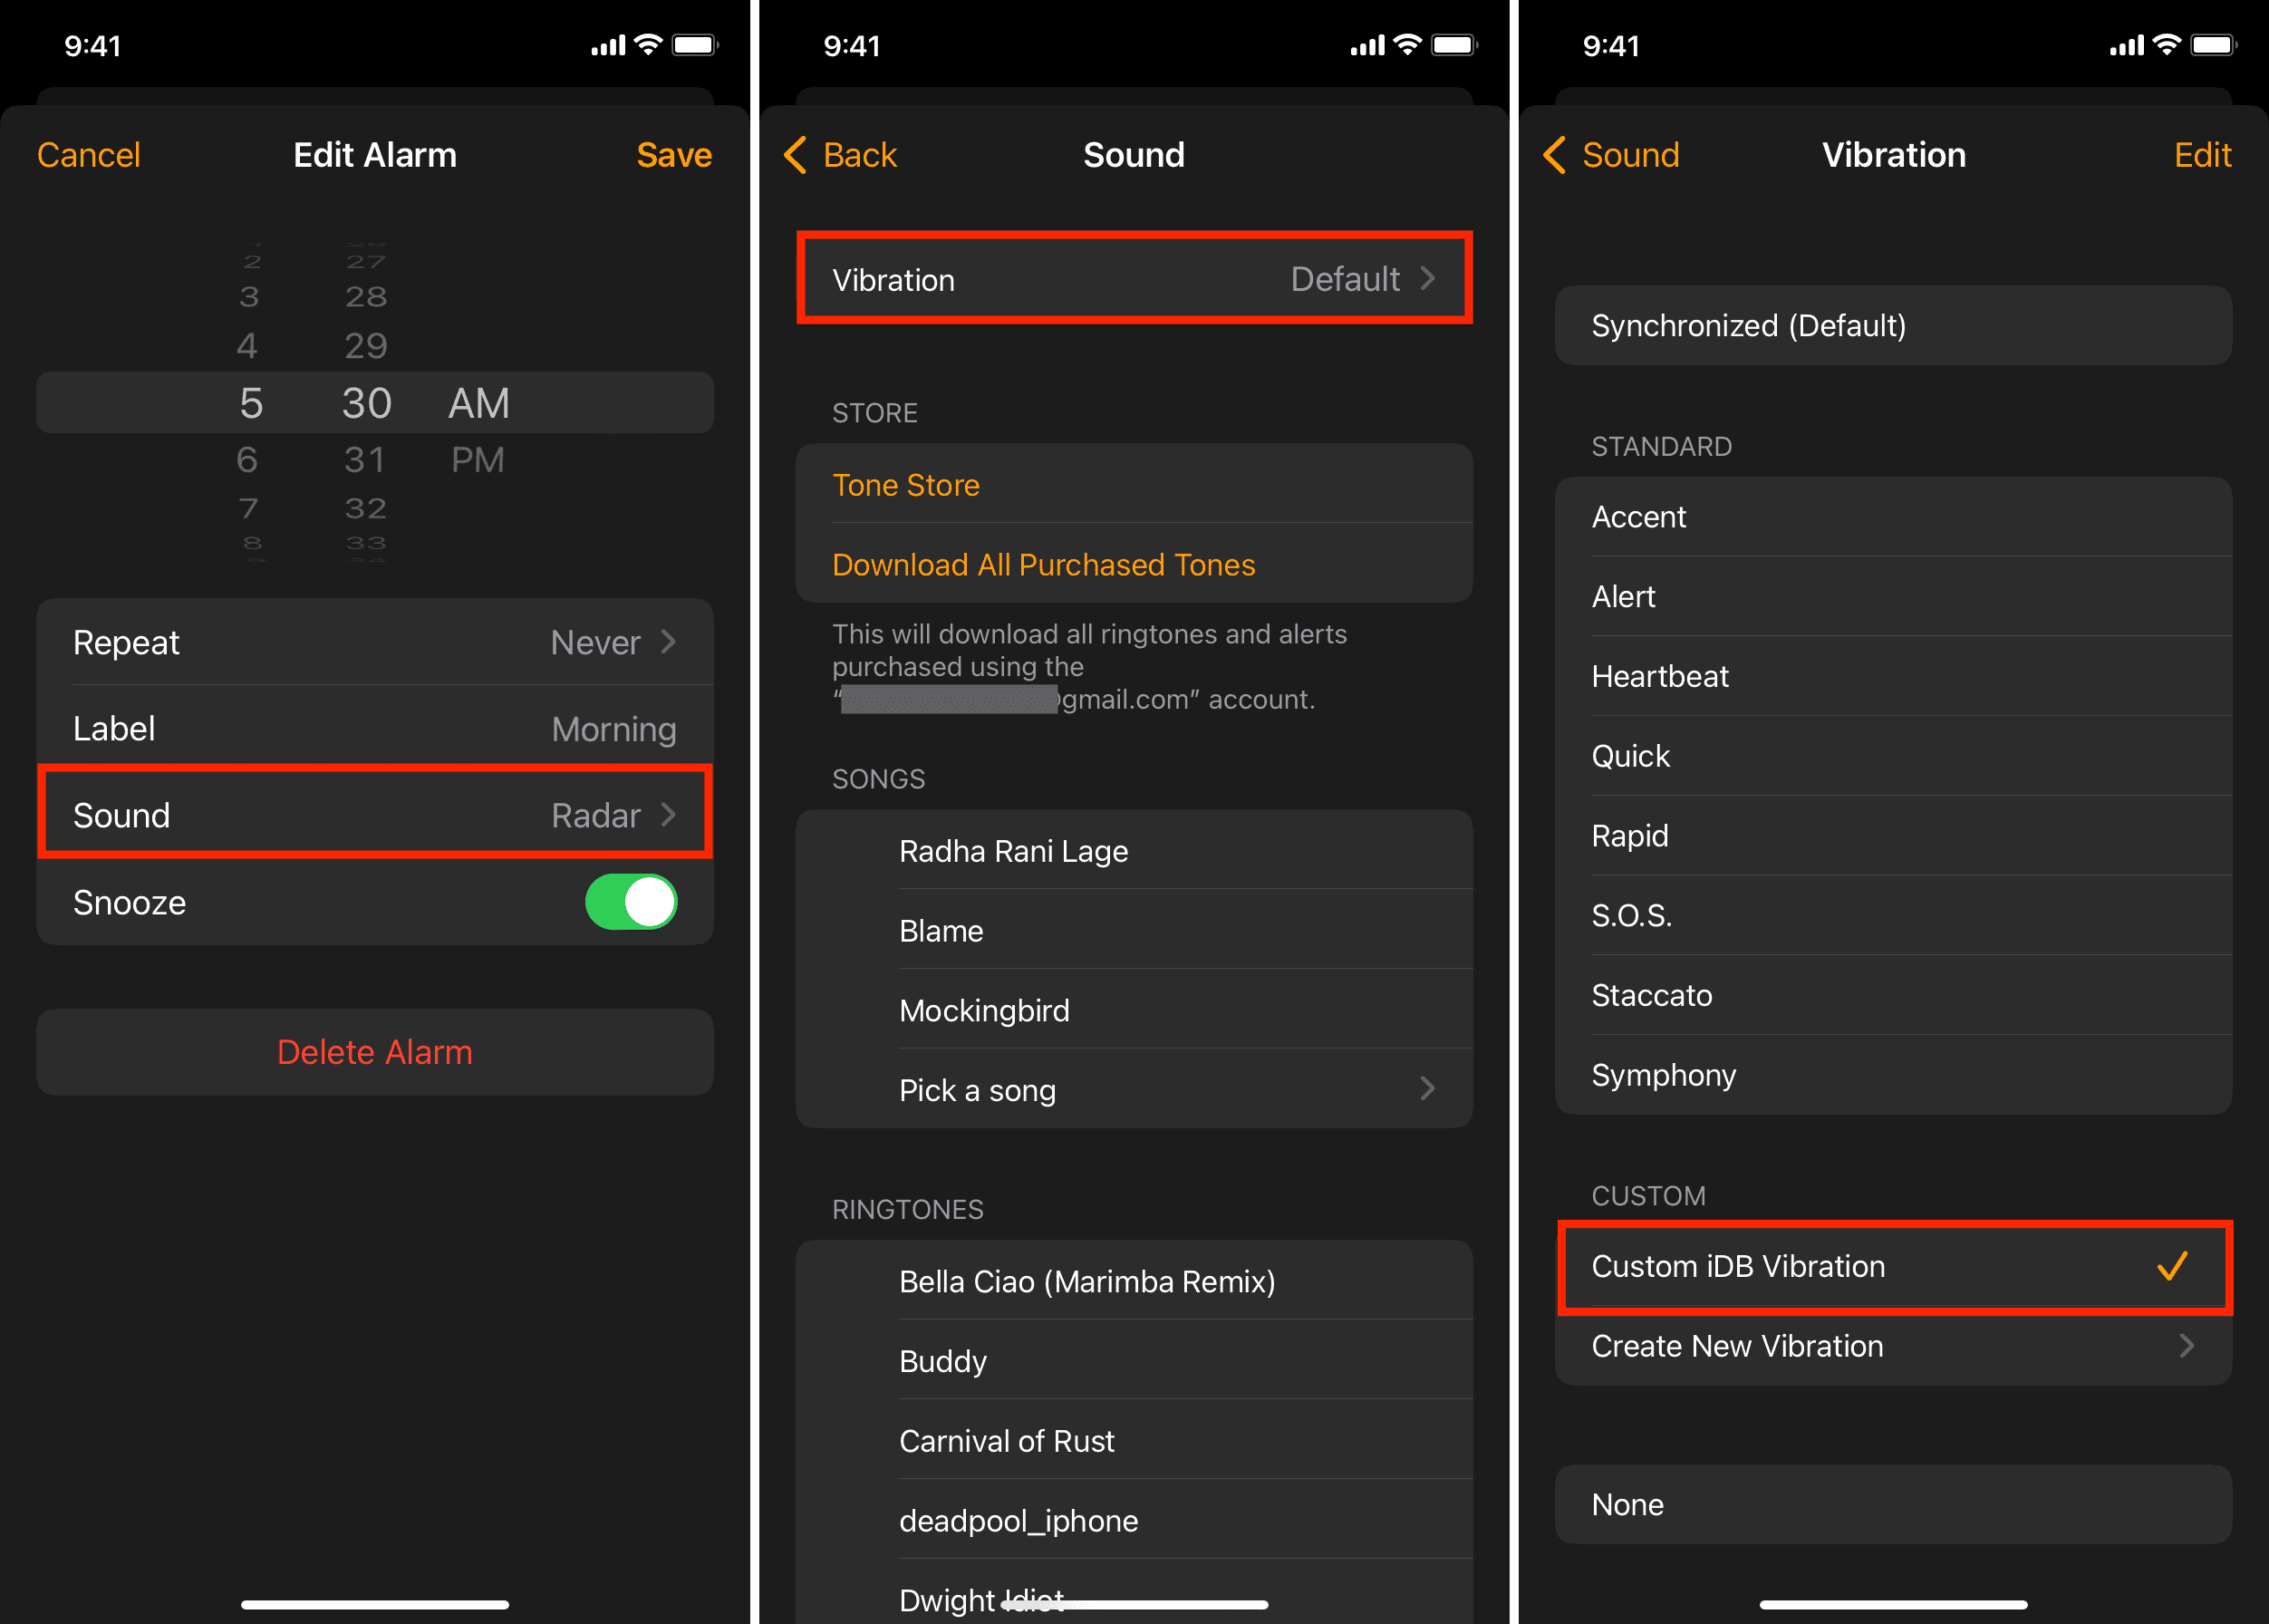
3) Alarm vibration: You can add a custom alarm vibration on your iPhone. To do that, open the Clock app > Alarm > Edit > pick an alarm > Sound > Vibration and pick the custom vibration you created above.
Now, not only have you created your own custom vibration pattern, but you’ve assigned it to a contact. You can make as many custom vibrations as you want and assign them to as many of your contacts as you want to. It’s perfect for having a head start in knowing who is really contacting you while your iPhone is in your pocket without having to pull out your phone to check.
Delete custom vibration patterns
You can easily remove the vibration pattern you created above if you don’t need it any longer or think the ones Apple already includes are just fine for your needs.
Follow these steps to delete a vibration pattern:
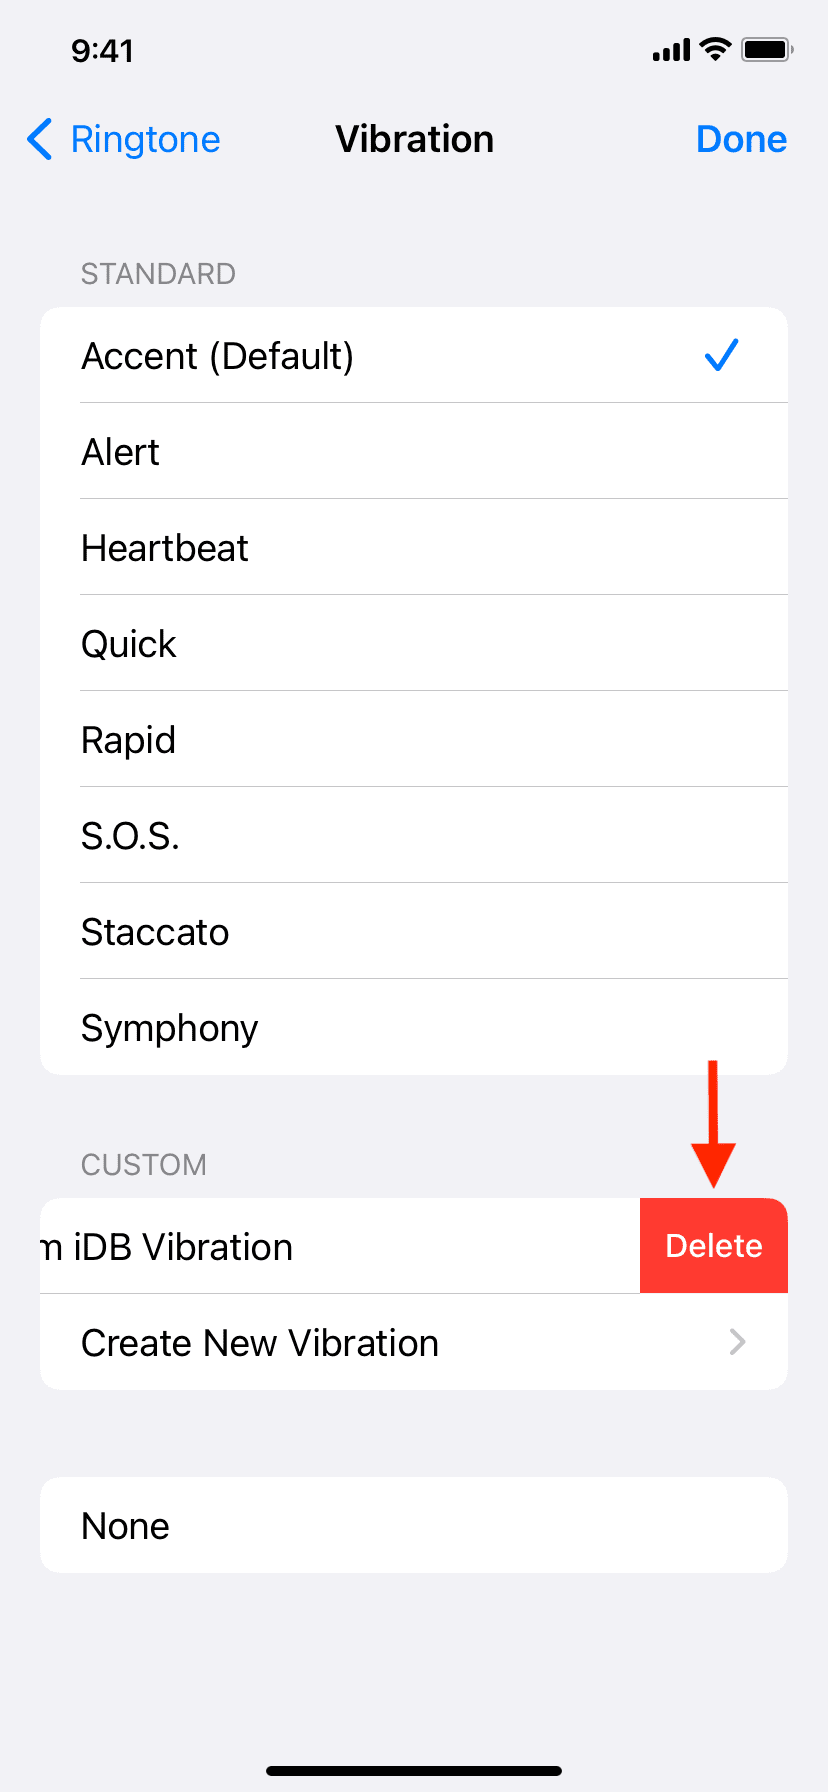
1) Open iPhone Settings and go to Sounds & Haptics > Ringtone > Vibration.
2) Swipe left on the custom vibration you created and tap Delete. You can also hit Edit from the top right and use the red minus button > Delete to remove it.
Finally, you can also create or delete custom vibrations from inside apps. For example, go to the Clock app > Alarm > Edit > pick an alarm > Sound > Vibration. From here, you can create new vibration or remove one already created.
That’s all there is to it!
Do you like having custom vibrations for contacts on your iPhone?
Check out next: