Learn about a few quick ways to find duplicate images in your Mac’s Photos app and permanently delete them to free up space.
How to find and remove all duplicate photos from Mac

Stay up-to-date on the latest Mac news, and tutorials. Get expert tips and tricks to optimize your Mac’s performance and learn about the latest Apple products and software updates. Discover the best Mac apps and accessories to enhance your user experience.
Learn about a few quick ways to find duplicate images in your Mac’s Photos app and permanently delete them to free up space.
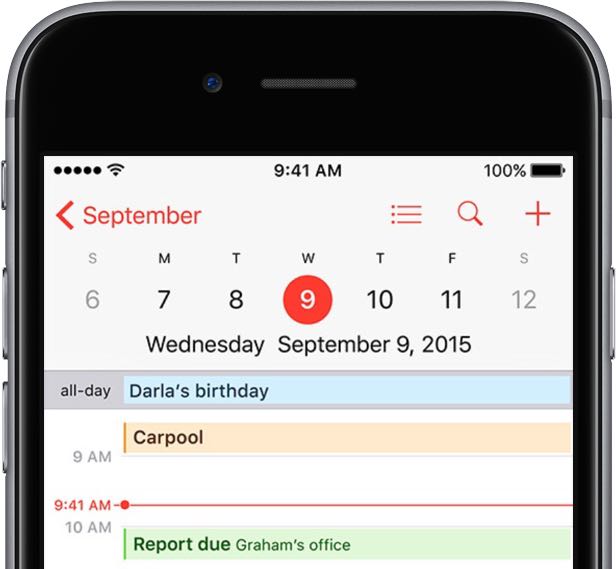
Apple's Calendar application for the iPhone, iPod touch, iPad, Mac and iCloud.com makes it simple to share events and to-dos with select people, or let anyone with a link subscribe to a read-only calendar.
For example, you could share a “To Do” calendar with your significant other, create a calendar for your entire family so every member can put errands on it, invite your wife to a shared “Kids” calendar to keep parents in the loop about school activities and more.
Not only do shared calendars increase your productivity in the workplace, they help those who use them become more organized in everyday life. You can assign edit privileges to invitees, adjust how participants access the calendar and more.
Invitees have a myriad of options at their disposal to view shared calendars, including the iCloud Calendar web app, the stock Calendar app on the iPhone, iPad, iPod touch and Mac or Microsoft Outlook on a Windows computer.
In this tutorial, you will learn how to share a calendar privately or publicly on iPhone, iPad, Mac and iCloud.com. You will also learn how to manage calendar sharing by adding or removing participants, changing privileges, adjusting calendar notifications, and more.

macOS comes with a security feature known as Gatekeeper, which can help prevent unwanted apps from launching on your Mac without your permission. It can also prevent potentially malicious apps from launching because it can be used to limit the kinds of apps that are allowed to open on your Mac.
In lieu of the recent Sparkle updater framework vulnerability having been uncovered in a variety of popular macOS apps, now is a great time to set up your Gatekeeper settings to prevent potential issues with malware on your Mac in the future.
In this tutorial, we'll be showing you how Gatekeeper works and how you can configure it to keep your Mac just as secure as you want it to be.

Learn how to hide the Favorites section in Safari for more privacy and a cleaner Start Page without these website bookmarks.

Safari Smart Search Field lets you type in either an URL to visit or a search query to send to the default search engine. It's also a place where search suggestions automatically pop up as you type. With this cool feature, you can type just the first few letters of a query and rely on the search engine (Google, Bing, Yahoo, etc.) to help you complete the search term without needing to type out the rest of your query. But, certain users may not be fond of this feature for privacy reasons.
If you're among them, use the step-by-step instructions provided in this tutorial to turn off suggested search terms in Safari for iPhone, iPad, and Mac.
After upgrading your Mac to OS X Yosemite or later, the new Photos app gets installed automatically.
On first launch, Photos will auto-upgrade your default iPhoto library to its new library format. People with multiple iPhoto libraries must manually convert them to the new format by holding the Option (⌥) key when clicking the Photos icon in the Dock.
Upon completing migration, you'll have two sets of photo libraries on your machine: the original iPhoto libraries and their Photos counterpart.
In order to free up a significant amount of storage space on your Mac, you can safely delete any iPhoto library that has been migrated to the new Photos app.

Every so often, you may come across the need to rotate a video after you've recorded it with your camera or iOS device because it didn't quite come out how you expected it to.
Fortunately, Apple's QuickTime app, which is built into the macOS operating system on your Mac, is powerful enough to do just that; and it's very easy to do.
In this tutorial, we'll be showing you how to rotate a video in any direction on your Mac using the QuickTime app.
In addition to moving your multi-gigabyte iTunes library to an external drive, a significant amount of Mac storage space can be freed up by moving your photo libraries onto a separate drive.
If you take a lot of pictures with a DSLR camera or your iOS devices and import them in Photos, you'll fairly quickly run out of free space on most Macs.
This tutorial will guide you through the process of moving an entire library of photos to an external drive, preferably to a much larger external hard drive, in a way that won't disrupt your photography workflow.

Heavy Mac App Store users will download, install, and delete apps from their Mac all the time. It may be because you're interested in experimenting with new utility releases, downloading games to get a thrill, or checking out the productivity apps that developers claim to be the "best" out there.
Through all this downloading, installing, and deleting, you may want to check out one of the apps you remember using from a long time ago to see if it got any cool new updates, and sometimes you don't particularly remember what the name of said app might be.
Fortunately, the Mac App Store comes with a way to see your purchase history, allowing you to see all of the apps you've ever downloaded from the Mac App Store whether they were free or paid ones. In this tutorial, we'll show you how to see your Mac App Store's download history.

You'd be amazed how much of your Mac's storage is wasted on the iTunes library. All those apps and media you have purchased and downloaded over the years pile and clog up your Mac's precious storage.
But with one-terabyte external hard drives retailing for less than $60 on Amazon, there are no excuses not to spring for external storage to move that humongous iTunes library of yours on.
This post takes you step-by-step through the process of consolidating your iTunes library and moving it to an external drive in a way that will preserve your playlists, ratings and other interactions, so you won't miss a beat.

In Safari, you can save websites you visit frequently so you can quickly revisit them later without having to remember their URLs. Saved webpages are accessible in Safari's Bookmarks menu on the iPhone, iPod touch, iPad or Mac.
If you save a lot of bookmarks, they will clutter the Bookmarks menu over time so locating that favorite website of yours will begin to feel like finding a needle in the haystack. You can avoid this by creating themed folders for organizing your bookmarks.
This tutorial provides step by step instructions for creating new Safari bookmark folders for iOS and macOS. You will also learn how to rename, reposition and delete these folders and file websites into them, all of which will help you organize your favorite websites to your liking.

Macs are nice computers, but they're not without their issues that can spur up at random times. Fortunately, troubleshooting problems on a Mac isn't incredibly difficult and there are tons of simple steps you can take as a Mac user before calling AppleCare for support.
One of the easiest troubleshooting steps is resetting your Mac's NVRAM, a step which can solve an array of problems. In this tutorial, we'll explain what the NVRAM is responsible for and how to reset it to fix common problems.