How to

Kick it Old School with SNES on Your iPad

Console emulators have been around the jailbreak scene for a long time. Those that aren't familiar with emulators, they basically allow you to play copies of console games, while not on that console.

SNES HD turns your jailbroken iPad into a Super Nintendo system. Not only that, it allows you to connect up to 2 other iDevices to use as controllers.

It's free, and all you need is a jailbroken iPad and iPhone or iPod touch. Wanna try it out? I'll give you an easy tutorial to get you started.

Step 1. Make sure you have a jailbroken iPad and iPhone or iPod touch (both devices must be jailbroken).

Step 2. Open Cydia on both iDevices, and go to the Sources tab. Add the following source by selecting Edit > Add : http://wherethewoozlewasnt.com/cydia/

Step 3. After the sources are done loading, you need to install SNES (HD) on your iPad and ControlPad onto your iPhone/iPod touch. Both apps can be found by searching for them in the Cydia Search tab.

Step 4. Almost done! Make sure bluetooth is activated on both devices, and load up the downloaded applications. You should see an SNES console on your iPad, and an SNES controller on your iPhone.

Step 5. If the controller doesn't connect right away, touch the bluetooth search icon. Once paired, press the power button to start your game!

If you are wondering why you don't have any games, it's because it doesn't come with any. Console games are copyrighted, and it is illegal to host or download them. And we certainly don't condone piracy.

There are, however, several websites that do offer them, but clearly state that you must have the original game in your possession. These copies of the game are known as "backup copies" which are legal to have, I've read.

If you can stomach the pain of locating games, it really is quite worth it. Games are surprisingly playable on the iPhone's touch screen. You can race against a buddy in Top Gear, or take them on in Street Fighter. That's it, now your kicking it old school.

Any questions?
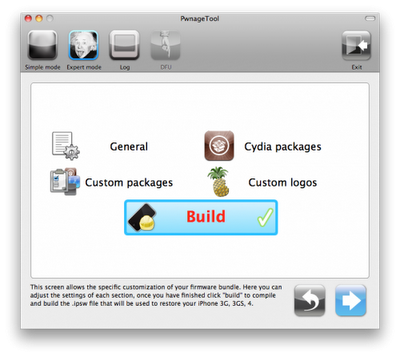
Jailbreak Your iPhone on 4.3.2 with PwnageTool Bundles

As most of you  are already aware of, Apple released iOS 4.3.2 today. As usual, we recommend avoiding new Apple updates, as they can include patches to exploits used in the current jailbreak.

Since there has been no announcement from the Dev Team or anyone else that the 4.3.2 software is safe, we recommend to stay away. But for those of you who updated to take advantage of the FaceTime fix, or by complete accident, you're not completely hopeless...

How to Access Your Apple TV’s File System With CyberDuck

Yesterday we showed you folks how to SSH into your jailbroken Apple TV2 through your desktop OS' command line prompt. Today we are going to show you how to create a connection with your hacked Apple TV2 in a much more user friendly way.

All you need is CyberDuck for Mac or Windows, and your Apple TV's IP Address. Of course you'll also need a jailbroken Apple TV2, and both it and your computer must be on the same Wi-Fi network. For those new to the game, you can find your IP in your Apple TV2's main menu, Settings > General > Network > IP Address.

Once CyberDuck is done downloading, fire it up. Your going to want to choose to create a new connection.

From the drop down menu, select SFTP. In the Server field type your IP Address that we had you get earlier.

In the Username section type root and for the password, type alpine.

Then just click Connect.

You should now be looking at your Apple TV's root directory. Besides the ability to view your ATV2's folder sub system, you also have write privileges. This is one way to install Plex or Firecore's ATV Flash.

Any questions?

How to Unlock iPhone 4.3.1

The Dev Team just released their unlock for iPhone 4.3.1. This updated version of ultrasn0w brings support for the iPhone 3Gs and the iPhone 4 that are exclusively using these basebands: 01.59.00, 04.26.08, 05.11.07, 05.12.01, 05.13.04, and 06.15.00.

In this post, we'll guide you into unlocking your iPhone 3GS or iPhone 4 on any of the above basebands, and running the latest iOS 4.3.1...

How to SSH into Your Jailbroken Apple TV2 to Install Apps

If you have recently jailbroken your Apple TV2 for the first time, you might find yourself wondering what to do next. Sure the default NitoTV is cool, but there's only so much you can do with it.

If you are seriously looking to venture into the world of Apple TV hacking, you might want to pay attention. One of the best ways to access your Apple TV and install files is through SSH. This is just basically a secure connection between 2 devices.

In this case it is between your computer and your Apple TV2. OpenSSH, written by Saurik is installed during the jailbreak process. This is what allows your Apple TV to make a connection with your computer.

I'm on a Mac but I assume it is basically the same process for Windows users with its command line prompt app. Mac users open spotlight and type in Terminal. Once open you want to enter the following:

ssh root@192.168.x.x

Obviously you want to fill in the x's with your Apple TV2 IP address. To find it, just open the main Apple TV menu and go to Settings > General > Network > IP address.

Don't get discouraged if you don't get it right away, it took me a few minutes before I finally got prompted for a password. Also you must make sure you are on the same Wi-Fi network as your Apple TV.

The default Apple password is alpine, like on all of their other iOS devices.  Type it in and hit enter. You should now see Apple-TV:~root# which means you have write access to Apple TV's hard disk.

For an example I will give you the commands to install XBMC on your AppleTV2 which is a popular home theatre PC software.

echo "deb http://mirrors.xbmc.org/apt/atv2 ./" > /etc/apt/sources.list.d/xbmc.list

apt-get update

apt-get install org.xbmc.xbmc-atv2

After the last line is entered, you should see some code scrolling across your Apple TV2 and your machine will restart. After it reboots, you should see XBMC in your Apple TV Main Menu. You have successfully SSH'd into your Apple TV!

Any questions?

Jailbreak Your Apple TV2 on 4.3.1 with PwnageTool [Tutorial]

For those of you who own an Apple TV2 and have been looking to jailbreak it, the time has arrived. Although the ATV2 has been hacked before, this is the first official solution available for those who have the latest iOS 4.3 software.

Even the tutorial we released last week on jailbreaking your Apple TV 4.3 with Seas0nPass wasn't an official release. It was extremely buggy and required you to connect your ATV2 to your computer every time it restarted.

Well, thanks to the hard work of the Dev Team, Saurik and NitoTV, we finally have an official jailbreak solution for iOS 4.3. So for those interested in hacking their Apple TVs and adding tons of extra capabilities to that little black box, let's get started.

Important Note: This is only for 2nd generation Apple TVs, the black one. Also this particular tutorial is only for Mac users, as it uses PwnageTool which is currently only available for Mac OS.

Before we start hacking, you want to make sure your Apple TV is on the latest software version. You can do this by connecting the device to a computer with iTunes or from the Apple TV main menu. Just go to Settings > General > Update Software.

Step 1: You will need a micro-USB cable. This are the most common USB cables and are typically used to charge smartphones. Also you will need the latest version of iTunes. Finally, you need PwnageTool 4.3, which can be downloaded here. I always download tools to my desktop so I can keep track of them.

Step 2: If you updated your software via the Apple TV itself, you will still need the firmware file which you can get here. If you updated through iTunes, move along to step 3.

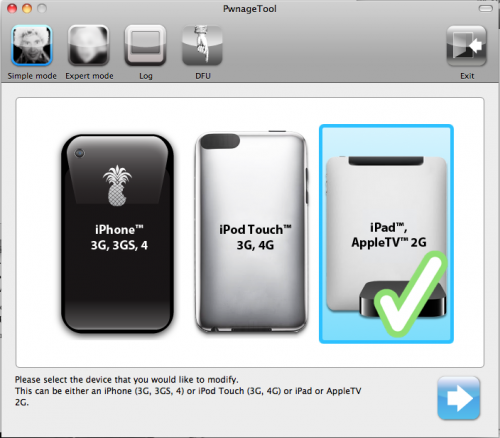
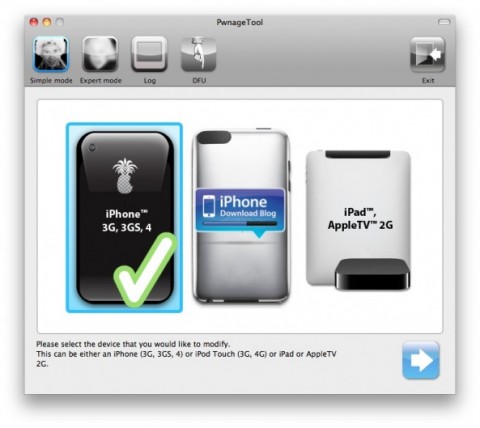
Step 3: Open up PwnageTool and select your device. Obviously for this tutorial we want the Apple TV2. Click the blue arrow and let the software find the file. When it's done, select the Apple TV firmware file and click next.

Step 4: PwnageTool will now create a custom jailbroken file out of the firmware, so give it some time. Once it's done working its magic, plug your Apple TV into your computer using the micro-USB cable. Make sure your power and HDMI cables are left unplugged.

Step 5: The software will walk you through the DFU process, which will prep your Apple TV for the custom firmware. If successful, it should look like this:

Step 6: You can now close PwnageTool and open up iTunes. With your Apple TV plugged in, iTunes should immediately go to the ATV page. You'll see a big button that says restore. While holding down your Mac's Option key, click restore. This should launch a Finder window and allow you to choose the custom firmware, that PwnageTool made, from your desktop.

Step 7: Let iTunes do its thing and once it says completed, you're done. Unplug your Apple TV from your computer and back into your TV set. If you see the NitoTV option in the main menu, you're jailbroken!

From here you can begin to experiment. Stay tuned to our blog as we post more tutorials on some of the cool things you can do with your new jailbroken Apple TV, such as browse the web and even watch Hulu.

Jailbreak Your iPad on 4.3.1 with PwnageTool [Tutorial]

The long-awaited jailbreak for Apple's iOS 4.3.1 is finally here. It is the first official jailbreak since Apple released iOS 4.3 almost a month ago. Those with iDevices wanting to take advantage of some of the new features in 4.3, haven't been able to upgrade without losing their jailbreaks.

That all changed in the wee hours of last night, when the Dev Team members finally released the anticipated software. The exploit is available in 2 different forms of software: PwnageTool, which is for Mac users only, and RedSn0w, which will work on either Windows or Mac.

This step by step tutorial will show you how to jailbreak your iPad on iOS 4.3.1, using PwnageTool. This software is for Mac users only. If you are on a PC, follow our RedSn0w tutorial here.

Important Note: Just remember this is not for the iPad 2, there is no jailbreak available for this device yet.

Before we get started, you want to make sure your iPad is on iOS 4.3.1. Backing up your iPad to iTunes is also recommended, better safe than sorry. But don't worry, the process is super simple and will have your iPad jailbroken in no time.

Step 1: For this tutorial, you'll need PwnageTool 4.3, which you can download here. Make sure you select the 4.3 version, as it is the only one that will work. I always download my tools to my desktop so they're easier to find.

Step 2: Load up PwnageTool, select the iPad/Apple TV option and click the blue arrow. With this method, PwnageTool should actually locate your iPad firmware on your hard drive for you, so there is no need to download the .ipsw file.  Select the iPad firmware and click next.

Step 3: Sit tight as PwnageTool does its thing, it can take a while. It is taking the file you selected and jailbreaking it. Then we will load the jailbroken firmware onto your iPad.

Step 4: Once done, you will be prompted to connect your device via usb. PwnageTool will now help you put your device into DFU mode. If you don't get it the first time, don't fret. Just wait until it's finished giving DFU instructions, and click try again. If you did it correctly, it should look like this:

Step 5: Now you can close PwnageTool. Open iTunes with your iPad still connected, and you should receive this message:

Step 6: Don't just click restore because you will just install Apple's original firmware. While holding down your Mac's Option key, click restore. This should open up a window for you to browse for the file. Select the custom firmware from your Desktop that PwnageTool just created, and restore it.

Step 7: It may take a while for iTunes to install the custom firmware on your iPad. But once completed, your iPad should restart itself and the Cydia icon should be on your home screen.

That is how you jailbreak your iPad on 4.3.1 with PwnageTool, any questions?

Jailbreak Your iPad on 4.3.1 with RedSn0w [Tutorial]

The long-awaited jailbreak for Apple's iOS 4.3.1 is finally here. It is the first official jailbreak since Apple released iOS 4.3 almost a month ago. Those with iDevices wanting to take advantage of some of the new features in 4.3, haven't been able to upgrade without losing their jailbreaks.

That all changed in the wee hours of last night, when the Dev Team members finally released the anticipated software. The exploit is available in 2 different forms of software: PwnageTool, which is for Mac users only, and RedSn0w, which will work on either Windows or Mac.

This step by step tutorial will show you how to jailbreak your iPad on iOS 4.3.1, using RedSn0w. If you are a Mac user and prefer to use Pwnage Tool, stay tuned. We will provide a tutorial for that software shortly. Either method is extremely easy, and will have your iPad jailbroken in no time.

Important Note: Just remember this is not for the iPad 2, there is no jailbreak available for this device yet.

Before we get started, you want to make sure your iPad is on iOS 4.3.1. Backing up your iPad to iTunes is also recommended, better safe than sorry.

Step 1: For this tutorial, you'll need RedSn0w which you can download here. Make sure you select version 0.9.6rc9, as it is the only one that will work. I always download my tools to my desktop so they're easier to find.

Step 2: For this method, you will need the actual 4.3.1 firmware file. If you don't know where to find it on your hard drive, just download it to your desktop from here. Make sure you download the iPad file, 4.3.1.

Step 3: Launch RedSn0w and click Browse. Find your 4.3.1 firmware from the previous step and select it.

Step 4: The software will then give you a few options before continuing. For most of us, all we need is the Cydia icon. Make sure there is a checkmark by Install Cydia and click Next.

Step 5: Plug in your device to your computer and turn it off. Now get ready to follow some onscreen instructions. RedSn0w will walk your through a few steps to put your iPad into DFU mode.

Step 6: If you're successful, RedSn0w will start its magic. Don't worry if it doesn't happen right away, just turn your iPad off, click back and try it again.

Step 7: Once the software is done loading the exploit, your iPad will restarted, and your home screen should load up with the Cydia icon installed. Success!

That is how you jailbreak your iPad on iOS 4.3.1 with RedSn0w. Any questions?

Jailbreak iPhone 4.3.1 with RedSn0w [Tutorial]

After weeks of anticipation, the Dev Team released a jailbreak for iOS 4.3.1 tonight, thanks to iPhone hacker i0n1c. This jailbreak will work with iPhone 4G, iPhone 3GS, iPod Touch 4G, iPod Touch 3G, and the second generation of Apple TV.

In this step by step guide and tutorial, we will show you how to jailbreak your iPhone 4.3.1 using RedSn0w. RedSn0w is a jailbreak that works both for Mac and Windows. Unlike PwnageTool, RedSn0w updates your baseband, so this is probably your preferred jailbreak method if you don't rely on an unlock....

Jailbreak iPhone 4.3.1 with PwnageTool [Tutorial]

The Dev Team just released a jailbreak for iPhone iOS 4.3.1, compliments of hacker i0n1c. This jailbreak will work with the iPhone 4, iPhone 3GS, iPod Touch 4G, iPod Touch 3G, iPad 1, and Apple TV 2nd generation.

In this tutorial, we will show you how to use PwnageTool to jailbreak your iPhone 4.3.1 while preserving your baseband. PwnageTool is a Mac only tool and is the only way to preserve your baseband to make sure you can unlock later on...

How to Speed Up Web Apps on the iPhone

In iOS 4.3, Apple has supposedly limited the speed of web apps added to the iPhone's home screen. Develepors and users have been reporting that web-based applications launched from an independent springboard icon are loading more than 2x slower than sites opened in Mobile Safari.

Meaning that, web apps/favorite sites launched from an icon shortcut aren't given any access to the Nitro Javascript engine that's baked into iOS 4.3. If Apple has intentionally hampered the performance of web apps in 4.3, such a move could been seen as a subliminal push to get people downloading more App Store apps.

If you've noticed lagging performance with your favorite web apps in iOS 4.3, there's an easy way to take advantage of Mobile Safari's full resources...

Tutorial: How to Use Skype for Your iPhone as a Home Security Camera Monitor

If you have a small child that is watched by a baby sitter in your house, or just want to know what your really weird roommate does when you aren't home, listen up! If you have a desktop computer or laptop with a webcam, then you already have a security camera.

Now all you need is an iPad 3G or iPhone that is compatible with Skype's iOS app to act as the monitor. This way you will be able to see what is going on in your home using your iDevice, from anywhere that you can get 3G service...