Check out these quick tips and ways to open HEIC or HEIF images on your Mac, even if it’s running an old version of macOS.
What’s an HEIC image?
There are many image formats like JPG (JPEG), PNG, GIF, HEIF, etc. HEIC is a variant of HEIF that Apple uses on its devices. The major benefit of using HEIC is that it offers better picture quality in a reduced file size when compared to older standards.
By default, your iPhone captures pictures in HEIC instead of JPG. And if you transfer those files to your old Mac in their original form, they appear with the .heic extension on your Mac. You probably got the HEIC images on your Mac from your iPhone via AirDrop, ImageCapture, or other transfer methods.
Must see: How and when to choose between HEIF/HEVC & JPEG/H.264 media formats
Open HEIC images on Mac
You’re on this tutorial looking for a way to open HEIC images on your Mac for one reason. And that’s because you haven’t updated your Mac in a long time! macOS High Sierra (released in 2017) and later versions offer built-in support for HEIC images on Mac.
If you’re on macOS High Sierra or later, use the first two methods to open HEIC files. And if you’re on macOS Sierra or earlier, use the remaining tips.
1. Use Preview
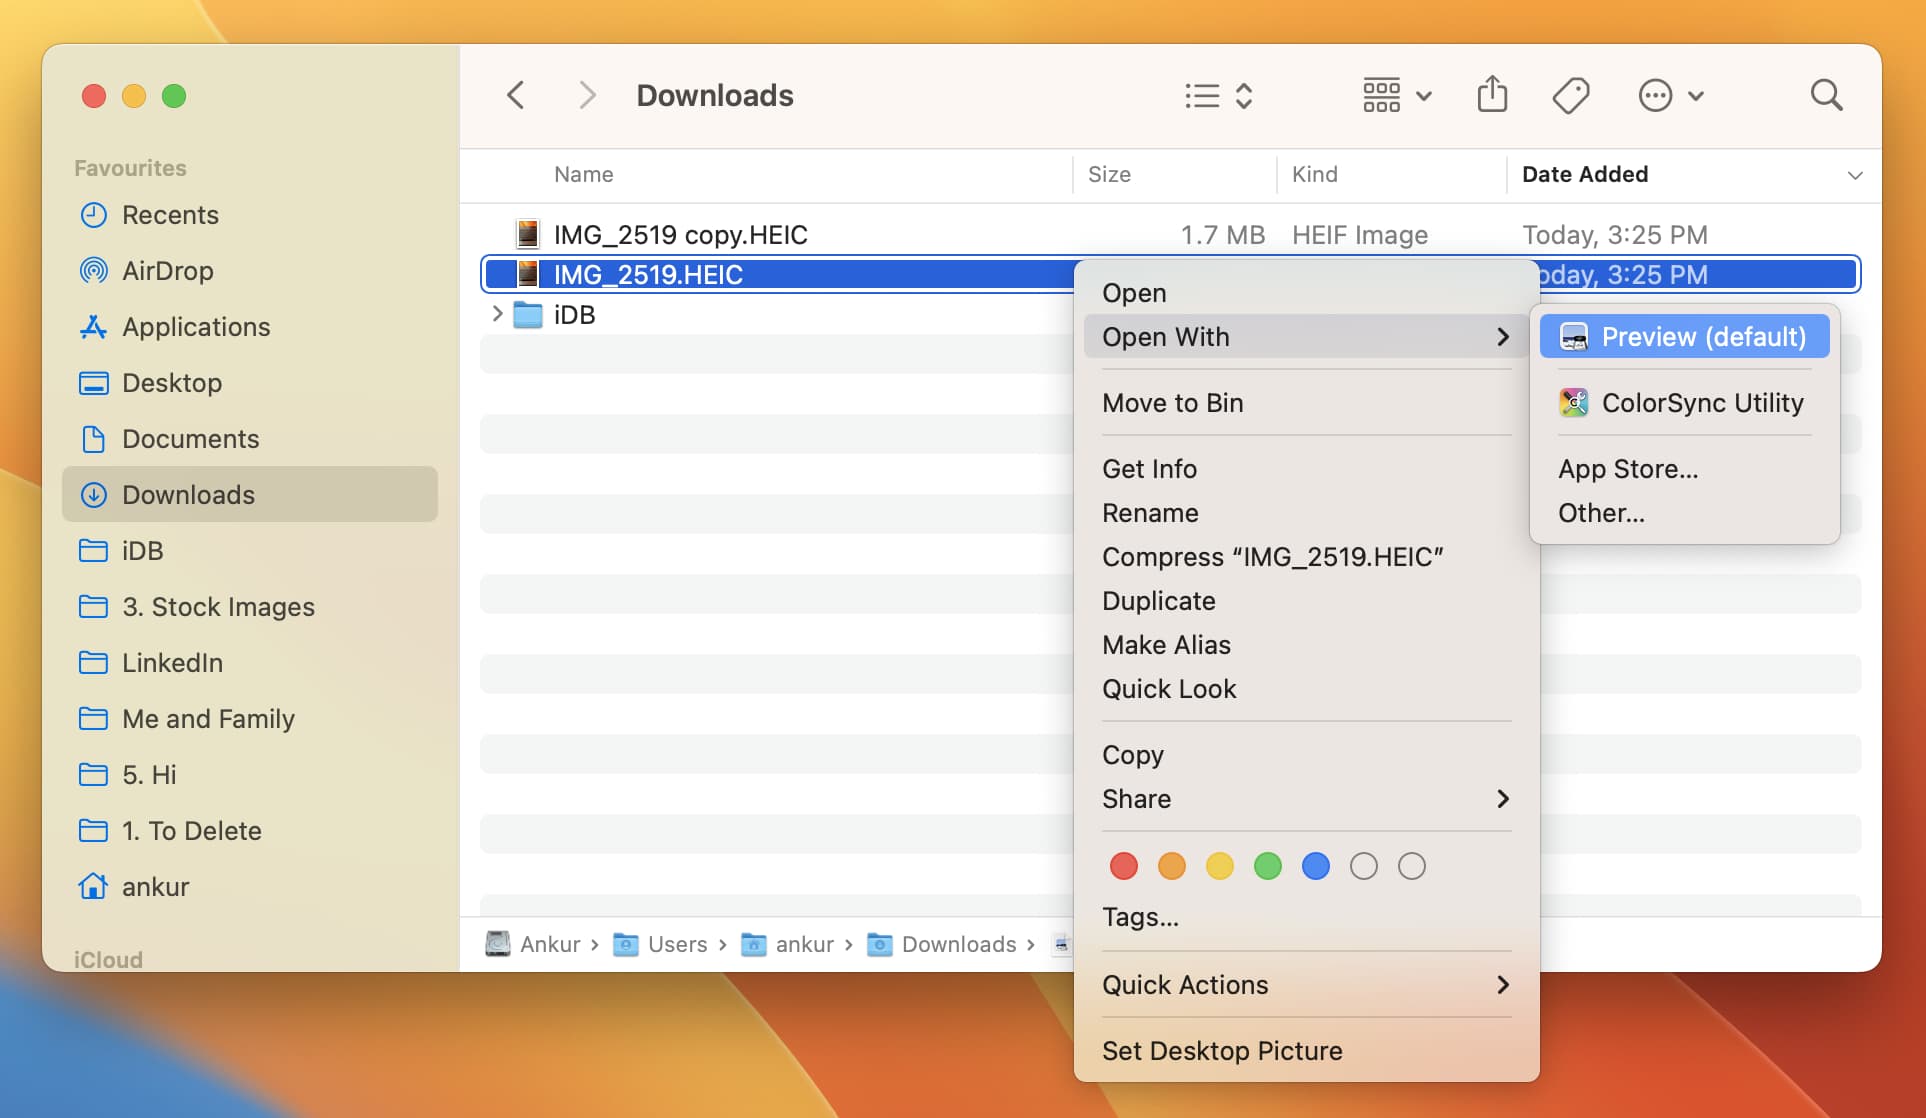
Follow these steps to open a HEIC image on Mac in Preview.
- Locate the HEIC image.
- Double-click it, and it should open in Preview.
In case it doesn’t, control-click on the HEIC image and choose Open With > Preview.
2. Use the Photos app
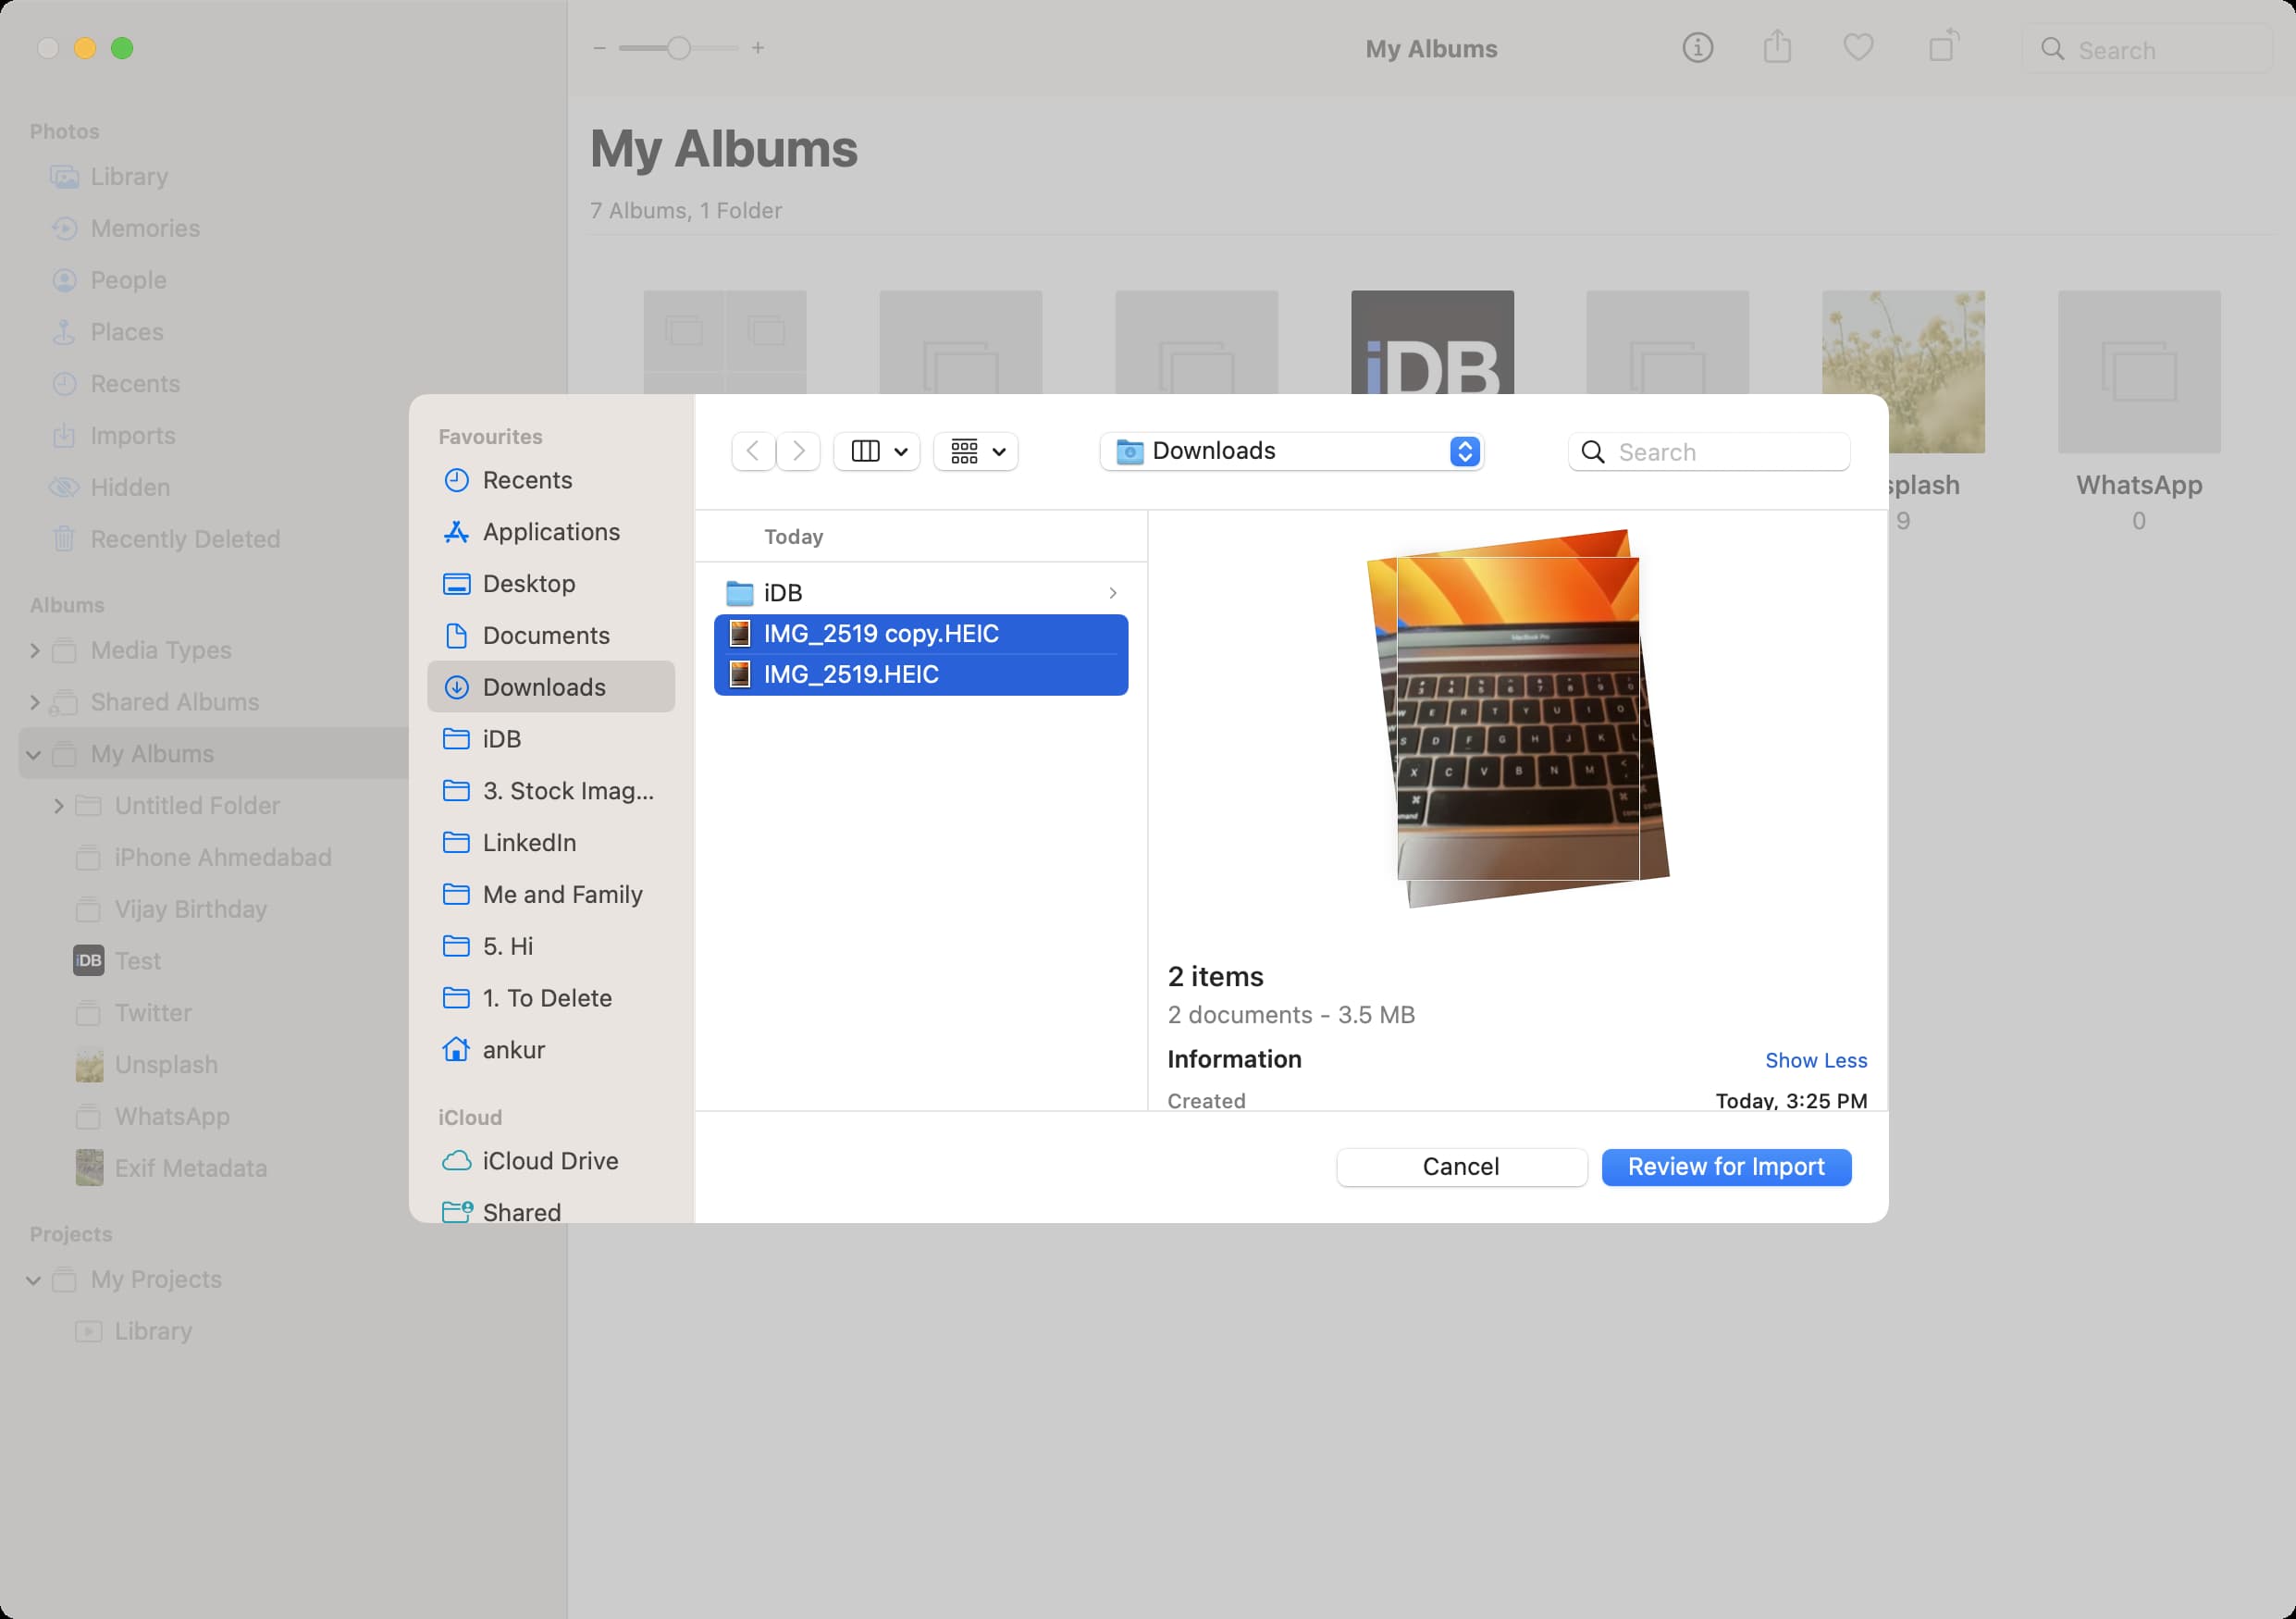
If you prefer using the Mac’s Photos app, follow these steps to open HEIC images inside it.
- Open the Photos app and press Shift + Command + I. Alternatively, you can click File > Import from the top menu bar.
- Select the single HEIC image or hold the Command key to select multiple files. Once that’s done, click Import or Review for Import.
- In case you saw Review for Import, go through the HEIC image inside the Photos app and click Import All New Photos from the top right. Alternatively, you can select the desired images and click Import N Selected.
3. Use Dropbox or Google Drive
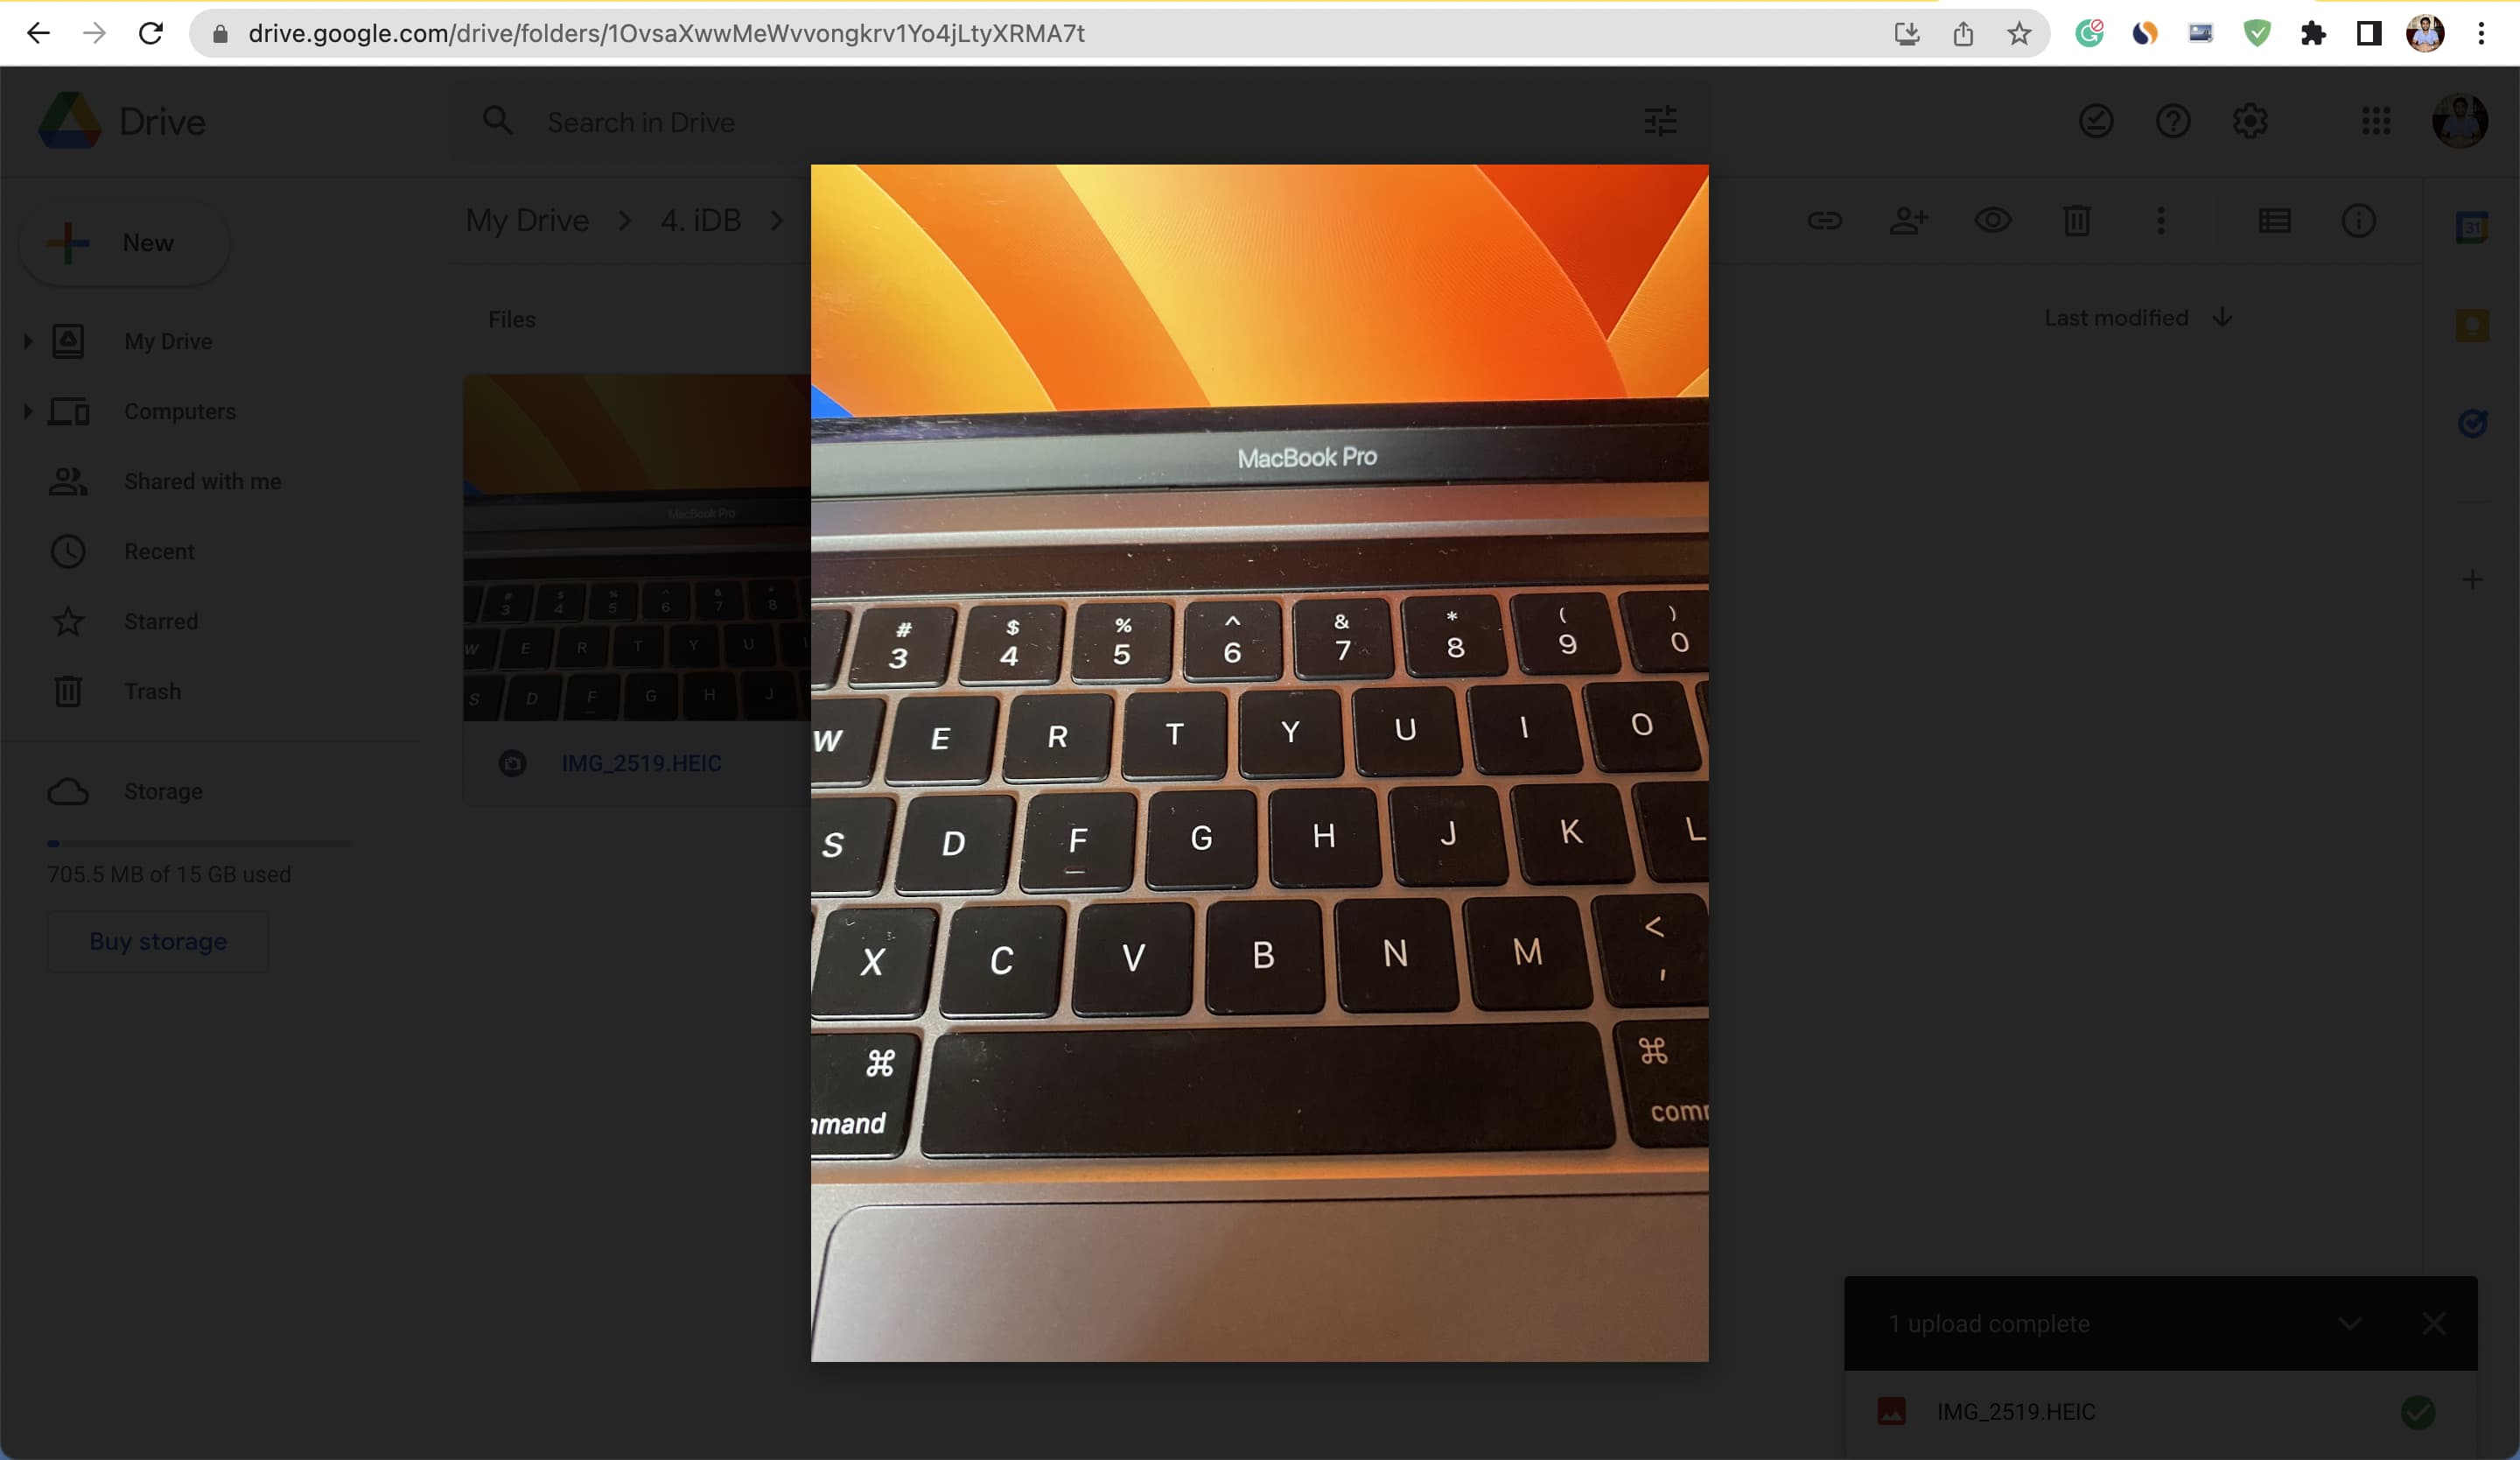
Go through these steps to open HEIC images if you’re on a very old version of macOS and are adamant about not updating to a newer version, or your system does not support a later version of macOS.
- Visit Dropbox or Google Drive in a web browser and sign in.
- Upload your HEIC photos here.
- Once the upload is complete, you can open the HEIC photos inside Dropbox and Google Drive.
4. Convert to JPG and open it
Another approach to open HEIC images on your Mac is to simply convert them to JPG, which almost universally works on all platforms – old and new. You can learn how to convert HEIC to JPG for free on iPhone and Mac.
5. Stop your iPhone from taking HEIC pictures
Finally, if you don’t want to upgrade your Mac to macOS High Sierra or later and think the above methods are a lot, simply set your iPhone to save pictures in JPG instead of HEIC. And if you don’t want to change the image format, you can ask your iPhone to transfer images in a format that’s compatible with your Mac. For this, go to iPhone Settings > Apps > Photos, and under Transfer to Mac or PC, choose Automatic. From now on, when you send photos and videos from your iPhone to your old Mac, it will automatically send them in a compatible format (like JPG).
Check out next: