Previously, we showed you how you could jailbreak any A9-A11 chip-equipped handset using the checkm8 bootrom exploit-based palera1n jailbreak, but since then, a newer version of palera1n has been released.

While palera1n is still technically the same jailbreak as it was, it is re-written in the C programming language, which lends several benefits including improved stability and a smoother user experience with an easier installation. Since the method to install the new palera1n is a bit different, we’ve went ahead and made a new tutorial showing you how to use it on a compatible handset.
What you should know about palera1n
Just like the original palera1n jailbreak, the new one is considered a public beta. While it’s recommended only for developers at this time, plenty of ordinary jailbreakers are using palera1n comfortably on their iPhone or iPad as of today.
The palera1n jailbreak is semi-tethered, which means that you can boot back into a non-jailbroken state, but you will not be able to jailbreak again until you can get to a computer. This differs from a semi-untethered jailbreak in that a semi-untethered jailbroken device can re-jailbreak without a computer after a reboot, assuming the jailbreak app is still signed. We go into more detail about the differences between tethered, semi-tethered, semi-untethered, and untethered jailbreaks in a separate post, in case you’re interested.
Due to operating with the checkm8 bootrom exploit, palera1n is only compatible with a subset of older iPhones and iPads that have the A9-A11 chip inside. Those include:
- iPhone X
- iPhone 8 Plus
- iPhone 8
- iPhone 7
- iPhone 7 Plus
- iPhone 6s
- iPhone 6s Plus
- iPhone SE
- iPad (7th generation)
- iPad (6th generation)
- iPad (5th generation)
- iPad Pro 12.9-inch (2nd generation, 2019)
- iPad Pro 10.5-inch (2017)
- iPad Pro 9.7-inch (2016)
- iPad Pro 12.9-inch (2015)
- iPod touch (7th generation)
Palera1n officially supports iOS & iPadOS 15.0-16.x and iPadOS 17.0-18.x. Unfortunately, palera1n doesn’t support iOS 17, as this update can’t be installed on the iPhone 8, 8 Plus, or X. Likewise, the only remaining checkm8-vulnerable iPad that can run iPadOS 18 is the iPad (7th generation).
Installing palera1n will require the use of Terminal, as this jailbreak does not yet have a graphical user interface (GUI). This is one of the reasons why it’s considered a developer jailbreak in its current form. Terminal is only available on Linux and macOS, and so this jailbreak is not intended for Windows users. If you have a Windows computer, we recommend using palen1x instead.
Keep in mind that all forms of jailbreaking come at your own risk. While bricking your iPhone or iPad while attempting to jailbreak it is highly unlikely, you continue at your own discretion.
How to install the palera1n jailbreak
If you’re ready to install the new palera1n jailbreak, then you can follow the steps outlined below. Note that this tutorial will focus on the macOS operating system:
1) Connect your device to your Mac if you haven’t already, and make sure to trust your Mac and your iPhone or iPad respectively if you haven’t already.
Note: We recommend using a USB-A to Lightning cable and an adapter if you have a USB-C port-equipped Mac. USB-C to Lightning cables can cause issues.
2) Download the latest version of palera1n from the palera1n web page.
Note: If you have a Mac, then you need to download the correct file for your Mac, such as the ARM version for Apple M chip-equipped Macs or the x86 version for Intel-equipped Macs (a universal option is also available). You would do the same for the Linux build. A Windows version of palera1n-c is not available, but you can use palen1x instead.
3) Open Terminal on your Mac and enter the following command:
cd Downloads
Note: Replace the word Downloads in the command above with whatever folder name you downloaded palera1n-c to.
4) Enter the following command in Terminal and then enter your administrator password when prompted:
sudo mkdir /usr/local/bin
Note: You may see the output mkdir: /usr/local/bin: File exists and this is good, move on to the next step.
5) Enter the following command in Terminal:
sudo mv ./palera1n-macos-universal /usr/local/bin/palera1n
Note: Replace the part that says universal in the command above with whatever version you downloaded from GitHub, whether it’s arm64, x86_64, or universal.
6) Enter your Mac’s administrator password when prompted.
7) Enter the following command in Terminal:
sudo xattr -c /usr/local/bin/palera1n
8) Enter the following command in Terminal:
sudo chmod +x /usr/local/bin/palera1n
9) Put your iPhone or iPad into DFU mode.
Note: What you do next depends on whether you have iOS or iPadOS 15 or 16 and the amount of storage space you have available.
10) Enter the correct command in Terminal the best fits your device. Read carefully:
- If your device has 16GB of storage and only has between 2GB and 3GB of that storage available, run:
palera1n -B -f - If your device runs iOS 15 and has between 2GB and 15GB of storage available, run:
palera1n -B -f - If your device runs iOS 16 or has more than 16GB of storage available, run:
palera1n -c -f
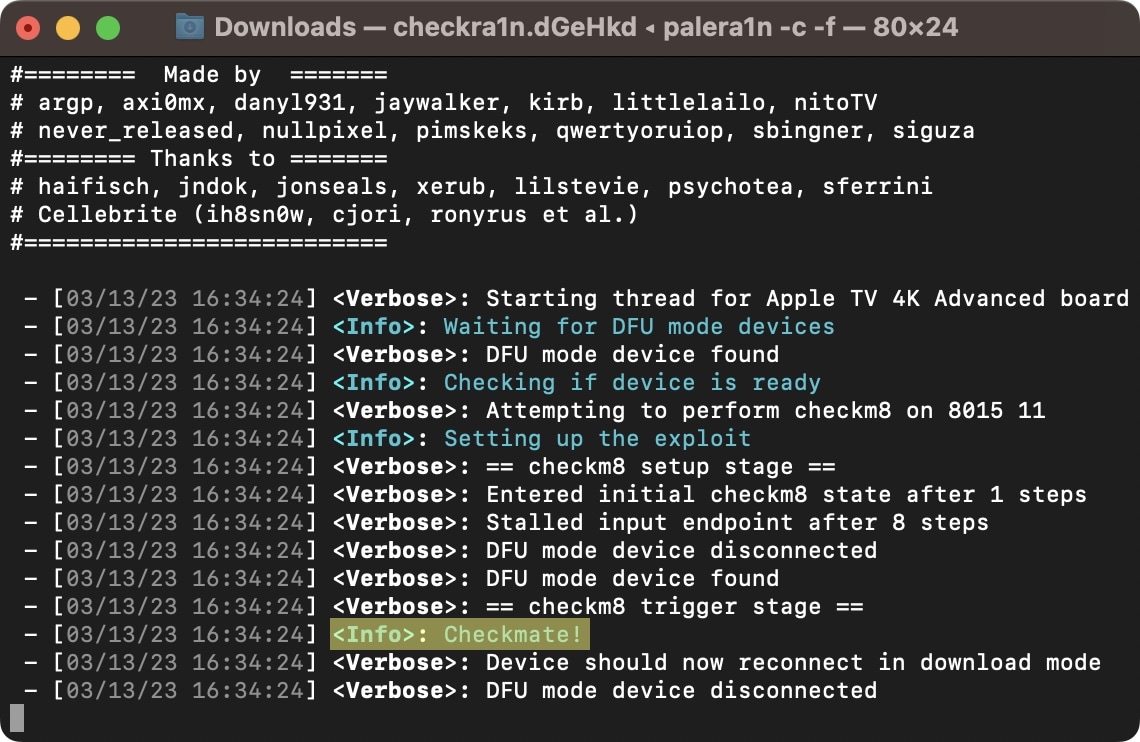
Note: Referring to the image below, if you have an M chip-equipped Mac, then you will need to unplug and re-plug your device back in to resume the jailbreak process. If you have an Intel-equipped Mac, then you can ignore this.
11) When finished, your device will fully reboot. When it does, enter the following command in Terminal:
palera1n -f
Note: Your device will be put into Recovery mode.
12) After your device is in Recovery mode, put it back into DFU mode.
Note: The palra1n jailbreak should resume again automatically once DFU mode is detected. You will need to unplug and re-plug the device back in again after the Apple logo appears if you have an M chip-equipped Mac when you see the word Checkmate again, as discussed above.
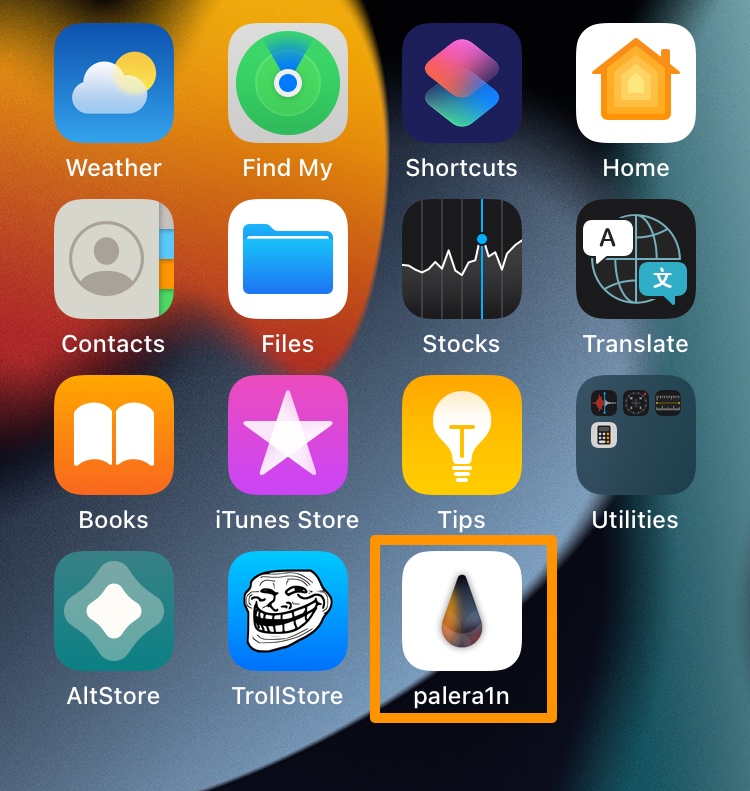
13) After your device boots back up, launch the palera1n app on your Home Screen:
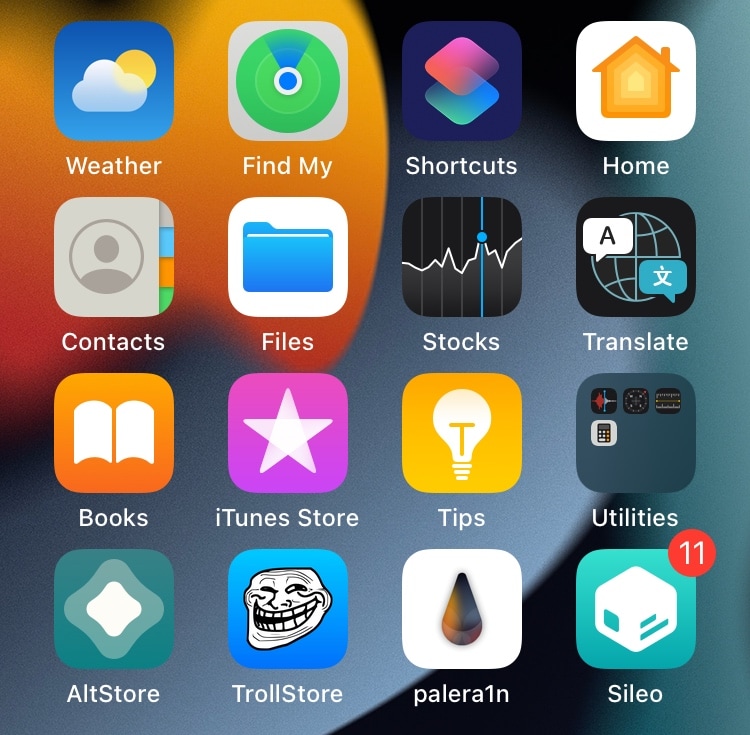
14) Tap the Sileo button to install the Sileo package manager:

Note: We recommend Sileo, but you may opt to install Zebra instead if you want, or both.
15) Enter a Terminal password when prompted.
Note: The Terminal password can be whatever you want it to be, but don’t forget it!
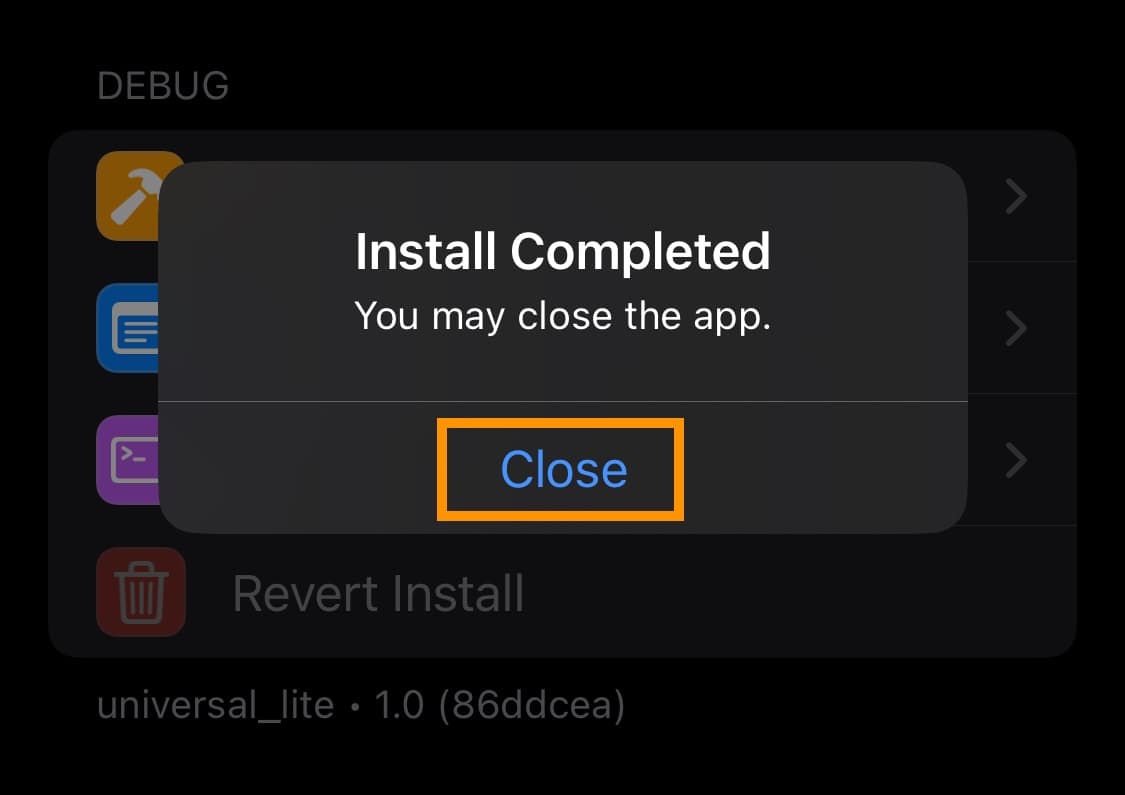
16) When the Sileo install completes, tap the Close button:
Once installed, you’re good to go. Enjoy using your jailbreak!
Conclusion
Compared to the original palera1n, we found that the latest tool was easier to use and required less setup. For one, you don’t need to install Python, and additionally, you don’t need Homebrew. Everything works just as it comes.
Have you tried the latest palera1n jailbreak yet? Be sure to let us know how it went for you in the comments section down below.