If you followed either of our tutorials for using DelayOTA on a jailbroken or non-jailbroken handset to upgrade to an unsigned firmware within the 90-day grace period, then you might be left wondering how you can remove the unsightly “This iPhone is supervised and managed by [insert name here]” spiel that appears at the top of your Settings app.
Is it necessary to remove supervised mode from your iPhone or iPad? Absolutely not. However, it is somewhat unsightly and even off-putting to some users to see this text. Fortunately, it’s easy to remove supervision from your iPhone or iPad after using the DelayOTA software update method in any of the scenarios above, and we’ll be showing you how in this tutorial.
This tutorial will be split into two parts: 1) removing supervised mode from a non-jailbroken device; and 2) removing supervised mode from a jailbroken device. Depending on your scenario, you can simply visit the correct section for you by scrolling down below.
What you need to know
We generally recommend keeping supervised mode on your iPhone or iPad since you can re-use it again in the future if needed. However, if the urge to remove the unsightly text from the Settings app is too great for you to handle, then you’ve come to the right place.
If you used DelayOTA to update your non-jailbroken iPhone or iPad to an unsigned version of iOS or iPadOS, then removing supervised mode is as simple as resetting your device to factory settings. Assuming you followed our advice in our tutorial about how to use DelayOTA on a non-jailbroken handset, you should already have a data backup from before entering supervised mode. You can restore to that backup and shouldn’t lose any data from doing this.
If you use DleayOTA to update your jailbroken iPhone or iPad to an unsigned version of iOS or iPadOS, then removing supervised mode is as simple as modifying a .plist file with Filza. You won’t need to reset or erase any data in this case.
We’ll start by showing you how to do this on a non-jailbroken device first, and then we’ll show you how to do this on a jailbroken device second.
Removing supervised mode from a non-jailbroken iPhone or iPad
To get started, follow the steps below:
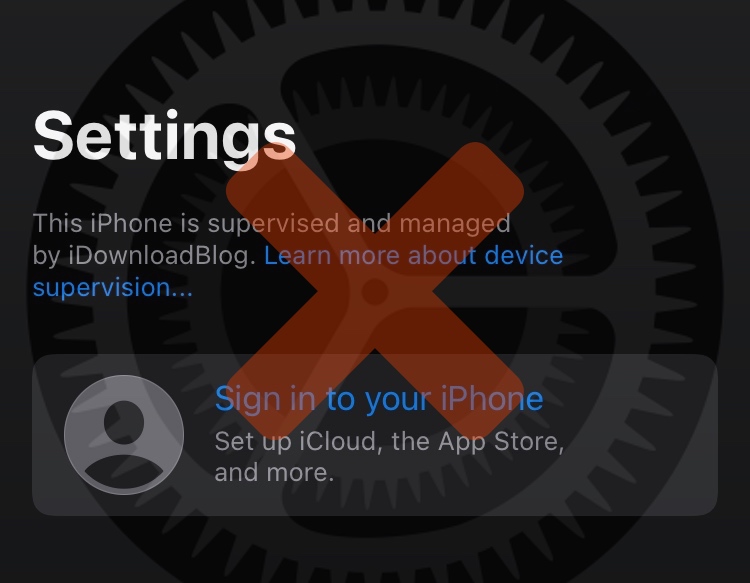
1) Verify that your handset is still supervised by opening the Settings app. You should see the “This iPhone is supervised and managed by [insert name here]” text as discussed above:
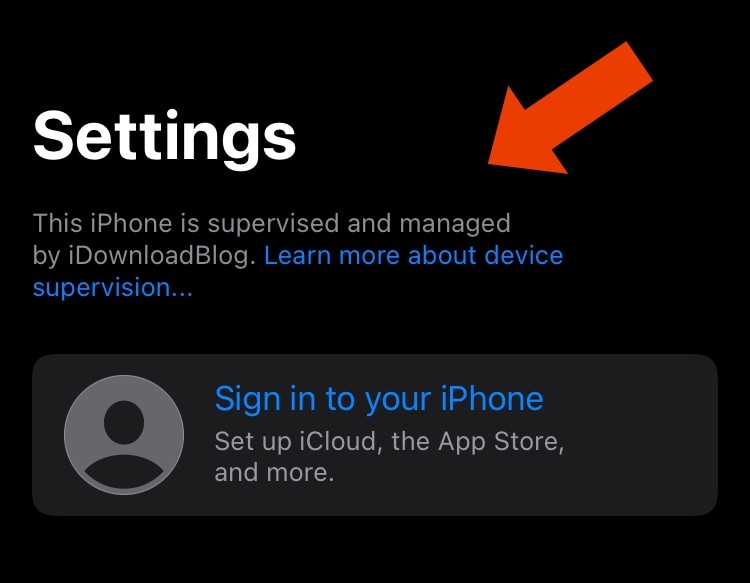
2) If you are supervised, then you can navigate to Settings > General > Transfer for Reset to begin the factory reset:
3) Tap on the Erase All Content and Settings button:
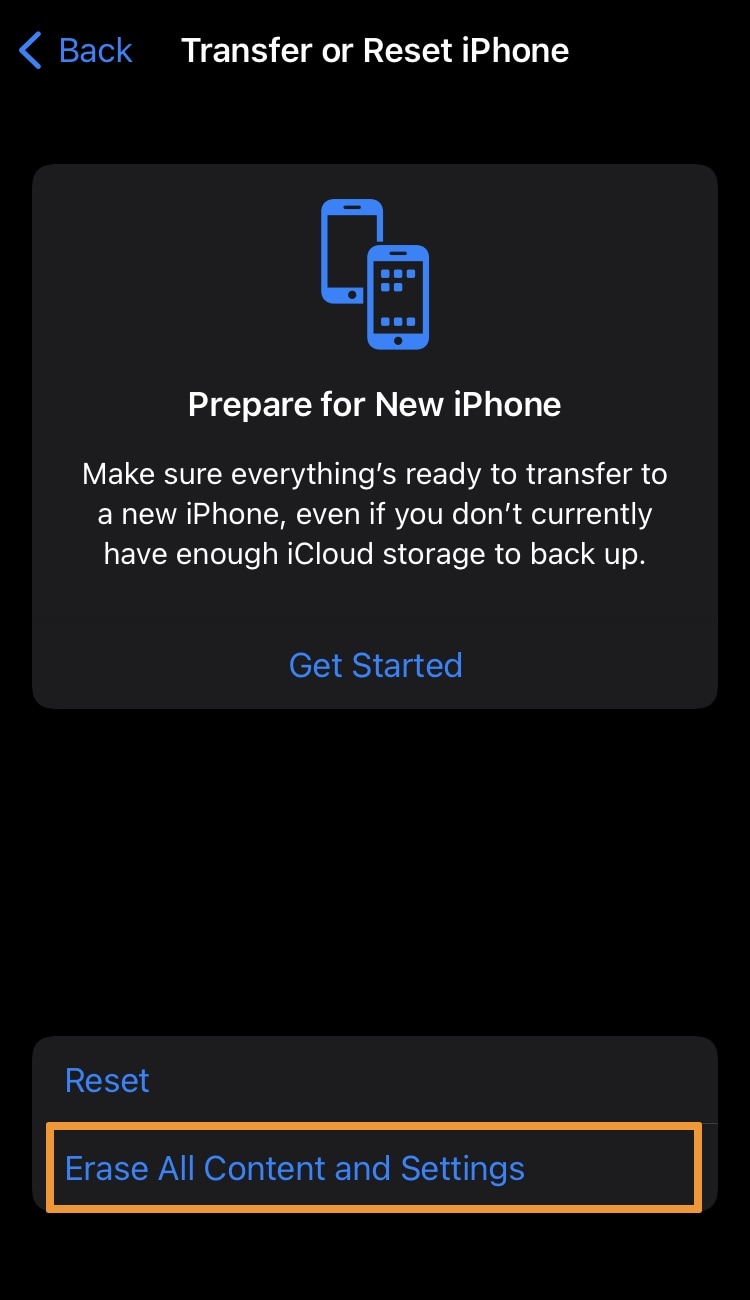
Pro Tip: Don’t accidentally tap on the Reset button.
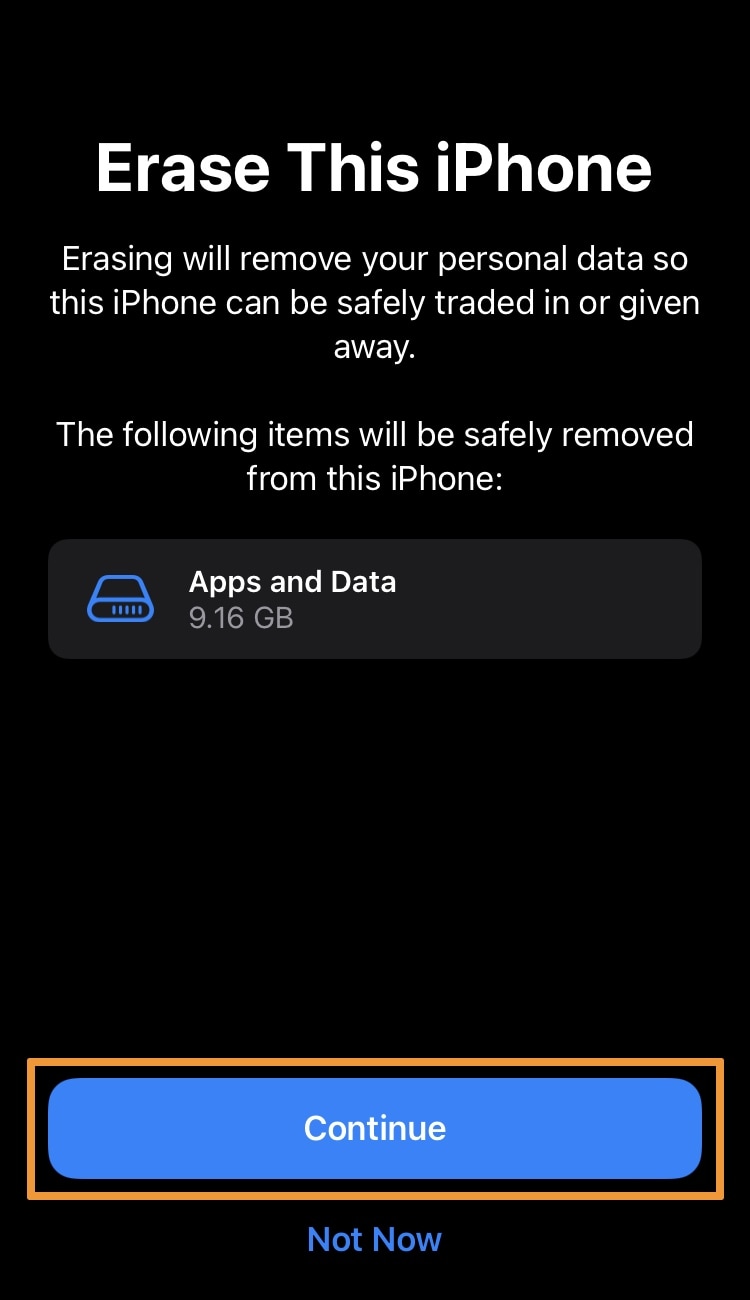
4) Tap on the blue Continue button:
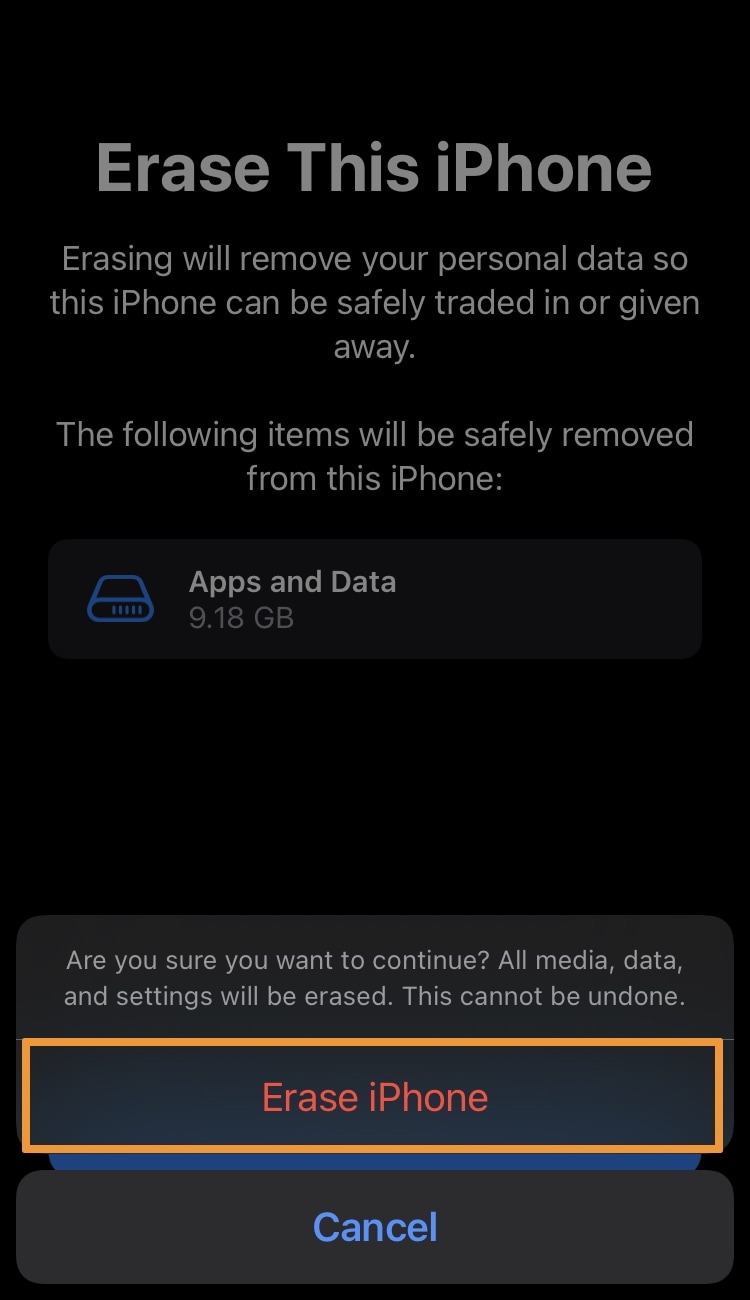
5) Tap on the red Erase iPhone button to confirm:
Wait for your iPhone to erase itself. It will reboot a couple of times. After it completes, your iPhone will display the same screen it did when you first bought it. You can then set it up and restore from your backup to get your data back.
6) When finished, verify that the supervision is gone from the Settings app:

That’s it!
Removing supervised mode from a jailbroken iPhone or iPad
If you’re jailbroken and you would like to remove supervised mode from your handset, then the steps to do so depends on how far you got with the DelayOTA tutorial we showed you initially.
NOTE: Assuming you haven’t completed the steps to perform a DelayOTA restore because you decided not to proceed with the upgrade, you can simply uninstall the SupervisedEnabler jailbreak tweak that we advised for you to install in the previous tutorial. Doing this will remove supervised mode from your device.
If you did complete the DelayOTA restore, then you’ll want to re-jailbreak your device with a compatible tool and then edit a .plist file to remove supervised mode from your handset. We’ll show you how below:
1) Verify that your handset is still supervised by opening the Settings app. You should see the “This iPhone is supervised and managed by [insert name here]” text as discussed above:
2) Launch your package manager app (we will be using Cydia for this tutorial) and tap on the Search tab:

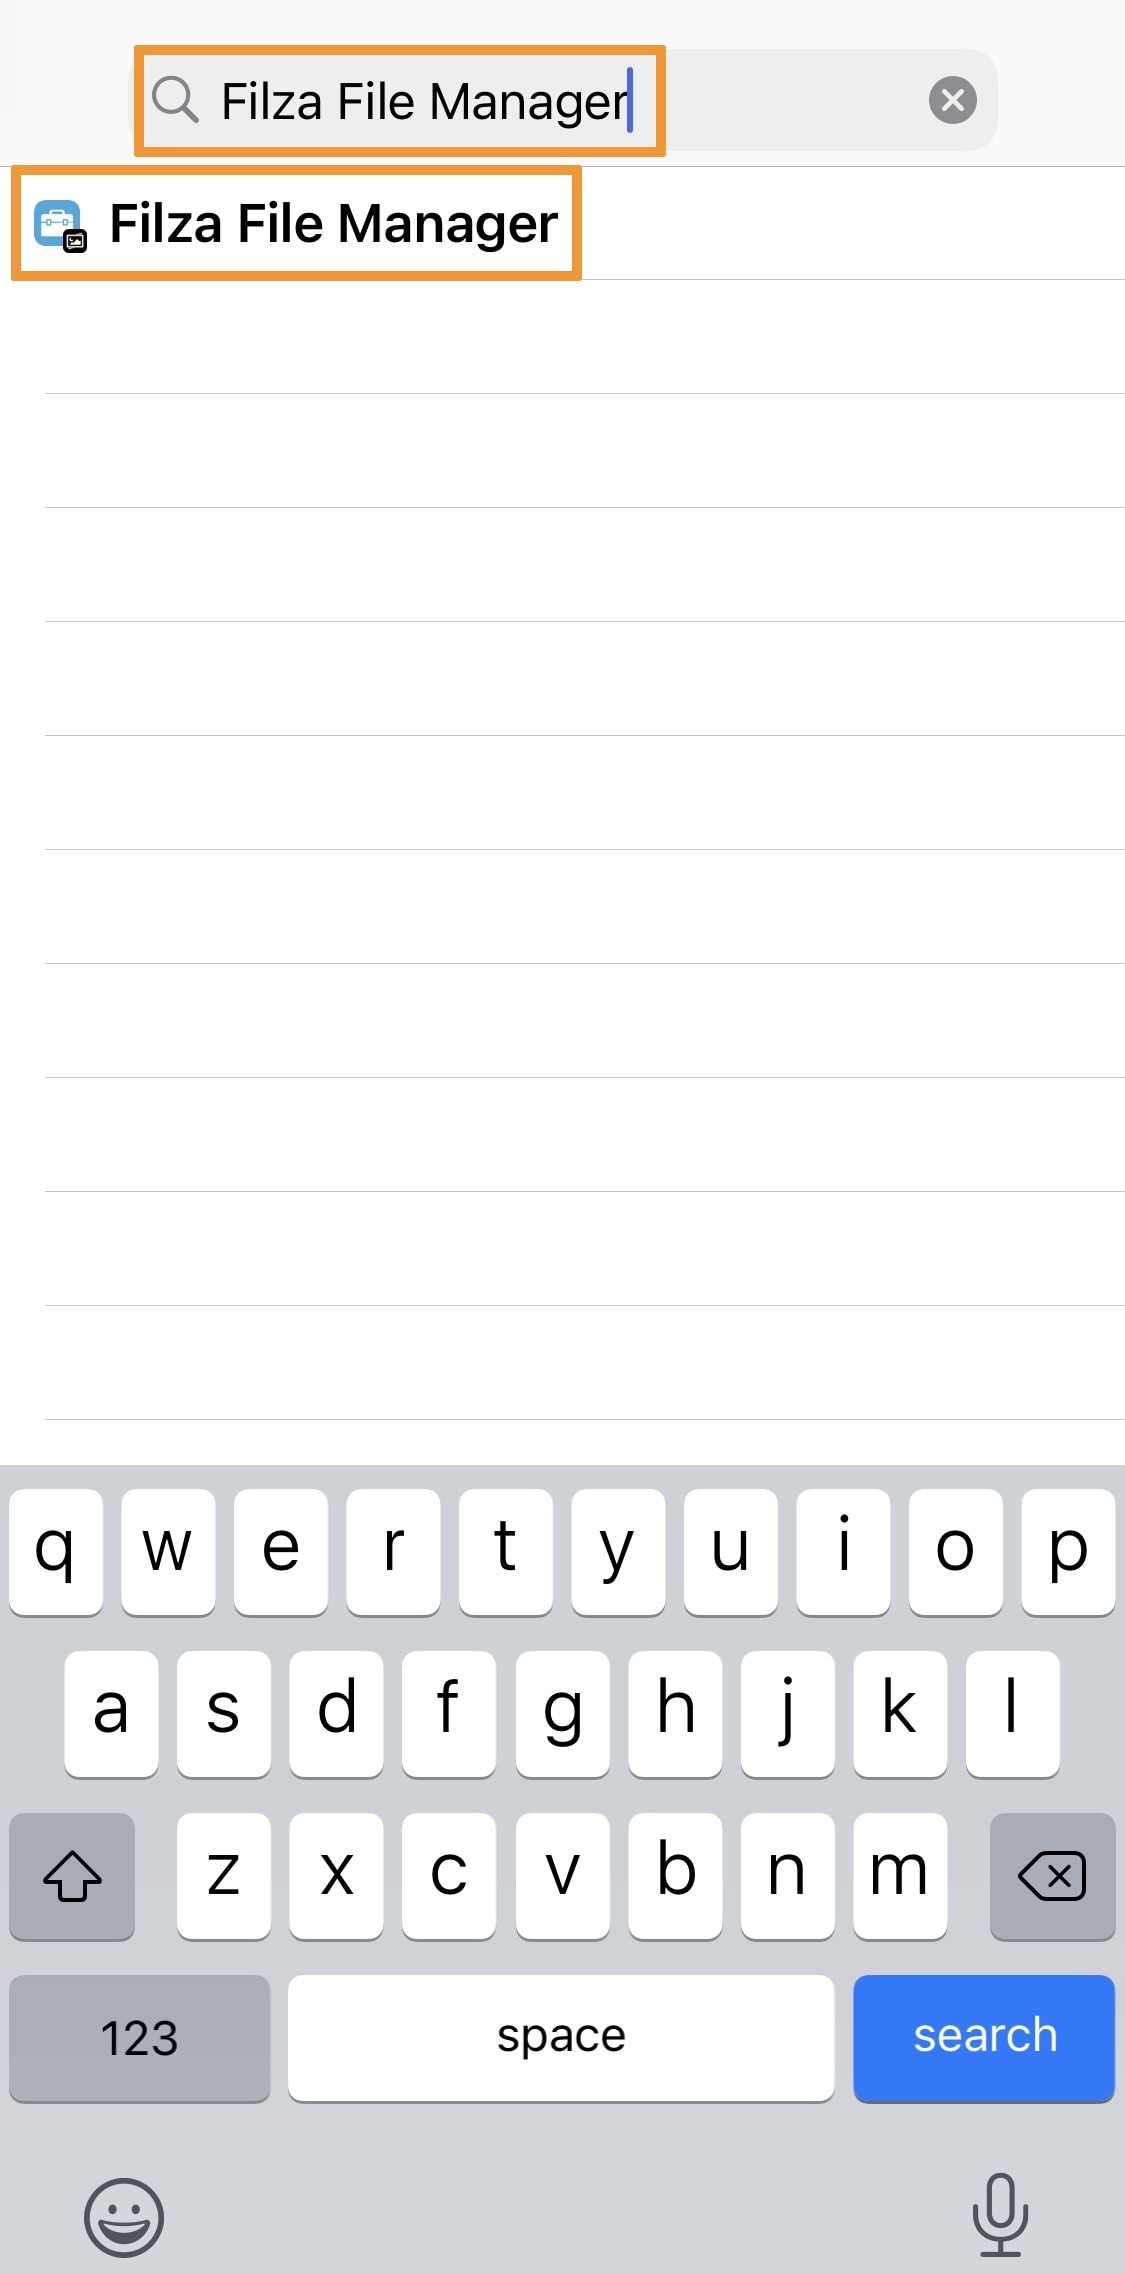
3) In the Search field, type Filza File Manager and tap on the lone result:
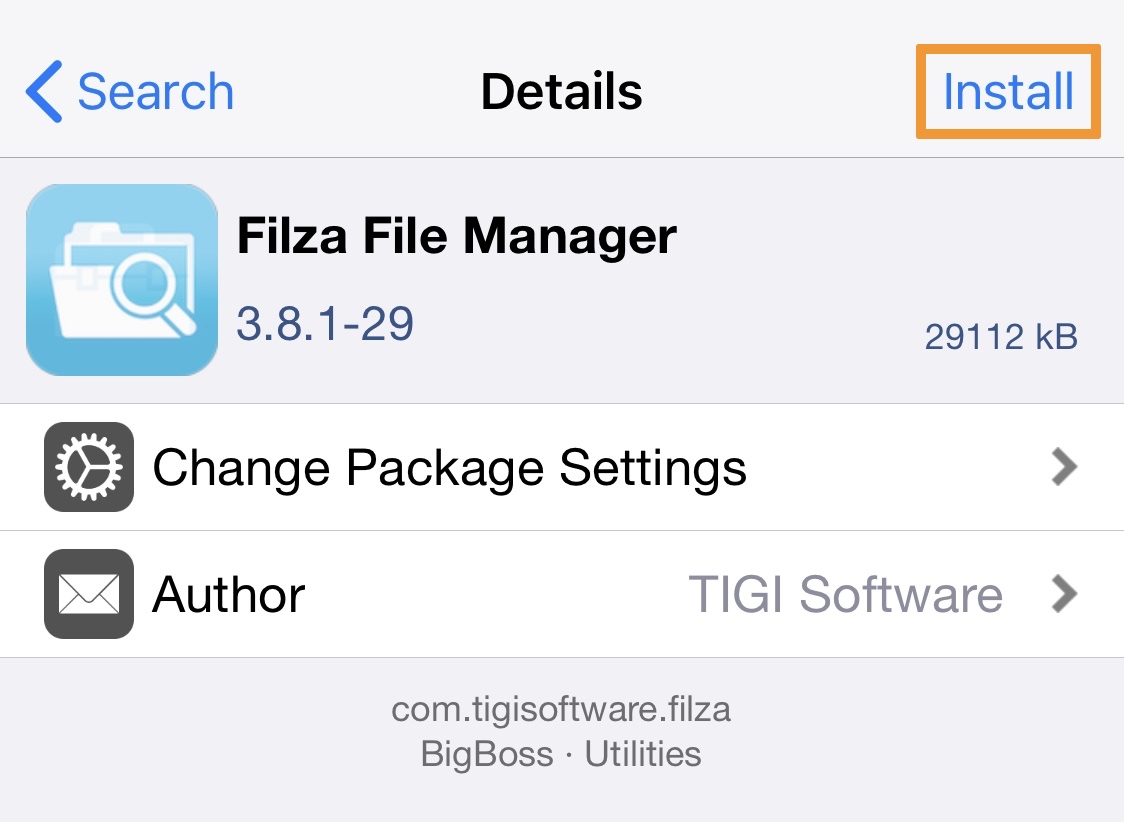
4) Tap on the Install button:
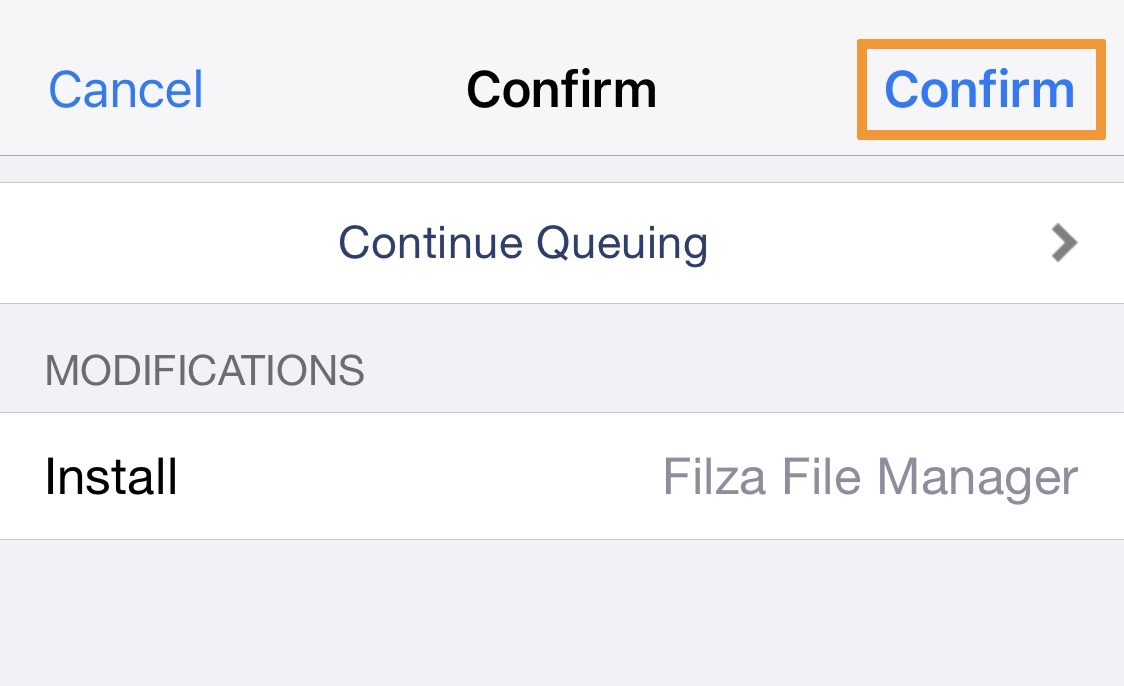
5) Tap on the Confirm button:
Note: If your package manager tries to install more packages than just Filza File Manager, that’s fine. Those are dependencies needed to use Filza.
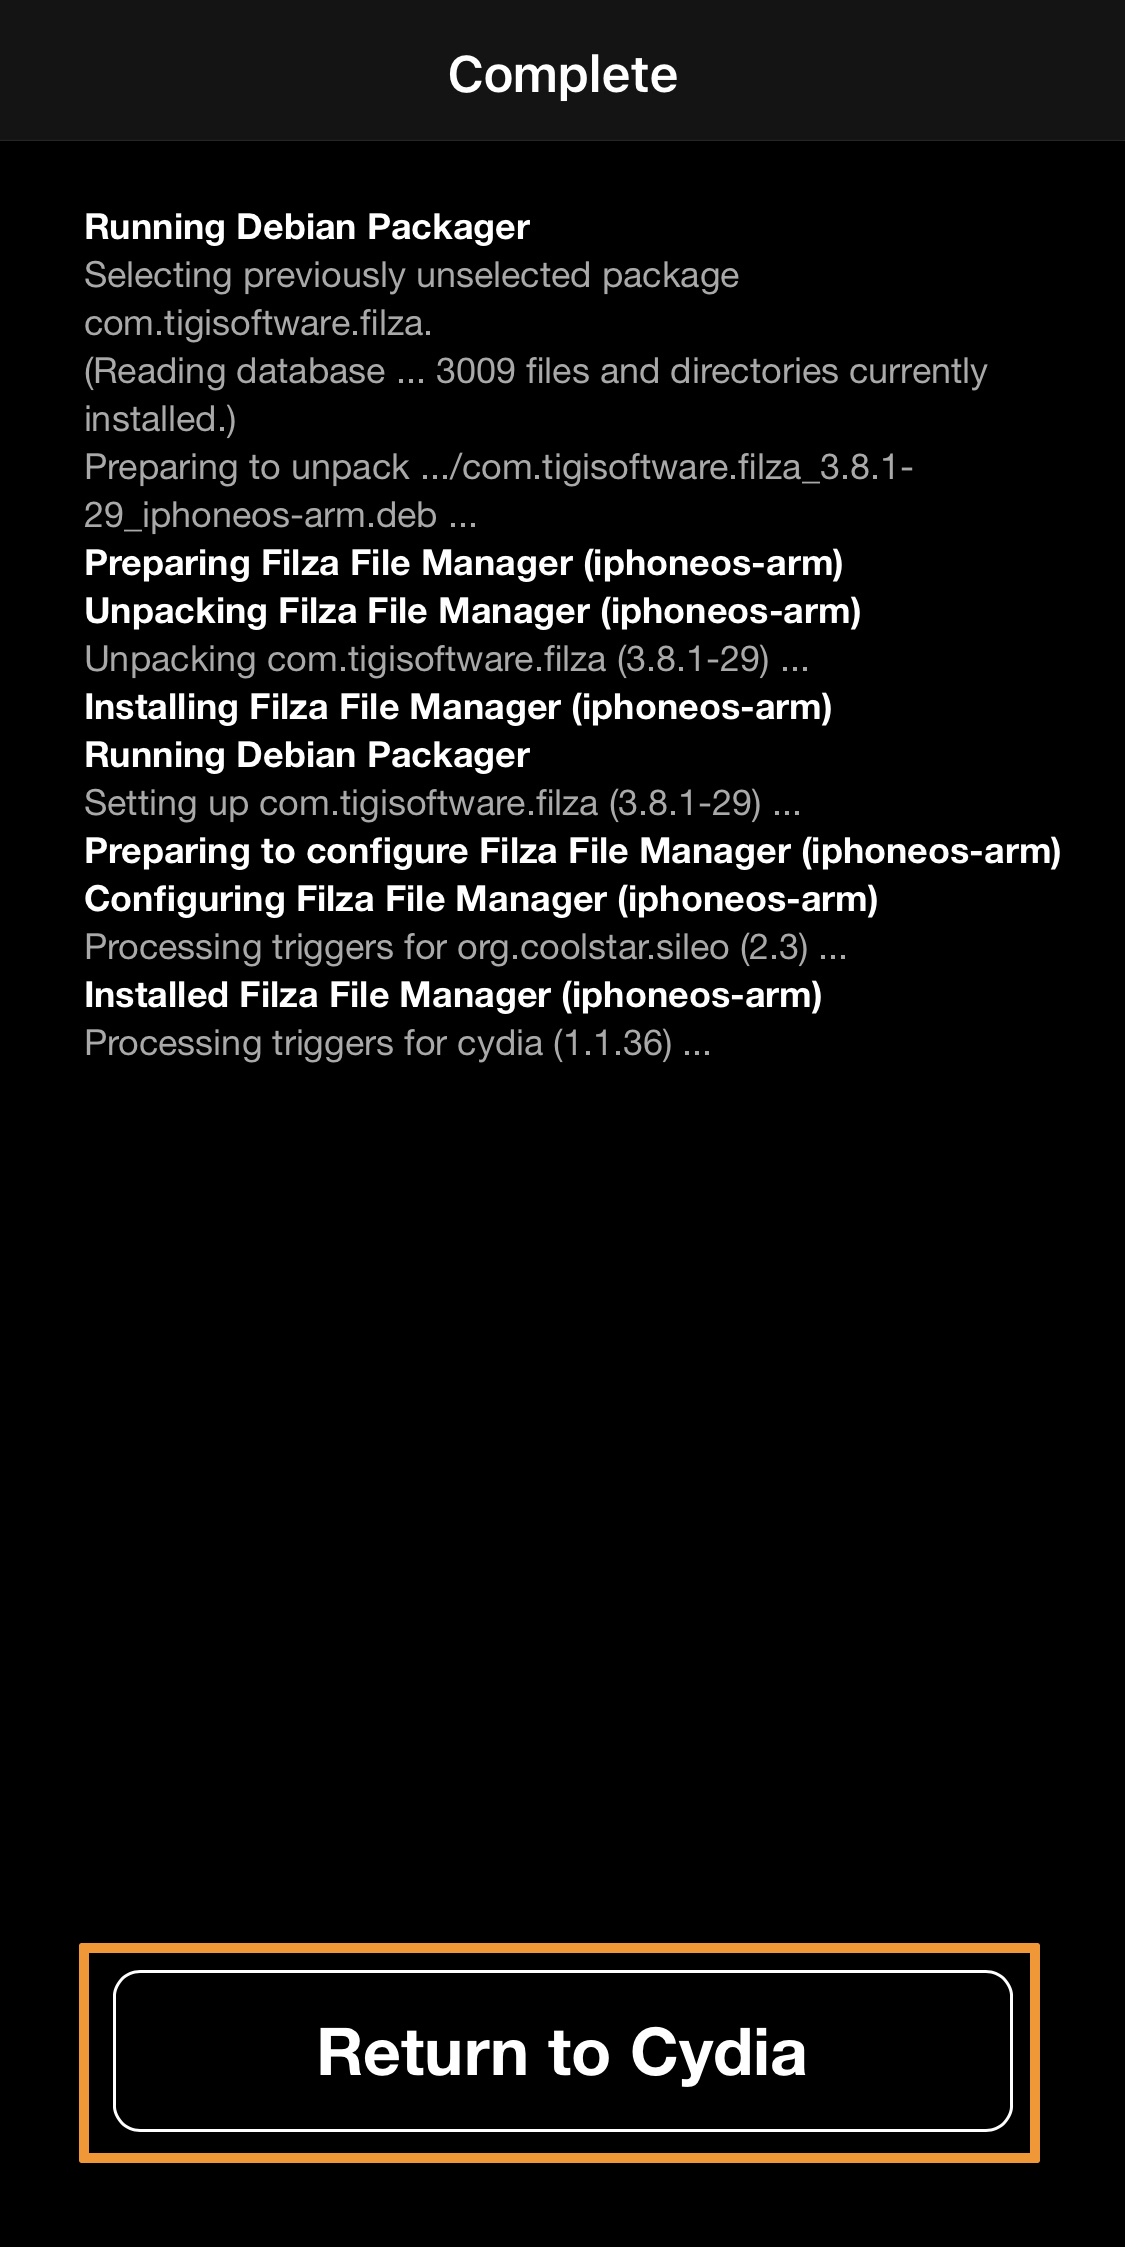
6) When finished, tap on the Return to Cydia button:
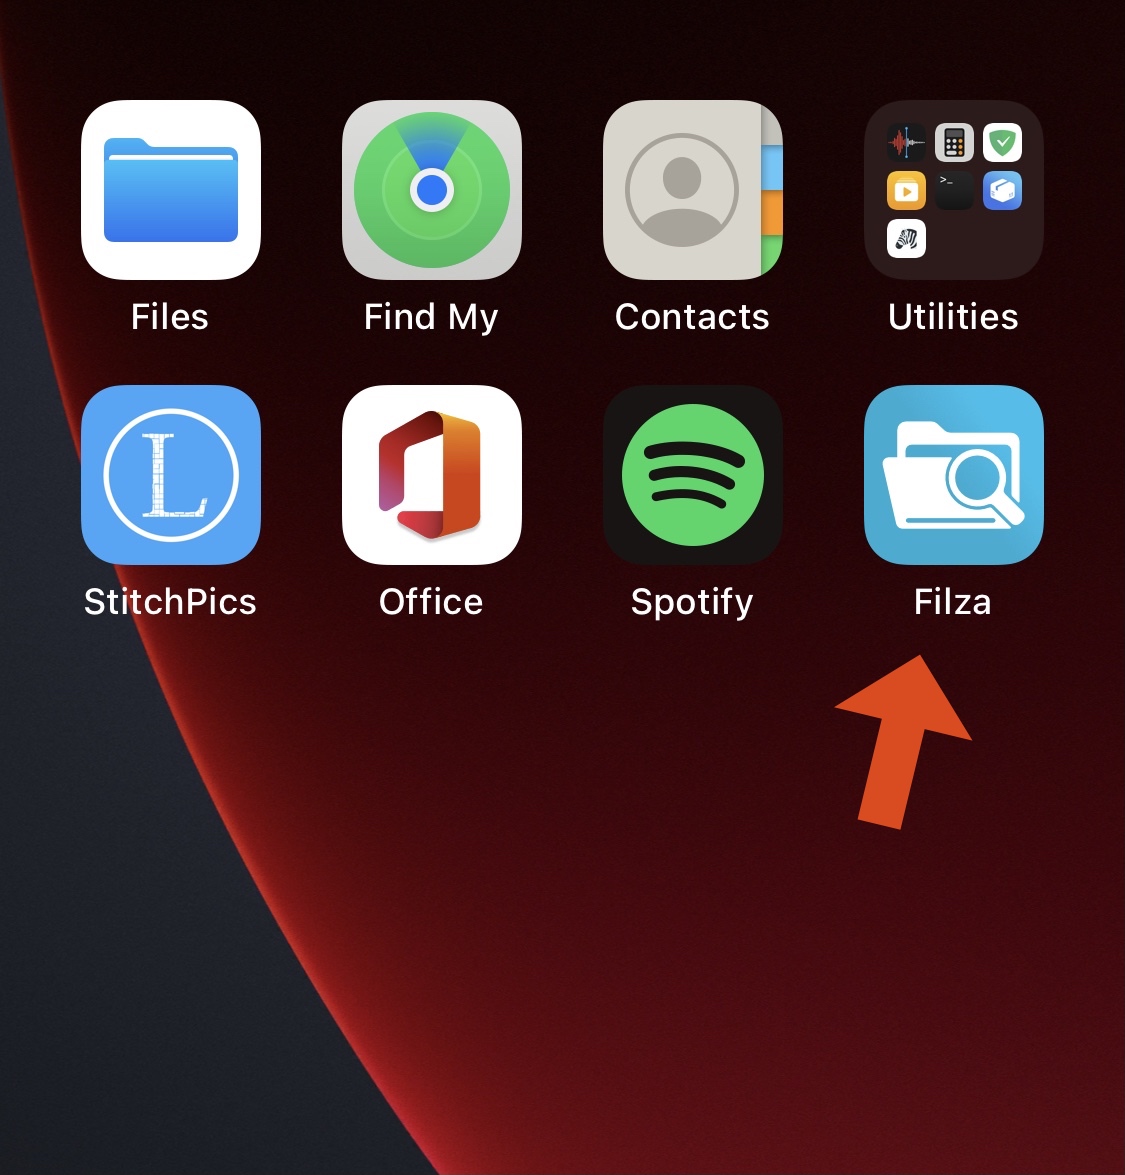
7) Launch the newly downloaded Filza app:
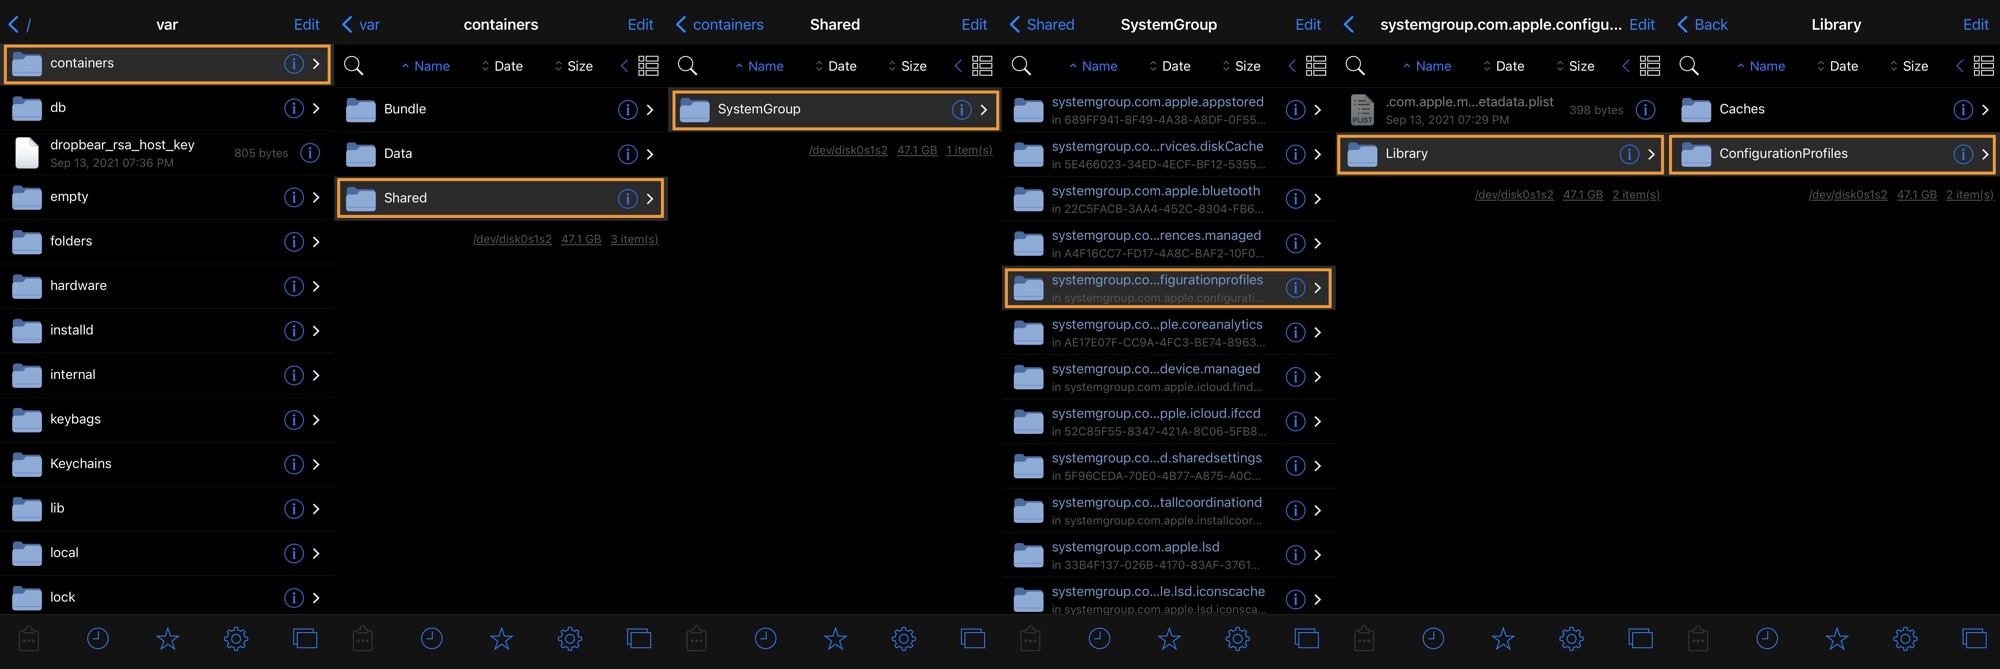
8) Navigate to /var/containers/Shared/SystemGroup/systemgroup.com.apple.configurationprofiles/Library/ConfigurationProfiles:
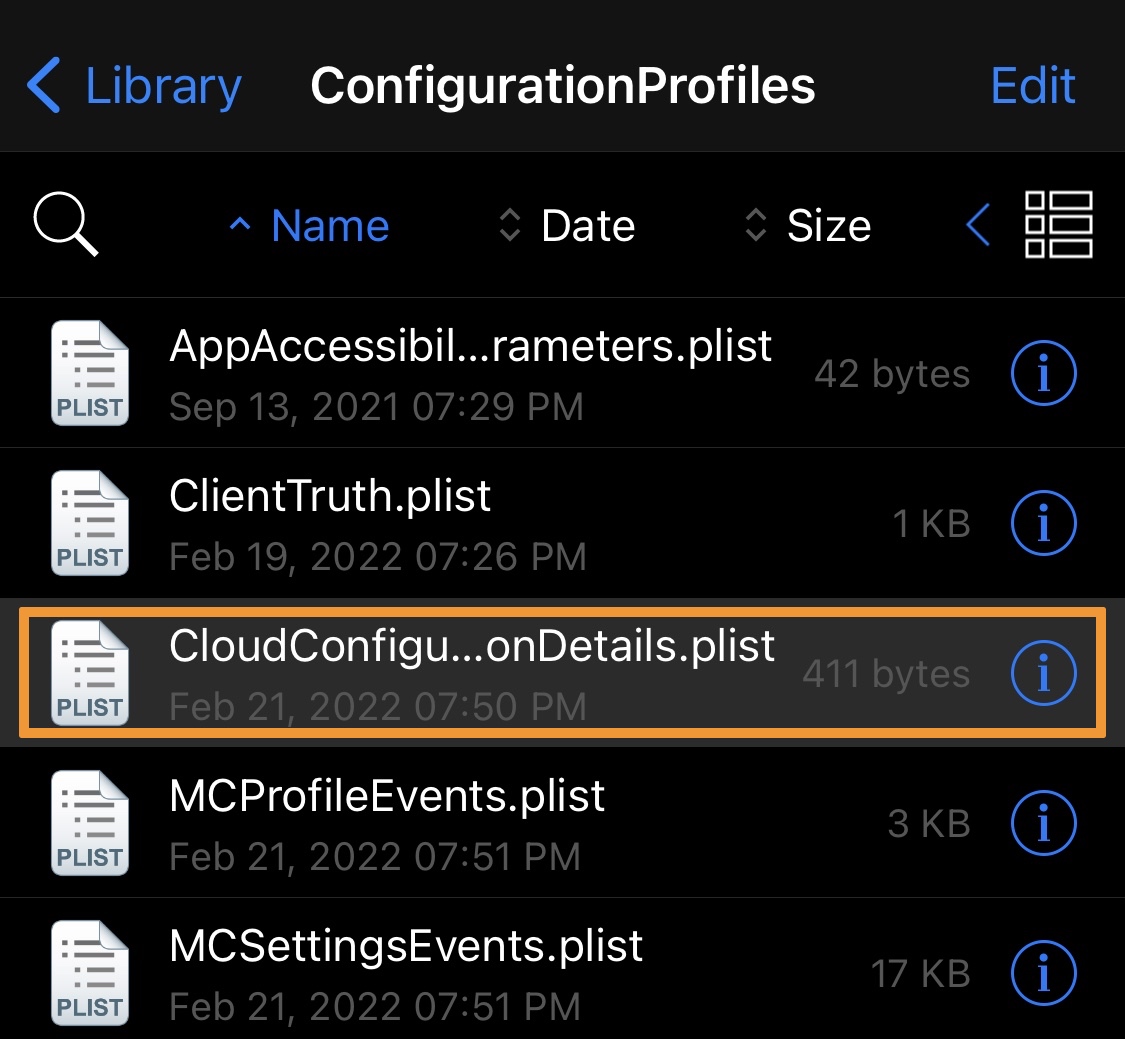
9) Tap on CloudConfigurationDetails.plist:
10) Tap on the Dictionary[5] option:
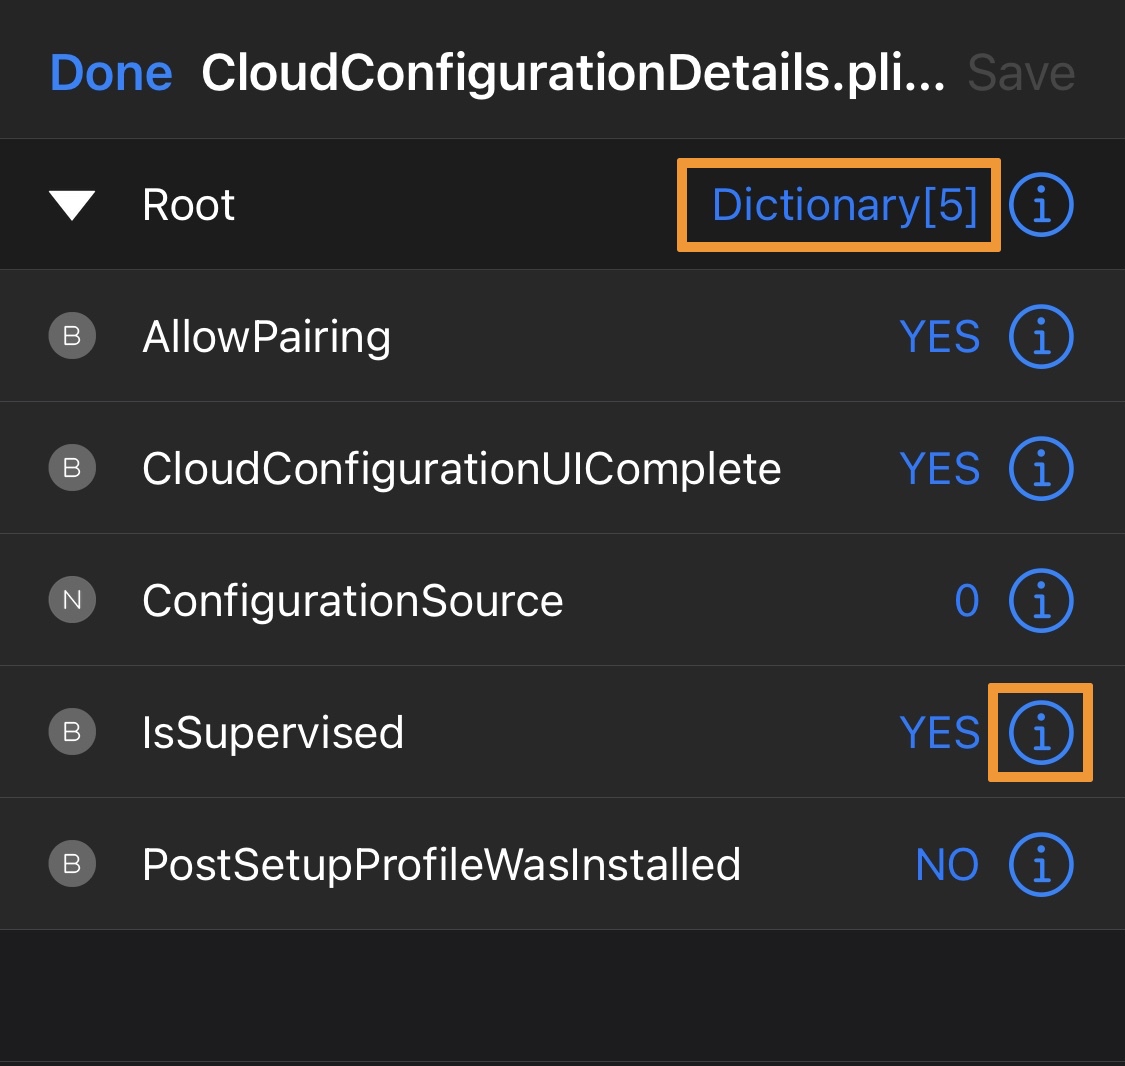
11) Then tap on the (i) button in the IsSupervised cell.
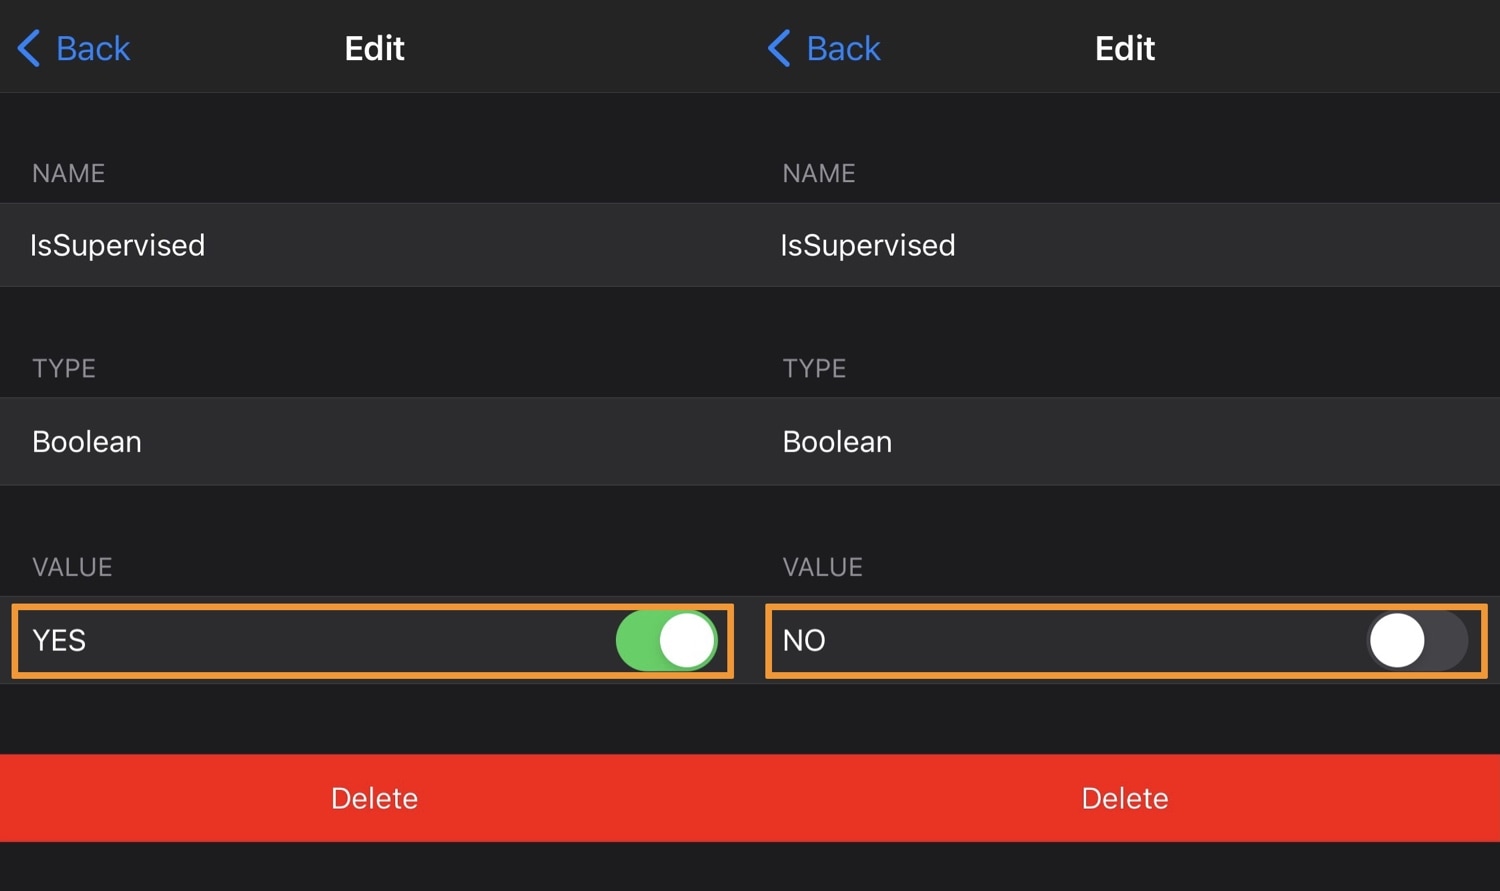
12) Tap on the toggle switch in the Value field to switch it from YES to NO:
13) When finished, verify that the supervision is gone from the Settings app:
Congratulations, you’re all finished!
Conclusion
Now that you’ve removed supervised mode form your iPhone or iPad, you won’t see the unsightly text in the Settings app anymore.
Please note that you can always get supervised again in the future by re-following one of the two tutorials detailed below:
- How to update non-jailbroken iPhones and iPads to unsigned firmware with DelayOTA
- How to update jailbroken iPhones and iPads to unsigned firmware with DelayOTA
Did you successfully unsupervised your iPhone or iPad with the steps outlined in today’s tutorial? Be sure to let us know in the comments section down below.