This handy tutorial shows you how to manage folders inside the Shortcuts app on iPhone and iPad to keep your iOS shortcuts neatly grouped and organized.

If you have just a few shortcuts, you may not feel the need to manage them. However, if, like me, you have added dozens, you should spend a few minutes putting them in appropriate folders for better organization.
The best part is that you have to create folders only on one device (ie. your iPhone), and they will sync automatically to all your other devices, like your iPad and Mac via iCloud.
So, if you’re ready to get organized, here’s how to create and manage folders in Shortcuts on iPhone and iPad.
View your folder list in the Shortcuts app
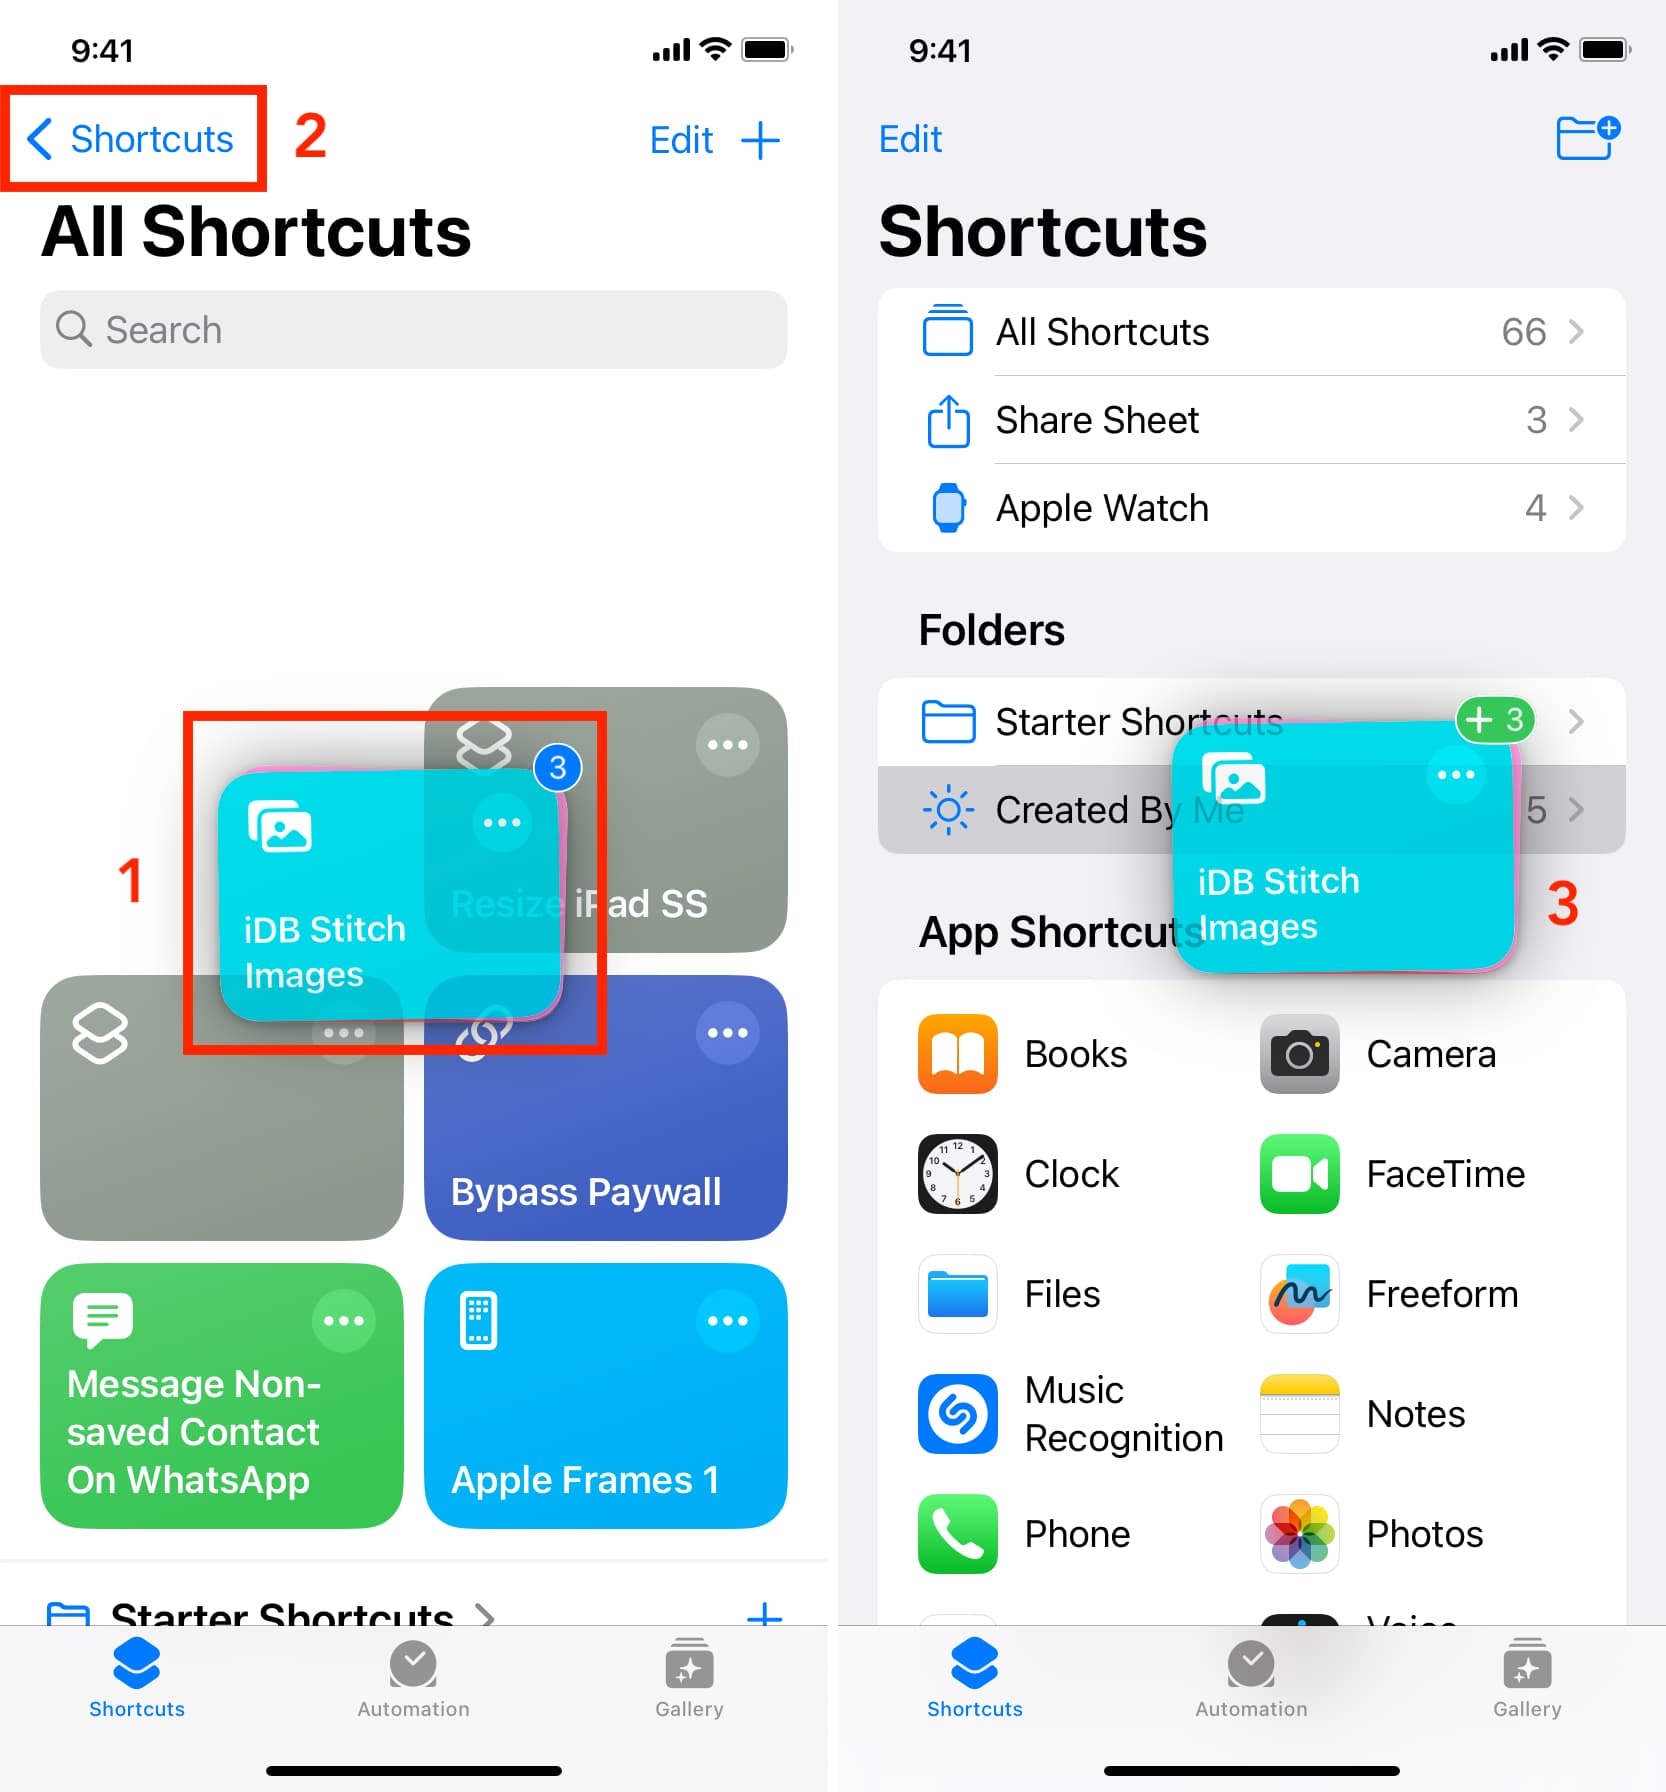
On iPhone, tap the < Shortcuts arrow on the top left. On iPad in landscape view, you can take advantage of the left sidebar and tap the Sidebar button to see your folder list.
Check out the premade folders
When you first open the folder list in the updated Shortcuts app, you’ll see some handy folders already there for you. These include All Shortcuts, Share Sheet, and Apple Watch.
Although self-explanatory, All Shortcuts contains exactly that, Share Sheet contains shortcuts you’ve added to your Share Sheet, and Apple Watch contains all those related to your Watch.
These folders will remain in the My Shortcuts section of the folder list and cannot be moved, edited, or deleted.
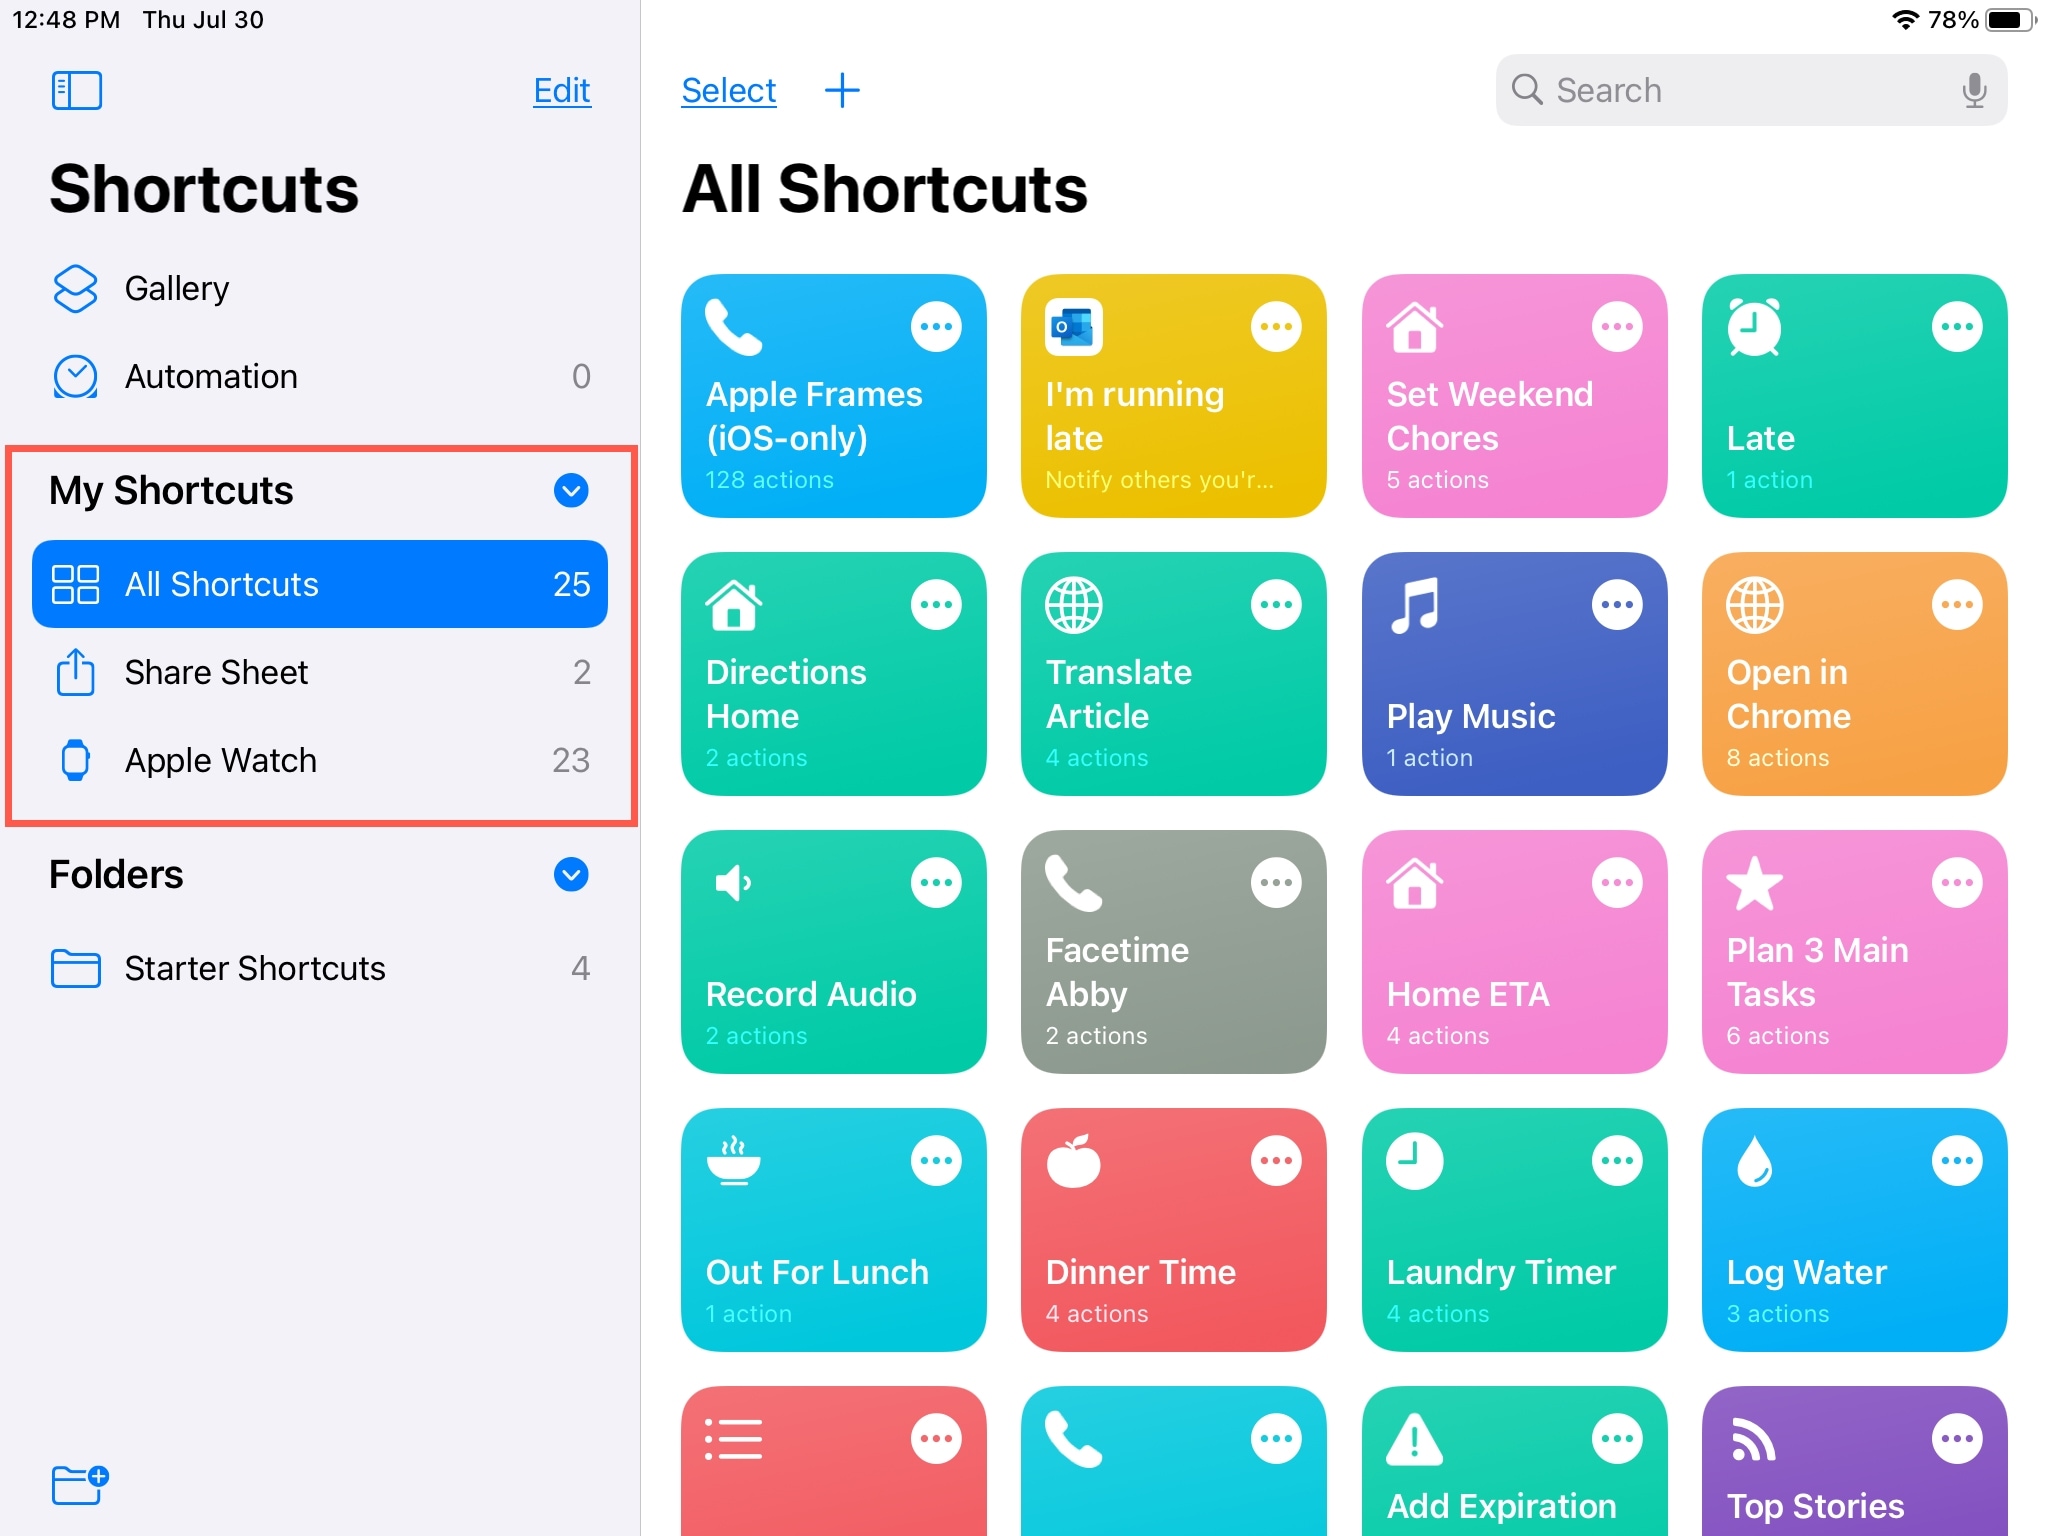
In addition to the above-mentioned categories or folders, you will also see the Starter Shortcuts folder. You can add shortcuts to it or delete this folder if you don’t need it.
Create your shortcuts folder
You can create custom folders to organize your shortcuts any way you like. To get started, make sure you’re on the folder list screen. Then do the following:
- Tap the new folder icon. On iPhone, it’s at the top, and on iPad, at the bottom of the sidebar.
- Give your new folder a name, and then pick out a fitting icon for it. You can choose from Objects, People, and Symbols. The icons will help you spot the folder you need faster.
- When you finish, tap Add.
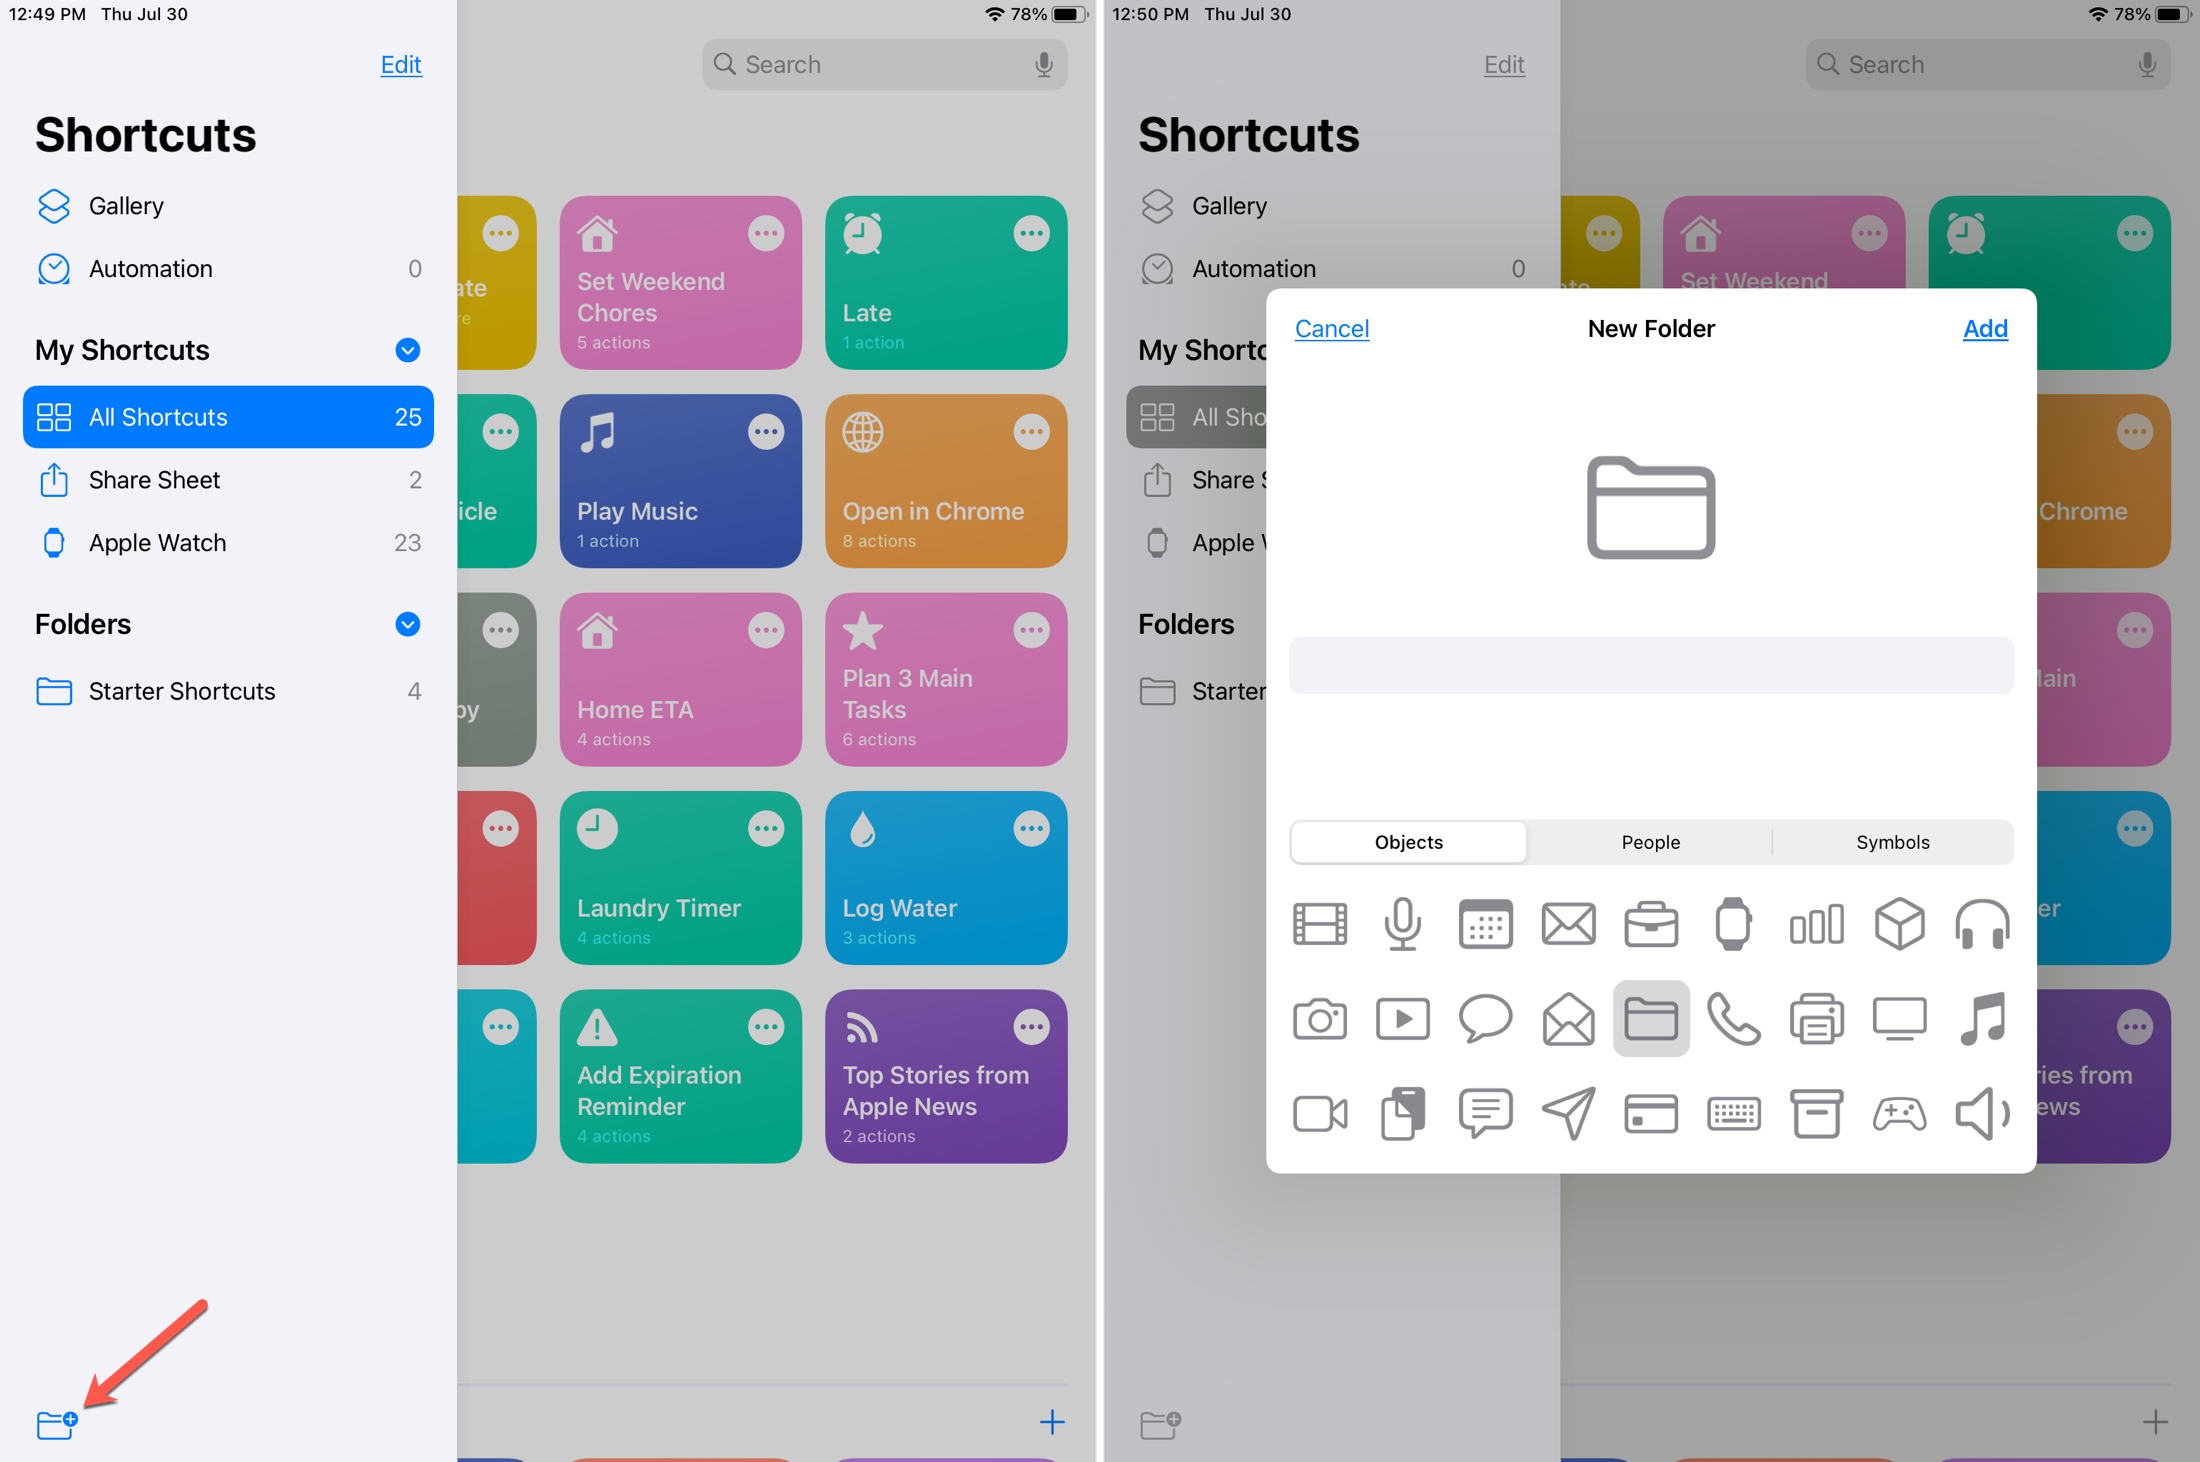
Your new folder will display in your list under Folders, ready and waiting for you to put shortcuts into it.
Move shortcuts to a folder
You have a couple of ways to move a shortcut to a folder on iPhone and iPad, individually or in bulk.
Move a single shortcut
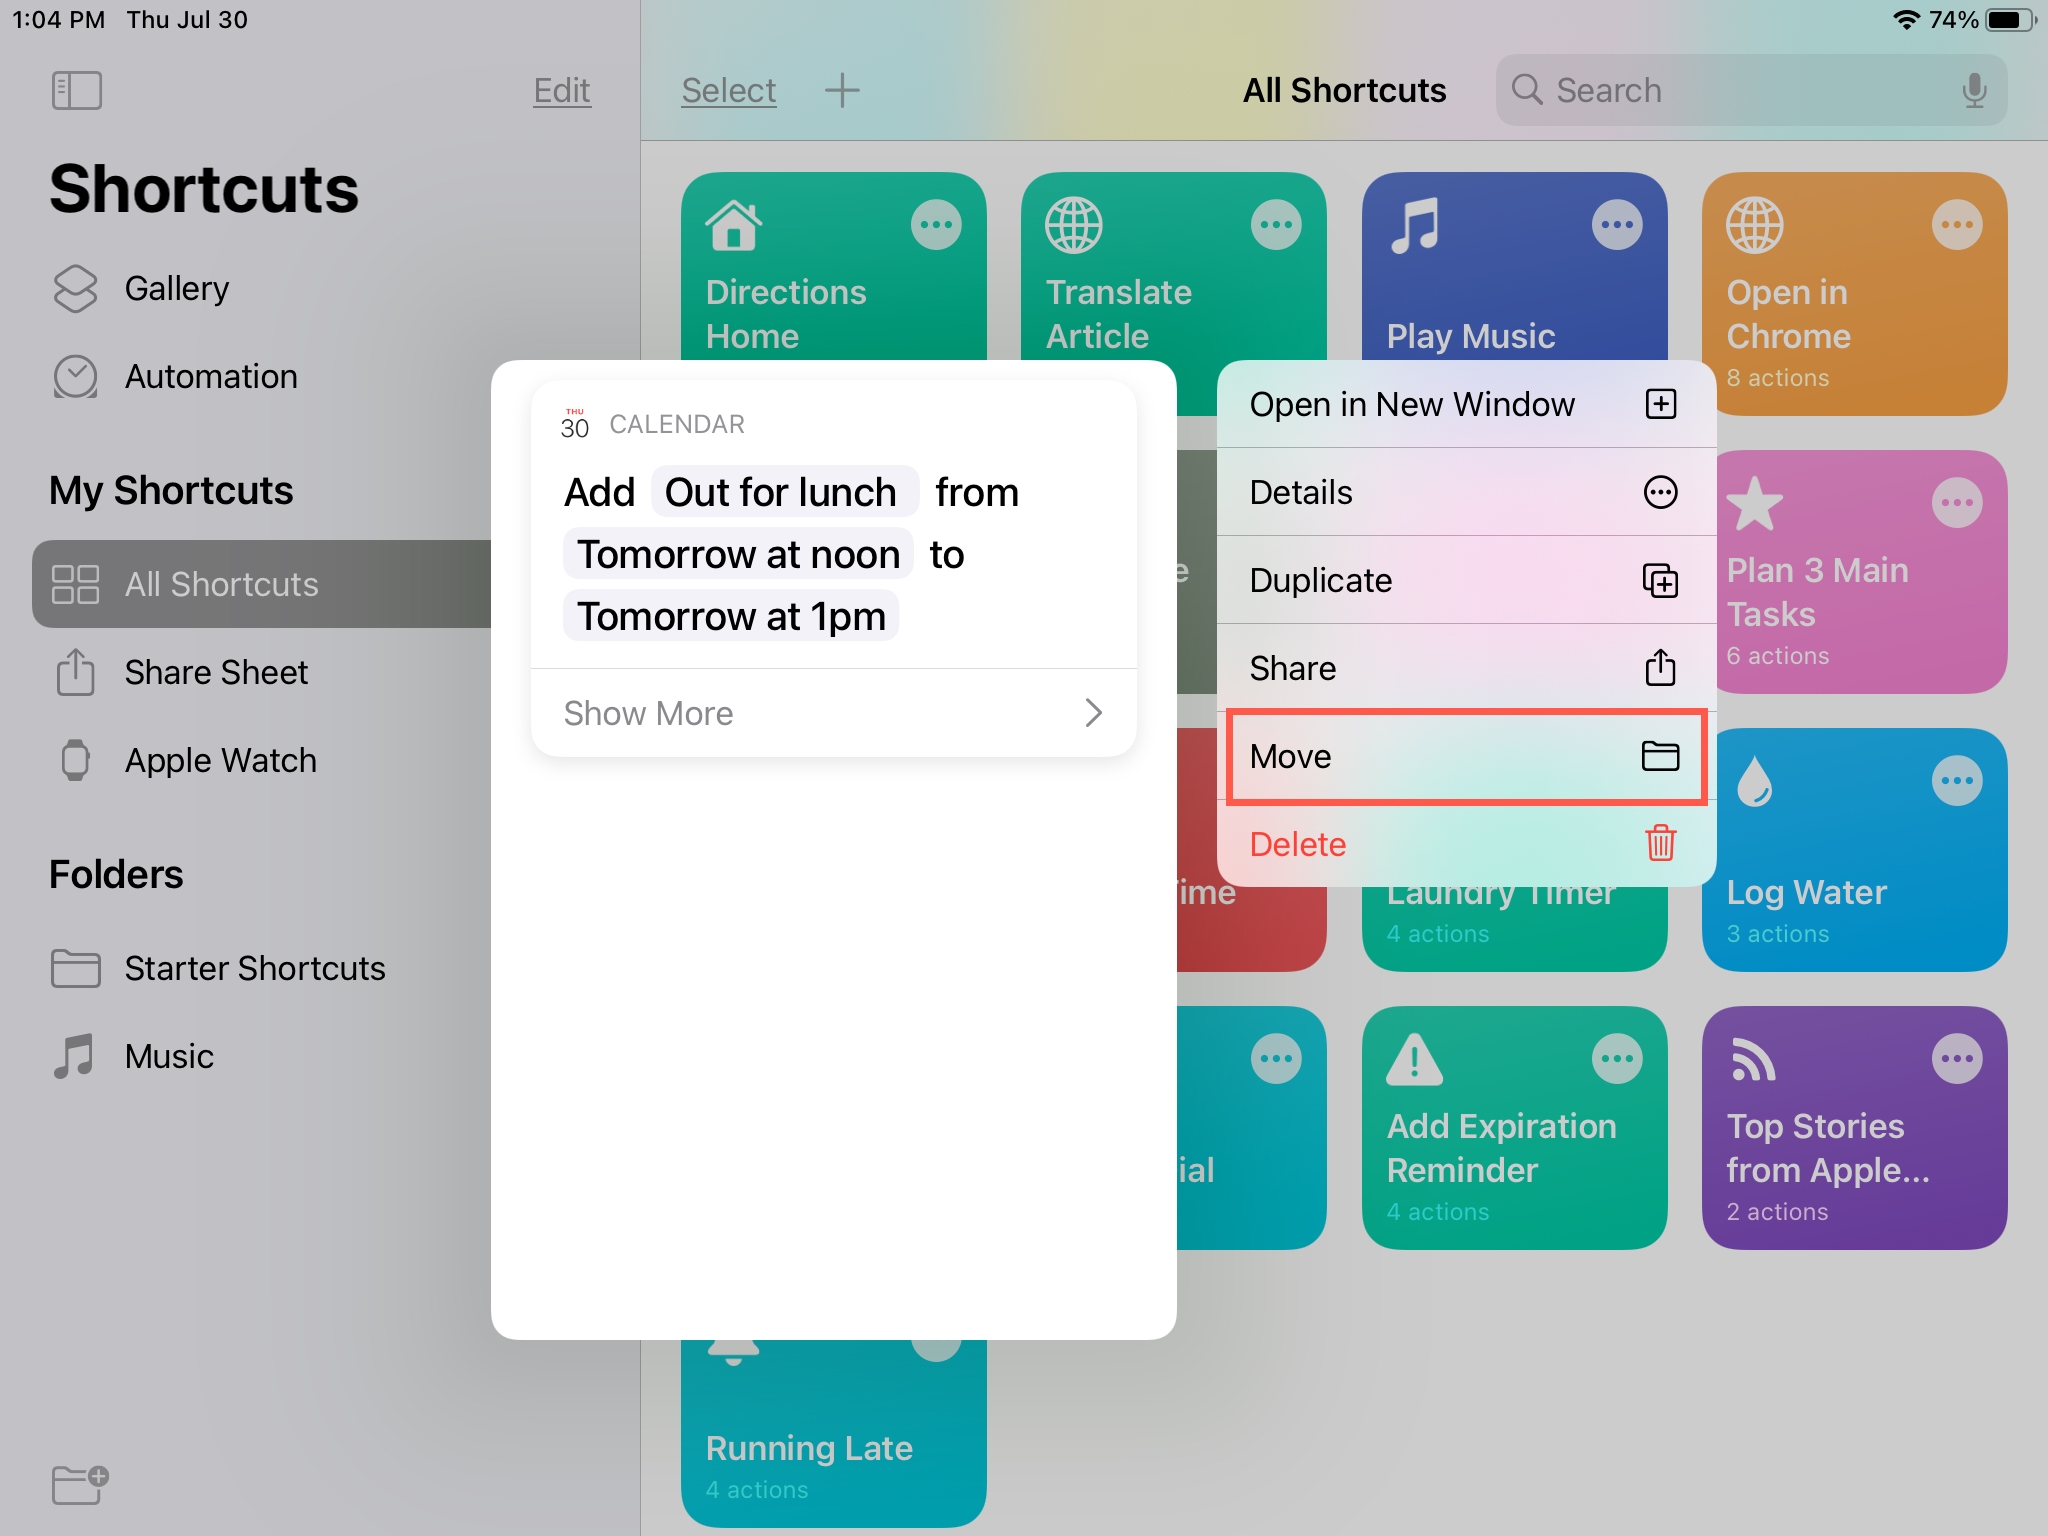
- Touch & hold the shortcut.
- Pick Move from the shortcut menu.
- Select your folder.
Tip: You can also use the drag & drop method. Start by tapping & holding a shortcut. (You can tap other shortcuts to select them as well.) Now drag the shortcut into the folder in your iPad sidebar. On iPhone, use your other hand to go to the Folders screen and drop the selected shortcuts over a folder.
Move several shortcuts
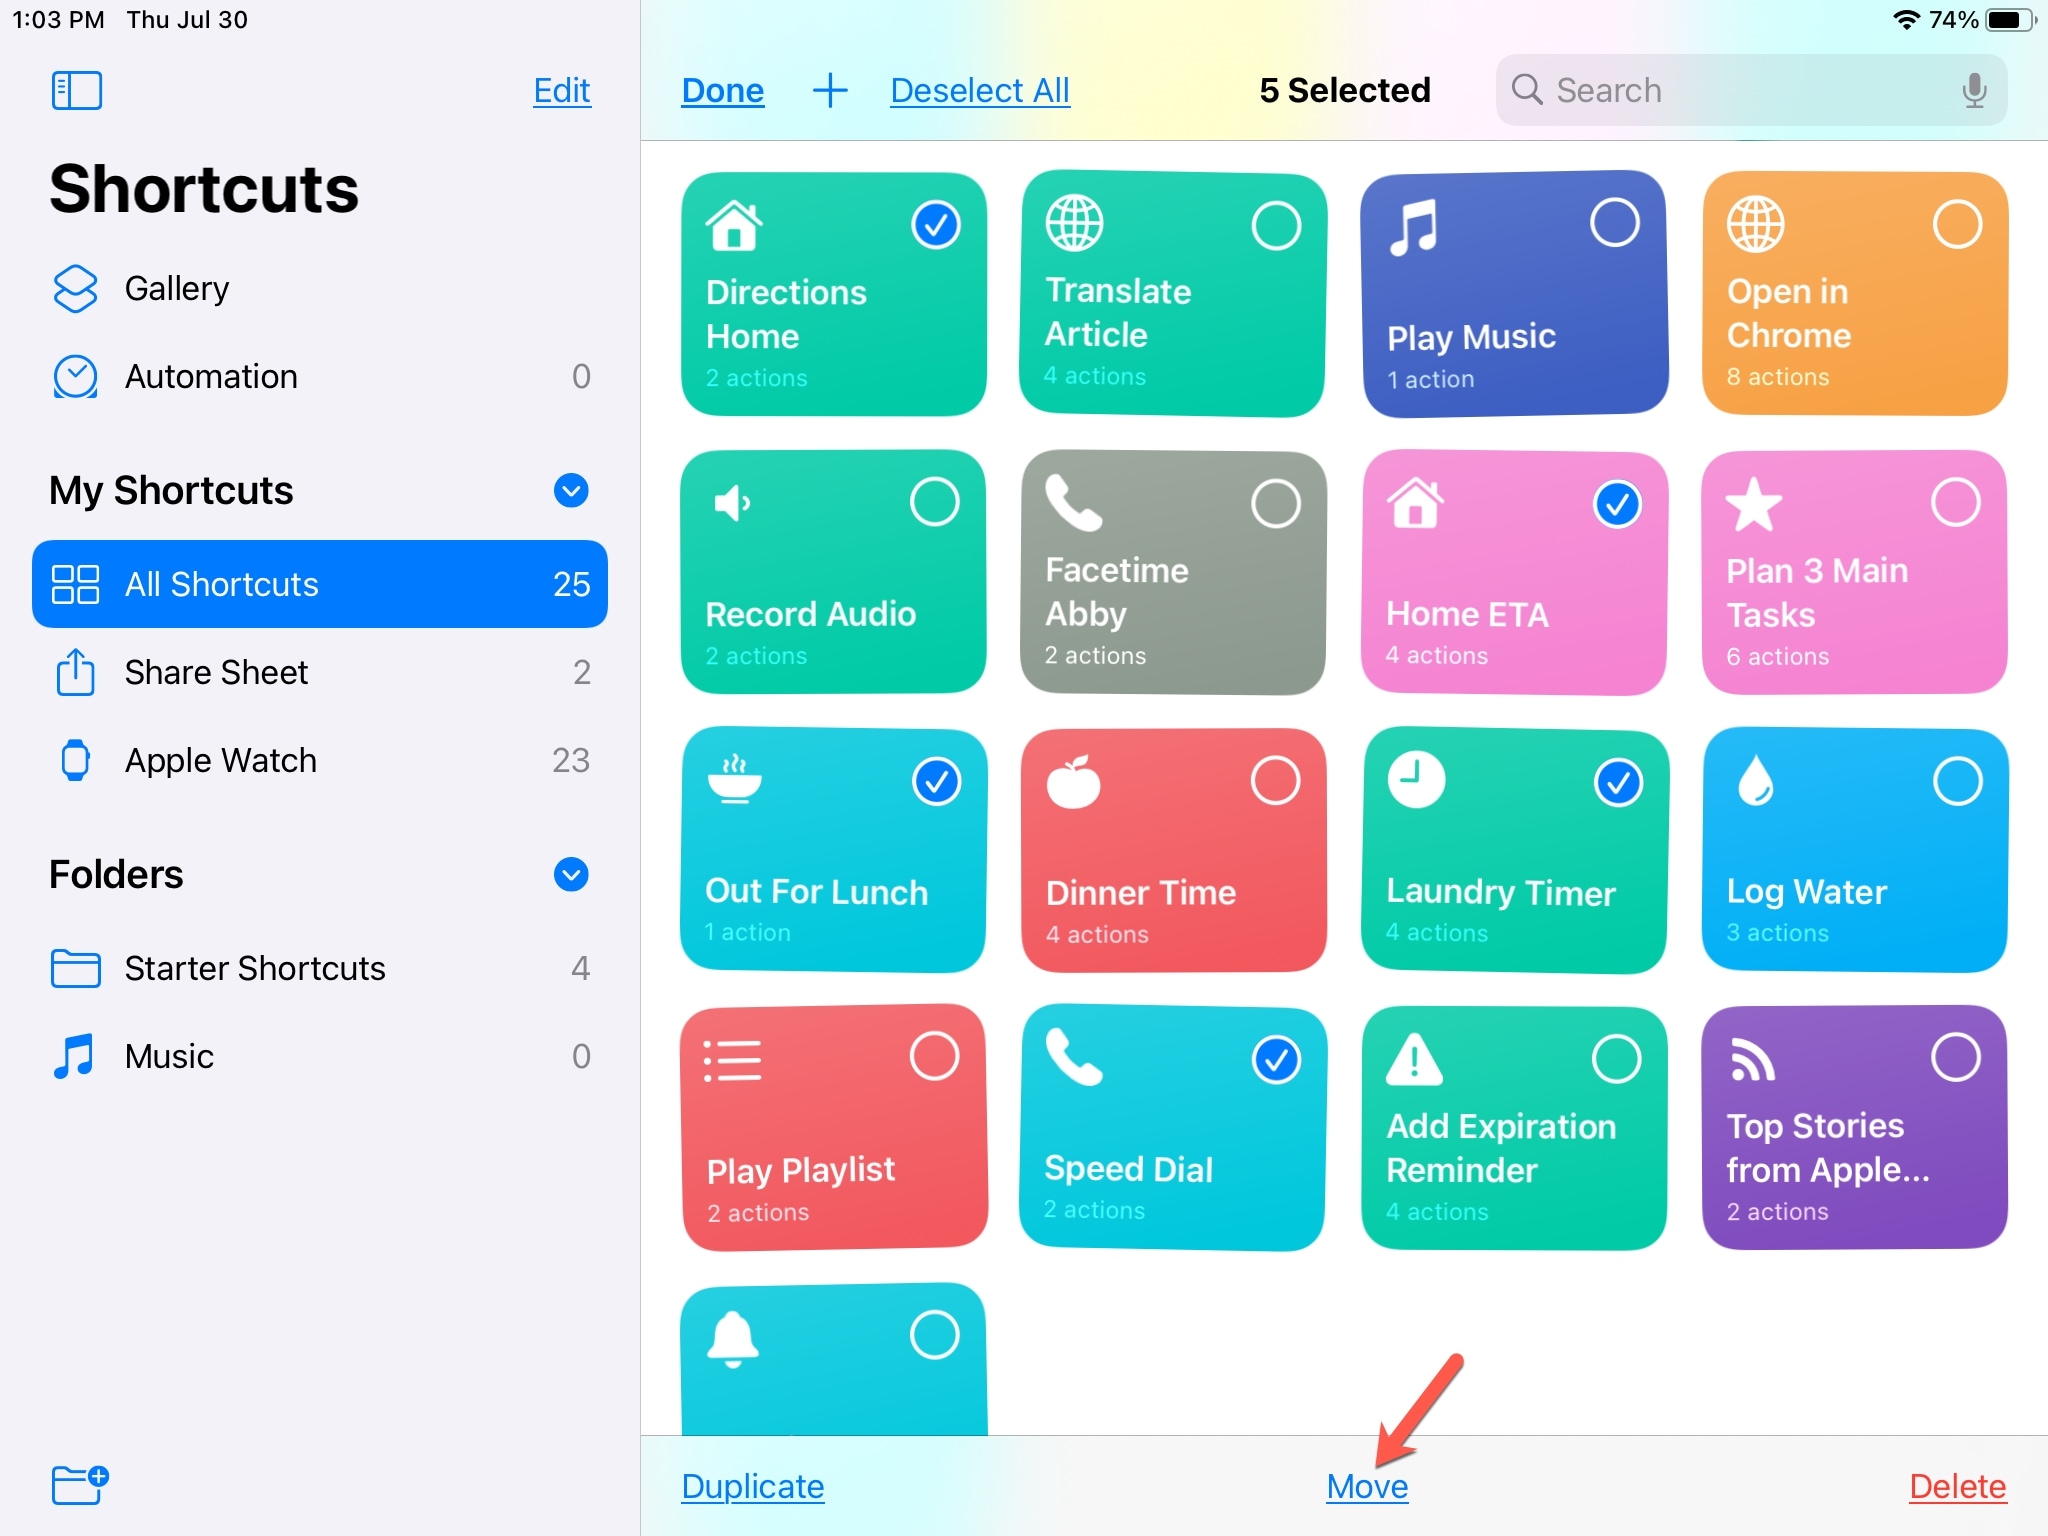
- Go to the All Shortcuts folder.
- Tap Edit and mark all the shortcuts you want to move.
- Tap Move at the bottom.
- Select your folder.
You can also use the steps directly above to move a group of shortcuts from one custom folder to another.
Edit your folders
You can reorder your custom folders in the list, change the name or icon, and delete folders that you create in Shortcuts.
- Rearrange: To rearrange folders, tap Edit at the top of the folder list. Then, drag and drop the folders where you want them. Keep in mind that you can only rearrange those in the Folders section.
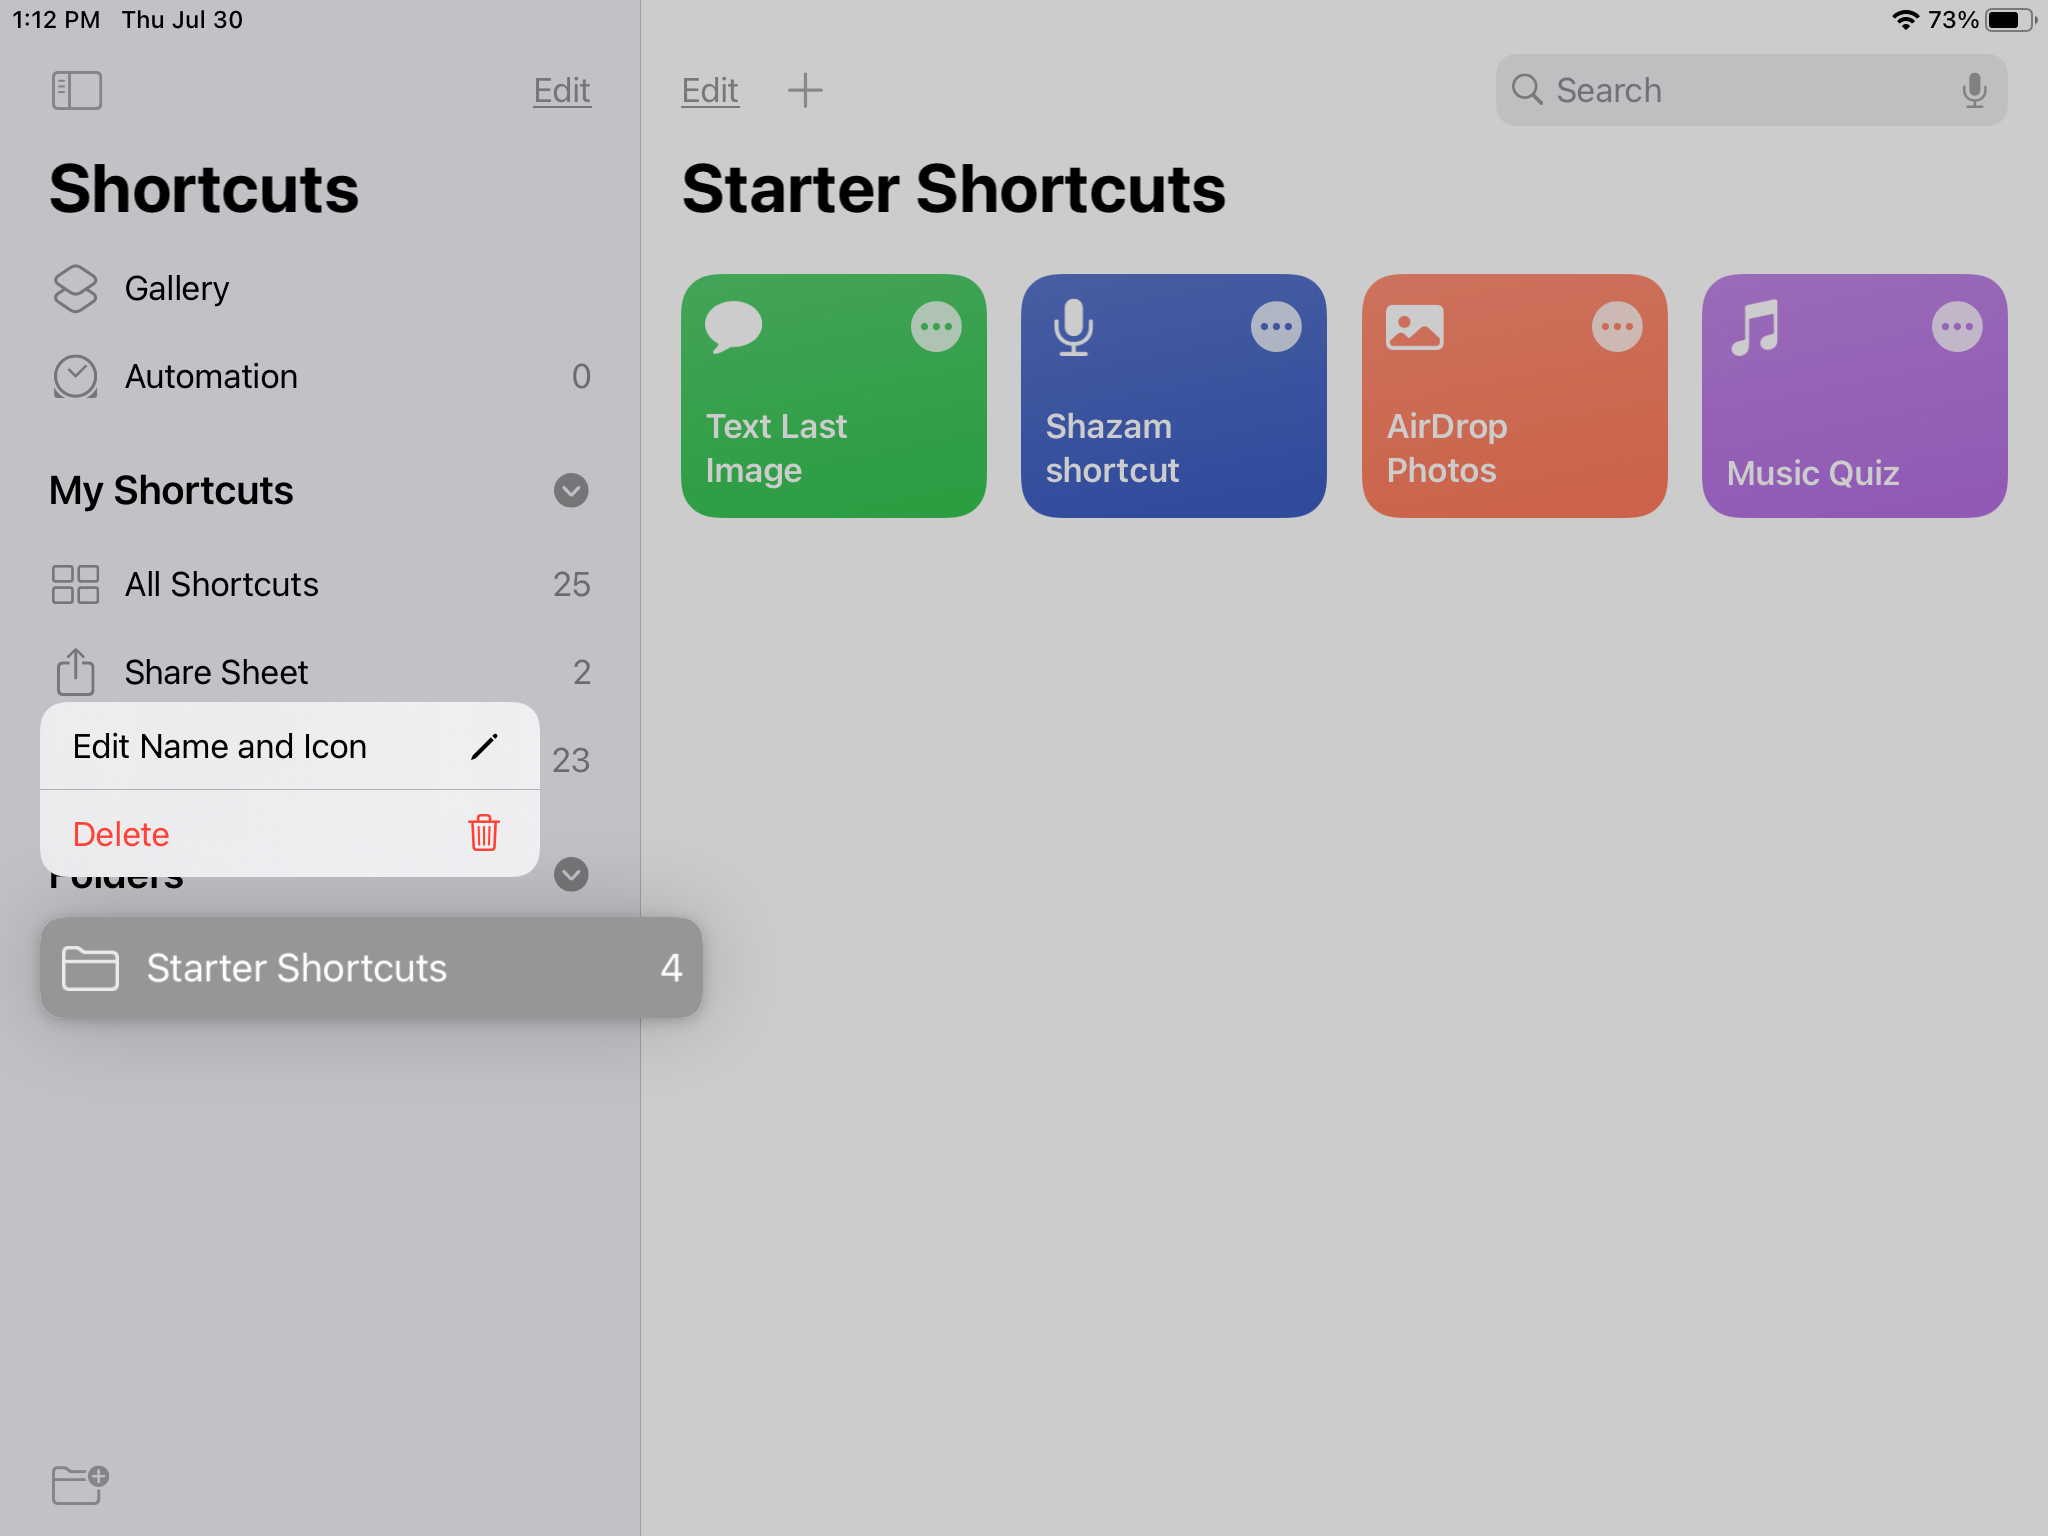
- Rename: To change the name or icon, press and hold the folder and select Edit Name and Icon. You can also tap Edit and then hit the info icon ⓘ next to the folder name to rename it or pick another symbol.
- Delete: To remove a folder, press and hold the folder and select Delete. Alternatively, you can tap Edit at the top of the folder list and tap the red minus sign next to a folder. Note: If you have shortcuts inside of a folder you want to delete, you’ll be asked if you want to delete the shortcuts as well or only the folder.
For more, take a look at: