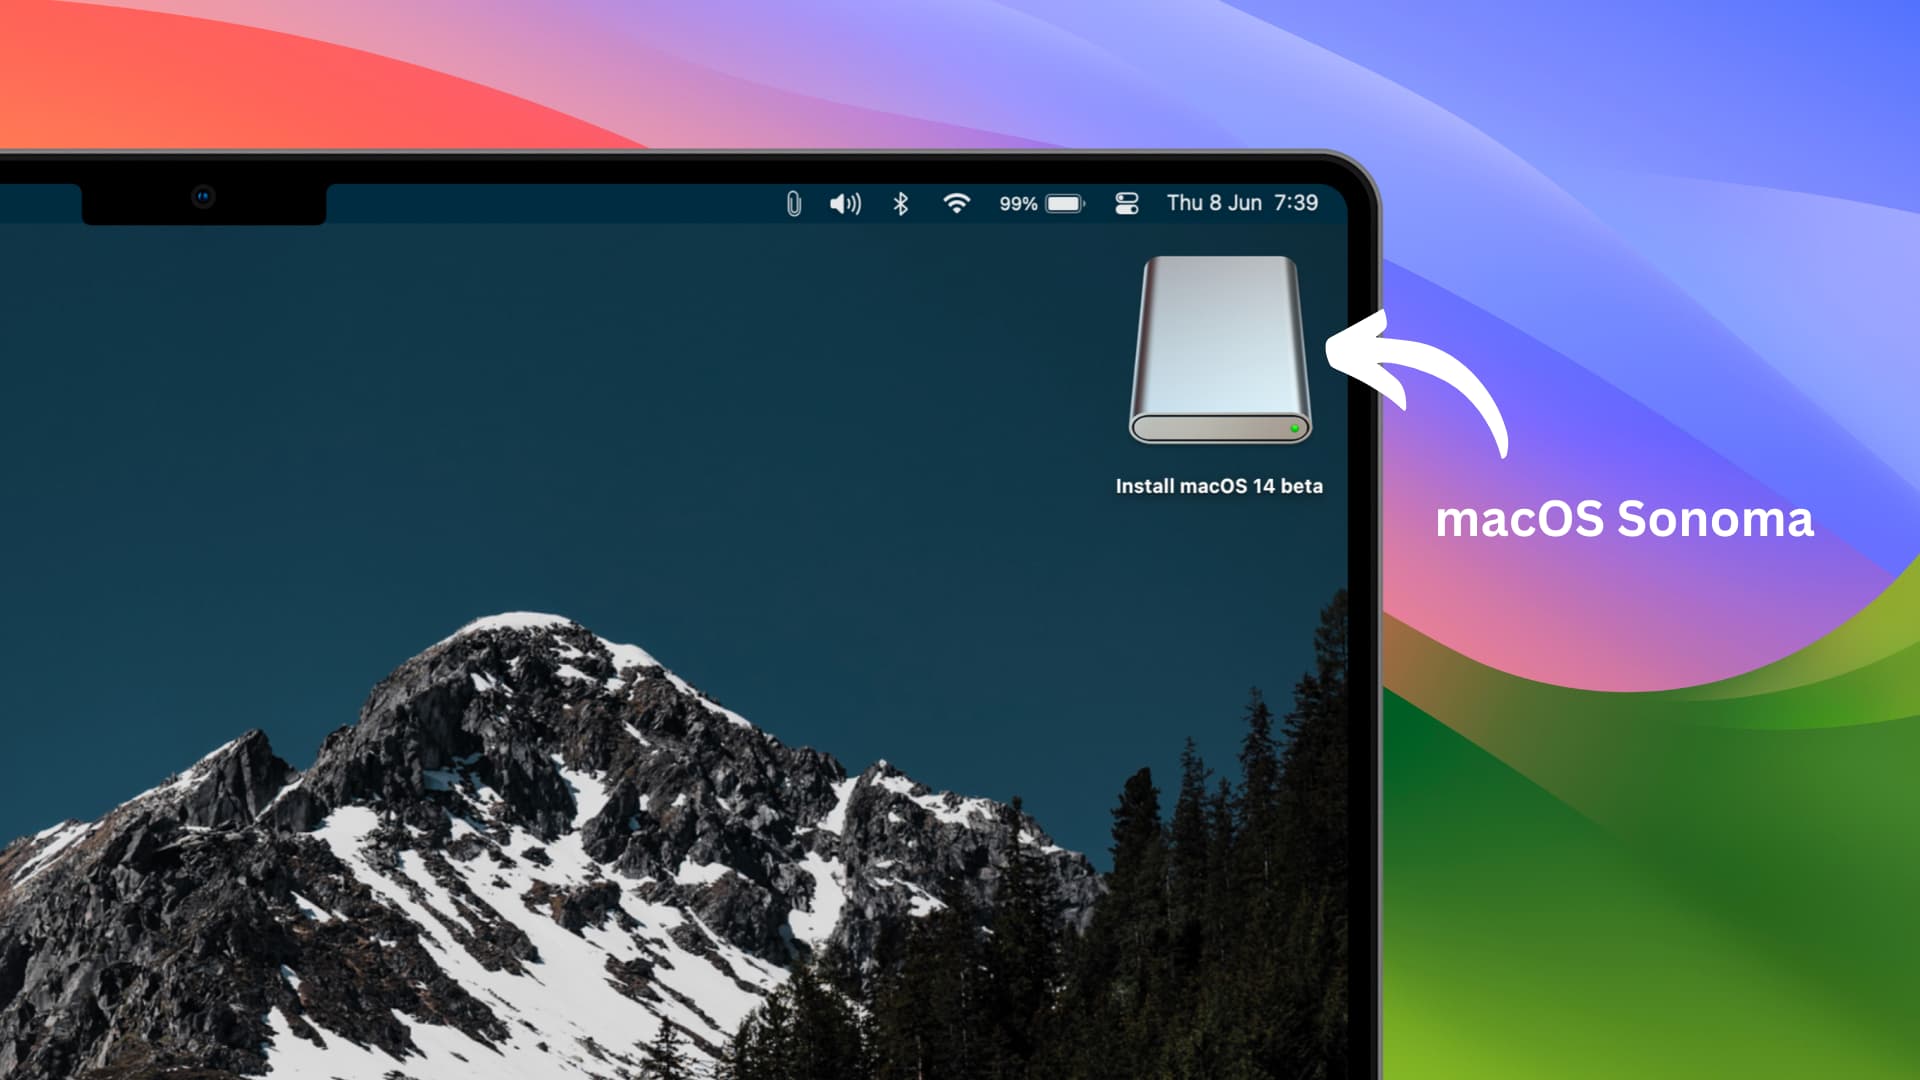
Learn how to get macOS Sonoma developer beta on your USB thumb drive and use it to install macOS 14 on multiple Macs without having to download the huge macOS file every time.
Also see: How to install macOS Sonoma on a different partition of your Mac
Things needed
- A USB thumb drive that’s at least 16 GB
- Reliable Internet connection on your Mac
- At least an hour of free time
Steps involved
The entire process involves three steps:
- Download the macOS Sonoma installer
- Format USB thumb drive as Mac OS Extended
- Use Terminal to create a macOS 14 bootable installer
Step 1: Download the macOS Sonoma installer
There are a few easy ways to do this. For example, when a macOS version is publically available, you can get it from the Mac App Store. But since macOS Sonoma is currently in the developer beta phase, you can download it directly from Apple’s website using these steps:
1) Hit this official Apple link to download the huge 13 GB pkg file. When you hover the mouse over this link, you can see that it’s from apple.com. Never download such files from non-Apple websites.
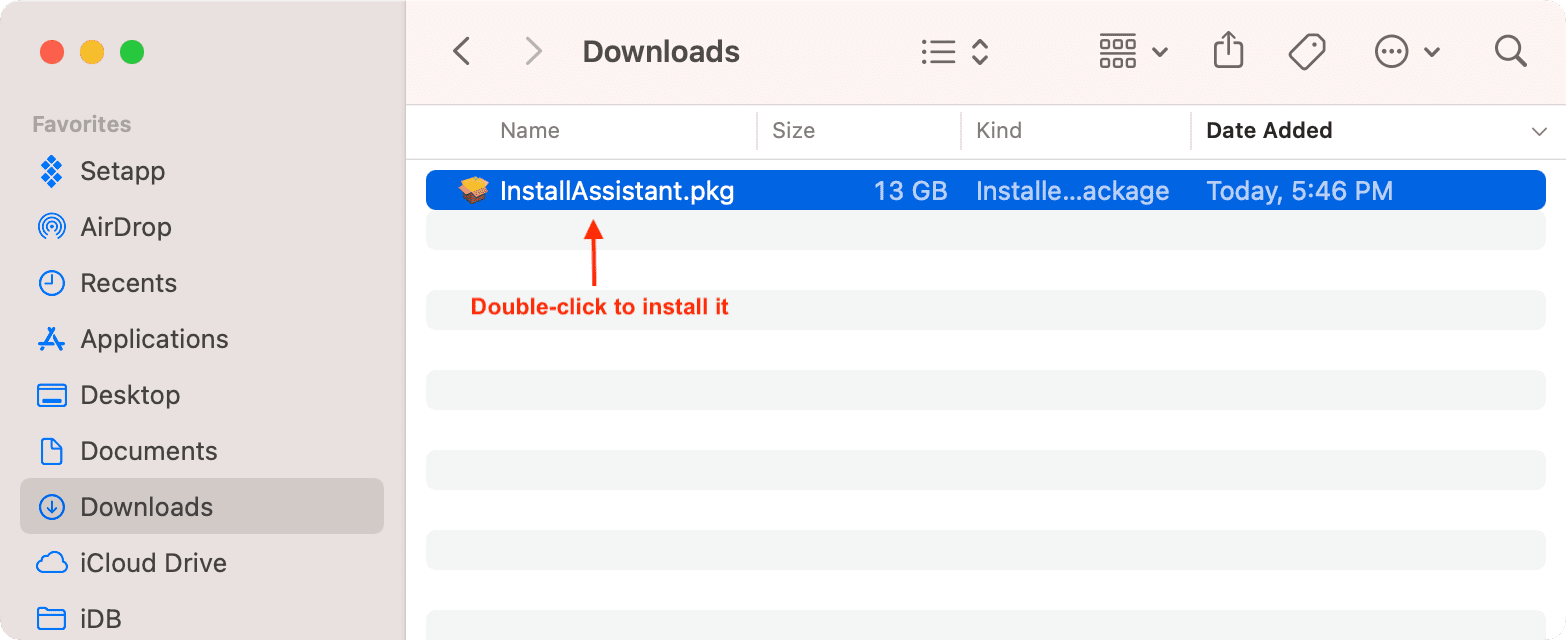
2) Once the massive file is downloaded, double-click it and finish the basic installation.
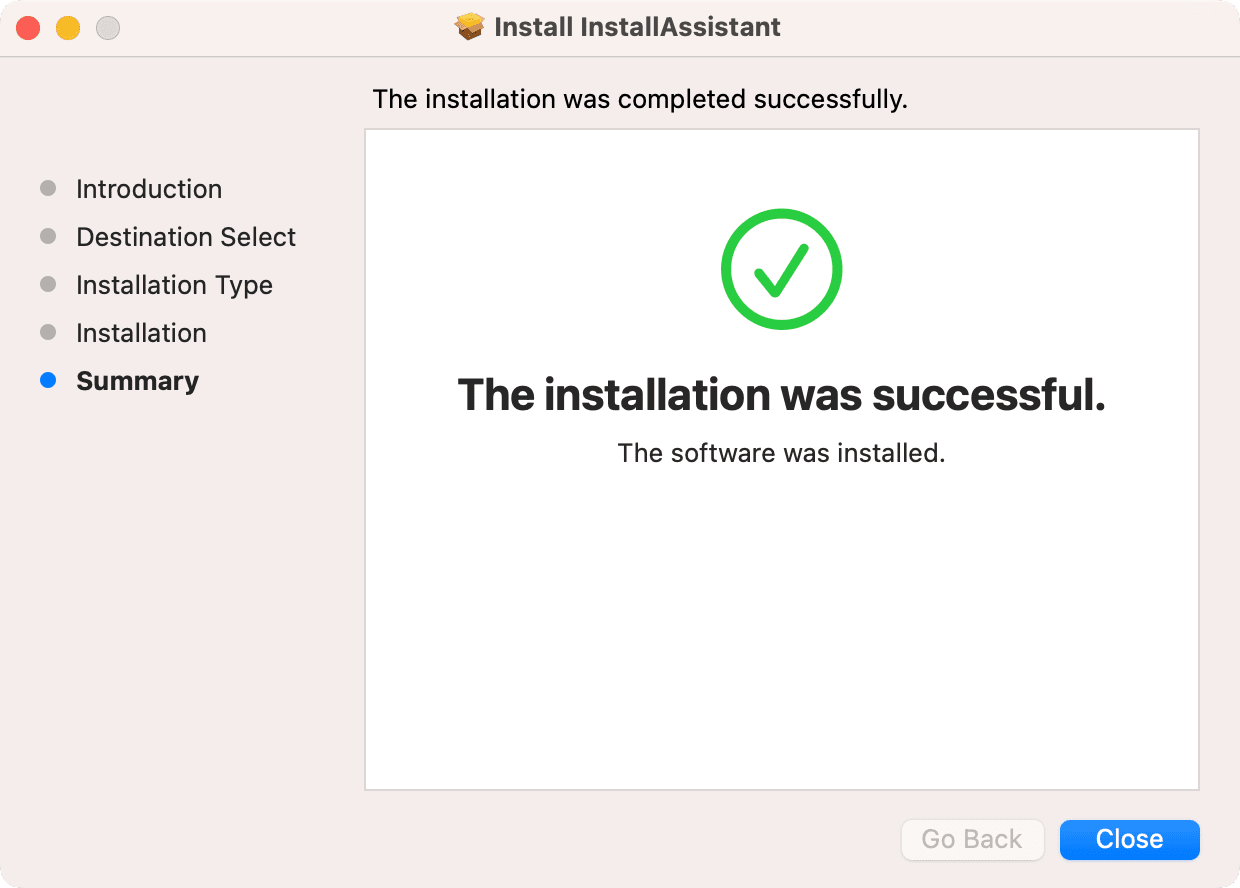
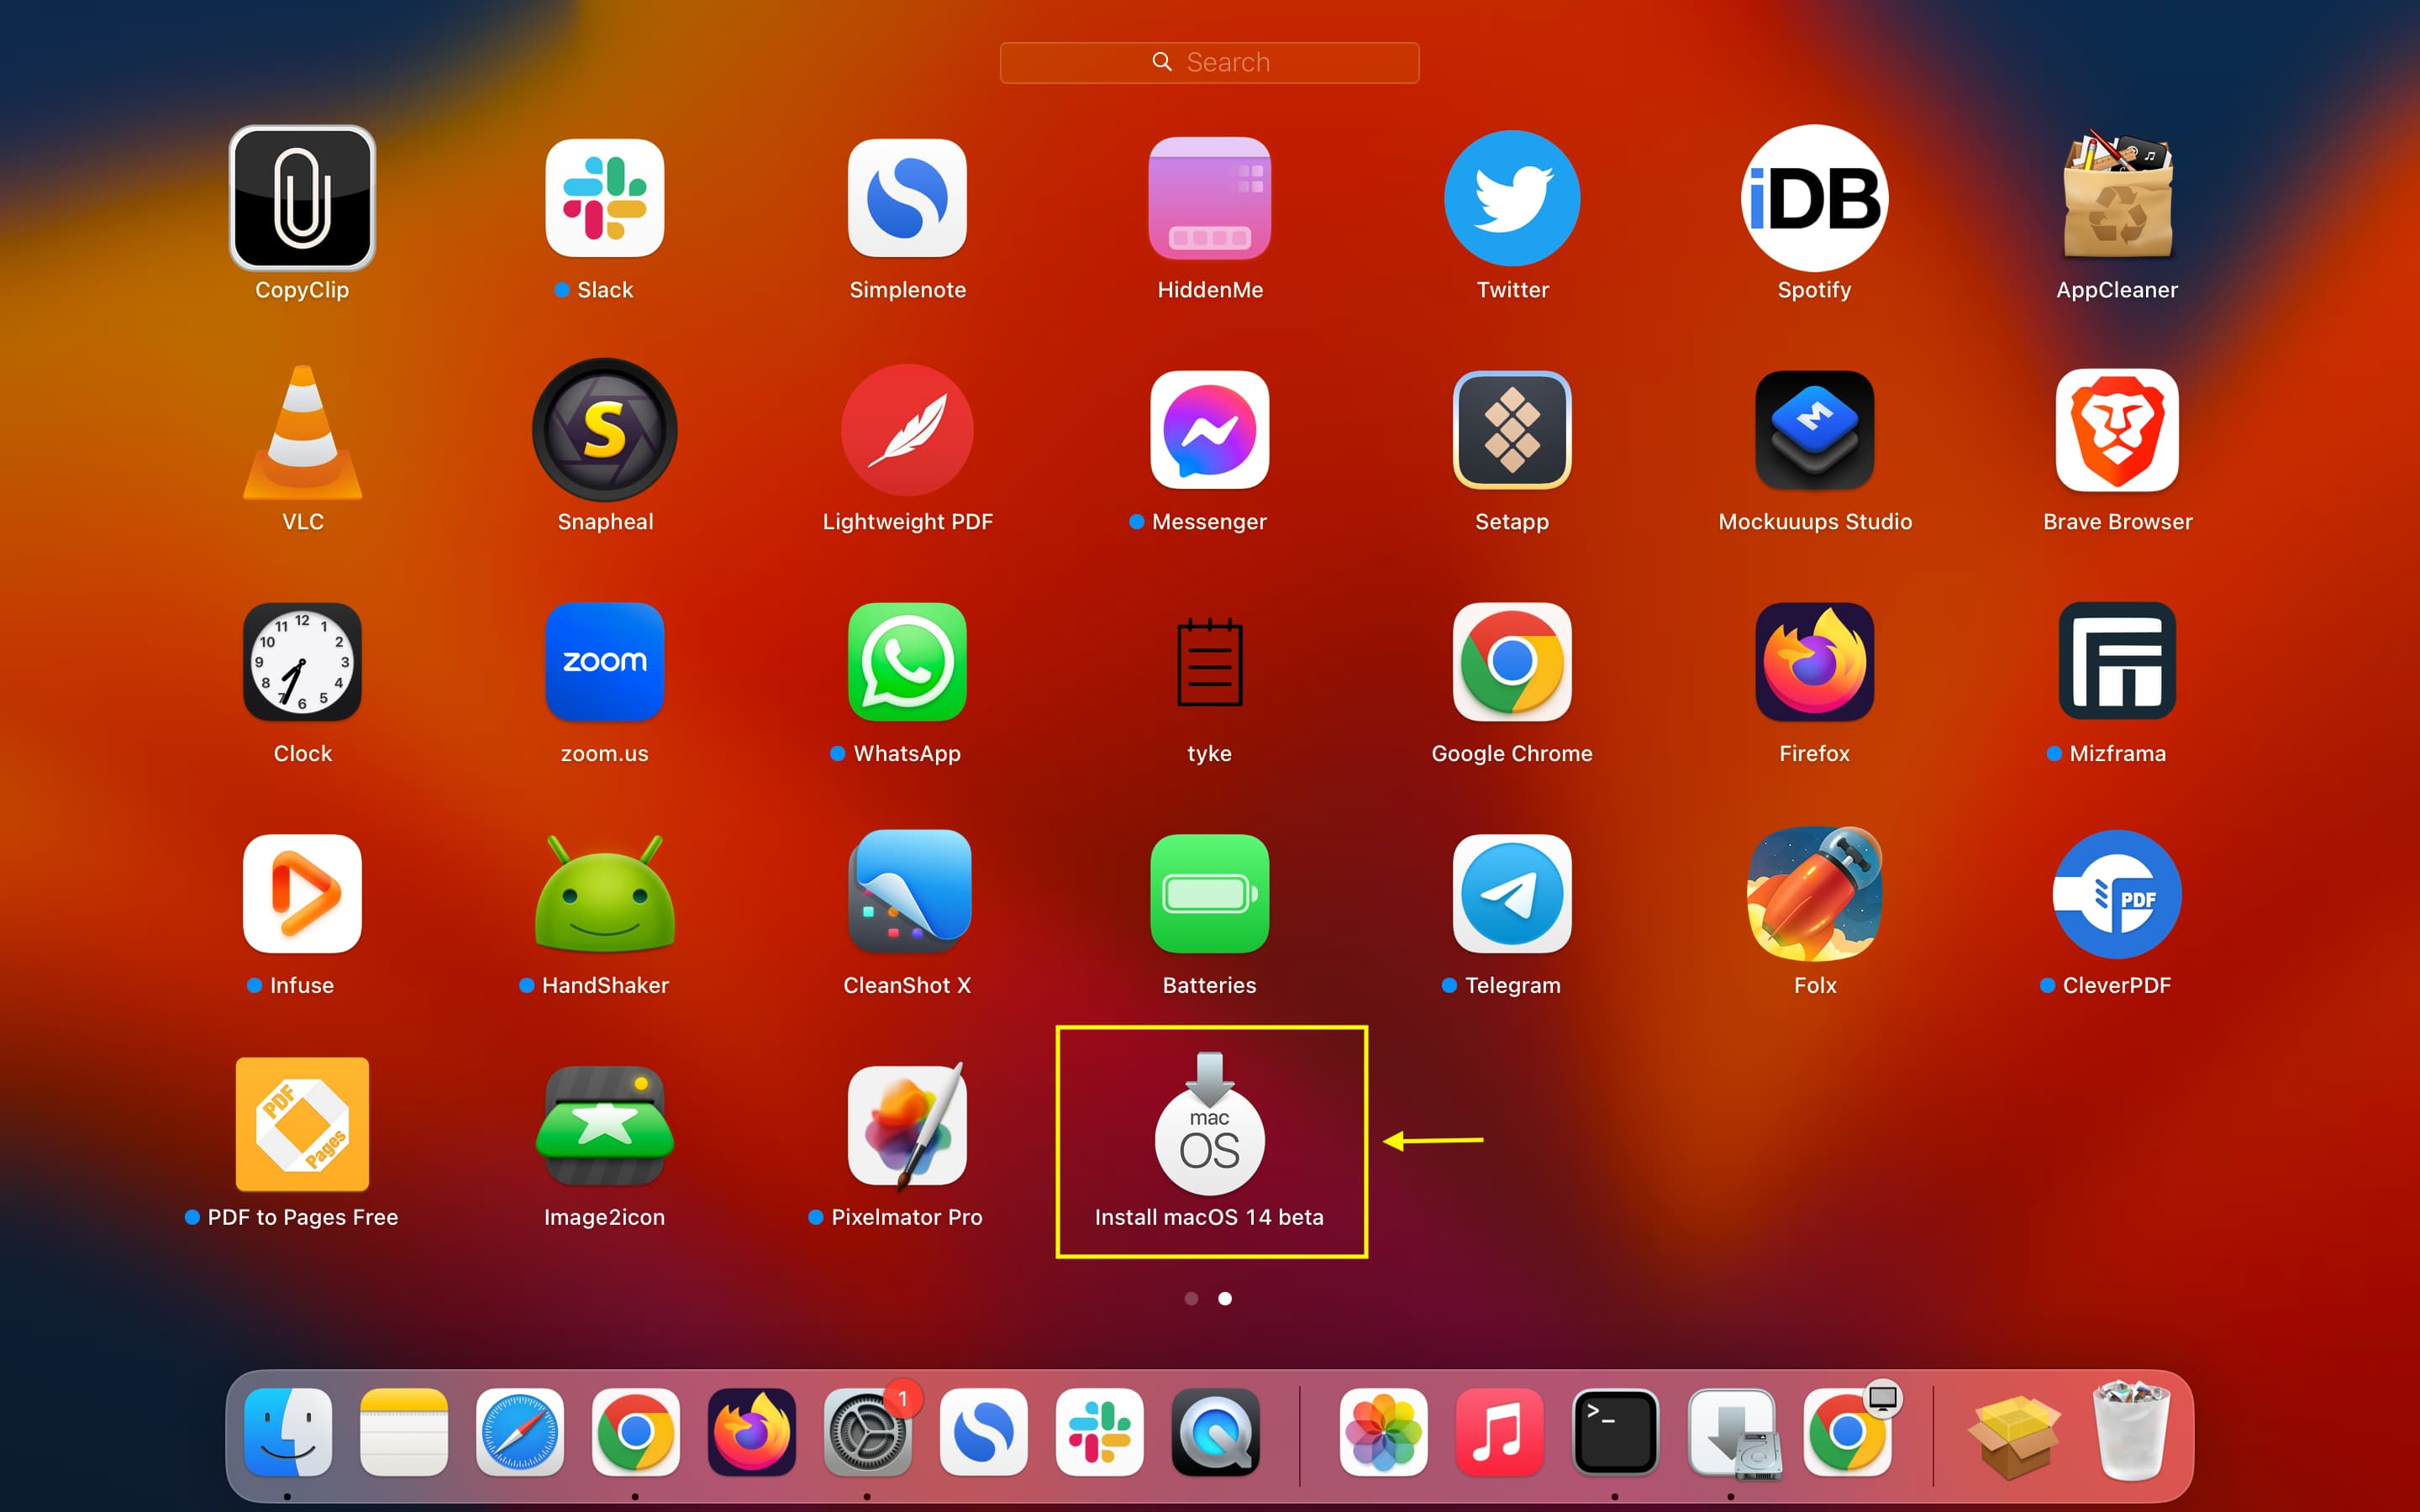
After your finish the installation, go to your Mac’s Launchpad or the Applications folder, and you will see the macOS Sonoma installer here. It’s called Install macOS 14 beta (as currently, it’s in the developer beta stage). Now, move to step 2. If you don’t see it, you can’t proceed further. In that case, try the above steps again or use another method (mentioned below) to download the installer.
If you’re not successful in following the above steps, you can also use Terminal to show, find, download, and install the installer file. This is a great method to get the latest macOS installer files.
Important: The Terminal method only lists those macOS versions that your Mac is capable of running. And since macOS Sonoma is currently in the developer beta stage, you will have to enroll your Mac in the developer program, and then only Terminal will list it as a potential option.
Here’s how to enroll your Mac:
If your Mac is on macOS Ventura 13.3 or earlier:
- Log in to Apple’s developer website and use this official link to download the macOS Developer Beta Access Utility.
- After that, double-click the downloaded macOSDeveloperBetaAccessUtility.dmg file and install it. Now your Mac is enrolled in the developer program.
If your Mac is on macOS Ventura 13.4 or later:
- You can use the above method or simply make sure you’re using your developer Apple ID on your Mac.
- If you don’t have a developer Apple ID, sign in to Apple’s developer page using your normal Apple ID to enroll it. We have explained it in our iOS 17 developer beta post. Next, go to System Settings > General > Software Update > info icon ⓘ next to Beta Updates > select macOS Sonoma Developer Beta > Done.
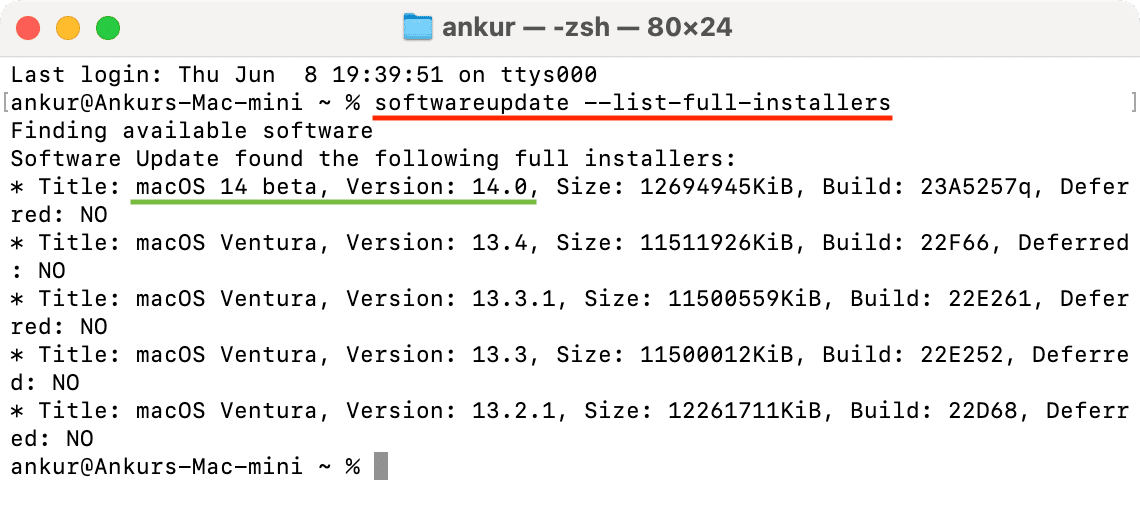
Now that your Mac is successfully enrolled in the beta program, open Terminal, enter softwareupdate --list-full-installers and hit the return/enter key. The Terminal will show a list of all macOS version installers you can download and install on your Mac.
To download the macOS Sonoma installer, once again type this in the Terminal and hit the return key: softwareupdate --fetch-full-installer --full-installer-version 14.0
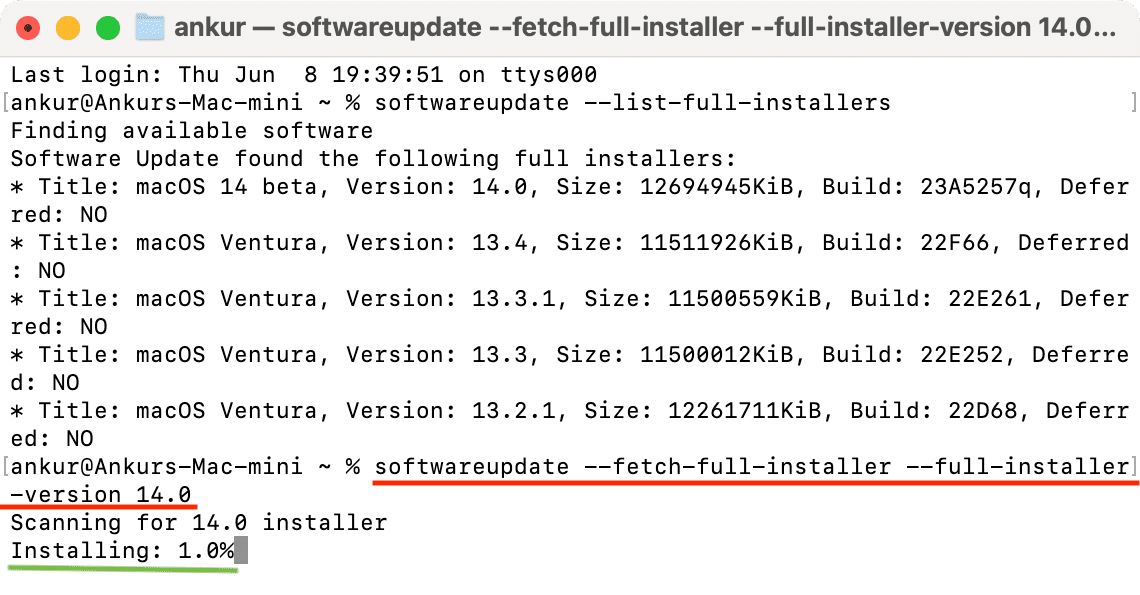
Obviously, later in the future, you can change 14.0 to the latest build.
Terminal will find the installer and start downloading it.
Once that’s done, you will see the “Install macOS 14 beta” installer in your Mac’s Launchpad and the Applications folder. You can now move to the next step.
Here’s a helpful video by Mr. Macintosh explaining the above methods:
Step 2: Format the USB thumb drive as Mac OS Extended
Terminal will automatically format the drive in the next step, but it’s recommended to do it beforehand so that it’s quicker for Terminal and some random errors do not fail the entire process.
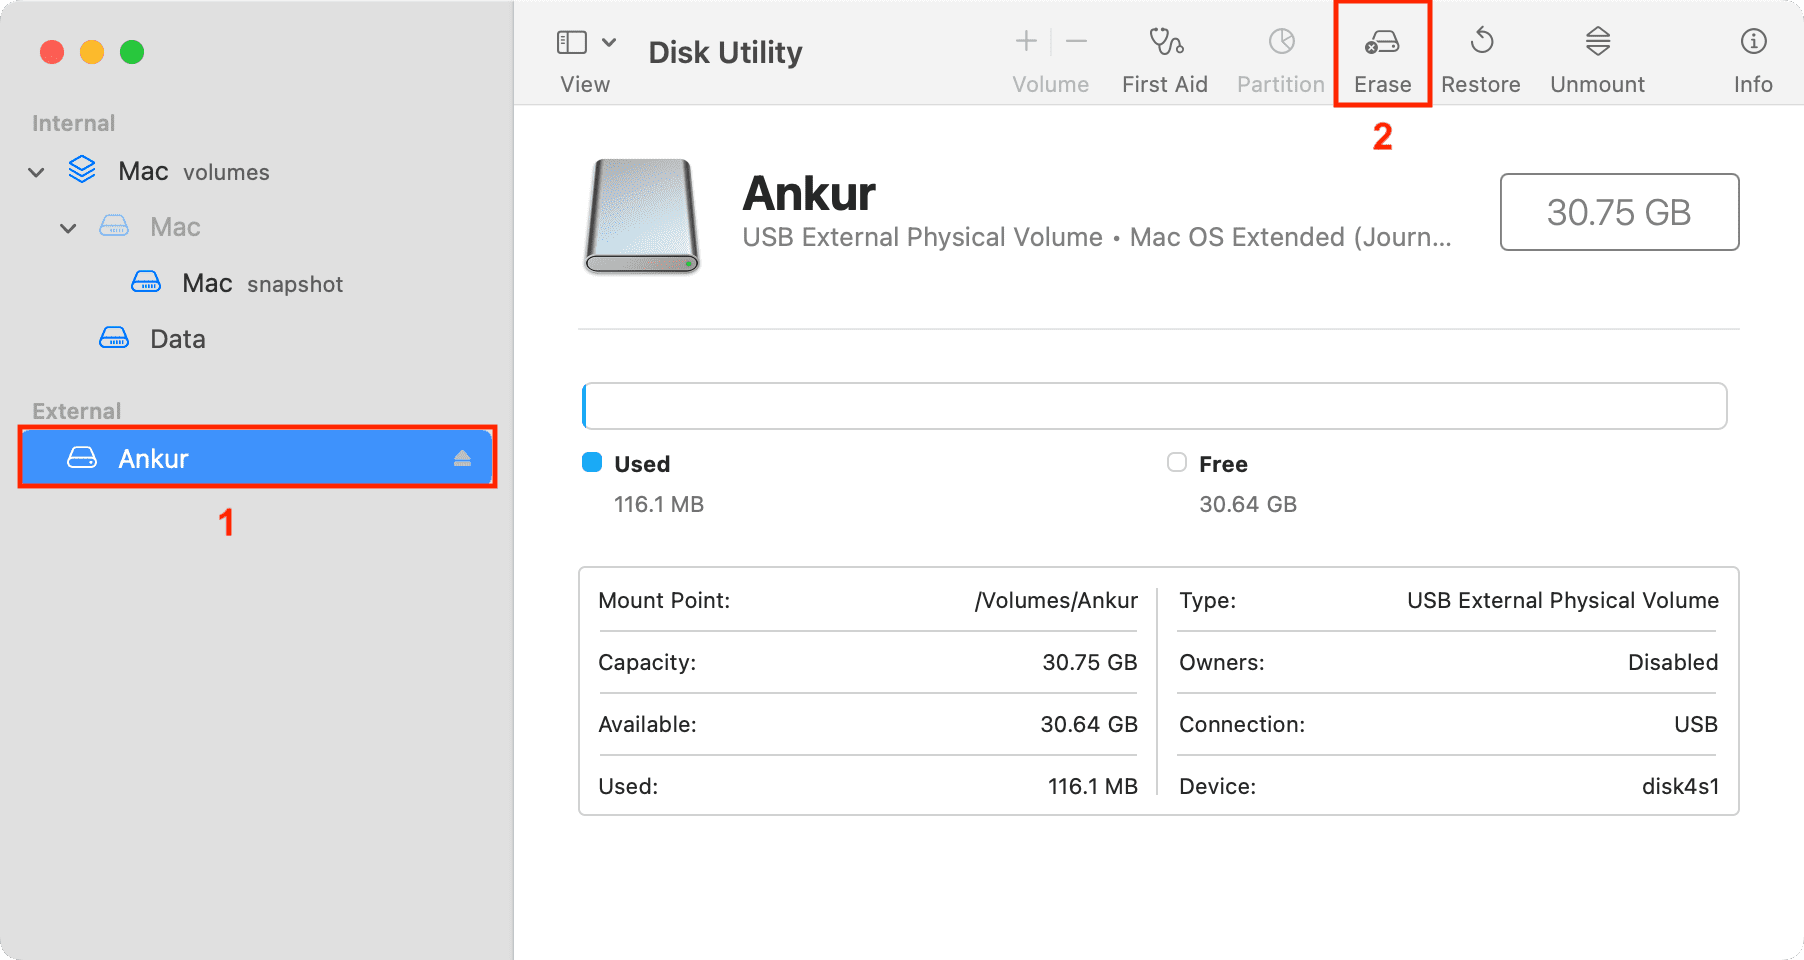
1) Connect your thumb drive to your Mac.
2) Open Disk Utility and select this thumb drive.
3) Click Erase.
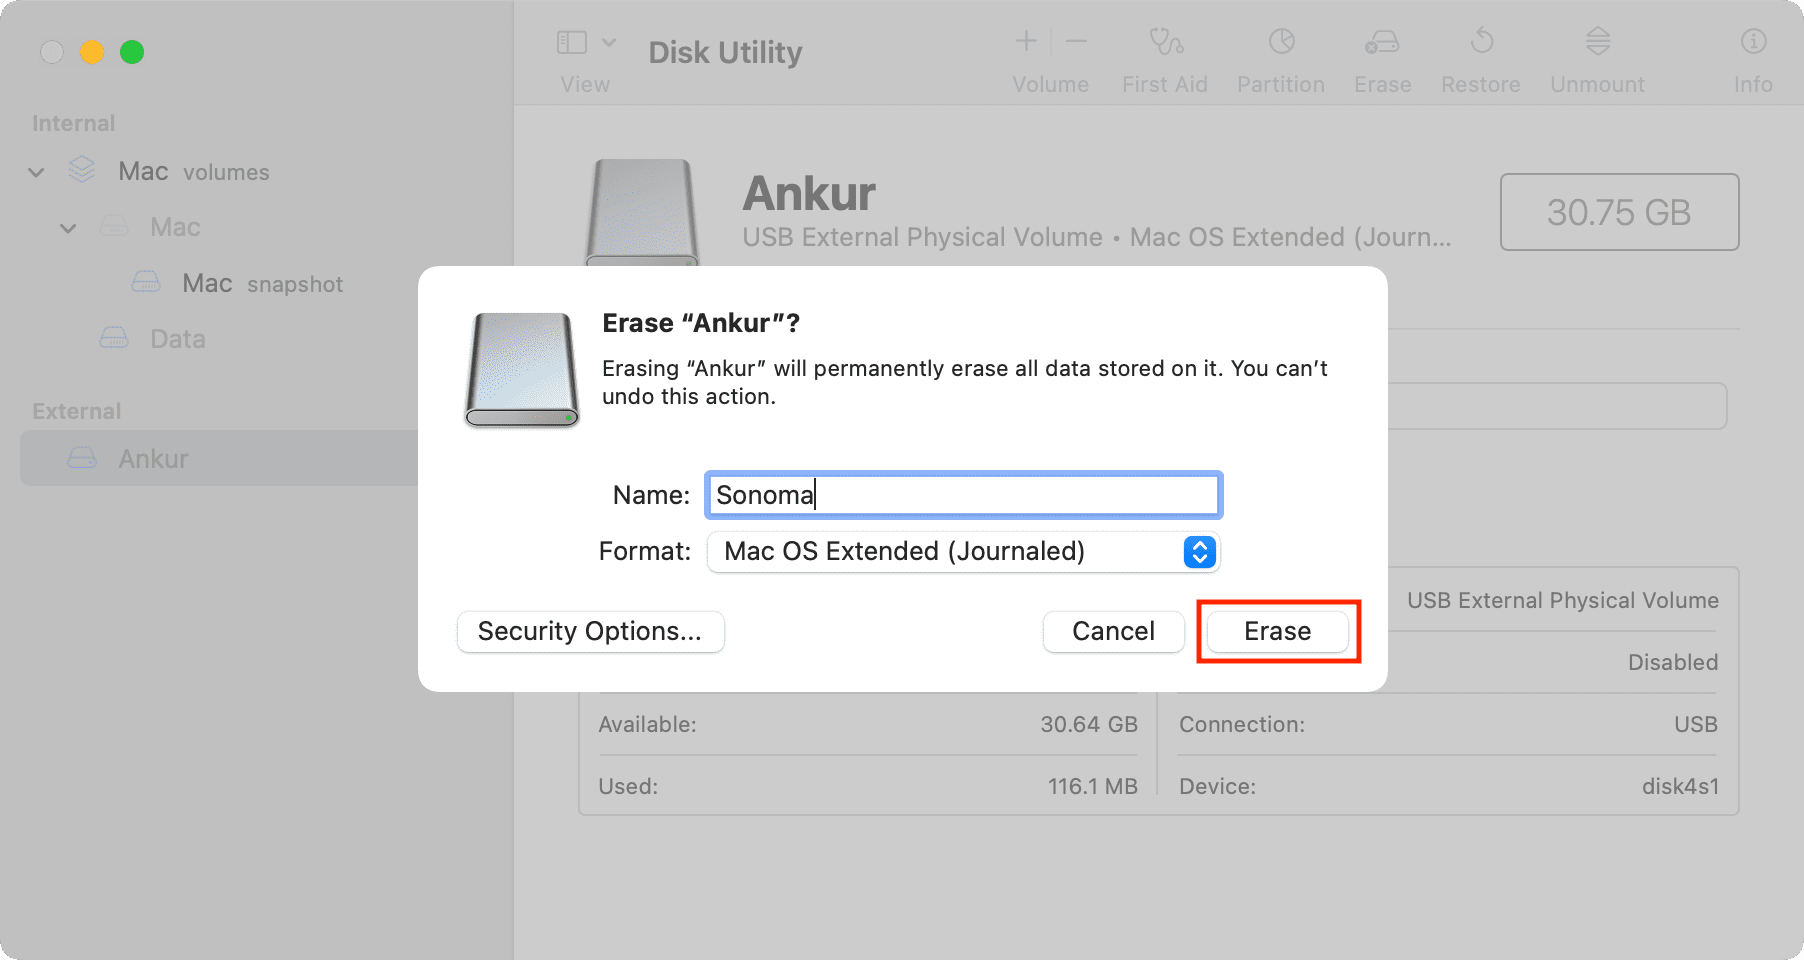
4) You can enter any name, as it doesn’t matter and will be overwritten by Terminal in the step 3. But I recommend naming it Sonoma. This way, you won’t have to edit the Terminal command in the next step and can simply copy & paste the command I used.
5) In the Format box, select Mac OS Extended (Journaled). And if you see Scheme, select GUID Partition Map.
6) Finally, click Erase and make sure it’s successful. If not, try erasing it again.
Step 3: Use Terminal to create a macOS 14 bootable installer
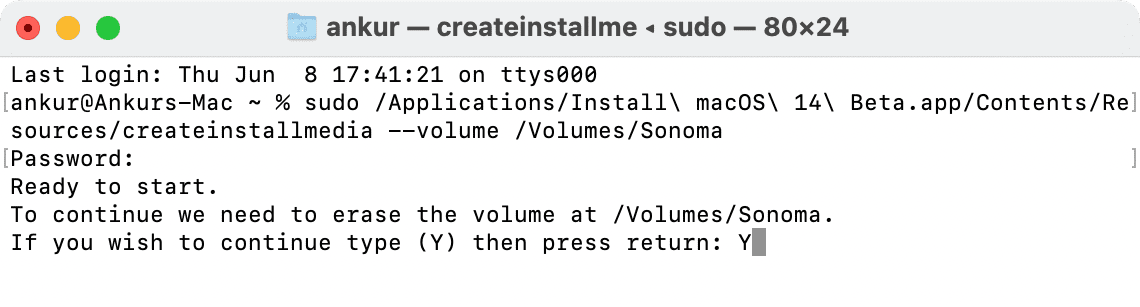
1) Open Terminal on your Mac.
2) Now, enter sudo /Applications/Install\ macOS\ 14\ Beta.app/Contents/Resources/createinstallmedia --volume /Volumes/Sonoma and hit the enter key.

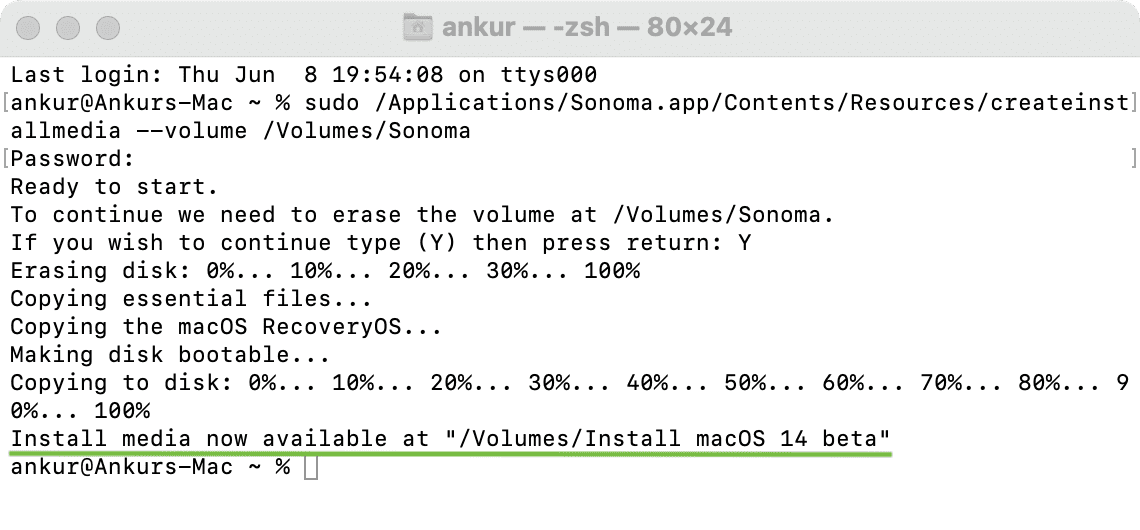
Note: If the process fails now or in later steps, consider going to the Applications folder in Finder and renaming the Install macOS 14 beta file to just Sonoma. Next, appropriately change the Terminal command to sudo /Applications/Sonoma.app/Contents/Resources/createinstallmedia --volume /Volumes/Sonoma and retry.
3) Enter your Mac’s password and hit the enter key. When you type the password in Terminal, it doesn’t show that you’re typing.

4) You will now see ‘To continue we need to erase the volume at…’ permission. Type Y in Terminal and hit the enter key again.
Click OK if you see a popup saying, “Terminal would like to access files on a removable volume.”

Note: If you see an “IA app name cookie write failed. The bless of the installer disk failed.” error in Terminal, go to System Settings > Privacy & Security > Full Disk Access and turn on the switch next to Terminal. After quitting and reopening Terminal, follow the above steps again.
5) All done! Now, Terminal will:
- Erase the disk
- Copy essential files
- Copy the macOS RecoveryOS
- Make disk bootable
- Copy essential files to disk
While it happens, try to keep your computer awake and refrain from doing intensive tasks. This will ensure Terminal can work without issues.
It will take a long time to finish. Remember not to unplug your thumb drive after 100% copying is done. Rather, eject it safely only after you see the “Install media now available at…” line in Terminal.
How to use macOS Sonoma bootable installer
Before you begin:
- You should know whether your Mac has Apple silicon (M1, M2, etc.) or an Intel processor. After that, follow the appropriate steps below.
- Make sure your Mac supports macOS Sonoma.
- While installing macOS from a USB drive, the huge macOS file isn’t downloaded from the internet. But still, your Mac must be connected to the internet to get firmware and other essential information.
- Open this iDB post on your phone or another computer and shut down your Mac where you want to install macOS Sonoma. Next, follow the steps below.
Apple silicon
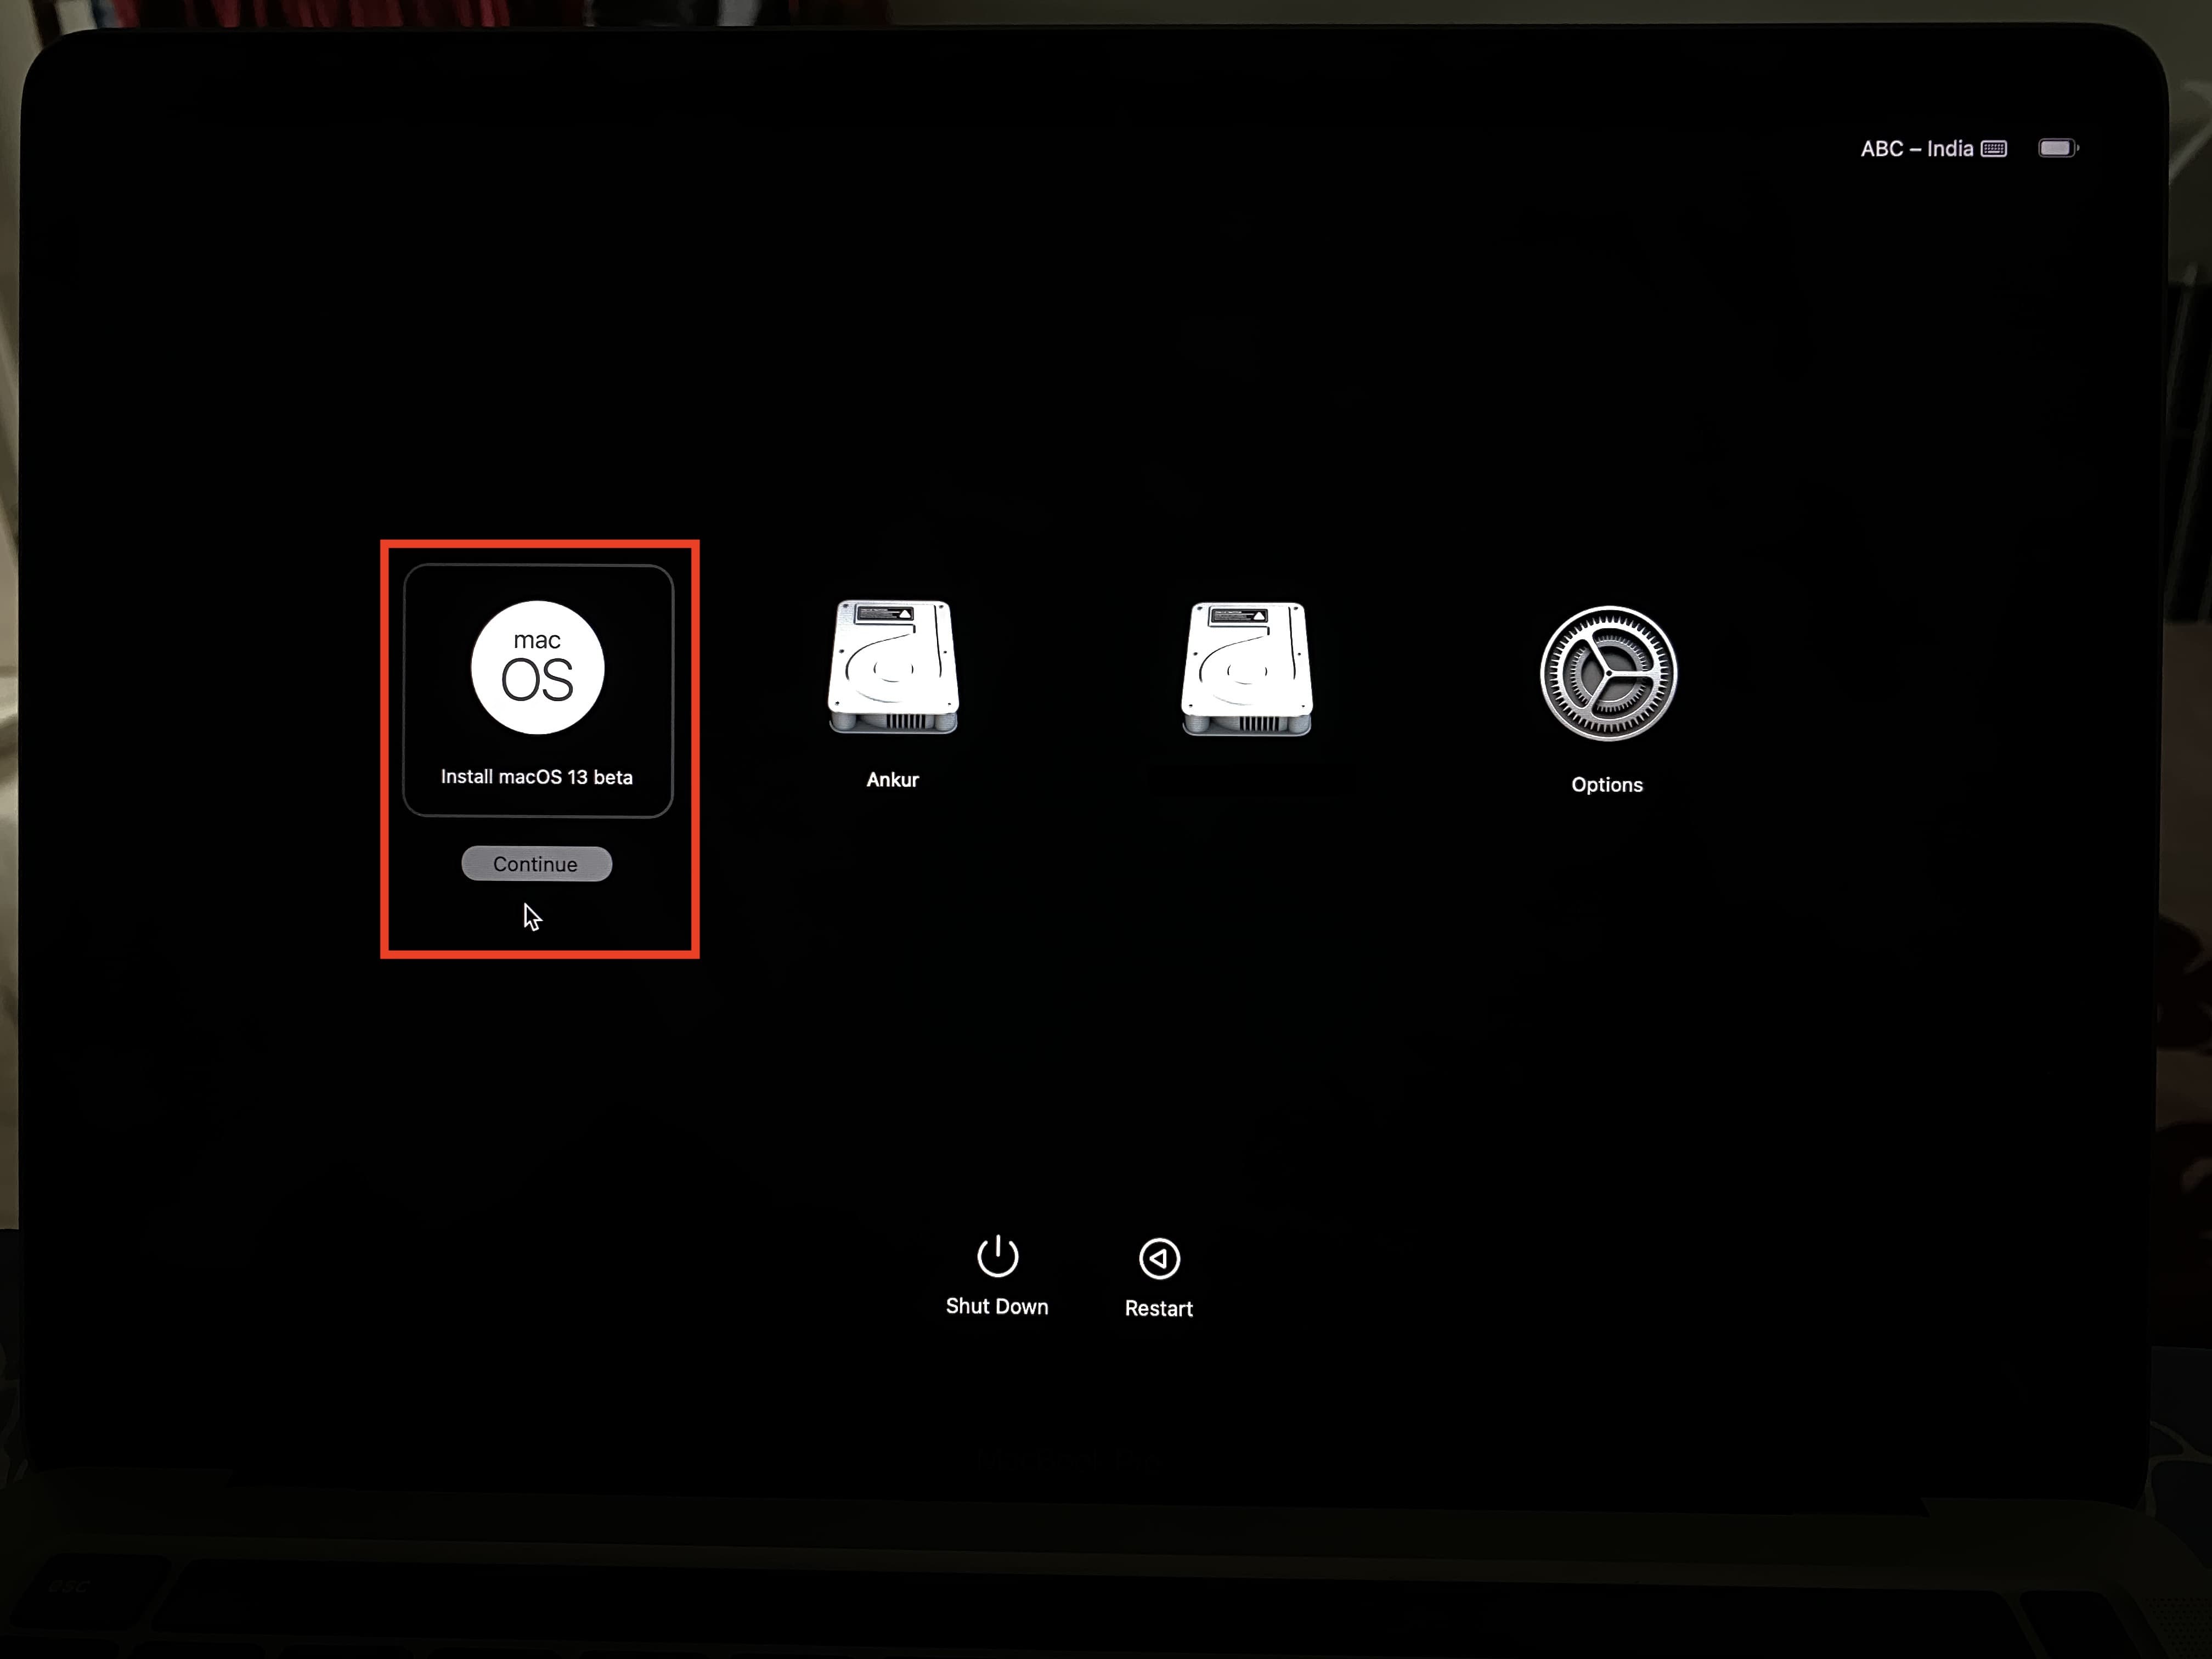
Here’s how to use a bootable macOS Sonoma Installer if your Mac has Apple silicon:
1) Plug in the bootable USB drive installer to your Mac.
2) Press the power button, and continue pressing it until you see Loading startup options on the screen.
3) You will now see the available bootable volumes. Select the drive with the bootable installer and click Continue. Follow the instructions in the macOS installer window to install macOS Sonoma on your Mac.
Intel processor
Here’s how to use a bootable macOS Sonoma Installer if your Mac has an Intel processor:
1) Plug in the bootable USB drive installer to your Mac.
2) Turn on your Mac and immediately press and hold the Option key. Stop pressing the Option key when you see the black screen with your Mac’s available bootable volumes.
3) Select the bootable installer drive and press the return key or click the up arrow.
4) After choosing the language, select Install macOS from the Utilities window and click Continue. Now, follow along with the onscreen instructions.
This is how you can create and use the macOS Sonoma USB installer to get the exciting new macOS 14 on your Mac.