Jailbreaking can be both a fun pastime and a way of making your iPhones and iPads capable of functionality that Apple doesn’t empower them with out of the box. Unfortunately, not all jailbreak tweaks work as expected, and in some cases, buggy or poorly coded tweaks may render your device temporarily unusable.
But fear not, as you probably won’t need to restore your device and lose your jailbreak data. The checkra1n jailbreak tool incorporates a Safe Mode mechanism that can be used to boot your jailbroken iPhone or iPad into a no-substrate-like mode in which jailbreak tweaks don’t load. You will, however, be able to launch Cydia and uninstall the offending tweak(s). We’ll show you how to do that in this tutorial.
What you need to know
This Safe Mode method only works if you’ve previously jailbroken your device with checkra1n. If you’re using the unc0ver jailbreak, then you should follow the steps of our unc0ver-based Safe Mode tutorial instead.
Furthermore, this method will only work on handsets that the checkra1n jailbreak is compatible with. In this case, that’s any device with an A7-A11 chip inside, or handsets as old as the iPhone 5s and as new as the iPhone X running at least iOS 12.3. Unfortunately, this guide will not work for you if you’re using an iPhone XS or newer due to device compatibility.
Lastly, the checkra1n jailbreak is currently only available for macOS and Linux. If you only have a Windows PC, then you may need to dual-boot Linux or borrow a friend’s Mac until further notice.
If you meet all these criteria, then you can move on with the guide below.
Booting into Safe Mode with checkra1n
If you’re having trouble operating your jailbroken device or launching Cydia to uninstall a faulty jailbreak tweak, then you can follow these steps to enter Safe Mode with checkra1n and uninstall that tweak:
1) Force-restart your jailbroken iPhone or iPad if necessary.
2) Plug your handset into your computer with an MFI-certified USB-A to Lightning cable (avoid USB-C to Lightning cables as these seem to interfere with entering DFU mode).
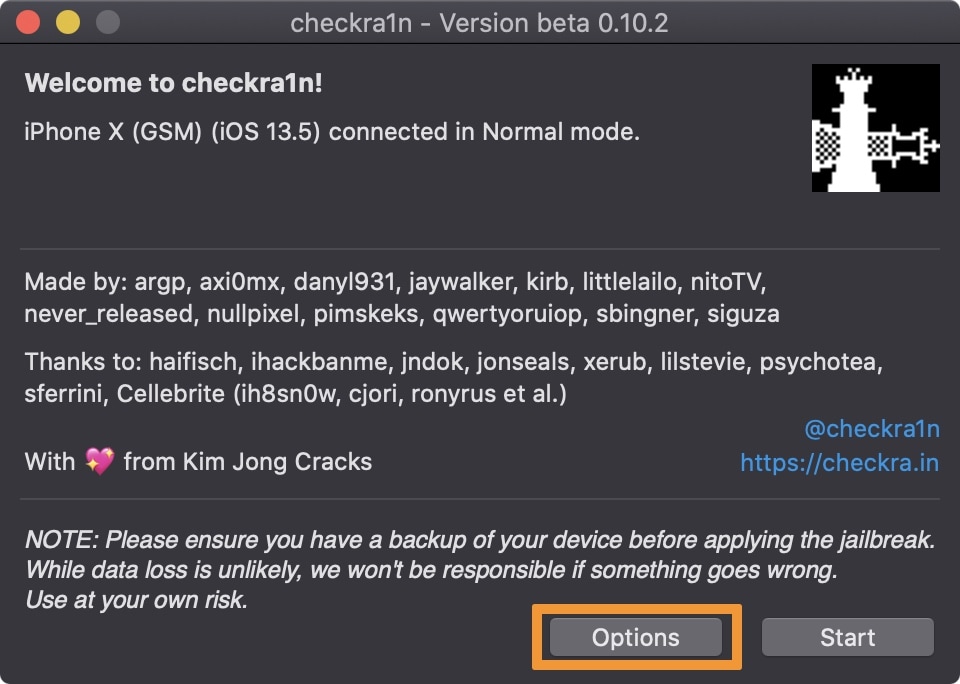
3) Launch the checkra1n application on your computer.
4) Click on the Options button at the bottom-right:
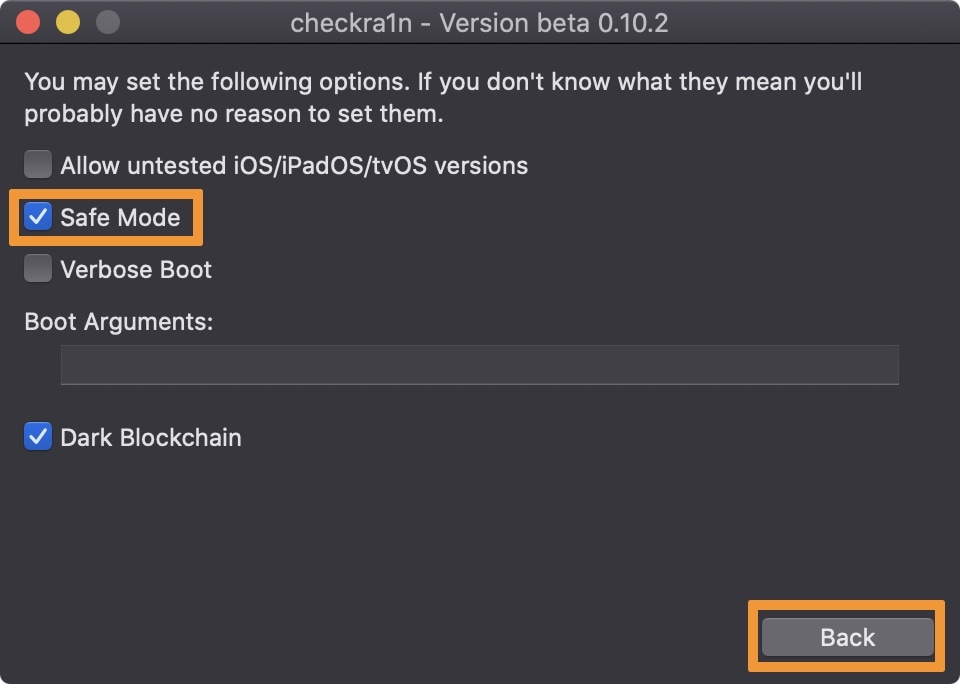
5) Put a check mark in the Safe Mode box in the next interface, then click on the Back button:
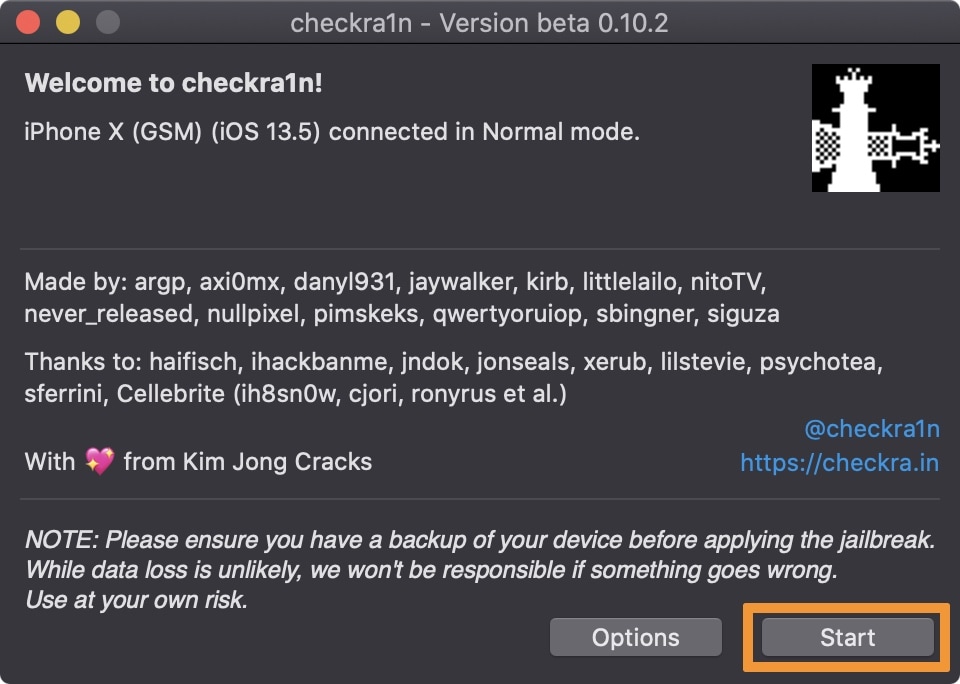
6) Now you’ll click on the Start button at the bottom-right of the application:
7) Click on the Next button to confirm:
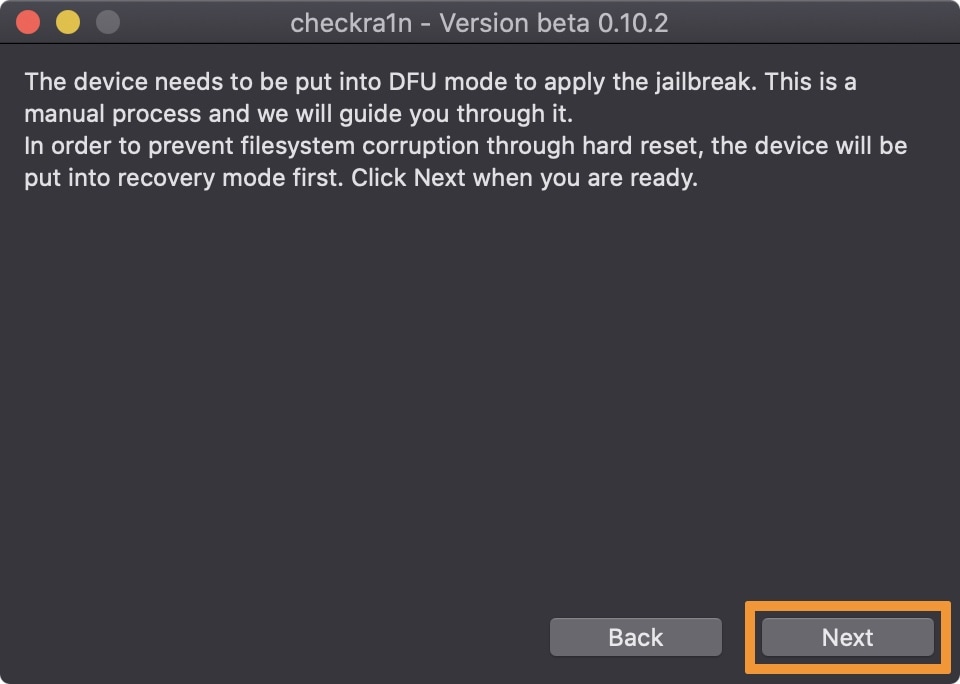
Your device will now be kicked into recovery mode. Prepare to enter DFU mode in the following steps to perform the jailbreak.
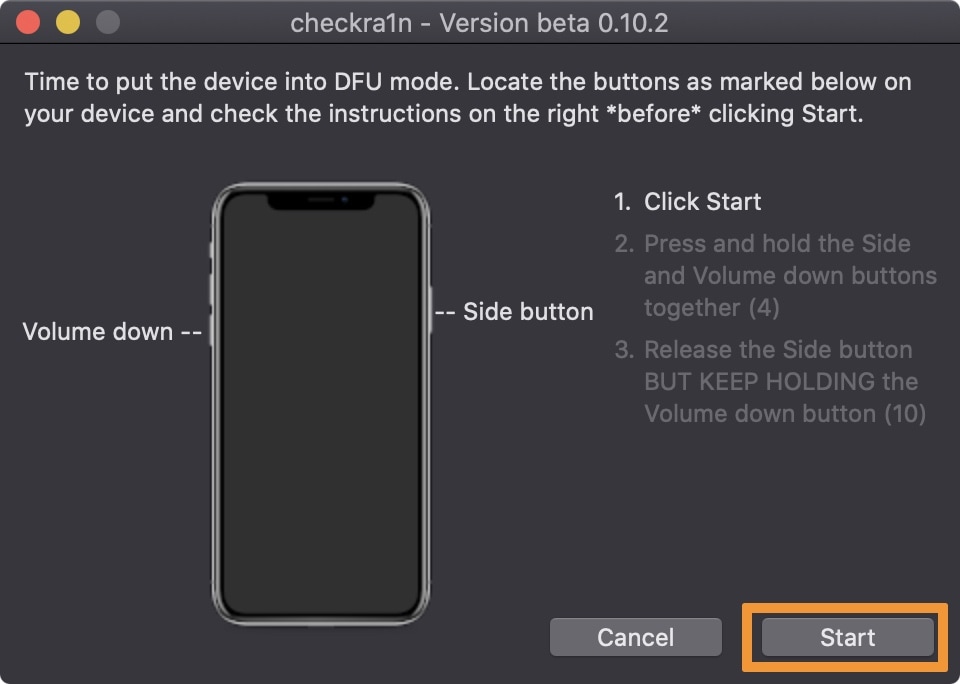
8) Read the instructions about entering DFU mode carefully. When ready, click on the Start button and follow the on-screen instructions:
If successful, checkra1n will begin exploiting your device with the checkm8 exploit and prepare it for boot-up:
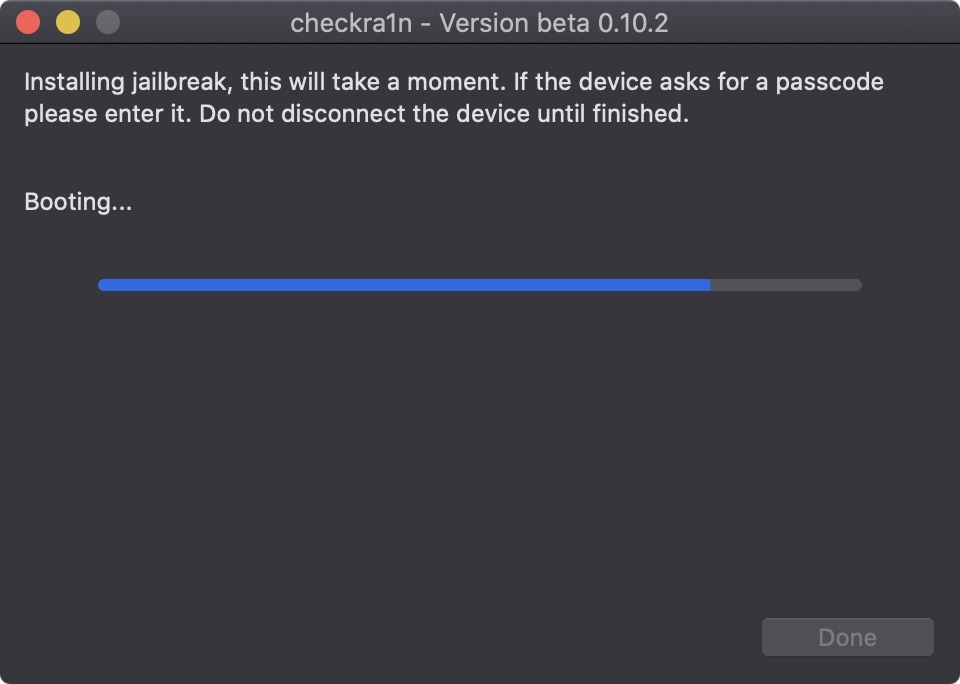
If you messed up, simply follow the steps above over again.
9) After your device reboots, click on the Done button in the checkra1n app:

Now that you’re in Safe Mode, you should be able to launch Cydia and safely uninstall the offending jailbreak tweak. Once you do, you can reboot your device and re-jailbreak normally with checkra1n by un-checking the Safe Mode option that you enabled earlier.
Conclusion
While Substrate Safe Mode works wonders to protect you against faulty jailbreak tweaks most of the time, there may still be instances in which a certain jailbreak tweak blocks you from unlocking your handset, prevents you from opening Cydia, or otherwise makes operating your pwned handset unbearable.
Under any of the aforementioned circumstances, checkra1n’s Safe Mode is as a wonderful way to evade restoring your device and losing your precious jailbreak data, and best of all, it hardly takes much more than a few minutes of your time.
Did entering Safe Mode allow you to uninstall a faulty jailbreak tweak from your pwned handset? Discuss in the comments section below.