Learn how to switch between available iPhone video resolution modes and frame rates directly in the Camera interface or from the Settings app.
With the Camera method, you can quickly pick the resolution and frame rate on a per-case basis, while the Settings app allows you to set a default resolution and frame rate.
Change video resolution and frame rate in iPhone Camera
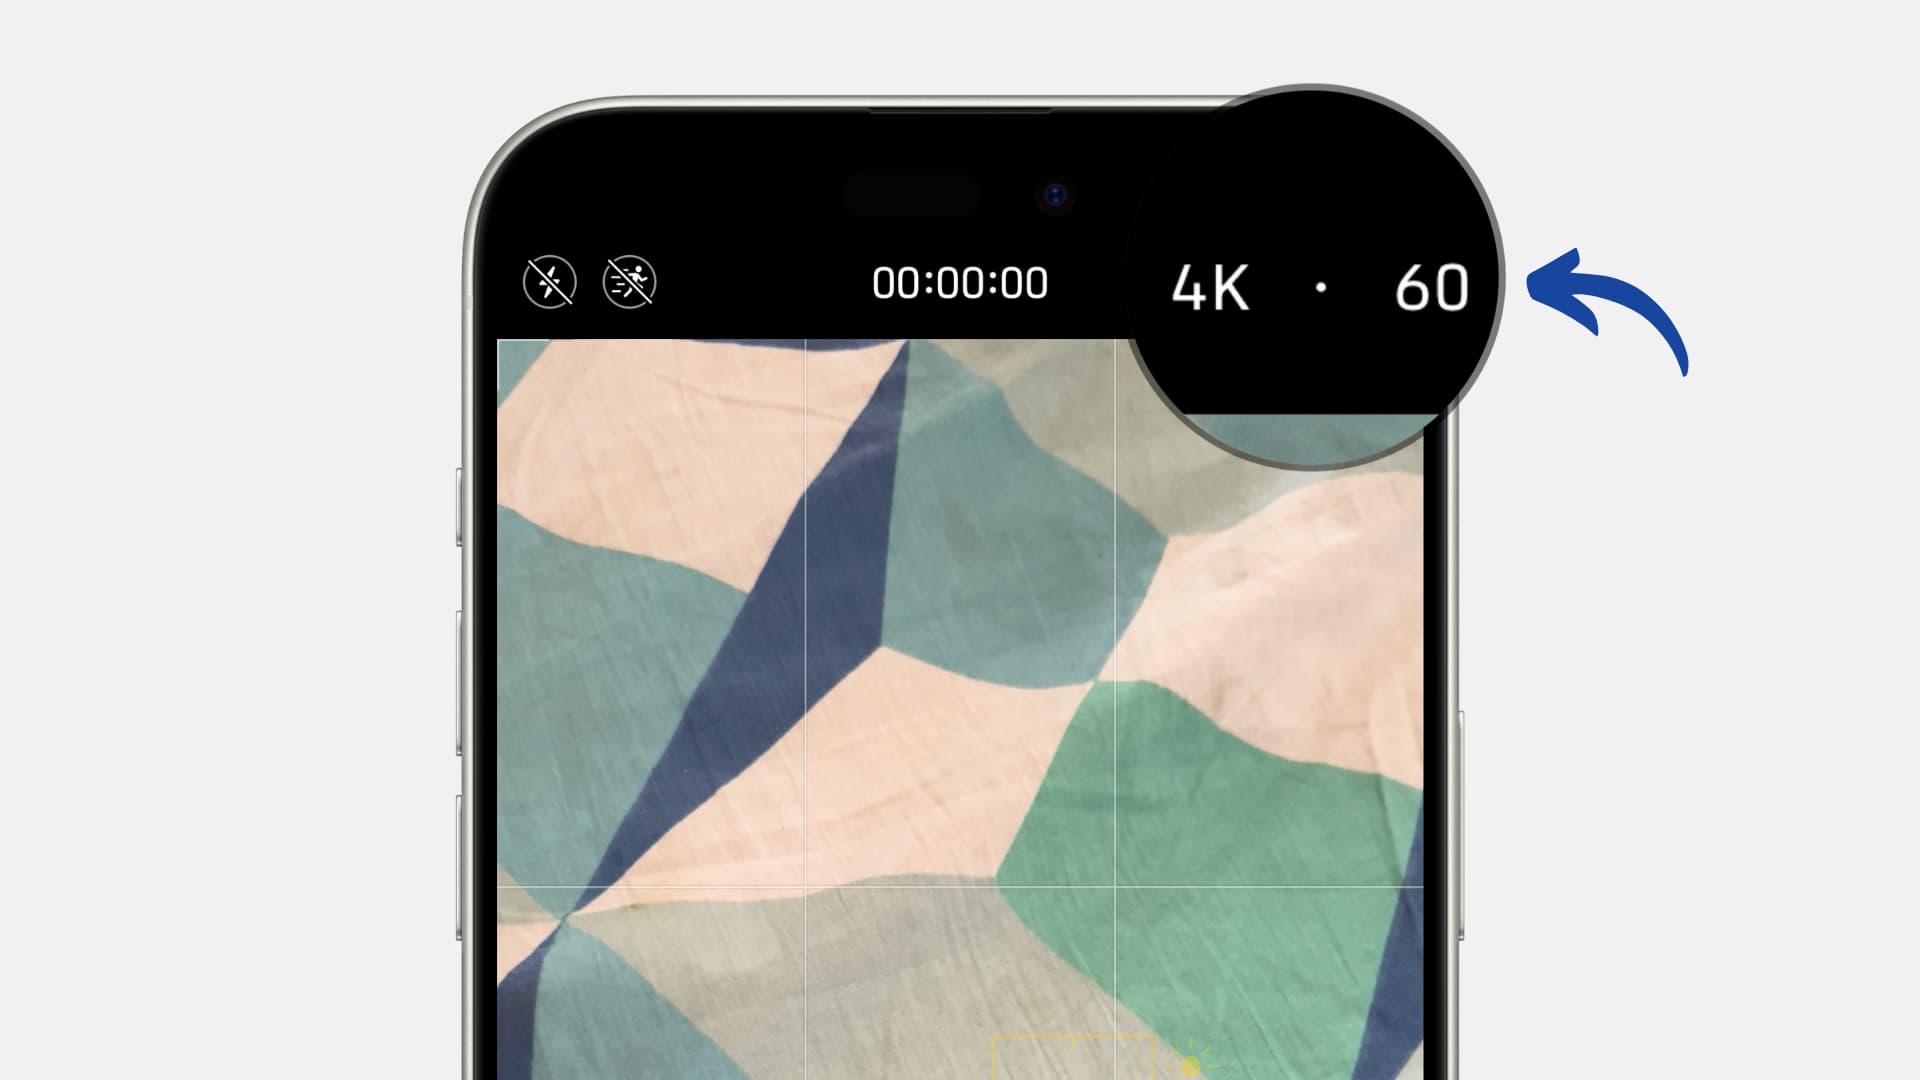
- Open the Camera app.
- Switch to VIDEO, CINEMATIC, or SLO-MO modes.
- You’ll notice the video resolution (720P, HD, 4K) and frame rate (24, 30, 60, 120, 240) labels appear at the top. Tap it and then select another video resolution and frame rate. You can also choose to capture PRORES videos.

The feature works with both front and rear cameras on iPhone 11 or newer models.
The resolution and frame rate combination you can select depends on what the iPhone supports. Furthermore, it goes without saying that you can’t change the resolution and frame rate once the recording has started.
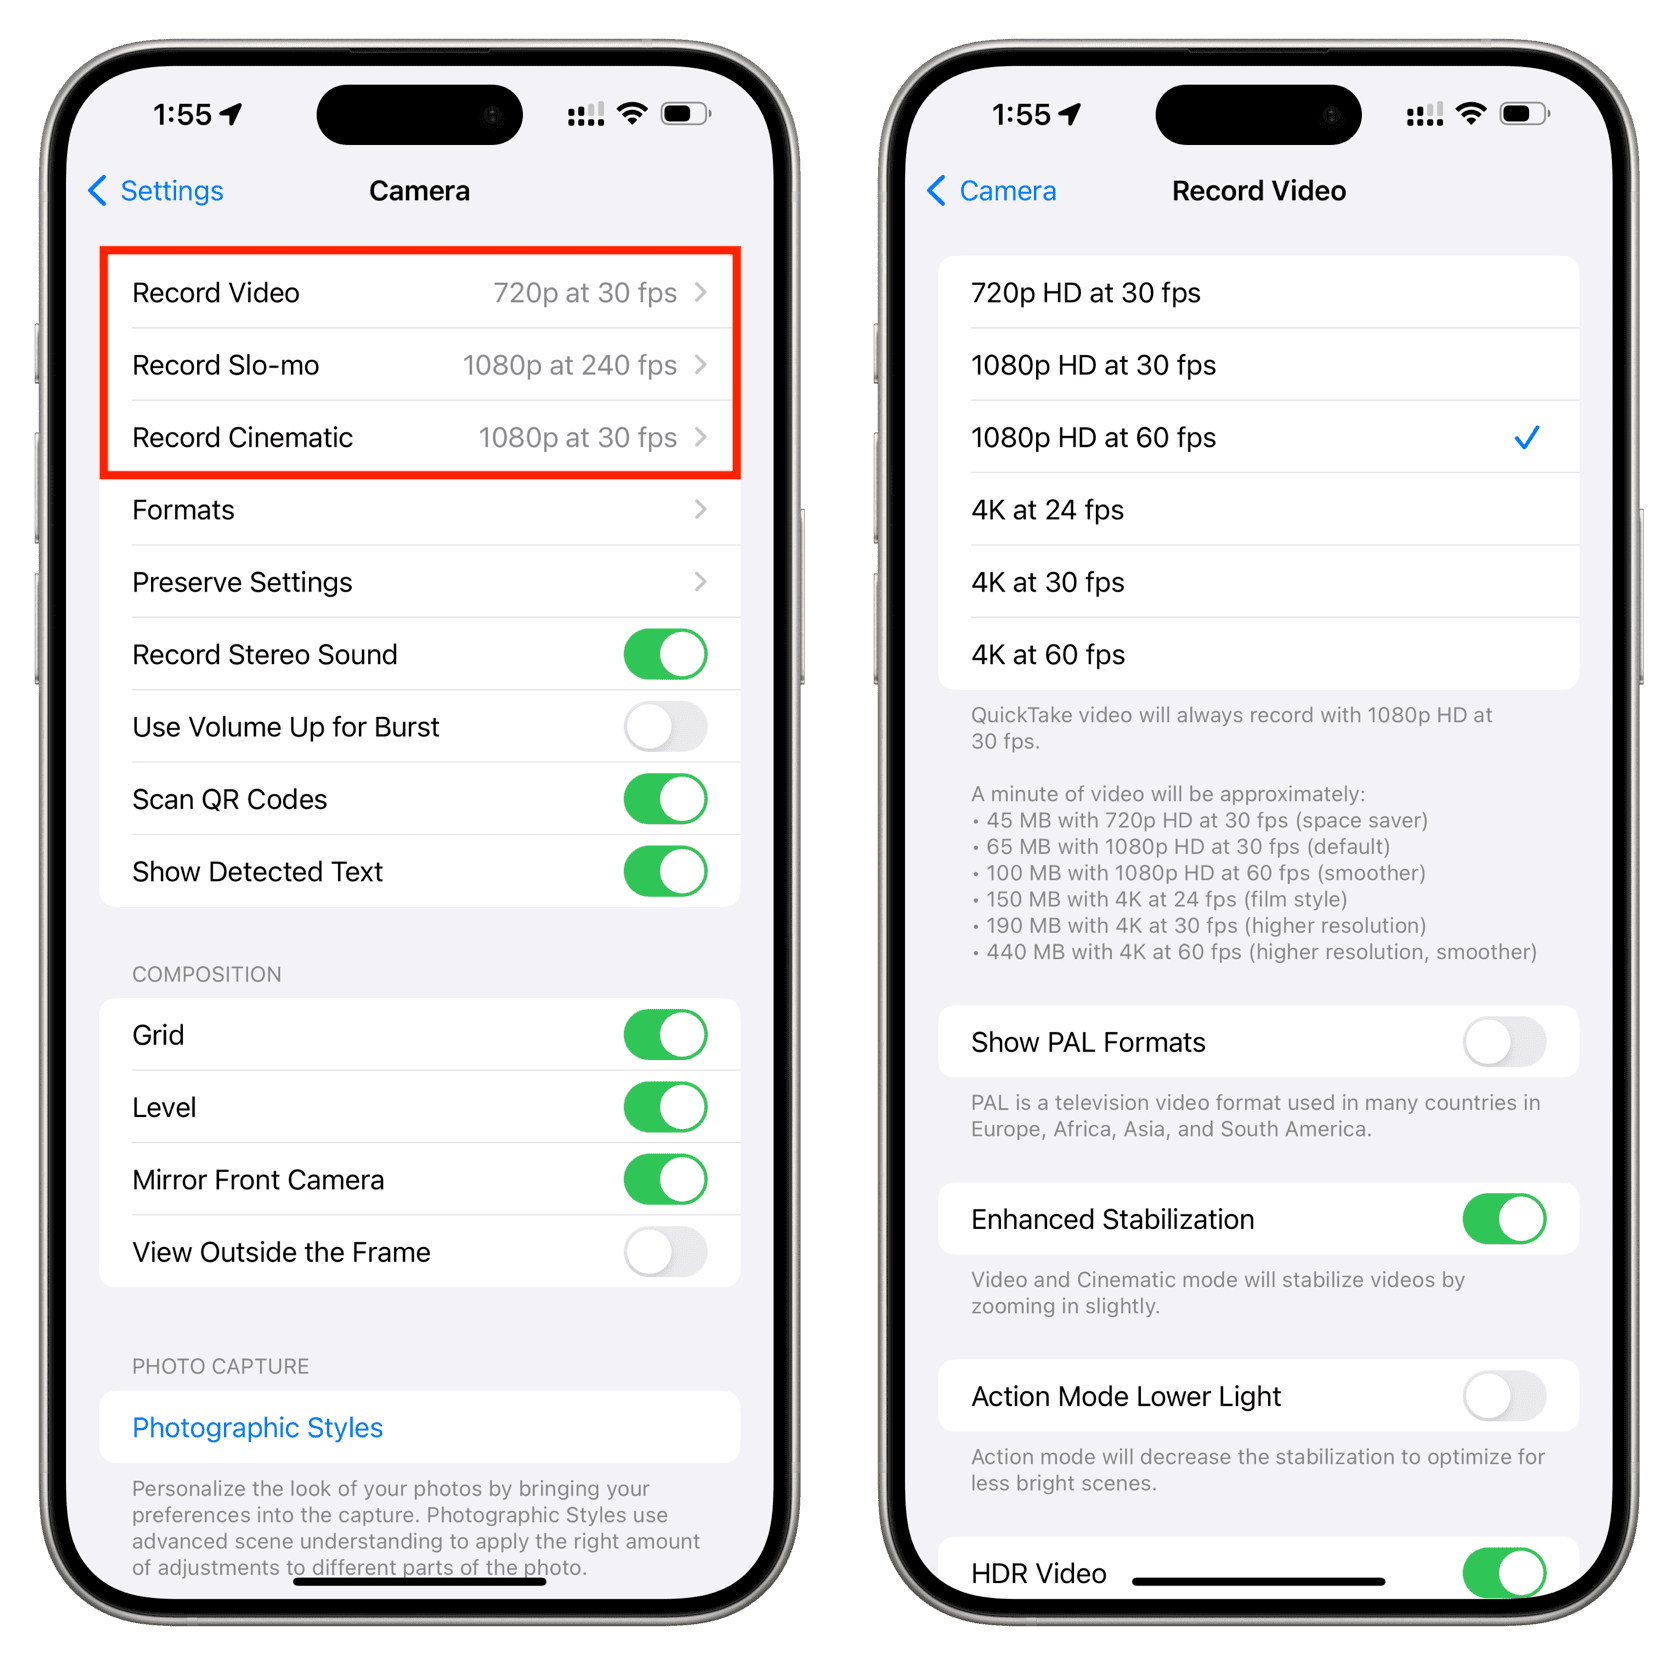
Set the default video resolution for the iPhone Camera
In addition to changing the video resolution and frame rate in the Camera app, you can also set a default. This will ensure that when you open the Camera app for video recording, it is ready to shoot at your chosen resolution and frame rate. You won’t have to change it manually unless you want to.
- Open the Settings app on your iPhone or iPad.
- Scroll down and tap Camera.
- Tap Record Video, Record Slo-mo, or Record Cinematic.
- Now, select a video resolution and frame rate.
On a related note: