There is a ton of VNC software options out there, but Screens by Edovia has by far been my favorite for a number of years because it looks and feels like software Apple could have created themselves.
In this tutorial, I’ll show you how you can use the Screens app from your iPhone, iPod touch, or iPad, in combination with Edovia’s free Screens Connect software for Mac, to access your Mac remotely.
Why Screens VNC?
Screens VNC for iOS is on the pricier side of things, at $19.99 from the App Store, so lots of people are going to be skeptical at its worthiness and compare it to free software like TeamViewer and other less-expensive VNC apps.
My opinion on many of those alternatives is that they may work alright, but… meh. The interfaces don’t really spark my interest, or the features aren’t really as appealing.
I’ve tried lots of VNC software apps, and none have felt as native as Screens. It just seems to work well and it looks and feels like an app that was put together by people who understand the design and function of Apple’s iOS and OS X platforms very well.
Accessing your Mac remotely with Screens VNC
There are two things you have to do to make this work: 1) you need to set up your Mac, and 2) you need to set up your iOS device.
Setting up your Mac
Using Screens VNC is pretty easy; Edovia has pretty much streamlined the process by making everything cloud-based. You can make a free Screens Connect account and everything else becomes easy peasy. We’ll show you the steps to set up your VNC connection to your Mac with Screens below:
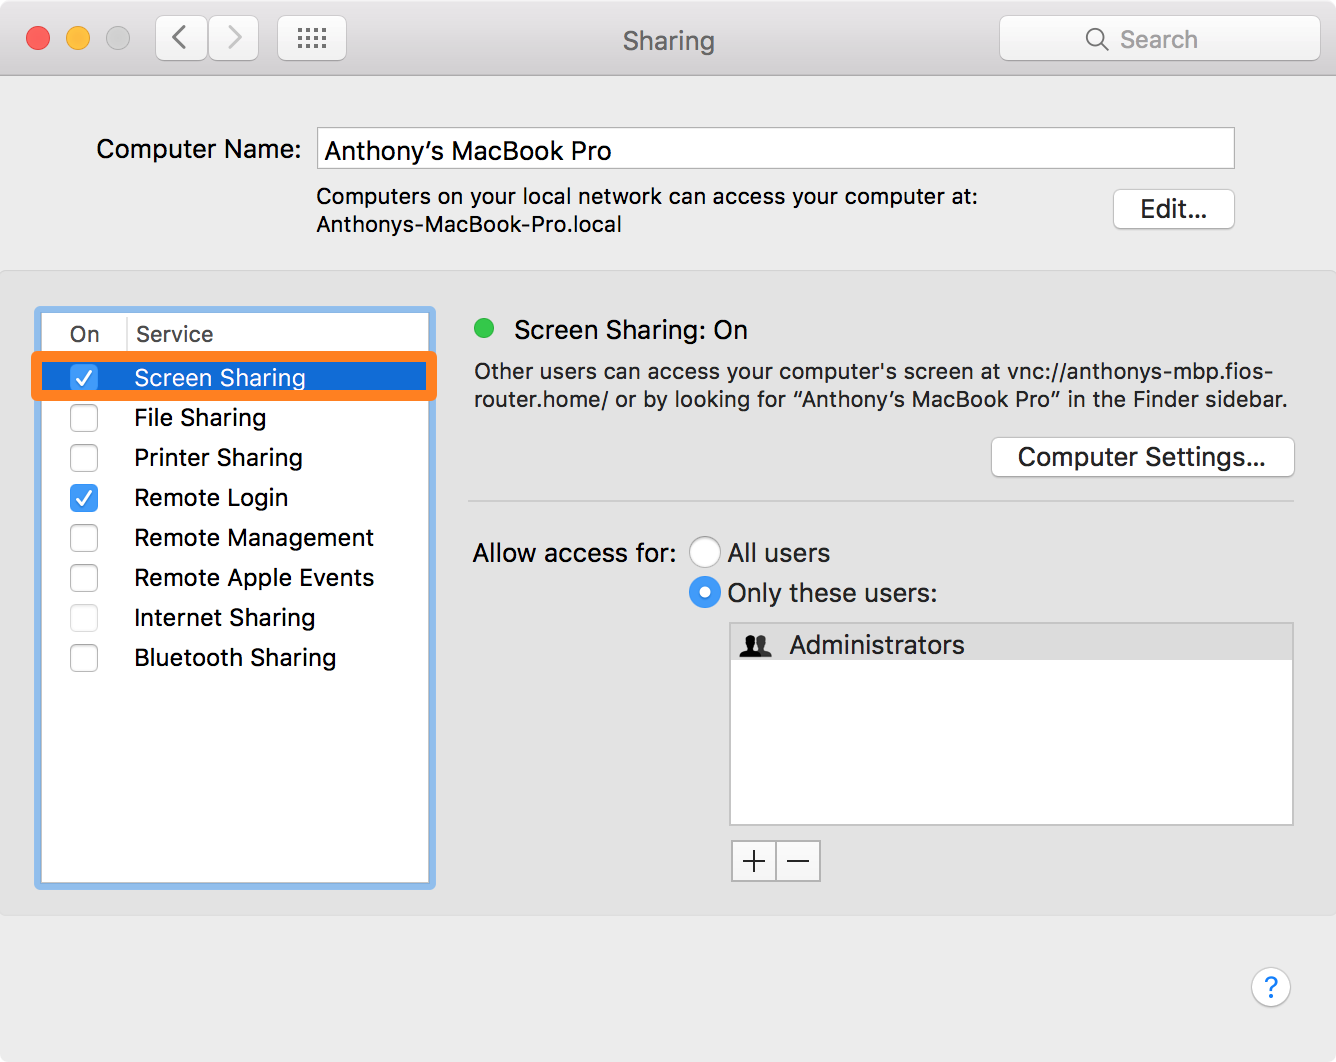
1) Enable Screen Sharing on your Mac from System Preferences > Sharing.
2) Next, download and install the free Screens Connect software from Edovia’s website on your Mac or PC after you’ve created your Screens Connect account.
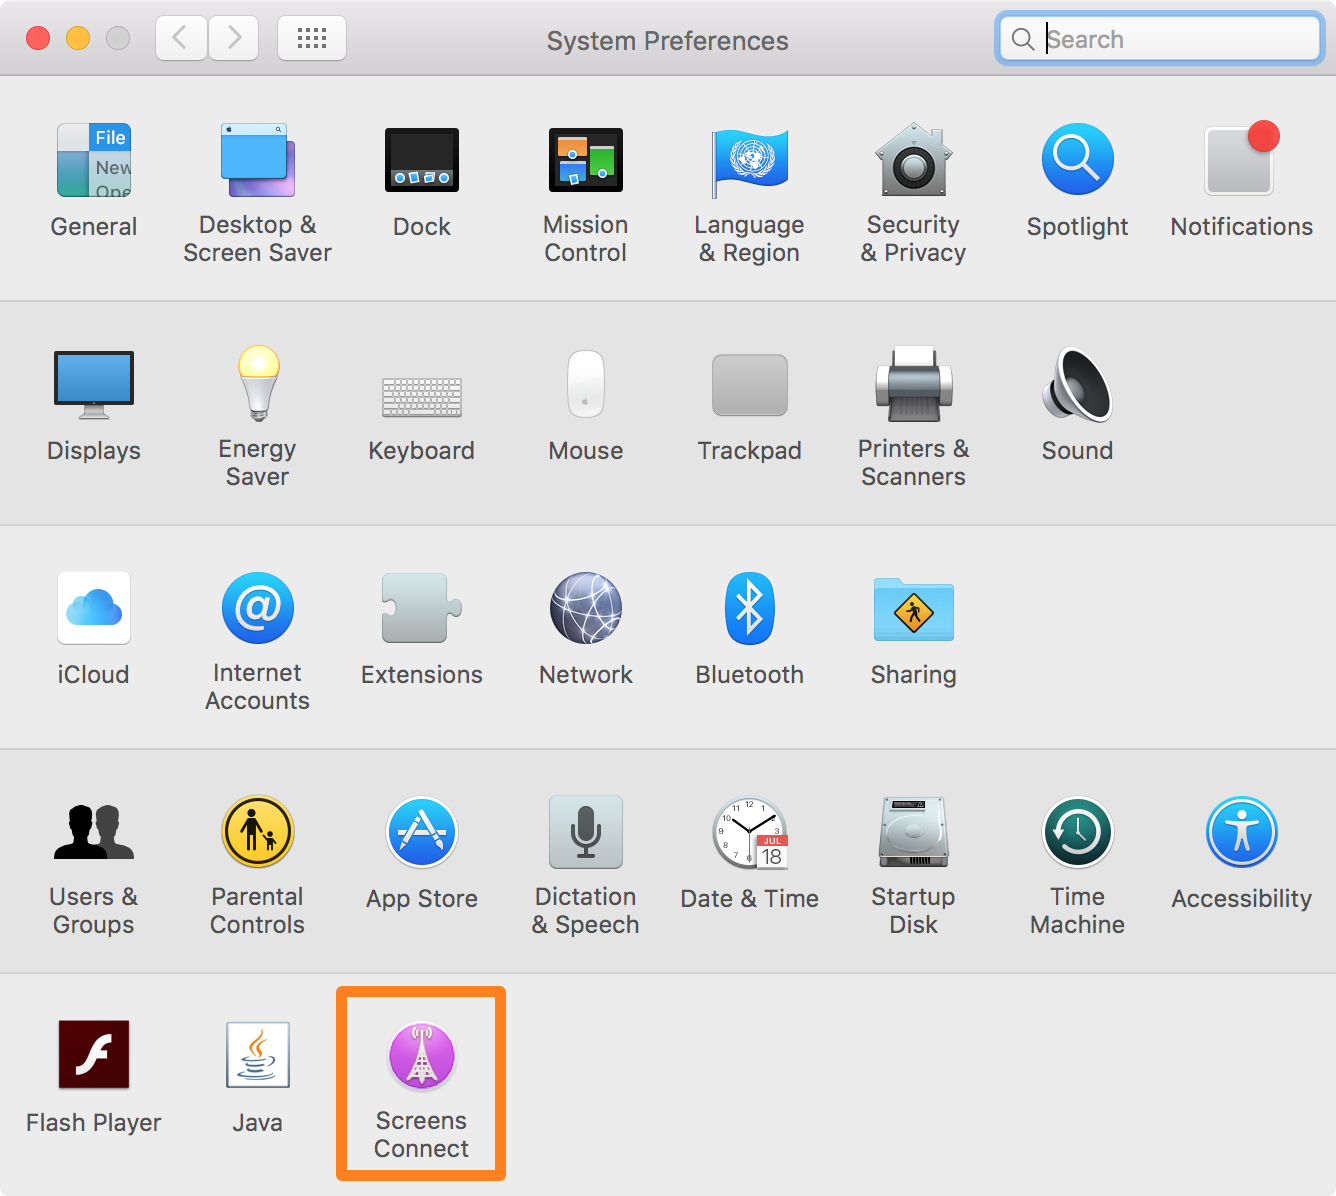
3) After you’ve installed the Screens Connect software, you can go to your System Preferences app on your Mac and you’ll find the Screens Connect preferences pane. Click on it:
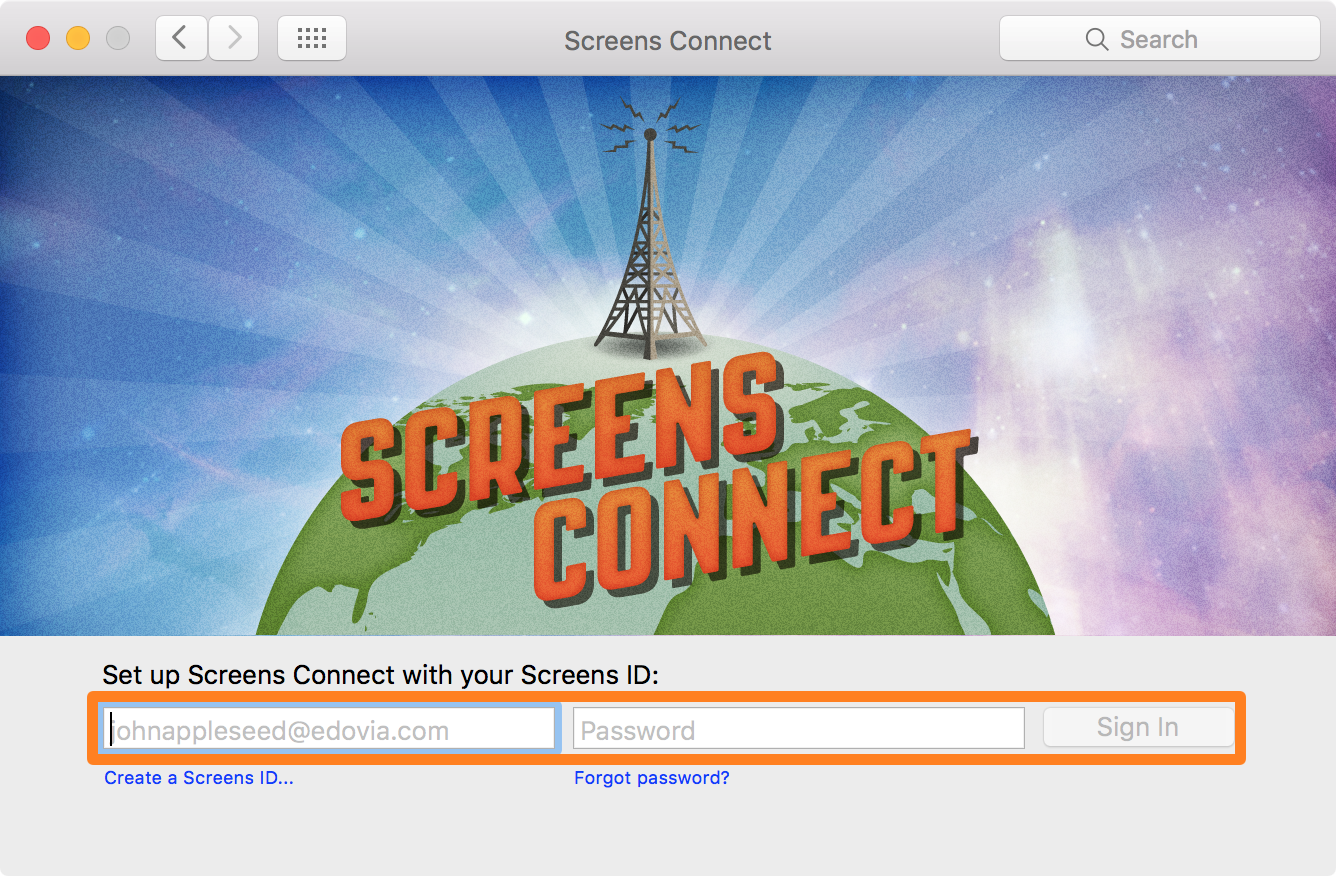
4) You’ll be prompted to sign in with your Screens Connect account. Type in your credentials, and then click on the Sign In button:
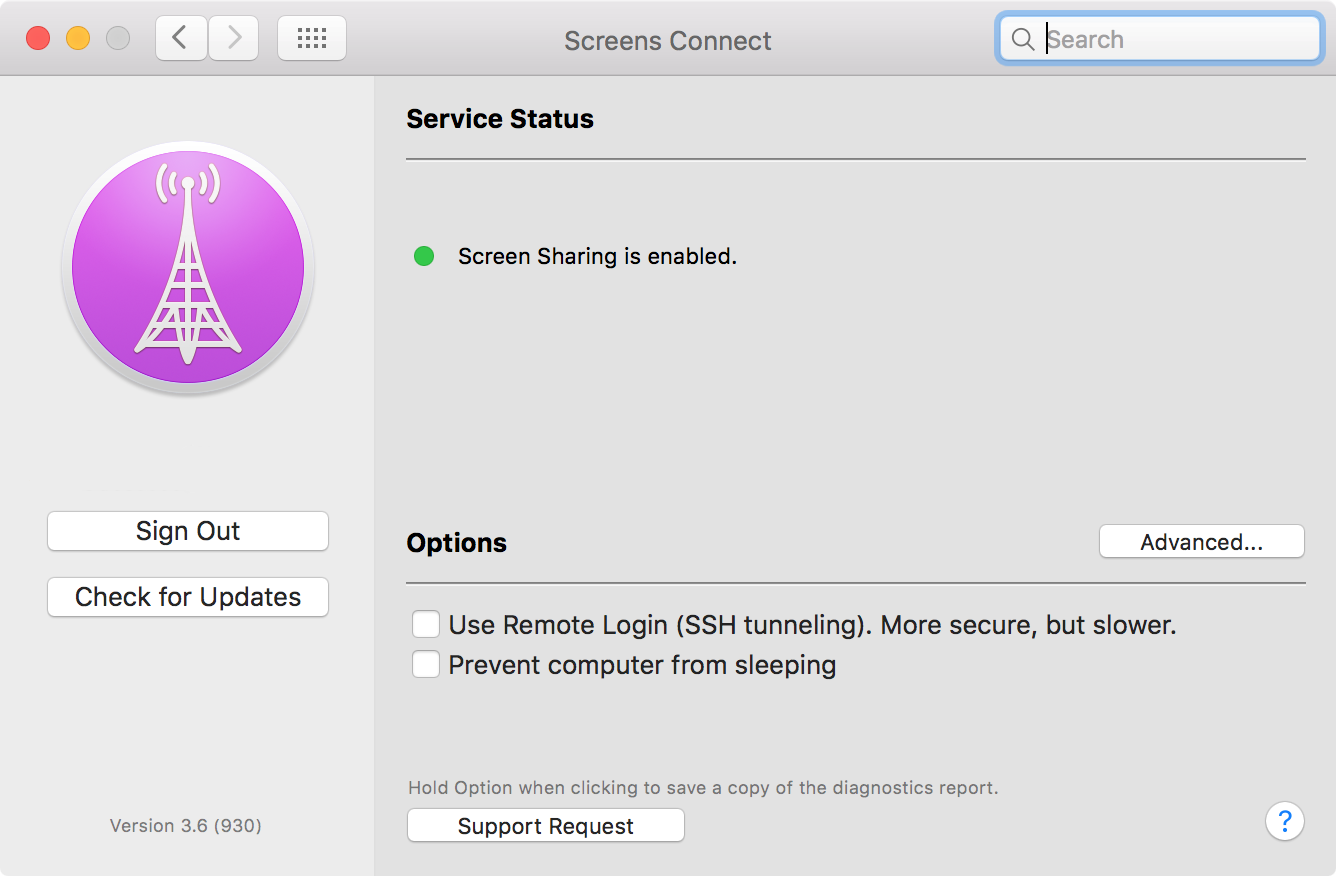
5) Once you’re in, you’re good to go. You should see green dots for everything because Screens Connect will configure itself automatically for the best performance on your network:
Setting up your iOS device
To prepare your iPhone, iPod touch, or iPad, you’ll follow these steps:
1) Download and install Screens VNC on your iOS device.
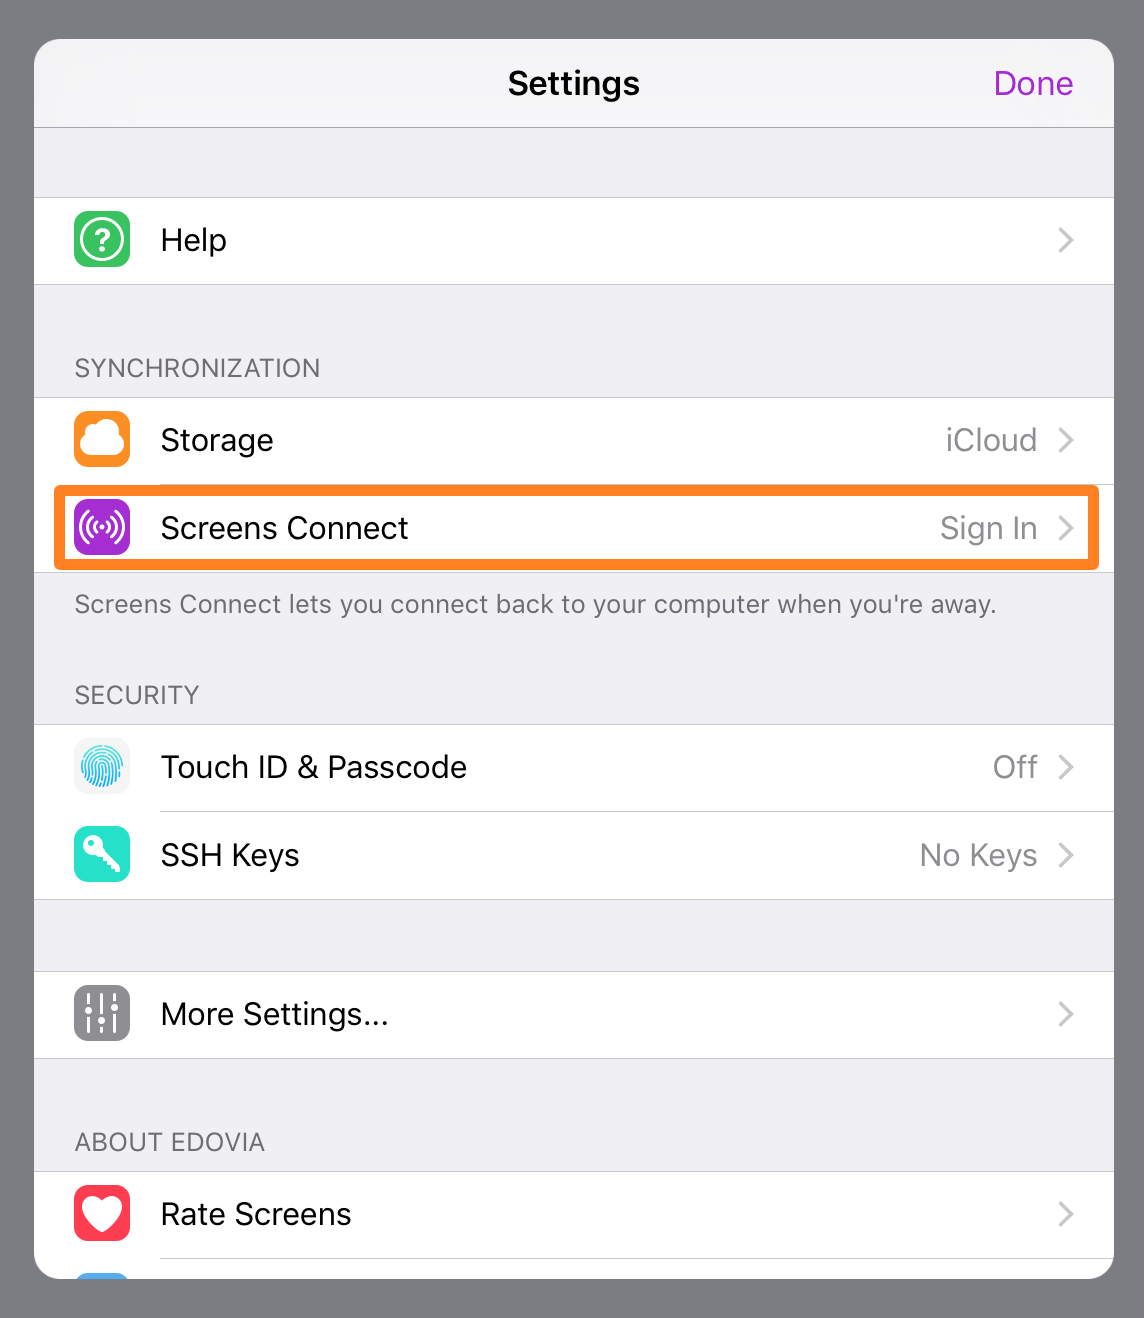
2) Launch the app and tap on the Settings button at the top left of the app’s interface:
 3) Next, tap on the Screens Connect Sign In cell.
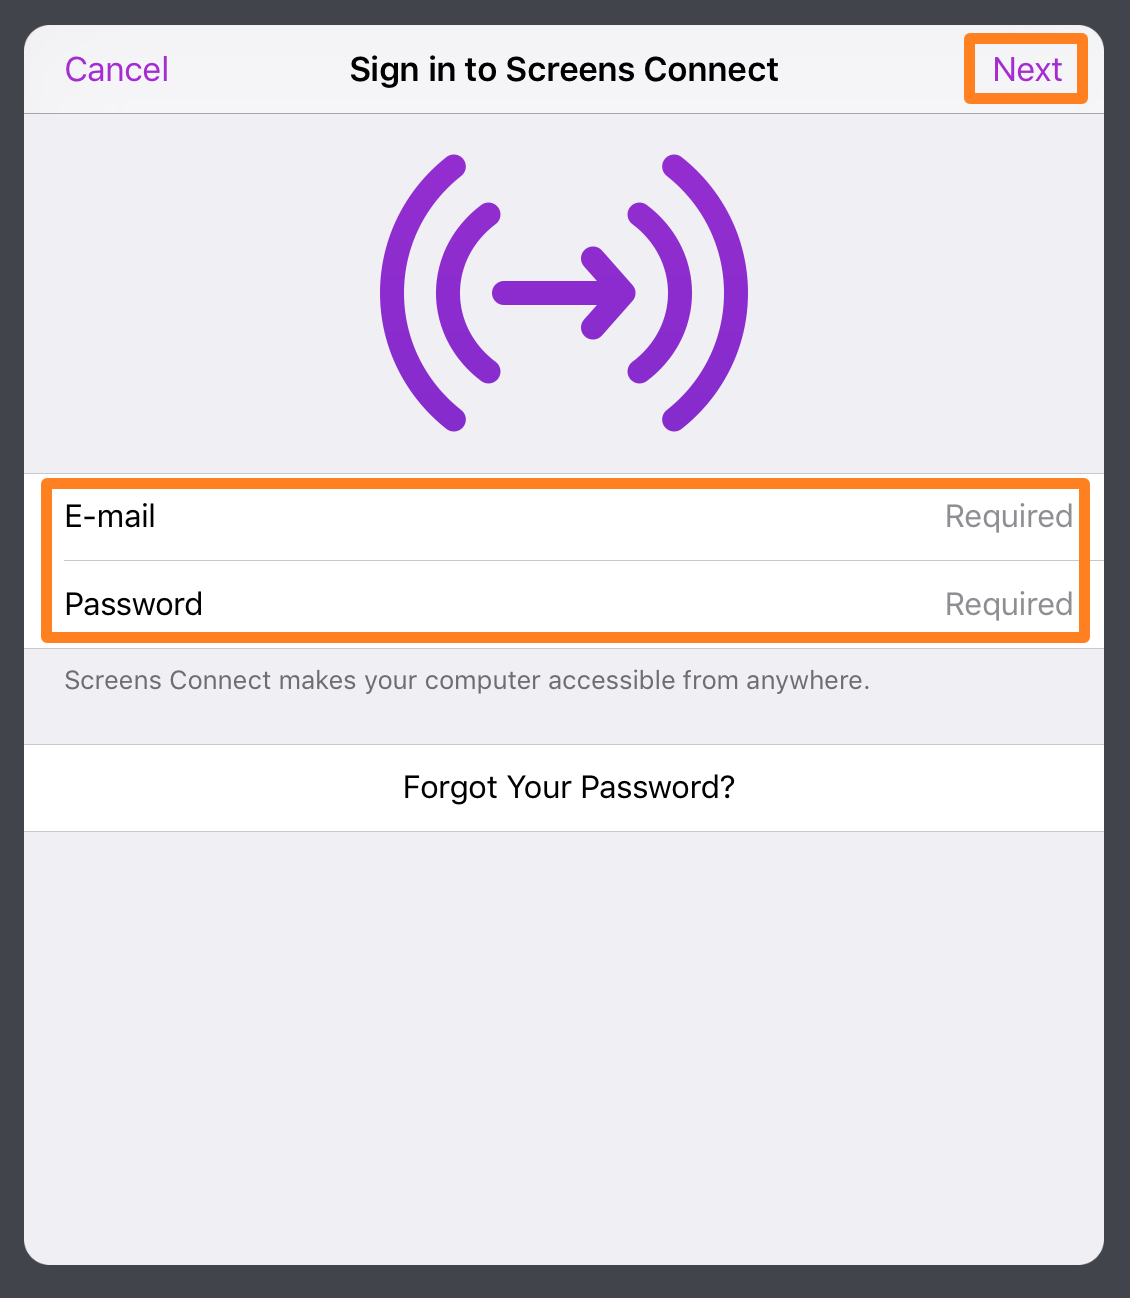
4) Enter your credentials for your Screens Connect account and tap Next.
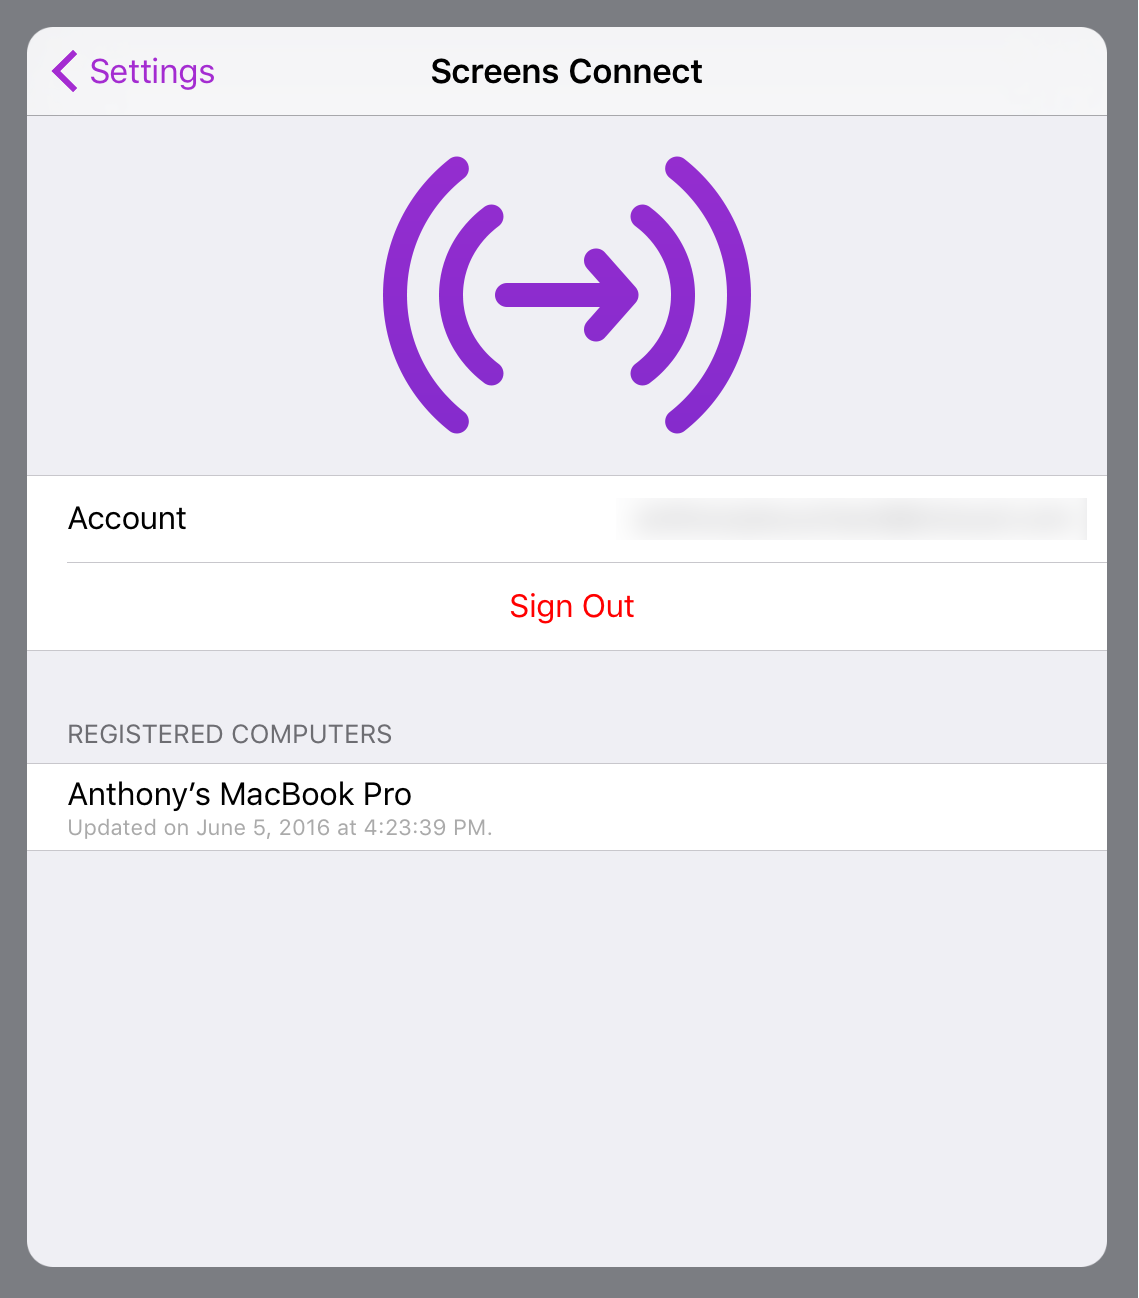
5) Once your sign in is complete, tap on the Settings button and then tap on the Done button.
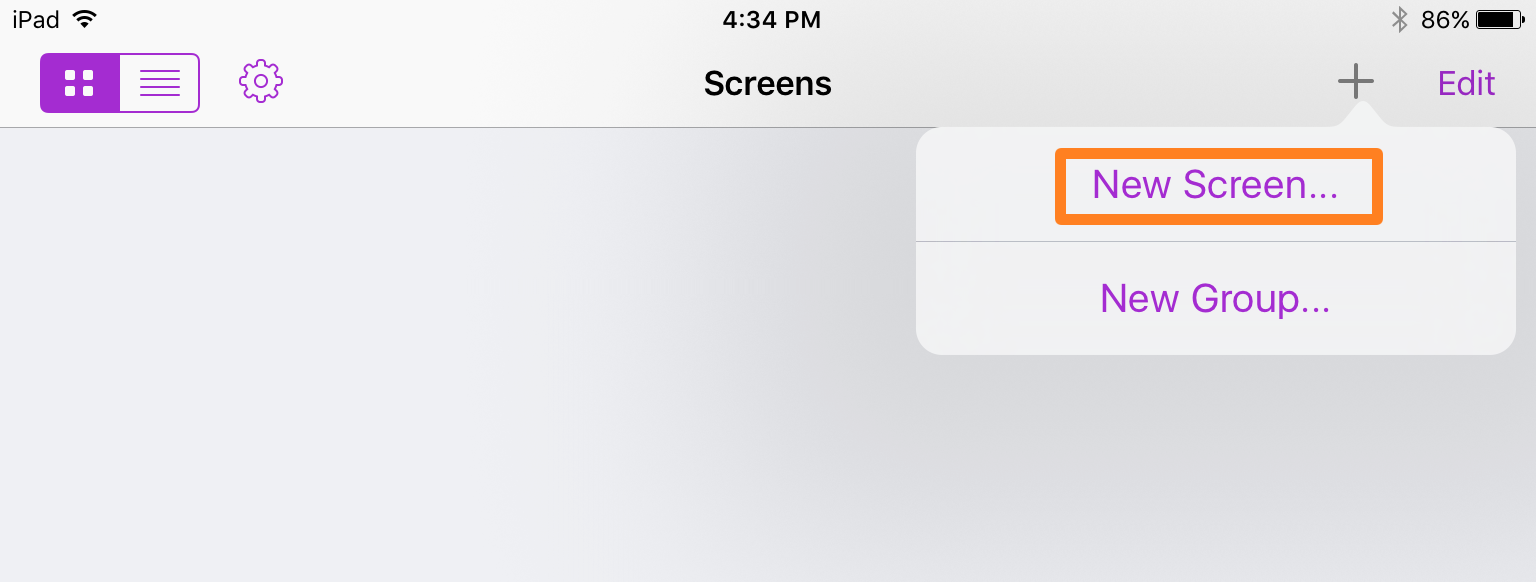
6) Now you’ll find yourself back in the Screens VNC app interface. If you’re on the same Wi-Fi network as your computer, you can tap on the + button to begin adding your computer.

7) In the next menu that appears, tap on the New Screen button.
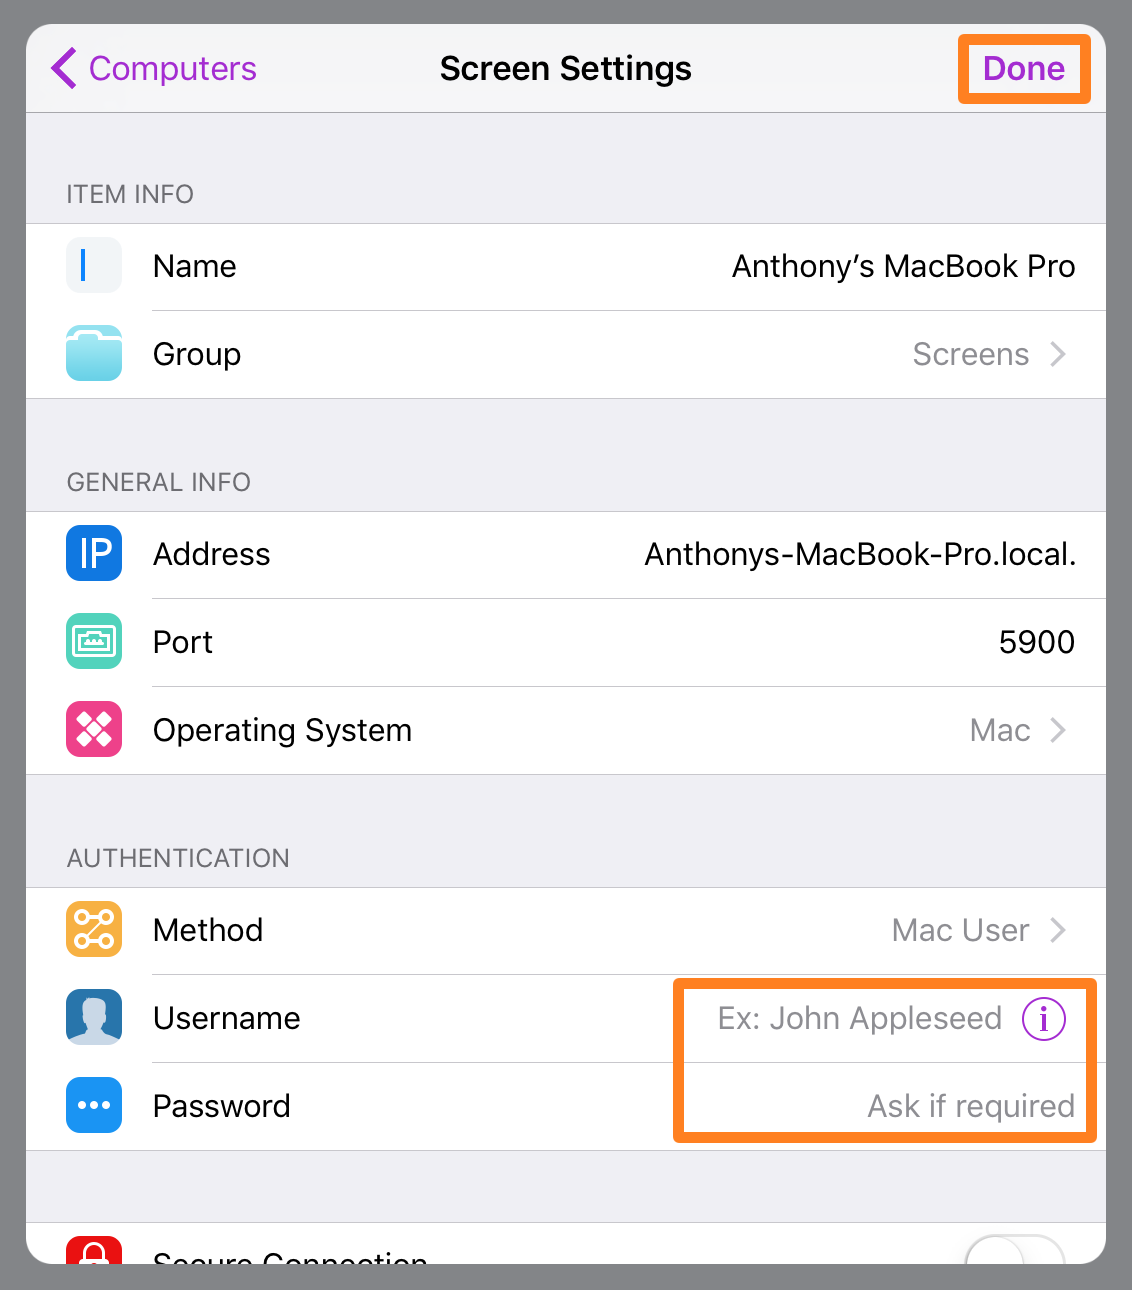
8) You should now be given a list of computers you can connect to. Your Mac or PC that you installed Screens Connect on should show up in this list if it’s on the same Wi-Fi network as your iOS device. Tap on it.

9) The next screen lets you configure your connection to your computer. You can leave almost everything how it is because Screens Connect set everything up for you already. Just enter your computer’s username and password so Screens VNC knows how to log into your computer, then tap Done.
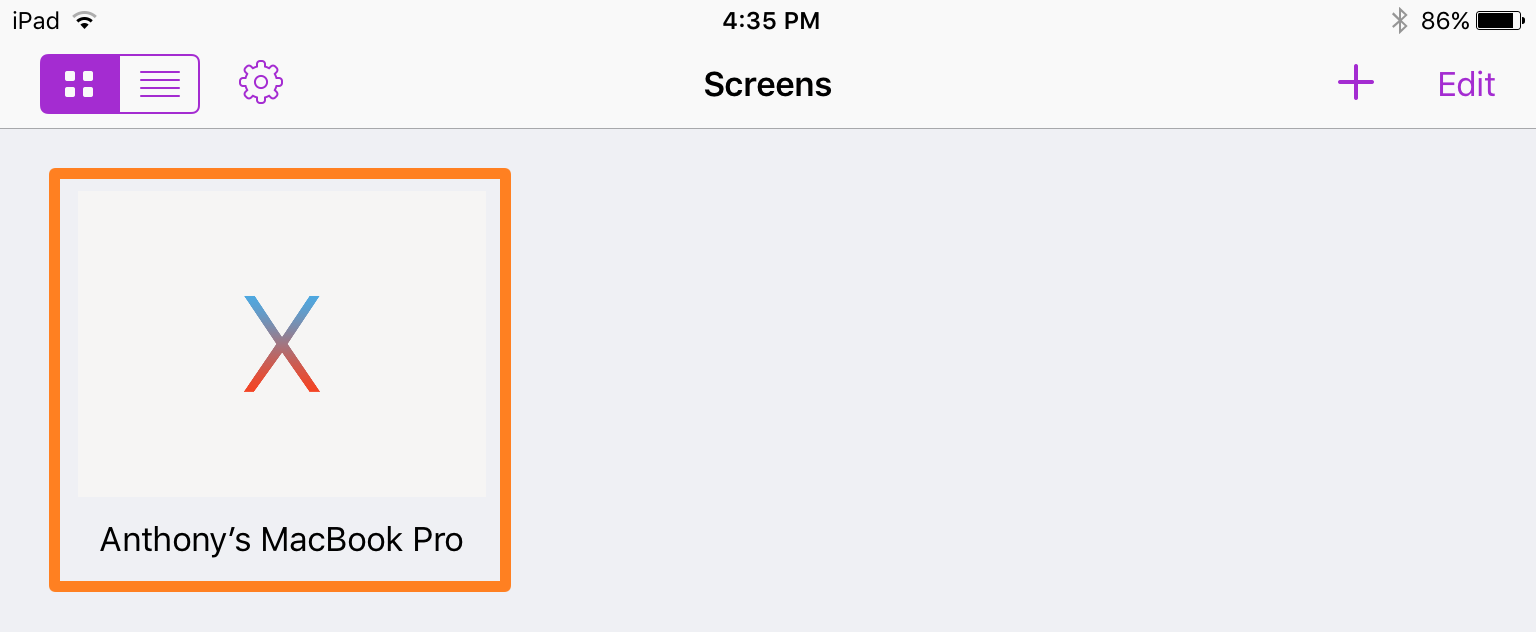
10) Your computer will now appear in your computer splash screen from the Screens VNC app interface. You can tap on it to begin connecting to it.
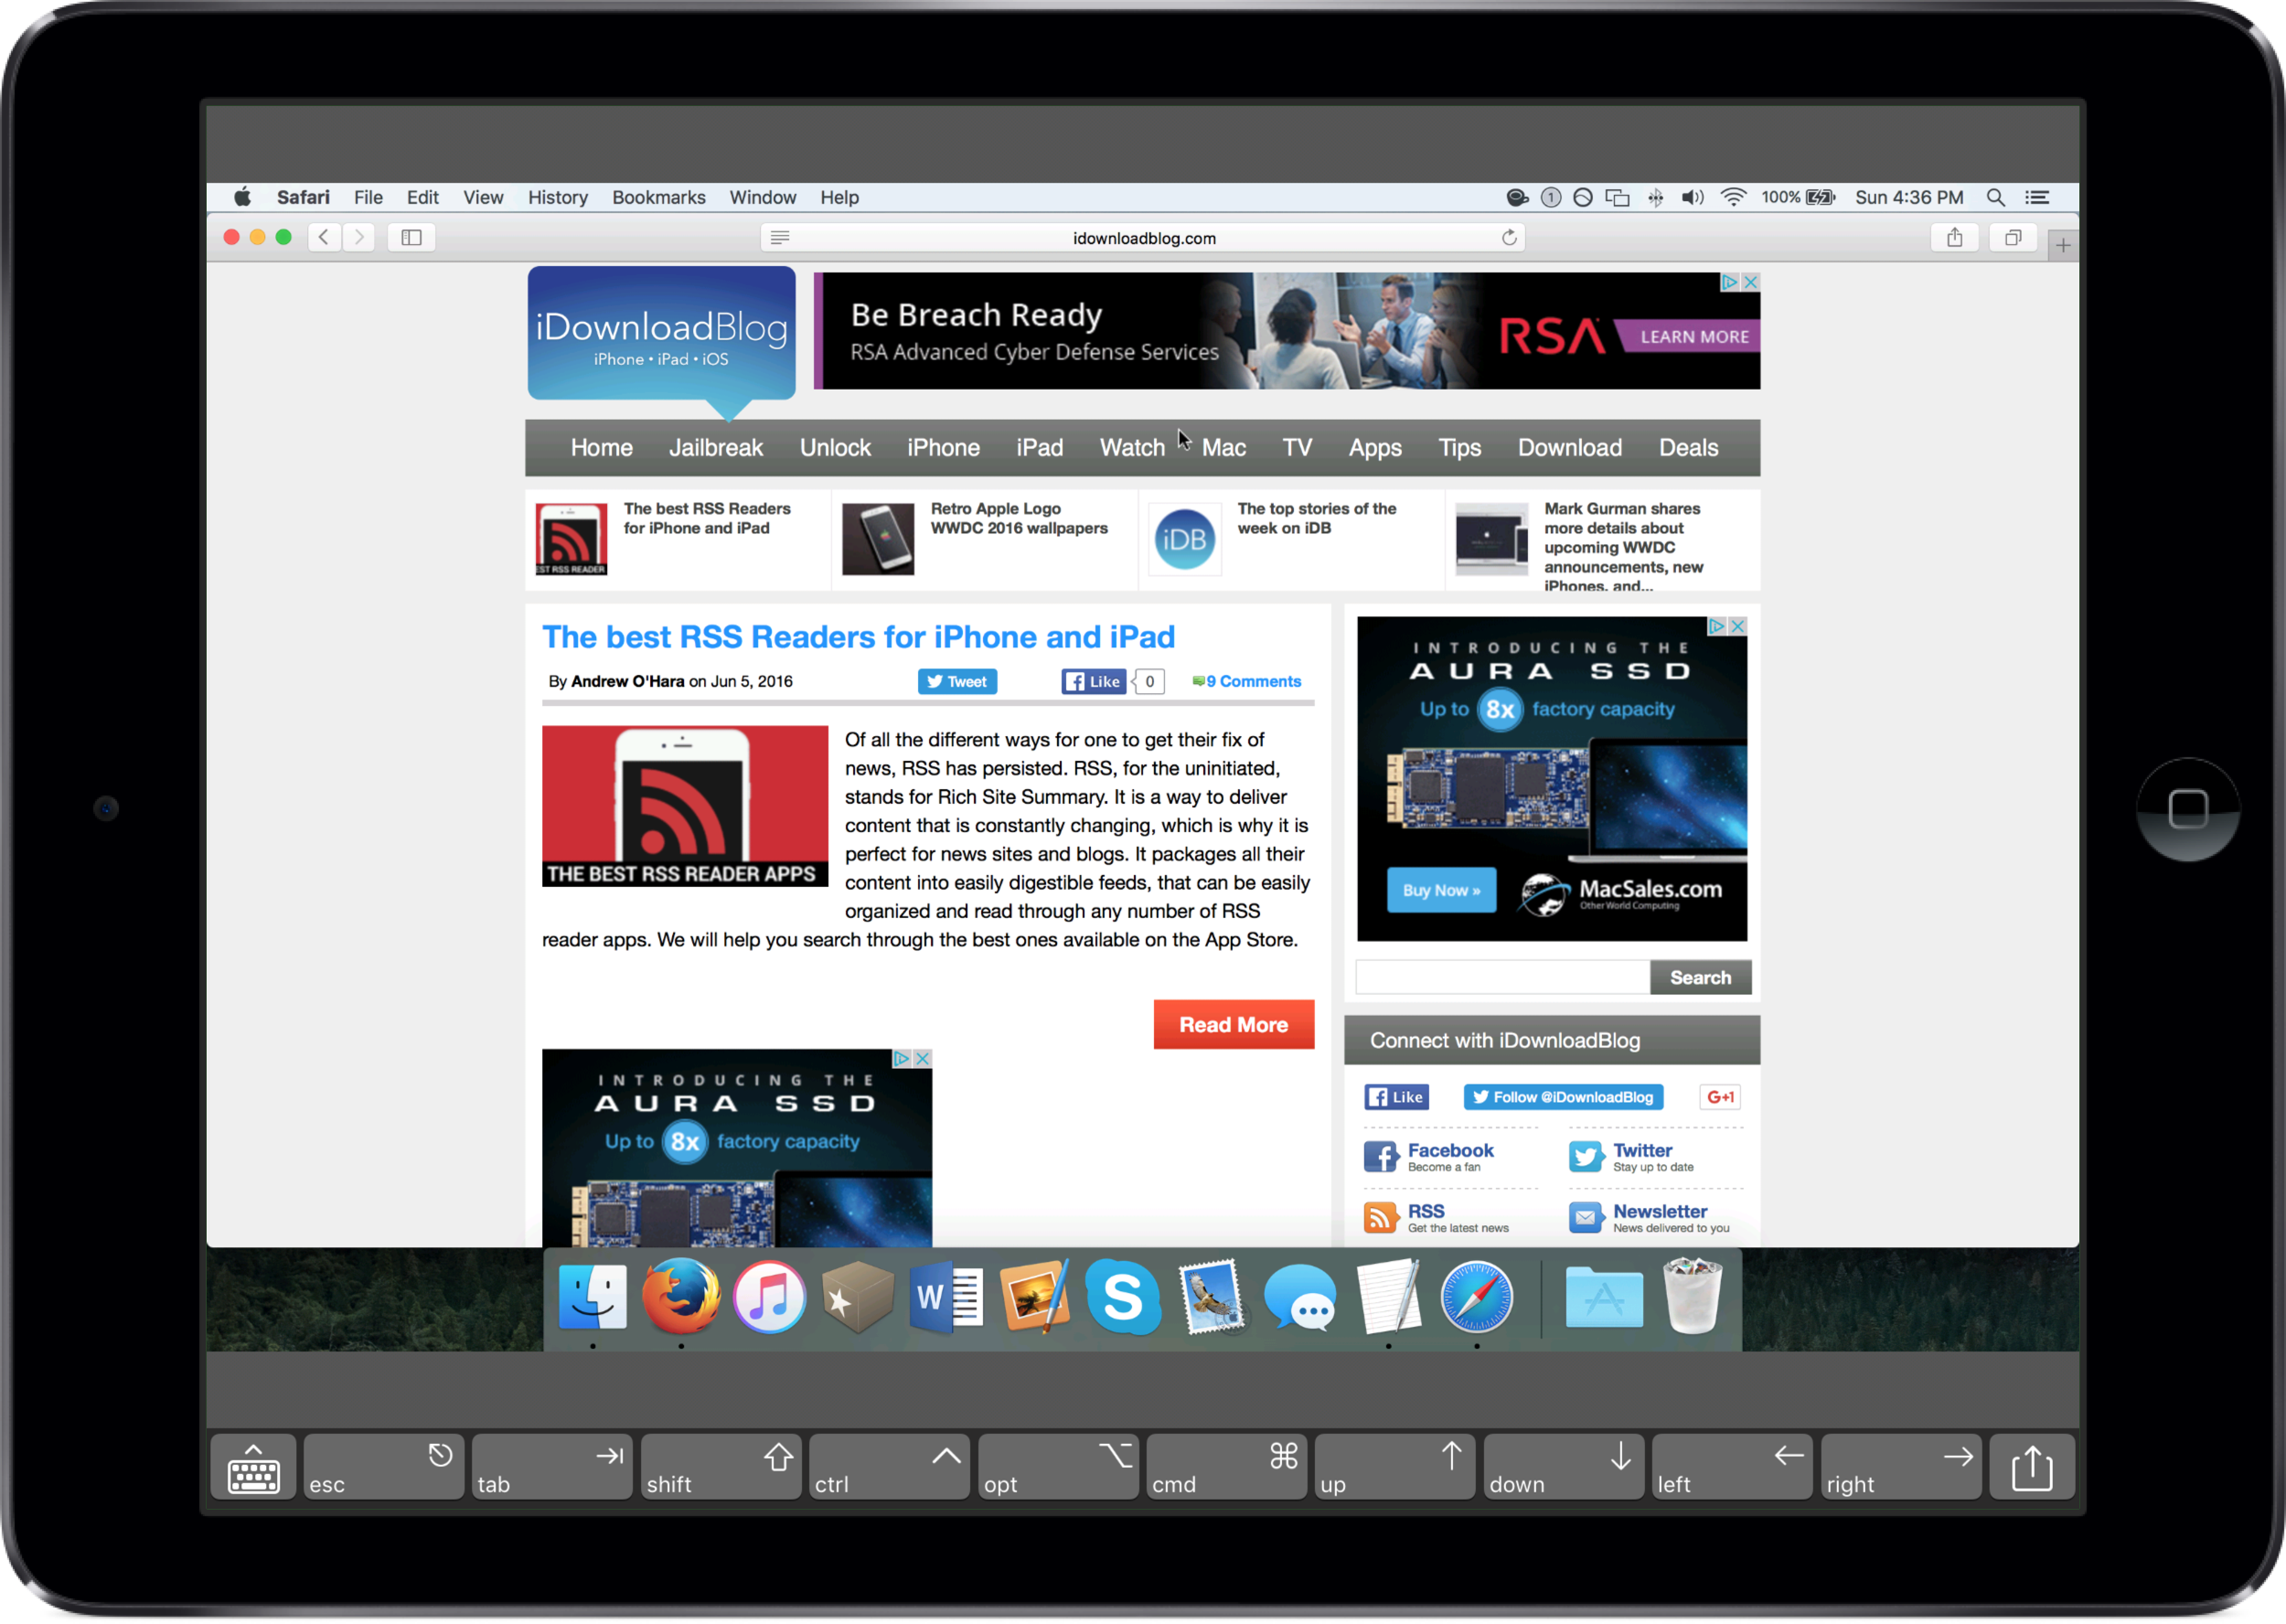
11) Because you gave Screens VNC your username and password, you won’t need to log in; it does it automatically for you. Screens VNC will begin downloading your Mac or PC’s display:
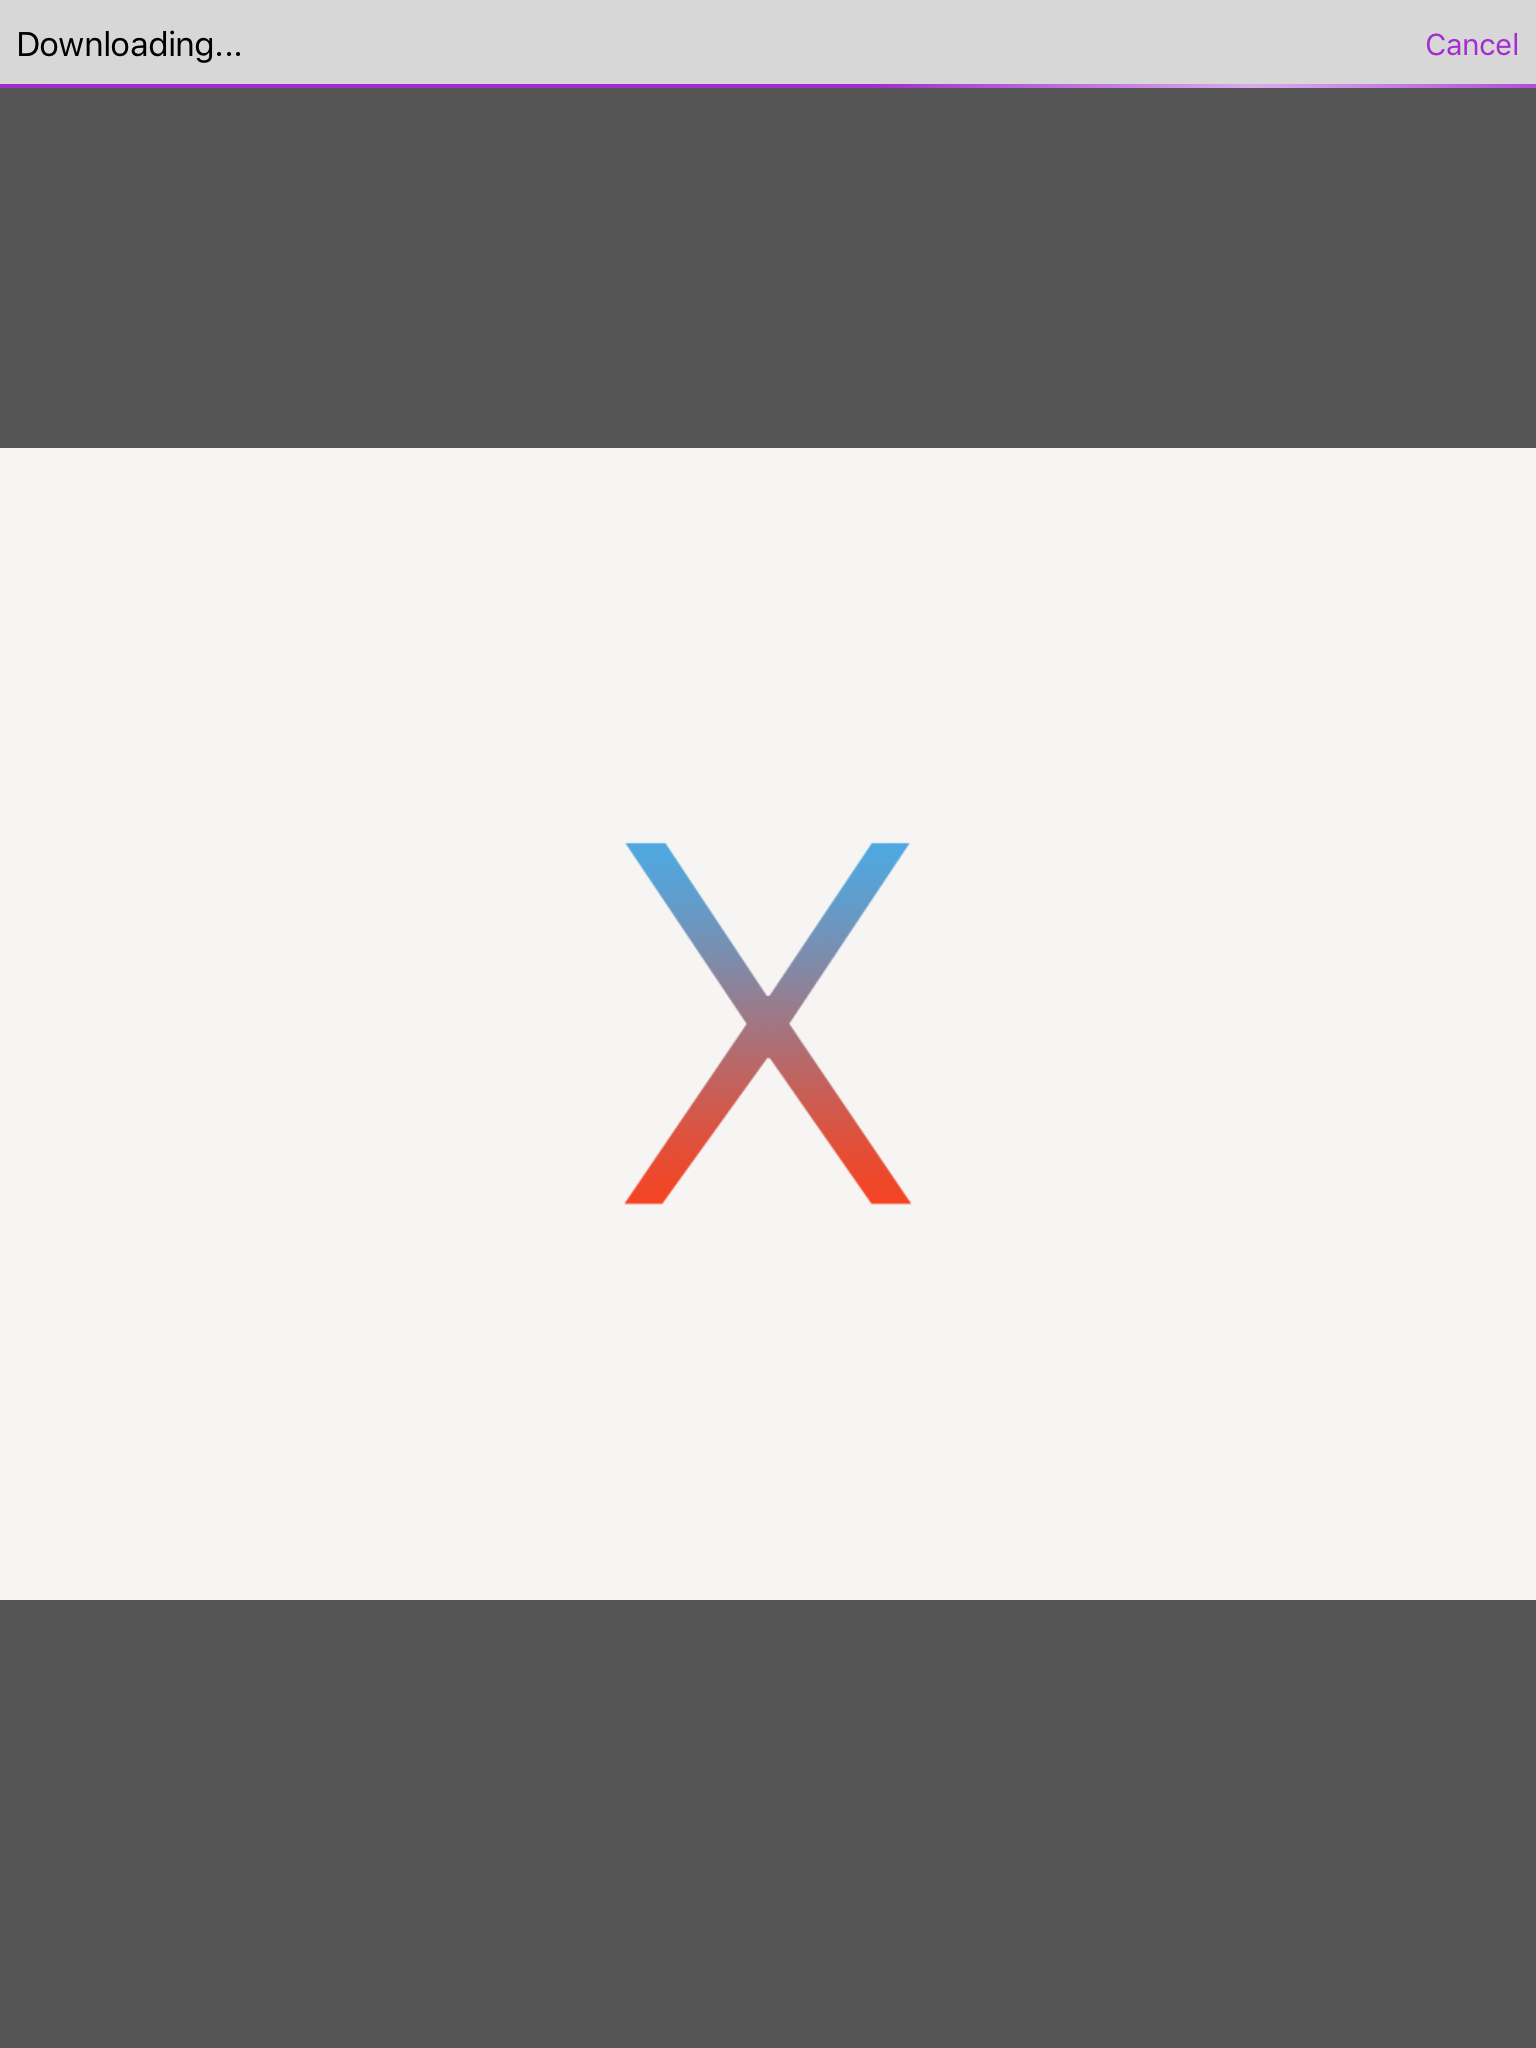
12) And once it’s ready, you’ll see your Mac’s screen on your iOS device’s display:
That’s all there is to it! You have connected to your Mac with the Screens VNC app by Edovia, and now you can control your Mac remotely without having to be sitting next to it.
To disconnect, you can tap on the Share button at the bottom right of the app, and then tap on the Disconnect button:

More things to know about Screens VNC
Screens VNC is a great VNC client for iOS, and at $19.99, you should expect no less than the best.
The app supports multi-touch and various other gestures for inputting information into your Mac. It even includes its own keyboard, as well as dedicated OS X-like shortcut buttons across the bottom of the app. With these tools, you can operate your Mac just like if you were sitting right next to it.
It’s possible to set up a DNS server with your Mac and access your Mac with Screens VNC even when you’re not connected to the same Wi-Fi network, so with that in mind, it is just as powerful as apps like TeamViewer, but requires a little more time to configure. Depending on your knowledge of networking, setting up a DNS server may or may not be outside of your comfort zone.
Wrapping up
Screens VNC is my favorite remote desktop software for my iOS devices, and it has a great front end design on not only the iOS platform, but also on the Mac. It’s a piece of software that does cost a bit of dime at $19.99 from the App Store, but I’ve been using it for years and I must say I don’t regret buying it one bit.
Also read: How to share your Mac’s screen via the Messages app
What is your favorite VNC app for iOS? Share in the comments below!