Google’s Chrome browser includes a handy feature designed to decrease bandwidth usage by up to fifty percent for mobile users on very slow networks. Called Data Saver, it works by passing webpages you visit to Google servers that compress graphics and other web content.
You can even tell Data Saver to replace the originally requested image with a small placeholder graphic, if the original image is likely not a crucial element of the page.
Here’s how you can reduce the amount of data that Chrome uses on your Mac, iPhone, iPod touch or iPad by enabling Data Saver mode to cut your bandwidth usage up to fifty percent, and even more.
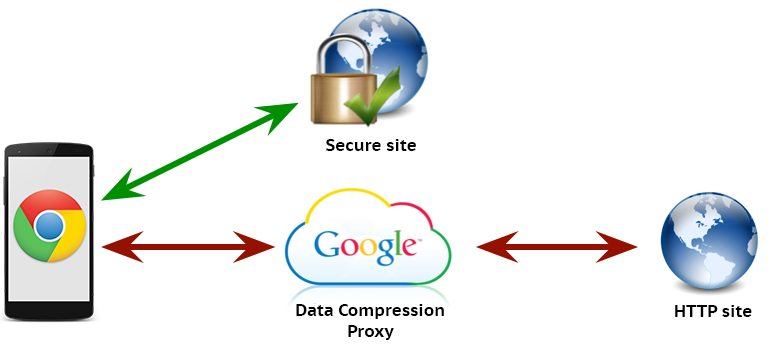
When Data Saver is enabled, Chrome opens a connection between your phone and one of the optimization servers running in its data centers, relaying all non-encrypted HTTP requests over this connection.
Using proxy servers hosted at Google to optimize website content can reduce the size of web pages by fifty percent, according to Google. You do not need a Google Account in order to use the compression proxy.
How to enable Data Saver on Chrome for Mac
Step 1: If you don’t have Chrome for Mac yet, download the latest release from Google. Instal Chrome by opening the installer package you just downloaded, it should be in your Mac’s Downloads folder.
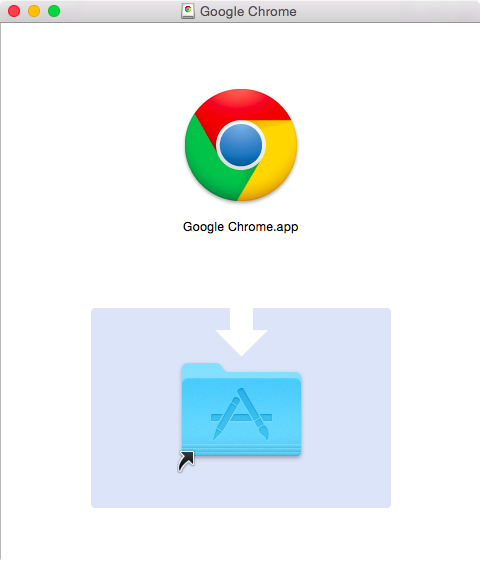
Simply drag the Google Chrome.app to your Applications folder.
Step 2: Fire up Chrome on your Mac.
Step 3: Download Google’s official Data Saver (Beta) extension from the Chrome Web Store by visiting this link in Chrome.
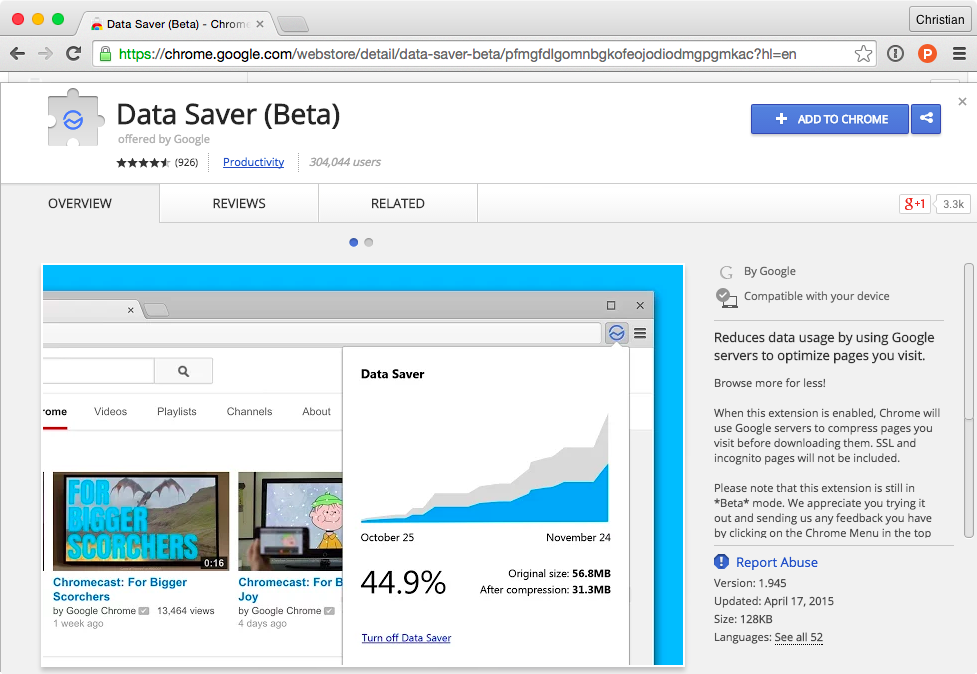
Now hit the blue Add to Chrome button to add the extension to the browser. Data Saver should be turned on by default. If it’s not, click Turn On Data Saver.
Step 4: Optionally, put Data Saver in Lo-Fi mode, which will send a small placeholder colorful graphic rather than the original requested image if this one is likely not a crucial element of the page. To do this, set the flag labeled “Data Saver Lo-Fi mode” to Always On by visiting chrome://flags/#data-reduction-proxy-lo-fi in Chrome.
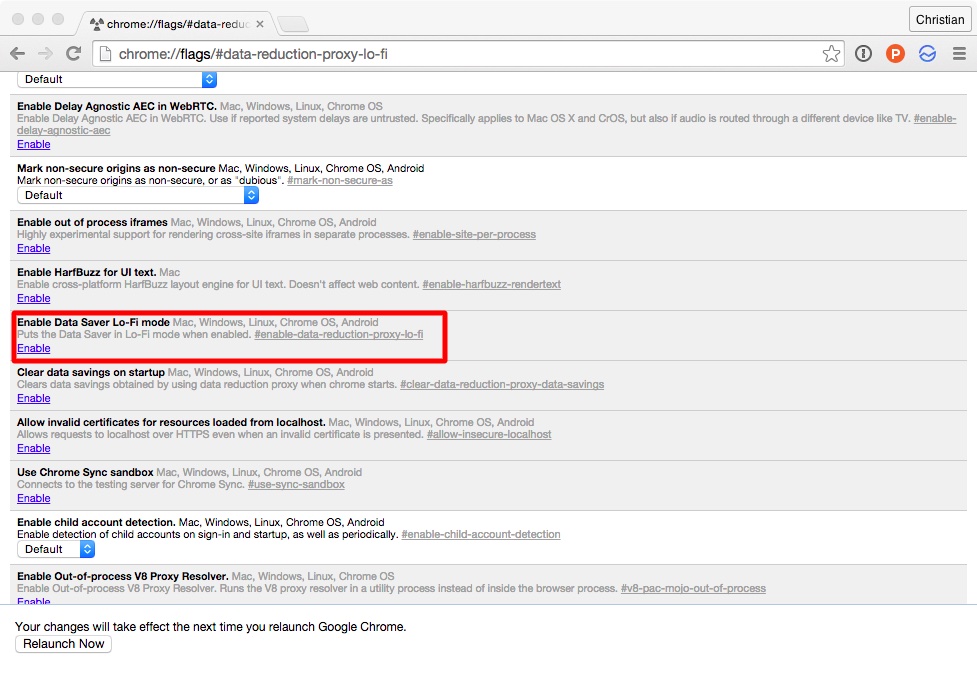
Now locate the aforesaid flag and click on Enable.
Tip: To enable Data Saver in Chrome’s Incognito mode, choose Extensions in Chrome’s Window menu and tick the “Allow in incognito” box below Data Saver (Beta). However, keep in mind that navigation in Incognito tabs bypasses the compression proxy.
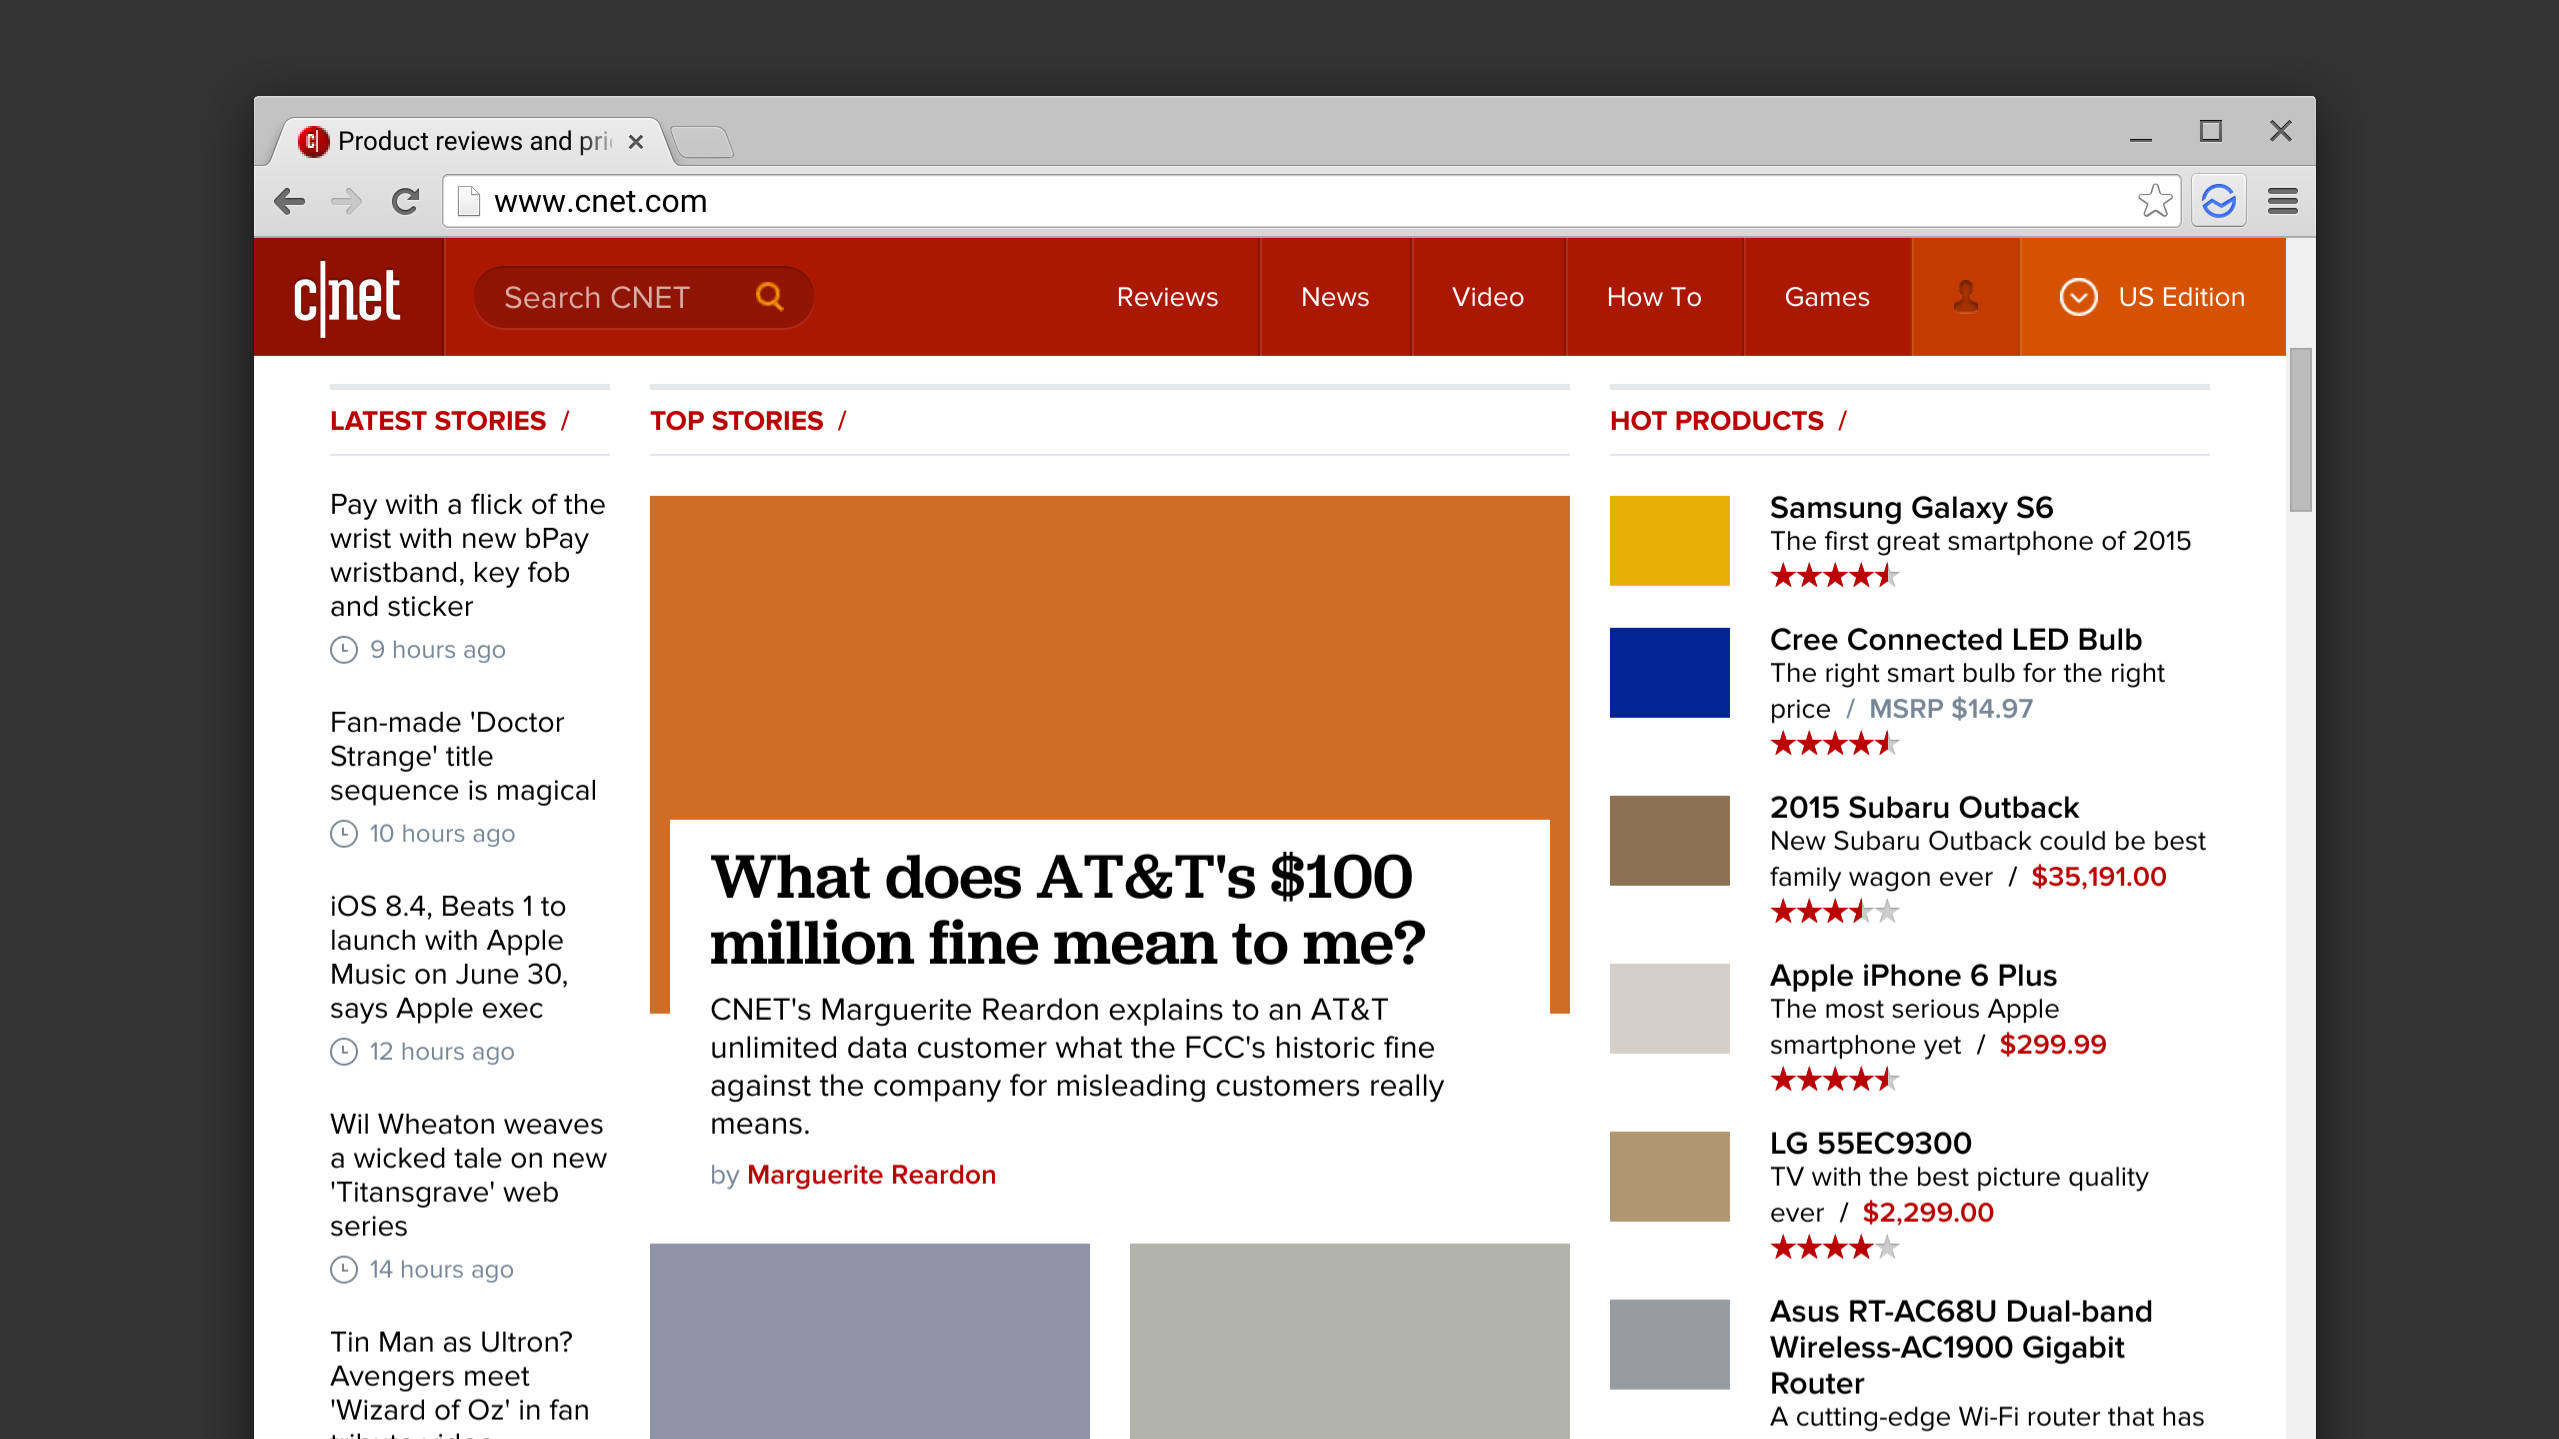
With Data Saver enabled, you can now browse the web as you normally would. Here’s browsing CNET.com with Data Saver mode enabled and set to Lo-Fi mode. You can clearly see how Chrome has replaced images with placeholder graphics.
Tip: Web pages visited through secure HTTPS protocol do not support Data Saver as of yet. These secure connections are instead routed directly from your device to the destination, bypassing Google’s compression proxy.
How to disable Data Saver on Chrome for Mac
Step 1: In Chrome for Mac’s toolbar, click the Data Saver icon.
Step 2: A drop-down menu will appear. Now choose Turn Off Data Saver.
How to delete Data Saver extension on Chrome for Mac
Step 1: Right-click the Data Saver icon in Chrome’s menu bar.
Step 2: In the contextual menu that’ll appear, choose the Manage Extensions option.
Step 3: On the Manage Extensions screen, hit the trashcan icon next to Data Saver (Beta) in the list of installed Chrome extensions.

Confirm by clicking the Remove button.
How to load original image in Data Saver’s Lo-Fi mode on Chrome for Mac
If Lo-Fi mode is enabled for Data Saver, any images on a webpage that are not crucial to your experience will be replaced with a placeholder graphic that consumes only a fraction of the bandwidth of the original image.
You can show the original image, however, if need be. In order to load the original image when browsing the web in Data Saver’s Lo-Fi mode, just right-click on its placeholder and choose the “Load image” option.
How to see saved bandwidth on Chrome for Mac
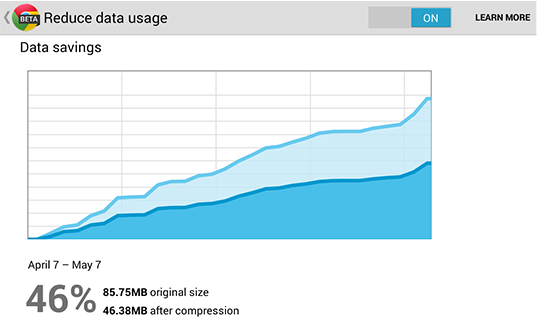
To check out how much data you have saved in Data Saver mode, just click on the Data Saver (Beta) icon in the upper right corner of Chrome’s top bar, like this.
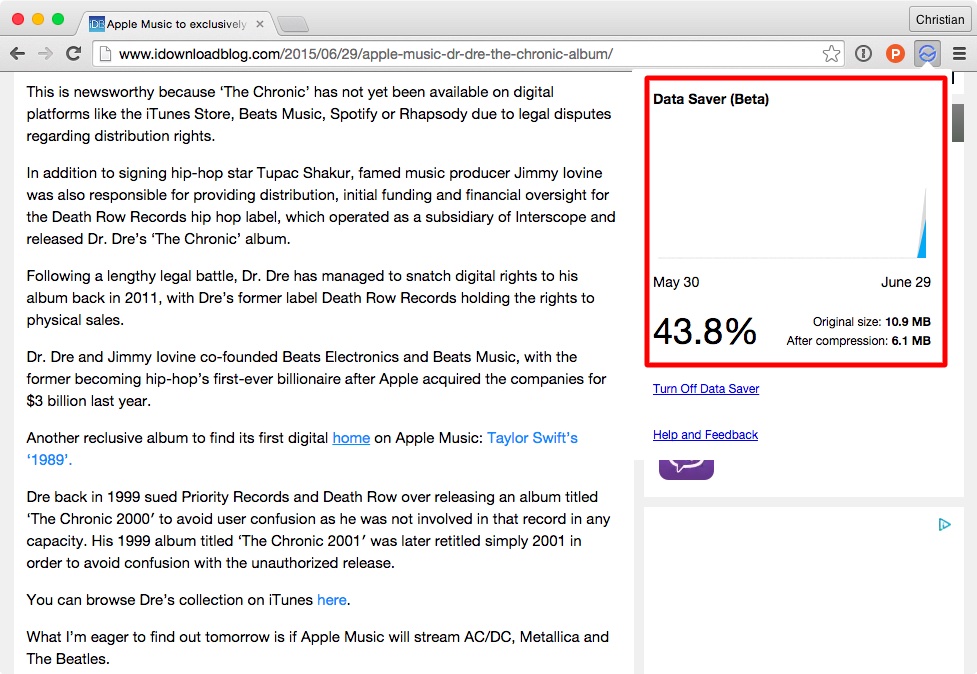
Tip: What you see here is the amount of bandwidth that has been saved across your entire browsing session in Data Saver mode.
How to enable Data Saver on Chrome for iOS
You can enable Data Saver in Chrome for iOS from its settings menu.
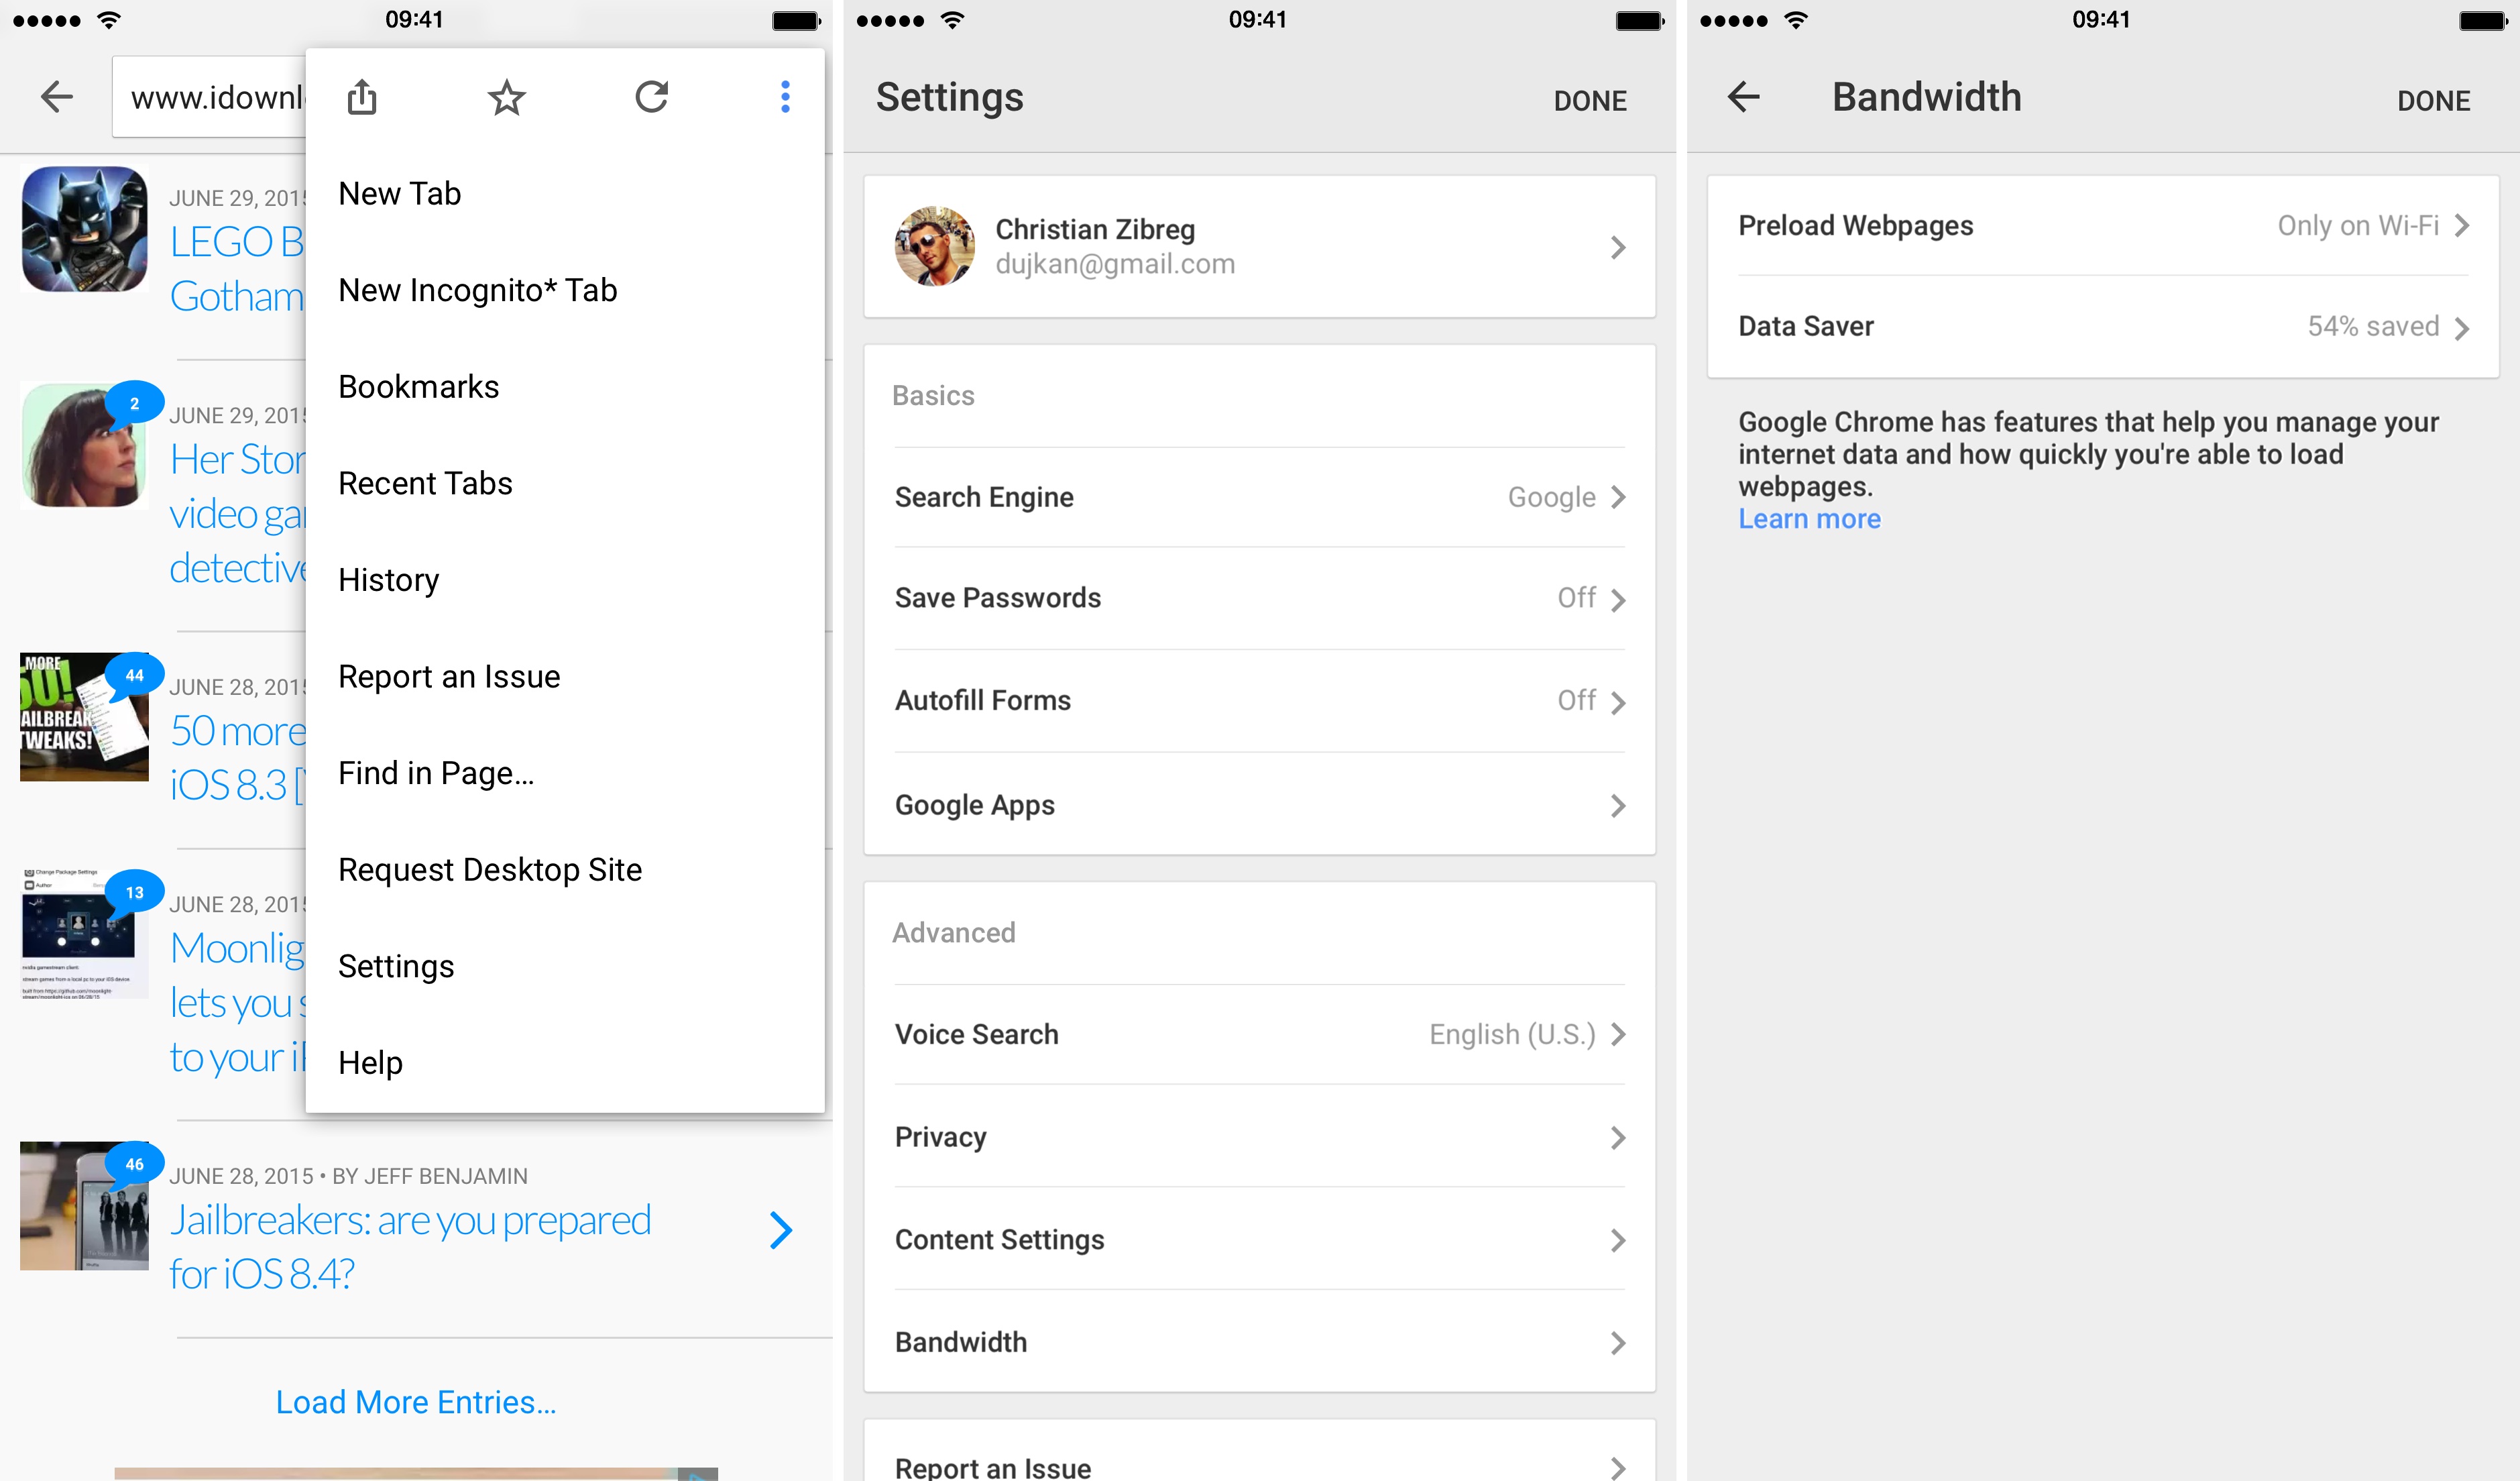
Step 1: Fire up Chrome on your iPhone or iPad, tap its menu (the hamburger icon) and choose Settings.
Step 2: Under Advanced, go to Bandwidth > Data Saver.
Step 3: Slide the switch ON.
Tip: Using Data Saver on Chrome for iOS uses Google’s Safe Browsing technology which protects you from malware and phishing attacks. It works by presenting you with a warning if you’re about to visit a dangerous site. You can click through if you wish to visit the website anyway.
How to disable Data Saver on Chrome for iOS
Step 1: Tap Chrome’s menu, then Settings.
Step 2: Under Advanced, go to Bandwidth > Data Saver.
Step 3: Slide the switch to OFF.
How to load original image in Data Saver’s Lo-Fi mode on Chrome for iOS
Long-tap on a placeholder image and choose “Load image” to load the original image.
How to see saved bandwidth on Chrome for iOS
Step 1: Tap Chrome’s menu, then Settings.
Step 2: Under Advanced, go to Bandwidth > Data Saver. A chart with some useful tidbits like the percent of data saved will show up. You can easily see the original size of the webpages you visited versus their size after compression.

If you’re into technicalities, Data Saver mode takes advantage of Google’s efficient compression technology which is fully detailed here. The proxy transcodes all website images to the efficient WebP format while also optimizing the perceptual quality of each image based on device screen resolution and pixel density, which results in up to 80 percent smaller image files.
The biggest takeaway is that website owners can exclude individual resources from Data Saver so that Google’s proxy servers will pass them through directly to your browser. In other words, website owners have the freedom to, should they choose so, force Chrome to load non-optimized webpages.
Known issues stemming from using Data Saver mode
If you plan on using Data Saver mode all the time, take into account the following drawbacks:
- Some websites might not be able to accurately determine your location.
- Some images might look a little fuzzy.
- Internal websites, like company intranet sites, might not load.
- Sites that mobile carriers use to authenticate and bill you might behave unexpectedly. For example, you might have trouble logging in to your mobile phone provider’s website.
- How much data gets saved depends on the type of content on the page.
See also:
- How to force quit an iPhone or iPad app
- How to force quit an Apple Watch app
- Our archive of Mac tips
Did you find this tip useful?
Is spending less data by using Google to optimize the websites you visit going to be useful to you, do you think? And what other data optimization techniques do you use when browsing the web on desktop and mobile?
Have a great tutorial suggestion? Send your submissions to tips@iDownloadBlog.com and we’ll take your best ideas into account in our coverage planning.