
The Music app is a stock application that comes preinstalled on all iOS devices. It’s the primary way for playing music on the iPhone, iPod touch, and iPad. With iOS 7.0, a new feature was baked into the stock Music app called iTunes Radio. iTunes Radio is an ad-supported service that allows users to browse more than 250 curated stations. Users can also create and build their own stations, which feature Pandora-like customization over time.
The stock Music app has endured significant changes over the past few years. The Music app was once exclusively relegated to the iPod touch, with iPhone models offering an “iPod” app as a means to play music and watch videos. Eventually, with the advent of iOS 5, the iPod app was broken-up into separate Music and Video apps for the iPhone line, unifying the stock Music app presence across all iOS hardware.
While there are many ways to play music via third-party apps on iOS, the stock Music app is the only music application that’s closely integrated with iTunes and allows you to use the iTunes Match iCloud-hosting service. There may be benefits to other apps like Spotify, but no app is as tightly intertwined with the rest of iOS as the stock Music app. With that in mind, please take a look inside, as we break down the many facets of this ever-growing and ever-changing stock application.
Table of contents
Controls
Basics
iTunes Radio
Tabs
iTunes Match
Settings
- Shake to Shuffle
- Sound Check
- EQ
- Volume Limit
- Lyrics & Podcast Info
- Group By Album Artist
- Show All Music
- iTunes Match
- Home Sharing
Conclusion

Playing
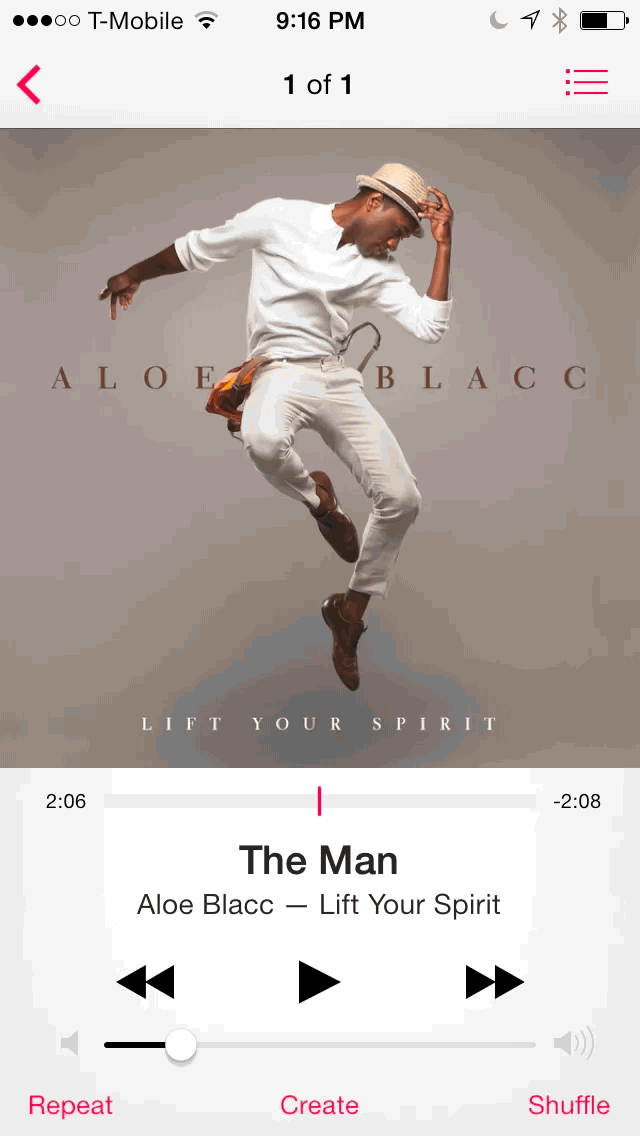
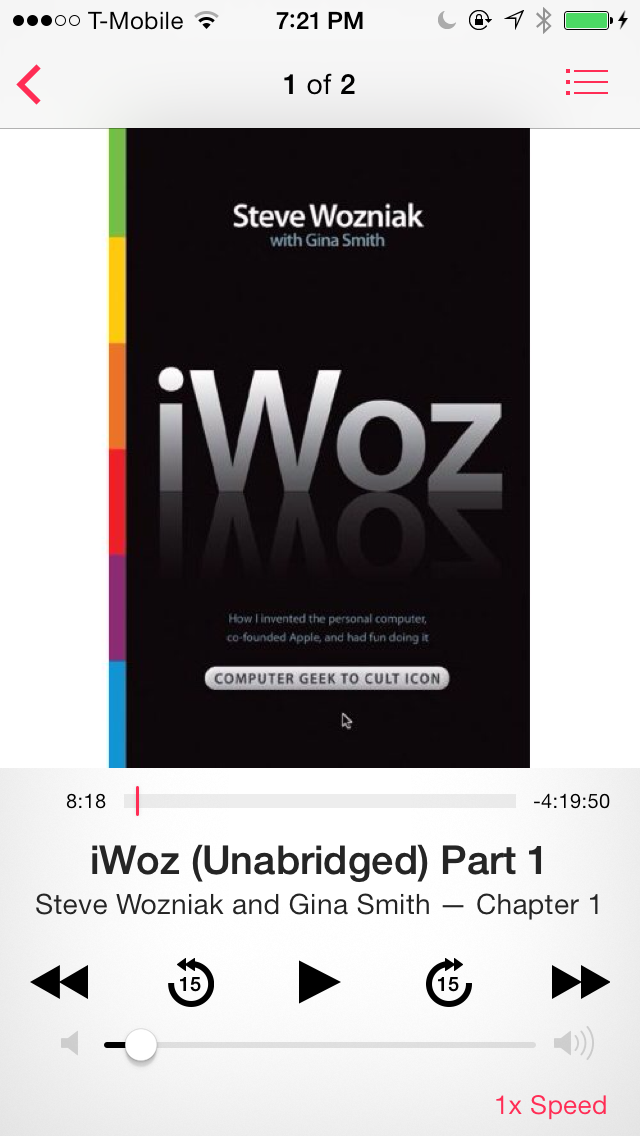
Playing music is as simple as launching the stock Music app and tapping on one of the songs found inside the tabs at the bottom of the interface. Tapping on a song will bring up the primary play screen with the transport controls at the bottom of the screen right beneath the album artwork.
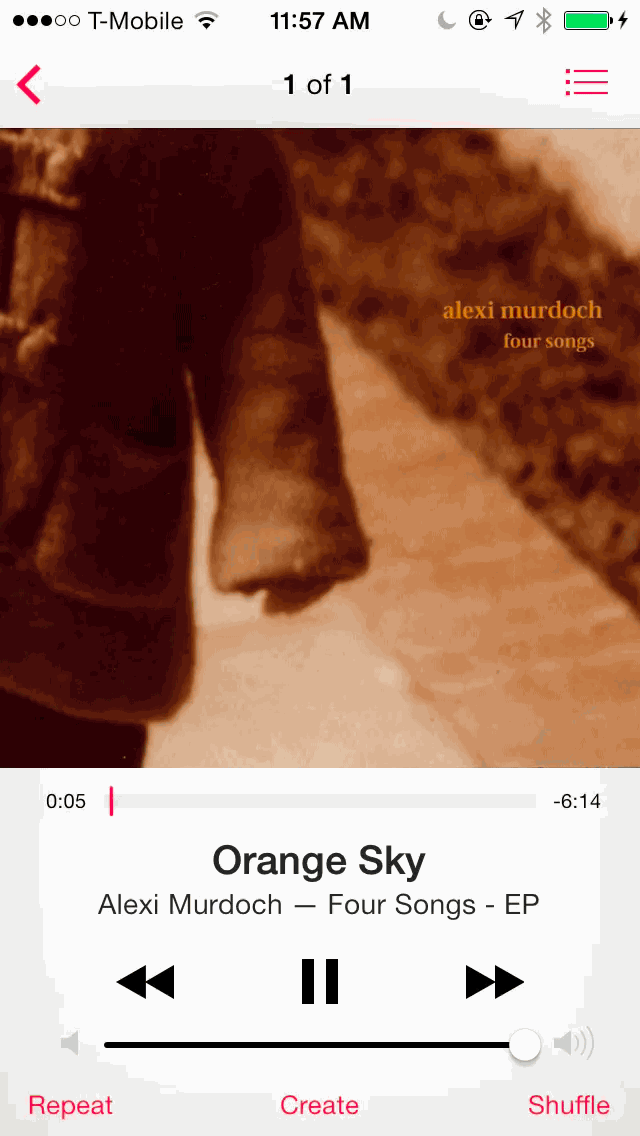
The primary play screen is where you’ll be spending the majority of your time when actually listening to music inside the stock Music app. The play screen features many controls that we’ll break down starting with the main controls.
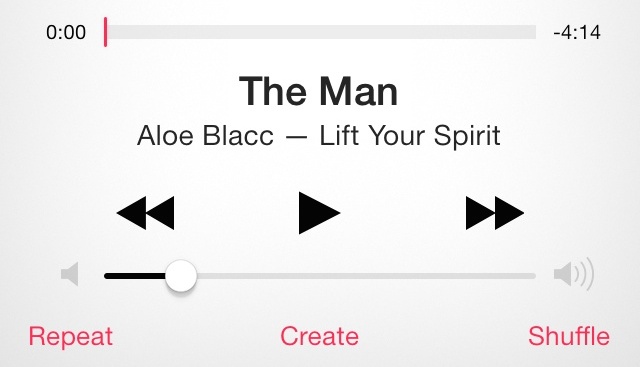
The Music app’s transport controls
The transport controls are the controls that make up the lower portion of the play screen beneath the album artwork. It begins with the music scrubber—the little timeline that shows the progression of a song and the amount of time it will take to complete the song—and ends with the repeat, create, and shuffle buttons at the bottom of the interface.
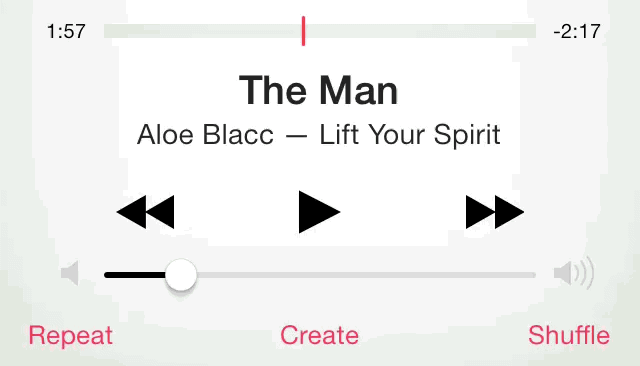
The scrubber
The scrubber is the little bar beneath the album artwork that allows you to manually progress through a song by dragging your finger across the bar. Dragging from right to left moves to the beginning of a song, and the inverse motion moves to the end of a song. But there’s more to it than meets the eye when it comes to the scrubber.
Hi-Speed Scrubbing
When you first begin scrubbing through a song using a tap-and-drag gesture, the Music app places you in hi-speed scrubbing mode. Hi-speed scrubbing is good to use when you want to briskly move through a track, but it’s not very effective when trying to locate precise points of a song. To help with precision, Apple implemented a clever method for reducing the speed of the scrubbing. As you tap and hold on the scrubber, drag your finger up towards the album artwork to adjust the speed of the scrubber.
Adjusting scrubbing speed using a slide up gesture
There are four different scrubber speeds to take advantage of, and here are their approximate speed increments:
- Hi-Speed Scrubbing – ten second increments
- Half-Speed Scrubbing – six second increments
- Quarter-Speed Scrubbing – two second increments
- Fine Scrubbing – one second increments
Of course, each speed increment value is approximate, and depends on how quickly you move your finger horizontally to initiate the scrub.
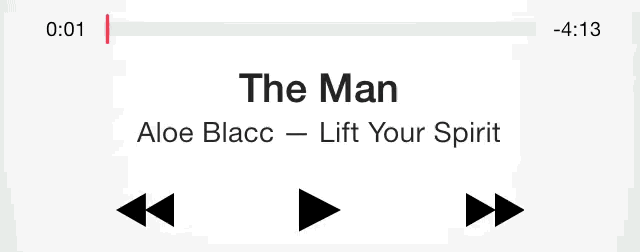
Song details
Directly beneath the scrubber lies the name of the song in bold letters, followed by the artist name and album name. It’s not immediately obvious, but tapping once on the song details reveals the ratings interface, which allows you to assign a star rating to the track.

Rating a track
A song can be rated between one and five stars, or can remain unrated. If you’d like to hide the rating, tap to the left or to the right of the rating interface to once again reveal the song details.
Transport controls
Beneath the song details lie the actual controls that allow you to play, pause, skip songs, and go back to previous songs. You can also use tap and hold gestures to fast-forward or rewind a song.
Skip, Back, Pause, and Play
The controls are self-explanatory, in that you tap the play button to play and pause a song, and use the back/forward buttons to go to previous songs and go to the next song respectively. Tapping and holding on the back button will perform an incremental rewind, where the longer you hold on the button results in faster rewinds. Likewise, the skip button allows you to perform an incremental fast-forward.
Volume slider
Beneath the transport controls lies the volume slider. This volume slider is one-way linked to the physical volume buttons on your device.
The Music app volume slider
Using the physical volume buttons will adjust the in-app volume settings and reflect directly on the volume slider, but adjusting the software volume slider with touch has no bearing on the physical ringer volume of the device. This setting can be changed by going into Settings > Sounds > and disabling the Change with Buttons toggle.
Repeat
At the very bottom of the primary play screen, you’ll find three buttons that allow you to perform different functions directly related to the now-playing song or artist. The first in the series of three buttons is the repeat button. Tapping the repeat button yields a sheet menu that allows you to adjust the repeat settings for the now-playing song, playlist, album, etc.

Using the repeat button
For example, if you’re playing an album, you’ll receive a pop up that allows you to turn repeat off, enable repeat song, or enable repeat album. Depending on your selection, the text on the button will change to reflect your setting.
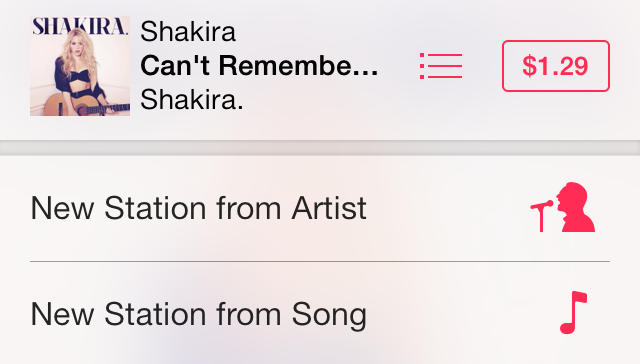
Create
The create button allows users to create a Genius Playlist, or a new iTunes Radio station based on the now-playing artist or song. The Genius Playlist feature automatically generates a playlist of songs from the user’s local library, which are similar to the selected song. The included songs are based on algorithms to match the type of songs as closely together as possible.
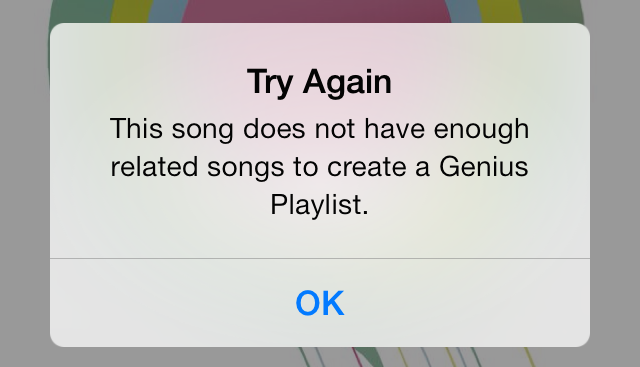
When you don’t have enough songs to create a Genius Playlist, you’ll see this error
Playlists come in multiples of 25. If you don’t have enough songs to create a Genius Playlist, you’ll receive an error message stating such. If you have a fairly large iTunes library, then in most cases you shouldn’t encounter the error.
Creating a new iTunes Radio station from artist
The other two options found by tapping the Create button—New Station from Artist and New Station from Song—allow you to create new iTunes Radio stations. These stations don’t rely on the number of songs contained in your local library, as they are streamed directly from Apple’s servers. The stations created using either of these options will closely match the style of music from the origin song or artist.
Of course, we will have more details regarding iTunes Radio in our iTunes Radio section below.
Shuffle
The shuffle button comes into play when you have three or more tracks available to play. Shuffle allows you to play each song in a random order after initiating the first song.
![]() The shuffle button
The shuffle button
Each song can be comprised of an album, playlist, or a group of unrelated songs. Shuffling a group of songs results in a completely new play-path every time you initiate a play.
Notice the count at the top of the screen after tapping the shuffle button
When starting a shuffle from a list of songs, you will notice that tapping the shuffle button results in the “of” count at the top of the Music app interface to reset to one of however many songs you have in the queue. Disabling the shuffle mode will cause the “of” count to resort back to its natural order.
Shuffle mode is a great way to keep your music feeling fresh and clean. It’s especially useful when working out. The iPod Shuffle—Apple’s most diminutive device in its product line—was created based off the popularity of the shuffle mode found in larger iPods.
Album artwork
Besides looking appealing to the eye, the album artwork contains a feature that allows you to see more about the album related to the now-playing song. Double-tapping on the album artwork will reveal a list of each song from the album available on your local device. The now-playing song will feature an animated equalizer bar next to it. You can tap on any of the songs contained on the album to quickly switch between songs.
Double tapping the album art reveals all songs contained on the album
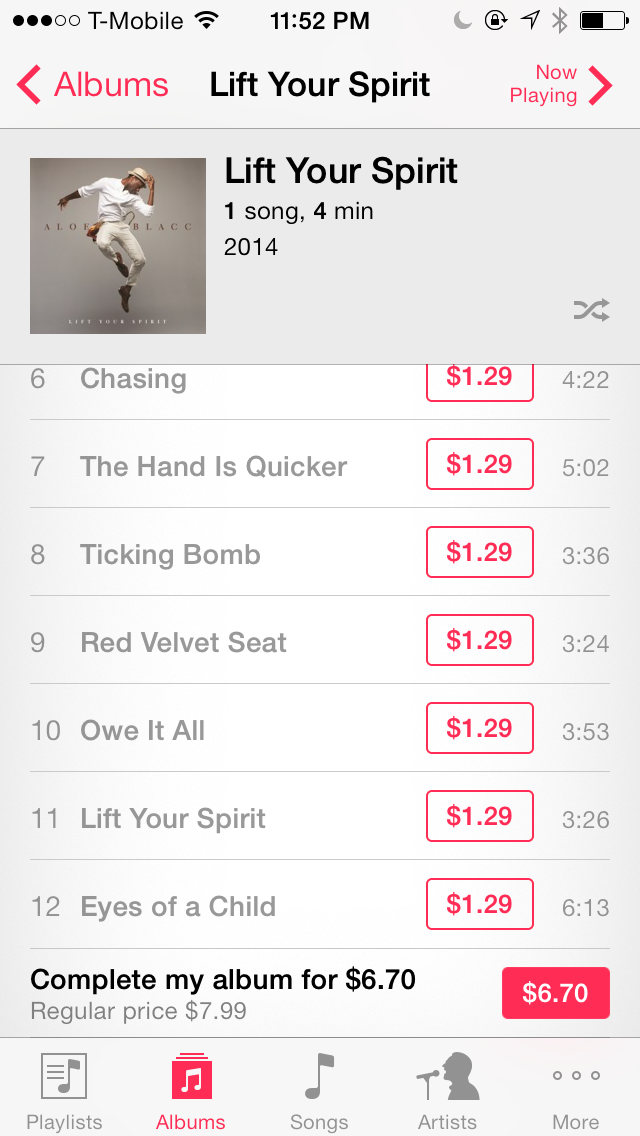
But what if you double tap the album artwork for an album where you’ve only purchased one or two songs? If you have only purchased select songs from the album, and not the entire album, a “show complete album” button will be available to show all songs from the album. Tapping this button will reveal all of the songs from the album, with the purchase price directly to the right of the name of the song. Songs that you already own will be in bold, and songs that are available for purchase will be displayed in light gray.

Only own a few songs from the album? Show the complete album
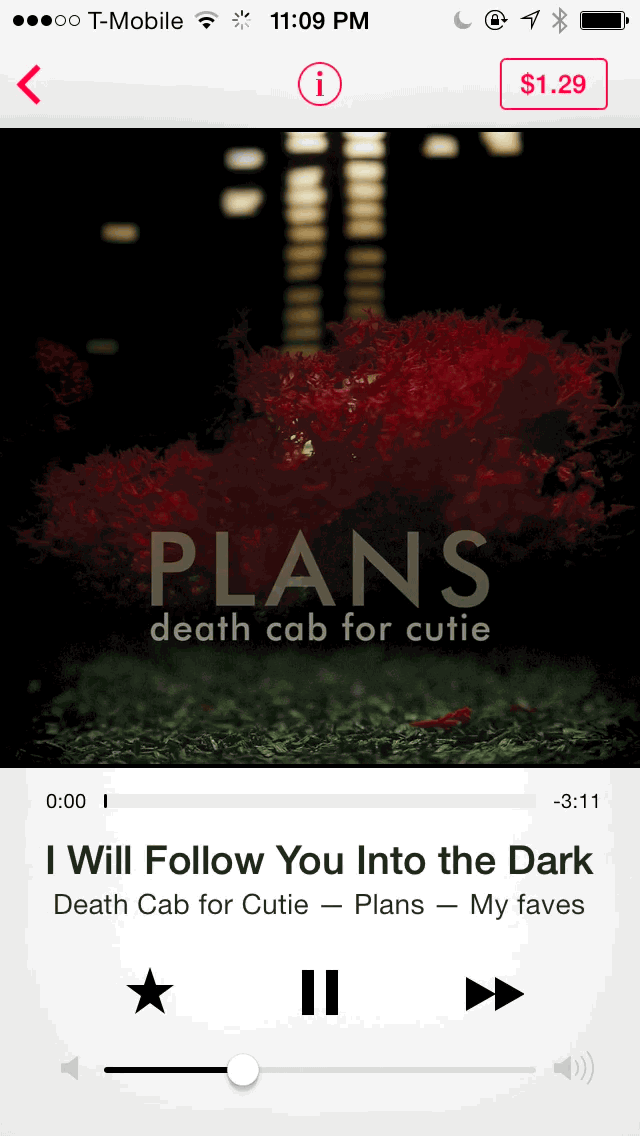
At the bottom of the list of songs contained in the album, you’ll find a “Complete my album” button. This allows you to purchase all remaining songs from the album that you don’t currently own. The price to complete an album will depend on how many tracks you currently own. So, for instance, if you own every track on an album except one, the price to complete the album will probably be in the ballpark of $1.29 USD.
The ability to purchase songs directly from the Music app itself cuts down on the friction, and makes it that much more likely that users will take advantage of the iTunes store. In the past, users had to exit the Music app and go to iTunes in order to complete their albums.
There are a few other functions that I want to be sure to mention before moving on to the next section. First, you can access the same album detail view by using the button in the upper right-hand corner of the interface. This button provides you with the same detail view that you receive when double tapping the album art.
![]()
Tapping the button in the upper right-hand corner shows the album detail view
Lastly, you can rate individual songs using the album detail view. Use the rating button in the upper left-hand corner to rate each song. See the illustration below for more details on how to rate each track. Note that only tracks that you actually own can be rated.
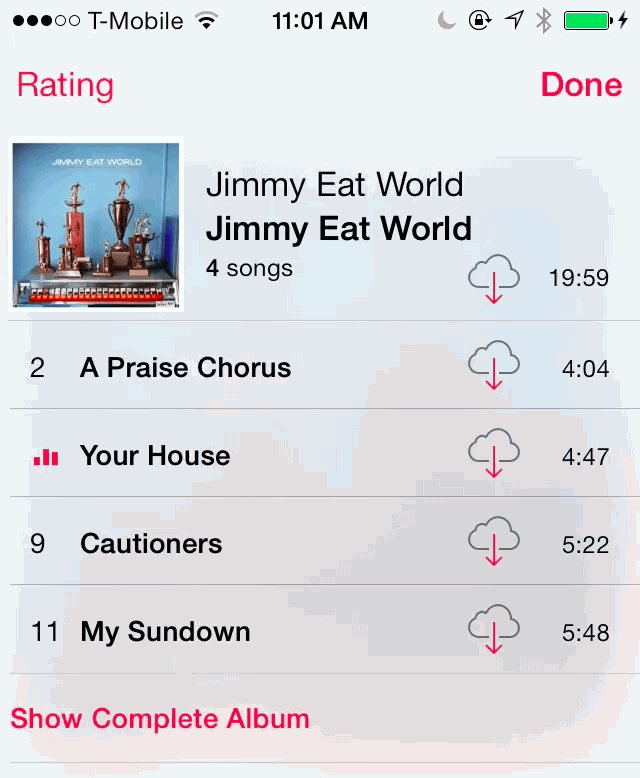
Rating a track in album detail view
Landscape mode
Placing your iPhone into landscape orientation will reveal all of the albums available on your device in a bulletin board view. You can swipe left and right while in landscape mode to view your entire collection of album art. You can zoom in or out of the album view by using a two-finger pinch gesture. The lowest zoom level is two rows of albums, while the highest zoom level is four rows of albums.
Use a two-finger pinch gesture to zoom in and out of your albums
Tapping on an album will zoom in on the album art and allow you to view all of the available songs associated with that album. You can then play songs individually, and man limited controls for play, pause, skip, and back.
Playing album content via landscape view
The landscape album art view can be accessed from anywhere in the stock iOS 7 Music app, except for when you’re using iTunes Radio. It replaces the iconic “Cover Flow” view found in earlier iterations of iOS with something more usable and practical. You can quickly switch back to normal view by holding your iPhone in portrait mode.
Lock screen controls
The Lock screen provides basic control over now-playing music. Like the controls in the stock Music app, it allows you to play, pause, skip, and go back to previous tracks if applicable. The Lock screen controls also feature a scrubber, albeit it’s a scrubber that doesn’t have the same precision options found in the full-blown Music app.
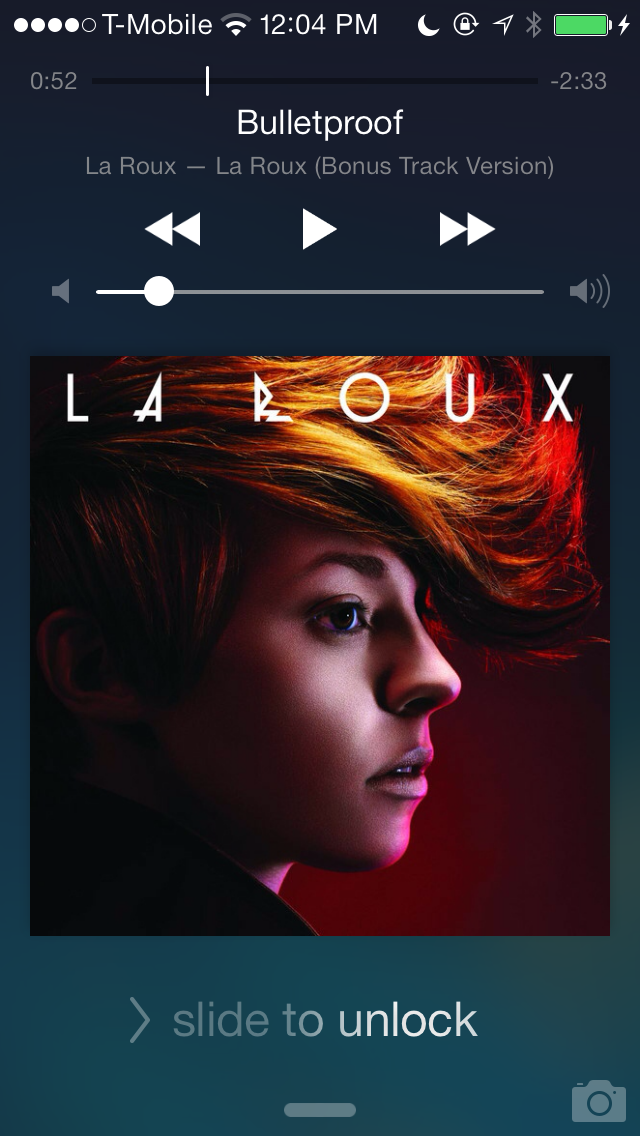
Lock screen controls are available whenever music is playing
You’ll find a volume control slider and the album artwork of the now-playing song beneath it. Unlike previous versions of iOS, you no longer have to double tap the Home button in order to reveal the transport controls—they appear by default whenever music is playing.
Control Center
Like the media controls found on the Lock screen, the Control Center media controls allow you to manage playing, pausing, skipping, and going back to previous songs where applicable. Unlike the Lock screen controls, the Control Center music controls are accessible from anywhere, including the Lock screen.
Using Control Center’s media controls
Due to the nature of the Control Center media controls, you can use the precision scrubbing features when moving forward or backwards through a song.
Headphones
Another, perhaps less thought about way to control music, is by using Apple’s EarPods with Remote and Mic. The iPhone comes bundled with a set of EarPods, but you can buy a retail pair as well. The EarPods allow you to control music using the buttons contained on the remote control built into the cord below the right earbud.
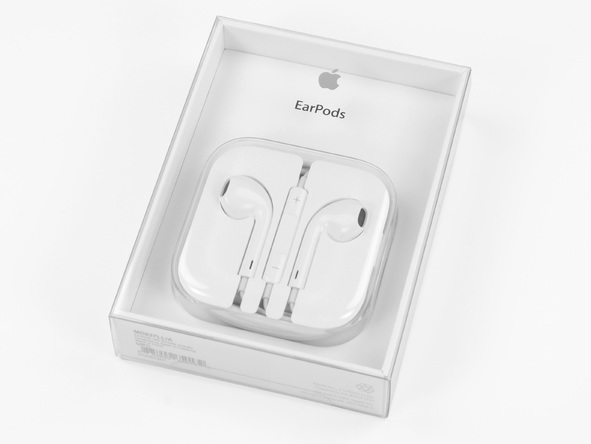
Apple’s EarPods with Remote and Mic
The EarPod remote control features three buttons pertaining to music control—volume up, volume down, and play/pause/skip. To play or pause music, press the middle button—the one between the volume up and volume down buttons—once. To skip to the next song, double-press the middle button. It’s a great tool to use when exercising and/or using the Music app’s shuffle mode.
Siri
Like many other functions found in iOS, the Music app can be controlled with Siri. There are several voice control functions that can be performed using Siri. We’ve documented many of the popular Siri commands in our iOS 7: The Ultimate Siri guide.

Playing a song from the Music library using Siri
There are many Siri commands for both Music and iTunes Radio. Here are some of the commands that you can use:
Music Library
- Play Smells Like Teen Spirit by Nirvana
- Play The Fame shuffled
- Play Jim James
- Play some bluegrass
- Play my japan mix
- Shuffle my road trip playlist
- Play
- Pause
- Skip
iTunes Radio
- Play iTunes Radio
- Play my rock station
- Play my Jim James station
- Play more songs like this one
- Don’t play this song again
- I like this song

Buying music
Most of the purchasing process happens inside the iTunes Store app and not the Music app. Starting in iOS 7, the stock Music app does have the ability to complete some purchases directly using features like the aforementioned “Complete my album” option. But it’s generally recommended that you stick to the iTunes Store app, as it has the most comprehensive search and discovery features when it comes to purchasing music.
You can buy music directly from the Music app in special situations
The iTunes Radio portion of the Music app is another great way to go about discovering and purchasing music directly. We’ll discuss the iTunes Radio portion of the Music app in just a bit.
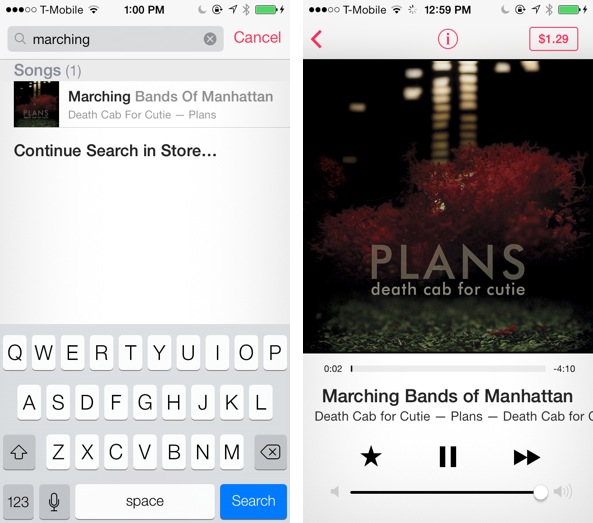
Searching
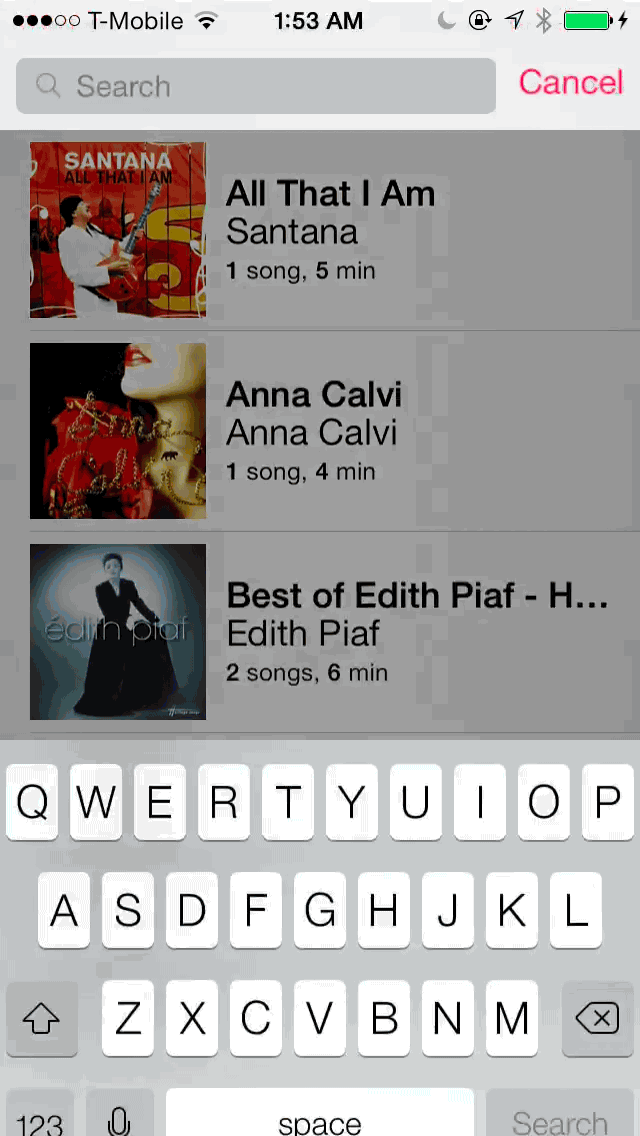
The iOS 7 Music app allows users to search their music library from virtually anywhere within the app. To initiate a search, pull down the page until the search bar is displayed and type in your search terms. The search returns results dynamically so that you can see its results in real time.
Performing a search
Searches are displayed in the following order:
- Artists
- Albums
- Songs
- Genres
- Composers
- Compilations
- Audiobooks
If no items appear for one of the search sections listed above, then that section will be omitted. Tapping on an artist, album, genre, composer, compilation, or audiobook will display a list of all of the items that fall within that criteria. On the other hand, tapping on a song will begin playing the song immediately.
If no results are found, or if you’d prefer to expand your search beyond your personal library, you can take advantage of an option that allows you to perform your search on the iTunes Store.
It’s possible to move your search to the iTunes Store app
At the very bottom of the search results you’ll find a button that says “Continue Search in Store.” Tapping this button will open the iTunes Store app and display your search results for the search term you used in the Music app.
Editing tabs
The Music app is only capable of displaying five tabs at the bottom of the screen simultaneously. Since there are limited tabs available to be displayed, some have to be omitted (the fifth tab is the “More” tab, which allows you to access the additional hidden tabs). You can always tap the more button to access the hidden tabs, but if you find yourself doing that a lot, you might consider moving the often used section to one of the available tabs at the bottom of the interface.
Editing tabs in the Music app
To edit which tabs are actually displayed at the bottom of the app, you’ll have to tap the More tab in the bottom right-hand corner, and then tap the edit button in the upper right-hand corner. The edit button will allow you to pick, choose and rearrange your tabs using any of the available tabs.

Moving tab locations
Once you’re in tab edit mode, drag any of the tabs to your desired location. You can even move tabs that are already located at the bottom of the interface if you wish to do so.

Undoubtedly, the biggest new feature found in the stock Music app, and one of the biggest overall features to hit iOS 7, is iTunes Radio. iTunes Radio is Apple’s answer to streaming music apps like Pandora. It’s free to use, but it’s also a clever way for Apple to upsell its users on buying songs directly from the iTunes Store.
As of late there have been rumblings that future versions of iOS will feature a standalone iTunes Radio app. That may, or may not prove to be true, but for now, iTunes Radio can be found exclusively within the stock Music app.
iTunes Radio features well over 250 curated radio stations based on DJs and genres. Like Pandora, your stations are cultivated through the music you play. Stations are also influenced by the music that you download from the iTunes Store. Like similar offerings from third-parties, the more you use iTunes Radio, the more it learns about what you like to hear, and the better your stations will become.
Unlike the normal music that resides in your library, iTunes Radio stations cannot be scrubbed, fast forwarded or rewound. In most cases, with the exception of live events and other special stations, you can skip songs, but you can only skip up to six songs per station per hour.
Launching iTunes Radio
There are several ways to launch iTunes Radio, but the easiest way is to open the stock Music app and tap on the iTunes Radio tab at the bottom of the screen. If you don’t see the iTunes Radio tab, you’ll need to edit your tabs to move iTunes radio to the bottom menu bar. See the section above entitled Editing Tabs, in order to learn how to do this.
You can also launch iTunes Radio while playing songs using the create button at the bottom of the now-playing interface. In this instance, iTunes Radio stations can be created based on artist or song.
iTunes Radio interface
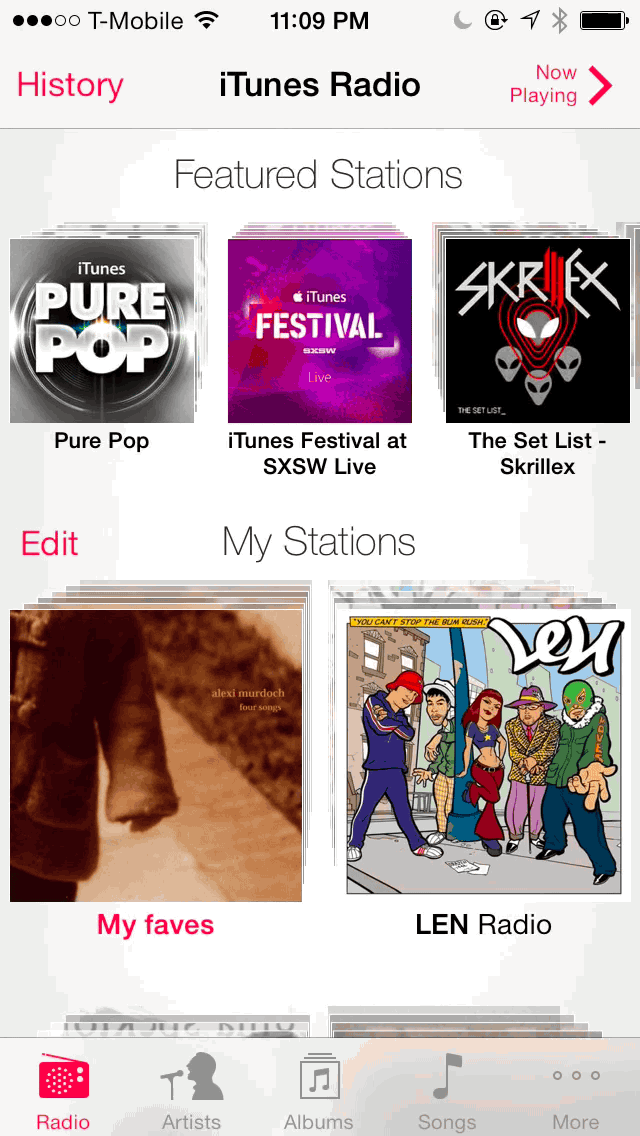
The main iTunes Radio page is broken up into two primary sections. At the top of the screen, you’ll see a list of Featured Stations. These are curated stations sourced by DJs, artists, and other means. Sometimes these stations will consist of previews of upcoming albums, or guest DJs. A featured station can consist of a group of songs, or a “live” streaming event that repeatedly loops, such as with Apple’s iTunes Festival at SXSW.
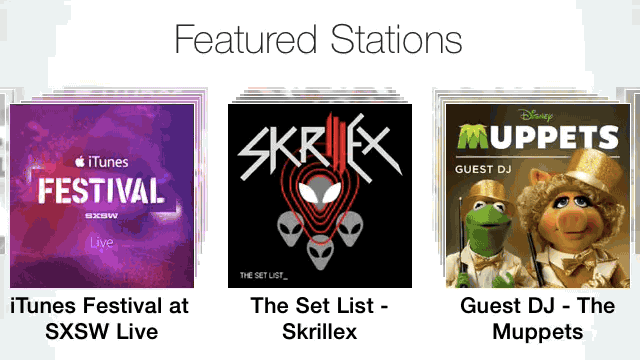
Scrolling through the Featured Stations
Other Featured Stations might include the iTunes Weekly Top 50 pop collection, or additional best of collections. There’s a pretty diverse group of featured stations available at any one time, so it’s a safe bet that you’ll find at least a few items that appeal to you.
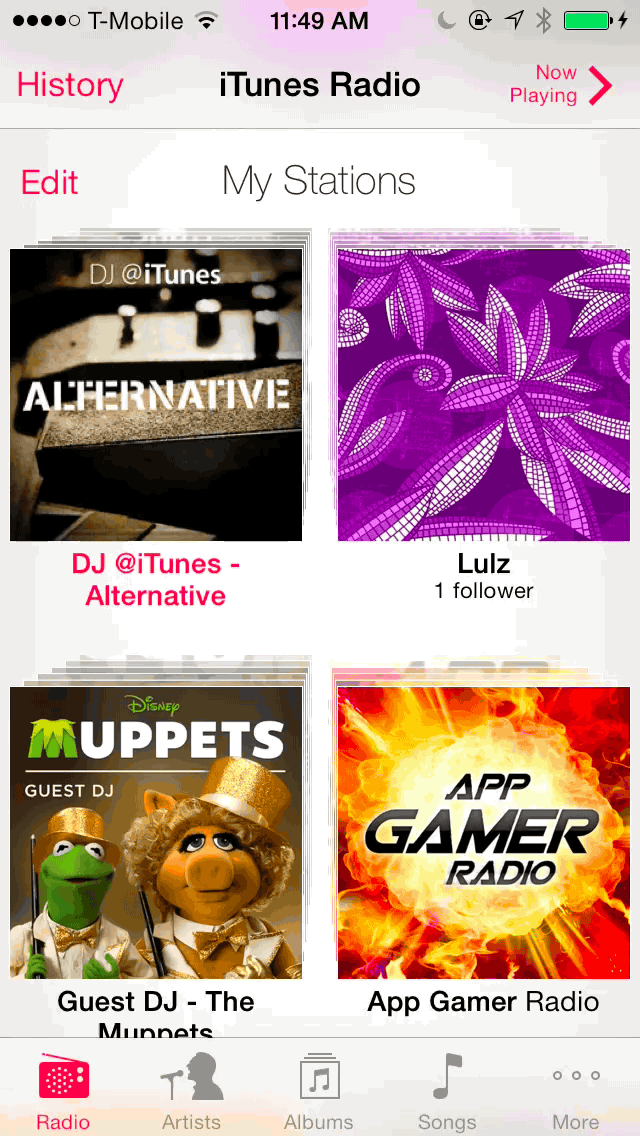
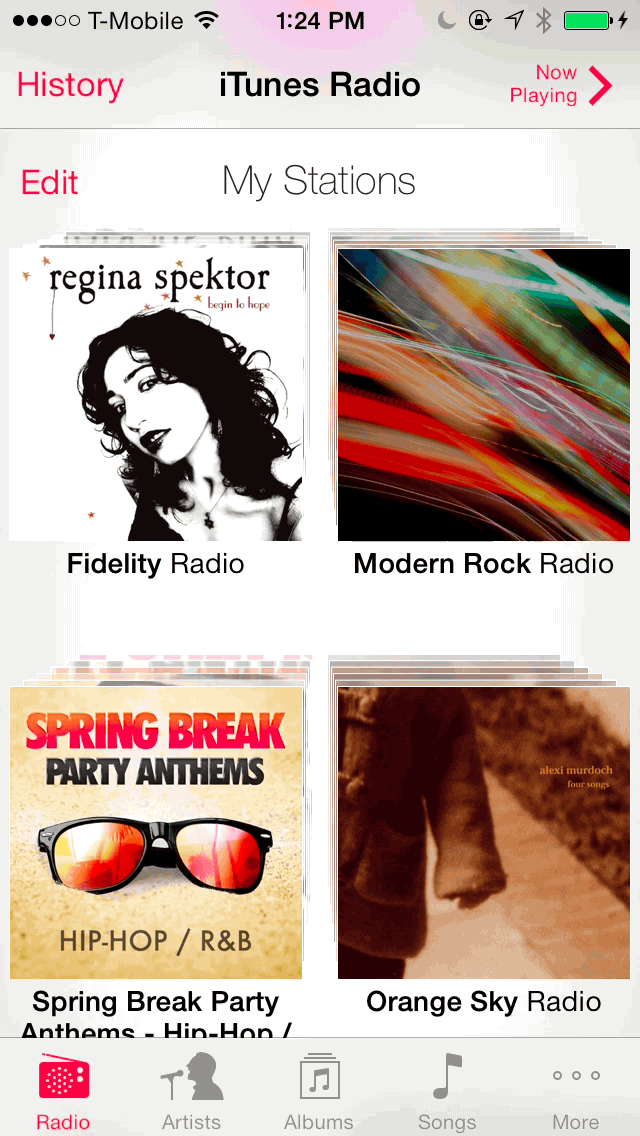
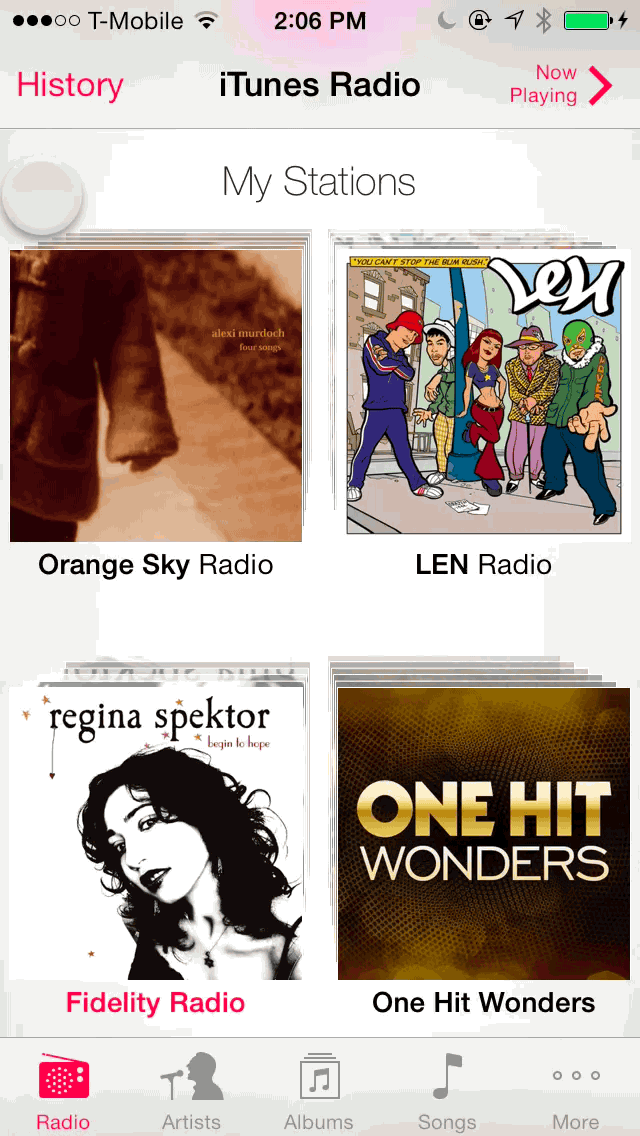
Beneath the Featured Stations section is a section called My Stations. The My Stations section contains a grouping of all of the stations created by you. You can even add the Featured Stations mentioned above to your collection of personal stations.
The My Stations section is where you should keep all of the stations that you genuinely enjoy listening to. You can always manage or delete a station by using the edit button found in the upper left-hand corner near the My Stations heading.
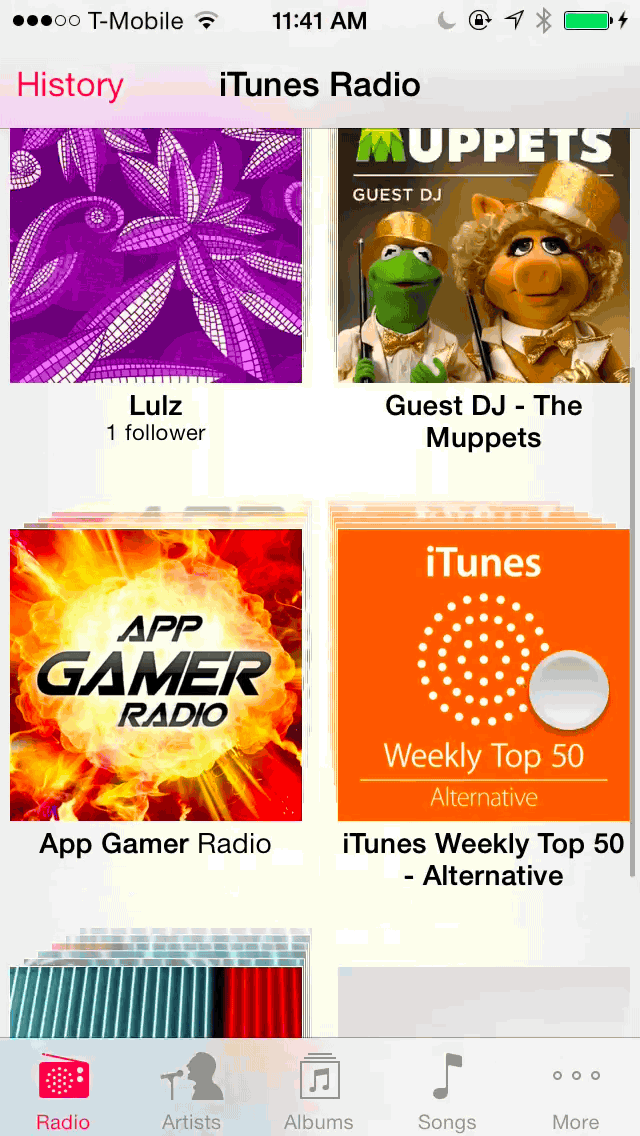
History
You can access a history of your iTunes Radio plays by tapping the history button in the upper left-hand corner of the iTunes Radio interface. Inside of the history page, you’ll find two tabs at the top—played and wish list. The played section is the section that contains your iTunes Radio playback history. The wish list is where you can go to find all of the songs that you’ve bookmarked to your wish list.
The played tab allows you to view a history of the songs that you’ve listened to sorted by time and station. You can preview the songs in your history by tapping on the album artwork. There are also quick links found to the right of each song for purchasing directly from the iTunes Store.
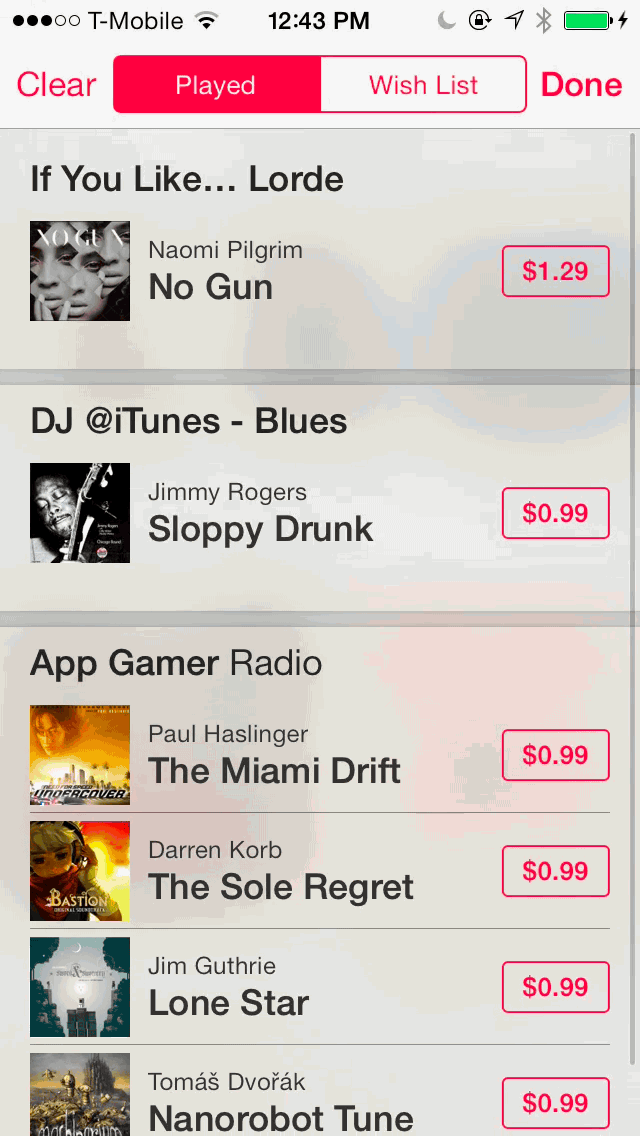
You can’t clear individual history items from iTunes Radio
Unfortunately, Apple doesn’t allow its users to clear individual items from the iTunes Radio history. If you want to clear out an item, you’ll have to use the clear button in the upper left-hand corner to clear out all of the items; it’s an all or nothing affair.
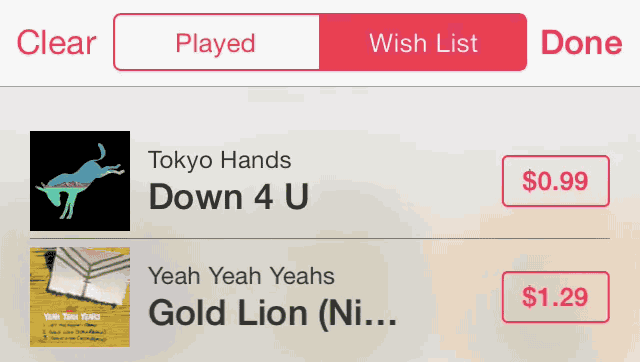
Clearing individual items from the wish list is possible
You can, however, clear individual items out of the wish list, and you can also clear all items from there in one fell swoop if you wish to do so.
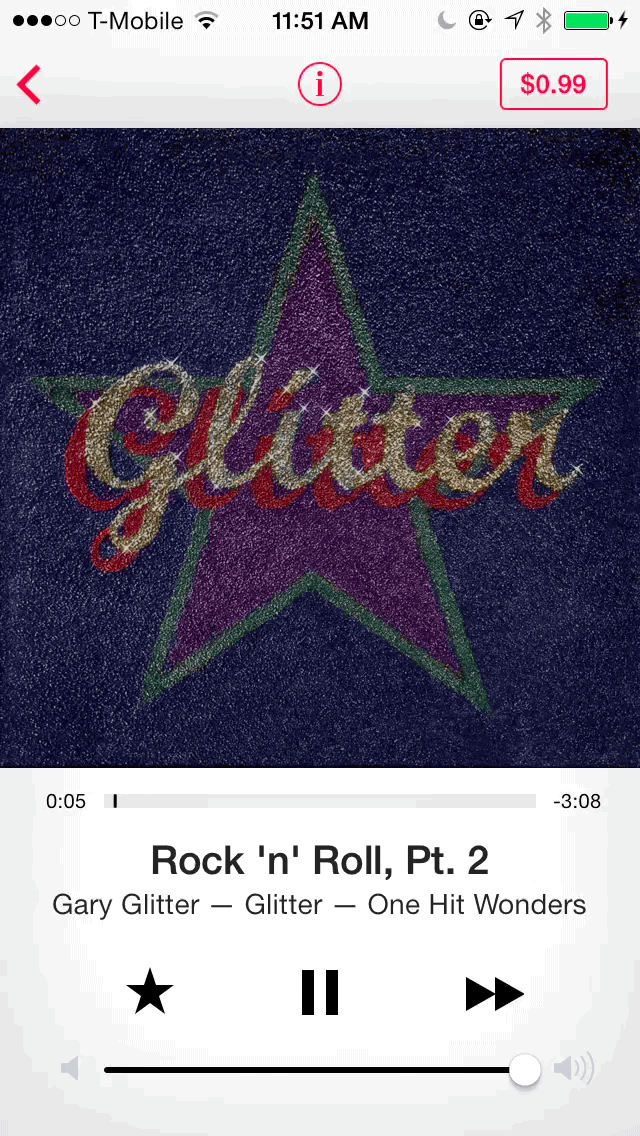
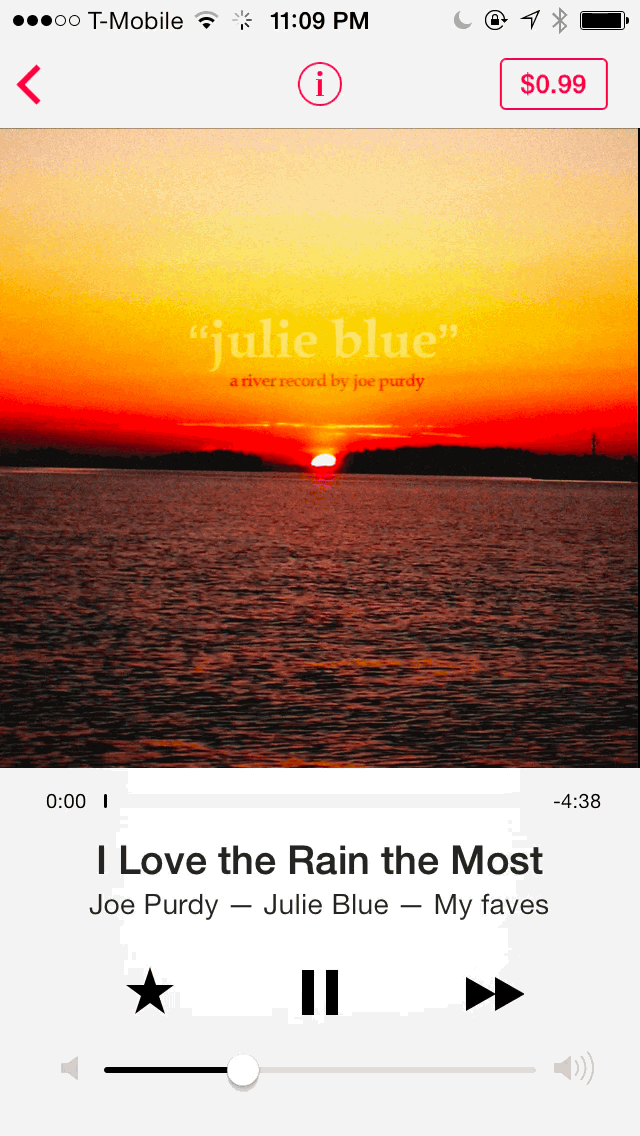
Now-playing interface
The now-playing interface is quite a bit different than the interface found in your normal music library. For starters, music played with iTunes Radio features no back button, because you can’t rewind, repeat, or go back to a previous song. The back button is instead replaced by a star button which assists with curating your radio stations. We’ll go more in-depth with curation features a couple of sections from now.
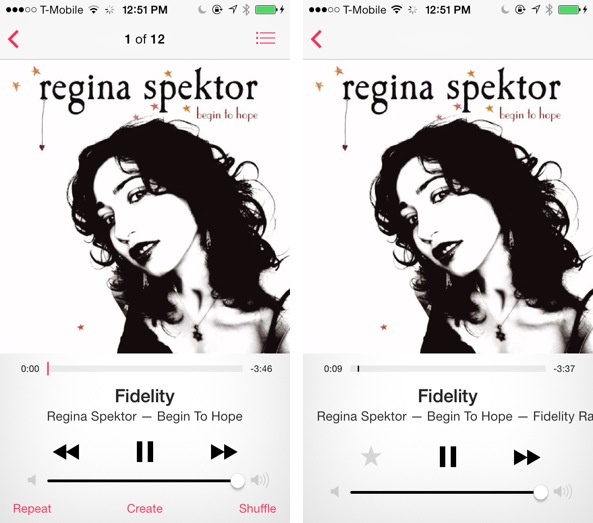
The differences between a song from the library (left) and iTunes Radio (right)
Since I own Regina Spektor’s album in the example above, you’ll notice that the option to purchase the song in the iTunes Radio interface isn’t present. When creating a radio station from a song you already own, iTunes is smart enough not to present purchase options to you since you already own the song.
See the purchase button? iTunes has no idea that I already own this song
Sadly, that’s pretty much the only case where iTunes is smart enough to know that I already own a song. For instance, if a song plays during an iTunes Radio play session, and I happen to already own that song, iTunes isn’t smart enough to figure that out.

Yep, iTunes just let me purchase a song I already had in my library…
Yes, iTunes will let you purchase a song that you already have in your music library or iTunes match, so you’ll have to be extra careful, especially if you have a large library where it’s easy to forget what you own.
In most cases while playing an iTunes Radio station, you’ll notice an ‘i’ button at the top-middle of the now-playing interface. This button allows you to access more radio station options.
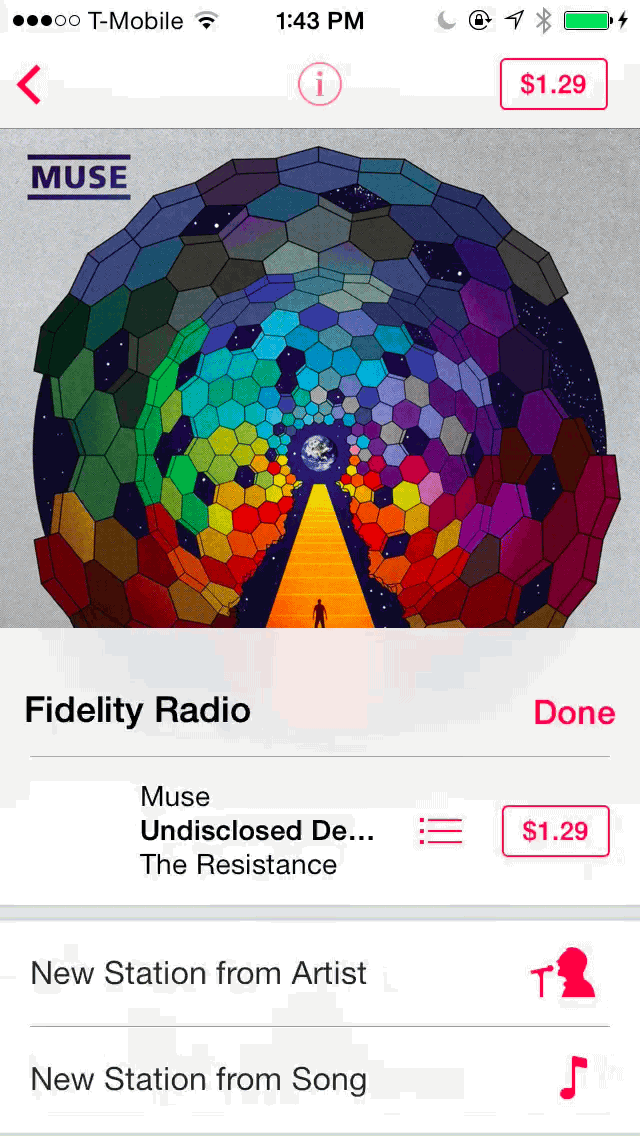
Tapping the info button yield more options
For starters, you’ll find a quick link to purchase the current song. You’ll also find a button that allows you to view all of the tracks associated with the song’s album, which is, again, useful for getting customers to purchase the content that they listen to.
Below the song information, you’ll find two buttons for creating a brand new radio station using the song or the artist as a mold. This is similar to the option found in the library to create a new station based on song or artist.
The Tune This Station feature allows you to specify what type of music you want to feature on your station. This option is only available for custom stations. If you move the slider to the left-most side, the station will play the most popular hits. If you move the slider to the right-most side, the station will play songs that aren’t as well known, but increases the discovery potential of new songs.
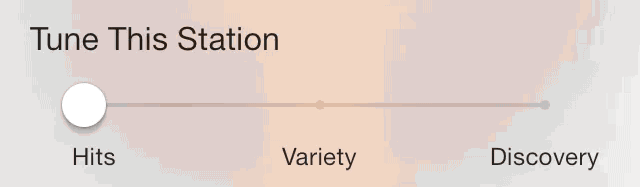
Tuning a custom iTunes Radio station
Below the tuning option, you’ll find a toggle for enabling explicit tracks within iTunes Radio. This explicit toggle is a global feature, so it modifies the behavior of all of the radio stations contained within iTunes Radio.
Lastly, you’ll find a share button for sharing your iTunes Radio station with others. Sharing a radio station keeps your custom name and curation options intact. You can share your station via Messages, Mail, Twitter, Facebook, AirDrop, or by copying the link to the station itself.
Creating stations
The simplest way to create a new iTunes Radio station is to tap the new station button located under the My Stations section of the main iTunes Radio interface. From there, you can select from several subsets contained in a list of genres, or use the search box at the top of the screen to create a new station by artist, genre, or song.
The simplest way to create a new iTunes Radio station
One of the cool things about creating a new station this way is that Apple provides you with a preview of the type of music you’ll hear within the station. If you’re content with the preview, you can tap the plus button towards the right-side of the station name to add the station to your My Stations section.
Stations can be created using a variety of methods. For example, using the Edit feature allows you to create a new station:
Creating a new station from the edit interface
…You can also add a currently playing Featured Station to your list of stations:
Adding a Featured Station to My Stations
…Or create a new station from the artist or song associated with a song currently playing on a station:
Create a new station from a song or artist from a Featured Station
…Or create a new station from an artist or song of the music in your music library:
Creating a new station from music you own
One of the nice things about creating a new station from music that you already have in your library, is that the song that you’re currently playing will continue to play as a part of your new station, and new songs will play after the currently playing song is completed. The way that Apple pulls this off makes for a seamless transition between the music you own and the music you play on iTunes Radio.
Of course, as previously mentioned, you can create a radio station using Siri. Again, here are the commands that can be used to interact with iTunes Radio via Siri:
- Play iTunes Radio
- Play my rock station
- Play my Jim James station
- Play more songs like this one
- Don’t play this song again
- I like this song
Editing and curating stations
The primary way to curate stations is to use the star button on the now-playing screen. The star button allows you to play more songs like the current song or to never play the current song.
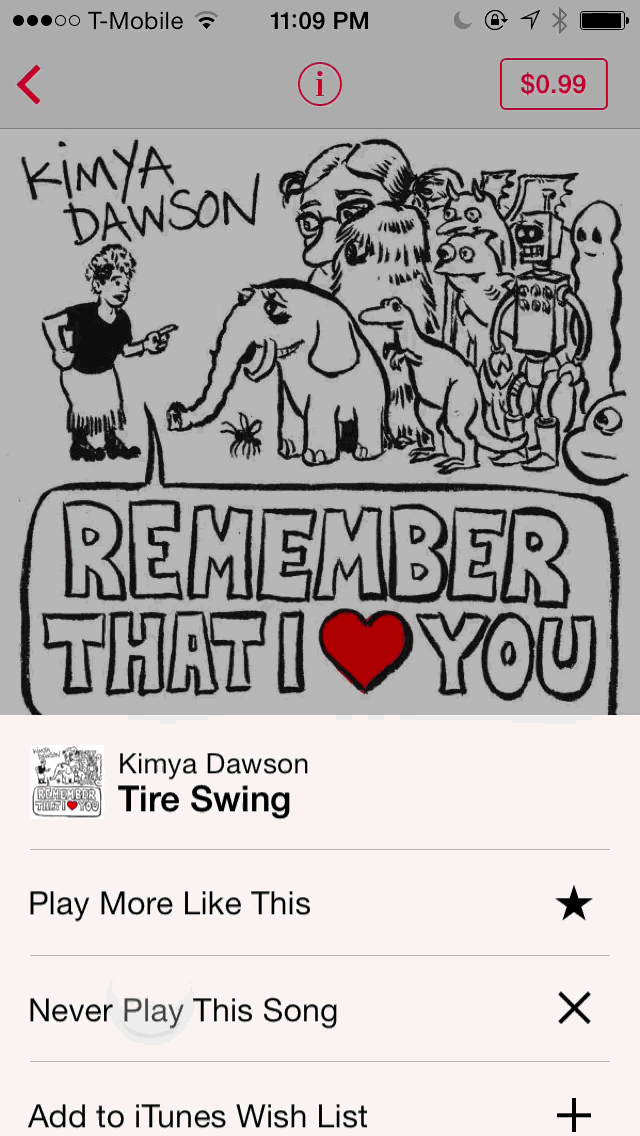
Play more like this
Never play this song
You can also add songs to your iTunes wish list for later retrieval and purchase.
Adding a song to the iTunes wish list
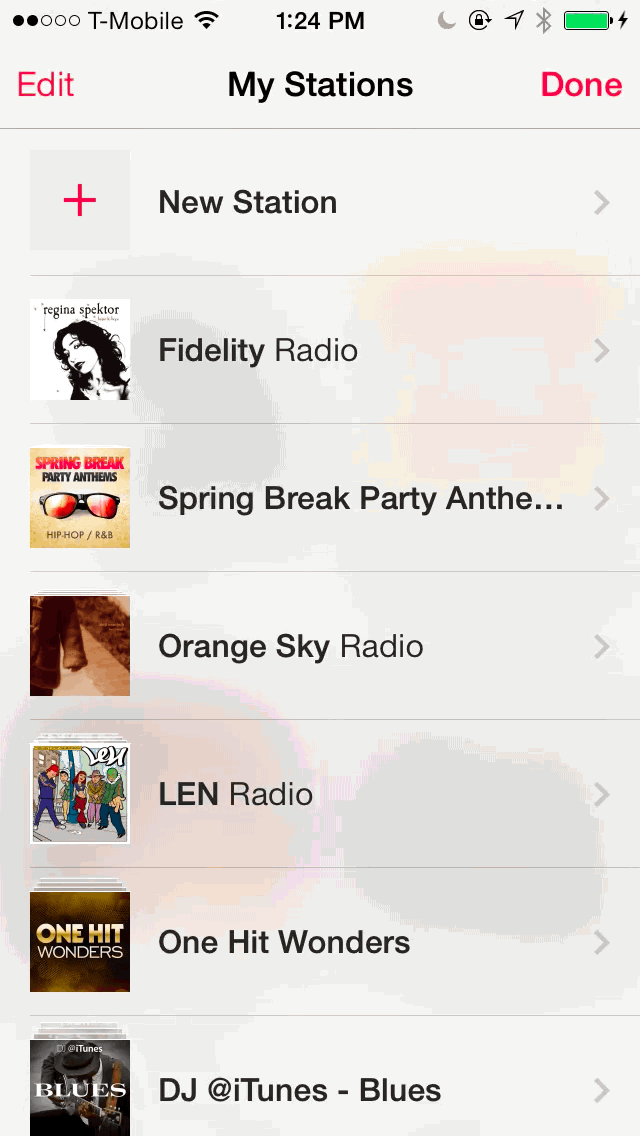
Using the edit button in the upper-left hand corner near the My Stations heading allows you to edit your favorite stations. Editing allows you to rearrange, rename, or delete any of the stations added to your My Stations section.
Deleting an iTunes radio station
Deleting a station is as easy as tapping the edit button and swiping from right to left on the station you want to remove. You may also delete a station by tapping the edit button that resides inside of the edit interface and delete each station by tapping on the red ‘-‘ symbol that resides next to each station.
Another way to delete stations
Being in the edit mode allows you to rearrange the order of the stations as well. Once you’re in the edit interface, tap edit again to view the drag-handles used to rearrange the station order. The changes will be reflected in your group of My Stations.
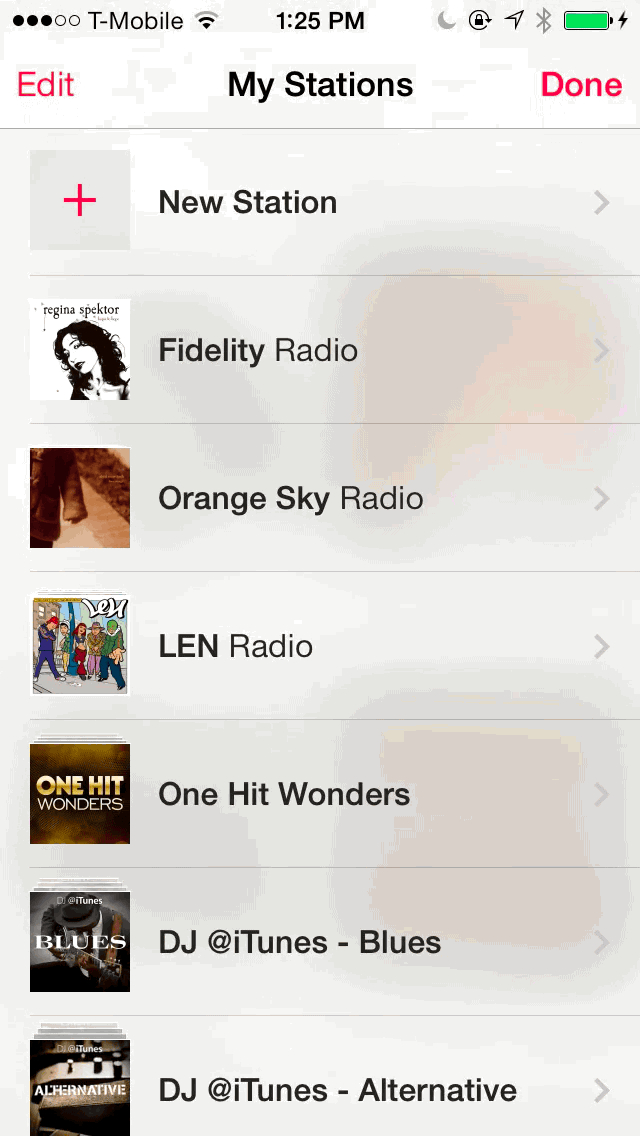
Rearranging an iTunes Radio station
For custom stations that you create, you can change the name of the station by tapping on the station while in edit mode.
Renaming a custom station
You can further curate the station by taking advantage of the “Play More Like This” option—adding additional artists, songs, or genres to the list of allowed modifiers that make up a station—or the “Never Play This” option—removing an artist, song, or genre from the list of allowed modifiers that makes up a station.
Curate your station using the Play More or Never Play options
For stations curated by Apple, you are not allowed to rename or curate the station manually, since these are canned-stations that don’t fluctuate or evolve based on listening habits. You can, however, share or delete the station by tapping on the name of an Apple-curated station while in the edit interface.
Overall, iTunes Radio is a great new addition to iOS. It’s also available on the Apple TV and the Mac. All of your curated stations go with you no matter the platform, which makes for an immersive experience. I was skeptical at first, but after thoroughly exploring its features, I can attest that iTunes Radio is an awesome new addition to Apple’s repertoire.

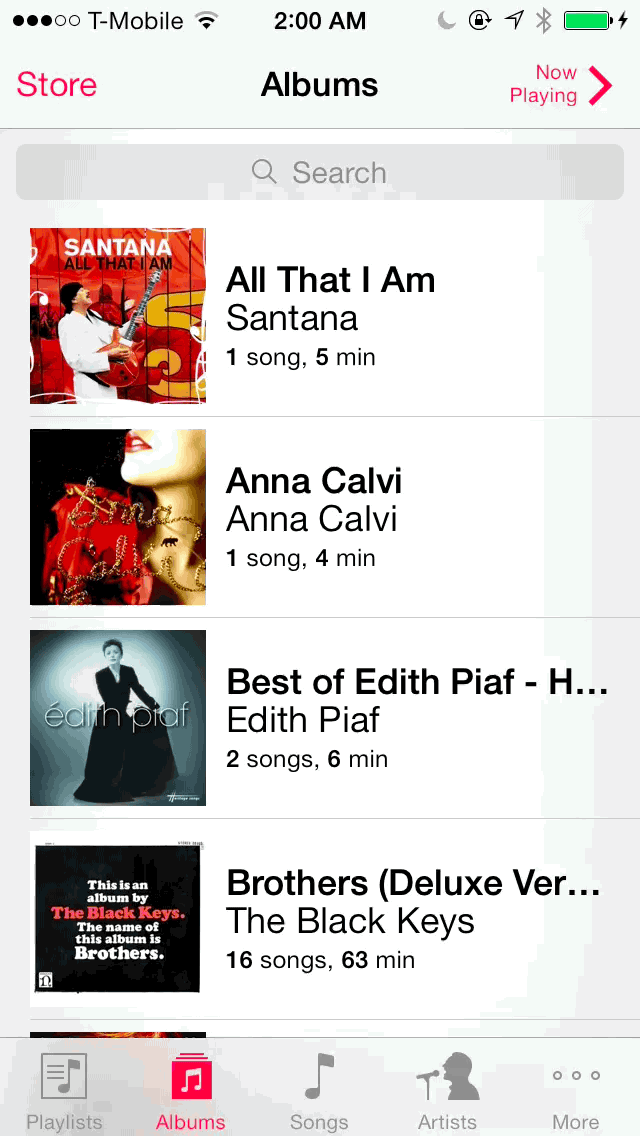
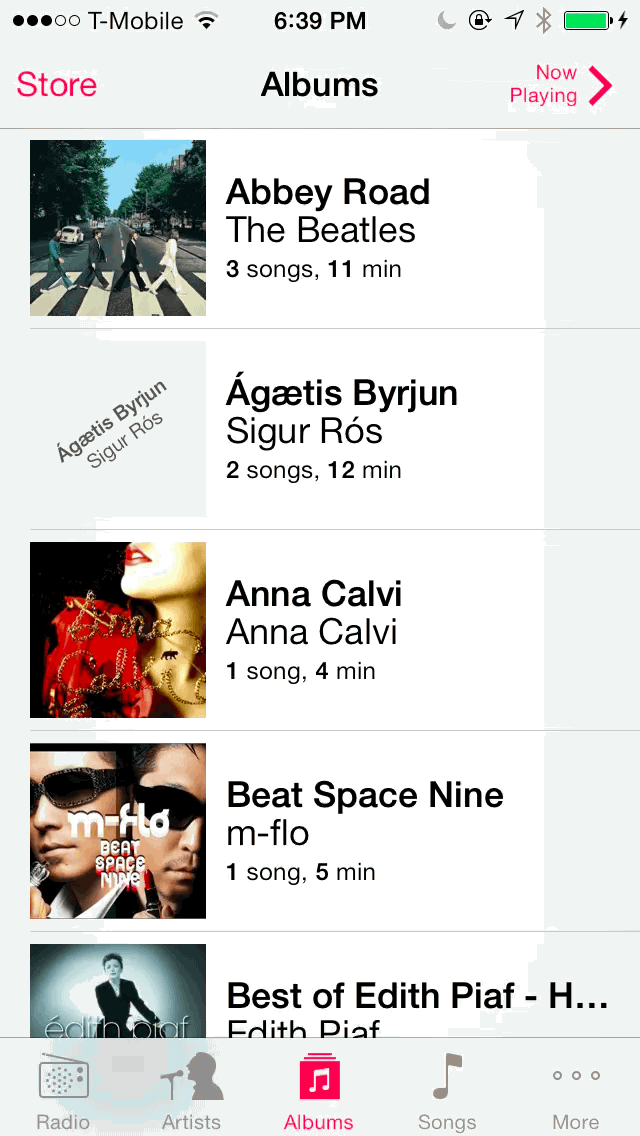
Albums
The albums tab contains an alphabetical listing of each individual album found in your music library.
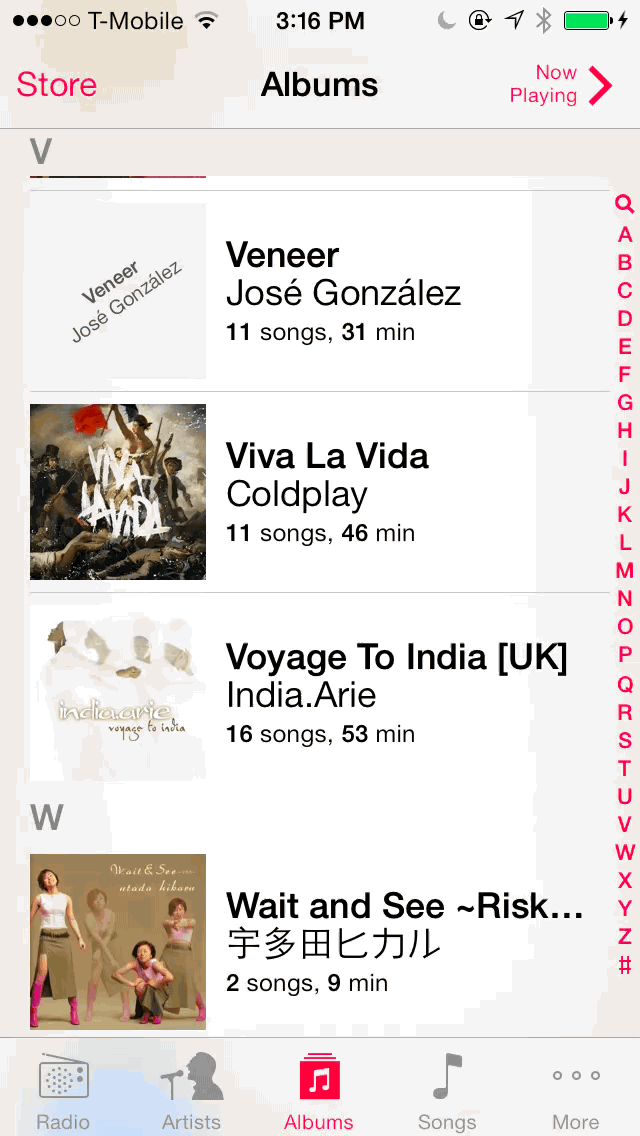
Viewing individual albums is a great way to find specific tunes
If there’s a specific album that you want to hear, this is the best tab to use to go about doing that. For me personally, it’s my go-to tab when it comes to playing music from my personal library.
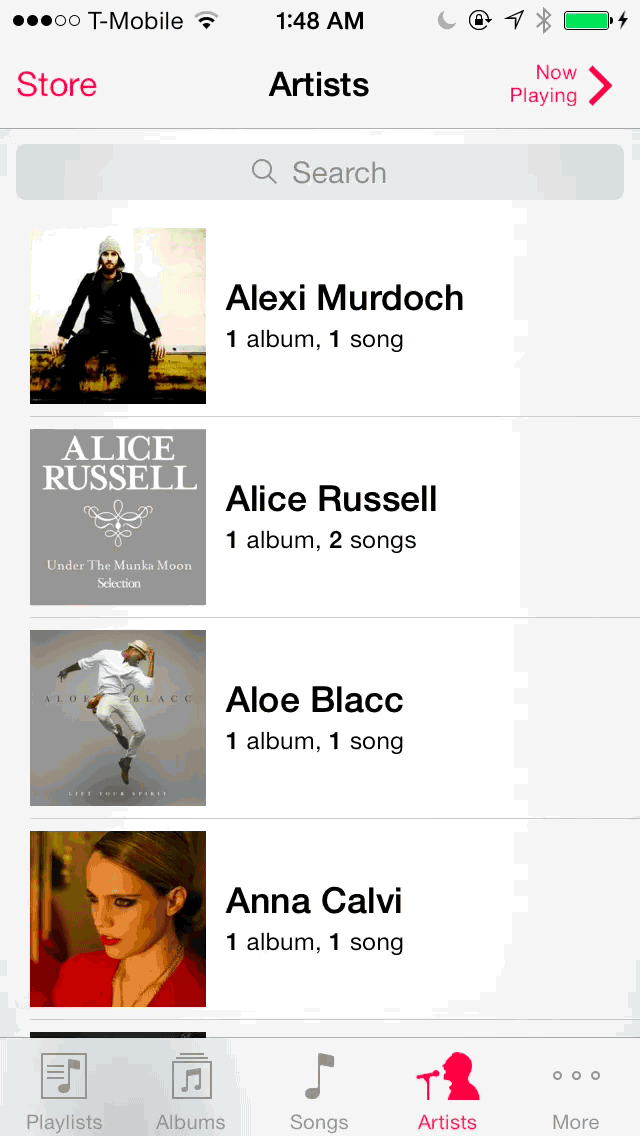
Artists
The artist tab features an alphabetical list of all of the artists found in your music library. Each artist name is associated with the album artwork from an album they are featured on. Tapping on an artist will allow you to view a list of all of their songs grouped by album.
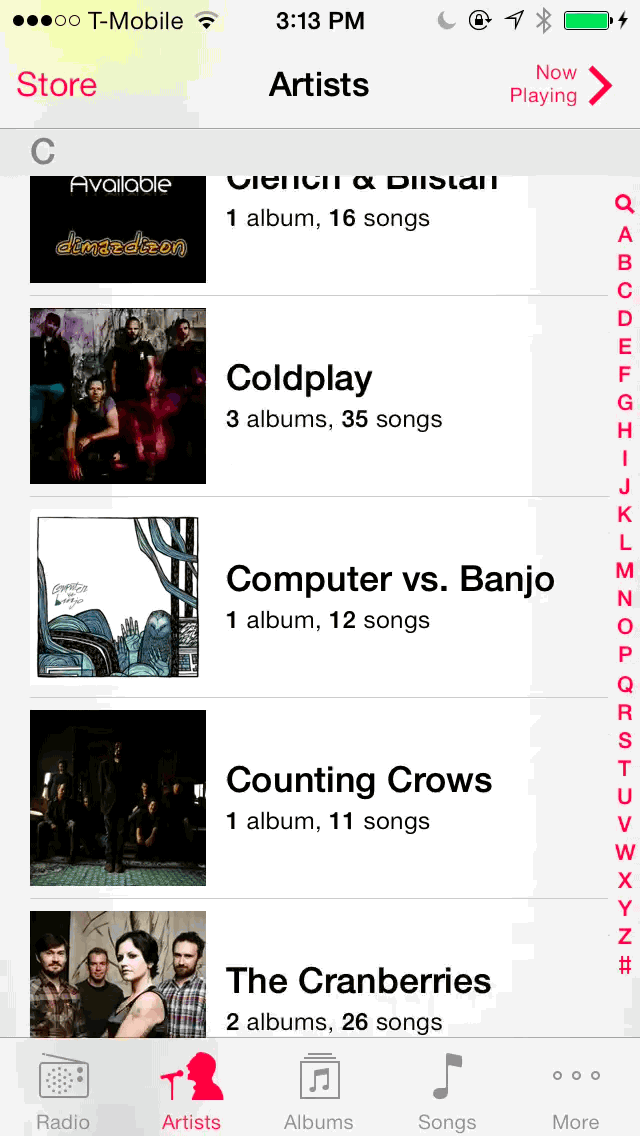
You can view all of the songs and albums related to a specific artist
At the very top of the individual artist page, you’ll find a button to shuffle all songs by that artist. This is useful for the times when you want to hear a specific artist, but don’t necessarily care about the actual song that plays.
Audiobooks
If you have an audiobook synced to your device via iTunes, then an audiobooks section will show up under the more tab. You can add the audiobooks tab to the bottom of the Music app interface if you go into edit mode and drag the audiobooks tab to one of the four tabs at the bottom of the screen.
The audiobook playback interface
Playing an audiobook works very similarly to playing a music track, with a few exceptions. First, the interface has changed to accommodate the extra buttons used for playing audiobooks. Secondly, some of the unnecessary features have been removed to help simplify the interface.
The most obvious change is the presence of two new buttons, one for skipping back 15 seconds, and the other for skipping forward 15 seconds. There’s also a speed button located in the bottom right-hand corner of the interface. This speed button allows you to adjust the speed of the playback by 1x, 2x, and 0.5x speeds.
Compilations
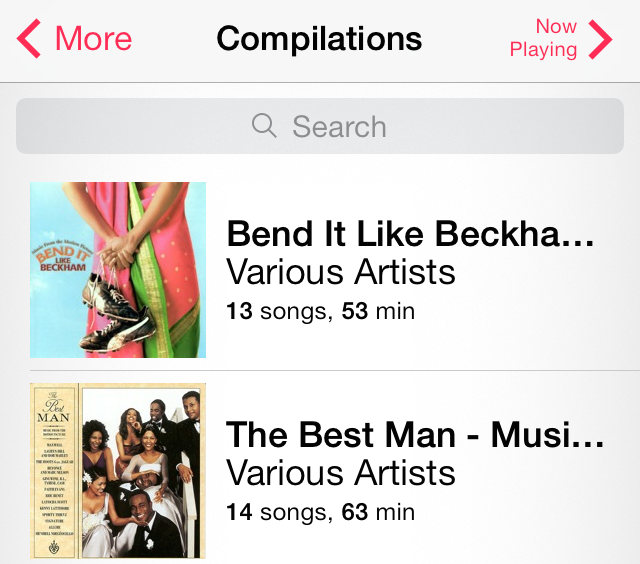
Soundtracks can count as a compilation
Compilations are generally best-of albums, soundtracks, or multi-disc sets. A special key has to be set within iTunes to label a collection of songs or an album as a part of a compilation.
Composers
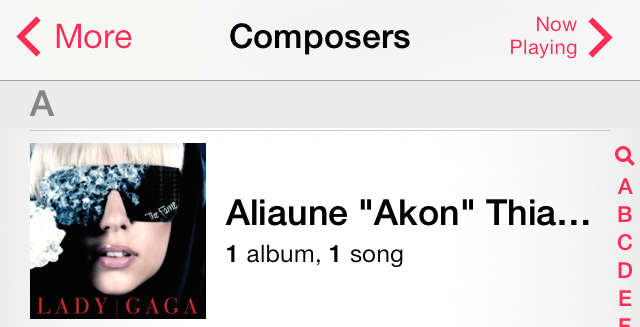
The composers tab allows you to view individuals who worked on a project behind the scenes
If you’re looking for a specific person who’s had a role behind the boards, then the composer tab is the tab for you. This allows you to view individuals who have played a part in creating a song, even if they didn’t necessarily sing on the song.
Genius
The Genius tab allows you to play predetermined genres using Apple’s Genius algorithm. These are auto-generated mixes that take a lot of the work out of creating a quality mix from a specific genre.
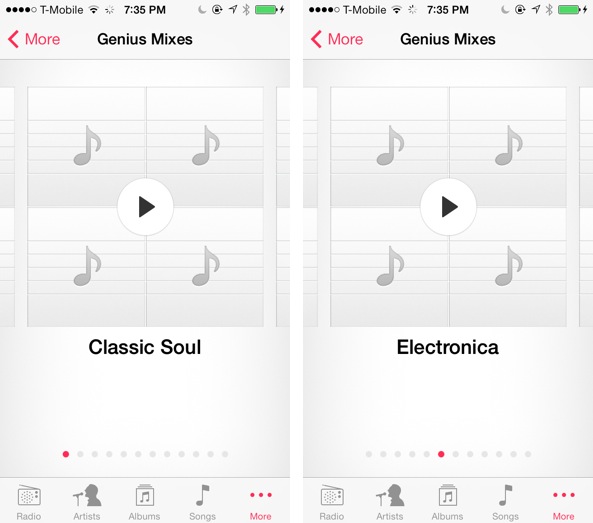
The Genius section doesn’t play very nice with iTunes Match items that are in the cloud
Genres
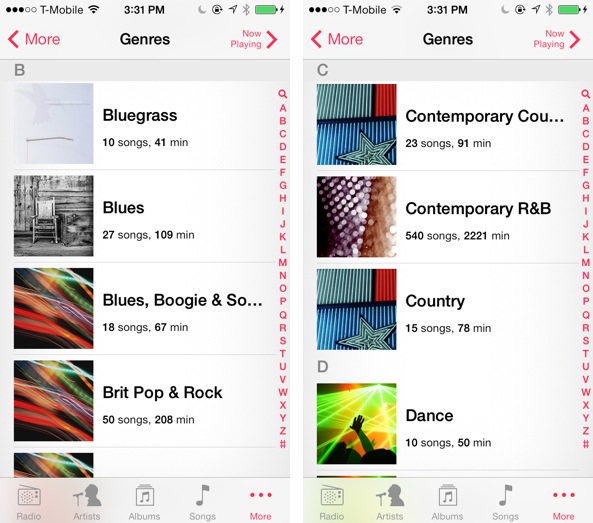
I guess you could say that I have diverse tastes in music
There are dozens upon dozens of different musical genres, and this tab allows you to key in on specific ones. This is a great tab to use if you’re in the mood to listen to a particular style of music.
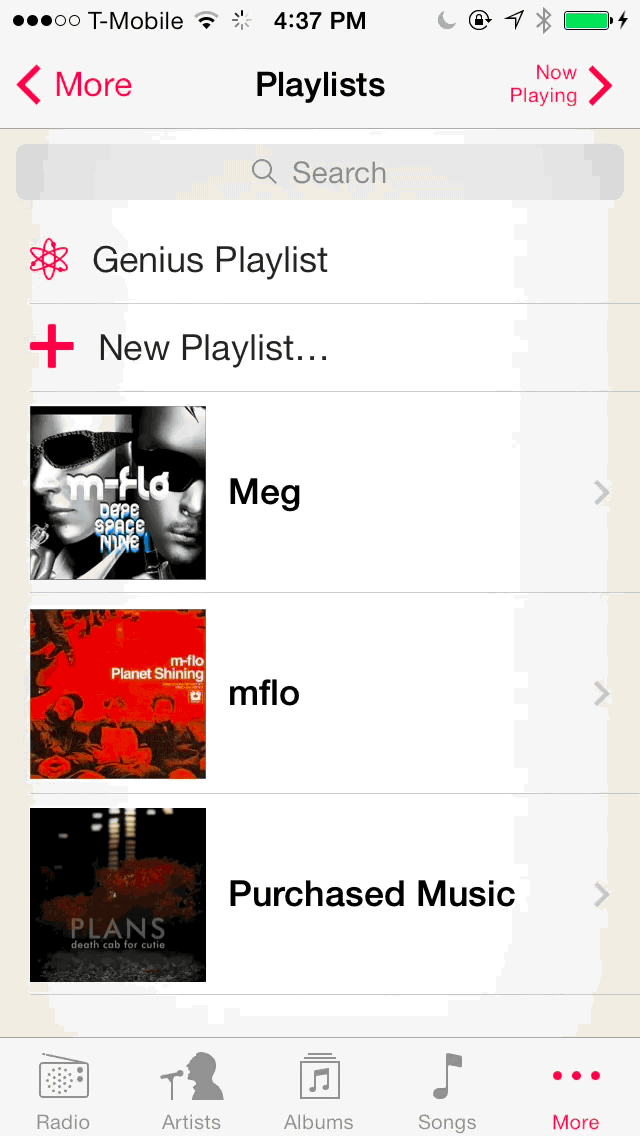
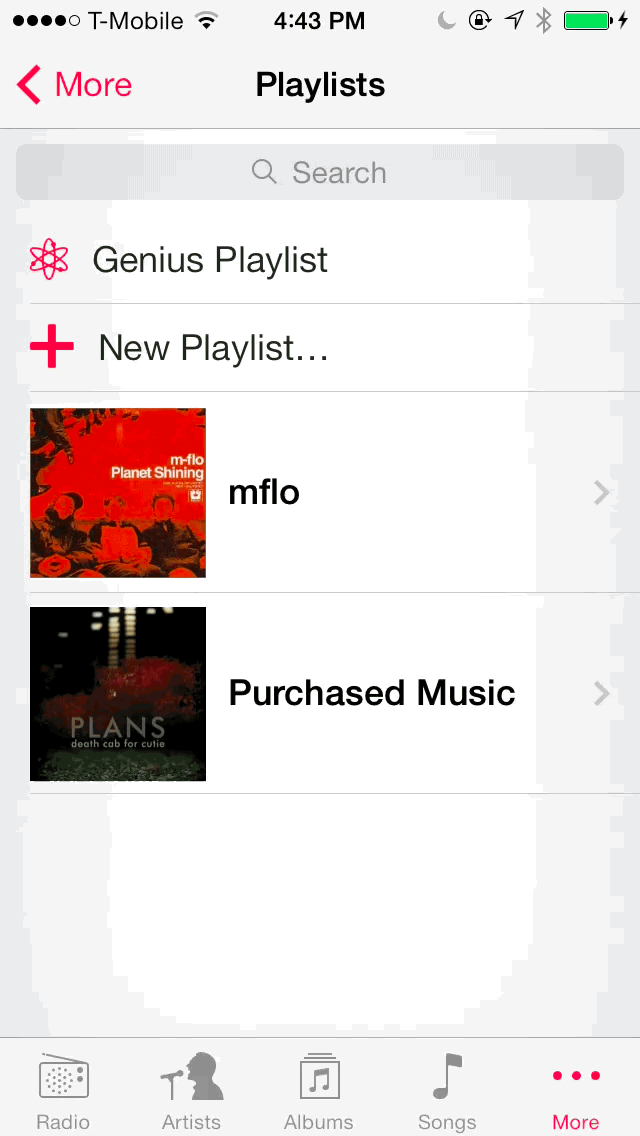
Playlists
The playlist tab lets you create, manage, delete and play playlists. There are actually two types of playlists available in the playlists tab: Genius playlists and normal playlists.
A normal playlist can be created by tapping on the new playlist button at the top of the playlist page. You’ll be asked to enter a name for the new playlist followed by the songs you want to add to the playlist. Songs can be added based on artists, albums, or composers. Once you finish adding songs to your playlist, tap the done button in the upper right-hand corner to finish the playlist creation. You’ll then find your new playlist, with an album cover represented by the first track listed, in the playlists tab.
Creating a new playlist
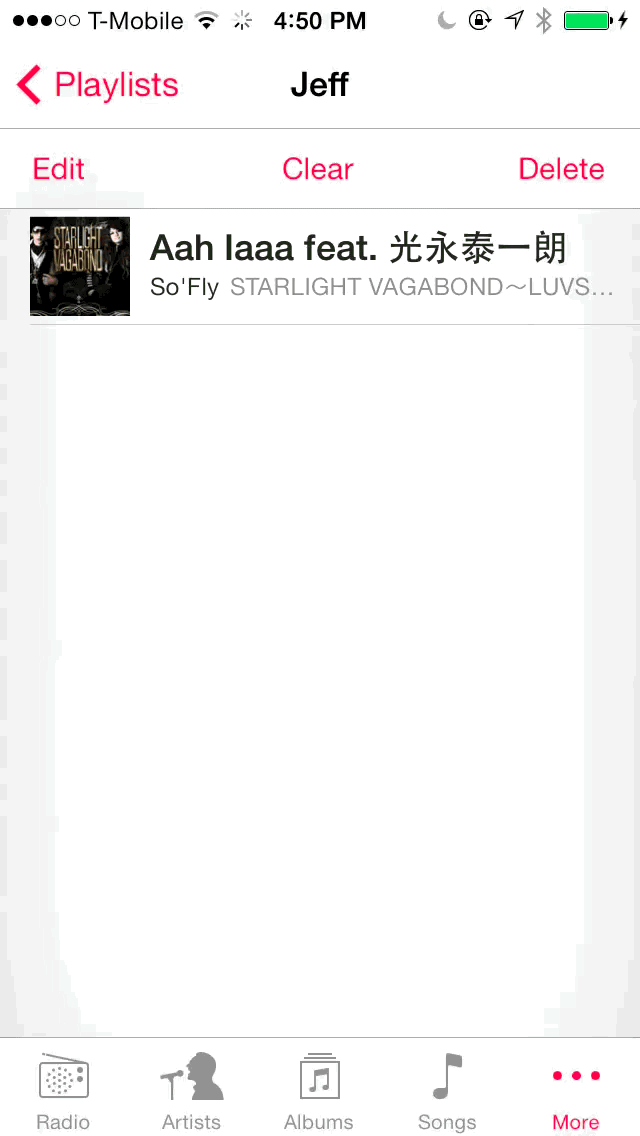
To edit a playlist, tap the edit button in the upper left-hand corner of the playlist. You can then tap the red ‘-‘ button to delete individual tracks, or use the drag handles to rearrange the order of the songs in the playlist. Once you are finished editing the playlist, tap the done button.
You can delete individual tracks from a playlist without actually entering the edit mode. Simply swipe from right to left on a song featured in the playlist to bring up the delete option.
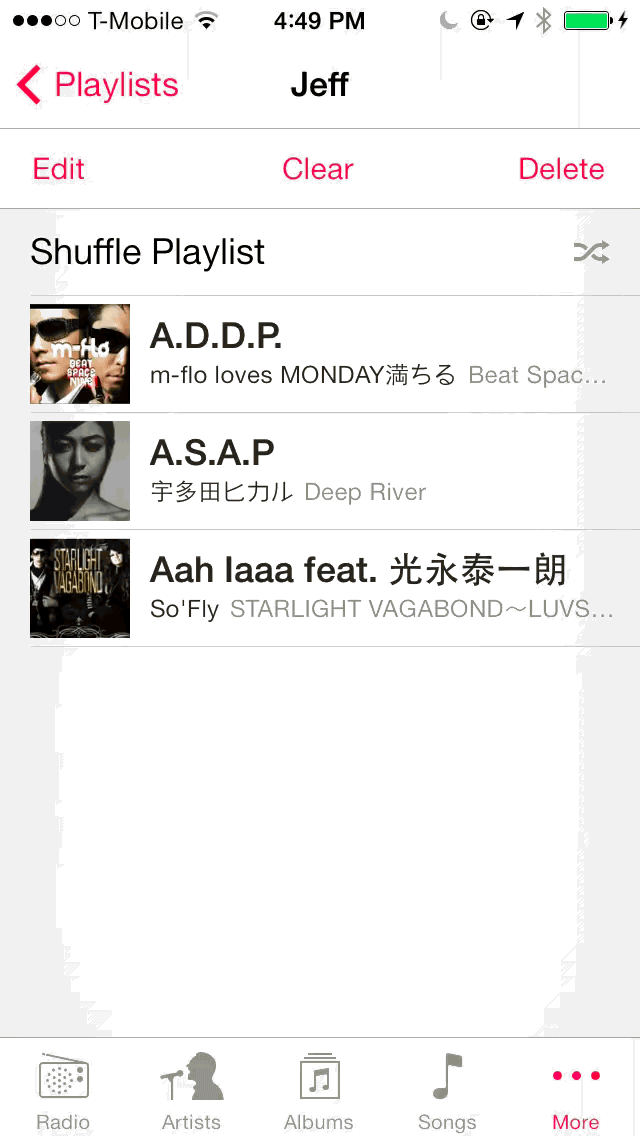
Deleting individual playlist items
To add additional tracks to a playlist, tap the edit button in the upper left-hand corner and then tap the ‘+’ button in the upper right-hand corner. You’ll see a list of all of the songs on your device, which will allow you to add new songs to the playlist.
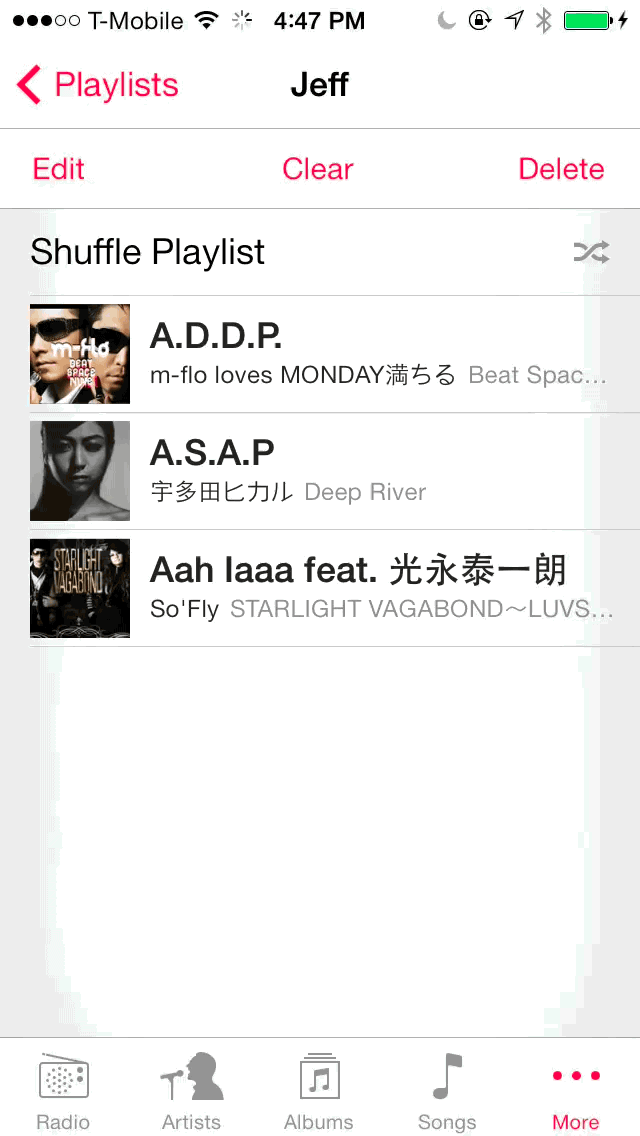
Clearing a playlist
If you’d like to clear all of the tracks associated with a playlist without actually deleting it, you can use the clear button located at the top-middle of the individual playlist page.
There are two ways to outright delete a playlist. You can swipe from right to left on the playlist itself, or use the delete button when in the individual playlist view.
To outright delete a playlist, swipe from right to left on the playlist remove it
Using the delete option in the individual playlist view
Genius playlists
The Genius playlist feature automatically generates a playlist of songs from the user’s local library which are similar to the selected song. The included songs are based on algorithms to match the type of songs as closely together as possible.
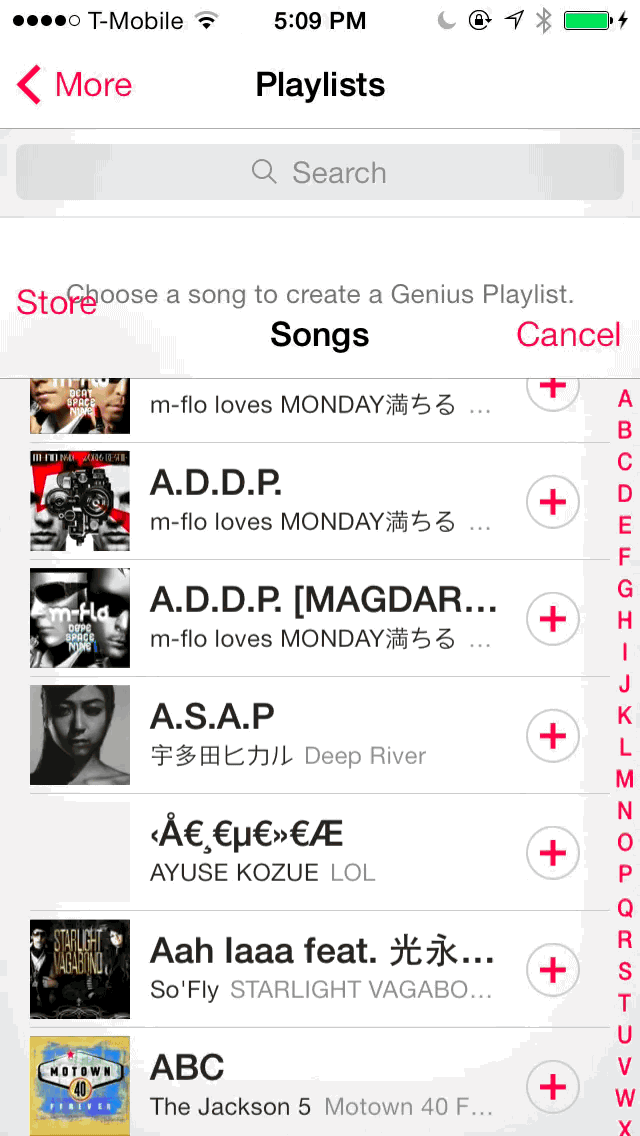
Creating a Genius playlist
Once your Genius playlist is created, you can use the refresh button to dynamically refresh the content of the playlist. Each refresh will cause the playlist to pull in new songs based on the song you used as a baseline for the playlist.
Radio
The Radio tab is for iTunes Radio. Please see the iTunes Radio section above for more in-depth information.
Songs
The songs tab is the most granular view you can possibly have when it comes to the items in your music library. When you tap on an item in the songs view, the song will begin playing immediately.
One of the perks of using the songs view is the shuffle button. By using shuffle in songs view, you can shuffle-play all of the songs in your entire library.
Shared
The shared section isn’t available as a tab, but you can find it under the more tab if you have Home Sharing enabled on both your iOS device (Settings > Music > Home Sharing) and your local computer running iTunes. Sharing allows you to share an iTunes desktop library directly to your iOS device’s Music app. The sharing is only local, so once you disconnect from your local Wi-Fi, you will no longer be able to view the shared section.
Shared libraries allow you to access a ton of extra content from your local computer
Tapping on shared will allow you to select the shared library and play songs available from your local computer. This is a great way to expand your music library locally without taking up additional storage space on your iOS device.

One of the benefits of buying music from iTunes is that all of your music is stored in iCloud—Apple’s cloud storage solution. When you log into your iCloud account on any device, all of the music that you have purchased automatically appears.
Wouldn’t it be nice if the same applied to all of your music, even if it wasn’t purchased via iTunes? That’s the premise behind iTunes Match; it allows you to store or match all of your music in the cloud and access it from any device.
iTunes Match is a subscription-based service that costs $24.99 annually. You can learn more and subscribe by visiting Apple’s official iTunes Match page.
Benefits
We won’t get into all of the particulars of iTunes Match, since that goes beyond the scope of this guide, but I wanted to highlight a few of the benefits of iTunes Match that I particularly enjoy:
- iTunes Match subscribers get an ad-free iTunes Radio experience
- iTunes Match will match all of your content, and only upload the items that it can’t match
- Matched content is high quality (256-Kbps AAC DRM-free) even if your original content was low quality
- You can play iTunes Match content from anywhere—the Mac, PC, iOS/Apple TV
- You can store up to 25,000 songs using iTunes Match (not including those purchased via iTunes)
- You can stream iTunes Match songs in order to save storage space on your device, or download the songs for offline access
Enabling iTunes Match
You can enable iTunes Match on your iOS device by going to Settings > Music > and enabling the iTunes Match toggle. Once you enable iTunes Match, you should see the iTunes Match splash screen momentarily as it downloads your content from iCloud.
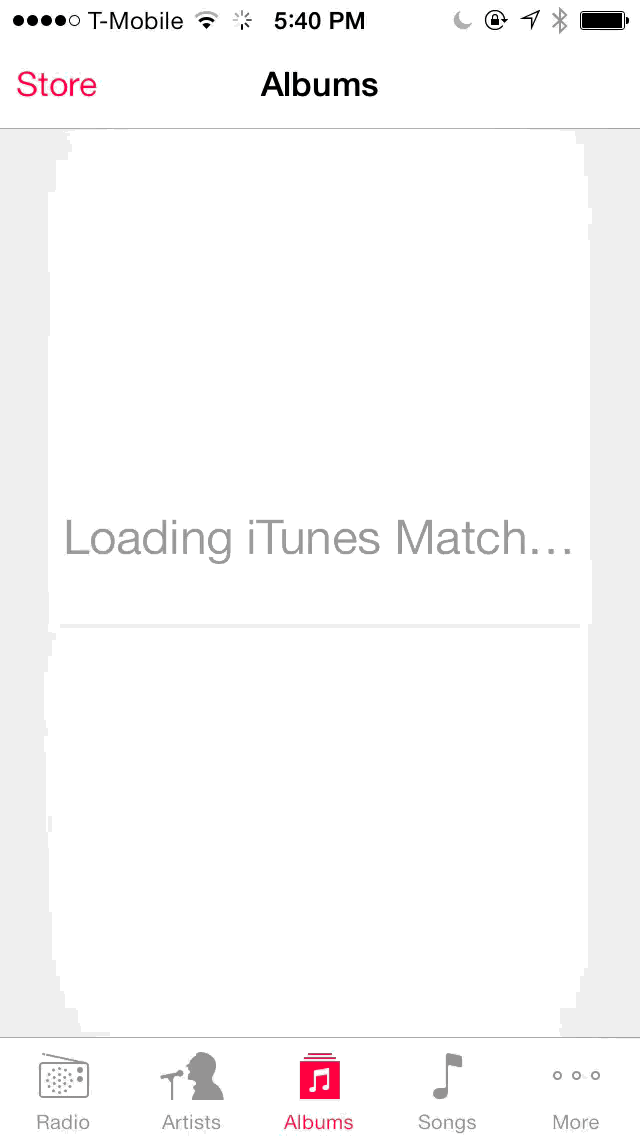
The iTunes Match splash screen
The songs and the album art that accompanies them will take some time to download depending on how many songs you have stored with iTunes Match. You will see placeholders of album artwork until all of the songs can be properly downloaded.
Notice the album art placeholder—it will take some time before all album art is downloaded
As mentioned earlier, one of the benefits of using iTunes Match is that it frees up a lot of the space available on your iOS device. You no longer have to download or sync your entire iTunes library to your device. Instead, you can stream all of the music stored in the cloud.
Streaming music directly from iCloud
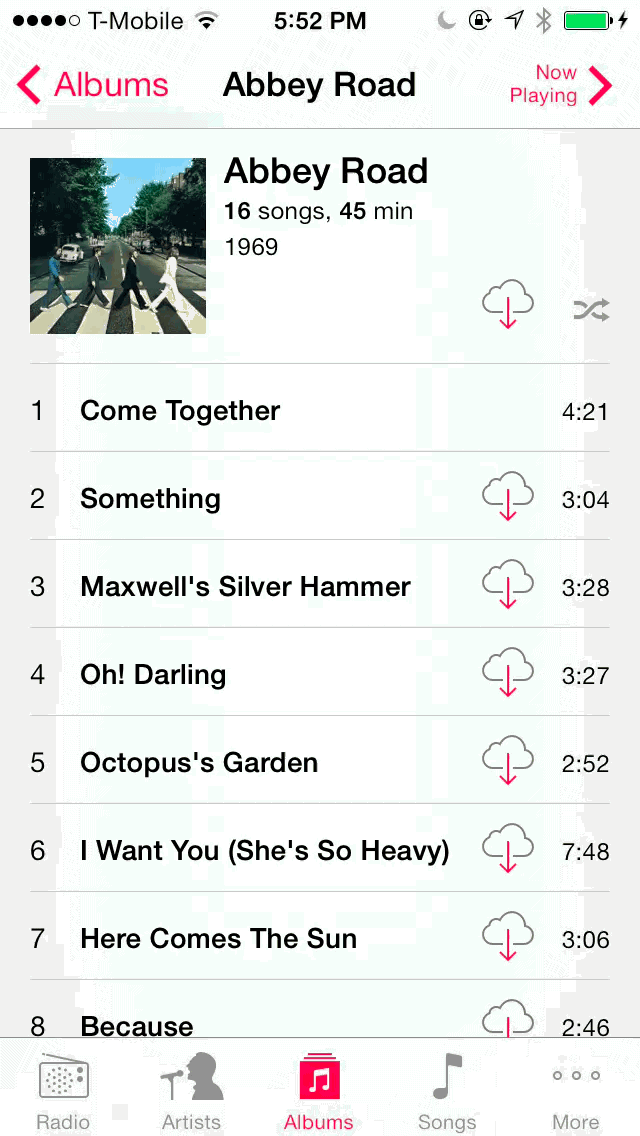
If you know you’ll be in a place without access to the internet, you can download your favorite songs for offline listening. This is accomplished by tapping the cloud icon that resides to the right of any songs stored in iCloud. You can download single songs, entire albums, or entire playlists using the cloud icon.
Downloading music from iCloud for offline listening
Since you can download music from iCloud for offline play, it would only make sense if you could delete items as well. Deleting items can be done for iTunes Match content as well as for content purchased from the iTunes Store. To delete a song, all you need to do is swipe on the song from right to left and tap on the delete option. The song will still be listed and available for streaming, but it will no longer be available for offline play until you download it again.
Deleting a song from the local device
In conclusion, I believe that iTunes Match is well-worth its $24.99 annual asking price. It allows you to store all of your music— whether you purchased it from iTunes or not—and makes it accessible from anywhere. Better yet, it saves you from having to use up storage space on your devices, because all of your music is streamable and downloadable on demand. iTunes Match mixed with iTunes Radio makes for a very compelling one-two combo.

The settings for the stock Music app can be found in Settings > Music. Below we will touch on each setting and discuss its purpose.
Shake to Shuffle
This is a fairly self explanatory setting. It allows you to shake your device to enable shuffle mode while playing music with the stock Music app.
Sound Check
This feature allows you to hear all of the songs in your library at a normalized volume. Sound check tries to play back all of your songs at an equivalent sound level so that your music won’t be outstanding loud or quiet.
EQ
Alter the Music app’s equalizer settings using any of the following pre-configured settings:
- Acoustic
- Bass Booster
- Bass Reducer
- Classical
- Dance
- Deep
- Electronic
- Flat
- Hip Hop
- Jazz
- Late Night
- Latin
- Loudness
- Lounge
- Piano
- Pop
- R & B
- Rock
- Small Speakers
- Spoken Word
- Treble Booster
- Treble Reducer
- Vocal Booster
Depending on the type of music that you’re listening to, you may benefit from adjusting the EQ setting. For instance, if you’re listening to an audiobook, you may want to select the Spoken Word EQ setting.
Volume Limit
Designed to prevent hearing damage when using headphones, you can set a max limit for music played through the stock Music app. This is a good setting to use if you have small children who like to listen to your device.
Lyrics & Podcast Info
This setting allows you to remove the text that appears on top of the album artwork for lyrics and podcast information.
Group By Album Artist
Sort albums under the artist tab by album artist.
Show All Music
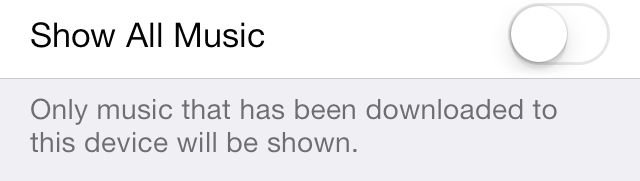
As we discussed earlier in the iTunes Match section, you can download music directly to your iOS device, or keep the music in the cloud and use streaming. This option allows you to hide all music that is not downloaded locally to your device. This is a handy option for those moments when you’re offline, or when you don’t want to worry about downloading songs. This option will ensure that only the tracks that you can play immediately without internet access are displayed.
iTunes Match
Enable iTunes Match. Learn more about iTunes Match here.
Home Sharing
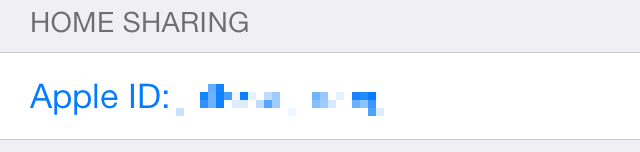
Home sharing allows you to play music from the iTunes Library on a local computer. You’ll need to log in with the same Apple ID used on the desktop version of iTunes. To learn more about Home Sharing, check out the details posted above about the Shared section.

The Music app is an incredibly deep stock application—and that’s readily apparent just by looking at the scope of this guide. I learned a lot about the Music app as I wrote this, and I hope that you did as well.
Apple has a wonderful ecosystem on its hands, and its been strengthened with the addition of iTunes Match and iTunes Radio. While the popularity of iTunes and music purchases may be declining due to competitors like Spotify and Pandora, it’s nice to see that Apple is trying to take preventative measure to ensure it stays strongly entrenched in the digital landscape.
What do you think about the stock Music app? Do you have anything to add to the tutorial? Was there anything that we missed, or anything that was unclear? By all means, we urge you to provide us with feedback down below in the comments section. We look forward to reading what you have to say.