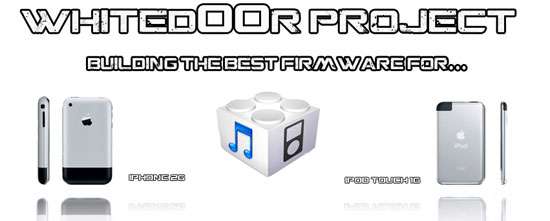
Unopened first-gen iPhone appears on eBay for $10,000

By Cody Lee on Aug 9, 2012

After months of rumors and speculation, Steve Jobs unveiled the original iPhone on January 9, 2007 in front of a large Macworld audience at the Moscone Center in San Francisco.

The handset would later become available for purchase on June 29 of that year, and the rest, as they say, is history. And now you can own part of that great history for a mere $10,000… Read More


Ask Jeff Season 02: Episode 01 – Finding the Secret

By Jeff Benjamin on Feb 21, 2012

Do you have a jailbreak related question that you’ve just been dying to find an answer to? Do you want to discuss all things Apple with the folks at iDB? If so, then be sure to tune into the latest episode of Ask Jeff.

In the first episode of the year, Jeff tackles questions regarding the rumored Apple Television, the iPhone 2G, the best jailbreak tweak for the iPhone, Cydia errors on refreshing, and much, much, much more… Read More


Sara: A Siri alternative for older devices, including the iPhone 2G

By Jeff Benjamin on Feb 10, 2012

Looking to add Siri on your iPhone 2G, iPod touch, or virtually any other pre-iPhone 4S device? Then look no further than Sara.

Sara is far from perfect, but if Siri Proxy is not an option for you then it is likely the next best thing.

Check inside as we take Sara for a test drive on video… Read More


The iPhone Turns 5 Years Old Today

By Alex Heath on Jan 9, 2012

Steve Jobs announced the original iPhone five years ago on January 9th at Macworld. He famously said, “Today, Apple is going to reinvent the phone.” He was right.

In a post-iPhone world, it may be difficult for most of us to remember what the industry looked like before Apple’s announcement at Macworld in 2007. The iPhone has profoundly impacted not only the mobile phone market, but the device has also led to other redefining products, like the iPad. Read More


How to Jailbreak Your Older iPhone or iPod Touch Using Whited00r

By Cody Lee on Jun 13, 2011

Earlier today we did a post about Whited00r, a custom firmware built for older Apple ARM6 devices. It includes built-in tweaks and gives you the option to remove unwanted features like Spotlight to make your device faster.

Whited00r has been out for a while, but it’s kind of flown under the radar. There’s still millions of these older devices floating around, so we figured we’d give folks an easy walkthrough on how to install Whited00r on your older iPhone or iPod touch… Read More


Whited00r Firmware Provides Jailbreak and Unlock for Older iDevices

By Cody Lee on Jun 13, 2011

We’ve gotten some complaints in the past that we don’t give older iPhones any lovin’. The truth is, we try to keep up with innovation in the jailbreak community and there just typically isn’t much of that going on for devices older than the 3GS. Especially since Apple stopped supporting them.

But for folks with older iDevices that really want to join in on the jailbreaking festivities, check out Whited00r. If you haven’t heard about this cool little project, it’s essentially a firmware file that has been modified to include multitasking, video recording and oh yeah, it’s jailbroken

Read More


Back to the Future: Apple Reinvents the Phone

By Sebastien Page on Mar 21, 2011

I was browsing the web earlier today when I came across the video of Steve Jobs announcing the first iPhone back in January 2007. I remember that day as if it was yesterday. I remember how I instantly fell in love with the iPhone as it was everything I ever wanted in a phone.

Fast-forward four years later and I can say that the iPhone has changed my life, literally. Not only the iPhone has allowed me to change the way I communicate and stay connected, but the iPhone has also allowed me to quit my job and make a living blogging about this revolutionary device… Read More


WhiteD00r Brings iOS 4.2 To iPhone 2G/3G And iPod Touch 1G/2G

By Kickstar13 on Feb 18, 2011

As many of you know, with the release of iOS 4.0 Apple discontinued support for the iPhone 2G as well as the iPod Touch 1G. This left iPhone 2G and iPod Touch 1G stuck on iOS 3.1.3 for life. Furthermore, while Apple did end up upgrading the iPhone 3G (which has the same amount of RAM/processor as the iPhone 2G), 3G owners experienced a great deal of problems after updating to 4.0. The OS was incredibly slow and was barely usable.

After various reports and angry iPhone 3G users, Apple began to look into the issue and stated the issues would be resolved in iOS 4.2.1. When iOS 4.2.1 came around, performance had been improved on the iPhone 3G, but it was still quite slow. Most users decided to downgrade/remain on iOS 3.1.3.

Read More


Apple Game Center Not Compatible With the iPhone 3G

By Sebastien Page on Sep 7, 2010

Well screw you if you have an iPhone 2G or iPhone 3G! Apple will not support your device for Game Center, the social gaming network that will ship with iOS 4.1 tomorrow.

There were rumors of Game Centers not making it to the iPhone 3G, but Apple has made things official on their website. Read More


How to Install Android on Your iPhone 2G or 3G with iPhoDroid

By Sebastien Page on Aug 19, 2010

Android on the iPhone is more of a “project” than anything else. It’s buggy, unstable, and doesn’t even bring all the features needed to fully use the iPhone. So why in the hell would you install Android on your iPhone? Just for the heck of it, of course! Thanks to Sergio McFly, this is now easily possible.

iPhoDroid 1shot is probably the easiest way to install Android on your iPhone 2G or iPhone 3G. It doesn’t require any file editing or anything that might scared the least technically advanced of us. Without further ado, here are the instructions to set up Android on your iPhone. As usual, proceed at your own risks…

Step 1: Make sure your iPhone is jailbroken and Cydia is up to date. If it’s not jailbroken, do so by using JailbreakMe.

Step 2: Download the latest version of iPhoDroid 1 shot from here. The download link is at the very bottom left of the page.

Step 3: Make sure your iPhone is connected to your computer via the USB cable. Launch iPhoDroid and click “shoot”.

Step 4: iPhoDroid will extract the touch driver and transfer the cache/system/data folders to your iPhone.

Step 5: iPhoDroid will now place your iPhone in recovery mode.

Step 6: After that, you will get the OpeniBoot splash page with different options (Apple, Android, Install, Uninstall). Use the volume buttons to highlight the “Install” option, then tap the Home button to select it.

Step 7: Some code will then be running on your screen. Once done, your iPhone will reboot in the Android OS.

Done! You can now enjoy your crippled iPhone running Android.

If you’re one of the few courageous men out there to try this hack, please let us know how it’s working for you by leaving a comment below.

[iClarified]


Jailbreak and Unlock iPhone 2G 3.1.2 Using PwnageTool

By Sebastien Page on Oct 13, 2009

A few weeks ago, I wrote a step-by-step guide and tutorial that shows you how to jailbreak and unlock your iPhone 2G 3.1 using PwnageTool for Mac OS X. I could very well rewrite this tutorial again and call it “jailbreak and unlock your iPhone 2G 3.1.2 with PwnageTool” but that would be a waste of time as the steps are identical.

I suggest you check out this tutorial and follow the steps over there. The only thing that will change is that instead of using the firmware 3.1, you will have to use firmware 3.1.2 (iPhone1,1_3.1.2_7D11_Restore.ipsw). Everything else is exactly the same.


Tutorial: Jailbreak & Unlock iPhone 2G 3.1 Using PwnageTool

By Sebastien Page on Sep 16, 2009

This guide and tutorial will show you step by step how to jailbreak and unlock your iPhone 2G using PwnageTool for Mac. At the time I am writing this, only PwnageTool for Mac is available to jailbreak or unlock iPhone 2G 3.1. Tools for PCs should be available soon. For the latest information about jailbreaking methods (including iPhone 3G and 3GS), I suggest you read our jailbreak page.

UPDATE: This tutorial also works for iPhone OS 3.1.2. Instead of using the 3.1 firmware, simply use a 3.1.2 firmware.

Please make sure you read and understand everything before starting the process. If you’re new to jailbreaking, please take the time to follow the tutorial step by step. Problems often come when people want to go to fast or skip a step, so again, please take your time to read and understand every step.

1. First, make sure you have the latest version of iTunes installed on your computer. If not, update to the latest iTunes available.

2. On your desktop, create a folder called “jailbreak”. In this folder download and save the following files available from our downloads page:

  • PwnageTool 3.1
  • 3.1 IPSW firmware for iPhone 2G (iPhone1,1_3.1_7C144_Restore.ipsw), or
  • 3.1 firmware for iPhone 2G (iPhone1,1_3.1.2_7D11_Restore.ipsw) if you want to jailbreak 3.1.2
  • BL 3.9
  • BL 4.6

When downloading the 3.1 firmware, make sure you use FireFox and not Safari as Safari often brings up unwanted issues. To download PwnageTool, you will need a torrent downloader such as uTorrent.

3. Launch PwnageTool. Click OK to the warning message. Then choose “Expert Mode“.

4. Choose your device. It should be the one on the very left. A green check mark should appear when you click on it. Click the blue arrow to continue.

5. You will now be able to “Browse for IPSW“. Click on it and look for the 3.1 firmware you downloaded in step 2. Select the IPSW file and click the blue arrow to continue.

6. You should now be taken to the general menu where you have 7 different options. Choose “General“.

7. In the “General settings“, make sure that “activate the phone” and “enable baseband update” are checked. This is important. Again, make sure these 2 options are checked. Change the root partition size to about 600 MB and click the blue arrow to continue.

8. In the “Bootneuter settings“, check “Neuter bootloader“, “Unlock baseband“, and “Auto-delete bootneuter.app“, then click the blue arrow to continue.

9. You should now be in the “Cydia settings“. This allows you to install packages so you don’t have to do it later via Cydia. I like to install my packages manually but feel free to select a few if you want to. I will skip this step. Click the blue arrow to continue.

10. In “Custom packages settings“, I recommend only checking Cydia. Icy is quite unstable so I don’t recommend installing it. Do as you want but make sure at least Cydia is checked. Click the blue arrow to continue.

11. You are now taken to the “Custom logos settings“. You can choose pre-selected logos or upload your own. I don’t recommend installing any. I suggest unchecking the 2 custom logos that are pre-selected, then click the blue arrow to continue.

12. You should now be back to the general menu. It is time to start building your custom firmware. Click “Build“, then click the blue arrow to continue.

13. If you haven’t pwned your iPhone before, you will have to upload the bootlader files you downloaded in step 2. Follow the instructions on the screen to upload BL 3.9 and BL 4.6.

14. PwnageTool will then ask you if “you have an iPhone contract that would activate normally with iTunes”. If you’re using an official phone carrier (ie AT&T in the US, 02 in UK, etc…), and don’t want to unlock your iPhone, click YES. Your iPhone will just be jailbroken. Click NO if you want to unlock your iPhone to use with other carriers.

15. You will now have to save your custom IPSW. Save it to your “jailbreak” folder on your desktop. PwnageTool will now create your custom IPSW which may take up to 15 minutes.

16. If asked for it, enter you admin username and password.

17. PwnageTool will ask you if your iPhone has been pwned before. Just say No.

18. This is a very important step. PwnageTool will ask you to turn off your device, the put it into DFU mode. After turning off your iPhone, follow the on-screen instructions to put your iPhone into DFU mode. Hold the power and home buttons for 10 seconds. Let go of the power button but keep holding the home button until you enter DFU mode. If you fail, PwnageTool will give you an error message and you will have the opportunity to start over this process until completed successfully.

19. Once your in DFU mode, launch iTunes if it hasn’t already launched automatically. It will tell you that iTunes has detected an iPhone in recovery mode. Click OK.

20. We will now restore your iPhone using the custom firmware you created. In iTunes, hold the Alt/Option key while clicking “Restore”. This is extremely important that you hold the Alt/Option key while clicking. A window will pop up and will let you browse for the custom firmware you created (which should now be saved in your “jailbreak” folder). Select it.

21. The restore will start, which may take up to 15-20 minutes. Once done, your iPhone will reboot.

Congratulations! You just jailbroke and unlocked your iPhone. If you have any question or comment, please leave a comment below.