Justin Balog

Justin Balog is an award winning photographer and filmmaker. You can follow his daily creative adventures at HOSSedia.com or learn more about iPhone Photography in his iBook “Big World Little Lens” (PDF version). To find out more about Justin, follow him on Twitter and Facebook.

How to photograph lightning with your iPhone

Taking picture of lightning with iPhone

Lightning photography is all about timing. If you're shooting with a DSLR, you can use all sorts of tricks, like super-long exposures and lightning triggers. With our mobile phones, we have to be a bit more creative. I thought I would share a few quick tips to improve your chances of photographing nature that happens in a fraction of a second.

In this iPhone photography lesson, we will show you several techniques about how to photograph lightning with your iPhone.

How to create stop motion animations with your iPhone and Google+ Auto Awesome feature

If you're going to understand this post, you'll first need to see my Auto Awesome in action. This might be a bit of a departure from a traditional lesson in iPhone Photography, but I always feel it's important to experiment with new technologies. I went so far down the Rabbit Hole trying to figure this out, I just had to share it!

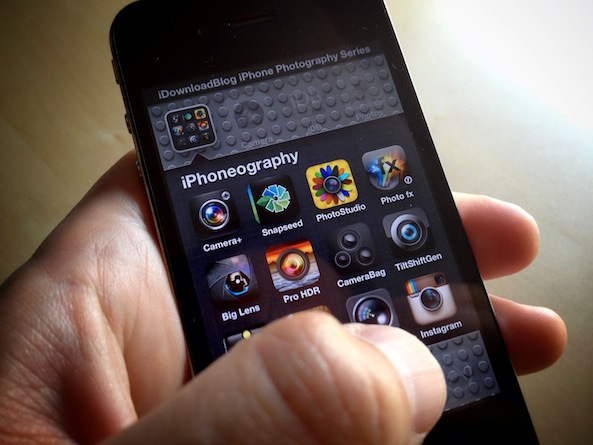
If you're a Google+ user, you probably already know this. If not, they actually have some very cool things going on over there. One of those things is the 'Auto Awesome' photo tools. In short, 'Auto Awesome' can do very awesome things with the images you upload and like the name implies, it does it automatically. Things like 'auto enhance', 'auto HDR', 'auto panorama', and for this example, 'auto motion'!

All you do is upload several photos and Google automatically determines the appropriate awesomeness to apply. For example, if they are different exposures of the same scene, it will auto HDR them. If there is overlap in the scene from one image to the next, it will auto panorama them. If it's the same scene with subtle motion differences, it will do this...

Three powerful ways to improve your landscape iPhone Photography

We have covered a whole bunch of creativity in these iPhone Photography lessons. However, one thing we haven't touched on is something that we all love to photograph: landscapes! I recently spent a week in the Utah desert photographing several of the National Parks with my iPhone. I thought I would share three quick tips to improve your landscape iPhone Photography...

Turn ordinary photos into extraordinary iPhoneography with textures

Welcome back to another installment of Lessons in iPhone Photography here at iDownloadBlog. After seeing the amazing images you have been sharing on Instagram, it is clear you are all enjoying your newly discovered creativity. In today's lesson I hope to share a new idea to fuel your own creative adventures. Today's lesson is a bit subjective, but I hope you learn a new idea and use it to make some of your own magic.

A fun way to add interest and mystery to your iPhone imagery is the use of textures. What are textures, you ask? In short, the idea is to take an image of the texture you might find in a burlap sack, brick wall, etc. Apply it over your original image so that only the texture can be seen and not the color. That's pretty much the idea behind it, but it might be better just to look at an example...

Make powerful iPhone photos by focusing on what’s important

Welcome back to our lessons in iPhone Photography. In today's lesson I'm going to do my best to share a fairly abstract creative tool illustrated with a few concrete examples. Last week I was in Belize working on a new iPhone Photography book. The book will feature iPhone images following the world famous Hummingbird Highway from the eastern coast of Belize to the Guatemalan border in the west.

I shared the context of this project with you so you could see how I use the tool I'm going to present in this lesson. When you are working on a photography project with a finite time-frame and budget, you have to make images. There's no option for returning the following day, or complaining that the muse isn't with you.

In previous lessons I've shared ideas about changing perspective and compositional aids that can help in our creativity. However, this one single piece of photographic wisdom has served me better than anything else I've learned. One of my personal photographic heroes, Bruce Percy, says (this is a bit paraphrased) "whatever it is that initially draws you to a scene... that is what you should focus on."

It is a simple, yet very powerful creative tool. I use this advice all the time by making whatever it is that attracted me to a scene the subject of my photograph and trying my best to reduce the other elements within the scene. As I mentioned in the beginning of this lesson, I want to illustrate how I've used this wisdom by sharing a few concrete examples from my recent trip to Belize...

Conceptualize your compositions to improve your iPhone photography

In today's lesson in iPhone photography, we will be digging a bit deeper into the mystical ideas of composition. Remember, before you consider the post processing of an image you need to expose and compose properly. In previous lessons we examined the Rule of Thirds. It is pretty straightforward and a great creative technique to have in your tool box. However, we never explored why, or how, it works. In this lesson, to better understand it, as well as other compositional guidelines, we will explore the idea of static vs. dynamic compositions.

Before we explore the ideas of composition, it's important we understand the concept of 'visual weight' (or strength). Every elements in our compositions have varying weight/strength associated with them. It could be heavy, light, dark, strong, soft, etc. Obvious properties that influence a subject's weight (or strength) are its size and position. Is the element in the background or in the foreground? Is it big or small?

Seven easy ways to improve your travel iPhone Photography

Welcome back to the lessons in iPhone photography. I hope you have enjoyed adding a little creative lens flare to your images the last couple of weeks. I have enjoyed looking at them! This week I thought we would do something a little different. I travel quite a bit with my iPhone and as you know by now, I take a lot of photos with it. I shot close to 4,000 iPhone images last year. Today I thought I would share a few tips to improve your own travel iPhoneography...

Creating creative lens flare with your iPhone

Welcome back to iDownloadBlog's lessons in iPhone photography. The last couple of lessons we have been exploring a the basics of photography (iPhone or otherwise). We learned about exposure, white balance, and white balance locking. Because we have covered the basics, I thought it would be fun to explore a more radical facets of iPhone photography: lens flare!

For years, photographers have come up with all sorts of ingenious ways to reduce that distracting little ball of light that appears in your photos when you point your camera at something bright. Very expensive lenses are measured by their ability to combat against this. You can easily pay $2,000 or more for glass that is lens flare resistant. Personally, it has never really bothered me. I kind of dig it. So much so, I seek it out. So in today's lesson I thought it would be fun to show you how to achieve it as well as enhance it using the new app Light Camera App - Mark I...

Improve your food iPhoneography with the Camera+ white balance lock

If you remember our last lesson in iPhone Photography, we learned a bit about white balance and how to control it using KitCam. In that lesson I mentioned using Camera+ as an app to control white balance. I thought in today's lesson we would extend our understanding and take a look at Camera+'s way.

In our last lesson, we looked at controlling white balance by setting the appropriate light source that was illuminating the scene (i.e. sunlight, fluorescent light, incandescent light, etc...) . With Camera+ we do it a little differently...

White balance: the iPhone photographer’s little secret

I hope you have enjoyed the last few weeks exploring the creative possibilities of exposure. I wanted to continue on our adventure back to the basics of photography. Something I'm sure you have seen at some point in your photographic pursuits is a dial, slider, or some other control annotated with a cloud, sun, flash, shade, and light bulb. Although, camera companies have done a great job researching the iconography that best represents 'it', they really don't explain what 'it' is. In today's lesson we will quickly learn what 'it' is and then explore creative ways to use 'it' to our advantage!

iPhoneography: back to the basics with KitCam and its powerful controls

I hope everyone had fun making abstract landscapes using the intentional camera movement (ICM) techniques from our last lesson. This week I decided to take a quick step back and return to the basics for a bit. I know many iPhone Photographers who are just starting to discover the creativity inside themselves might have never owned a camera before their iPhone. And just because your camera happens to be a phone doesn't mean that it operates any differently than this camera. My old Shur-Shot Jr!

I don't want to bore you details, but these ideas are important to understand as we begin to explore new concepts in future lessons. So bear with me and let's take a quick look at the way cameras work...

iPhone photography: how to use Intentional Camera Movement to your advantage

I hope you have had a great couple of weeks making some HDR magic with your iPhone. Today we are going to explore a more abstract and fun approach to iPhone photography. If you remember a couple of lessons back we were using a slow shutter speed to create light trails. You probably remember having to hold your iPhone still and leave your camera shutter open for a long time. It was kind of complicated and gear intensive.

This time around, we are going to leave our shutter open for a long time but careless about holding our iPhone still. This is a technique that we in the industry call "Intentional Camera Movement" or ICM. The goal is to intentionally use blur to create something unique and beautiful!