In this guide we’ll go through how to create an install drive from the macOS Mojave 10.14 application, either general release or beta. This will allow you to perform clean installs, install to multiple machines without re-downloading, boot the system externally for troubleshooting, and more.
For this guide, you’ll need the Install macOS Mojave application from the Mac App Store, and a USB stick/SD card/external drive partition with capacity >=8GB.
How to create a macOS Mojave installer
1) If you don’t already have the Install macOS Mojave application, download it via the Mac App Store.
If you require a beta seed, you’ll need to install the Beta Access Utility before beginning, which can be downloaded from the Apple Developer portal, or the Public Beta webpage. Users creating a USB from the general release do not need to do this.
2) When the download completes, your Mac will launch it. Quit the installer, and instead locate it in your /Applications folder. If you’d already placed it somewhere else on your computer, move it back to the Applications folder. It’s also simpler to leave the file name as is: Install macOS Mojave.app.
(Beta users should leave the file name as Install macOS Mojave Beta.app).
3) Insert your >=8GB drive. If it isn’t formatted to GUID Partition Map and Mac OS Extended (Journaled), you can launch the Disk Utility application and format it from there. This will wipe all data from the drive.
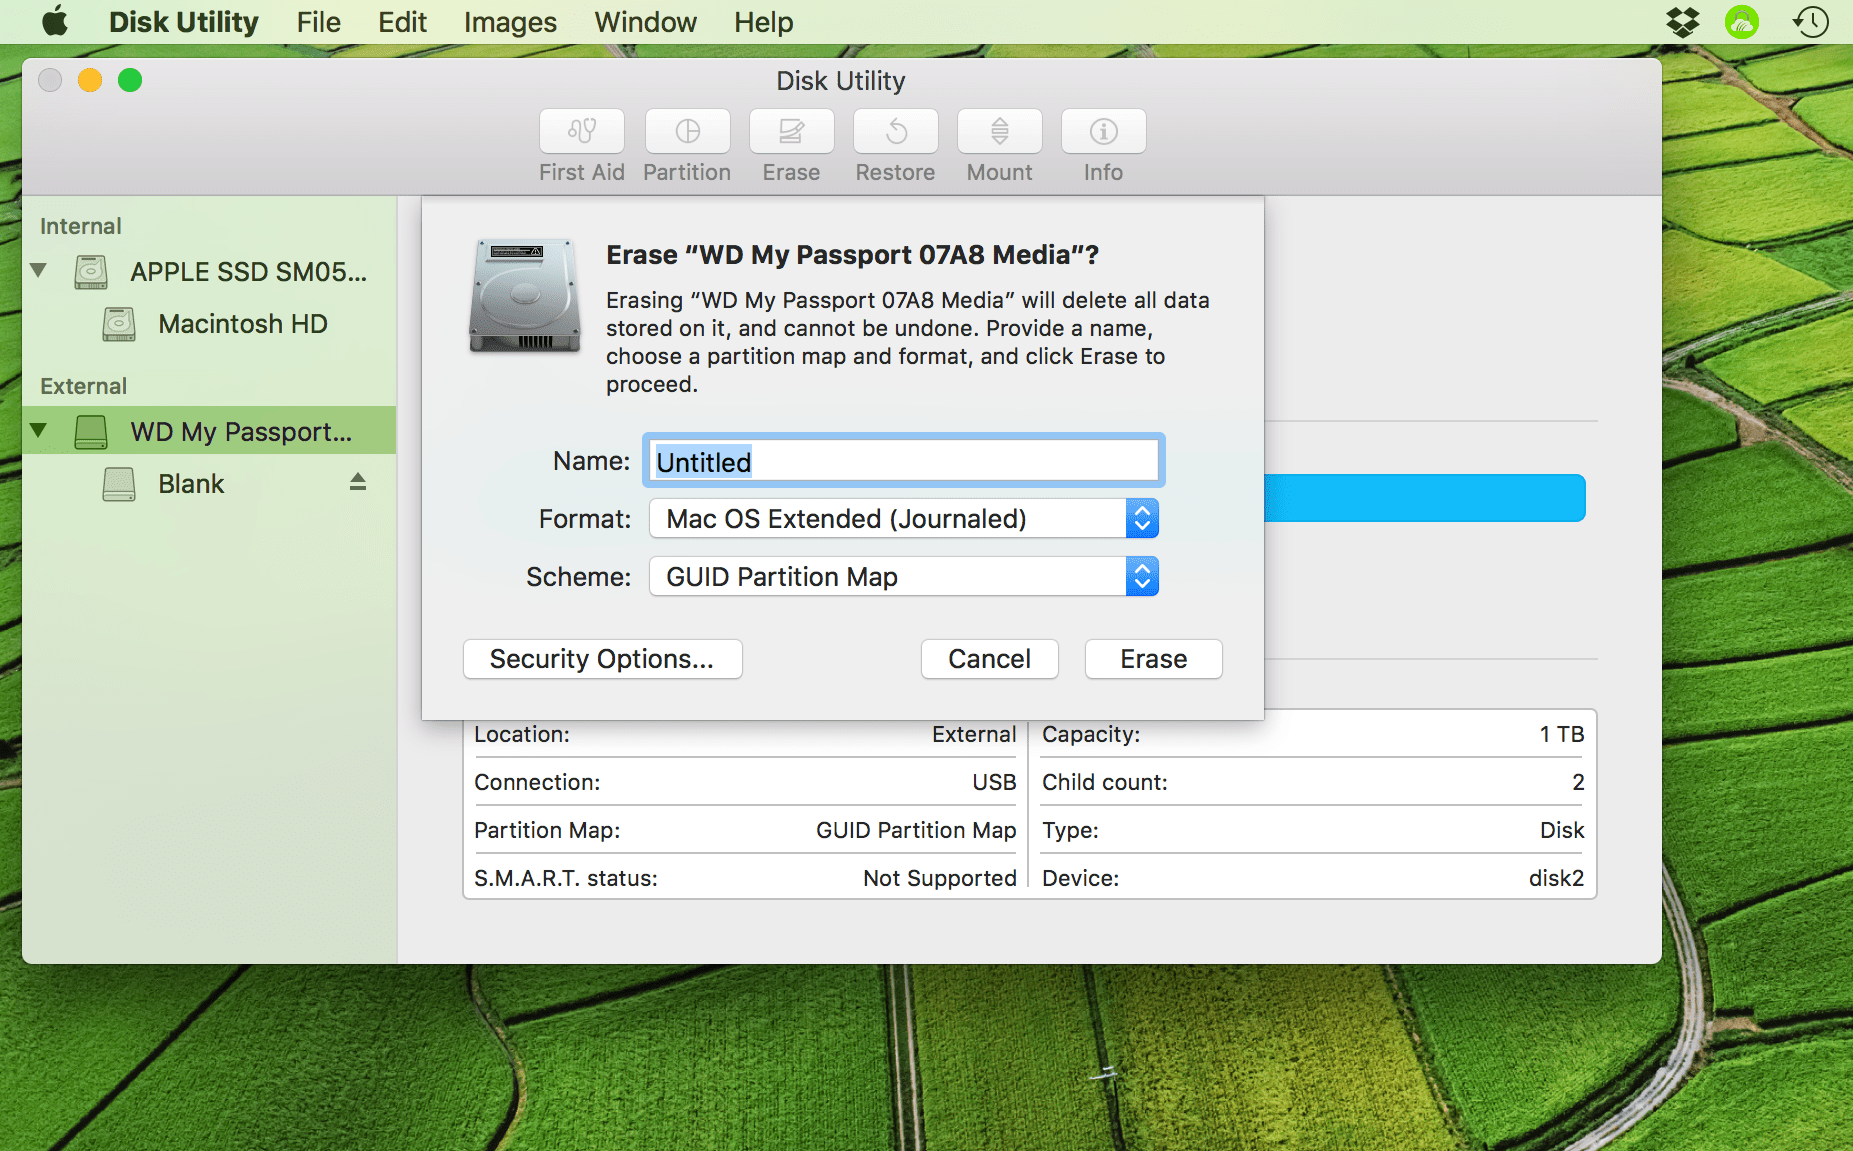
4) To make this guide a little easier, name the finished USB drive USB.
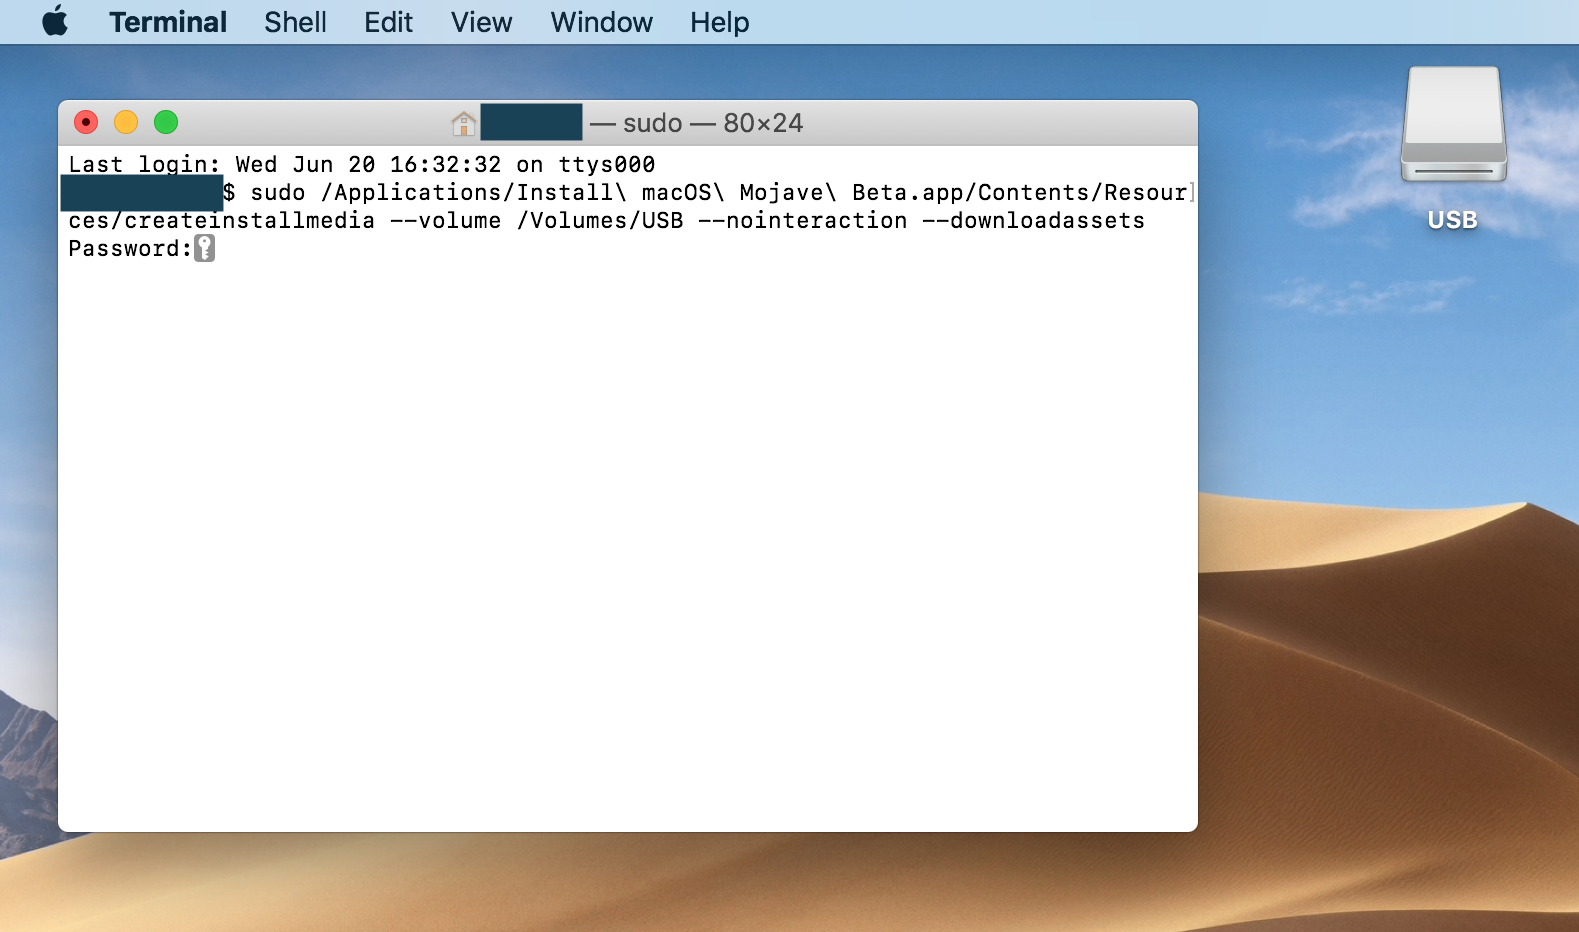
5) Now open up a Terminal session and paste in the following command:
sudo /Applications/Install\ macOS\ Mojave.app/Contents/Resources/createinstallmedia --volume /Volumes/USB --nointeraction --downloadassets
This will use the Mojave application to create an installer on your chosen drive.
If you’re creating an install USB from either the Public or Developer Beta, and not from the general release, use the command below instead:
sudo /Applications/Install\ macOS\ Mojave\ Beta.app/Contents/Resources/createinstallmedia --volume /Volumes/USB --nointeraction --downloadassets
- If you would like to be asked for confirmation before erasing the drive, remove “–nointeraction” from the above command.
- The “–downloadassets” flag is new in macOS Mojave. It downloads assets which may be required during installation. This is presumably helpful for faster or offline installations, as it won’t require downloading during installation. However, the above command will still function without this flag if you prefer.
- Previous versions of macOS used an “–applicationpath” flag in this command. That flag is now deprecated and will throw an error if used. For this reason, use the above command instead of updating the command quoted in guides written for older versions of macOS.
NB: If you renamed the “Install macOS Mojave.app” or your USB drive to something other than what I advised above, you must edit the command to match your chosen names. Similarly, if you moved the installer out of the /Applications folder, you must change the above command to show its new filepath.
6) Enter your administrator password when prompted.
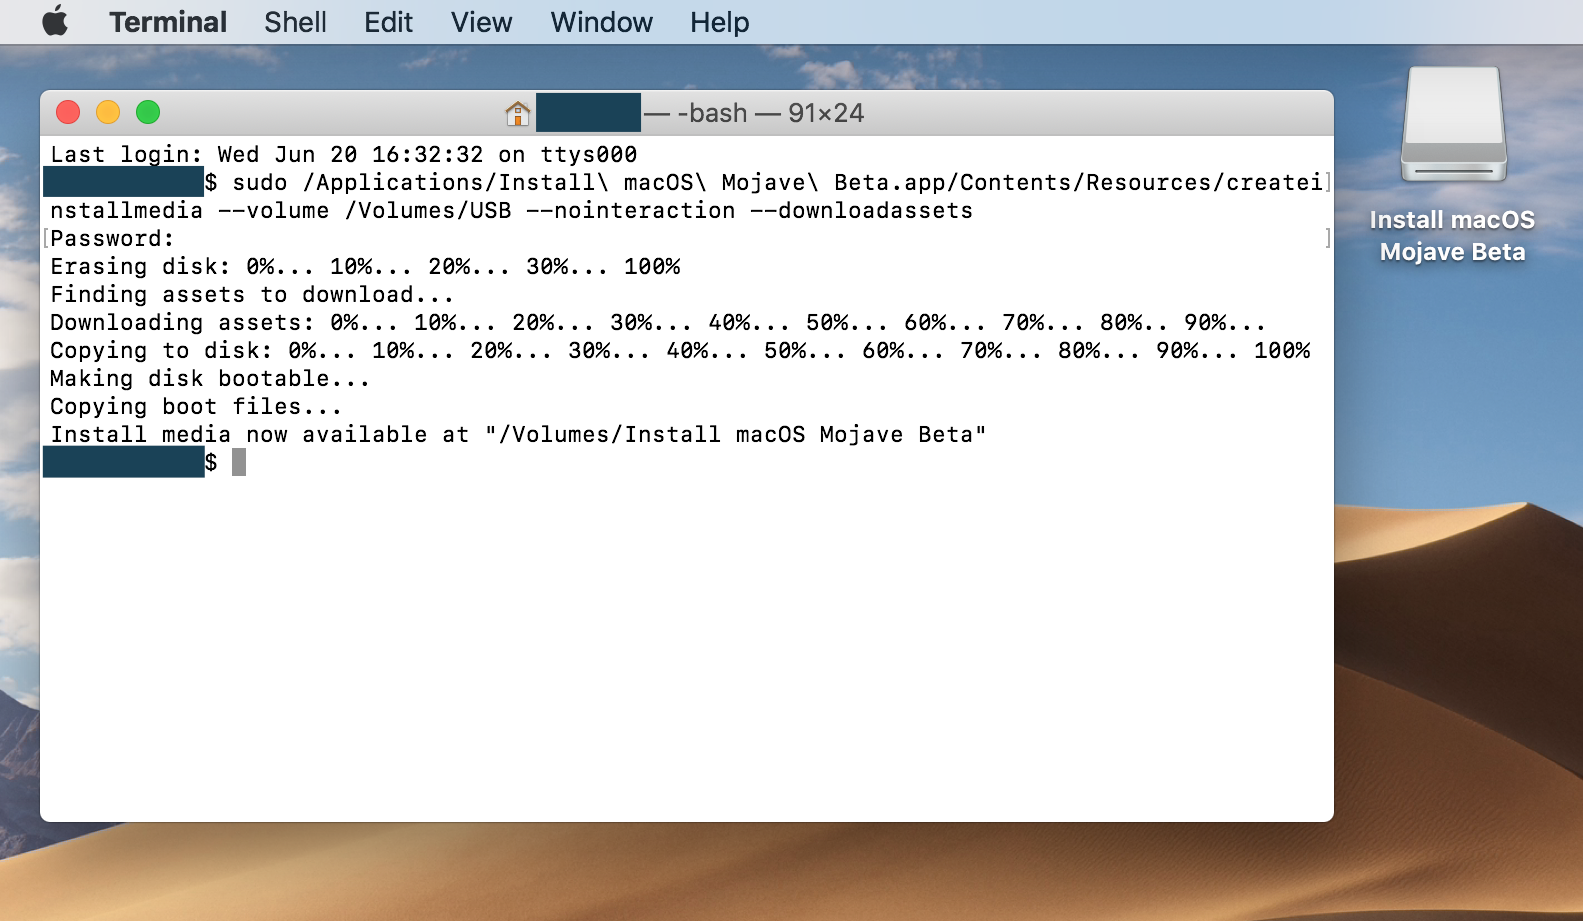
When the files are transferred and the drive has been blessed it will be remounted on the desktop, as shown above, and Terminal will read out as complete.
How to use the macOS Mojave USB installer
1) Shut down your Mac with the USB drive inserted.
2) Start up the computer whilst holding the Option (⌥) key.
3) Select the drive called “Install macOS Mojave Beta” from the Startup Manager using the keyboard arrow keys. The computer will now boot from the selected drive.
4) You can now deploy Mojave as necessary. Using this external USB installer lets you reformat and/or repartition the startup drive and other storage devices. You can also access built-in tools such as Terminal, Startup Disk, and Firmware Password Utility from the menus.

Have fun with the OS! Although not without bugs, I’ve found it relatively stable, and certainly more attractive than High Sierra was.
If you don’t need it for other purposes, you can store your new USB installer in a safe place. If your Mac gets into trouble and can’t start up to Recovery Mode, boot from the USB drive and troubleshoot the issue, by reinstalling the operating system or leveraging tools like Terminal. You’ll also be able to install Mojave to your other Macs without having to download a new copy of the installer from the Mac App Store every time.
Need a hand with this, or want to request another guide? Let me know in the comments section!