If you have an old iPhone, iPad, or iPod touch laying around that is just collecting dust, why not put it to work by turning it into an affordable home monitoring camera? We’re not talking about a full-featured surveillance system here, but just a simple setup that can live stream anything happening in your house, and send motion alerts directly to you should it detect activity.
In this post we’ll be showing you how to convert your spare iOS device, whether it is an iPhone, iPad, or iPod touch, into a video monitoring camera. The best part is, it’s completely free and you should be up and running in just a few minutes.
There are many options available if you want to use a proper video camera to keep an eye on your house, kids, pets, or office, but they usually come at a price. This solution is completely free. All it requires is a spare iOS device to act as the video camera.
What’s needed?
There are a few basic requirements to make this happen.
First, you’ll obviously need a spare iOS device. As previously mentioned, it can be an iPhone, iPad, or iPod touch. As long as it features a camera, you can use that device as the main recording camera. You will end up with two devices. One will be the Camera (your old iOS device), and the other will be the Viewer (your main iPhone, for example). In this post, we will refer to the spare iOS device (the one recording) as the Camera. We will refer to your main device (the iPhone you use to watch the stream) as the Viewer
Then you need to download the free Manything application from the App Store on both devices you plan on using (the Camera, and the Viewer). You will have to create a free account directly from within the application, or from Manything’s website.
Finally, as obvious as it may sound, you will need an active internet connection at all time. This is needed so the Camera can stream what’s in front of it, and of course, it’s needed so you can view what the camera is streaming, as well as receive notifications.
Setting up the monitoring Camera
Setting up the monitoring Camera couldn’t be any simpler.
1) After downloading the Manything app and logging in, select the Camera option at the top of the screen. This will effectively turn your iPhone into the home monitoring device.
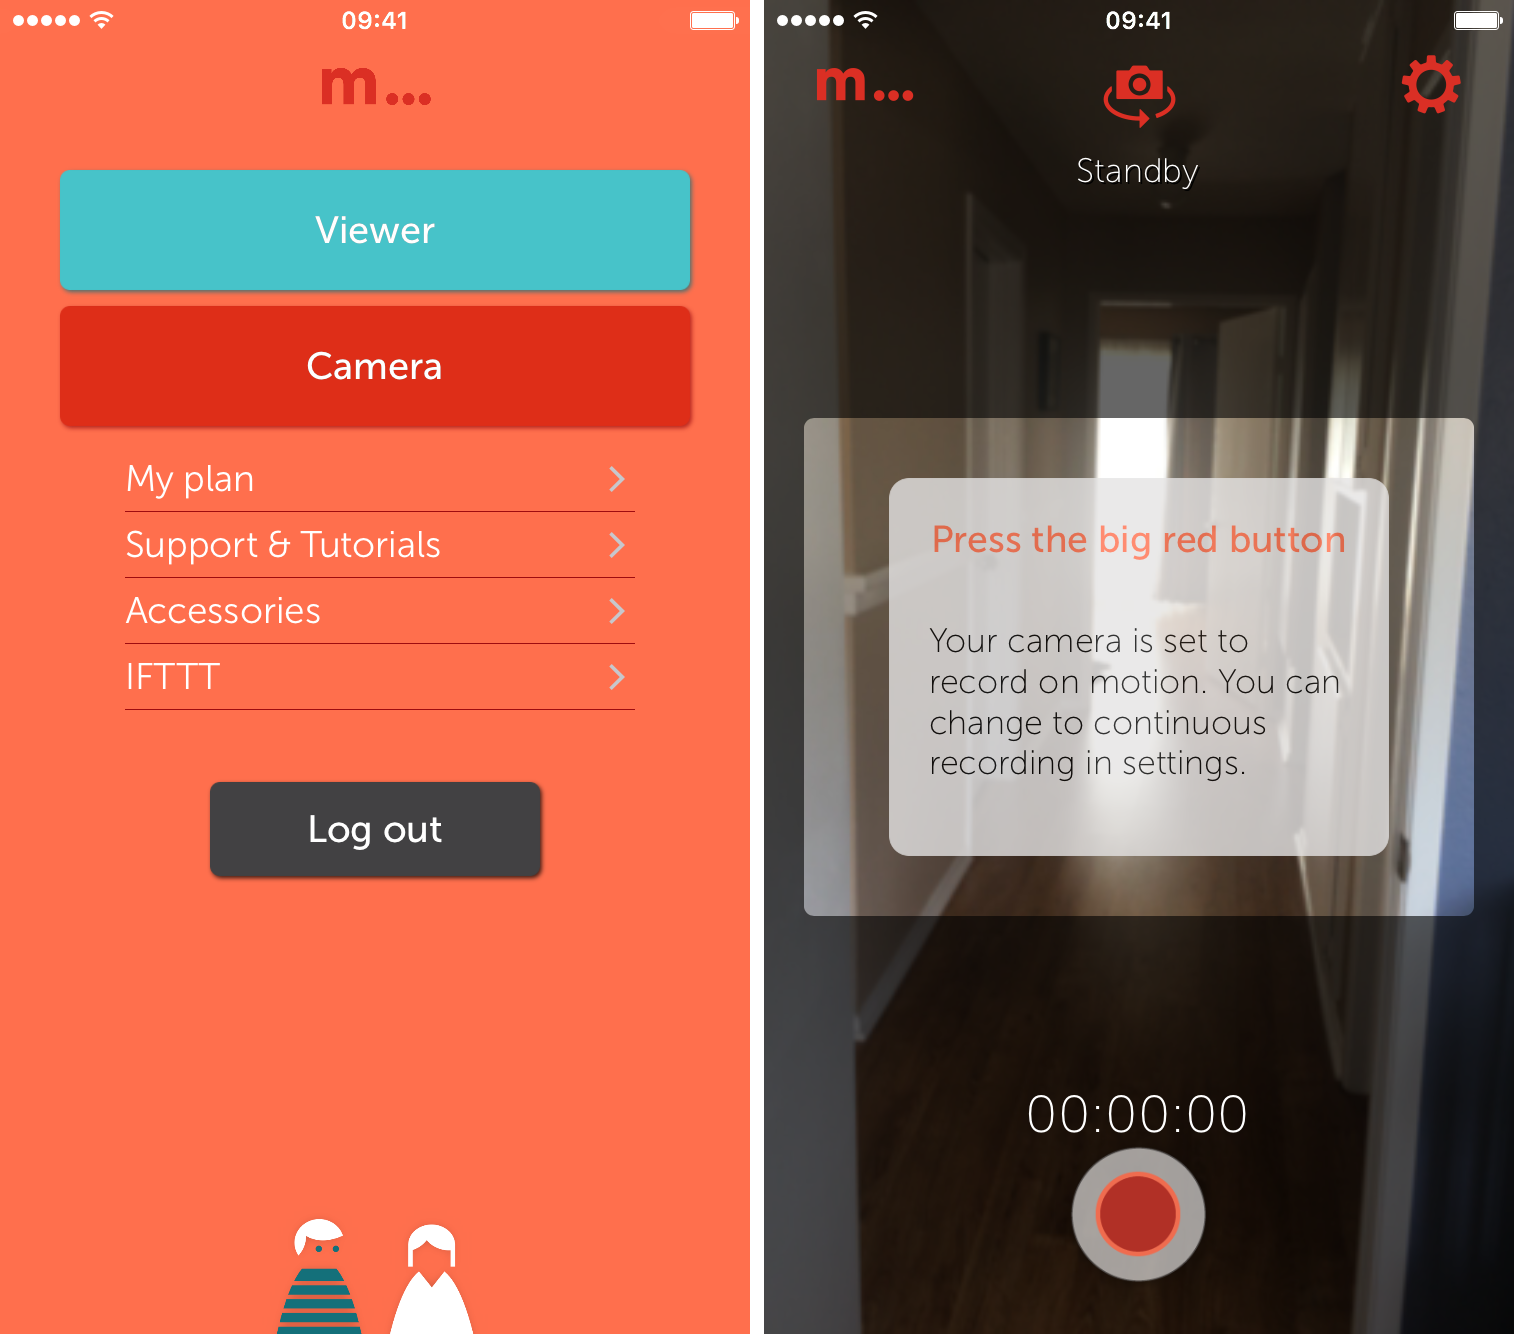
2) Place the Camera in a convenient location where it can have an unobstructed view of what you are trying to monitor. Because it is constantly connected to the web, I’d highly suggest plugging in the device so it doesn’t run out of battery too quickly. If it is plugged in, you will be able to use that device to monitor activity 24/7 without having to worry about running out of battery.
3) Tap on the big red recording button, and you’re all set! This Camera is ready to stream what’s in front of it and alert you should it detect any activity.
There are some settings you can tweak of course, but we’ll get to these later.
Watching a live stream directly from your iPhone
Now here is the fun part. If you want to keep an eye on your kids or pets while you’re away for example, you can easily see what’s going on in your house, directly from your iPhone.
1) On your iPhone, open the Manything app and make sure you are logged in.
2) On the main screen, select the Viewer option, and select the Live feed.
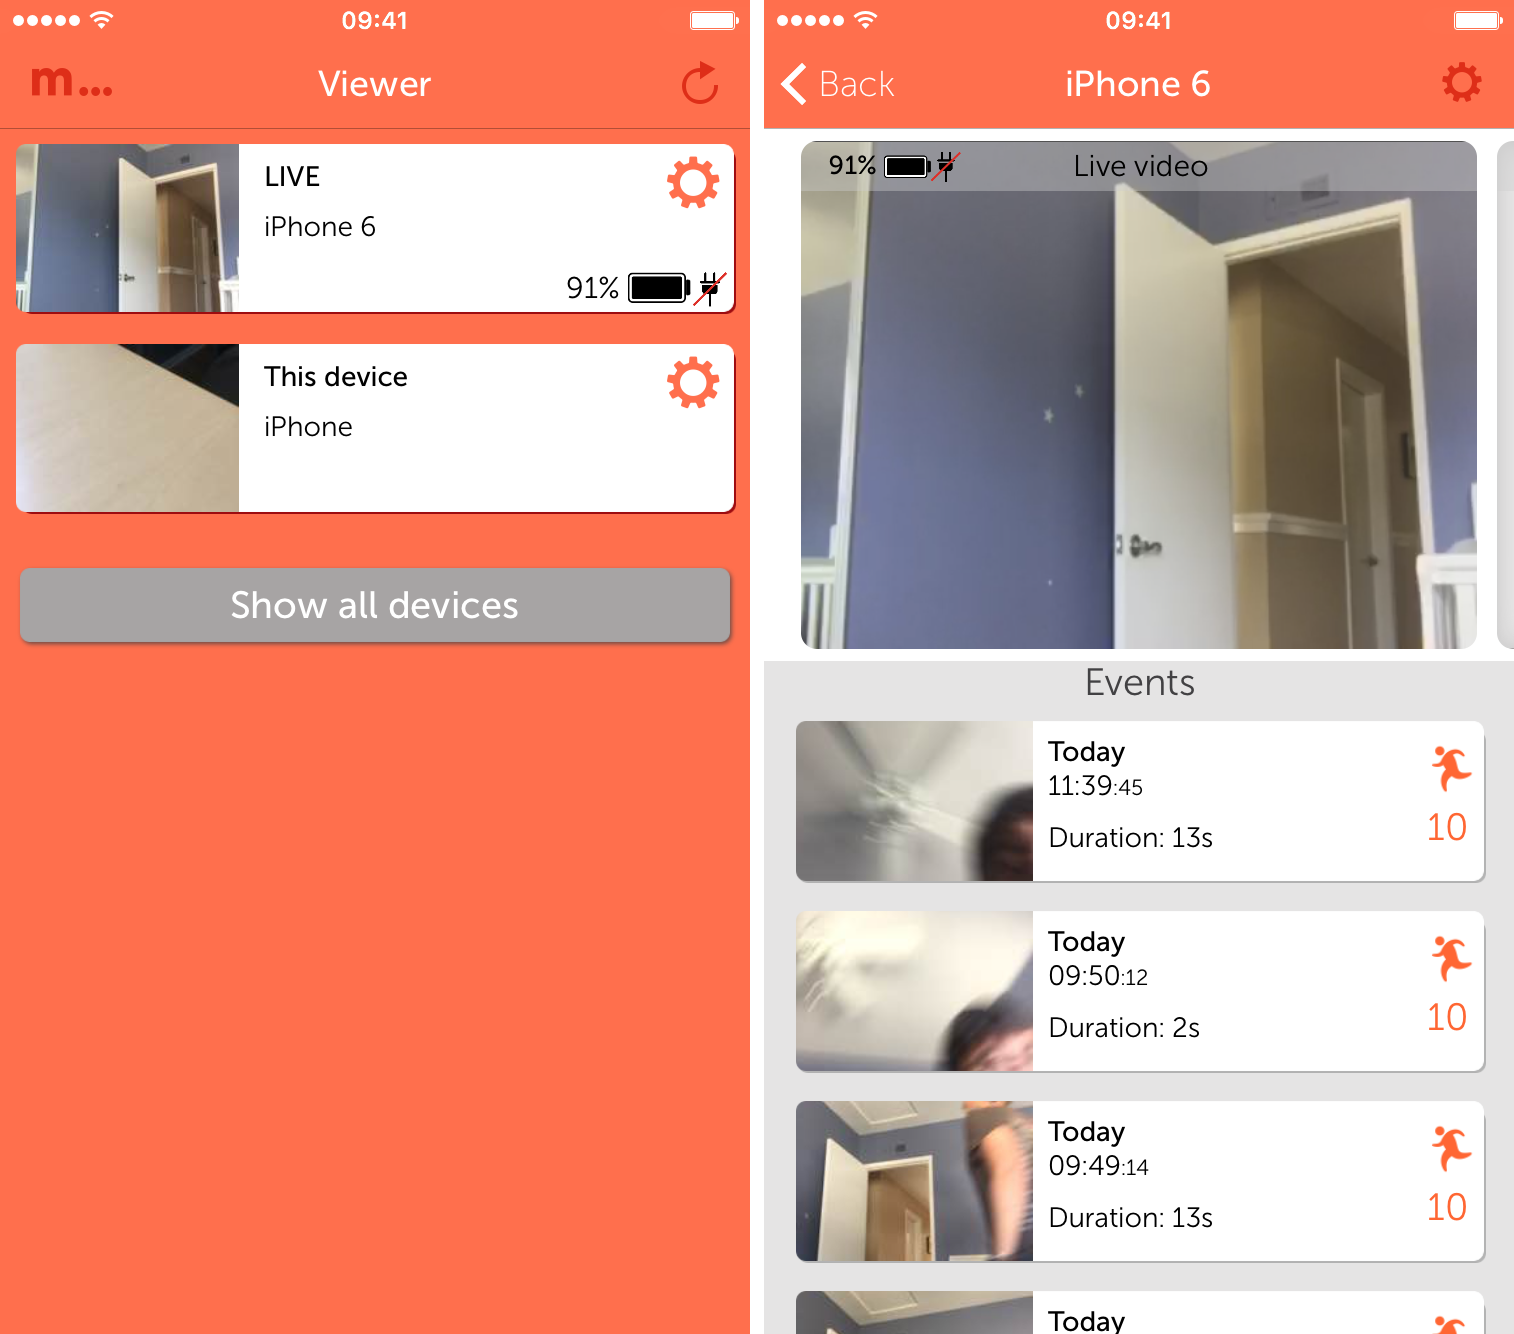
3) You will then see and hear in almost real time what is happening in your house. I say “almost real time” because there is a very slight delay, usually a second or two.
Reviewing motion alerts recordings
If the Camera detects activity, and assuming you have set it up this way, you will receive a notification on your iPhone telling you that motion was detected. From there you can easily watch a replay of what was detected. Note that motion alert recordings are only available to paid users, but are also free for one month when setting up a new account.
1) Tap on the notification you received, or open up the Manything application to connect as a viewer.
2) Below the Live feed, you will see a list of events. Each event shows when it was recorded, the duration, as well the motion score. Tap on an event to watch it again.
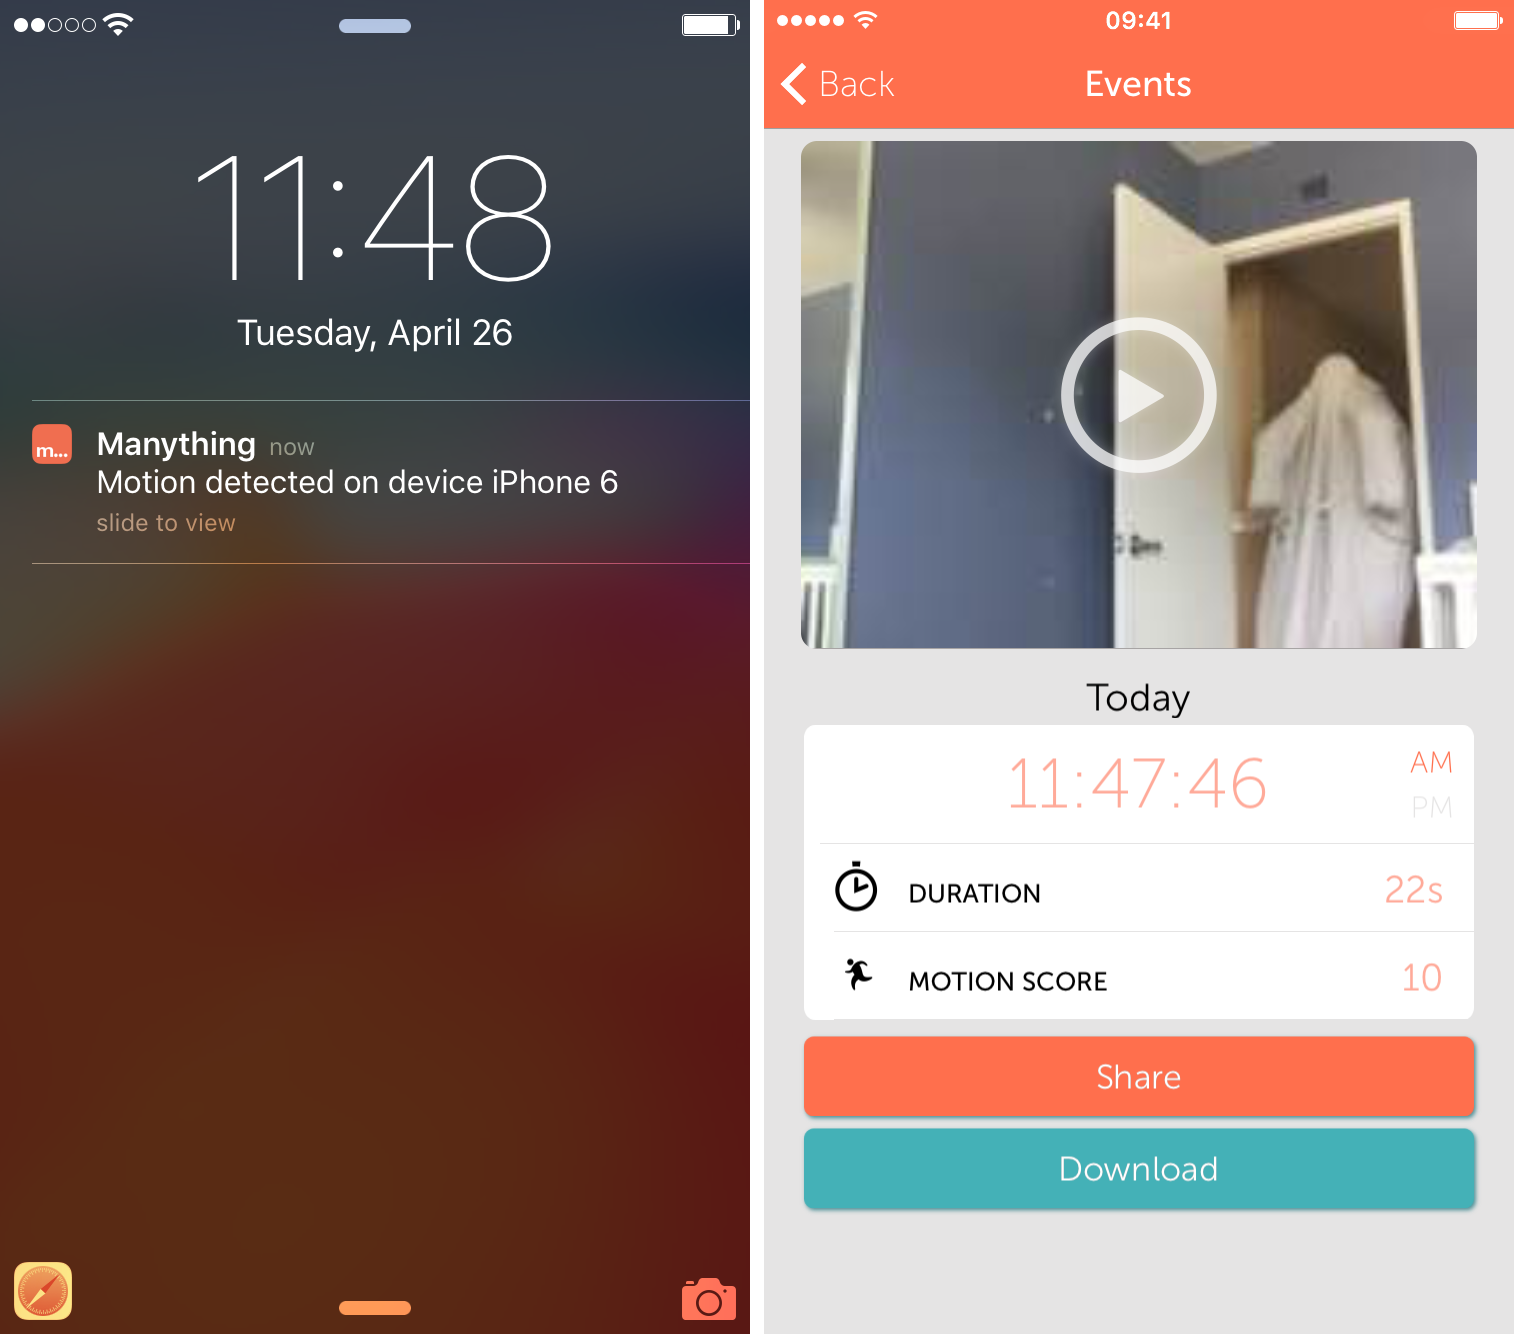
3) After watching the event, you can share it, or download it to your Camera roll.
Adjusting the settings of the monitoring camera
You don’t really need to adjust any settings in order to get going, but if you want to have finer control over what is recorded, you can tweak some of the Camera settings. Note that all of these settings can be controlled from the Camera itself, or remotely from the Viewer. To access the Settings, simply tap on the gear icon, either on the Camera or the Viewer.
Video recording options
- Camera On: lets you turn the Camera on and off, both remotely or from the Camera itself.
- Switch Camera: switch between front facing camera and back camera.
- Recording Mode: choose between continuous recording, or record on motion. I suggest just using record on motion.
- Mute Audio: lets you mute audio recording.
- Stills Mode: takes a still photo on a set interval.
- Flashlight: lets you activate the flashlight.
Motion Detection
- Sensitivity Treshold: lets you adjust the sensitive of motion detection.
- Detection Zones: allows you to mask areas of the screen you don’t want Manything to record. For example, if you have a window in the field of view of the Camera, there may be activity happening behind that window, such as people walking by outside. You don’t want Manything to alert you of that activity so you can set it to mask that specific area.
Alerts
- Send Push Notifications: turn push alerts on or off.
- Minimum Gap Between Notifications: set a time frame during which you will not receive notifications after you were already sent one.
- Send Alert Emails: turn email alerts on or off.
- Minimum Gap Between Emails: set a time frame for consecutive email alerts.
Video Quality
- WiFi Video Quality: adjust the video quality frame rate. The higher the quality, the more bandwidth it will use.
- Set Data Limit: if you’re on a capped Wi-Fi plan, you may want to set a limit in here.
- Month Rollover Date: precise when your data limit should rollover.
- Allow Cellular Data: choose to use cellular connection should Wi-Fi not be available. This is not recommended unless of course you have unlimited data.
How does Manything make money?
This all looks great and all, but what is the catch?
There is no catch, but there are paid upgrades that offer more features and cloud storage for video recordings. This said, there is also a free plan which offers very basic features that may be just enough for most people.
The free plan includes the ability to set up one camera, have the live streaming option, set up motion alerts, and detection zones. Unfortunately, the free plan doesn’t offer the ability to store recordings, however, each new user gets a one-month free trial with the ability to view those recordings. This tutorial, for example, was made possible thanks to the free trial.
Other plans offering support for more cameras and longer cloud recording storage periods are available starting at $2.99/month. If you’re interested in learning more, check out Manything’s pricing plans.
A free solution for basic camera monitoring
At the end of the day, only you can decide whether this service is worth paying for. If you need support for additional cameras, as well as cloud recordings, then you won’t have any option but to get on a paid monthly plan.
Personally, I don’t think this is necessary. I don’t really intend to use an older iPhone as a security camera, and I don’t really need the extra bells and whistles paid plans have to offer. It’s just good to know that, if needed, I can turn my old iPhone into a camera. This is particularly handy if the babysitter is watching the kids and I want to make sure everything is going well when I’m out and about with my wife. In a matter of seconds, I can have the whole thing set up and ready to stream.
As far as free services go, this is as good as it gets when it comes to using an older iPhone as a video camera, especially considering the easy setup and ease of use.
If you know of alternative options, please do share in the comments section below.