In addition to the iPad Pro support brought forth in the GarageBand 2.1 update, the app comes with a new killer feature called Live Loops. Live Loops makes music creation accessible to anyone. Creating songs using Live Loops features a low barrier to entry, but a high ceiling and virtually endless possibilities.
In this video walkthrough, I’m going to share with you 20 basic GarageBand Live Loops tips for getting started with this awesome new feature. I’ll even make a song, and rap to it on the fly! If GarageBand has always seemed intimidating to you, then I guarantee that after watching this video, you’ll be ready to roll your sleeves up and start creating your own musical masterpieces.
In-depth video guide
How to create a new song using Live Loops

Tap the ‘+’ sign in the upper right-hand corner and select Create New Song. Once you do, tap the Live Loops option at the top of the screen, and tap one of the templates to get started.
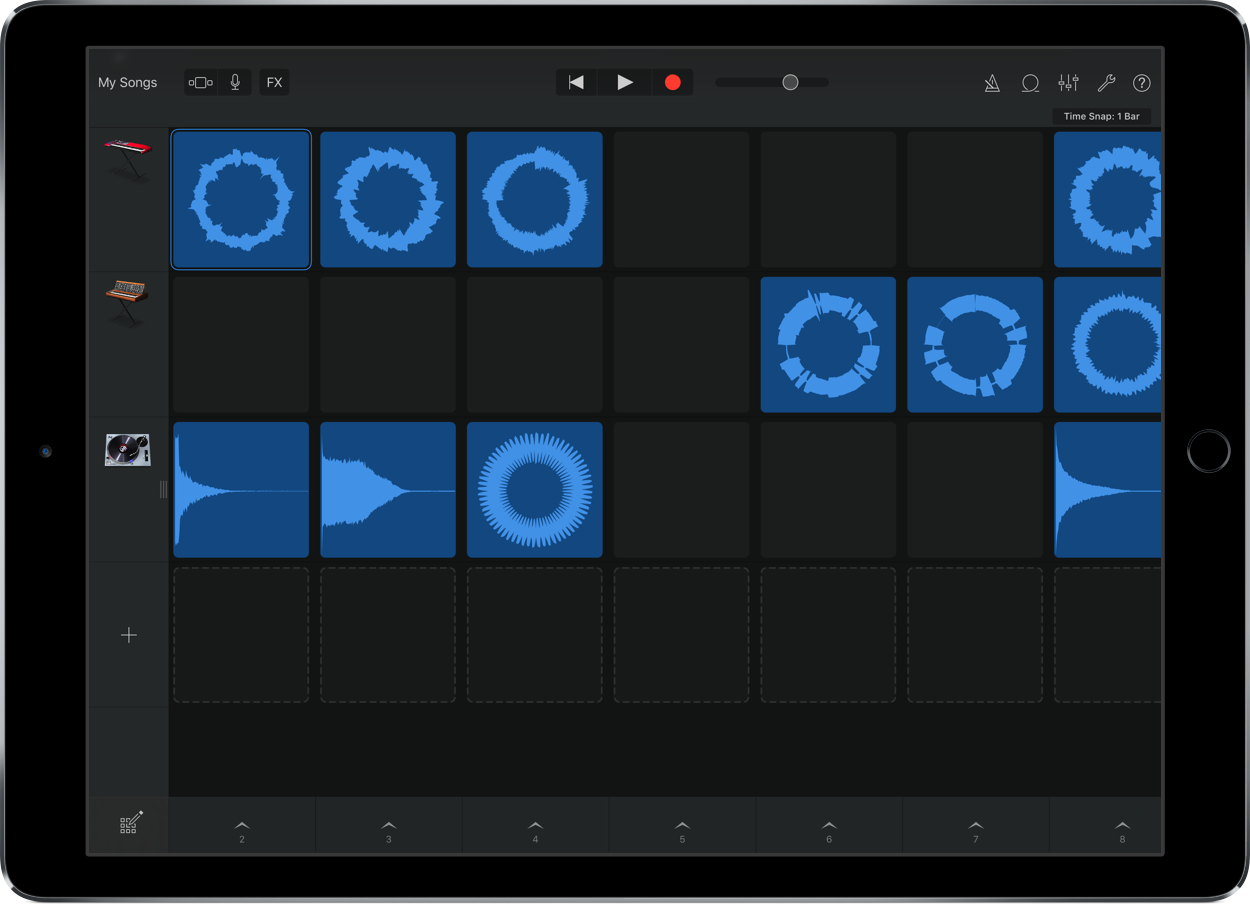
How to play a loop
To play a loop, simply tap on the loop once to commence playback.
How to tell when a loop is looped vs non-looped
If a loop will play back continuously when played (looped) the waveform on the loop will appear as a circle. When a loop is non-looped, and will only playback once, the loop’s waveform appears as a straight line.
How to move and zoom the Live Loops grid
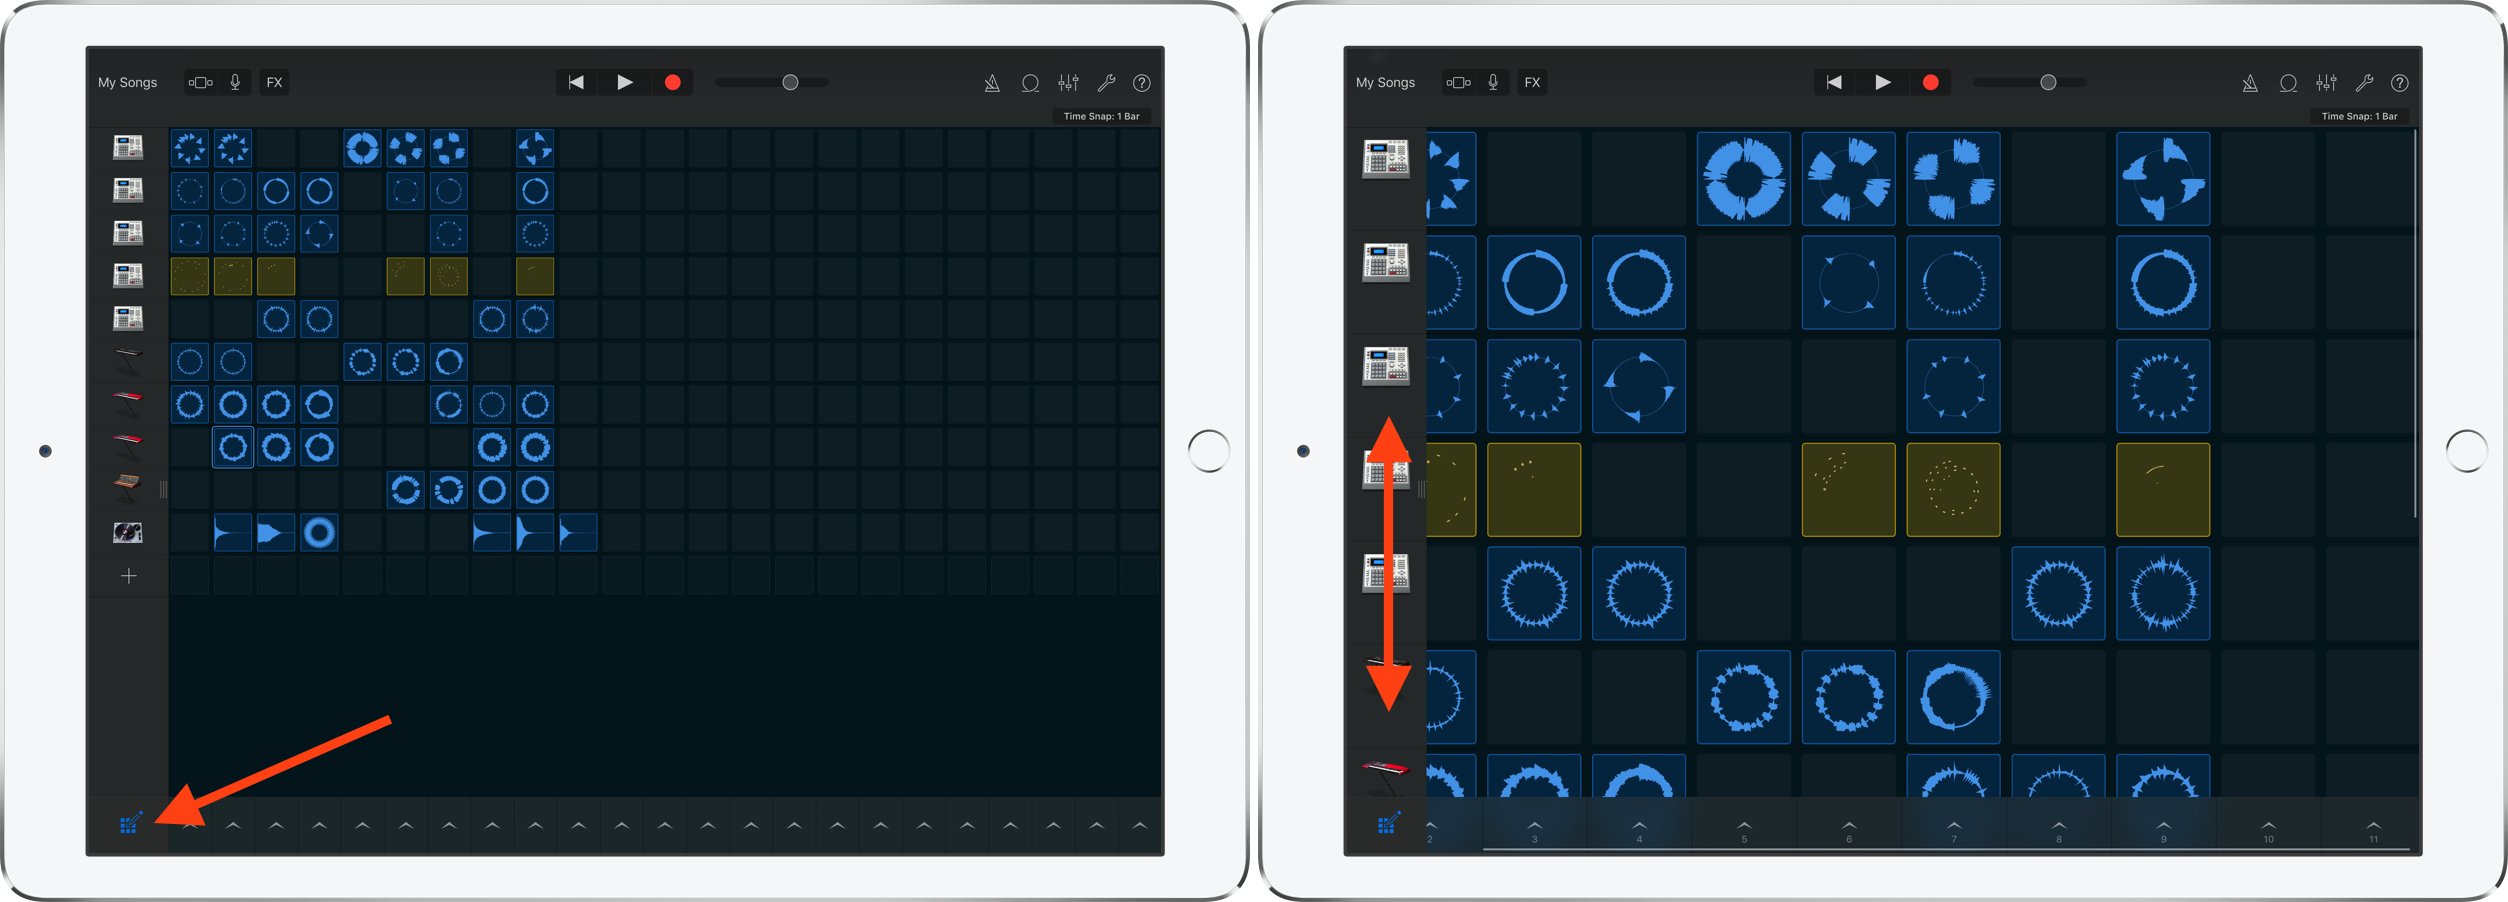
Although it’s possible to zoom in and out of the grid without going into edit mode, using edit mode is by far the best way to traverse and zoom in and out of the beat grid. While in edit mode, use a two finger pinch to zoom in and out, and use your finger to drag around the grid. If you’d like to zoom without being in edit mode, use a two finger pinch on the side instrument row or in individual playback columns.
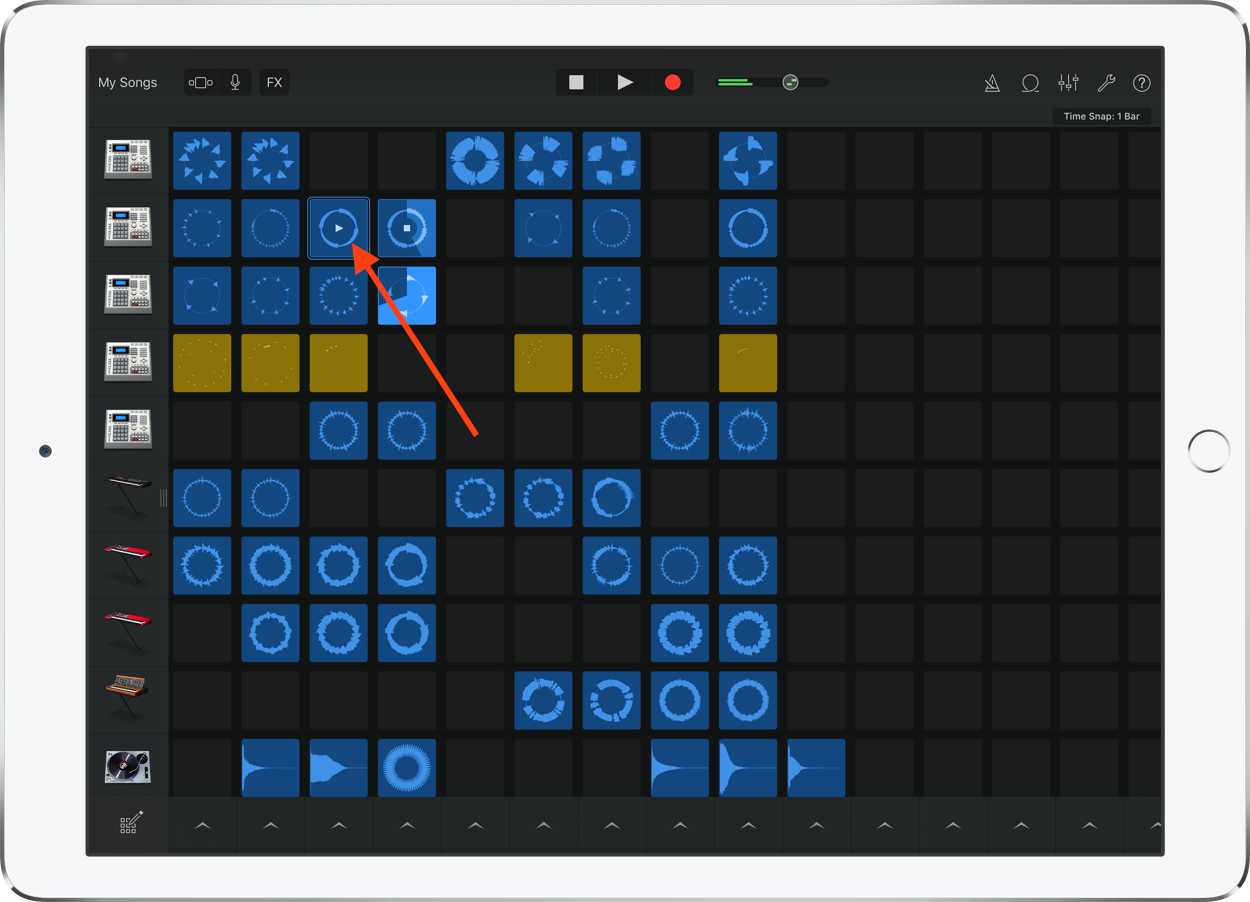
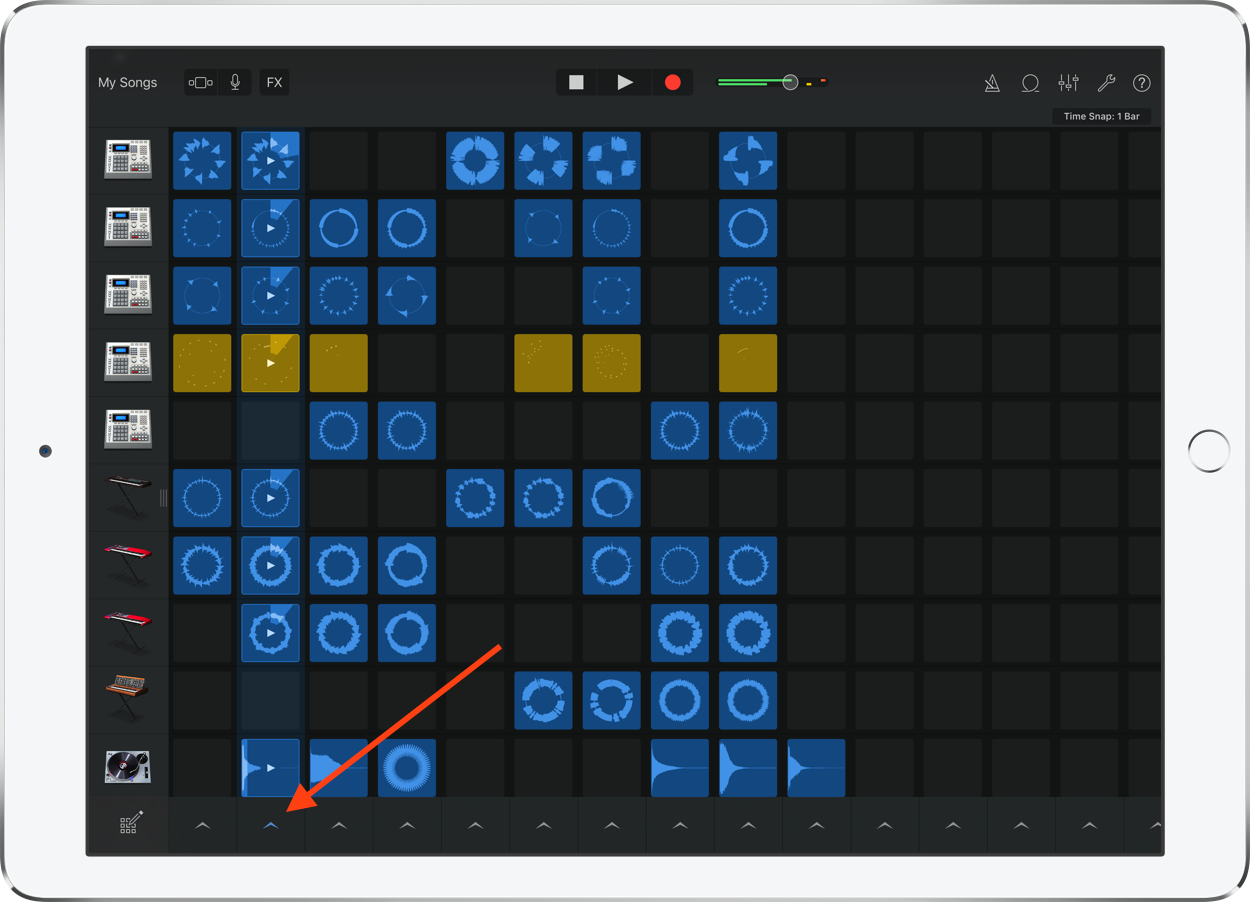
How to play a column
How to adjust volume, mute, and solo instruments
You can quickly mute, solo, and adjust the volume of instrument columns by using the drag handle to reveal additional details about each instrument.
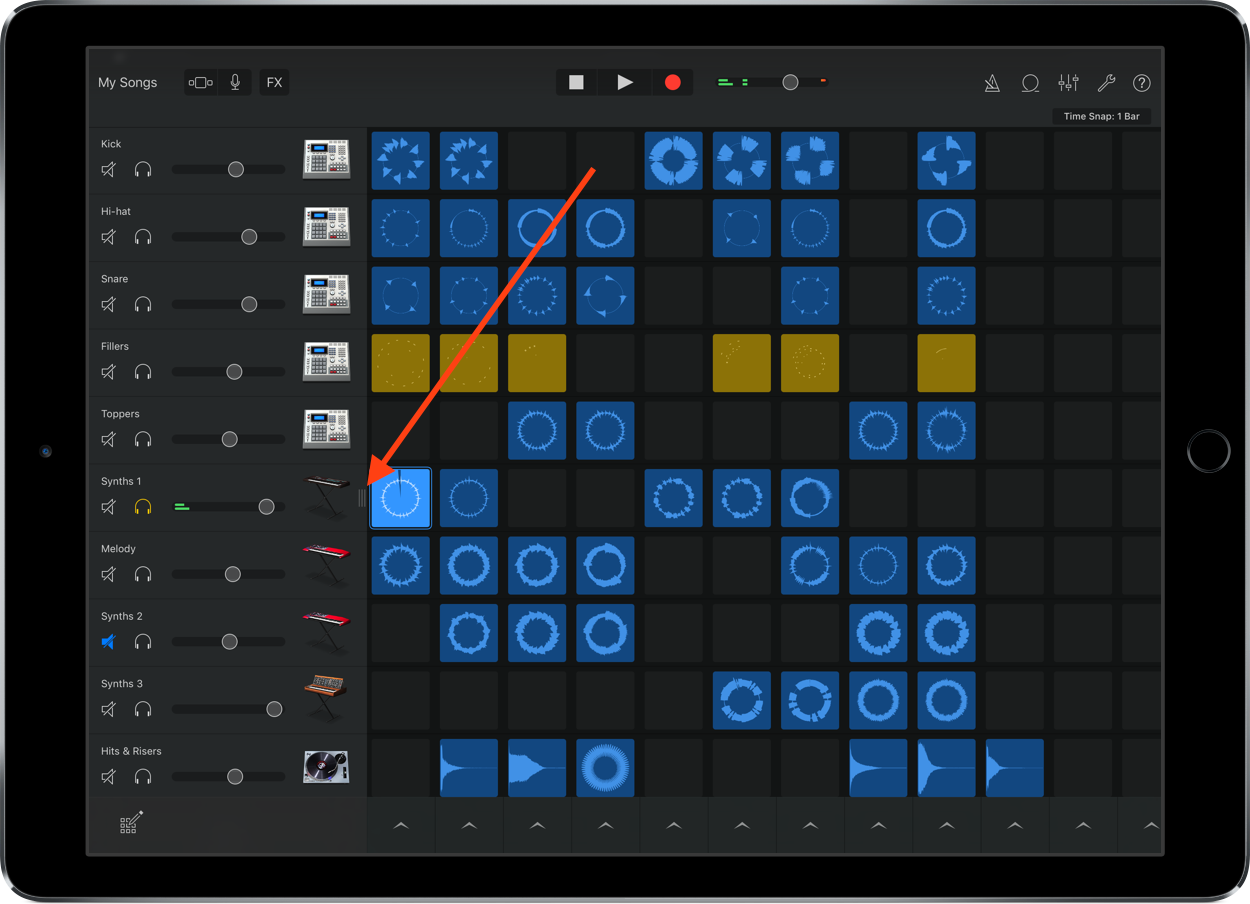
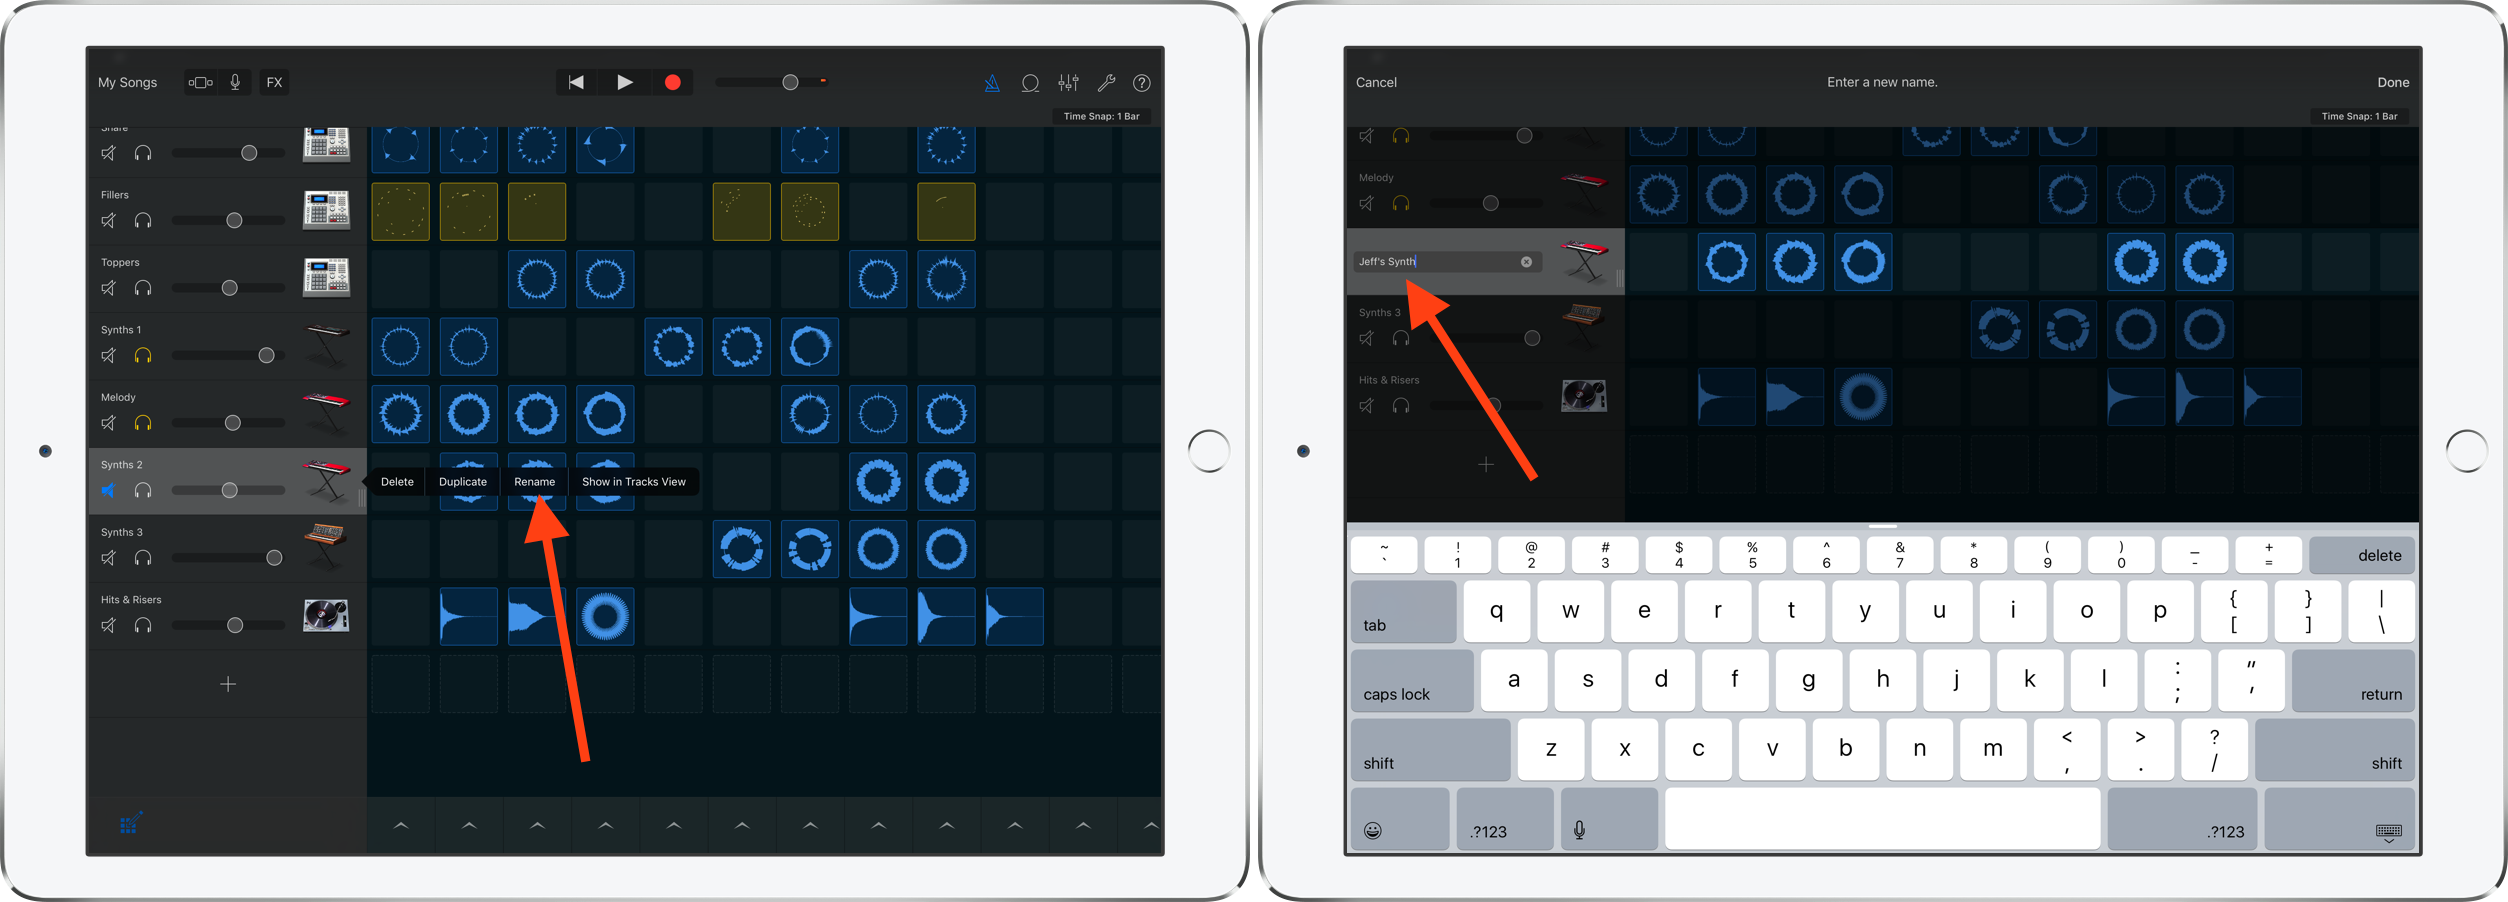
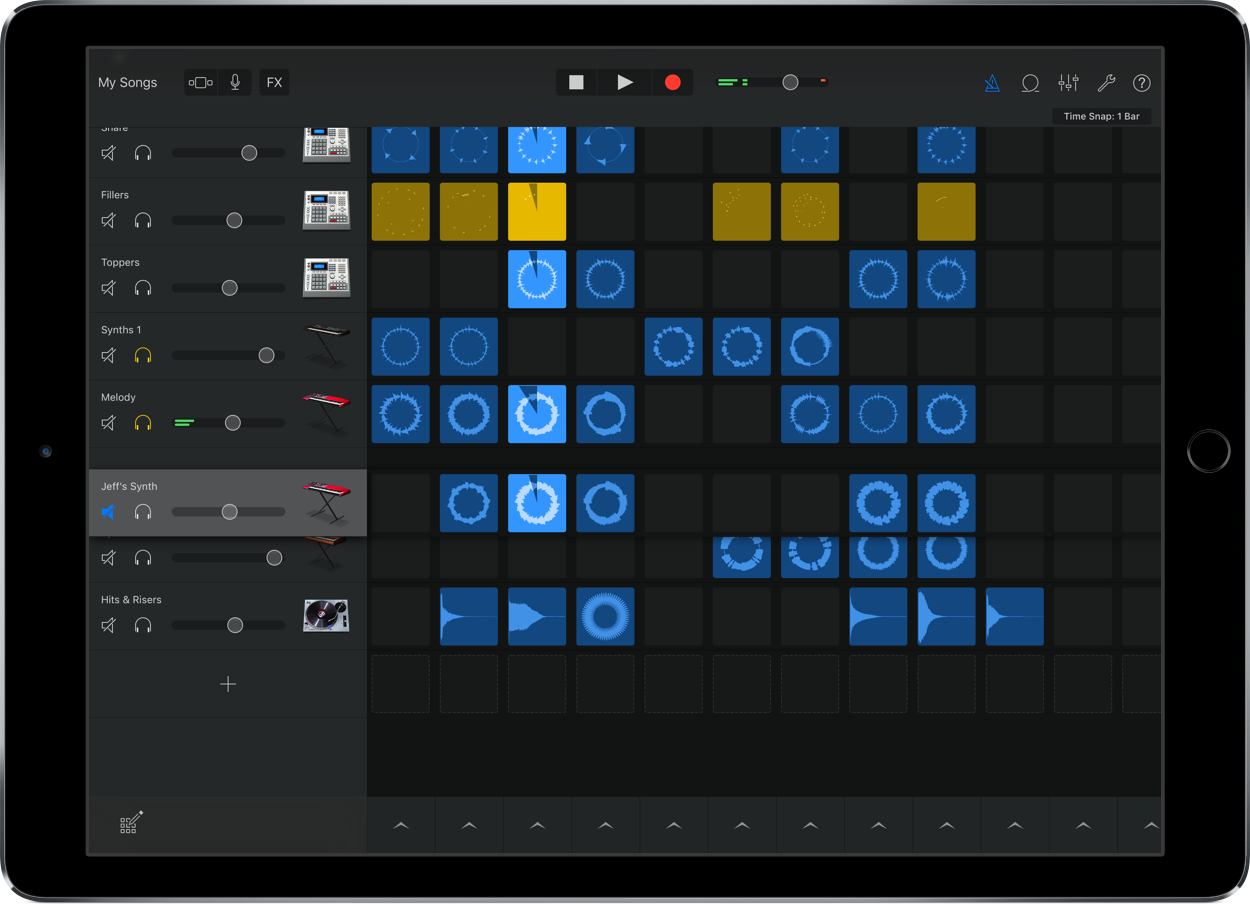
How to rename columns and instruments
Simply tap and hold on a column selector or instrument icon while in edit mode, and you’ll be provided with the option to rename a column or instrument.
How to move rows
To move a row, tap, hold, and drag the row to your desired location
How to browse, filter, and import loops
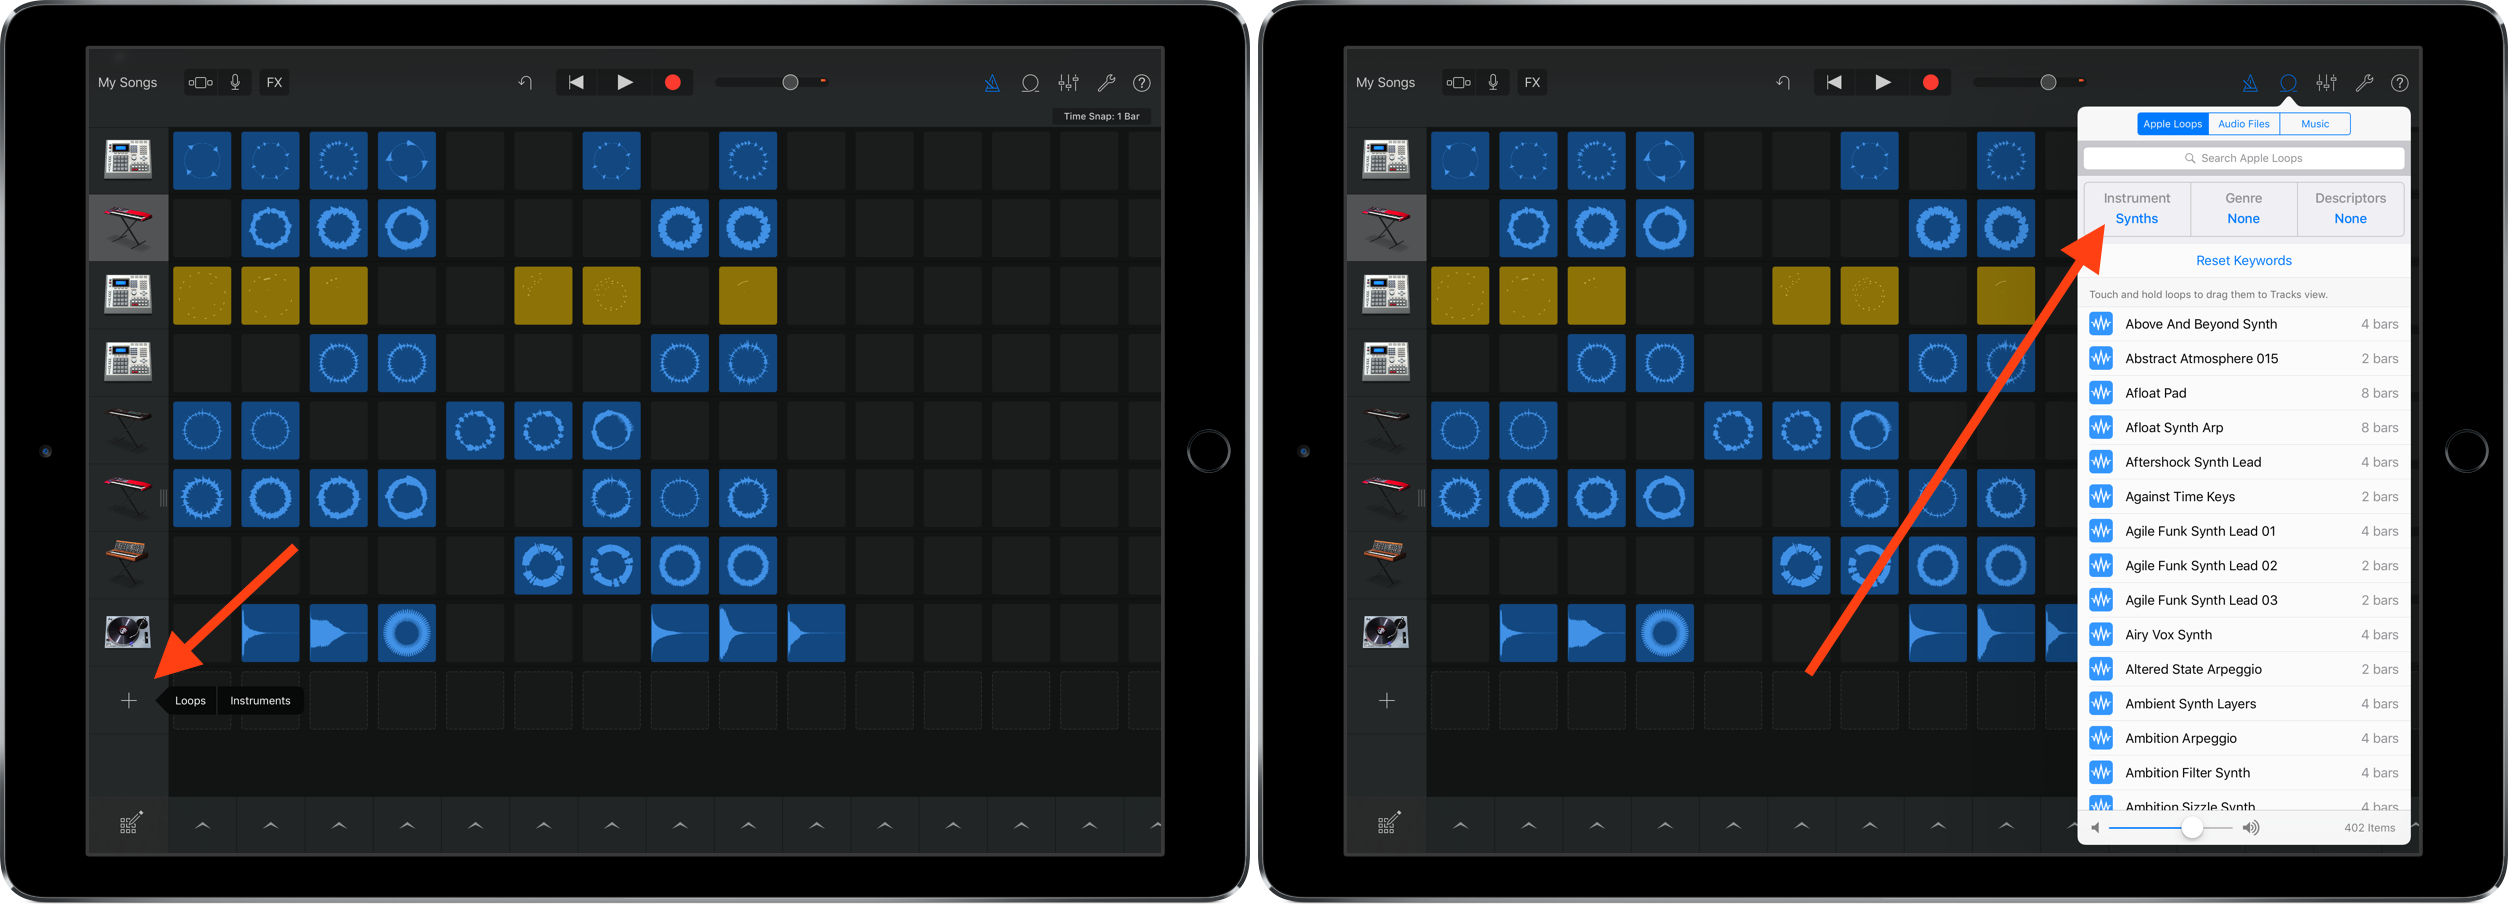
Tap the ‘+’ on a row, and tap the Loops option to bring up the loops browser. Use the three categories at the top of the browser to filter to a specific type of loop.
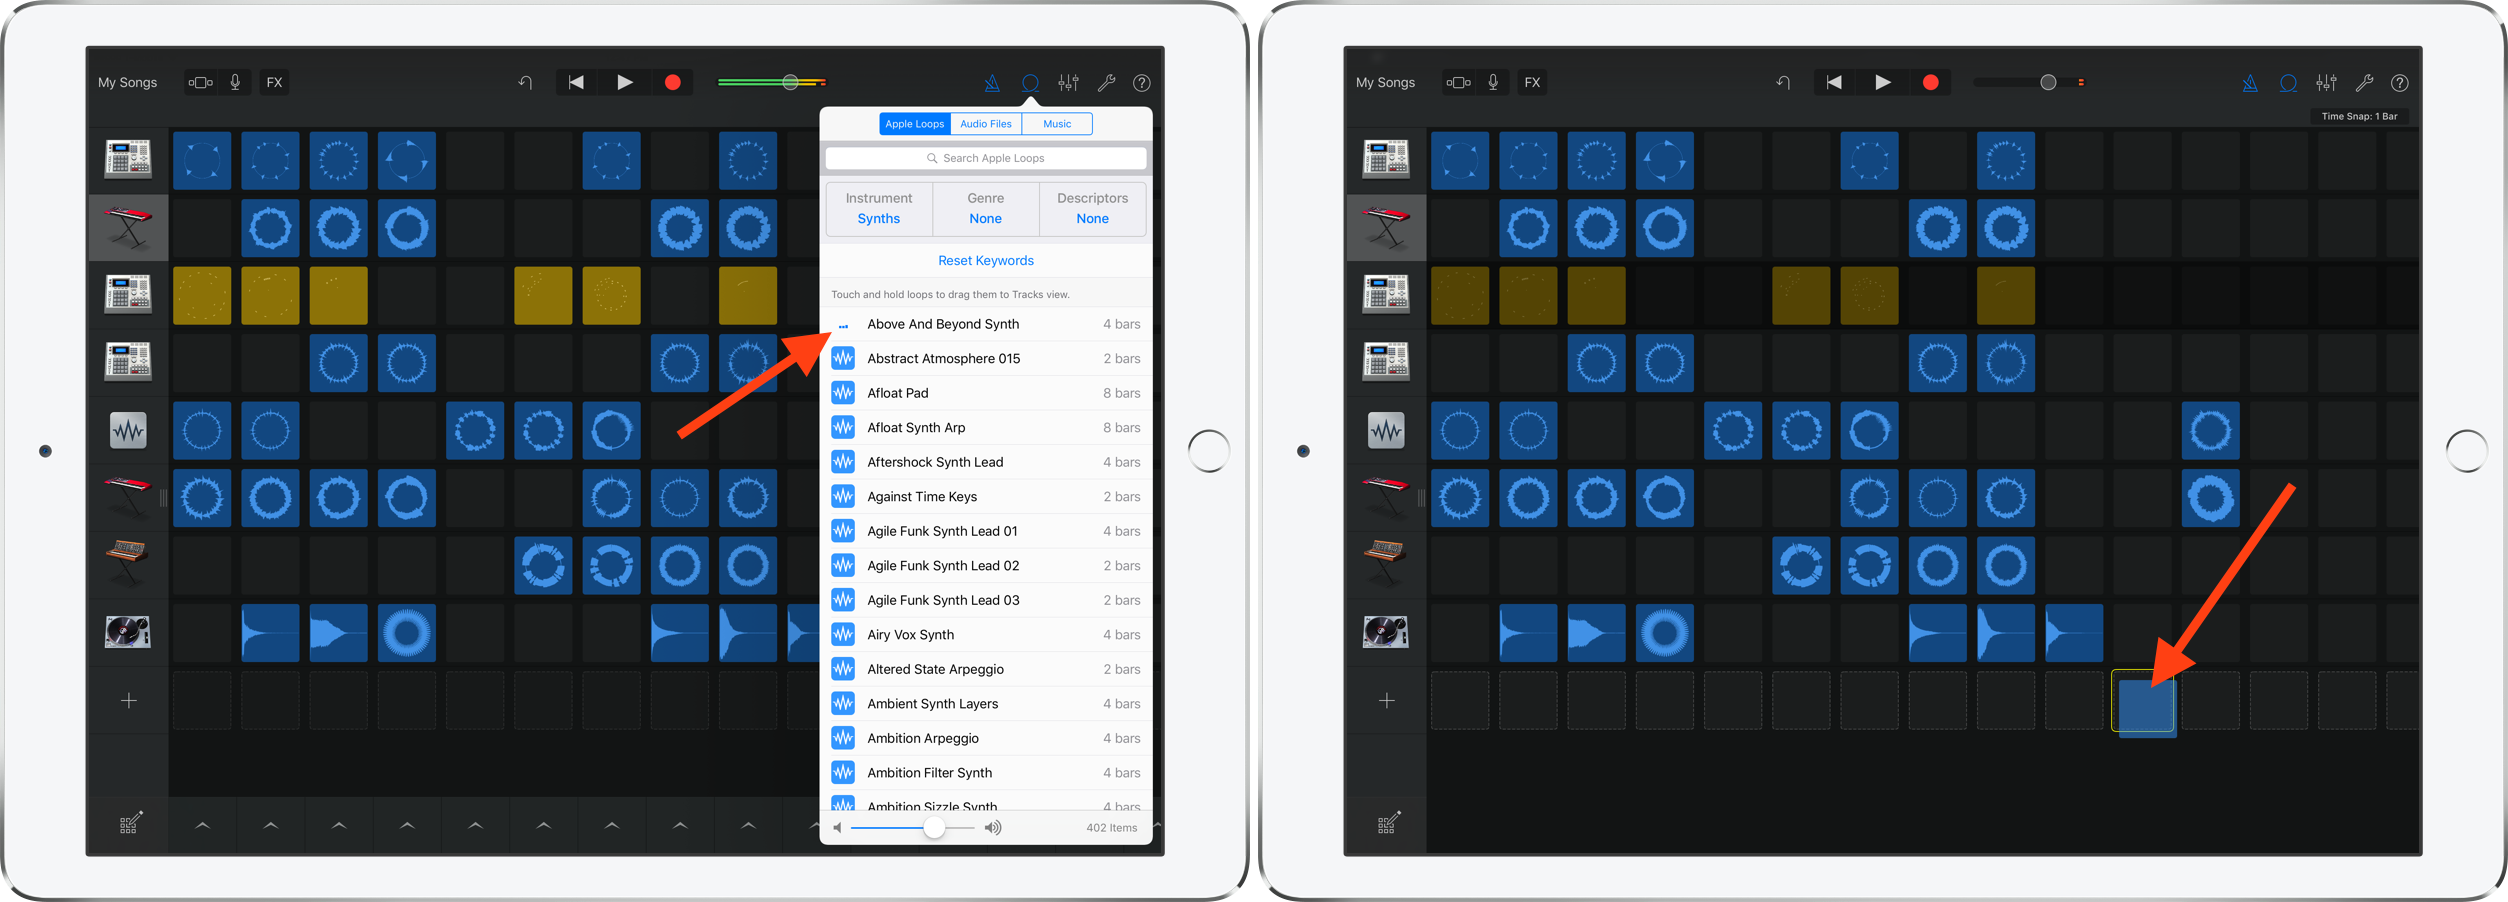
You can preview a loop by tapping on it once. Once you’ve settled on a loop, drag it to the grid using a tap, hold, and drag gesture.
How to cut, copy, paste, and delete loops
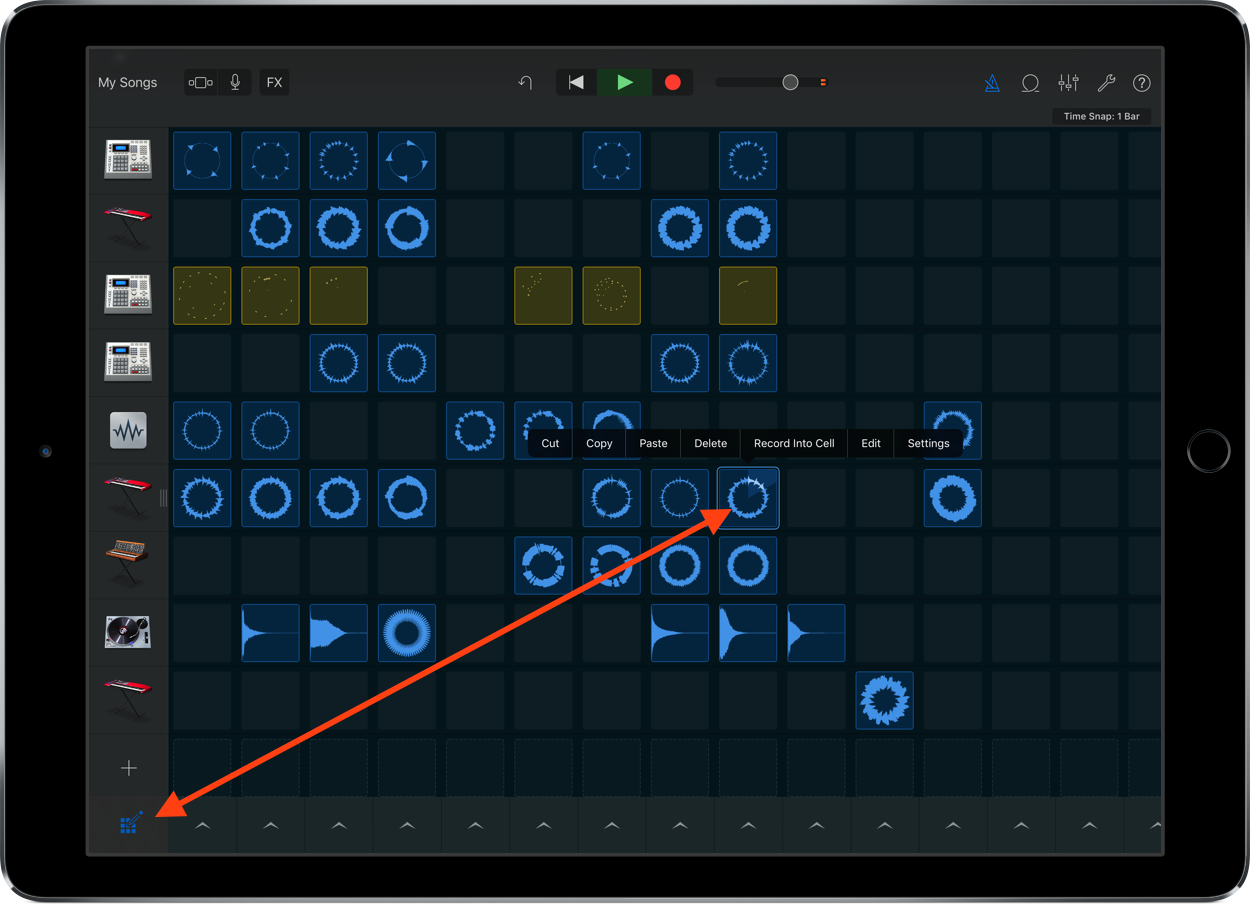
To cut, copy, paste, and delete loops, go into Edit mode, and tap and hold on a loop.
How to move loops
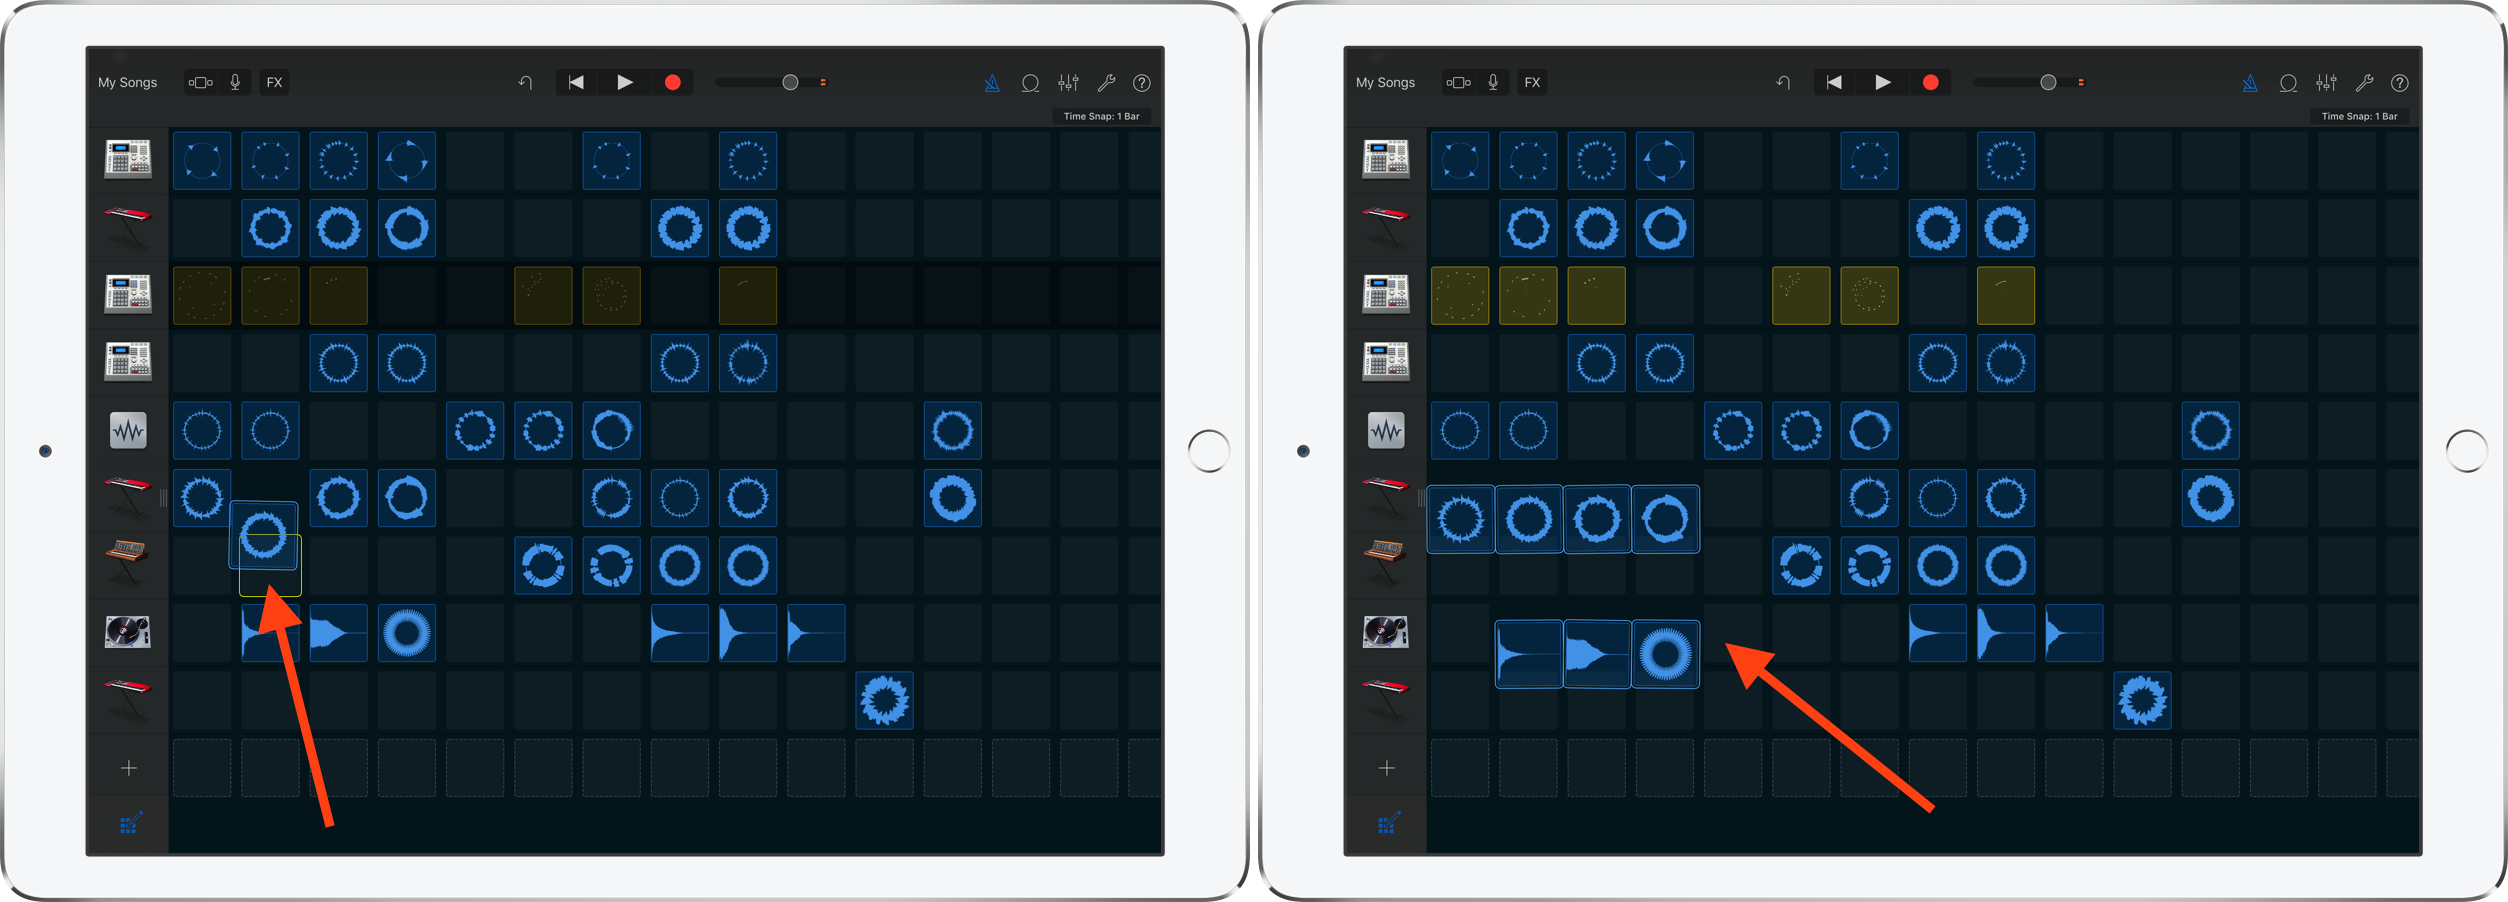
While in edit mode, you can tap and hold on a loop to drag it to a new spot on the grid. You can also select and move multiple loops by tapping on additional loops while holding the initial loop.
How to edit a loop
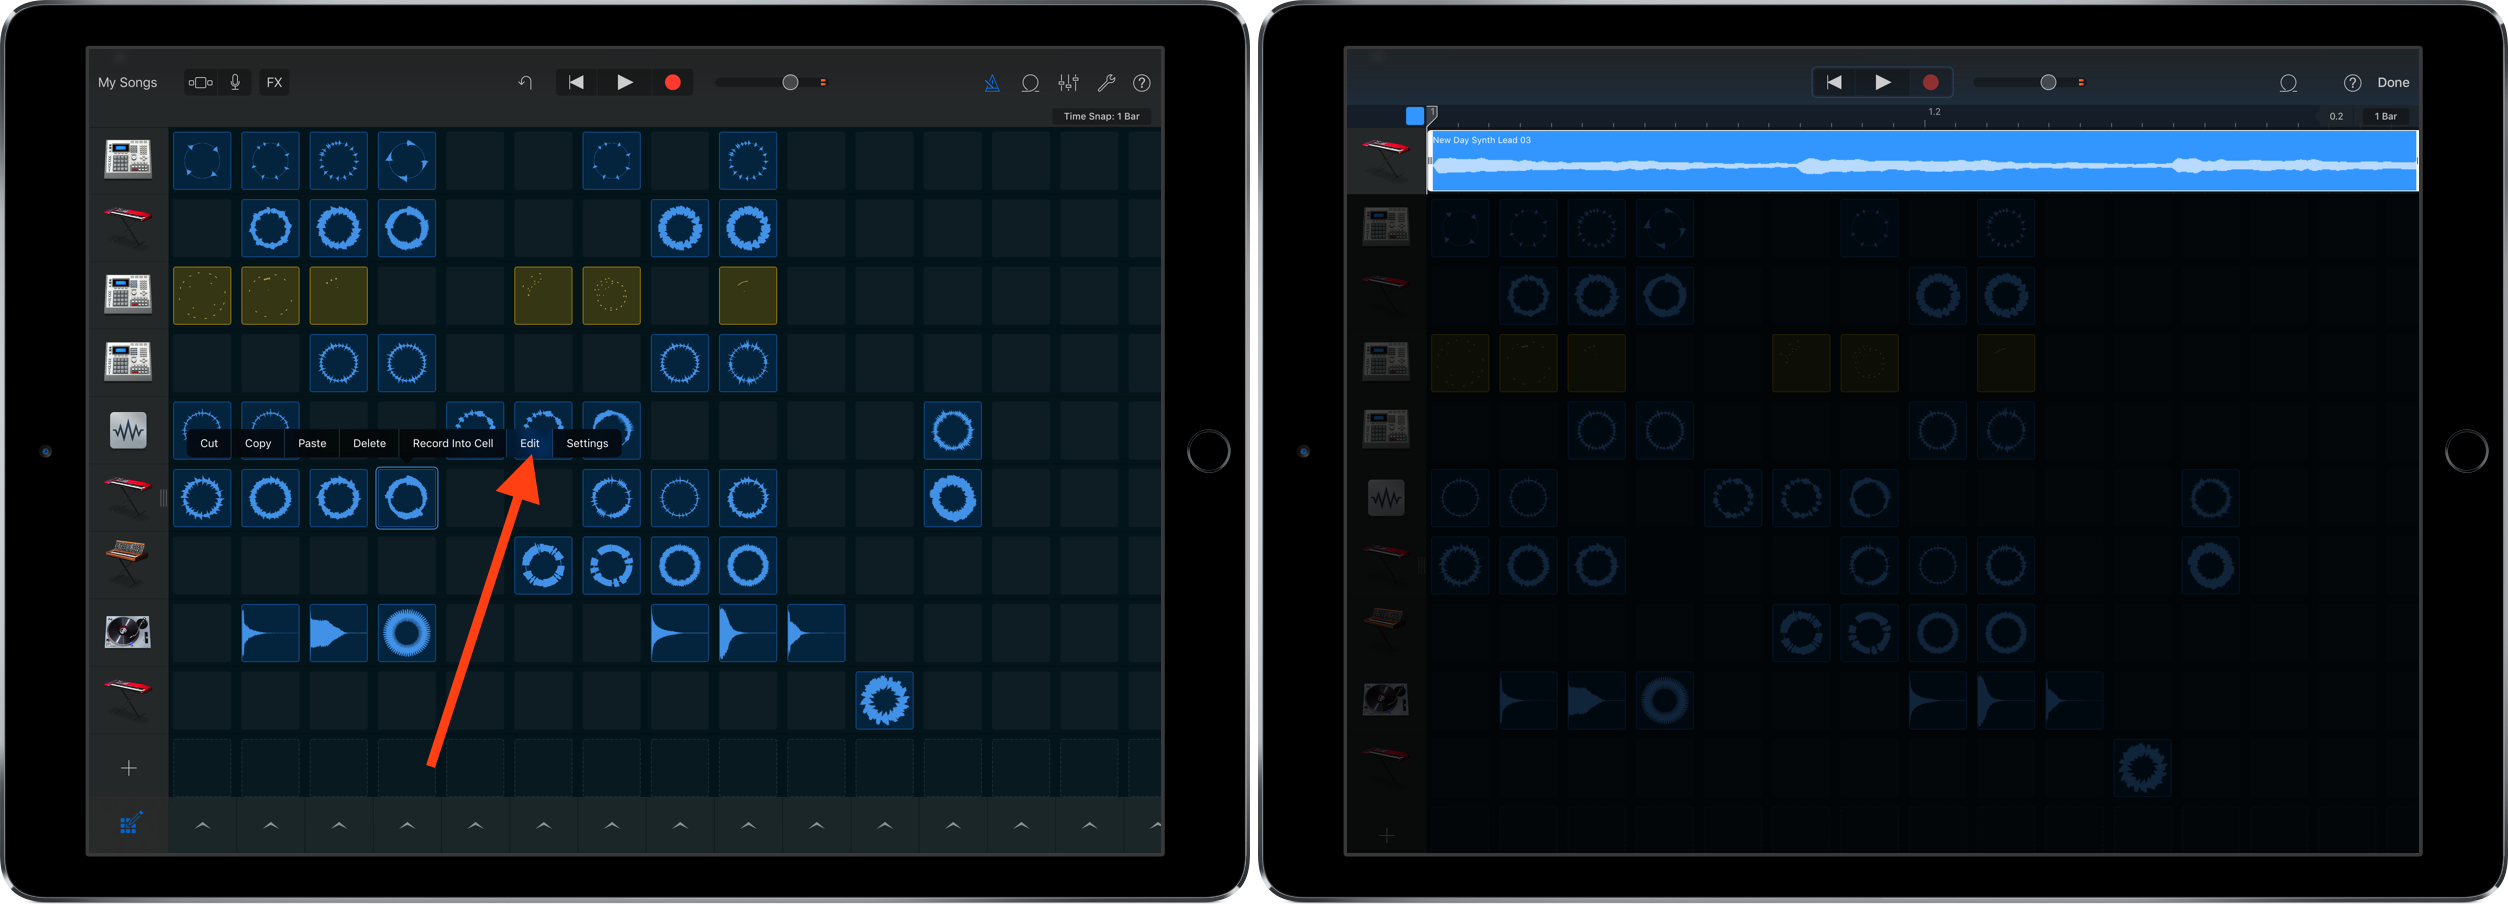
It’s possible to edit the waveform of a loop for low level editing. To enter waveform editing mode, tap and hold on a loop while in Edit mode, and tap the Edit option.
How to turn off looping for a loop
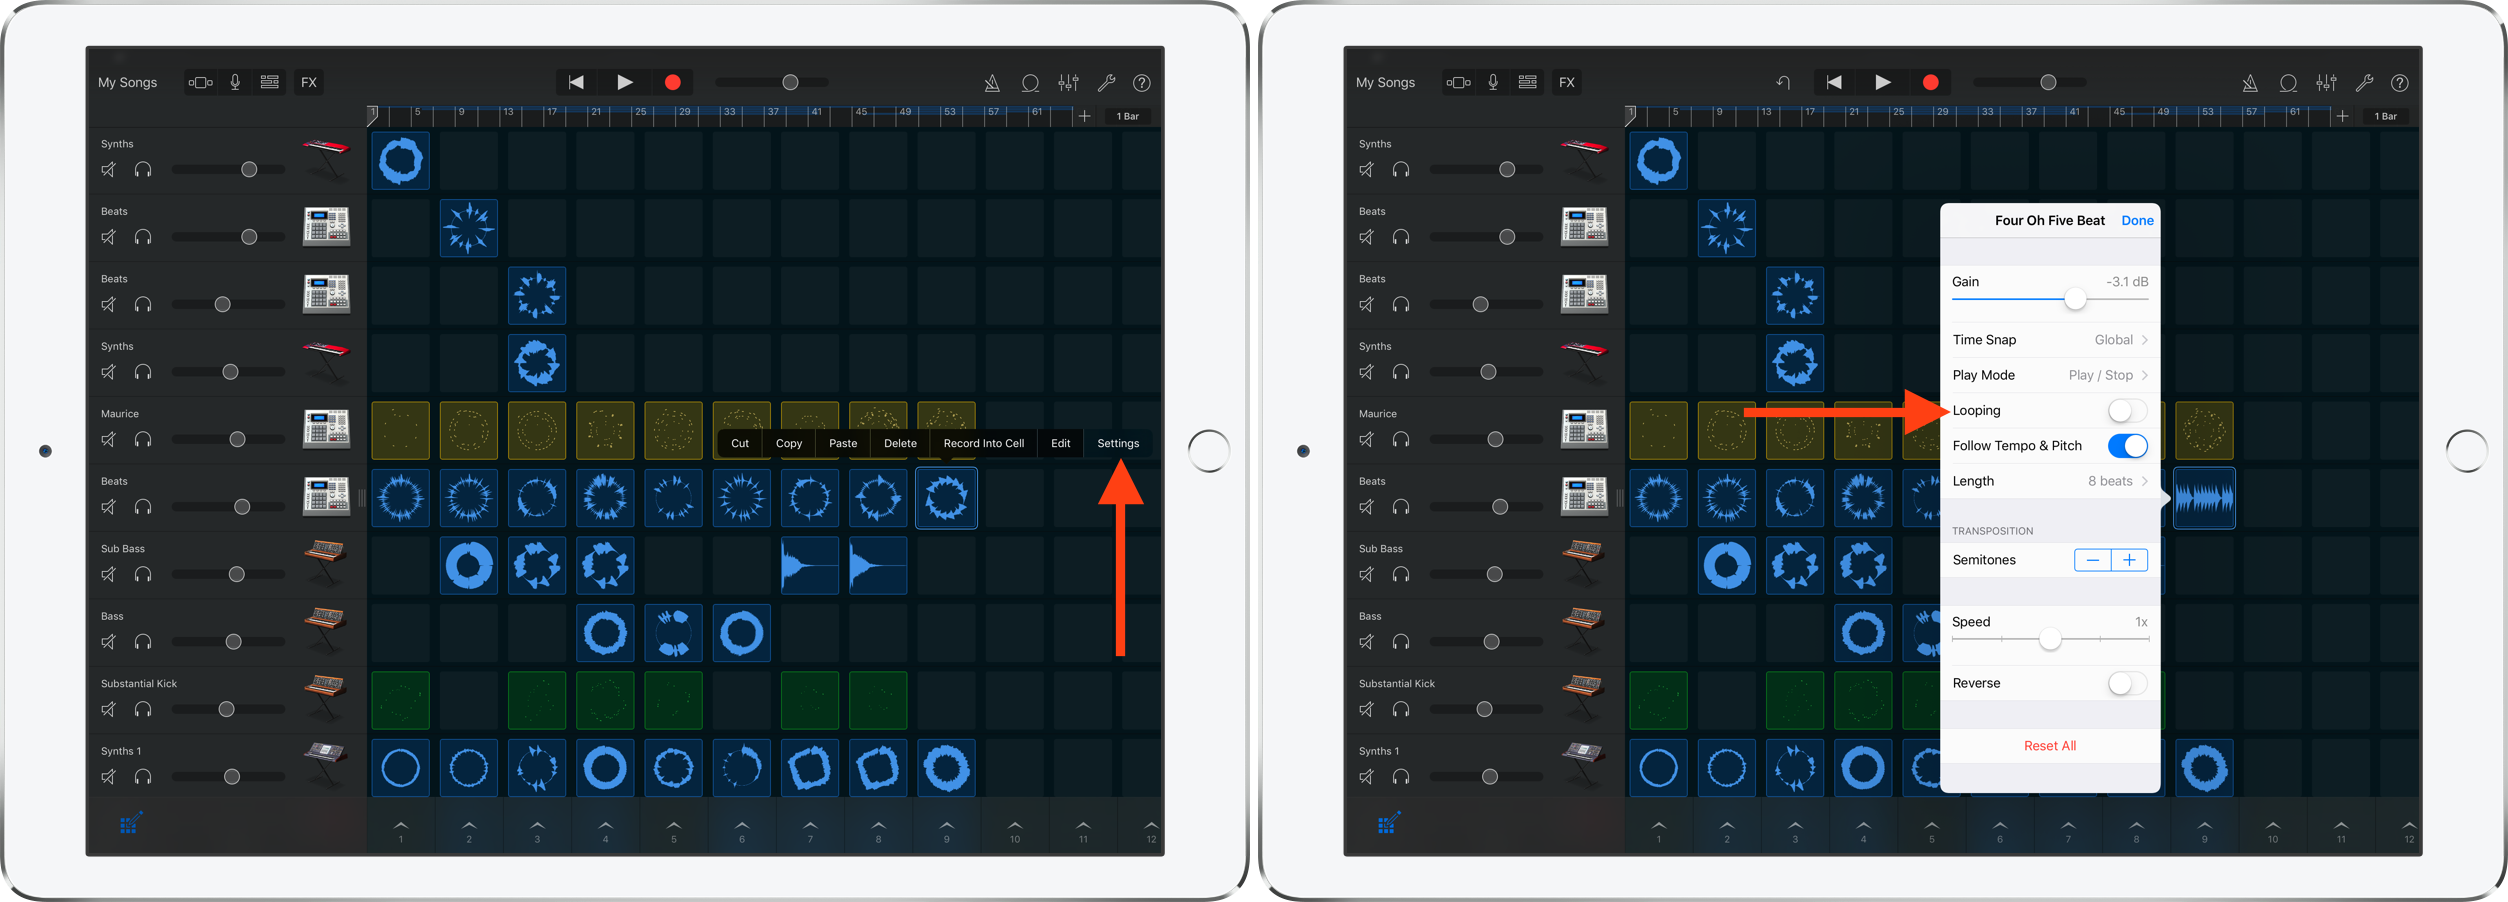
To disable or enable looping for a particular loop, tap the Settings option that appears when tapping a loop while in Edit mode. From the Settings menu, use the Looping switch to quickly enable or disable looping.
How to change the length of a loop
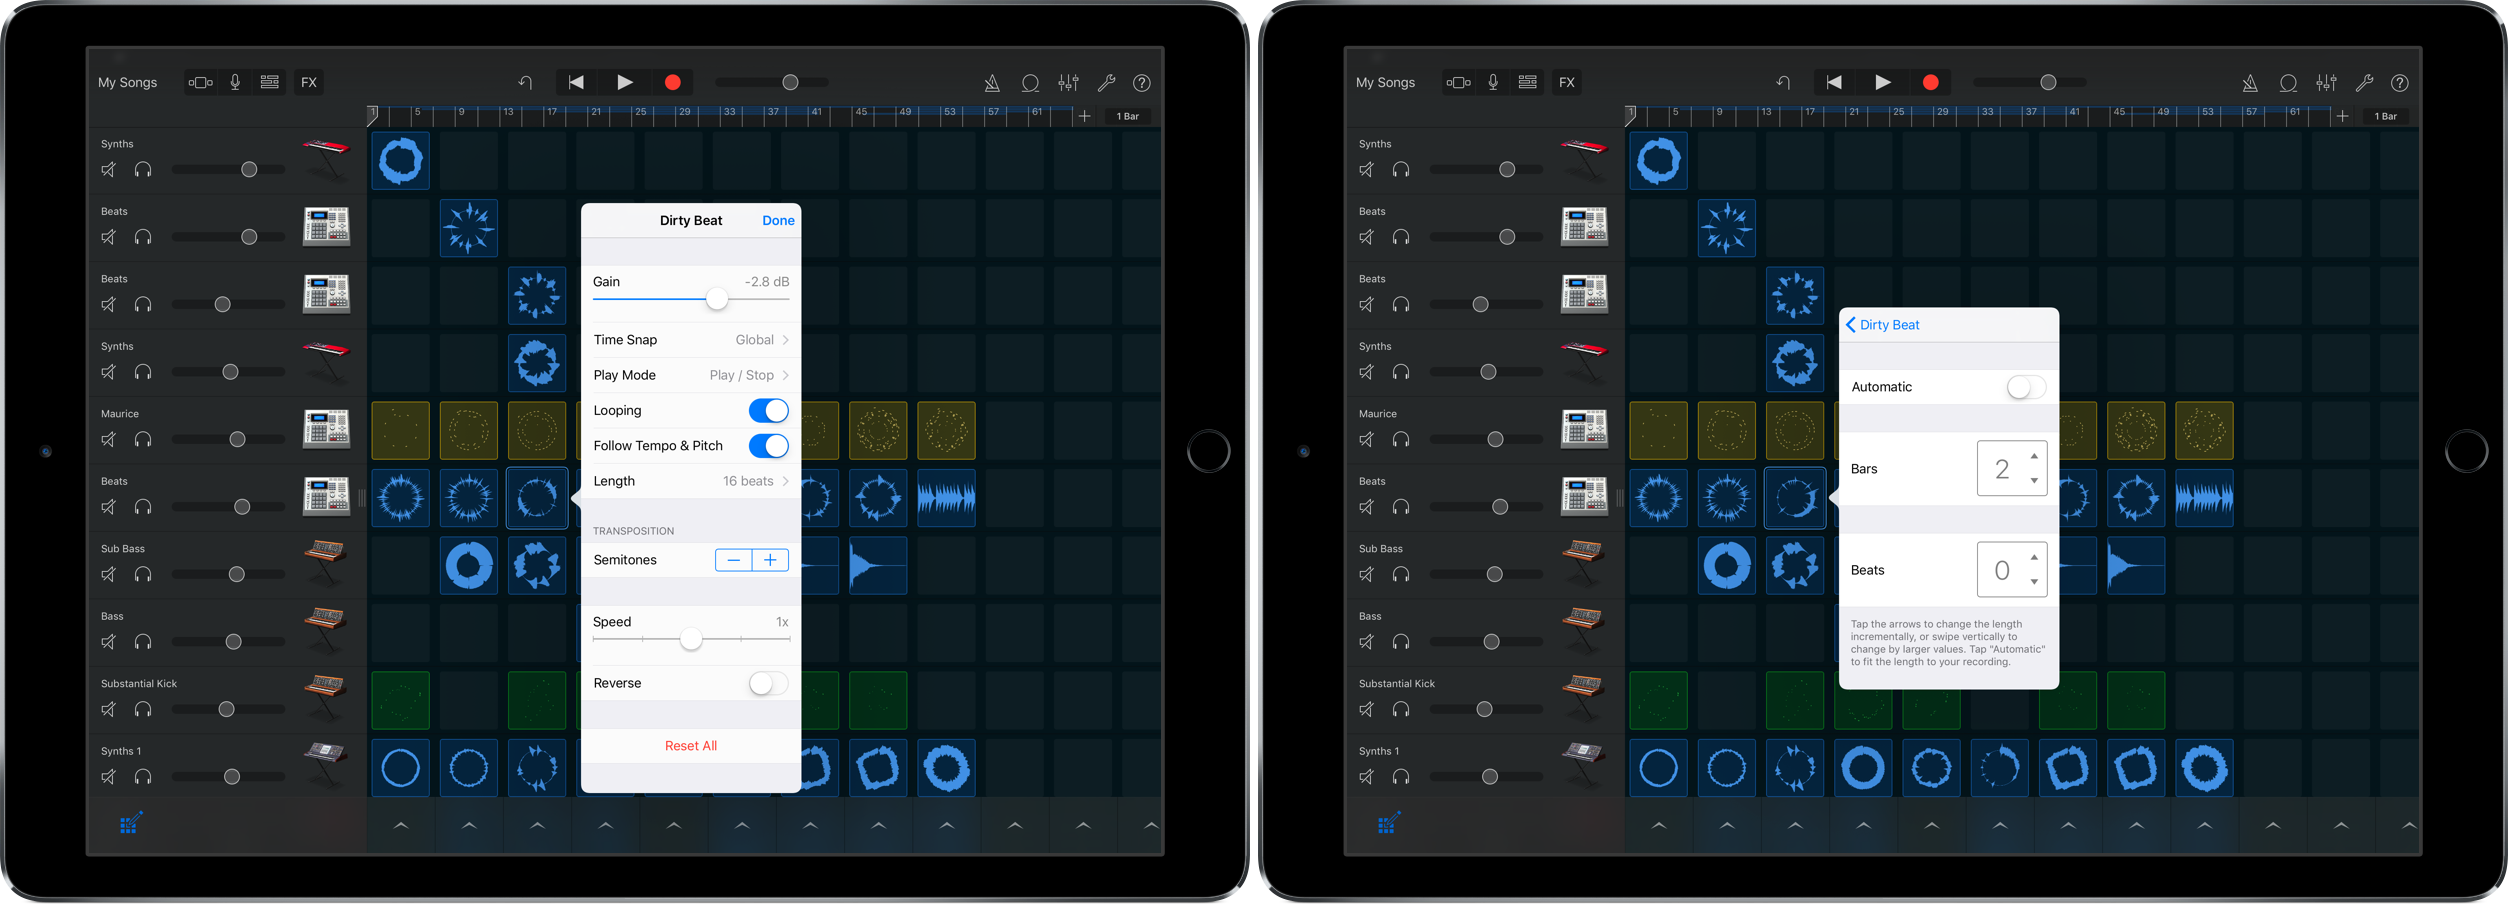
Loop length is measured in bars and beats, and four beats make a bar. To change the length of a loop, go into the loop settings, and tap the Length section. From there, it’s possible to manually adjust the number of bars, beats, or both.
How to add effects to a Live Loops performance
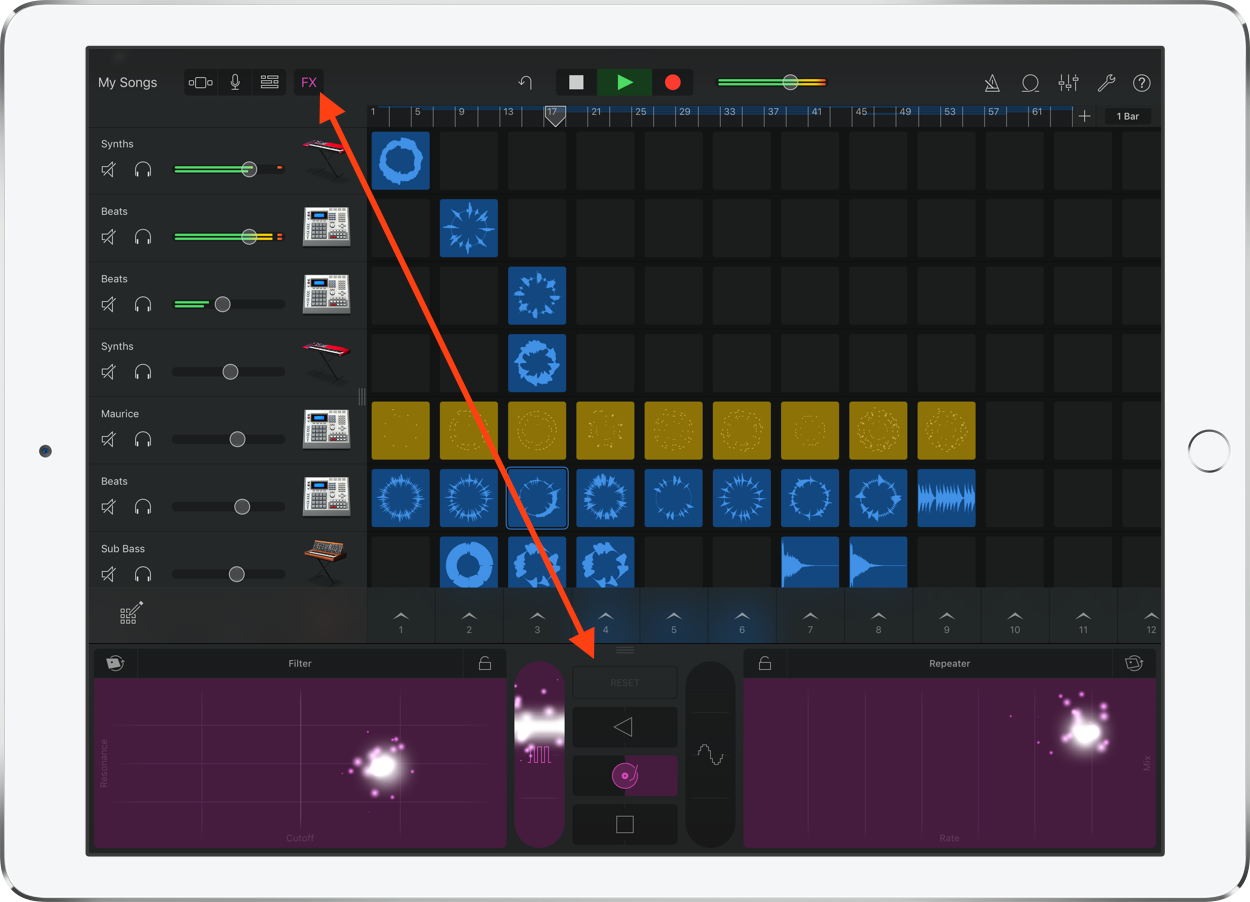
Tap the FX button at the top of the screen while a performance is playing. You can then use the many effects found in the FX panel to add variety and spice to a performance. As a bonus, by tapping the accelerometer button on the Filter and Repeater pads, you can physically move the iPad to invoke different sounds, which is downright awesome.
How to add a virtual session drummer to your performance
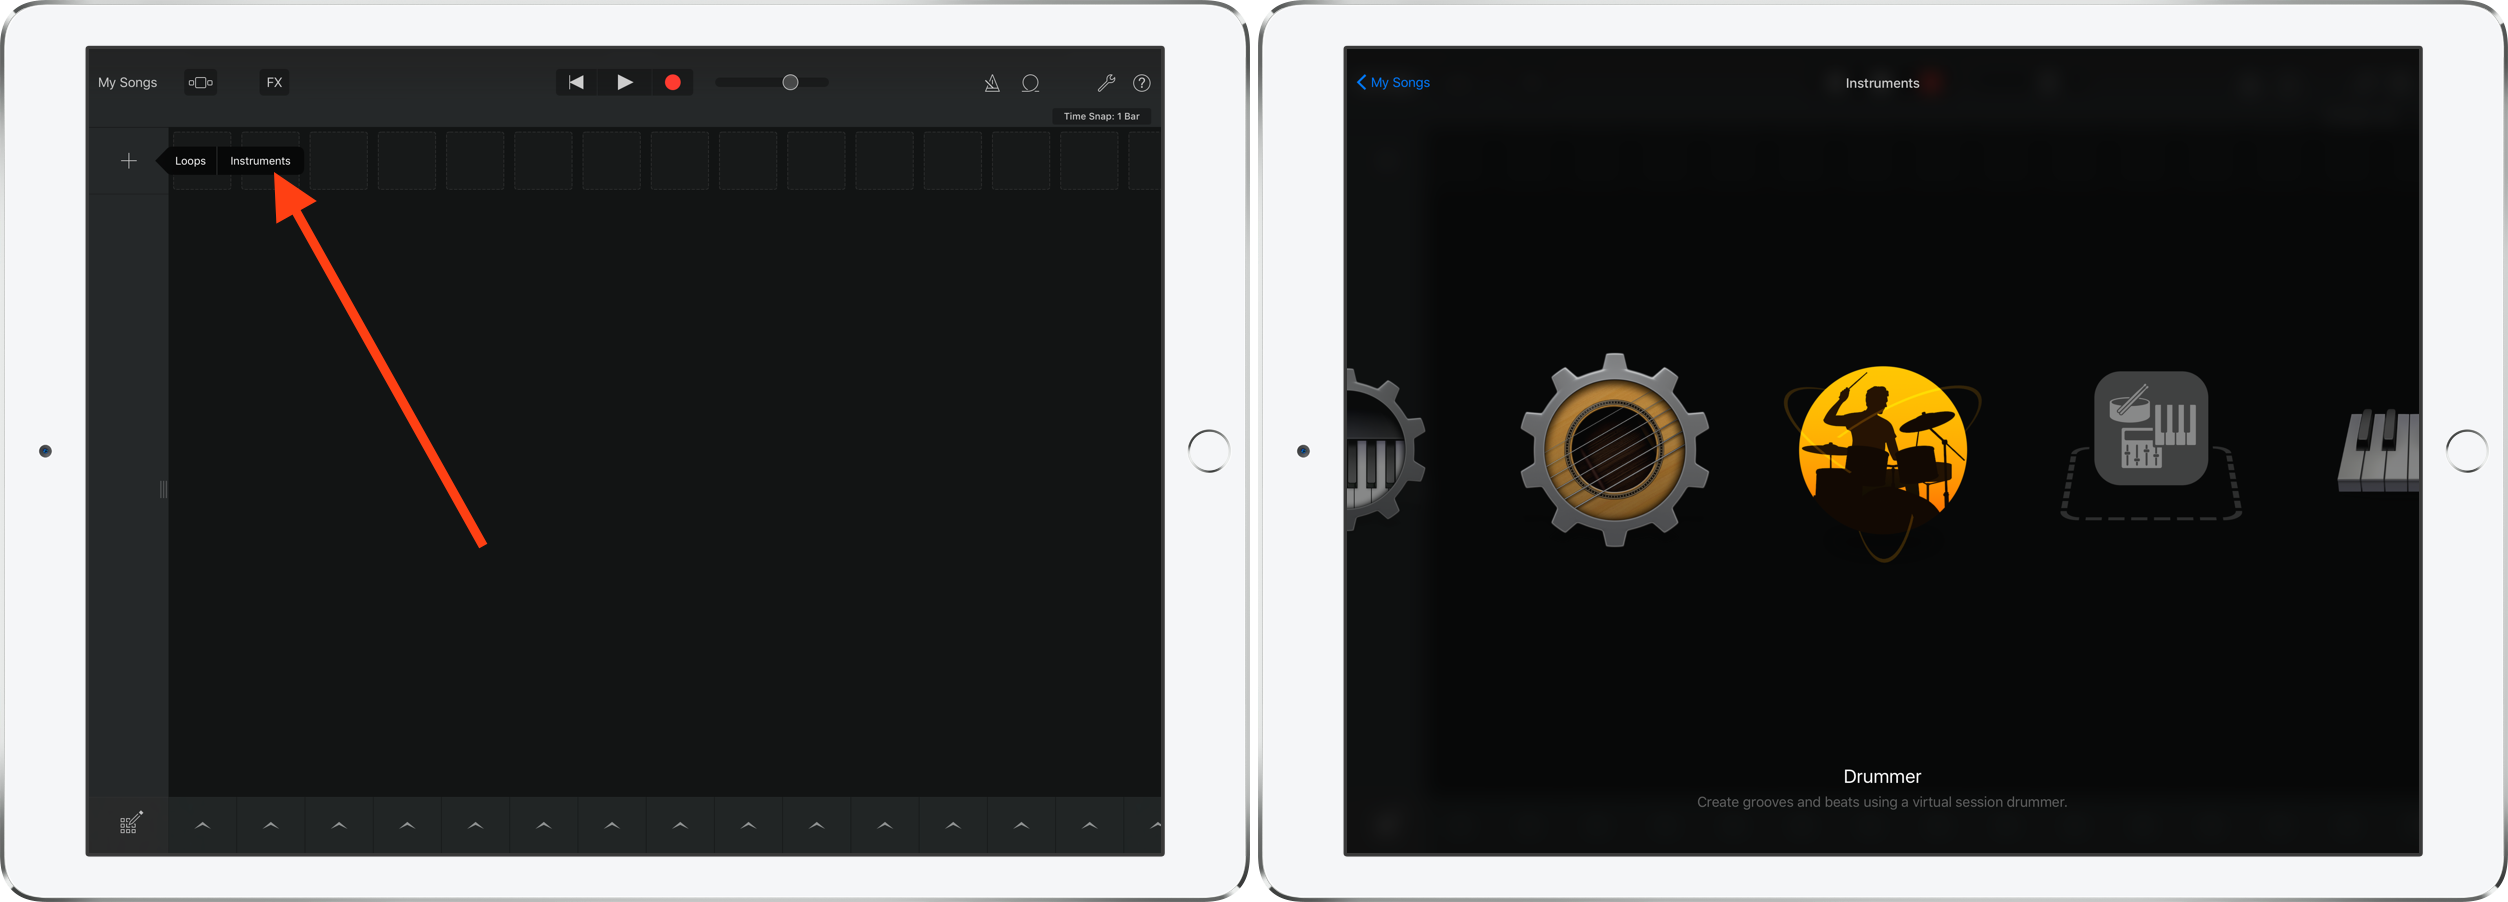
By choosing to insert an Instrument instead of a Loop, you can add a virtual session drummer to your performance.
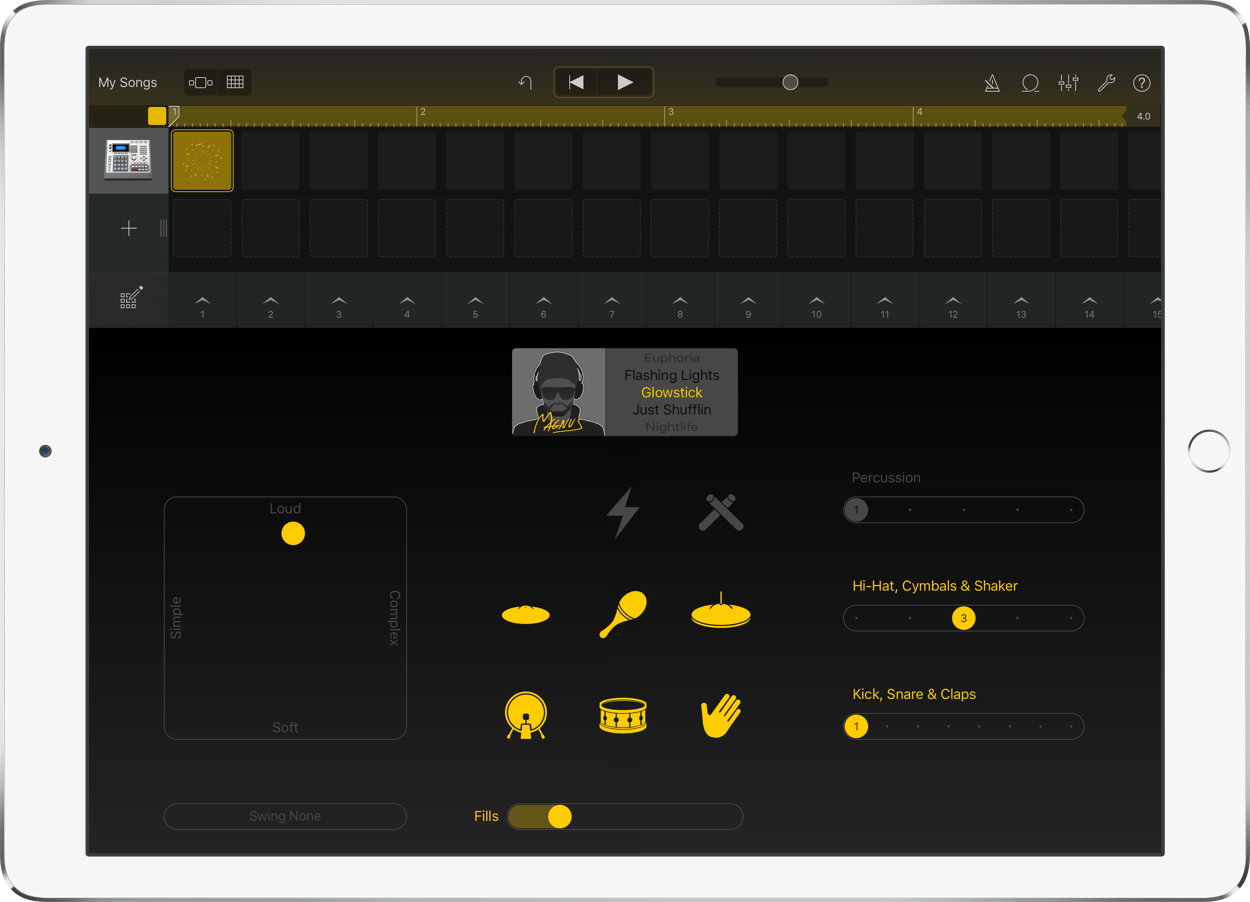
A virtual drummer can be customized on the fly using the various drummer options to create a unique sound for your performance.
How to record a Live Loops performance
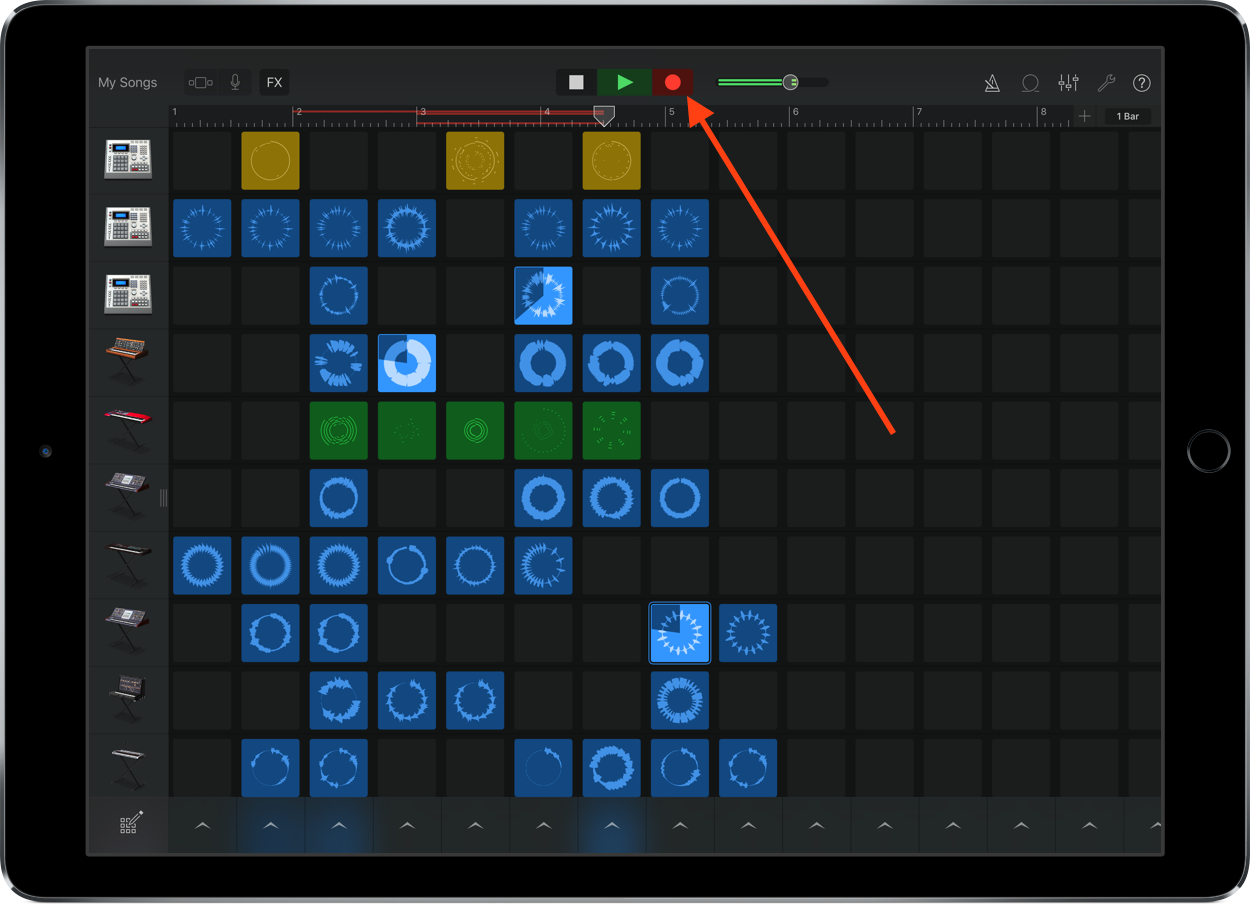
It’s important to know how to manage, play, and alter loops, but it’s all for naught if you can’t sequence it all together to create a recording of your performance. Thankfully, GarageBand makes this easy. Simply tap the Record button at the top of the grid interface to start a recording of your performance. You can then play loops to create your own unique song.
How to view the song waveform layout

After you’ve recorded a song, you can see its entire waveform layout by tapping the waveform button to the left of the FX button. While viewing the entire waveform layout, you can fine-tune your recording. What you won’t find, however, are more advanced features like automation for automating pan and volume settings for individual tracks.
How to make a song fade out
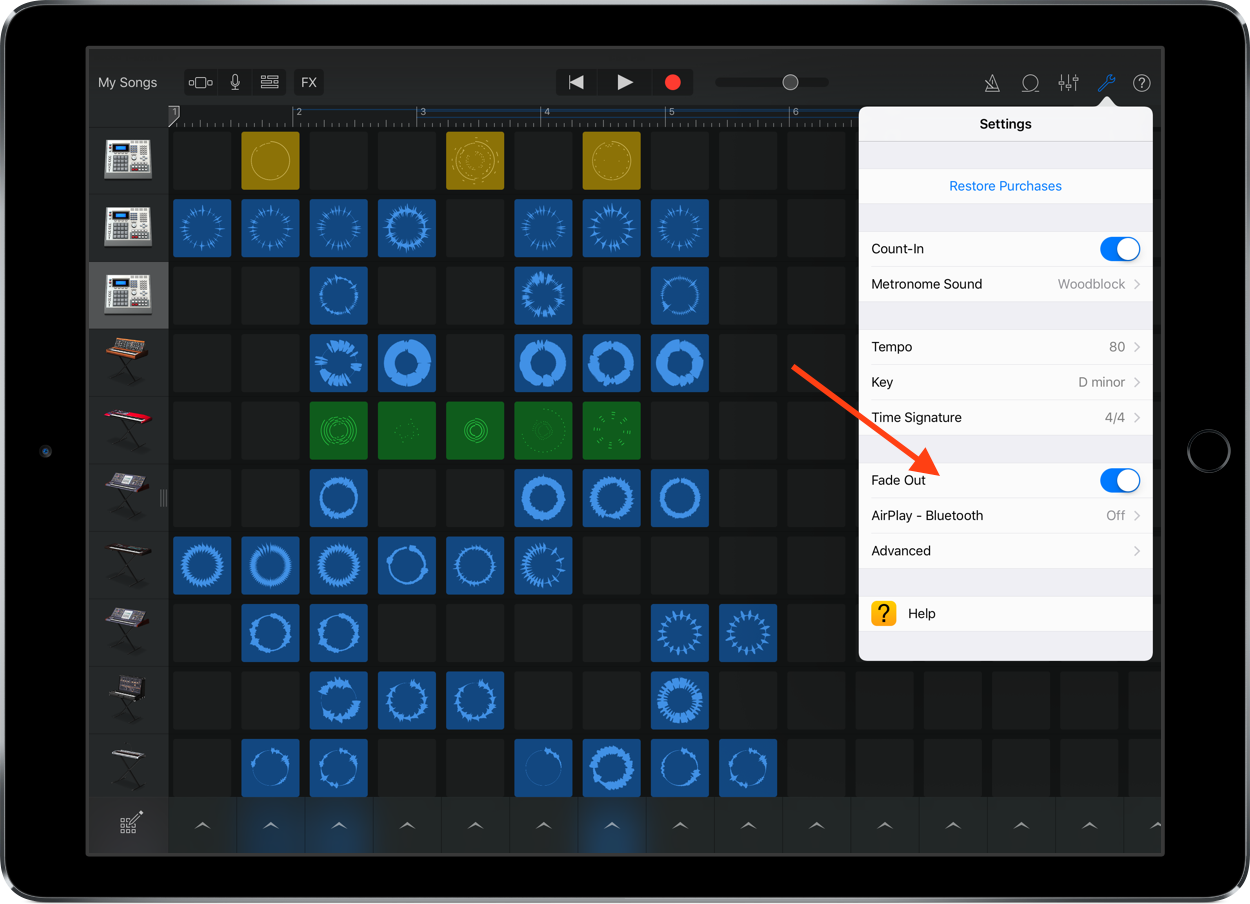
If you’re not careful, your song will abruptly come to a halt when it reaches the end of a recording. To prevent this, use the track settings to enable the Fade Out option.
How to export a recording
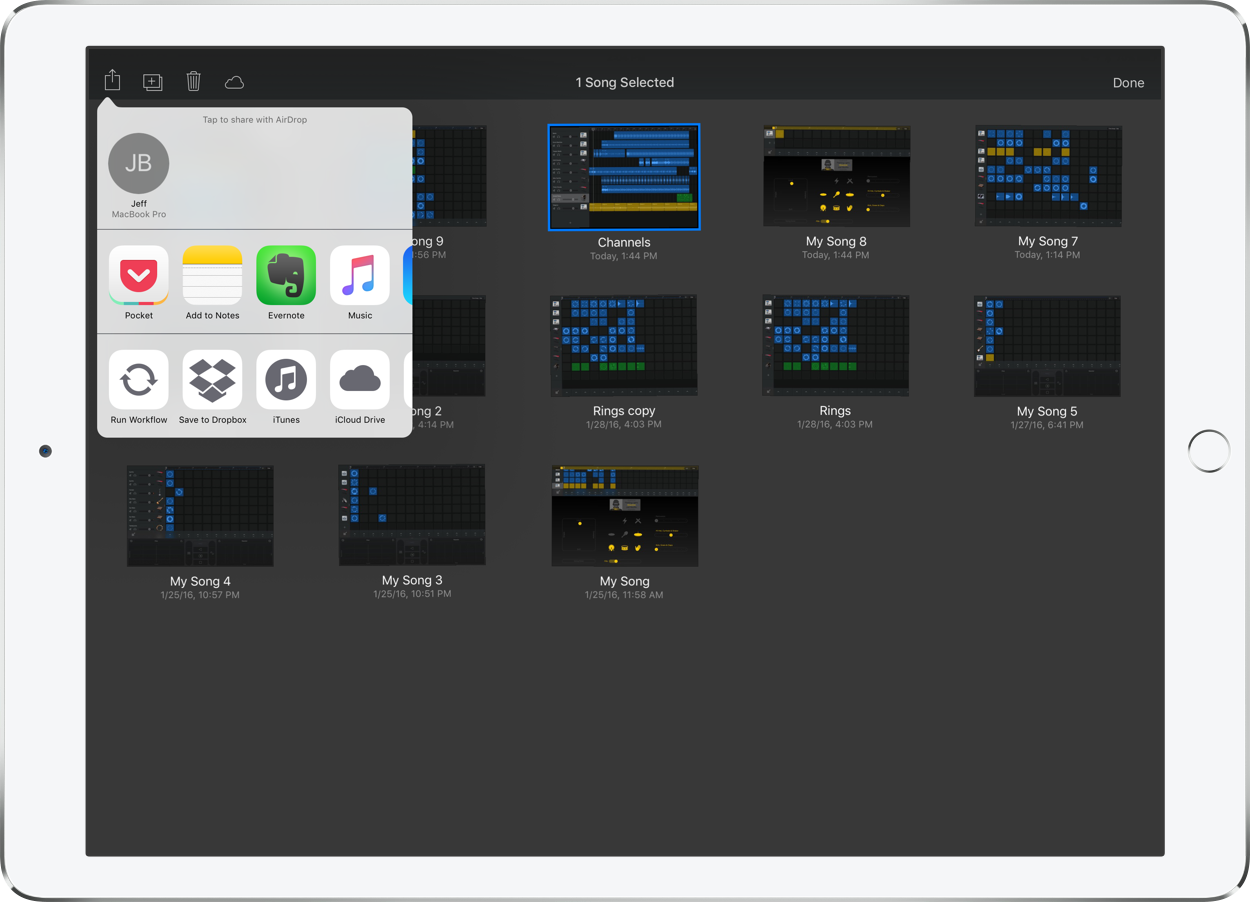
To export a recording, close the song by tapping the My Songs button in the upper left-hand corner. Next, tap the Select button in the upper right-hand corner of the main song view, and tap the song that you wish to export. Tap the Share button, and choose Open In… This will allow you to select the audio quality, and provide the name of the Artist, Composer, and Album.
Once you’re finished with the Share Song details, tap the Share button. GarageBand will then export the song, and provide you with another Share menu for copying the song to an app, or saving to a service like DropBox.
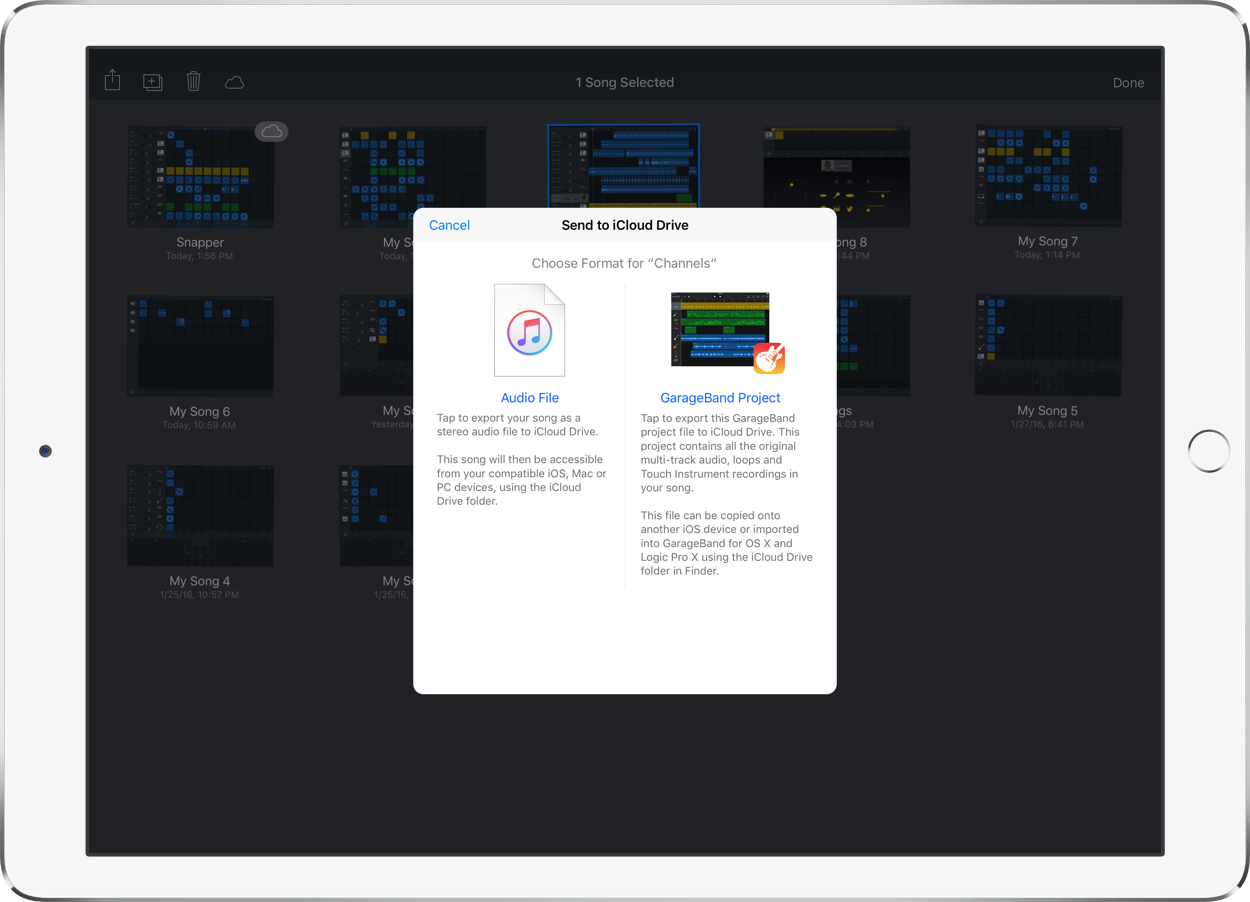
You can also choose to save to iCloud Drive, which will present you with the ability to save as an audio file, or save as a GarageBand file that can be imported into GarageBand or Logic Pro X for Mac.
Conclusion
As you can see from the walkthrough and video, GarageBand is an extremely easy app to get into, but has a very high ceiling and lots of depth. I didn’t even touch on all of the many features that this app has, as this basic tutorial is truly just the tip of the iceberg.
While it’s true that the desktop versions of GarageBand and especially Logic Pro X are much deeper than GarageBand for iOS, this app lends you enough to make entire songs, and at least start the creativity process until you can get back to your Mac.
GarageBand is especially awesome on the 12.9″ screen of the iPad Pro. Not only does the screen real estate make it easier to navigate the Live Loops grid, but the processing muscle found inside the iPad Pro lets it handle pretty much any combination that I can throw at it.
Needless to say, I highly recommend this app. If you’re a music creator that’s been on the fence about the iPad Pro, I can promise you that it’s a wonderful experience.