
Now that you’ve tried Apple Music thanks to Apple’s generous three-month free trial, you may have decided that the service just isn’t cut for you.
Though impossible to get rid of it completely, you can temporarily hide most of Apple Music’s aspects.
Our previous tutorial has taught you how to disconnect from Apple Music’s Connect feature and today’s how-to lays out the steps to hide Apple Music on your iPhone, iPod touch, iPad and Mac and go back to the old way of enjoying music.
How to hide Apple Music on your iOS device
Step 1: Open the Settings app on your iPhone, iPod touch or iPad.
Step 2: Navigate to the Music section.
Step 3: Flip the Show Apple Music switch to the OFF position.
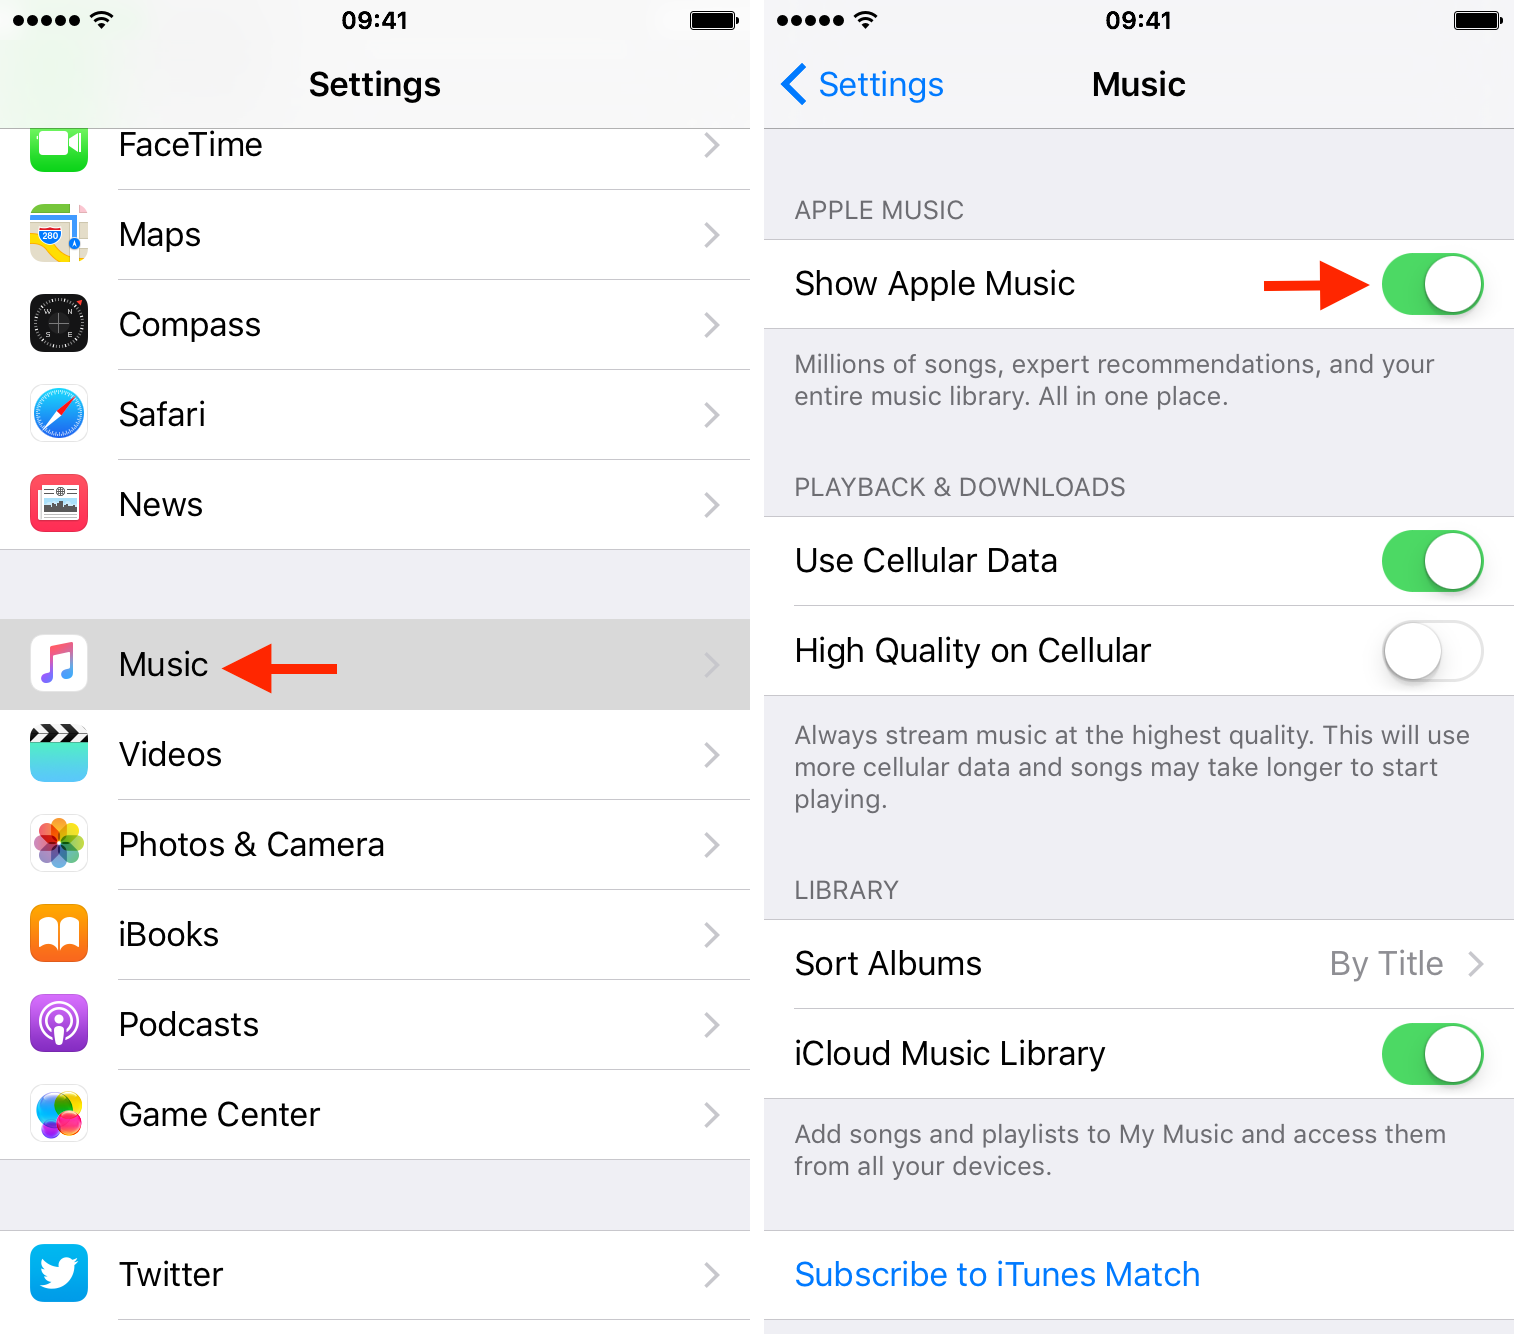
Don’t worry, disabling Apple Music won’t remove songs you’ve downloaded for offline listening so long as iCloud Music Library is enabled.
How to hide Apple Music on desktop iTunes
Step 1: Open iTunes on your Mac or Windows PC.
Step 2: Choose Preferences in the iTunes menu on your Mac, or choose Edit > Preferences on a PC.
Step 3: Click the General tab and untick the box labeled “Show Apple Music”.
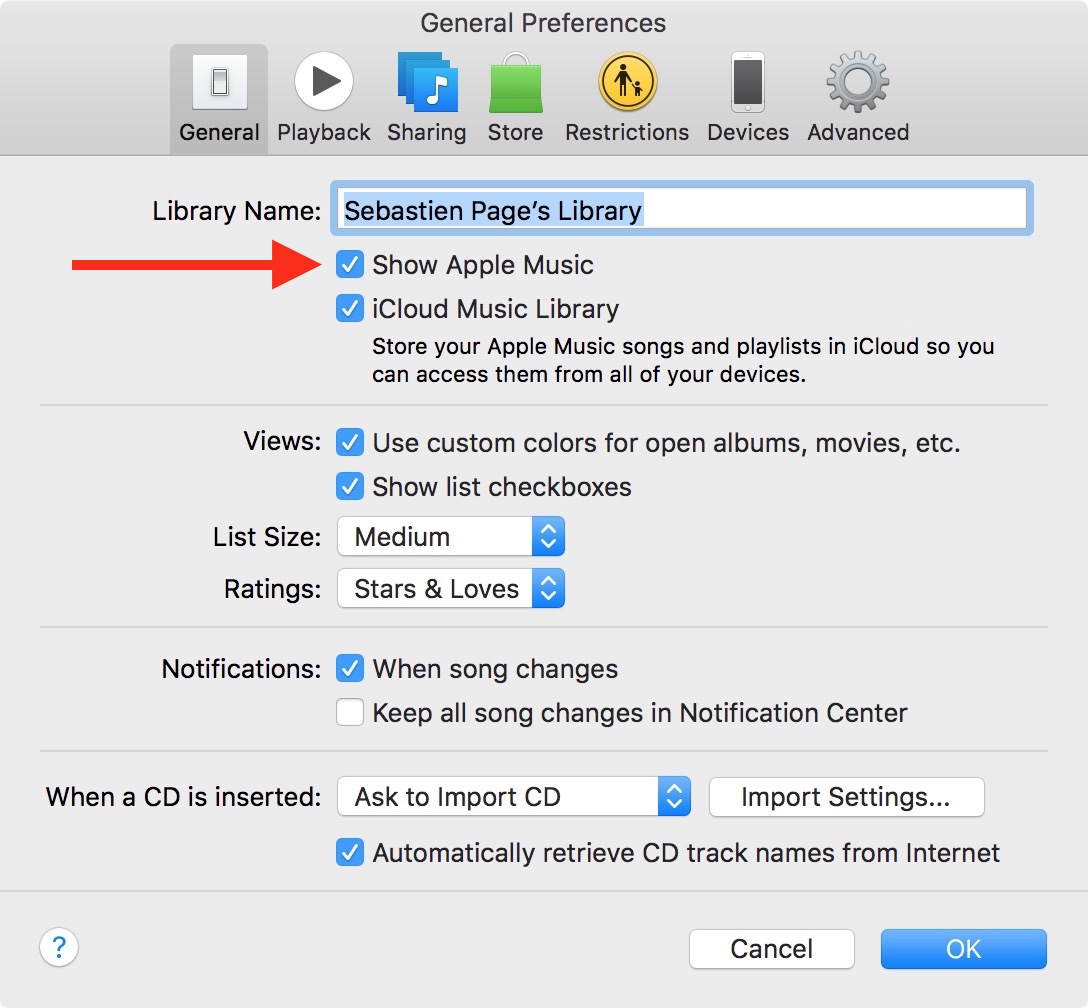
Keep in mind that hiding Apple Music on your desktop will automatically disable iCloud Music Library, which will remove all Apple Music songs from your computer, including those downloaded for offline listening.
What happens after hiding Apple Music?
As hinted above, removing Apple Music changes your music listening experience and brings back the old way of navigating your music library in the Music app. Here’s precisely what happens after you disable Apple Music on your iPhone, iPod touch, iPad or Mac.
1. Apple Music disappears from search
With Apple Music enabled, the two buttons right below the Music app’s search field let you narrow the search scope to Apple Music and Your Library. Hiding Apple Music will also remove the Apple Music button from search and replace it with Radio.
Tip: In order to search across radio stations when Apple Music is enabled, simply run your search query across Apple Music. Then in your search results, scroll down until you see matches in the Stations subsection.
It’s not very intuitive but gets the job done.
2. For You, and Browse tabs get removed
Some folks will want to turn off Apple Music just to get their old tabs back. With Apple Music enabled, the Music app replaces some of the old tabs with the four new buttons: Library, For You, Browse, Radio, and Search.
To get rid of the For You, and Browse tabs, simply hide Apple Music. If you want to get rid of the Connect tab alone, consult this tutorial.
3. Offline songs remain in your iOS music library
When you hide Apple Music, songs you previously downloaded for offline listening will remain in the music library on your iPhone, iPod touch or iPad. Should you also disable iCloud Music Library, offline tracks and Apple Music songs will get removed from the device, freeing up storage space.
What is iCloud Music Library?
iCloud Music Library can be switched on and off separately from Apple Music.
iCloud Music Library is similar to iCloud Photo Library: it stores your music and playlists in iCloud so you can access them from any device. Upon enabling the feature, your Mac will compare each song in your music library to iTunes’ vast catalog of thirty million songs, and counting.
Matched songs become immediately available to stream on all your devices with iCloud Music Library enabled. Non-matched songs get uploaded to iCloud first, after which you can stream them to any device.
How to disable iCloud Music Library on iOS
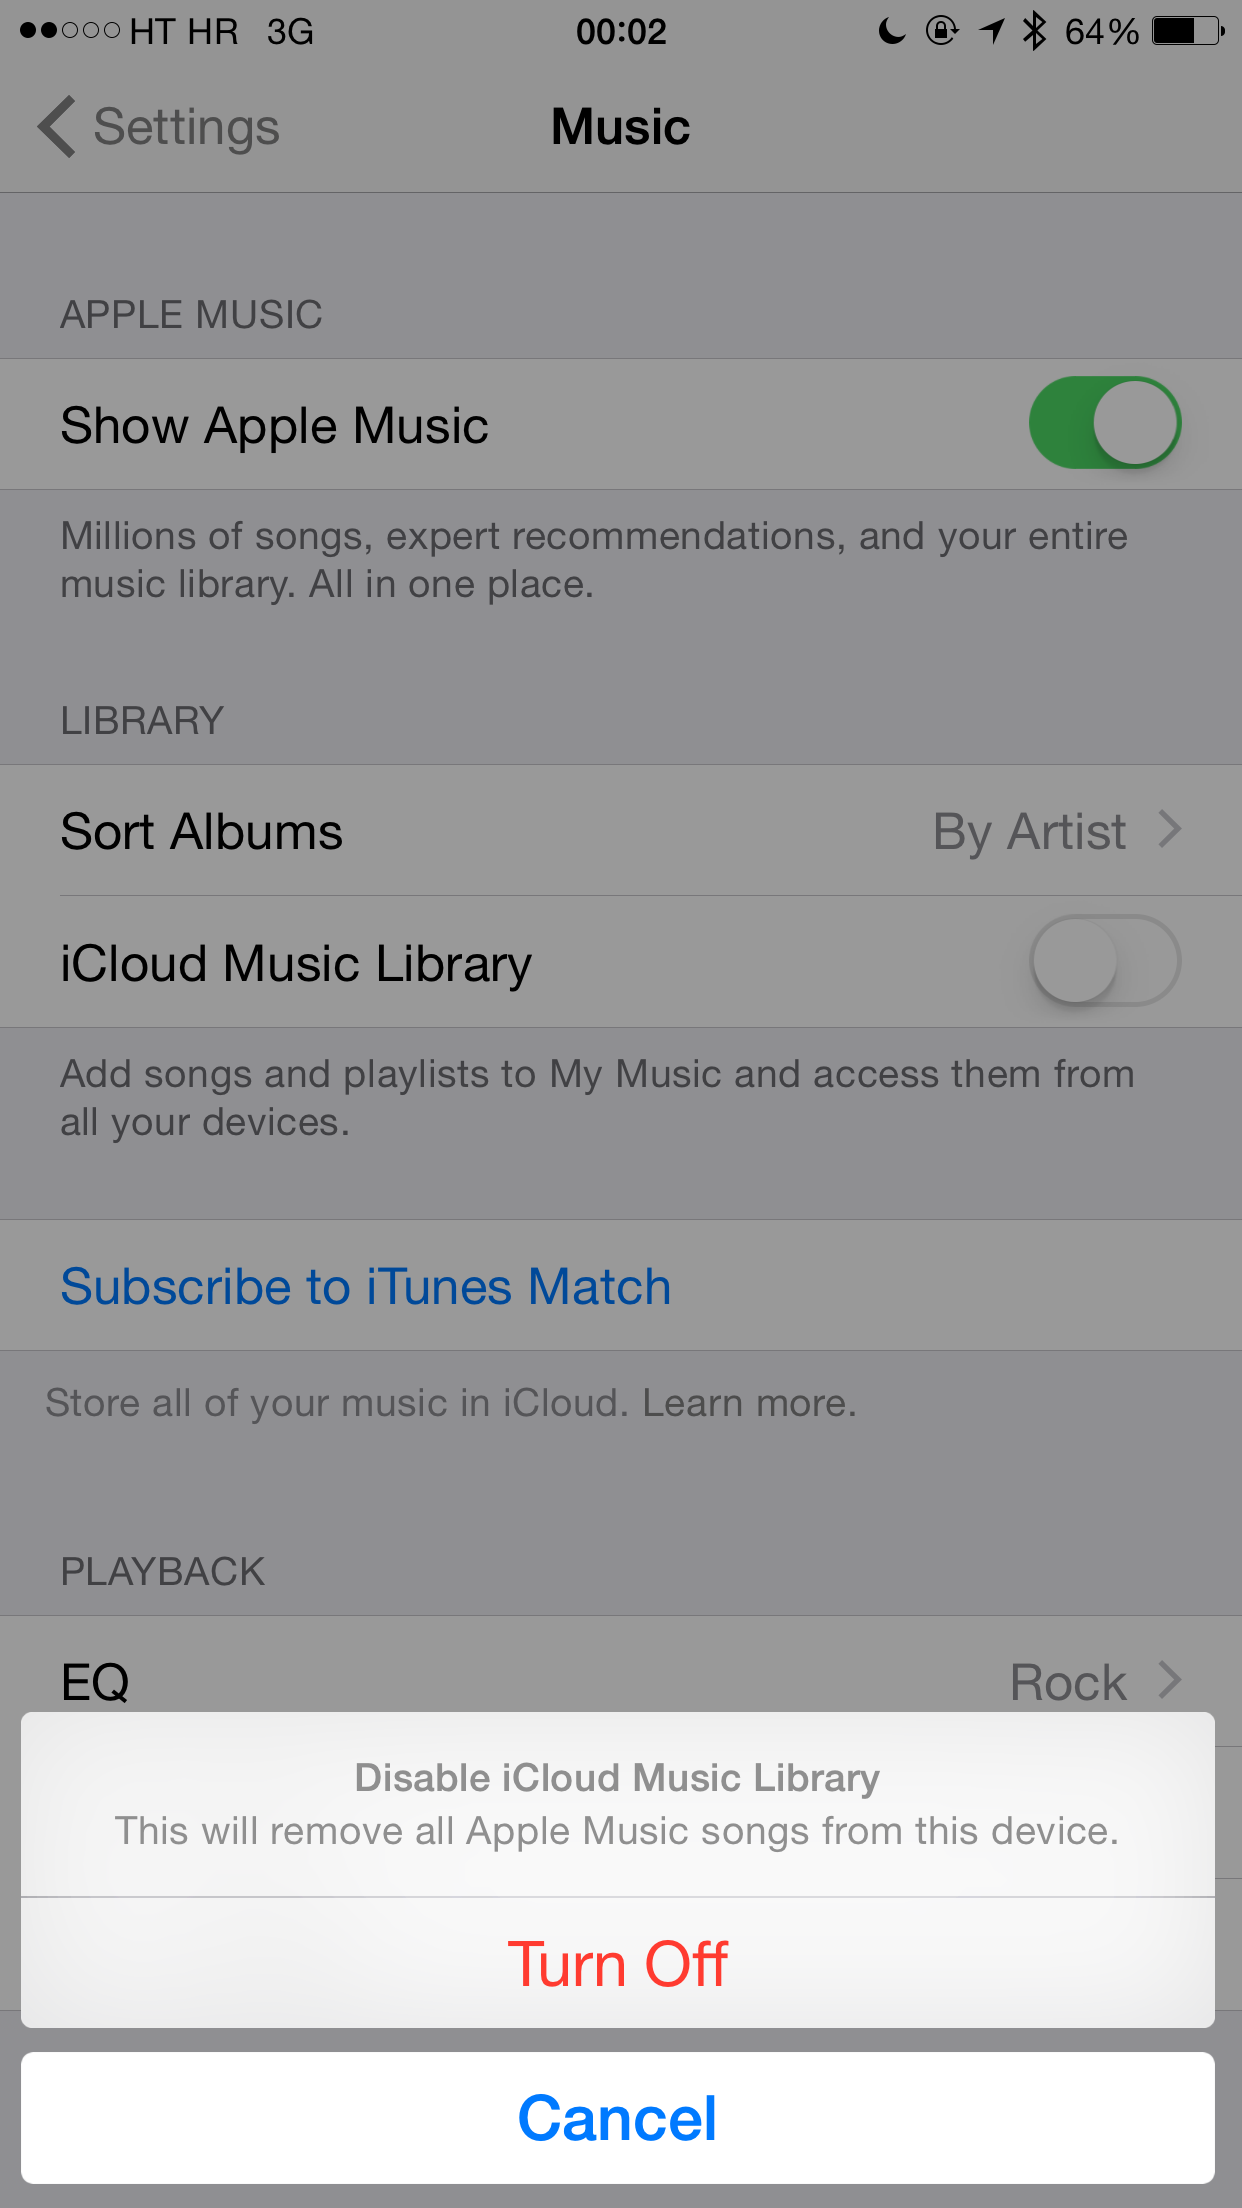
Step 1: Open the Settings app on your iPhone, iPod touch or iPad.
Step 2: Navigate to the Music section.
Step 3: Flip the iCloud Music Library switch to the OFF position.
How to disable iCloud Music Library on OS X
Step 1: Open iTunes on your Mac or Windows PC.
Step 2: Choose Preferences in the iTunes menu on your Mac, or choose Edit > Preferences on a PC.
Step 3: Click the General tab and untick the box labeled “iCloud Music Library”.
See also:
- How to master Apple Music liking system to influence ‘For You’ recommendations
- How to disable Apple Music Connect
- 10 tips for Apple Music
- Our archive of Apple Music posts
If you like this how-to, please help spread the word by sharing it on social media. We also want to hear your thoughts on Apple Music so feel free to chime in with your observations in the comments below.
Have a great tip or an idea for a tutorial?
Shoot us your submissions to tips@iDownloadBlog.com and we’ll take your best ideas into account in our coverage planning.