Learn how to easily create GIFs on your iPhone or iPad using various free methods and bring your images to life.

GIFs are animated images that play continuously in a loop. You can turn your still photos, Live Photos, set of burst images, and videos into GIFs for increased effect when sharing that image.
1. Use the iPhone Photos app
Highlights:
- Turns a Live Photo into a GIF
- Free to use
- No watermark
- Extremely easy
Con: Works only with a single Live Photo. You can’t merge two or more Live Photos into a GIF.
Good for: Quickly turning a Live Photo into a GIF and sharing it with friends and family via Messages, WhatsApp, and so forth.
Follow these steps to turn a Live Photo into a GIF on your iPhone:
1) Open the Photos app and tap the Live Photo you want to turn into a GIF.
2) Tap Live from the top left and choose Loop or Bounce. You’ll notice that the Live Photo is now constantly moving as if it’s a GIF. Tap the share icon and send it via WhatsApp or another medium, and this Live Photo will be sent as a GIF.

2. Use the built-in Shortcuts app
Highlights:
- Turns several photos, Live Photos, bursts, and videos into a GIF
- Free to use
- No watermark
- Easy even for a beginner
Con: Not many customization options compared to third-party apps.
Good for: Creating basic GIFs quickly, for free, and without a watermark.
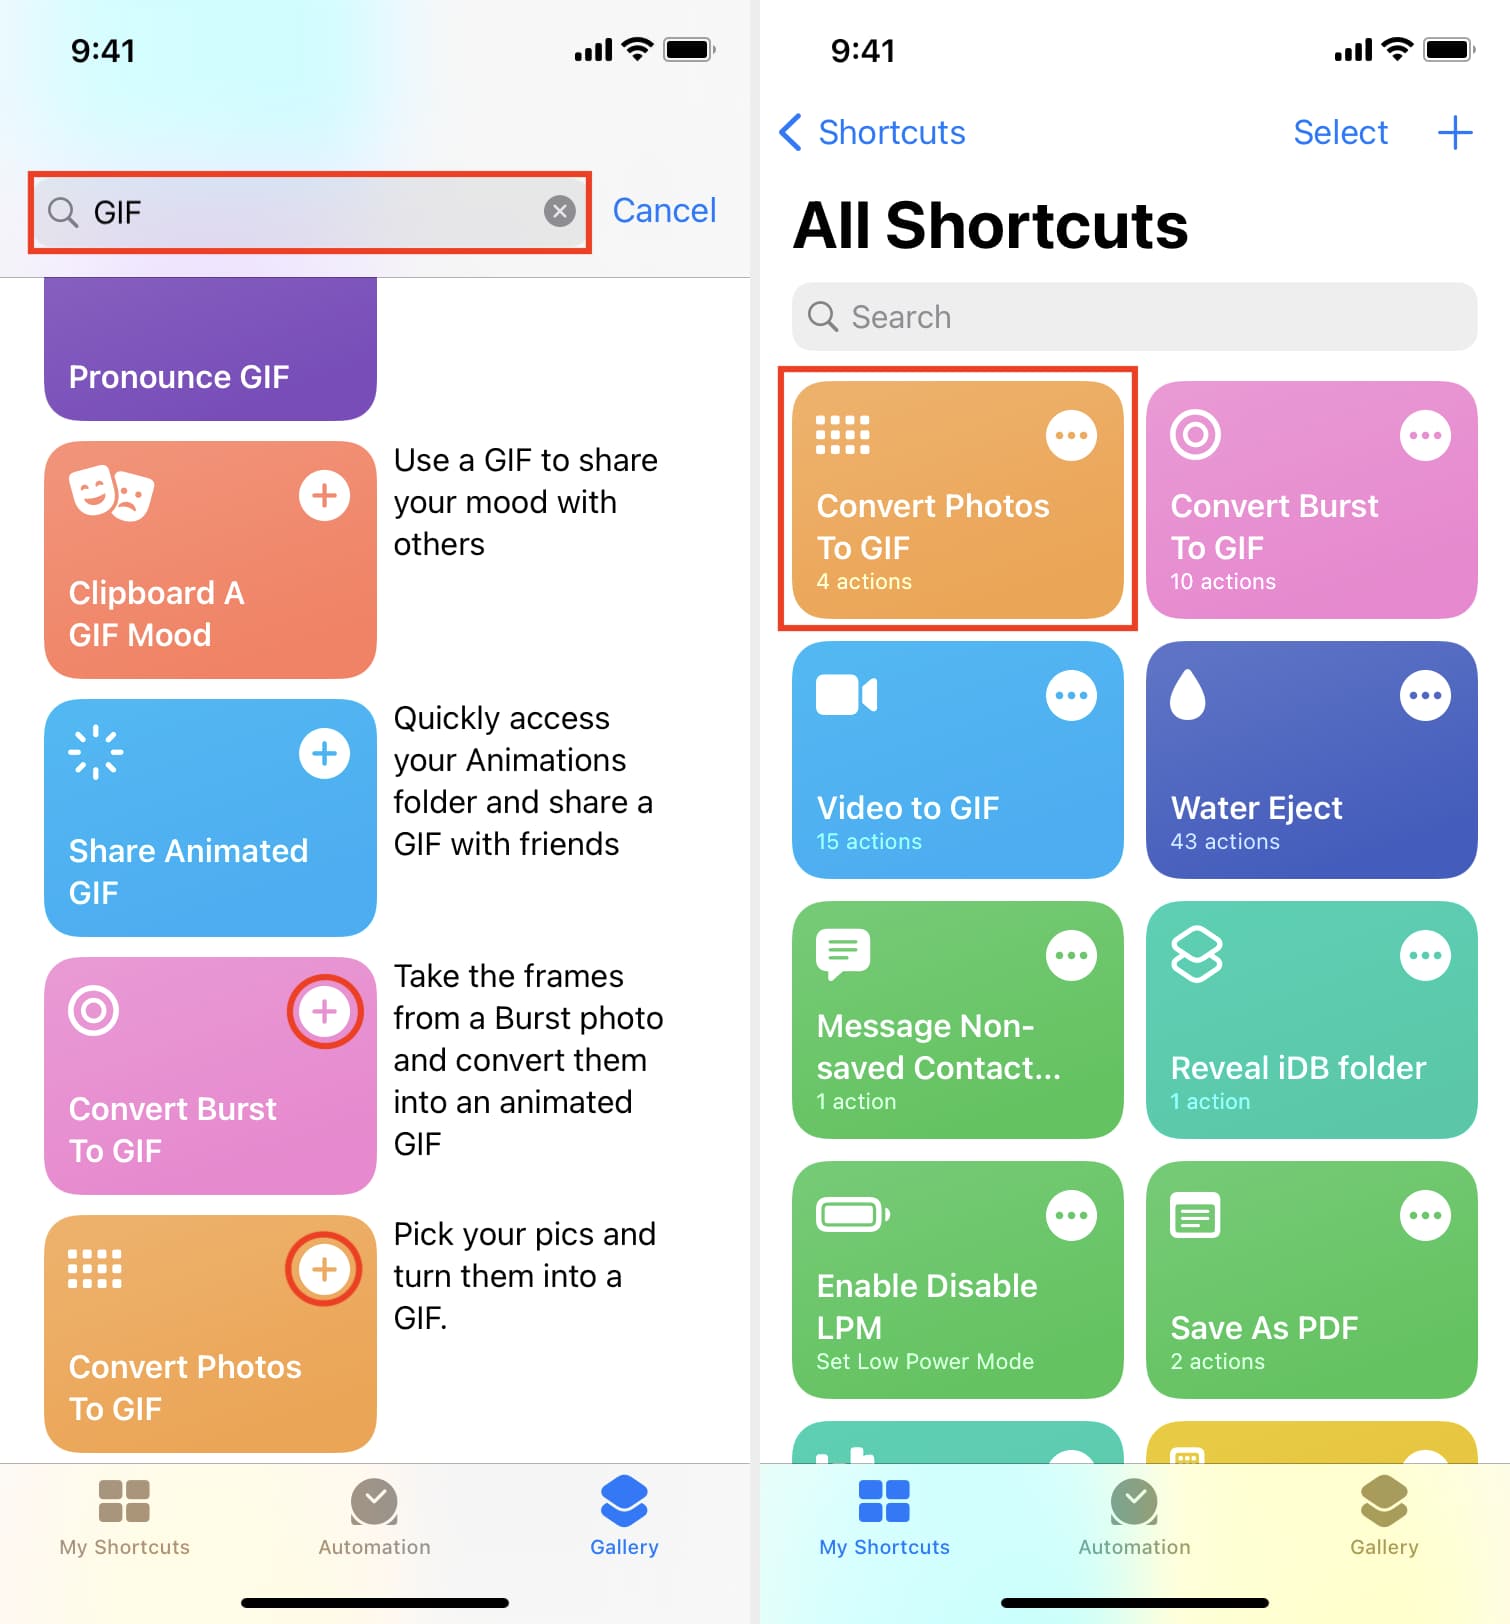
The Gallery section of the iOS Shortcuts app has several handy shortcuts that you can use to create GIFs on your iPhone. Go through these steps to use them.
1) Open the built-in Apple Shortcuts app on your iPhone or iPad and tap Gallery.
2) Type GIF in the search bar to see related shortcuts.
3) Tap the plus button tile to add them to your shortcuts. I have added the following shortcuts:
- Convert Photos To GIF
- Convert Burst To GIF
- Video to GIF
- Shoot A GIF
4) Go to the Shortcuts tab to see the above-added shortcuts.
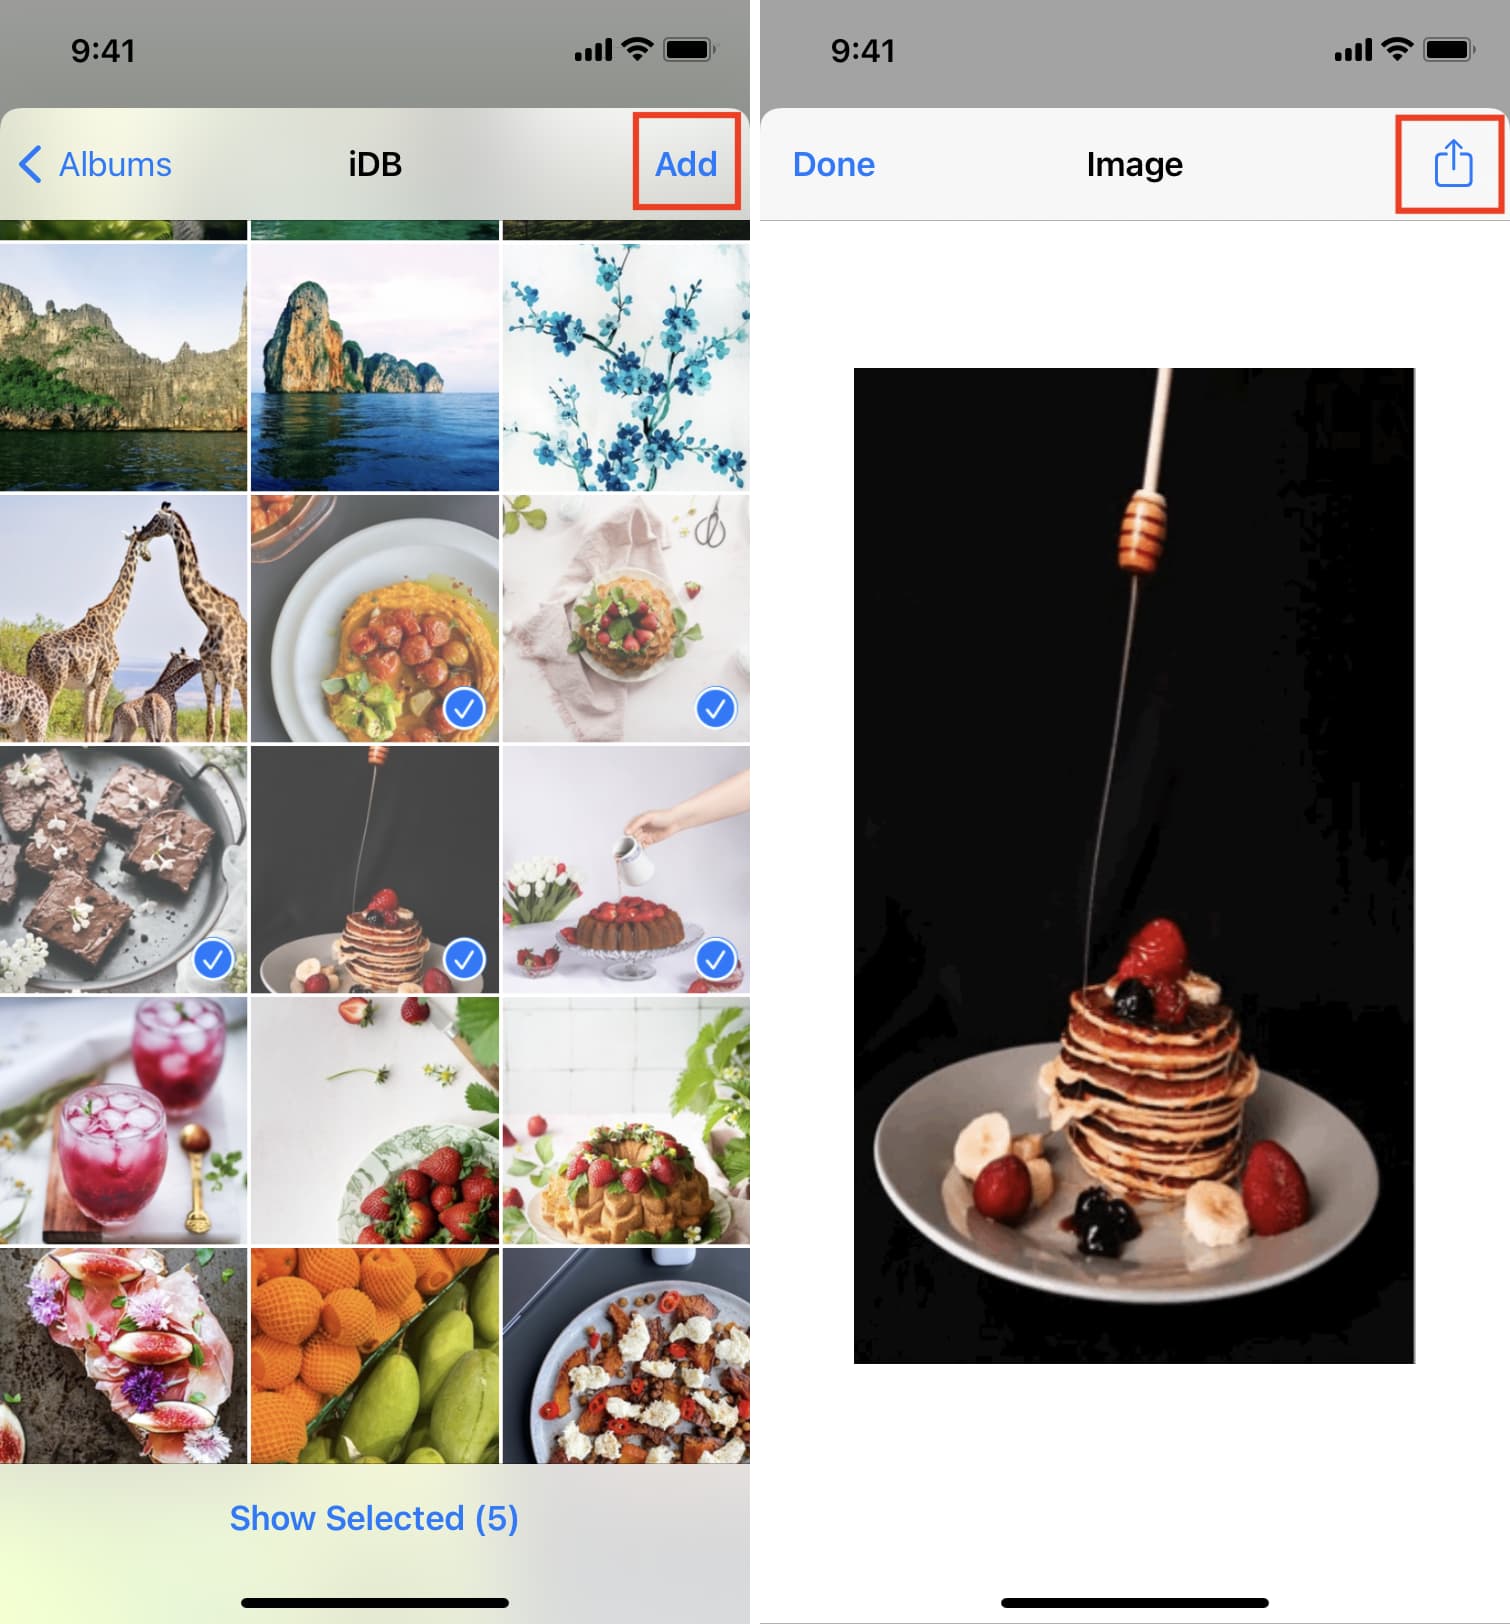
5) Tap the desired shortcut tile and select the images, Live Photos, or video.
6) Once the shortcut creates the GIF, it will show you a preview. Tap the share icon and choose Save Image to have the GIF in your iPhone’s Photos app.
Special mention: Make a GIF from a set of burst images
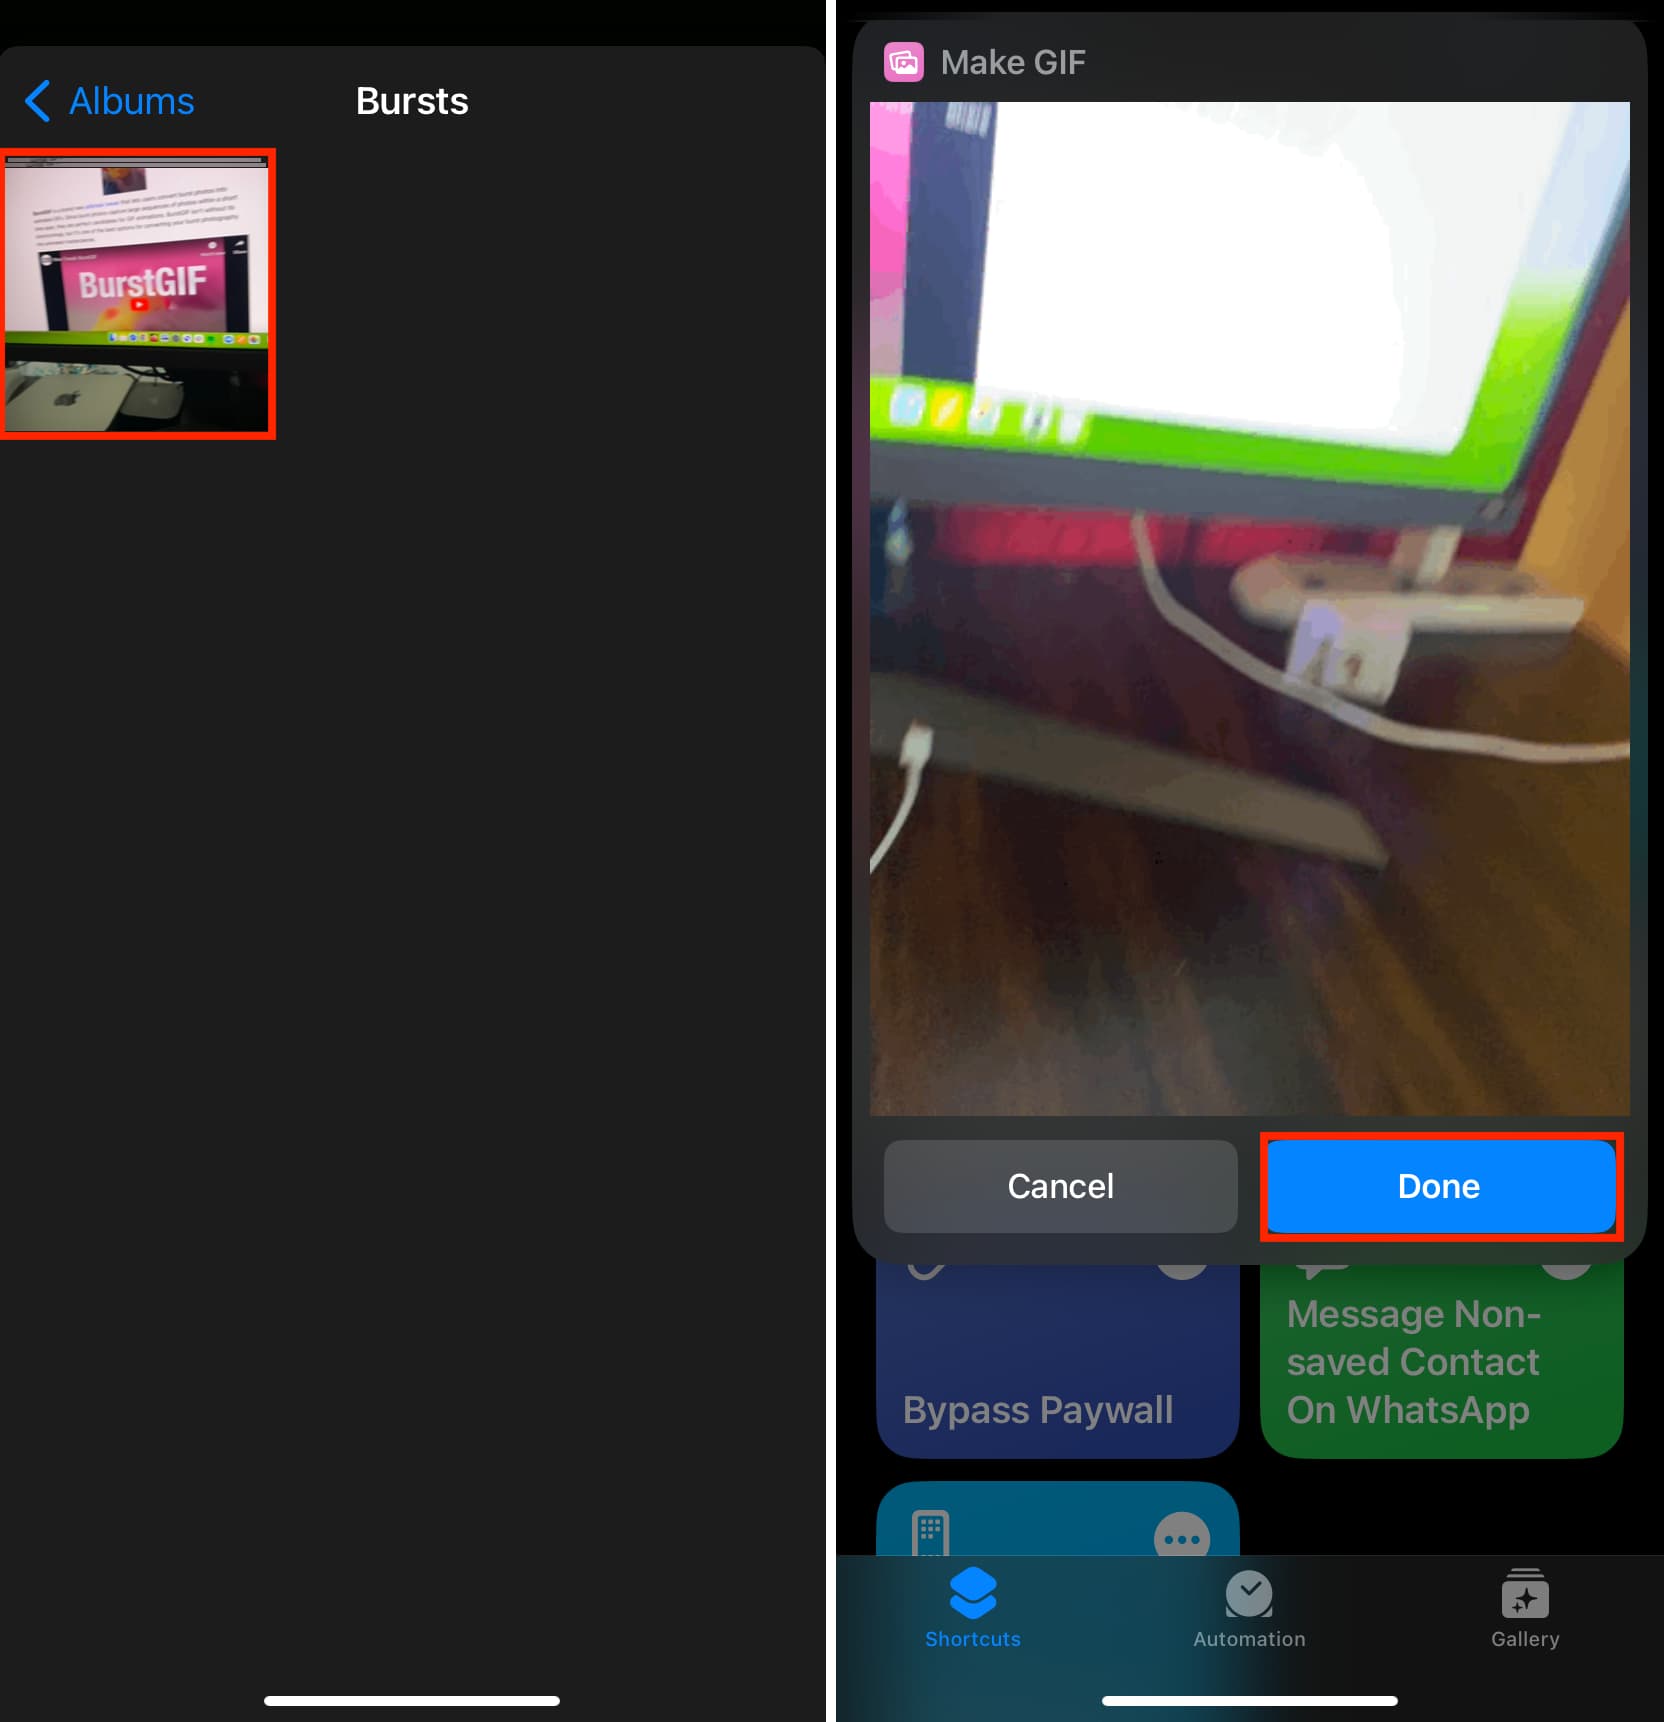
Since burst photos capture large sequences of photos within a short time span, they are perfect candidates for GIF animations. The Gallery section of the Shortcuts app has shortcuts curated by Apple, and one of them is called Make GIF. It’s very simple to use and instantly converts all images of a burst photo into a GIF. That’s why I decided to explain the steps here.
1) Open the Shortcuts app on iPhone or iPad and get the Make GIF shortcut from the Gallery section.
2) Tap the Make GIF tile from the Shortcuts tab.
3) Tap Collections from the top. After that, scroll down and tap Bursts under the Media Types heading.
4) Tap a set of burst images, and this shortcut will instantly turn them into a GIF.
5) Tap Done to save it to your Photos app.
3. Use the X app to create a GIF
Highlights:
- Easy and free to use
- No watermark
Con: You can only use the camera to create a GIF. You cannot use existing photos.
Good for: Easily turning what you see around you into a GIF.
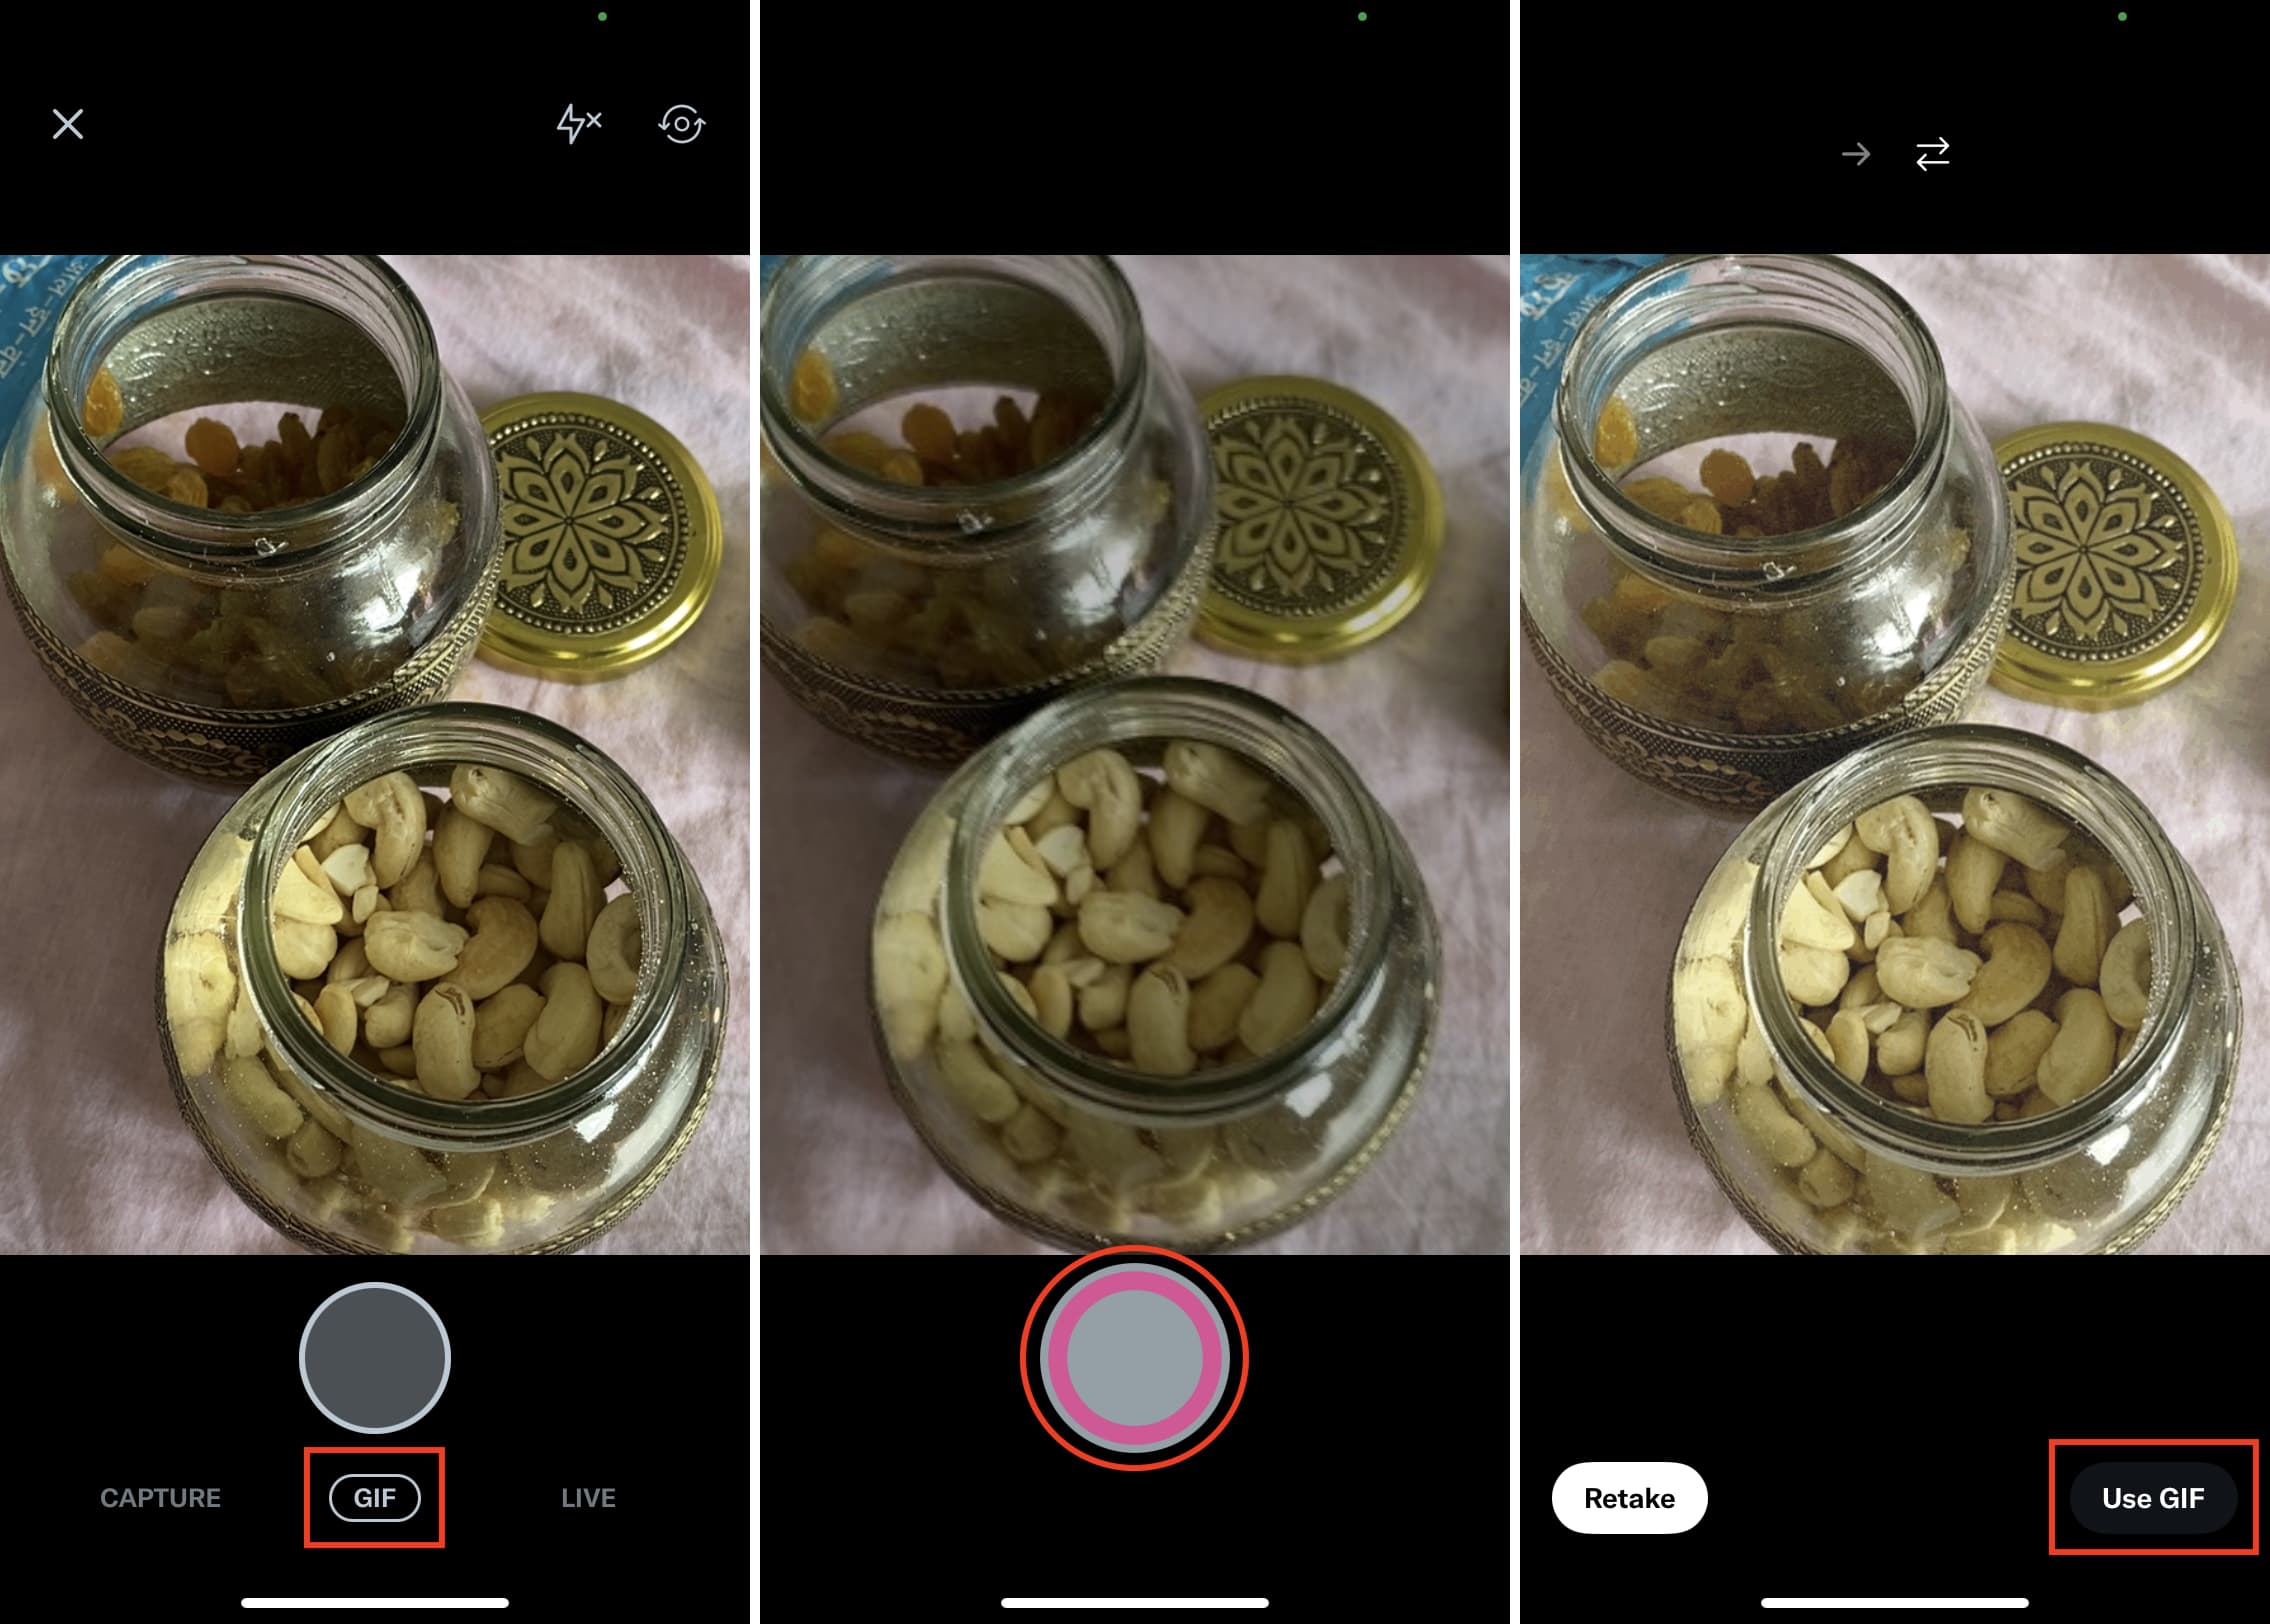
1) Open the X app and tap the plus button to compose a new post.
2) Tap the camera icon.
3) With GIF selected, press and hold the big round shoot button.
4) Tap Use GIF.
The GIF is automatically saved to your iPhone’s Photos app. You don’t have to post this GIF to X if you don’t want to.
4. Use third-party iPhone apps to make GIFs
Highlights:
- Offers more customizations like adding text, changing speed, tweaking the canvas type, etc.
- You can turn images, Live Photos, videos, bursts, Time-lapse, and even Slo-Mo into a GIF
- Relatively easy to use
Cons:
- Too many tools can create confusion
- Not to forget that most GIF apps show several ads, require payment, add a watermark to the final file, or let you only use a few images to create the GIF. To get rid of all these, you need to subscribe to a plan or buy a lifetime license
Good for: People who make several GIFs daily and need a bunch of tools to customize the GIF.
GIF Maker – Make Video to GIFs
This app lets you turn photos and other file types into GIFs. The free version has ads and several limitations, which you can unlock with a monthly or yearly subscription. But overall, GIF Maker is easy to use, and if you want to create tons of GIFs, this app is a powerful tool to achieve that goal.
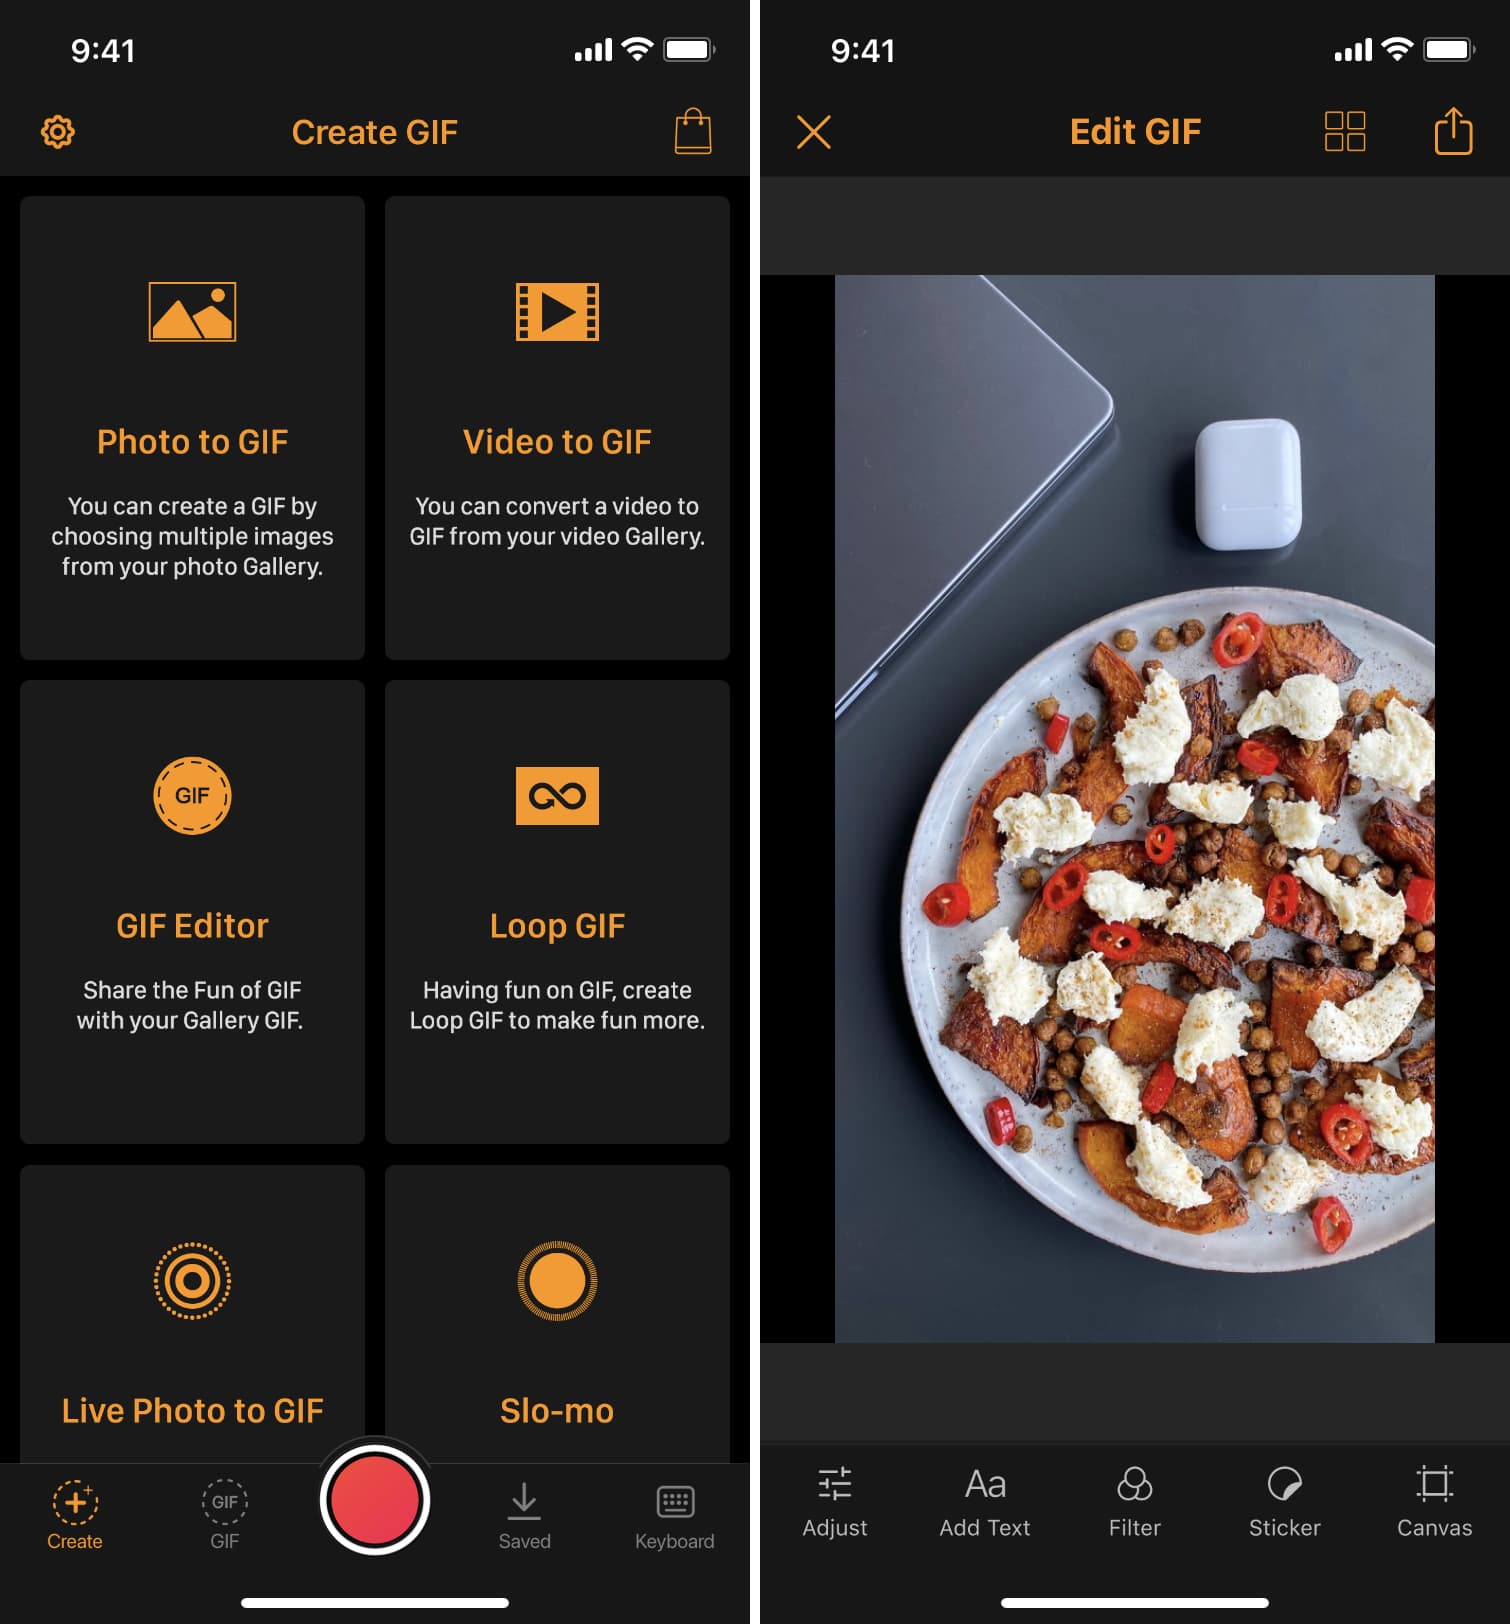
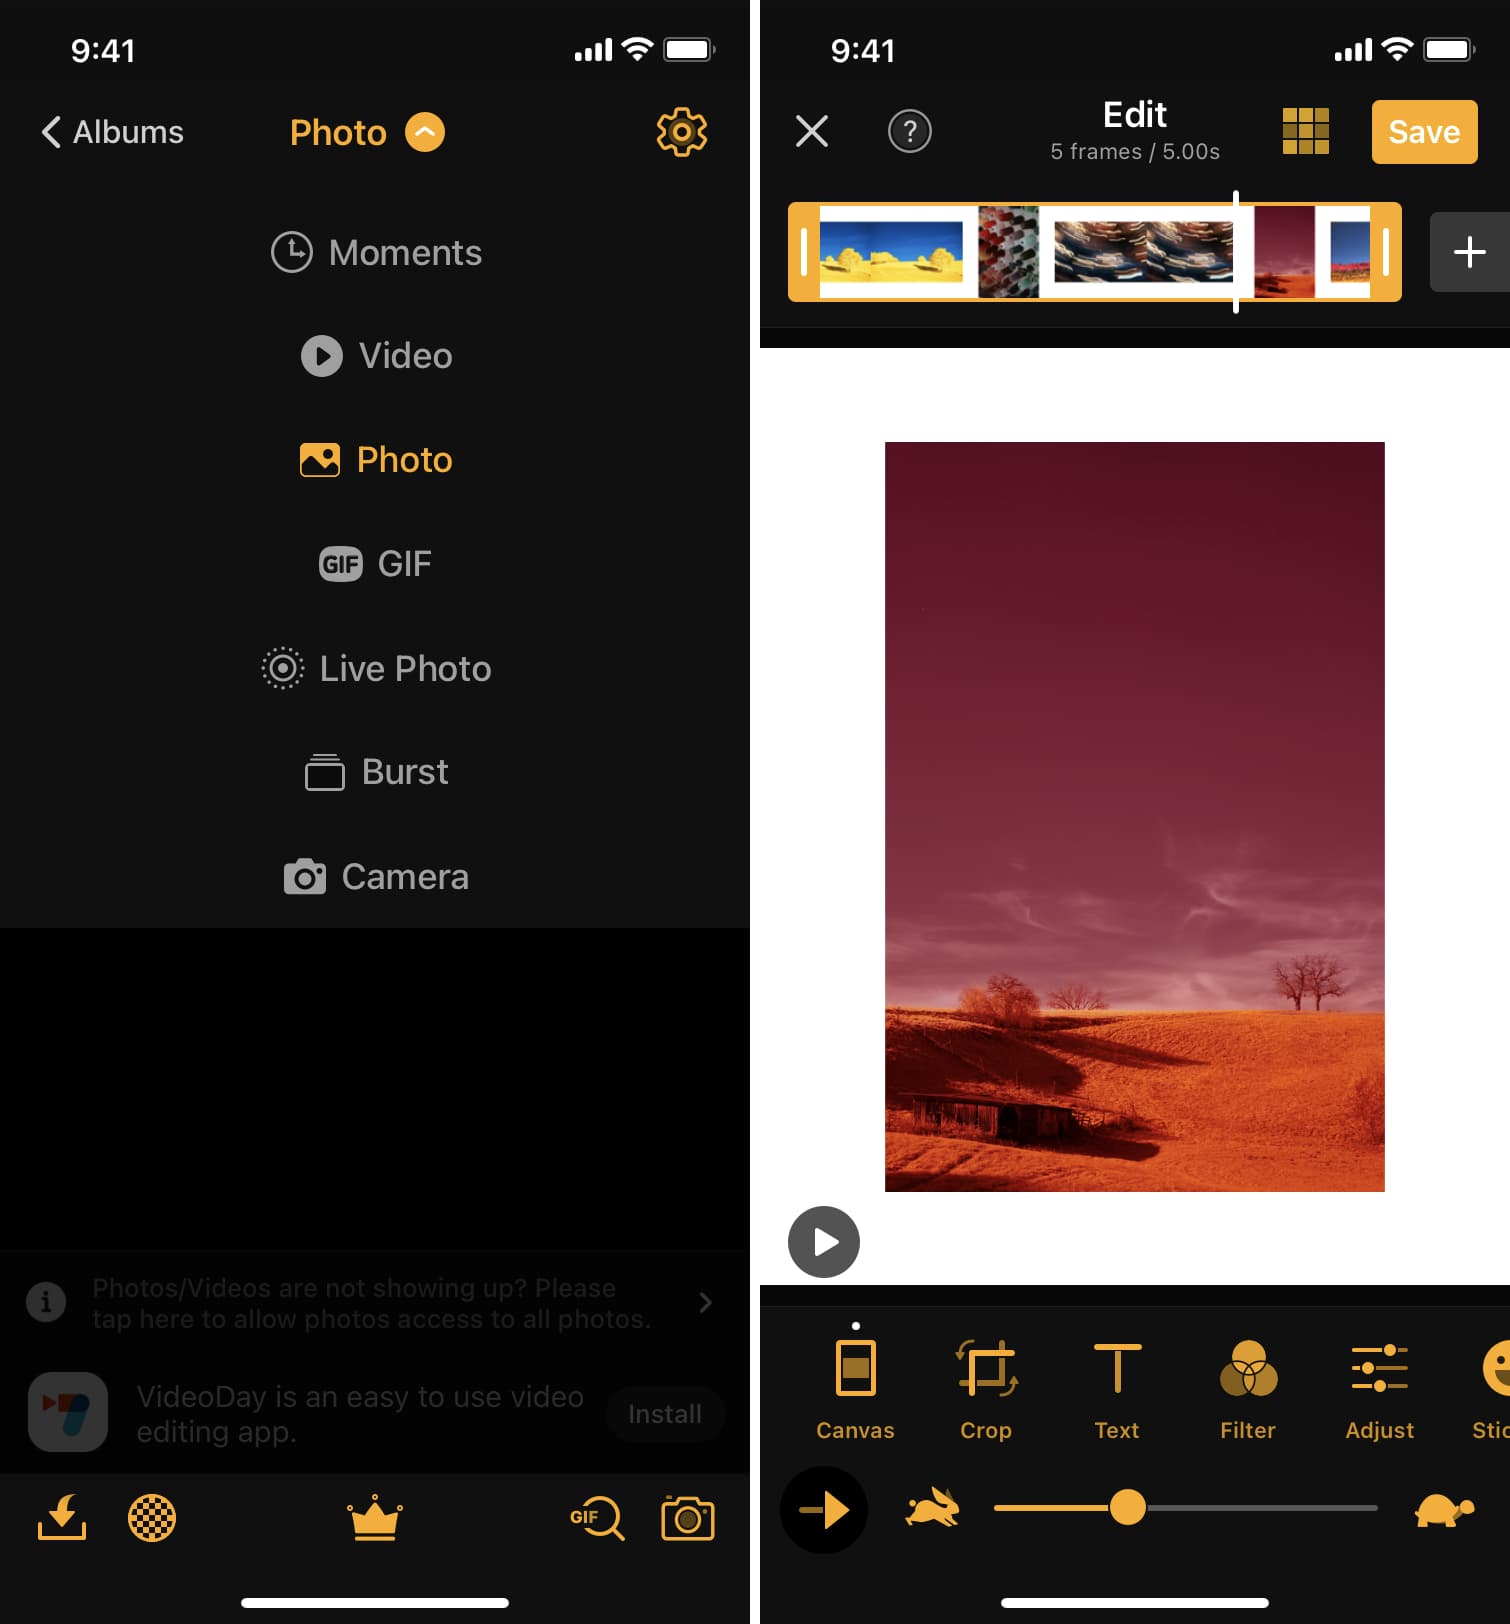
GIF Maker – ImgPlay
ImgPlay allows you to create a GIF from Video, Photo, Live Photo, Burst, etc. The app also offers several features like adjusting the canvas size, adding text, beautifying with filters, changing the speed, spicing the GIF with stickers, and more. However, please note that the free version adds a watermark in the bottom right of the GIF.
In addition to the above two apps, you can also use the GIF Maker – GIF Creator app, a simpler iOS application that offers fewer customization options during GIF creation.
These are some of the handy ways to create a GIF on your iPhone and iPad. If you have a particular app or method in mind, please feel free to share that with us.
More on GIFs: