Learn how to securely add, update, and remove saved credit and debit cards for Safari Autofill on your iPhone, iPad, or Mac.
Benefits
Once you’ve added details for your cards, Safari can automatically fill out billing information on web forms. Safari Autofill is helpful when buying a product that’s in limited supply or selling quickly, especially when buying new gadgets on launch days!
Before you begin
- Password-protect your iPhone, iPad, or Mac.
- Set up iCloud Passwords by going to Settings > your name > iCloud > Passwords and turning on the Sync this iPhone switch.
Save card info automatically
When entering a new card on a web form for the first time, Safari may offer to save the card for future use, or you can choose to add cards manually, as explained below.
Manually add card details
iCloud syncs autofill info, so that any cards you’ve added on your iPhone or iPad automatically appear on your Mac, and vice versa. Here are the steps to manually add card details for Safari Autofill on your iPhone, iPad, and Mac.
On iPhone or iPad
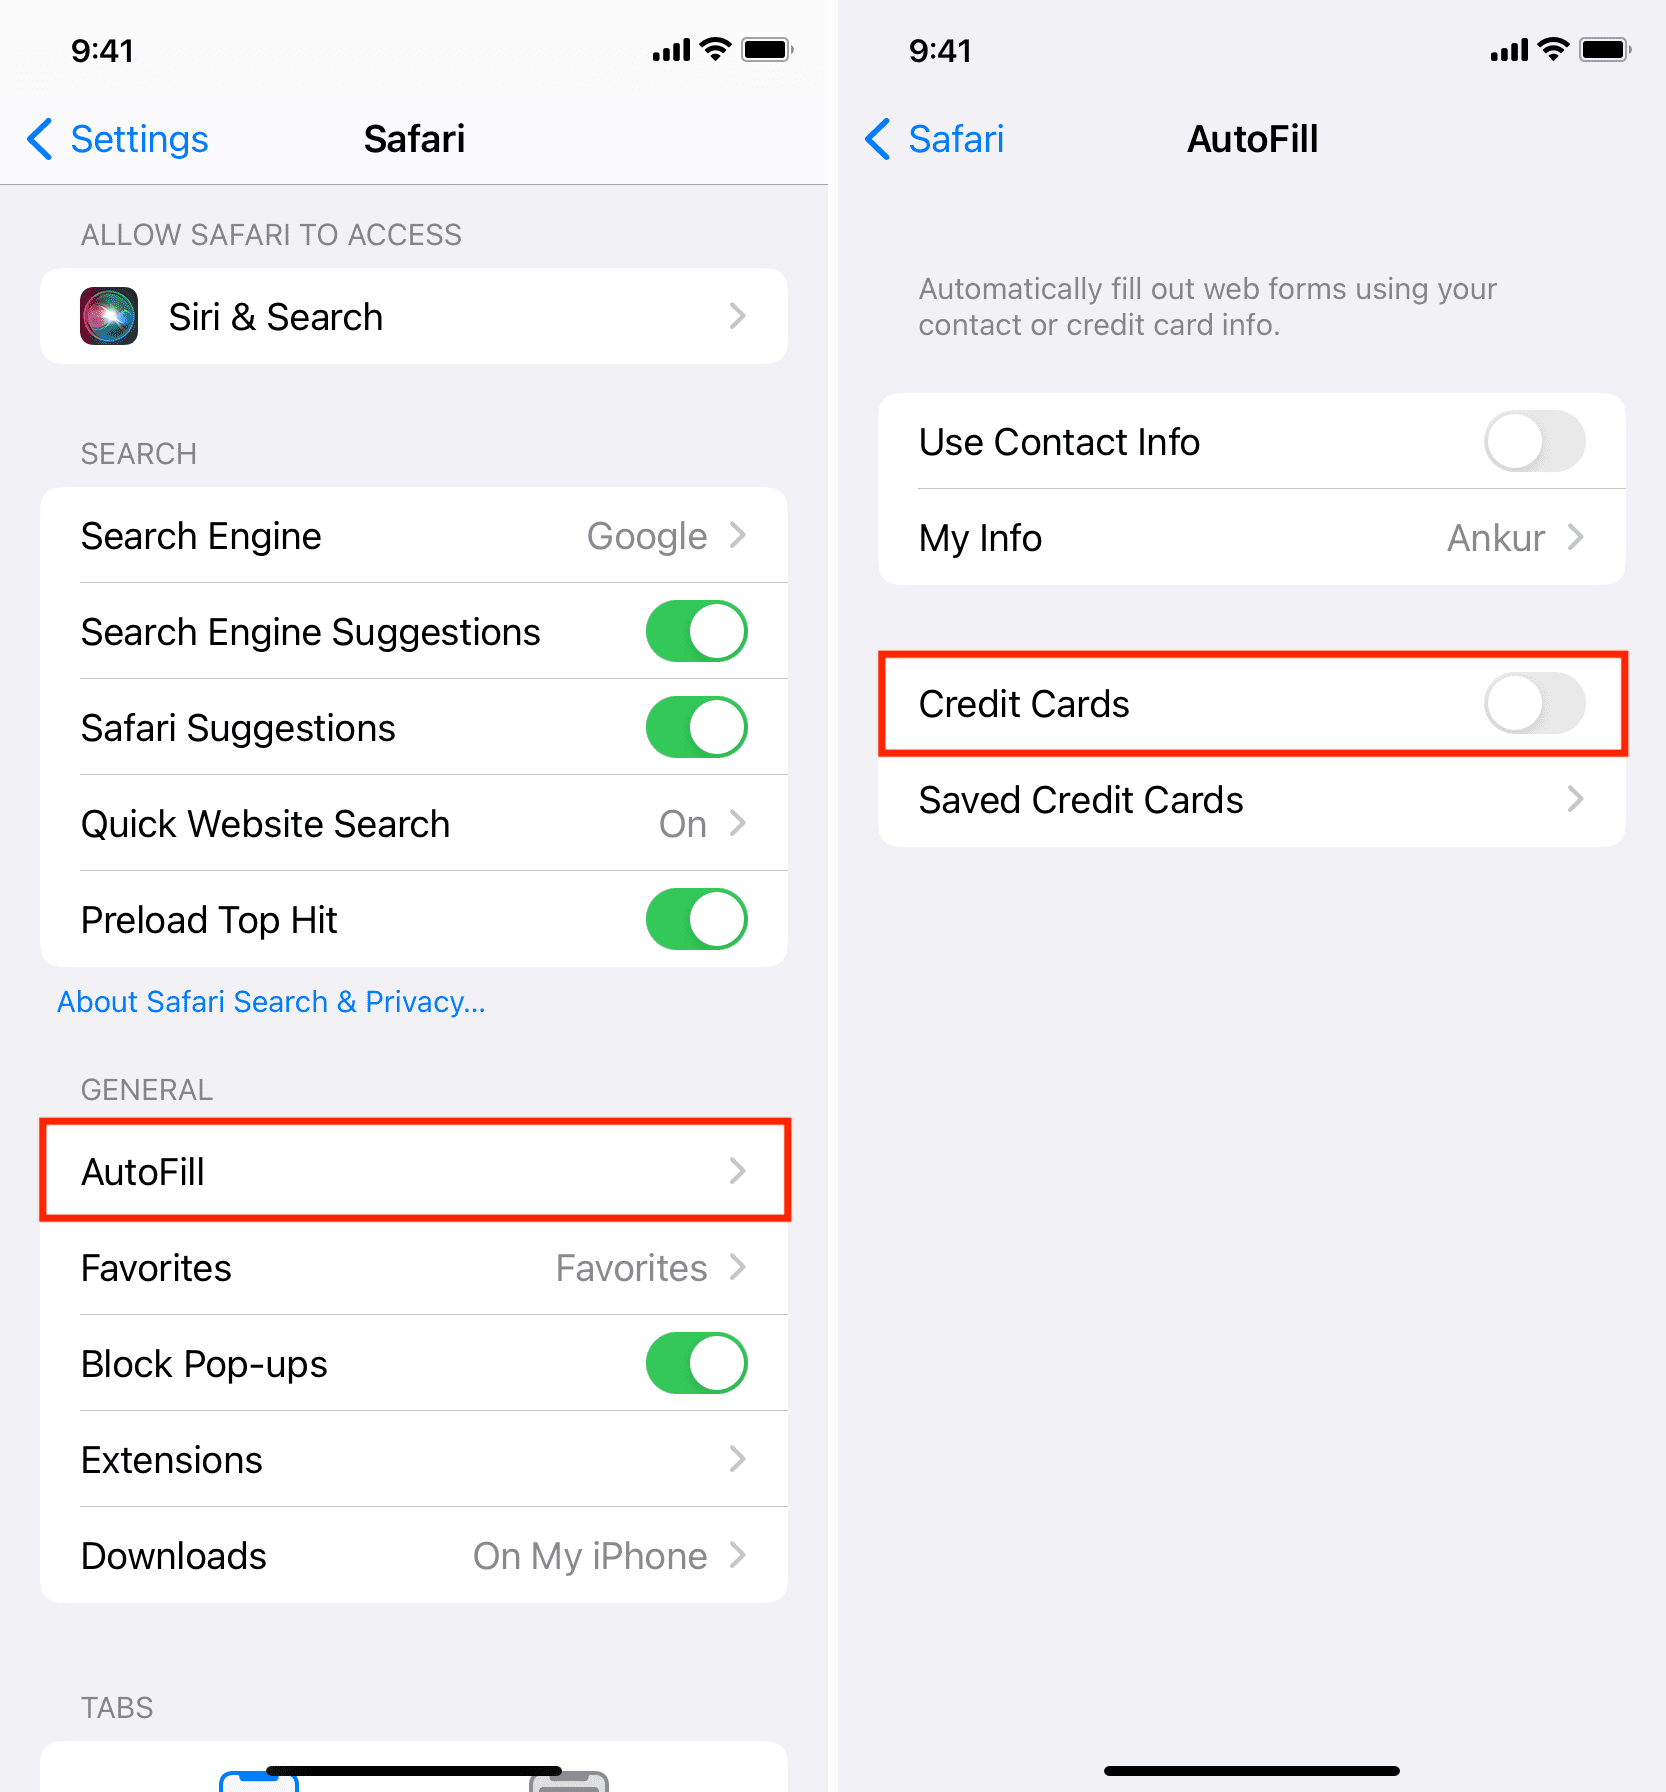
1) Open the Settings app and choose Apps at the very bottom.
2) Select Safari from the list of apps.
3) Tap AutoFill.
4) Turn on the switch for Credit Cards to have Safari fill out card info on web forms.
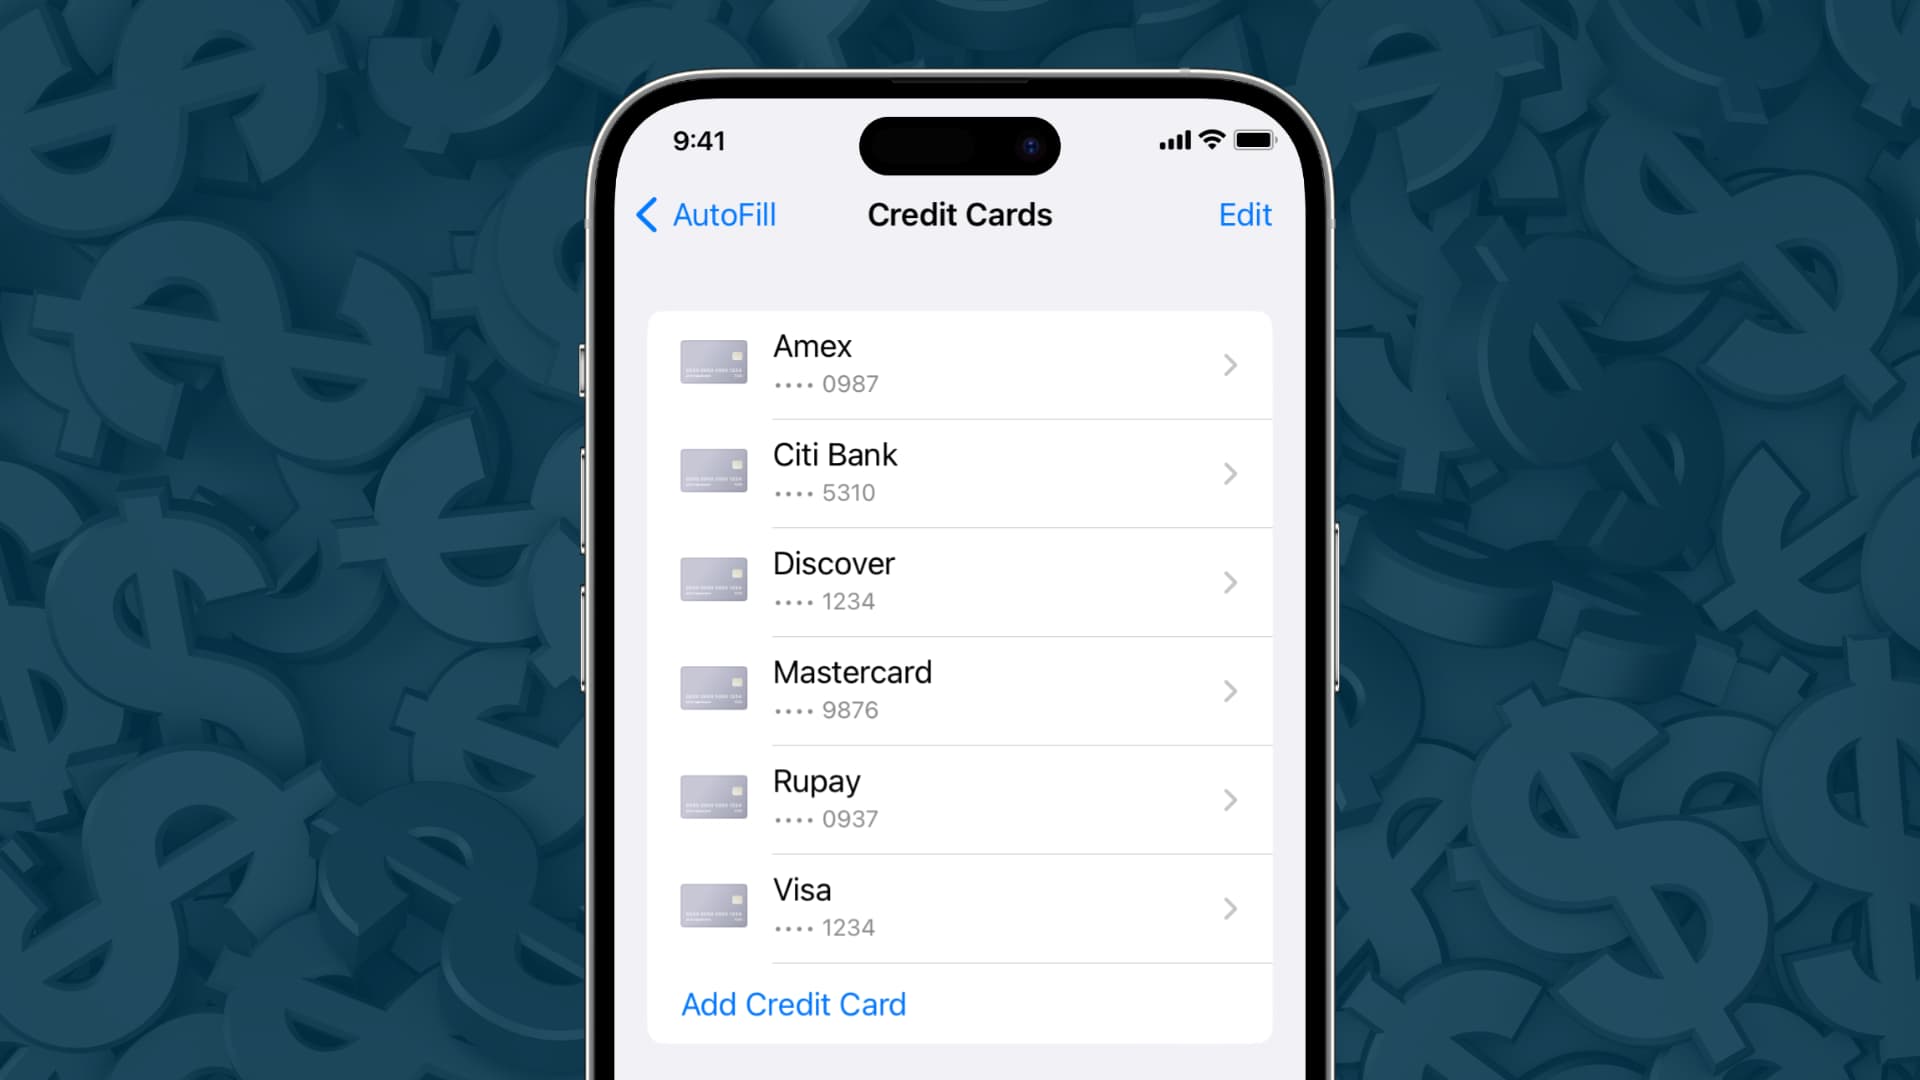
5) On newer versions of iOS, tapping Saved Credit Cards should take you to wallet settings. If not, manually go to iOS Settings > Apps > Wallet & Apple Pay > AutoFill Cards and authenticate with Face ID or Touch ID. On older versions of iOS, just tap Saved Credit Cards and move to the next step.

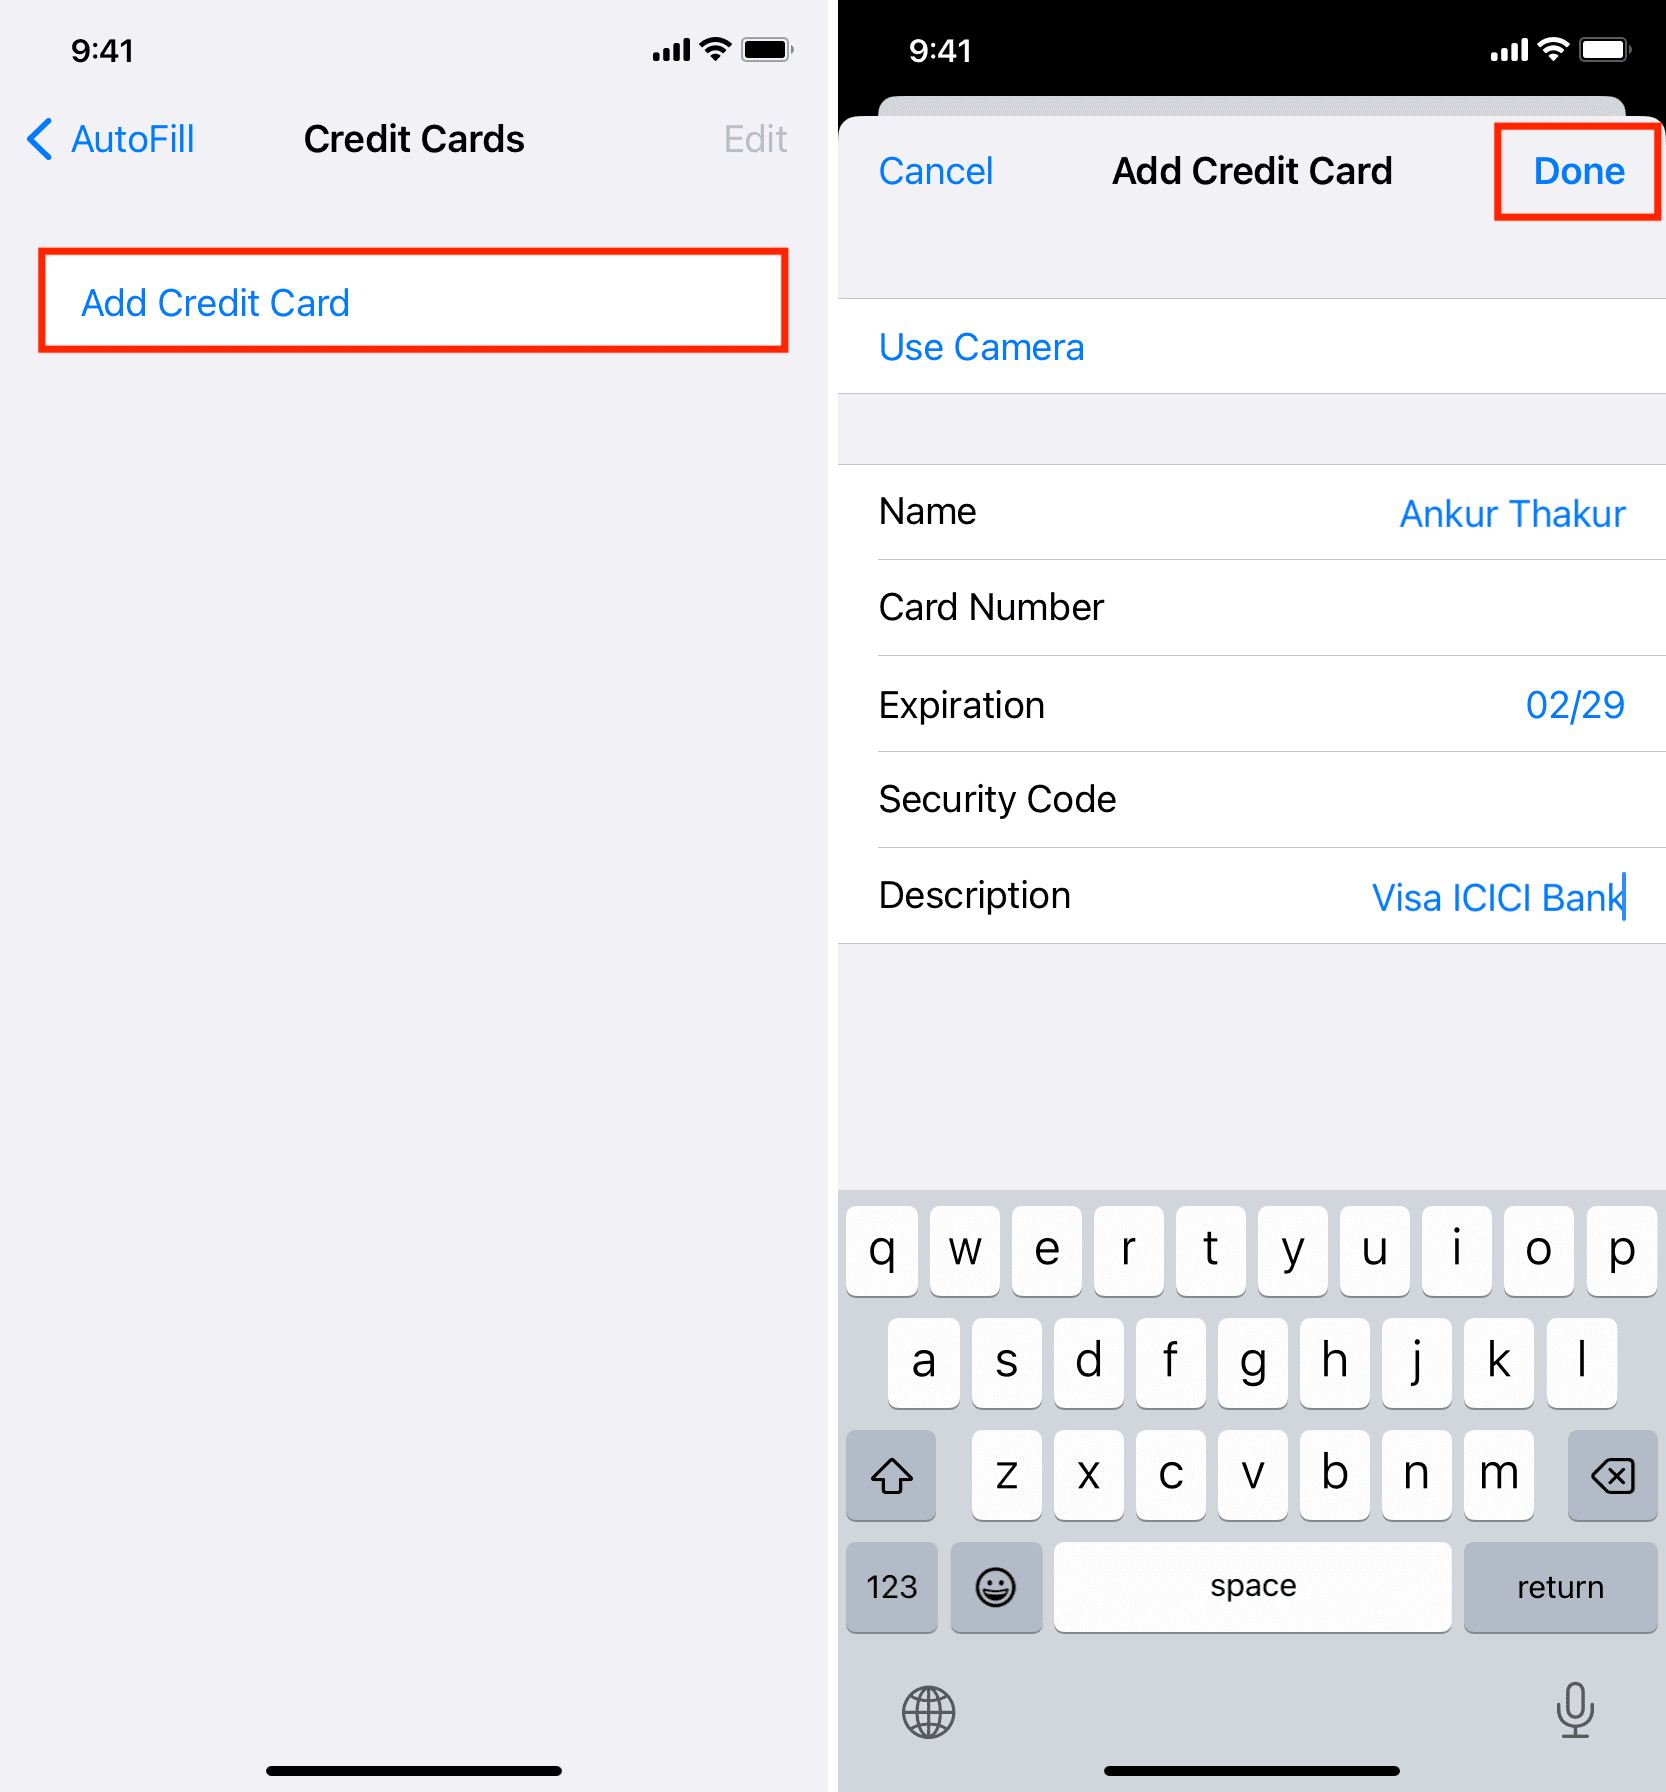
6) Tap Add Card or Add Credit Card.
7) Enter your name, card number, expiration, and security code (CVV) manually or point your iPhone’s camera at the card; computer vision will read the card’s number, expiration date, and provider name, like Visa or Mastercard. You can safely change the Description field to something else, like the name of your card issuer or bank.
8) Finally, tap Done to save the changes.
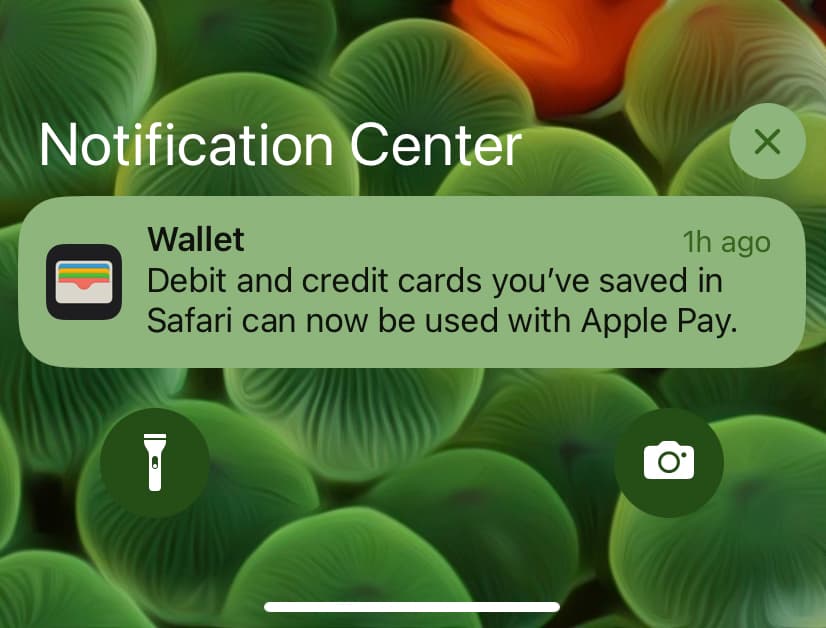
You’ve successfully added details for your card to Safari for use with the Autofill feature. iOS may also display a notification from the Wallet app to inform you that any cards saved in Safari can be used with Apple Pay. If you don’t use Apple Pay or live in an unsupported country, ignore the alert or turn off “Apple Pay Compatibility” in AutoFill Cards settings.
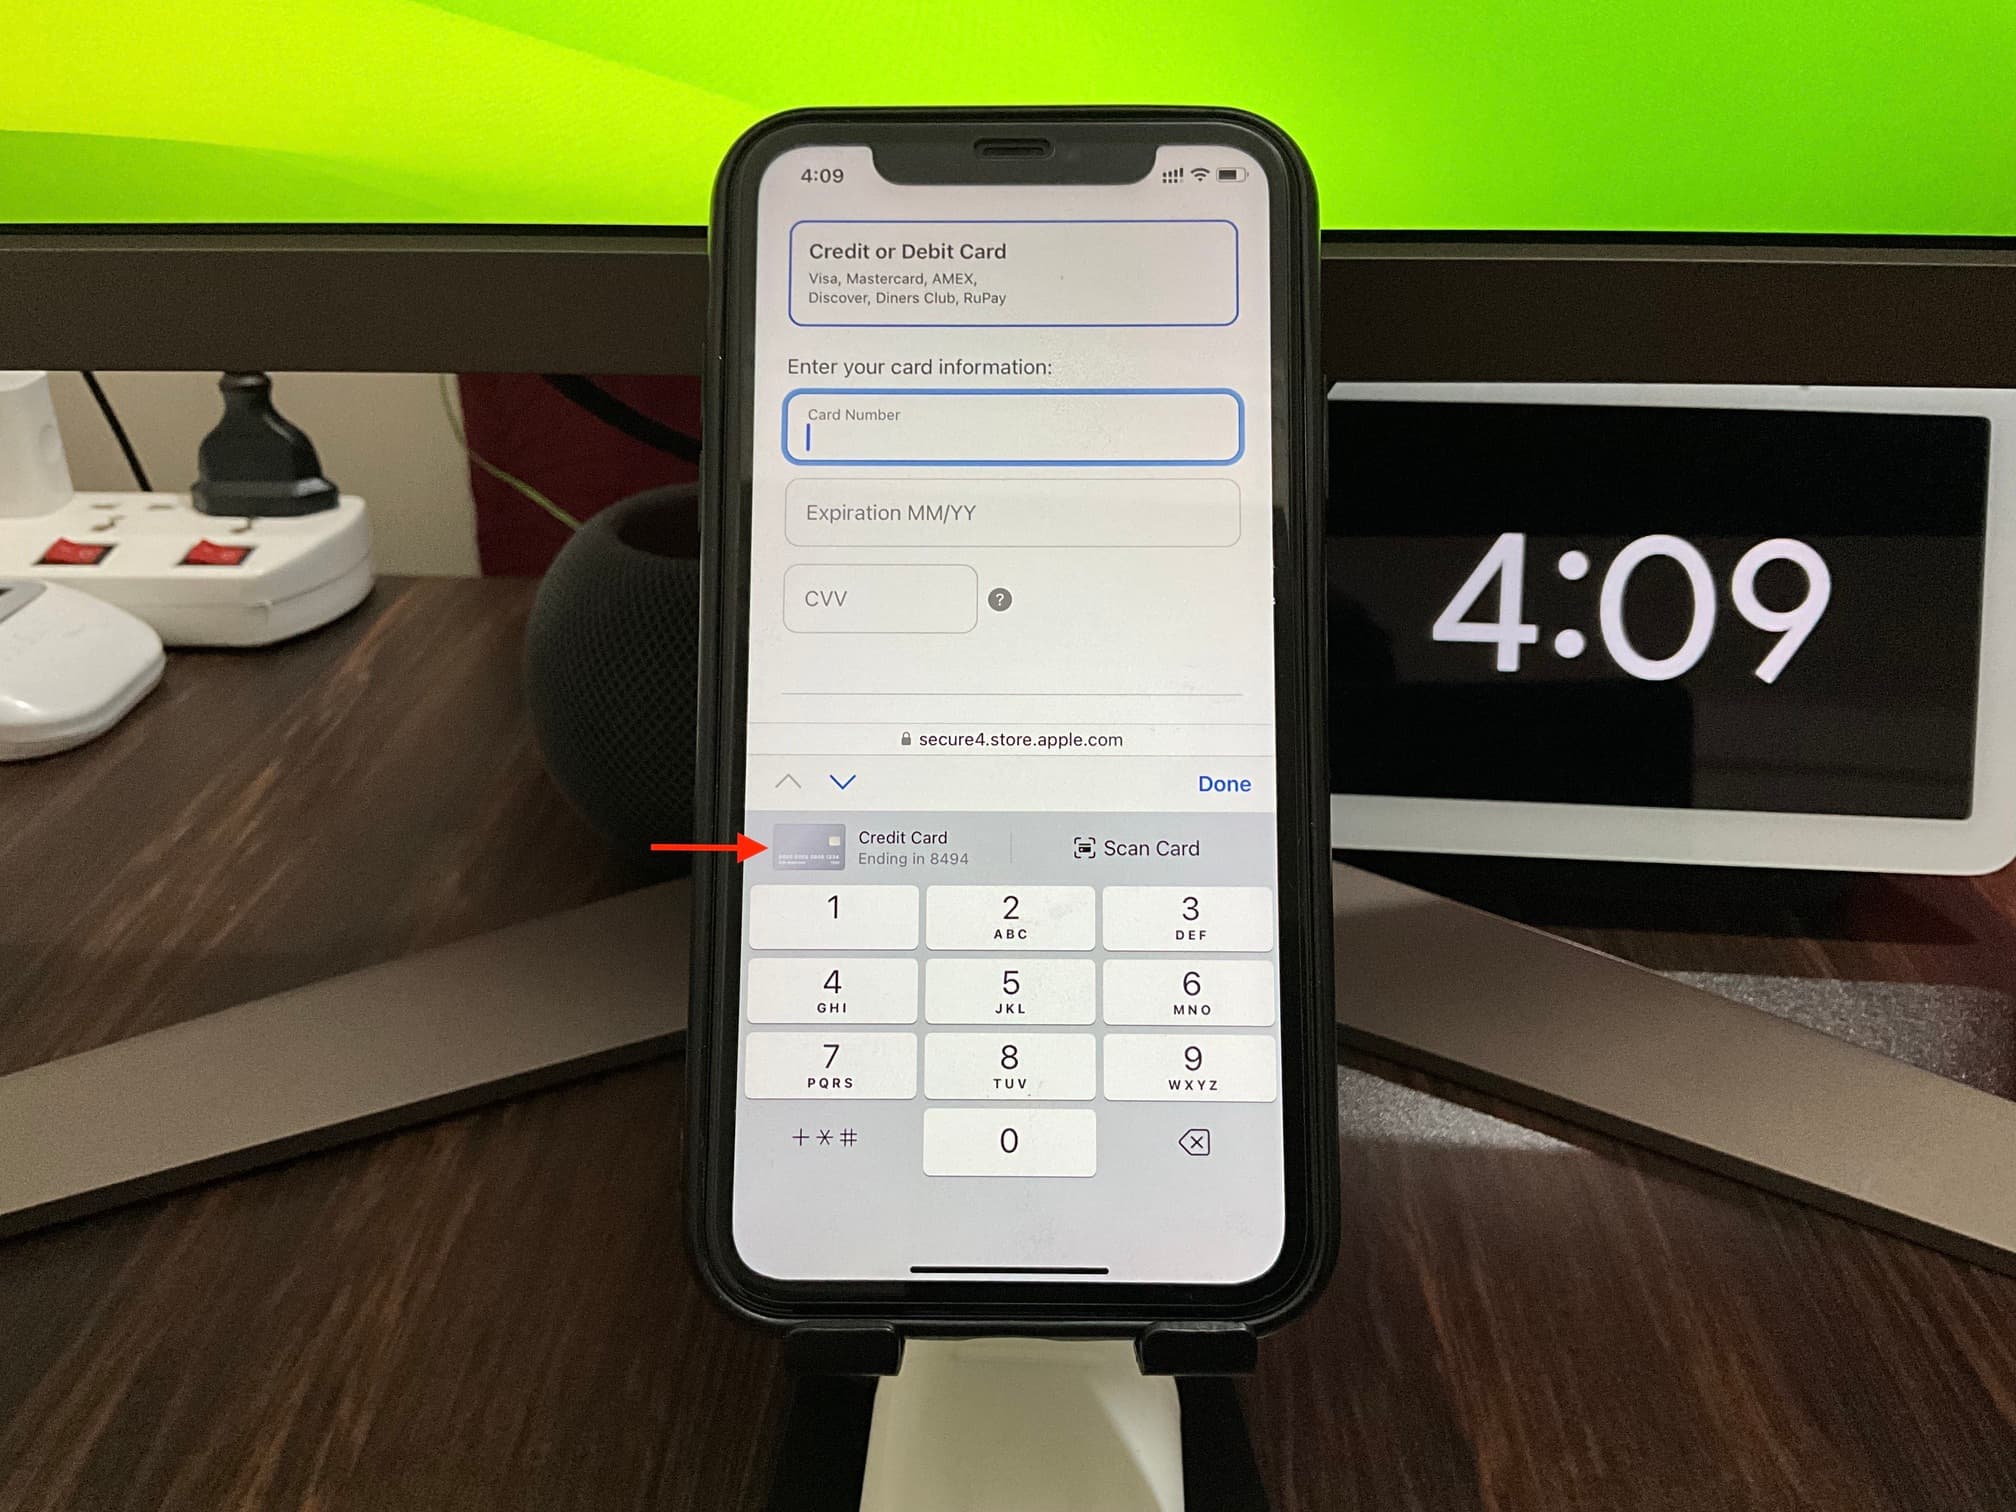
Whenever you start entering card details at checkout, your saved cards will appear above the keyboard. Tap to select one, then authenticate with Face ID or Touch ID, and Safari will automatically populate the payment fields using information from the selected card for a faster checkout.
On Mac
1) Open Safari and click Safari > Settings or Preferences in the menu bar.
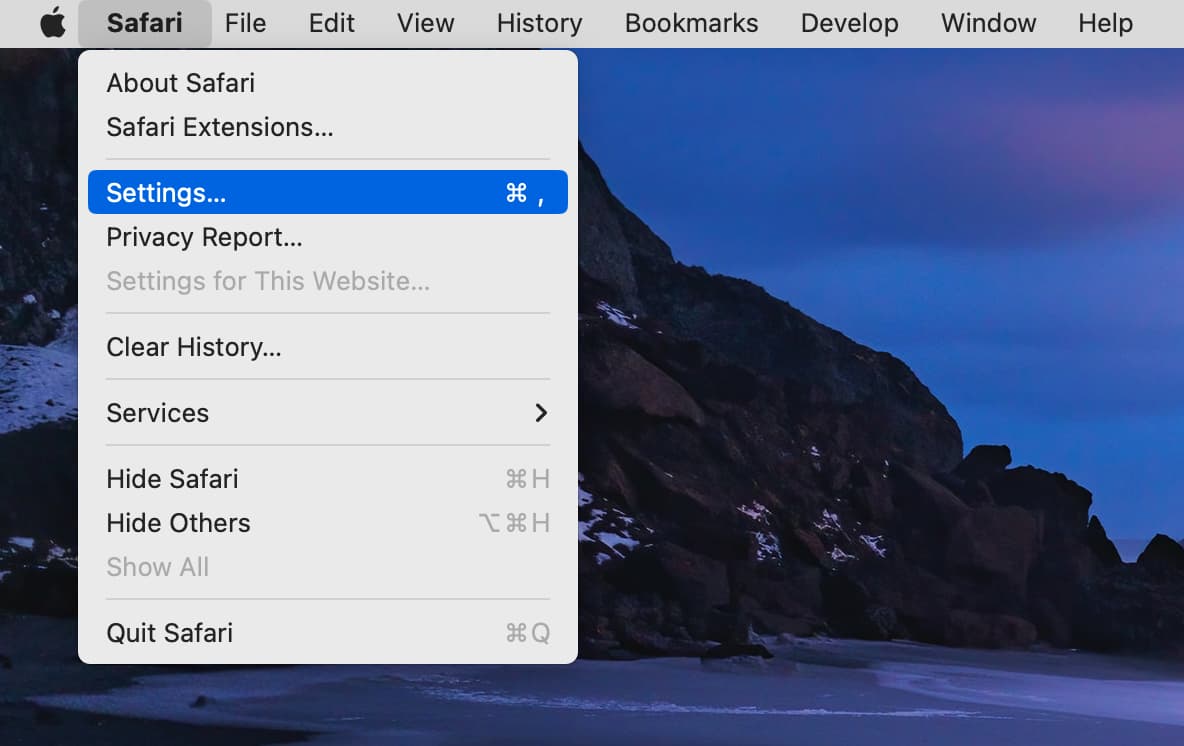
2) Go to the AutoFill section.
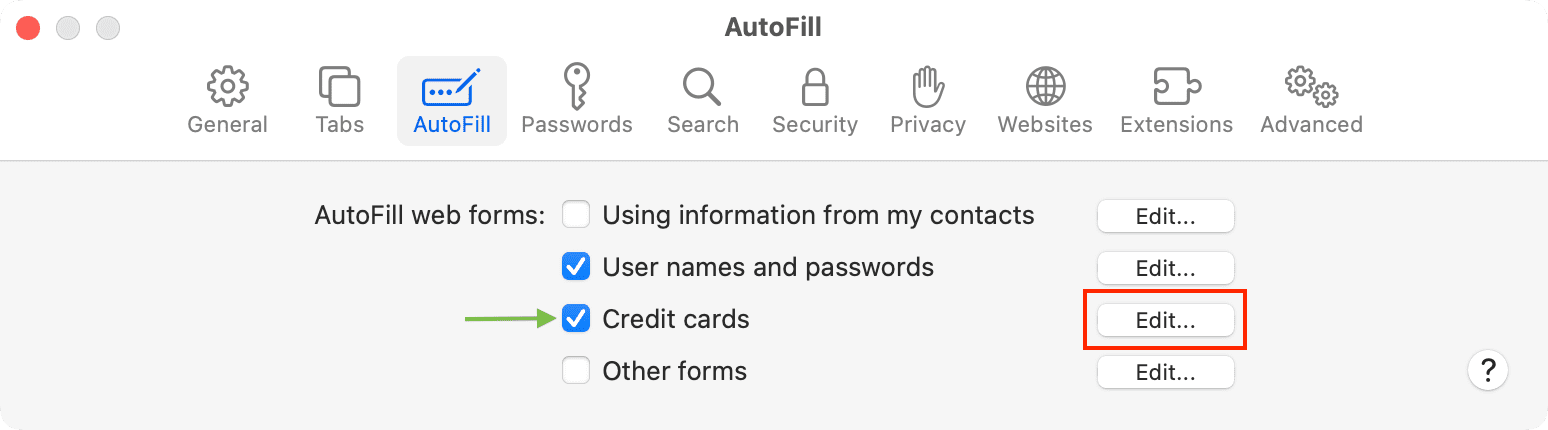
3) Tick the Credit cards box to enable autofill.
4) Click Edit next to Credit cards and authenticate with your Mac’s password or Touch ID.
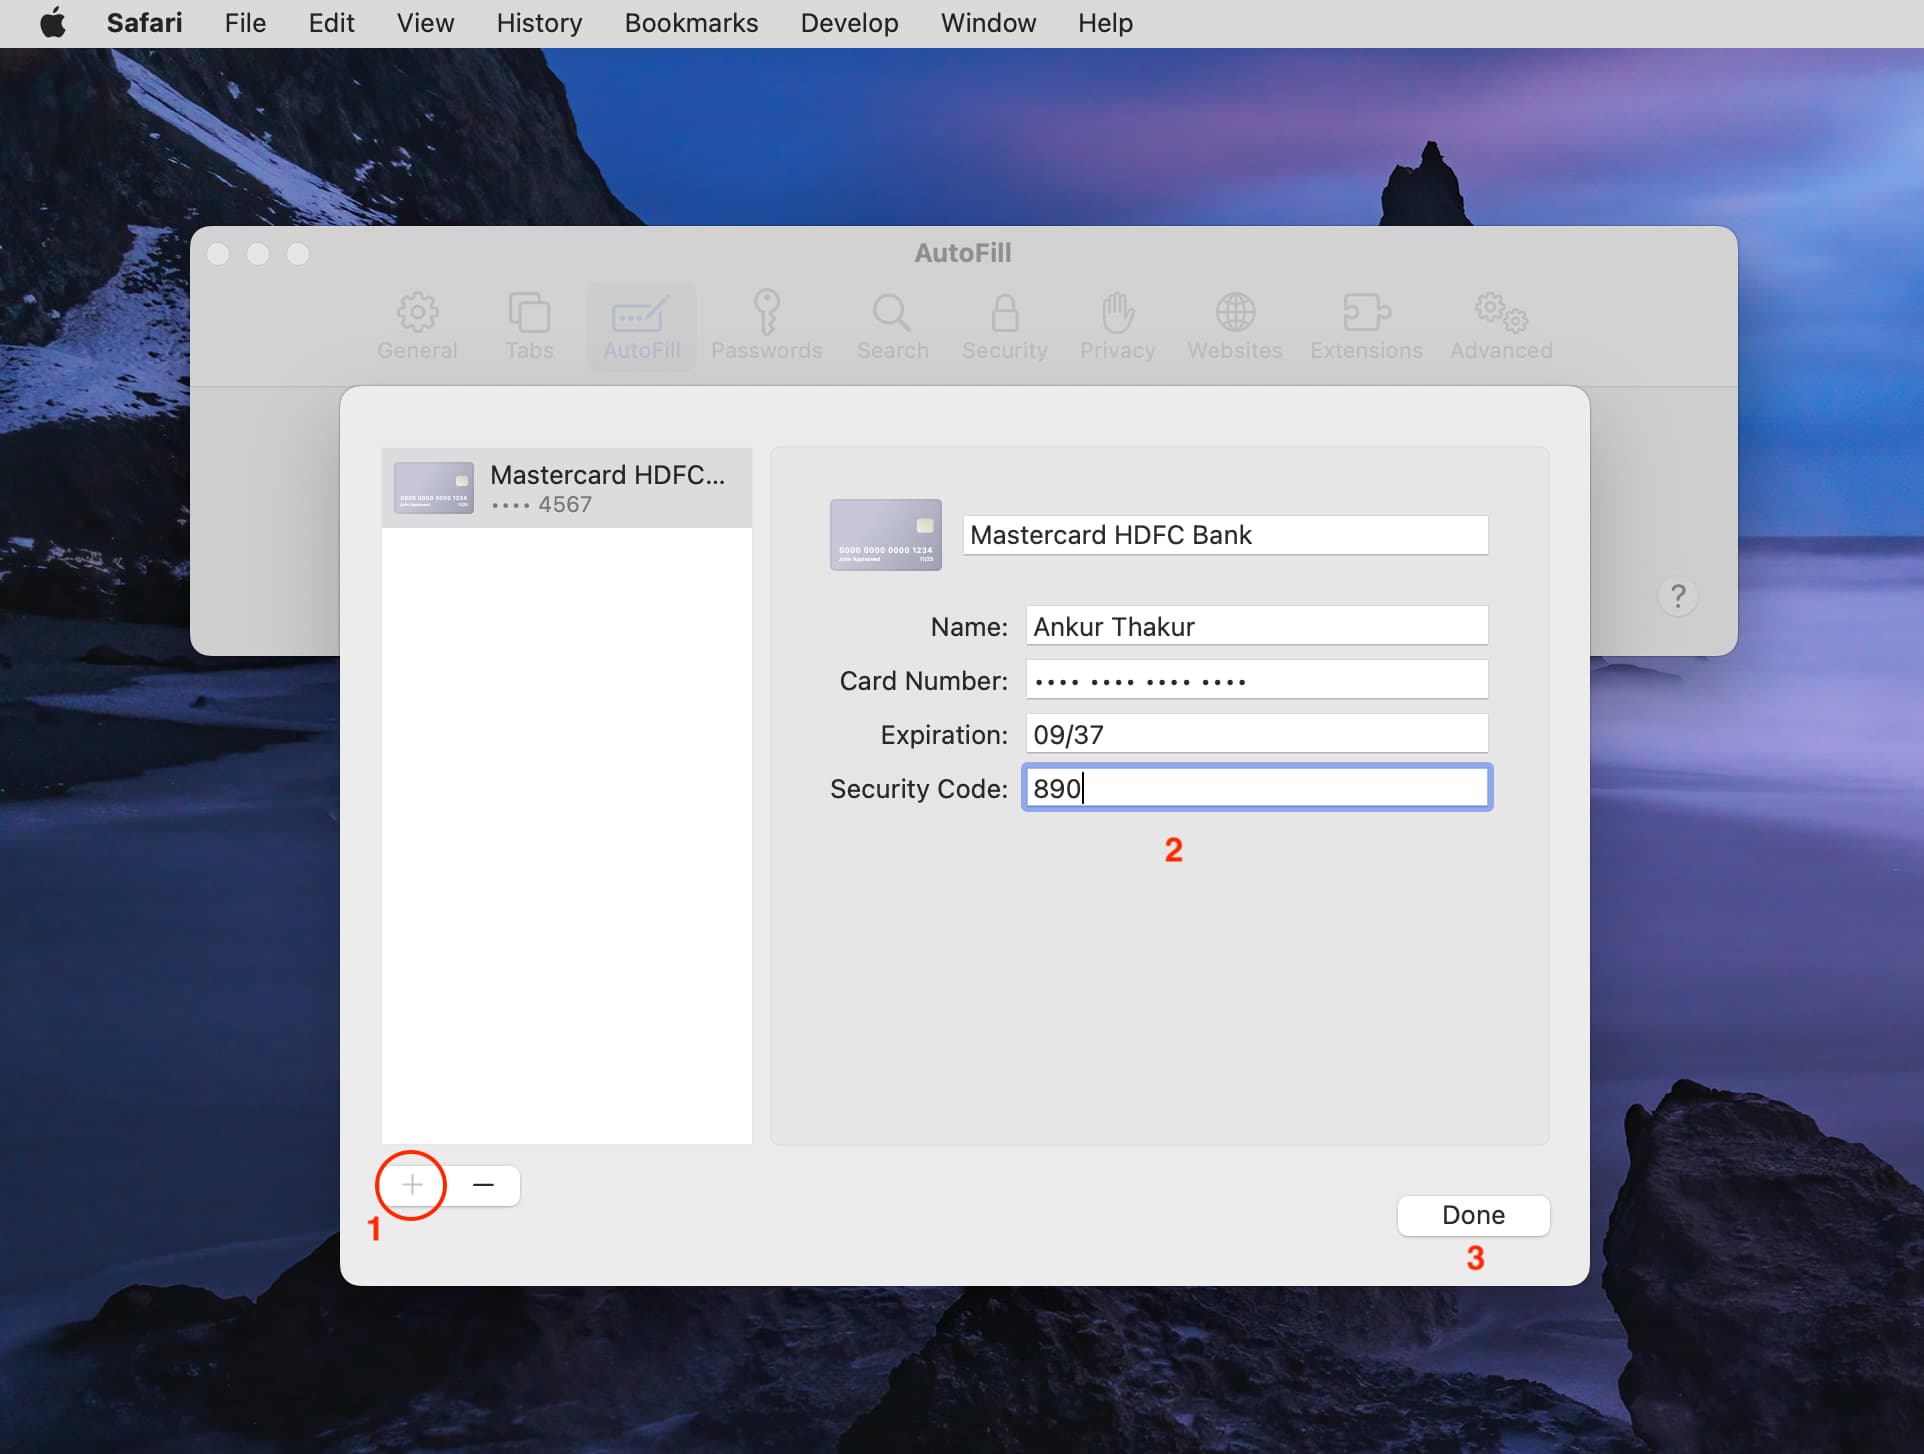
5) Newer versions of macOS will take you to the AutoFill Cards screen in System Settings > Wallet & Apple Pay. Click Add Card here.
On older versions of macOS, click the plus button (+) in the bottom-left corner.
6) Fill in your card details and click Save or Done.
Safari on your Mac can now use saved card details for swift checkout.
Edit your saved card details
- Return to the AutoFill Cards screen (Settings/System Settings > Wallet & Apple Pay > AutoFill Cards).
- Select your added card.
- Hit Edit.
- Enter the new details and save them.

Turn off Safari Autofill for credit cards
Your saved credit cards won’t be removed, but will no longer appear as an autofill option in Safari. This is a per-device option that only applies to a specific device.
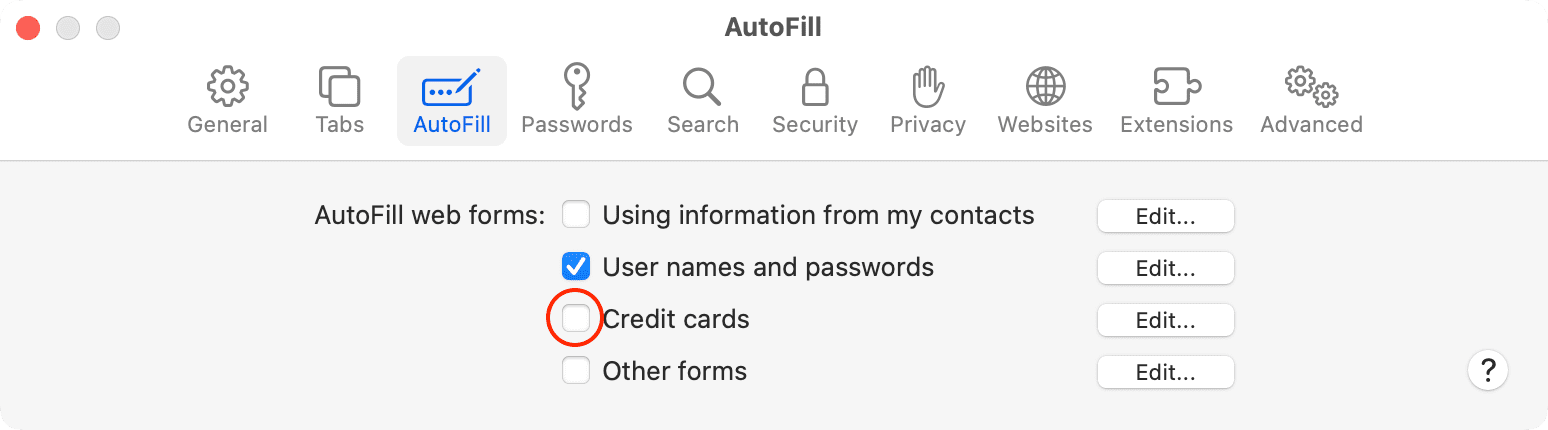
Return to Safari Settings > AutoFill and turn off or uncheck the Credit Cards option.
Here’s how it looks on Mac:
Do you have safety concerns?
Apple encrypts card details with 256-bit AES encryption during storage and transmission. If you have any reservations, however, you can omit the security number (CVV) when saving the card and instead type it manually at checkout.
Delete a saved card from Safari Autofill
Go to iOS Settings or macOS System Settings > Wallet & Apple Pay > AutoFill Cards and select a card. Now, hit Edit, followed by the Remove From AutoFill or Remove Card option.

On older versions of iOS, head to Safari Settings > AutoFill > Saved Credit Cards > Edit > select one or more cards > Delete.
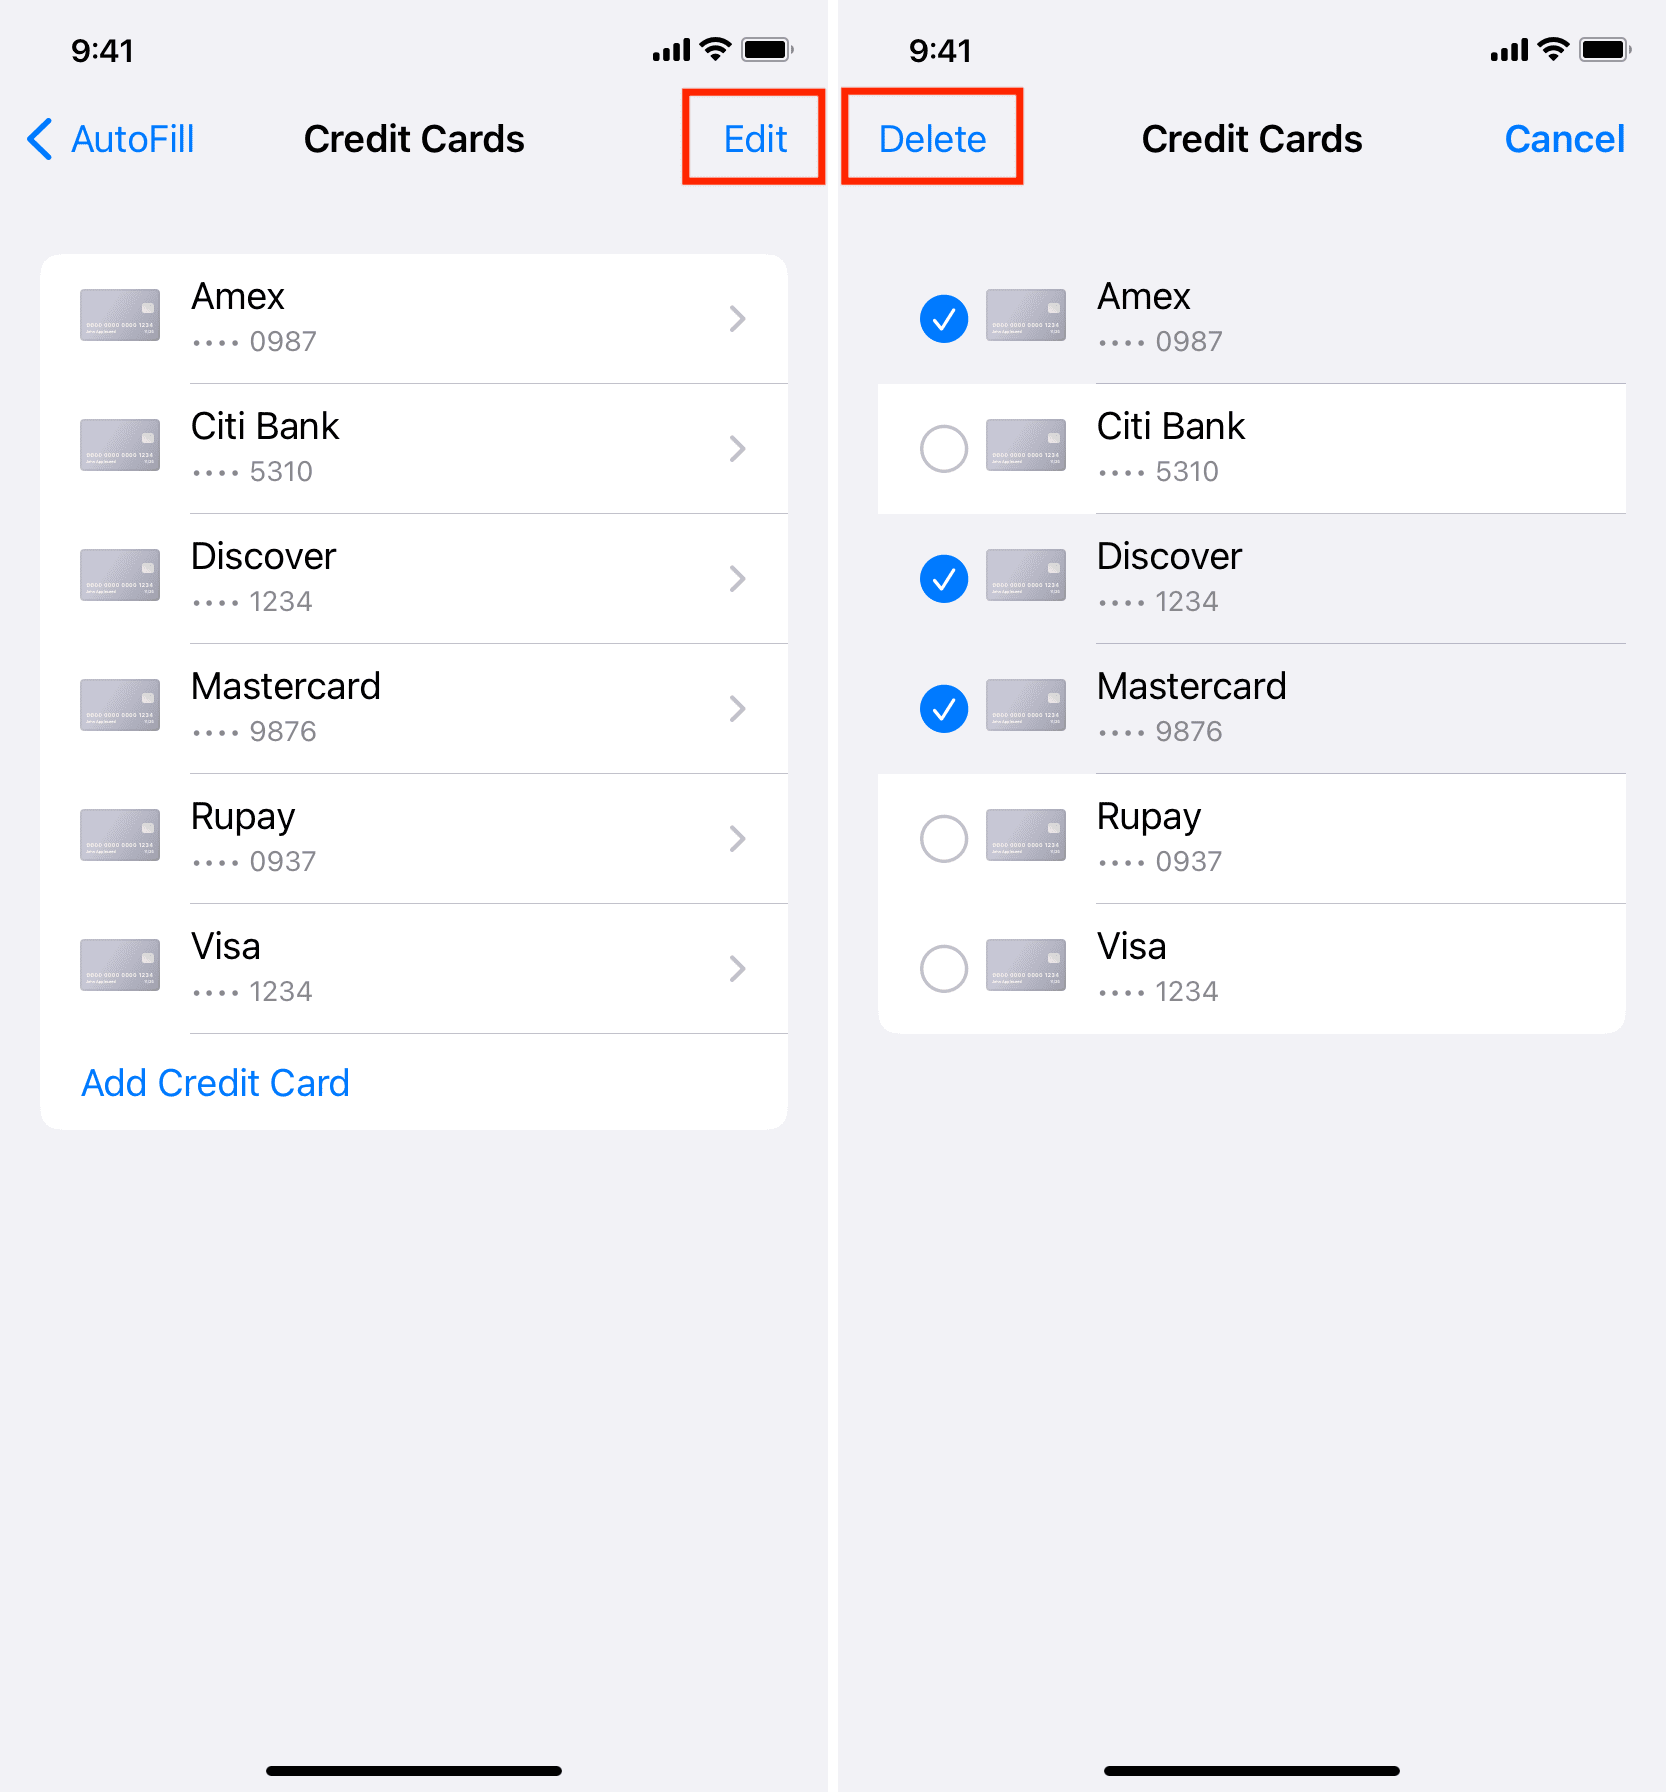
The selected cards will be deleted from all devices using the same Apple Account.
On older versions of macOS, go to Safari Settings > AutoFill > Edit next to Credit Cards. Then, select a card and click the minus button (-) to delete it.

Check out next: How to stop name, address, email, and payment autofill suggestions in Safari