The Photos app on iPhone, iPad, and Mac allows you to create a public website that lists the photos and videos of an album for free. You can share the link of this publicly shared album website with anyone, and they can view those photos and videos!
This little-known feature is a great way to easily share pictures with friends and family, even if they don’t own an iPhone. And in this tutorial, we’ll show you how to do that.

You can only turn shared albums into a public website. Please jump to the next section if you already know what shared albums are and have created a few. In case you don’t know what a shared album is, follow these links to learn how to make and manage shared albums, or how to turn an existing album into a shared album.
Once you have created a shared album, follow the steps below.
On iPhone or iPad
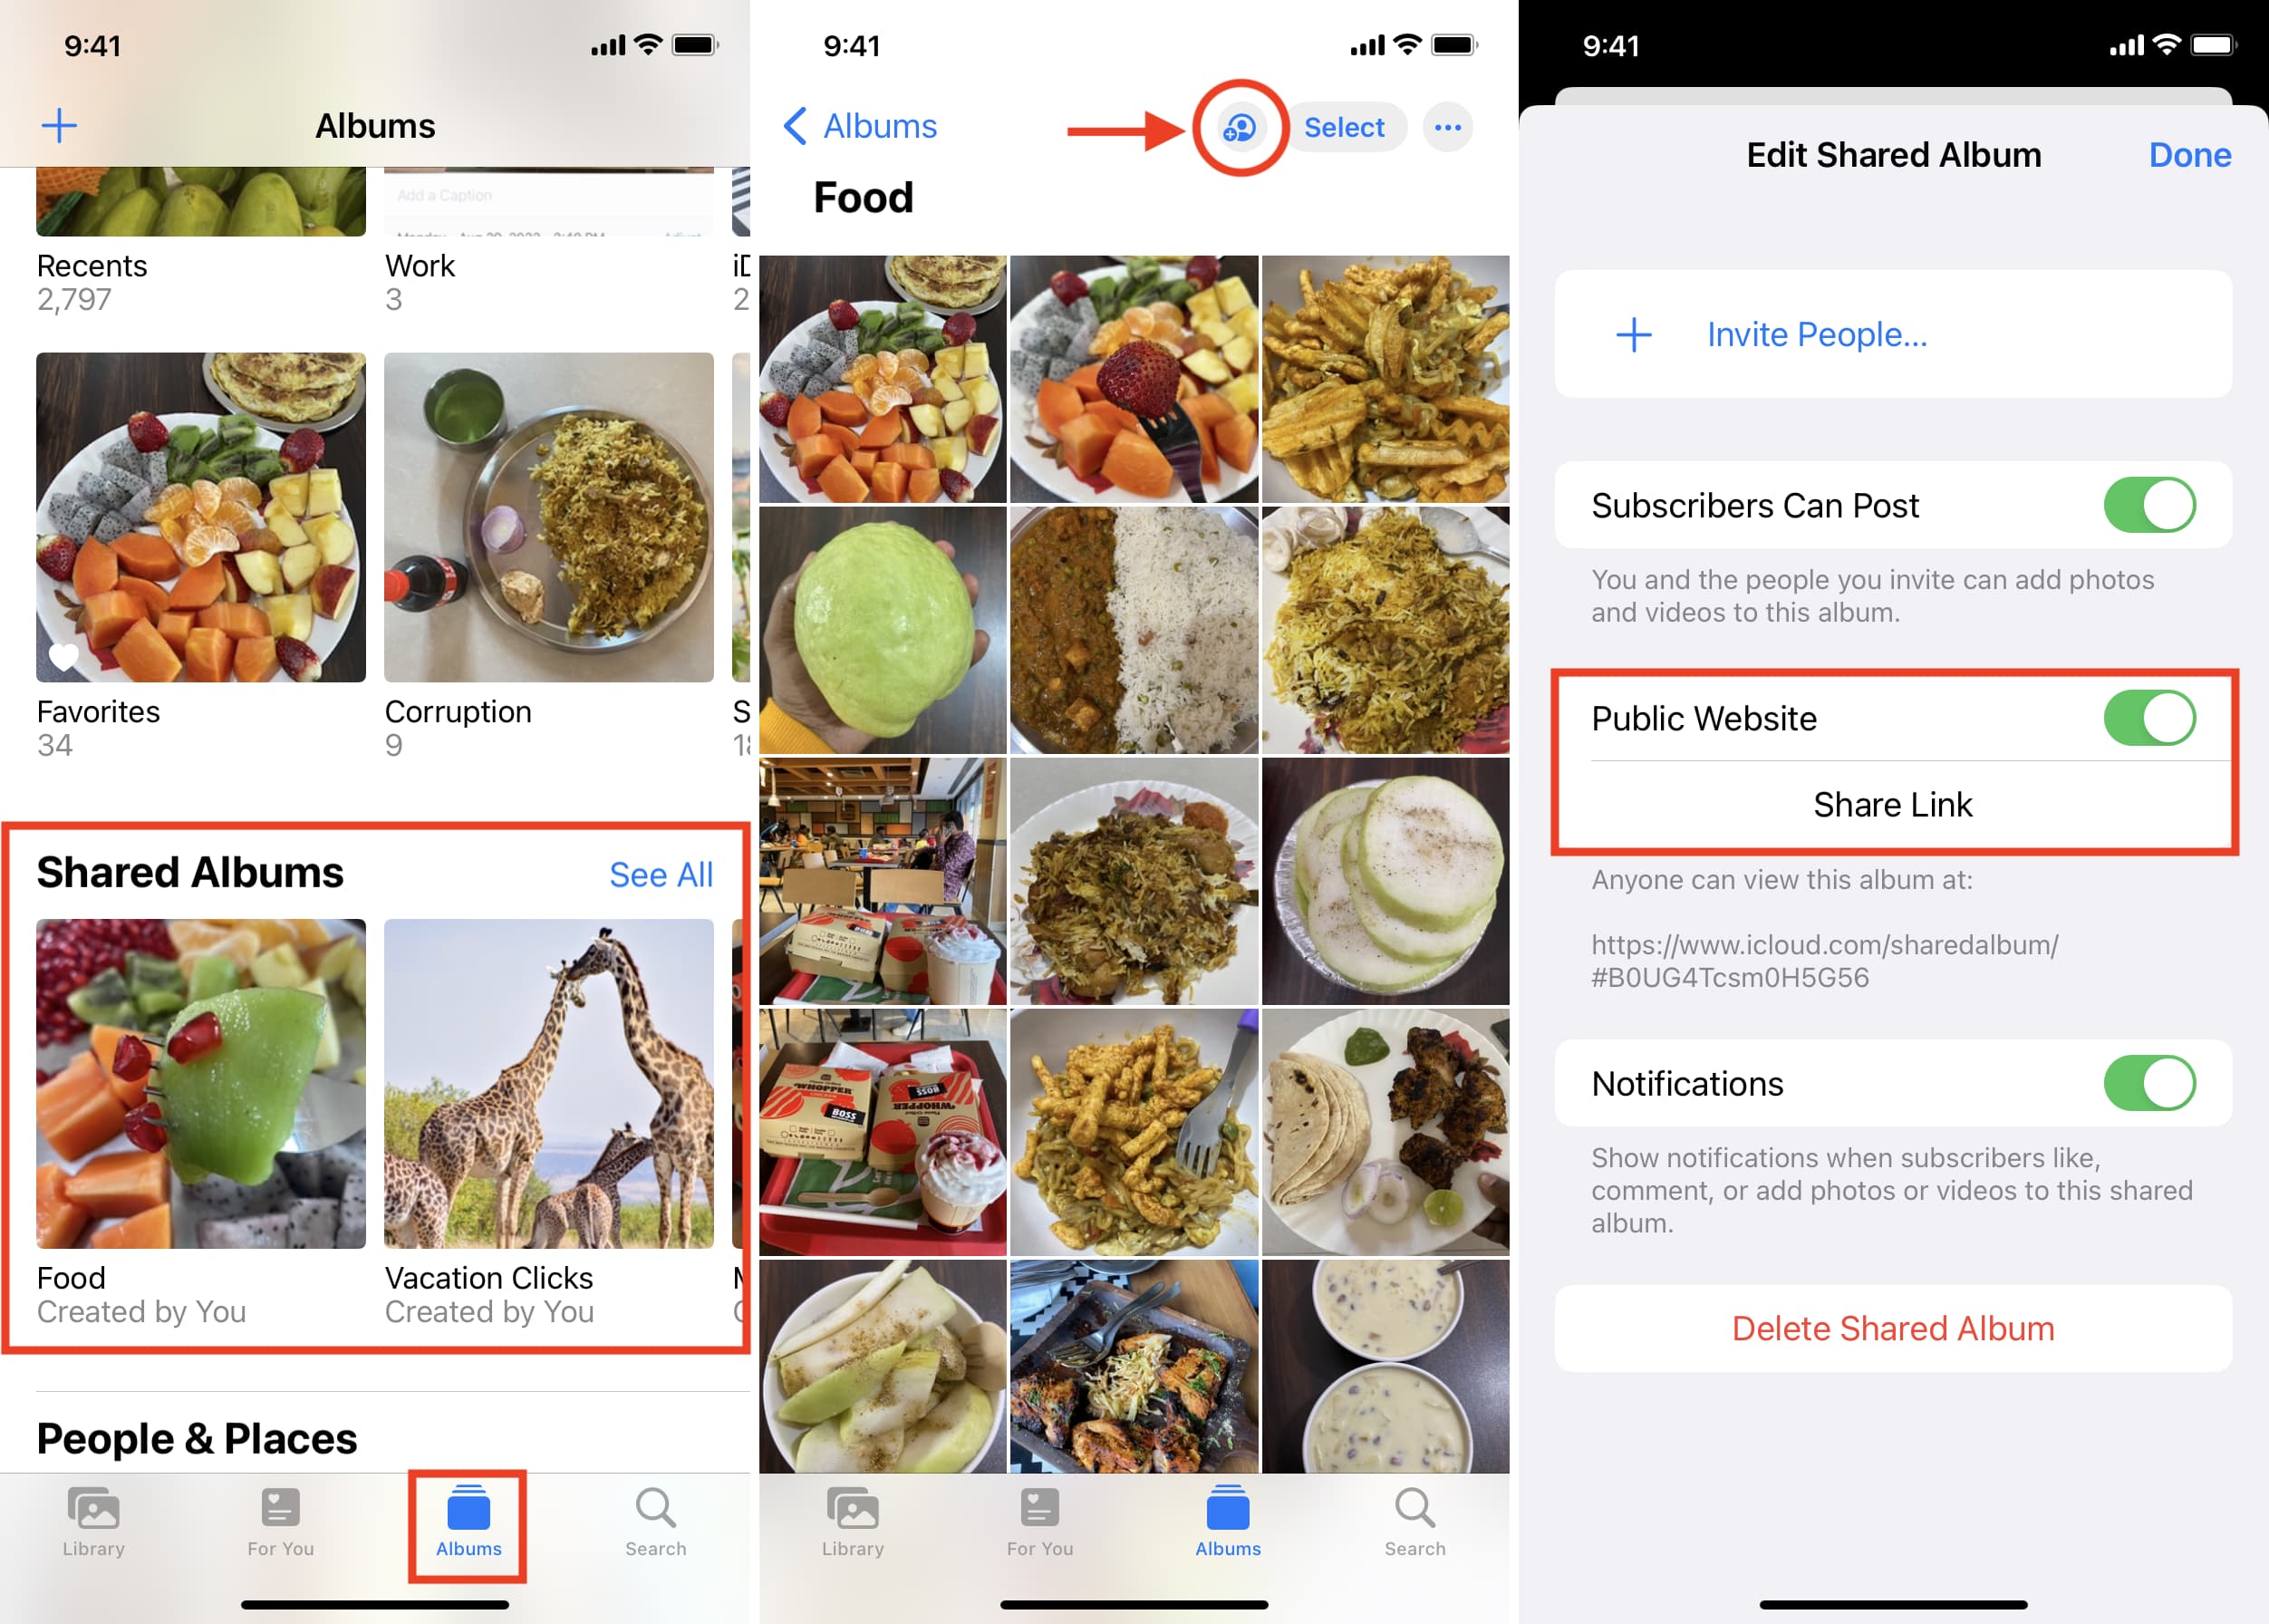
- Open the Photos app and tap Albums.
- Here, you’ll see the Shared Albums section. Pick a shared album you want to turn into a website. Note: You can only use shared albums you have created, not those you’re invited to view.
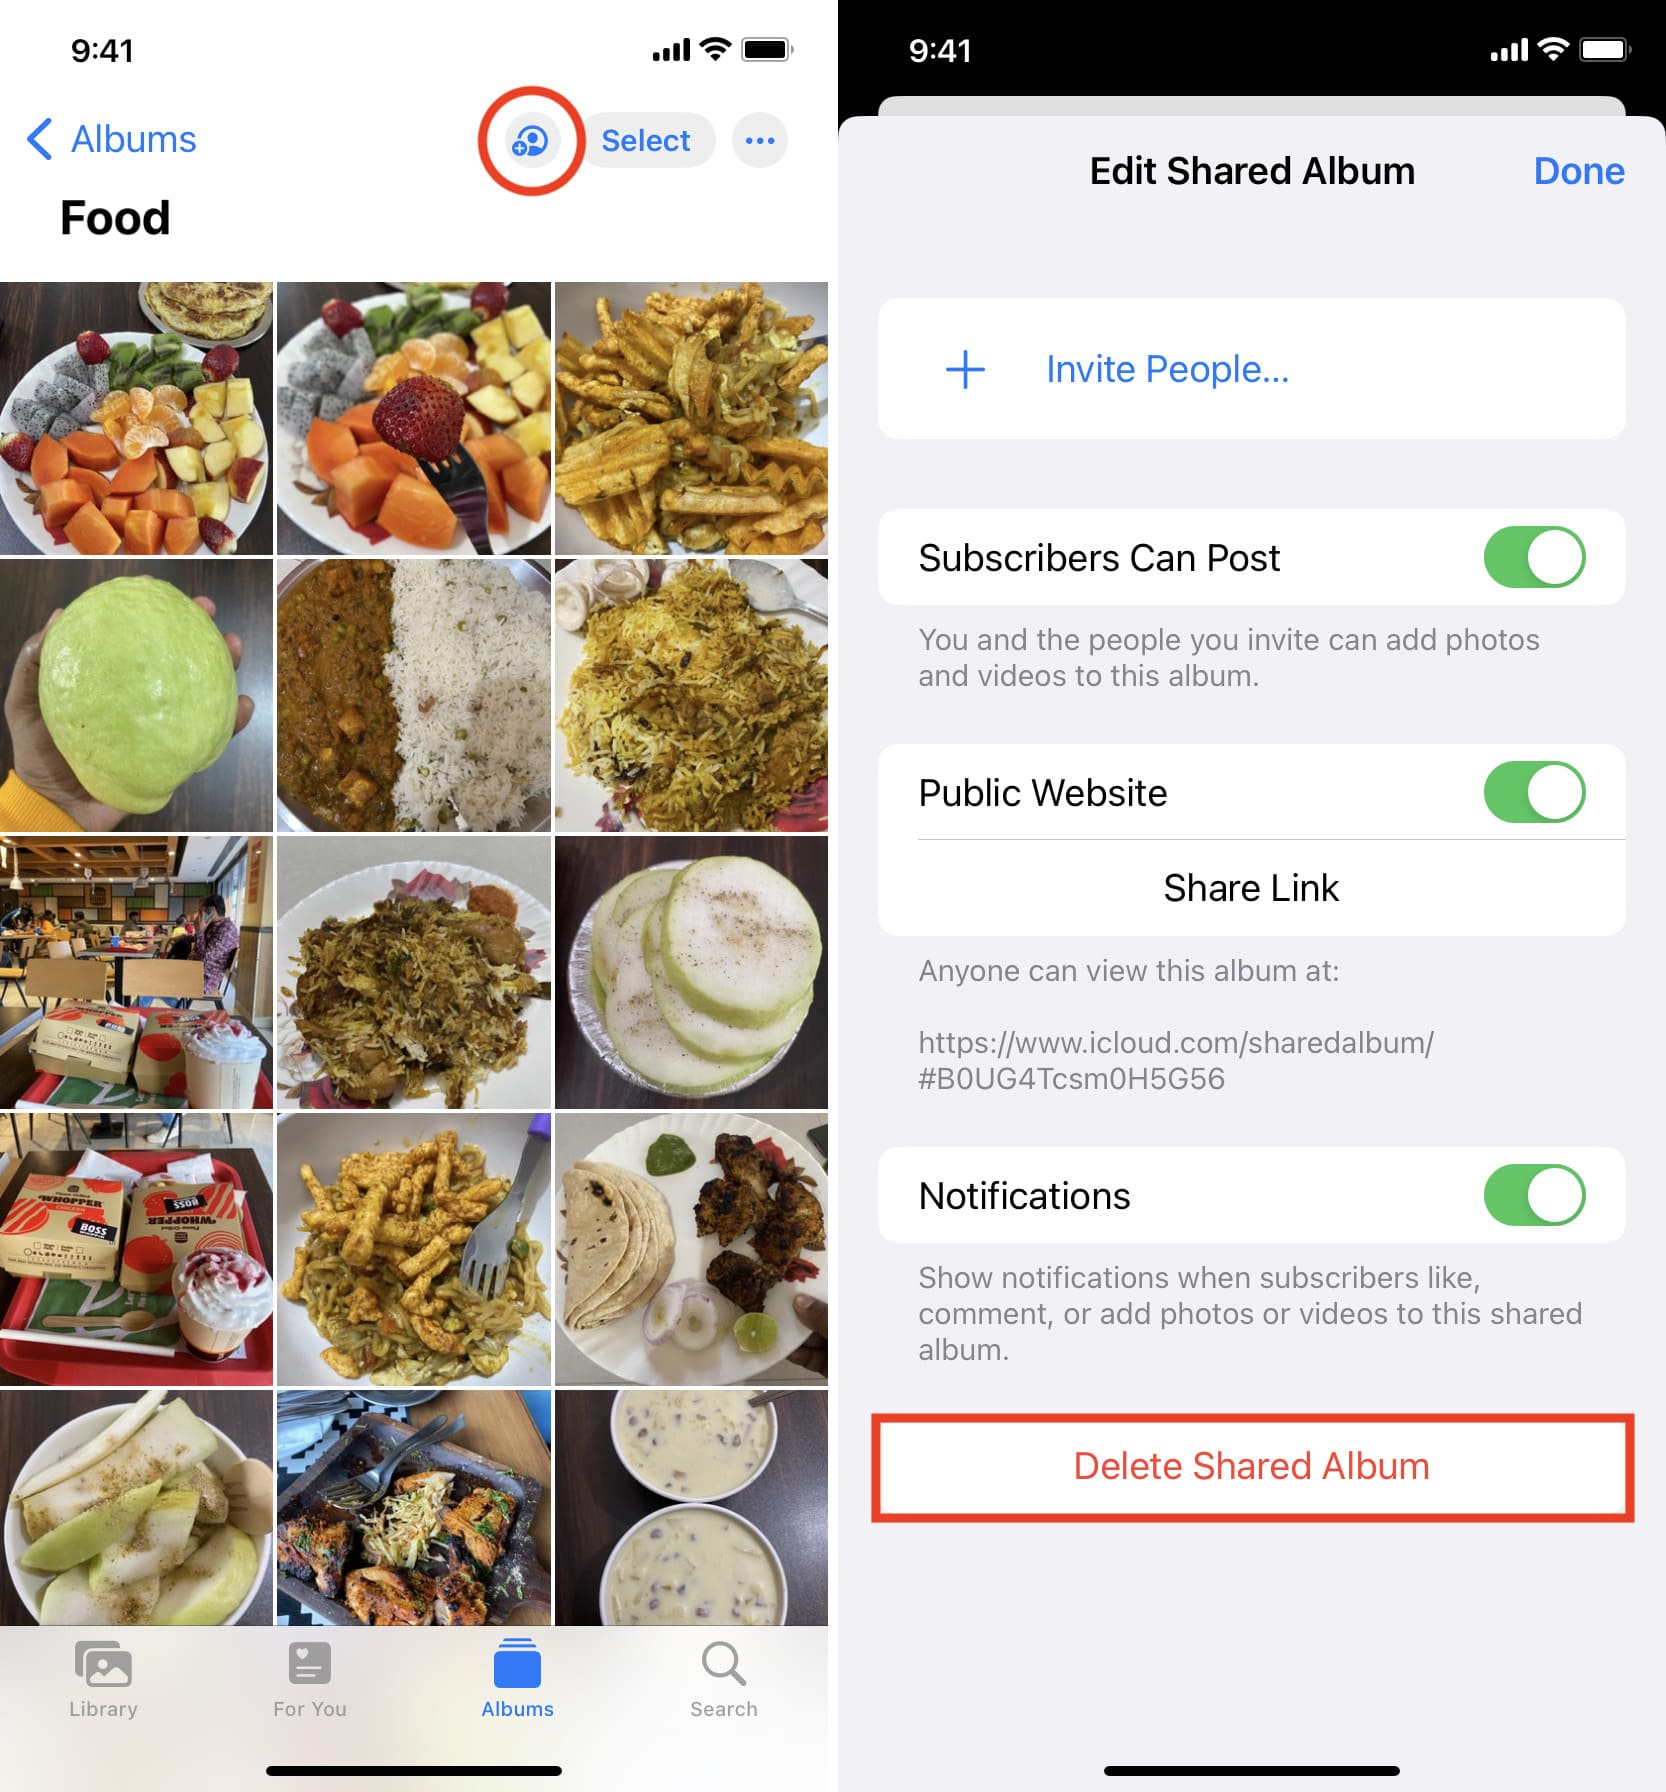
- Tap the People icon.
- Now, enable the switch for Public Website.
- Tap Share Link and send the website link via Messages, Mail, WhatsApp, or any other option you see on the iOS Share Sheet.
- Finally, tap Done to exit this screen.
You have successfully created a beautiful website that has all the photos and videos of that shared album listed there.
The person you sent the link to or whoever has the shared album website link can view the images and video clips on their device. They don’t need to have an Apple ID, log in to it, or anything like that. It’s a simple public website with photos and videos that anyone can view as long as they have the iCloud album link.
On Mac
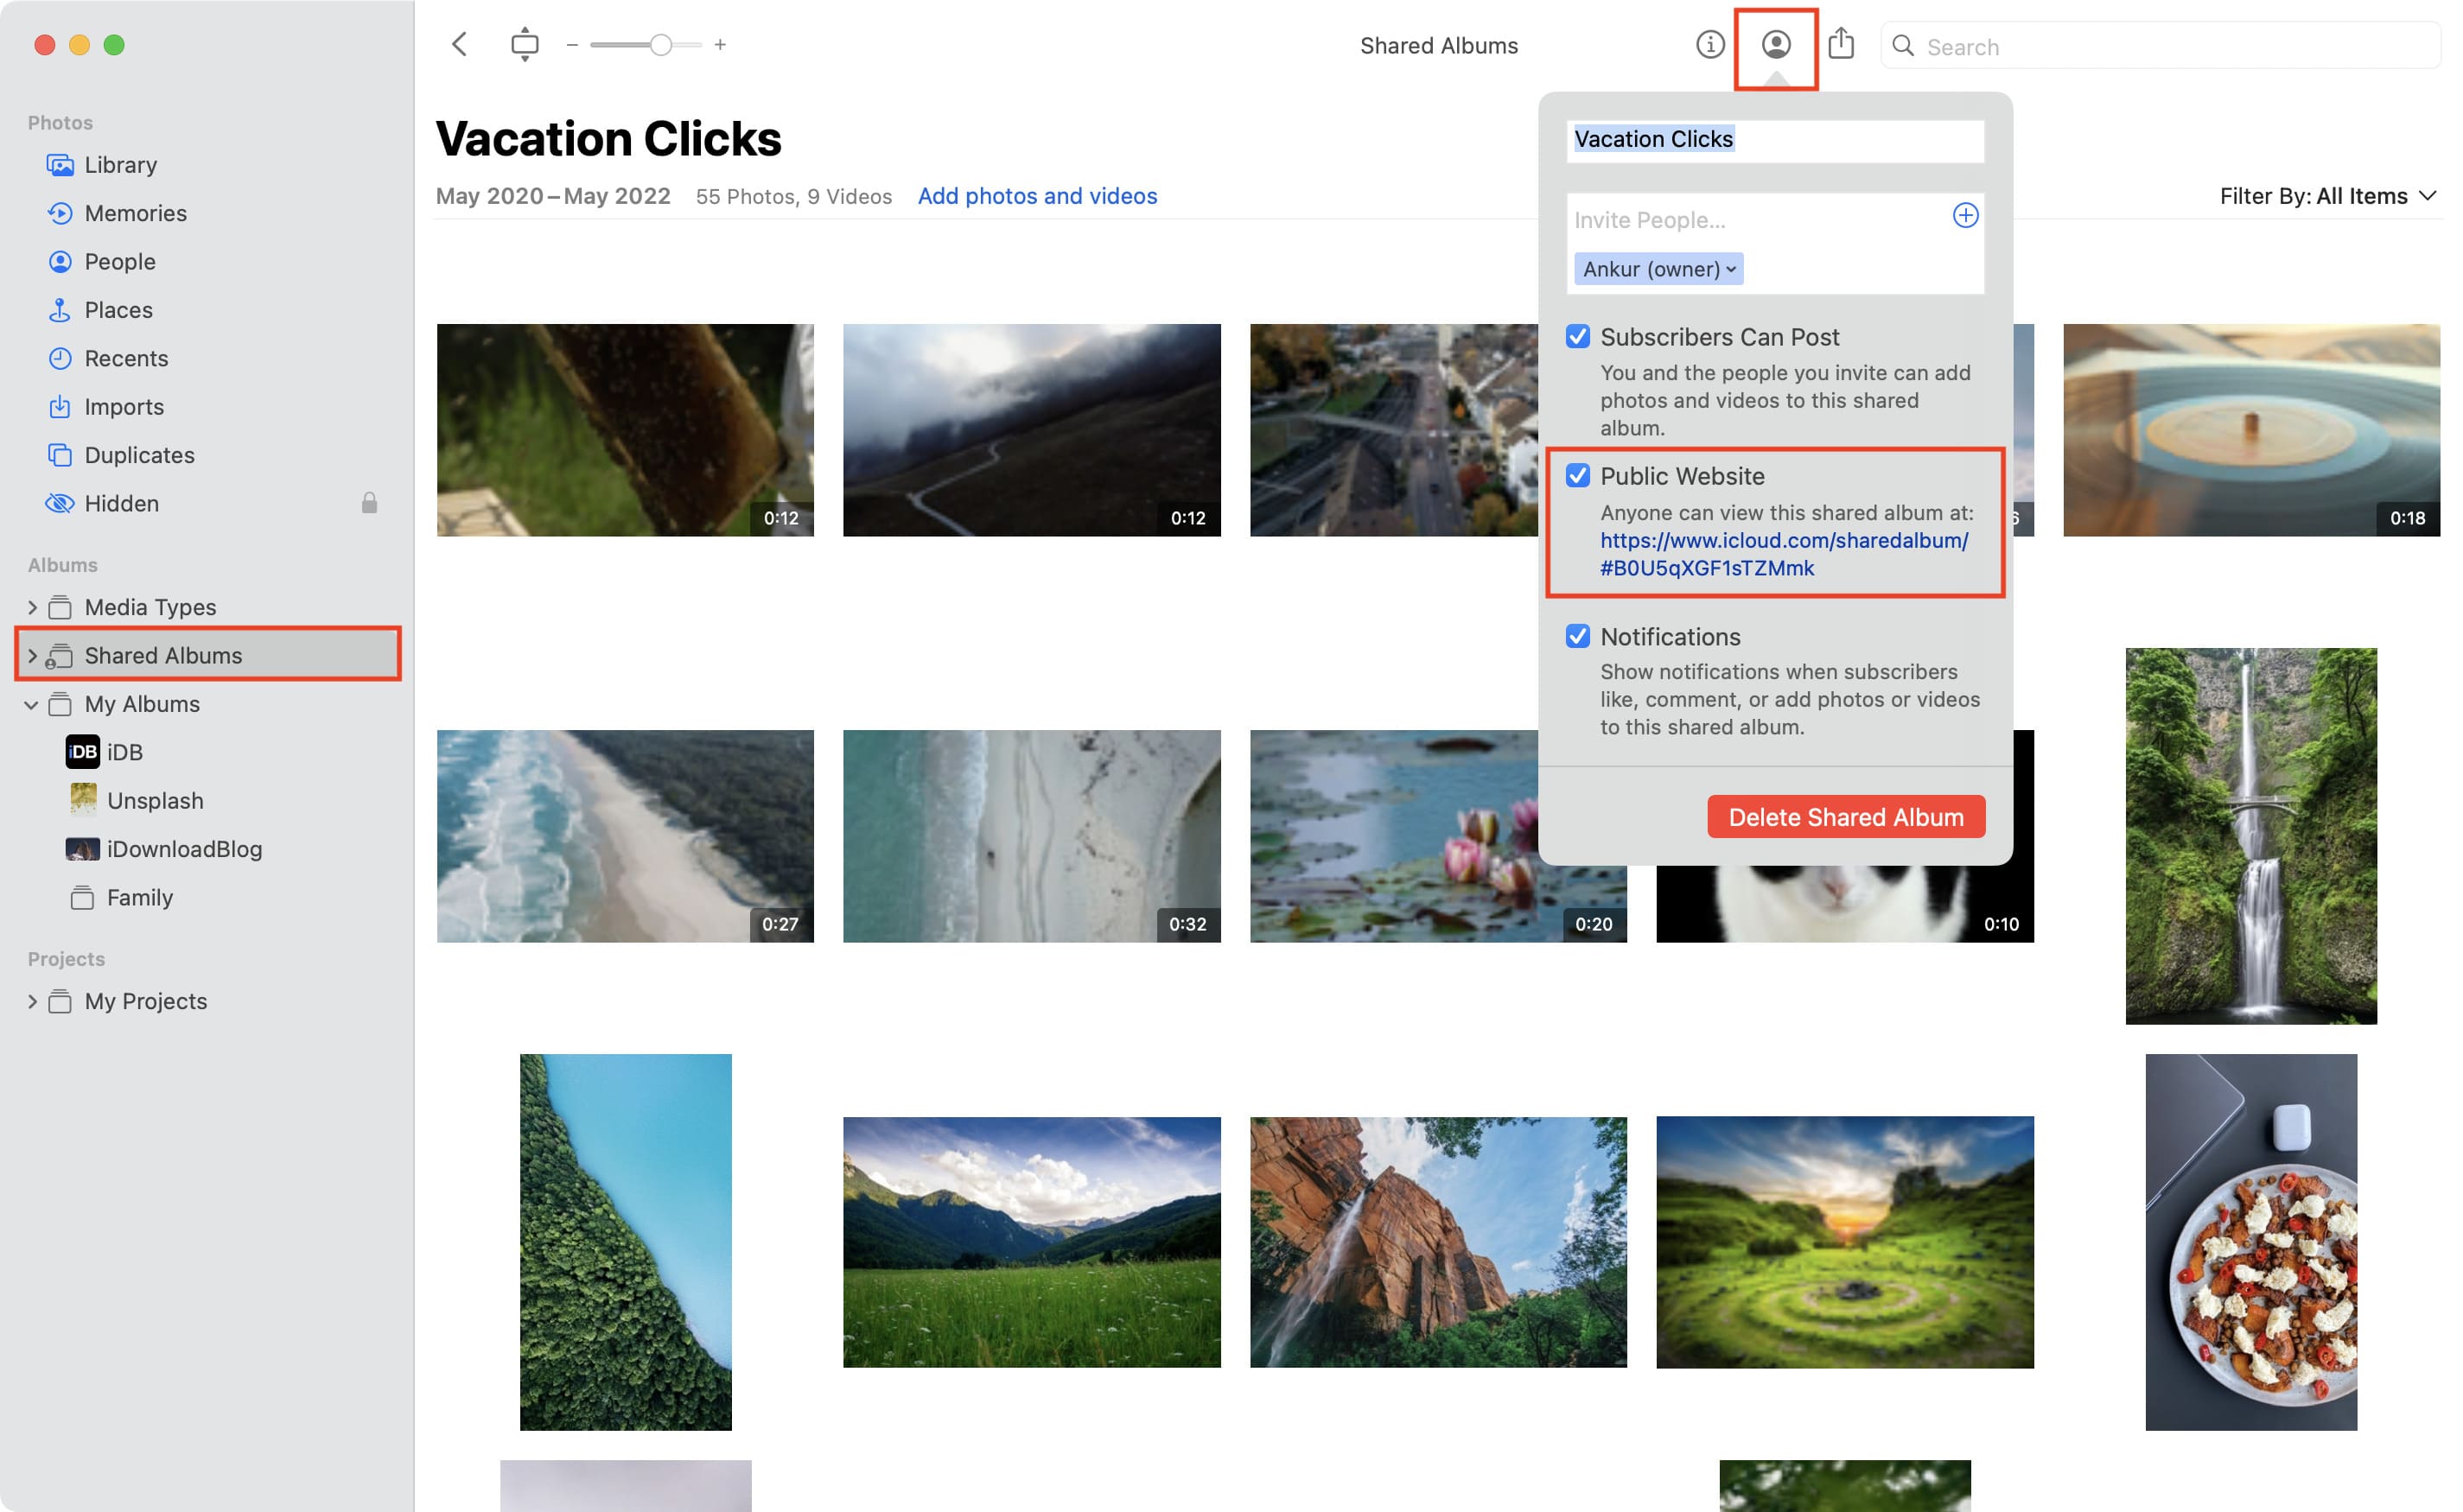
- Open the Photos app and click Shared Albums from the left sidebar. If you don’t see it, take the pointer over Albums and click the tiny arrow next to it.
- Go inside a shared album and click the People icon from the top.
- Check the Public Website box and wait for a few seconds until you see the website link below it.
- Copy the link and share it via any medium. If you click the link, the shared album website will open in your Mac’s default browser. From there, you can copy the URL.
Add new photos to the public website
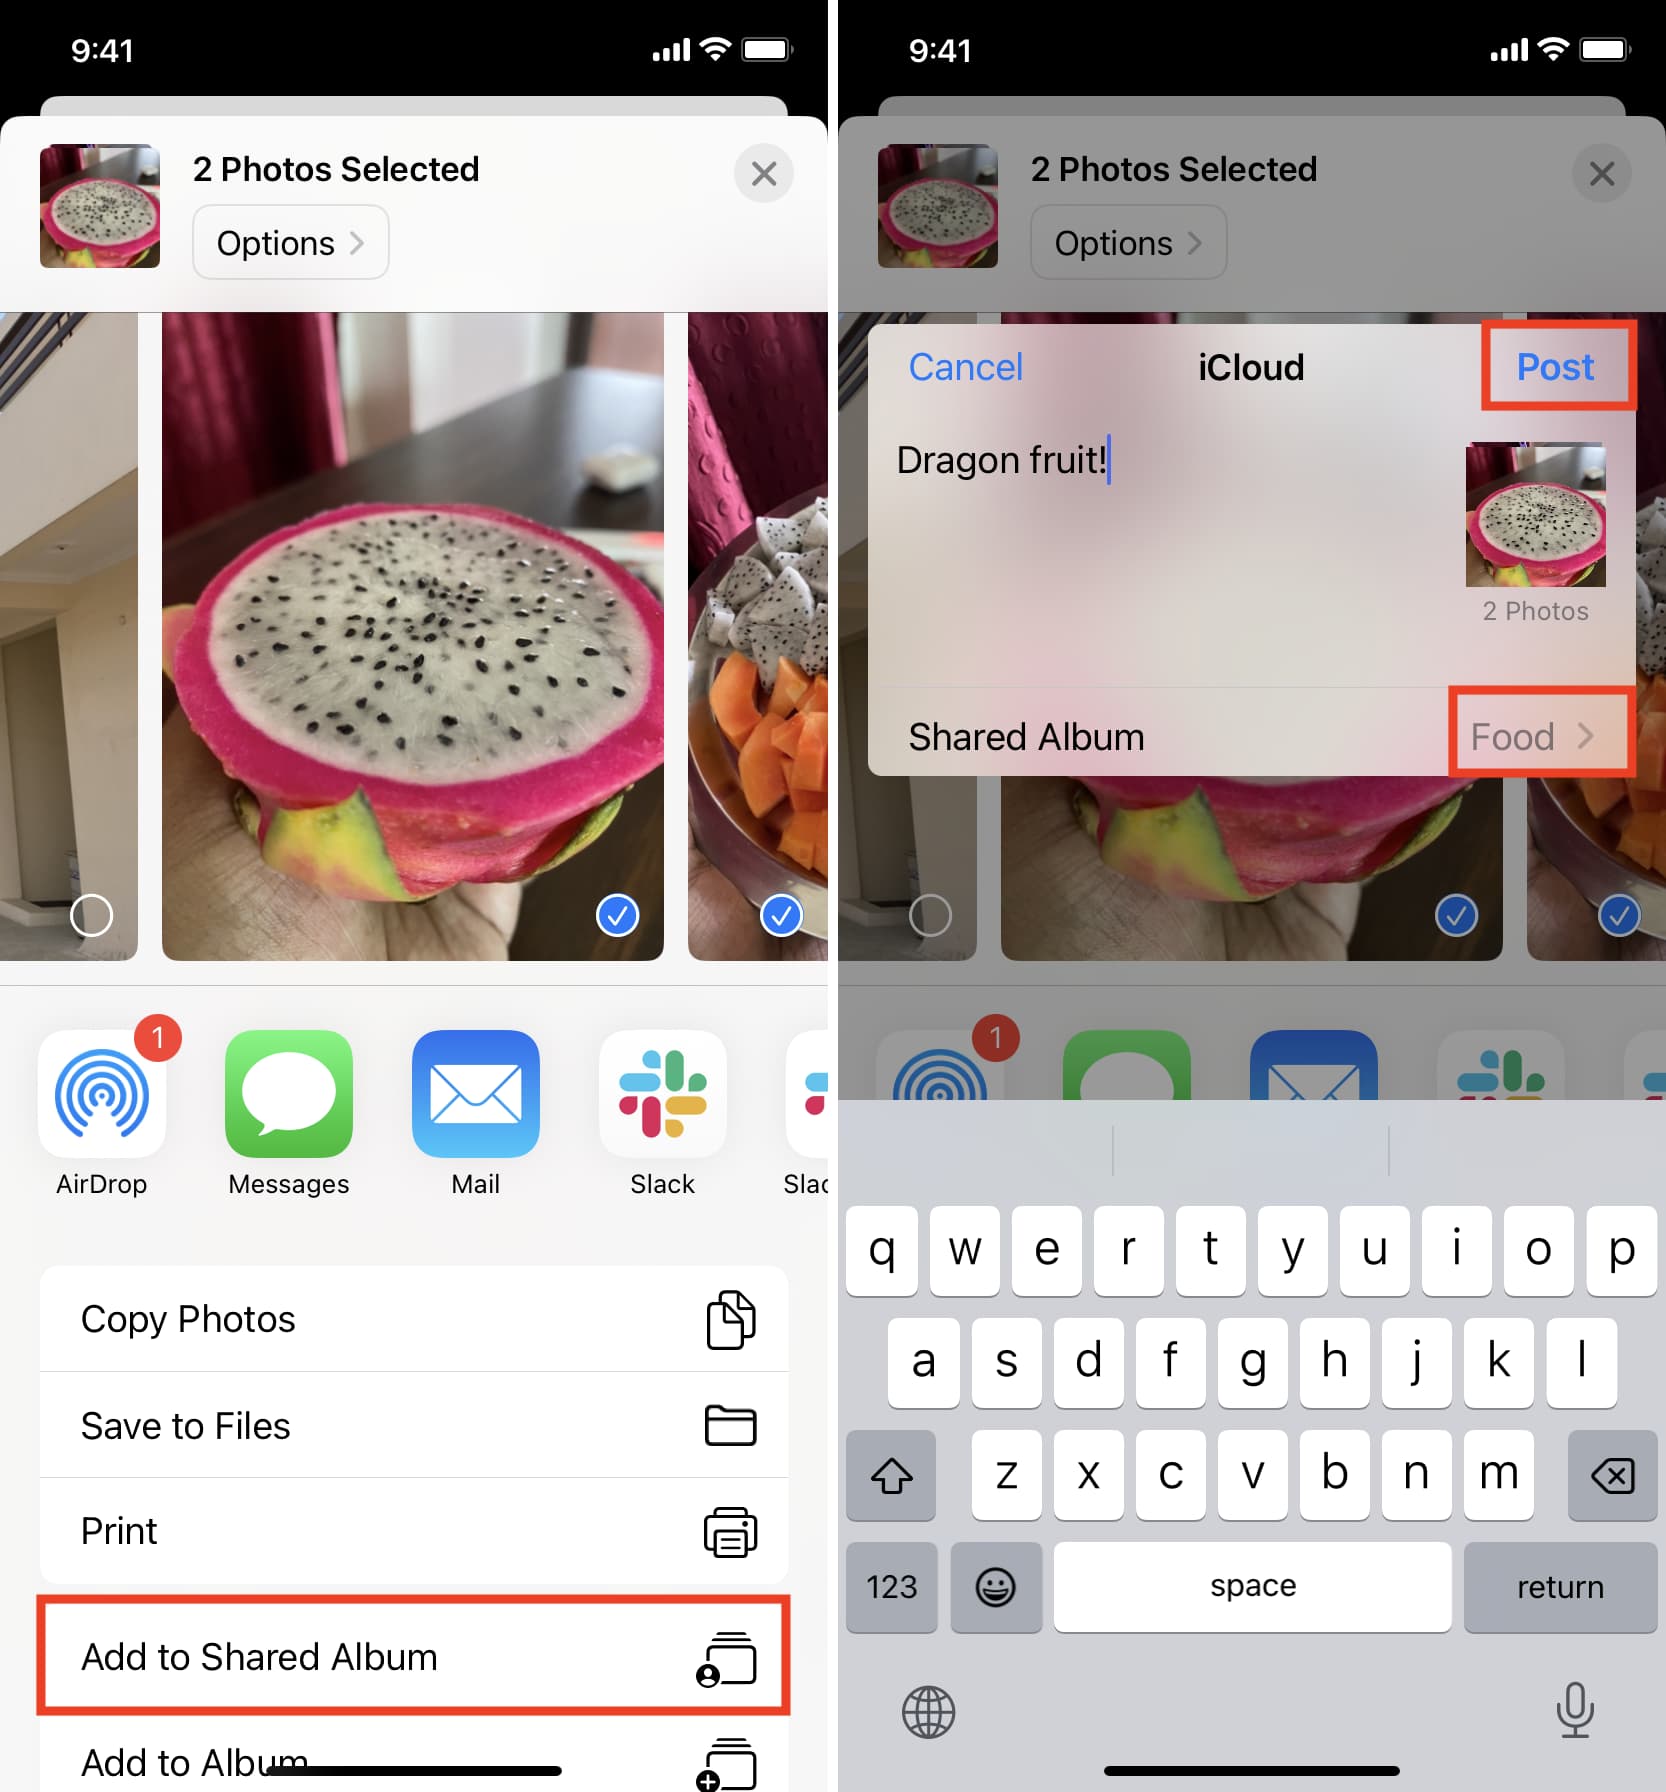
Once you have created a public website of your shared album, you can add new photos and videos to that shared album, and those newly added media will automatically appear on the public website. Anyone with the website link can refresh the page, and the recently added pictures and videos will show up there.
As mentioned, any person who has the shared album website link can view the images and video clips there. So, if someday you want to shut down the website, you have the following three options:
Take down the public website
Go inside the shared album and tap the People icon. From here, turn off the Public Website switch and tap Done.
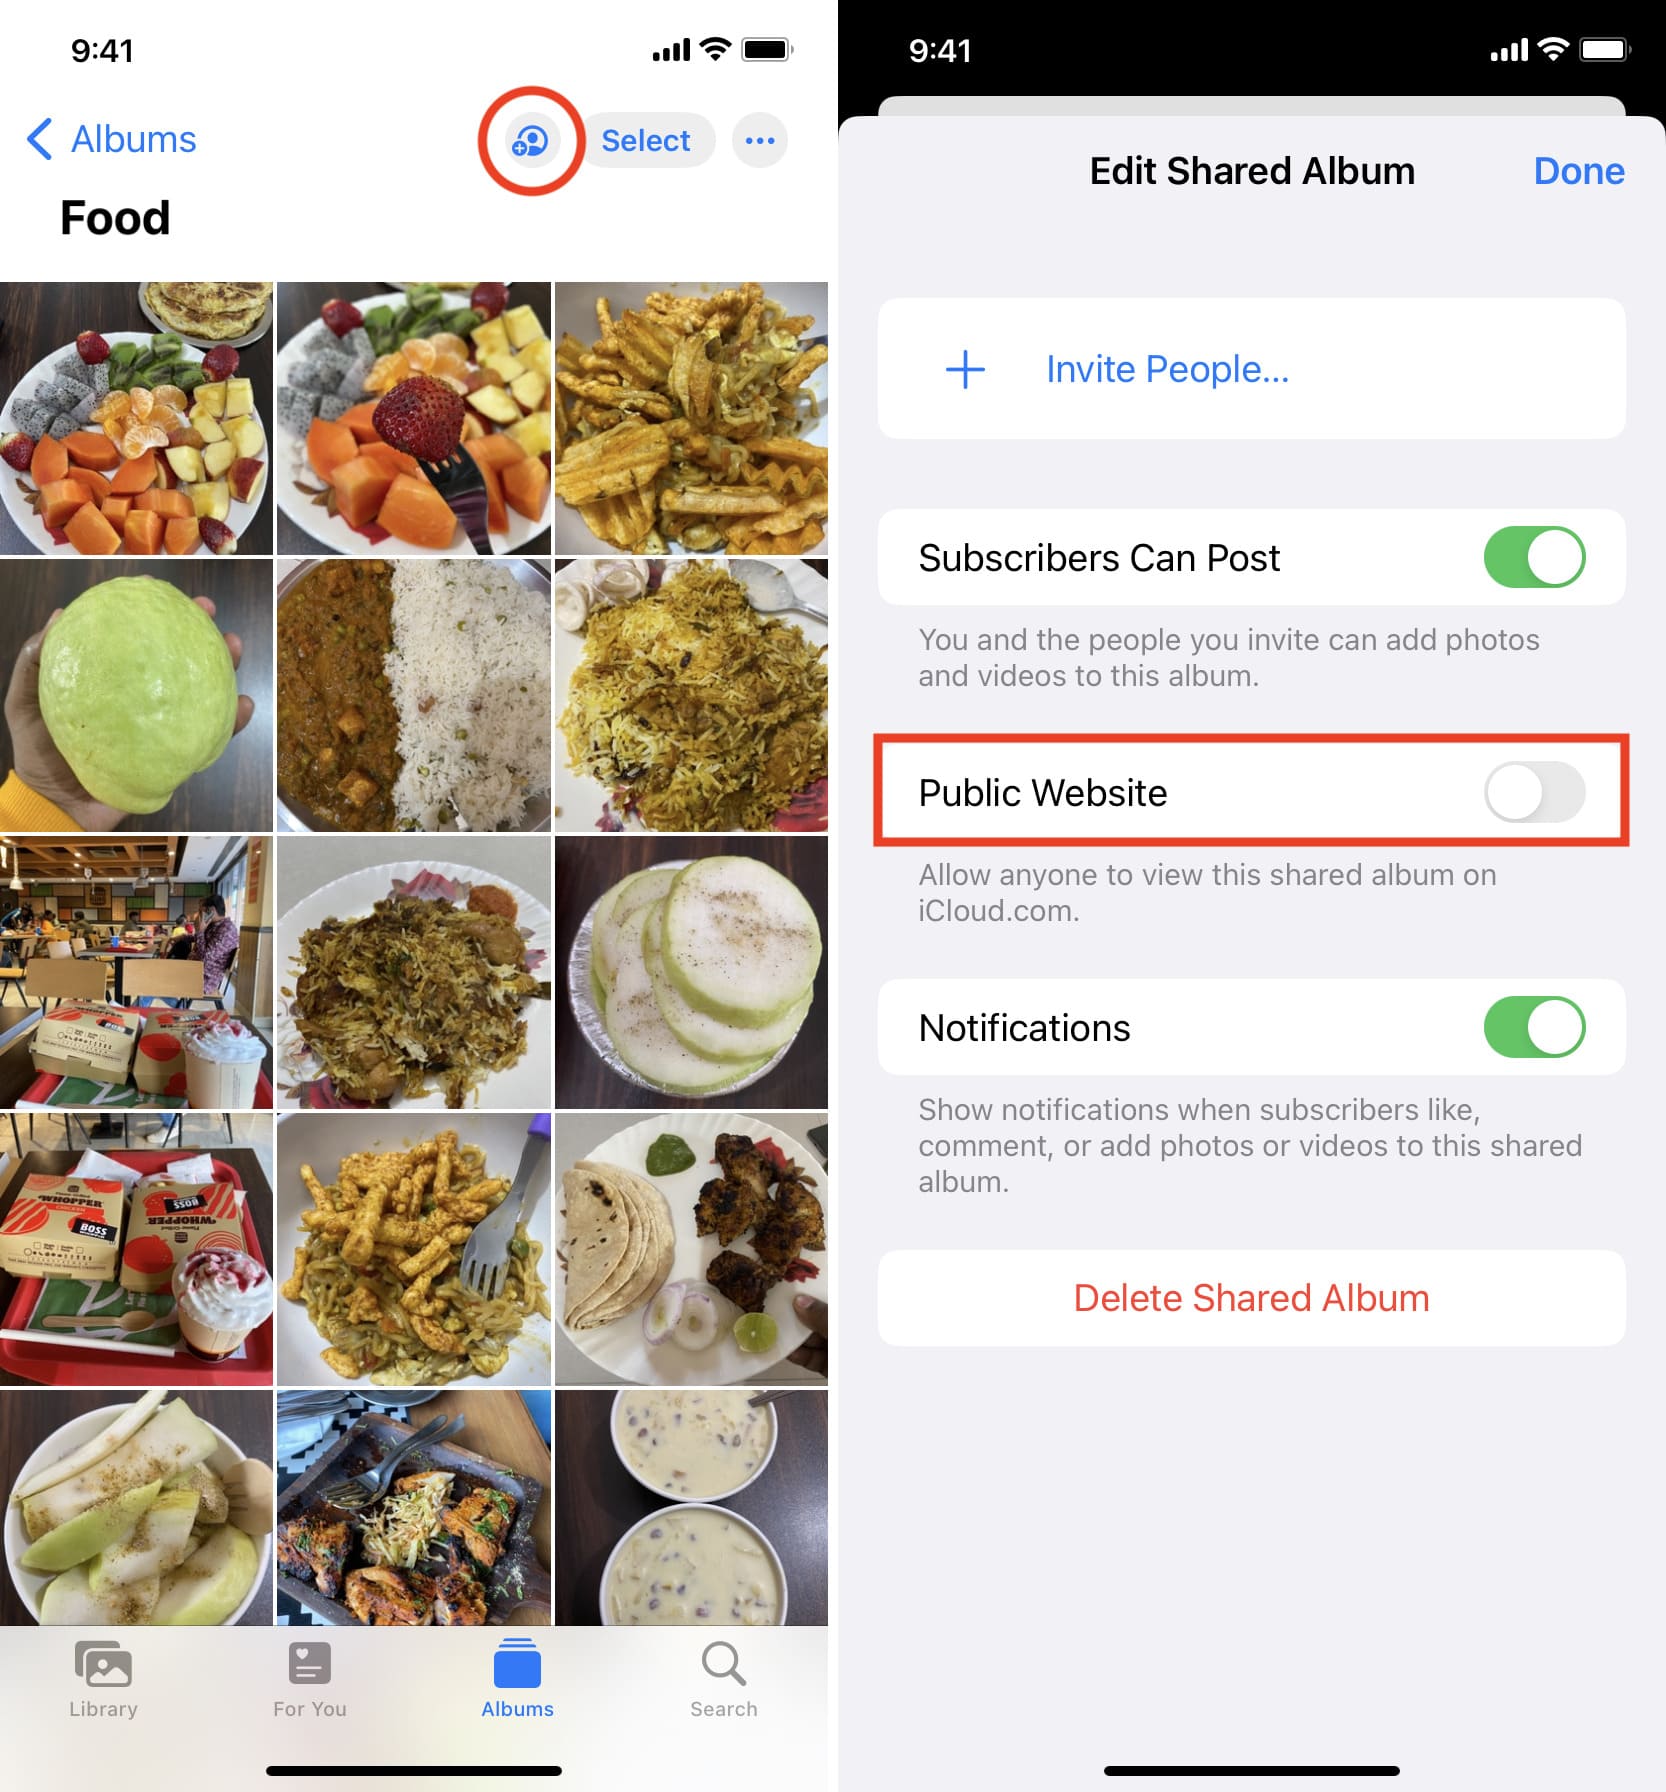
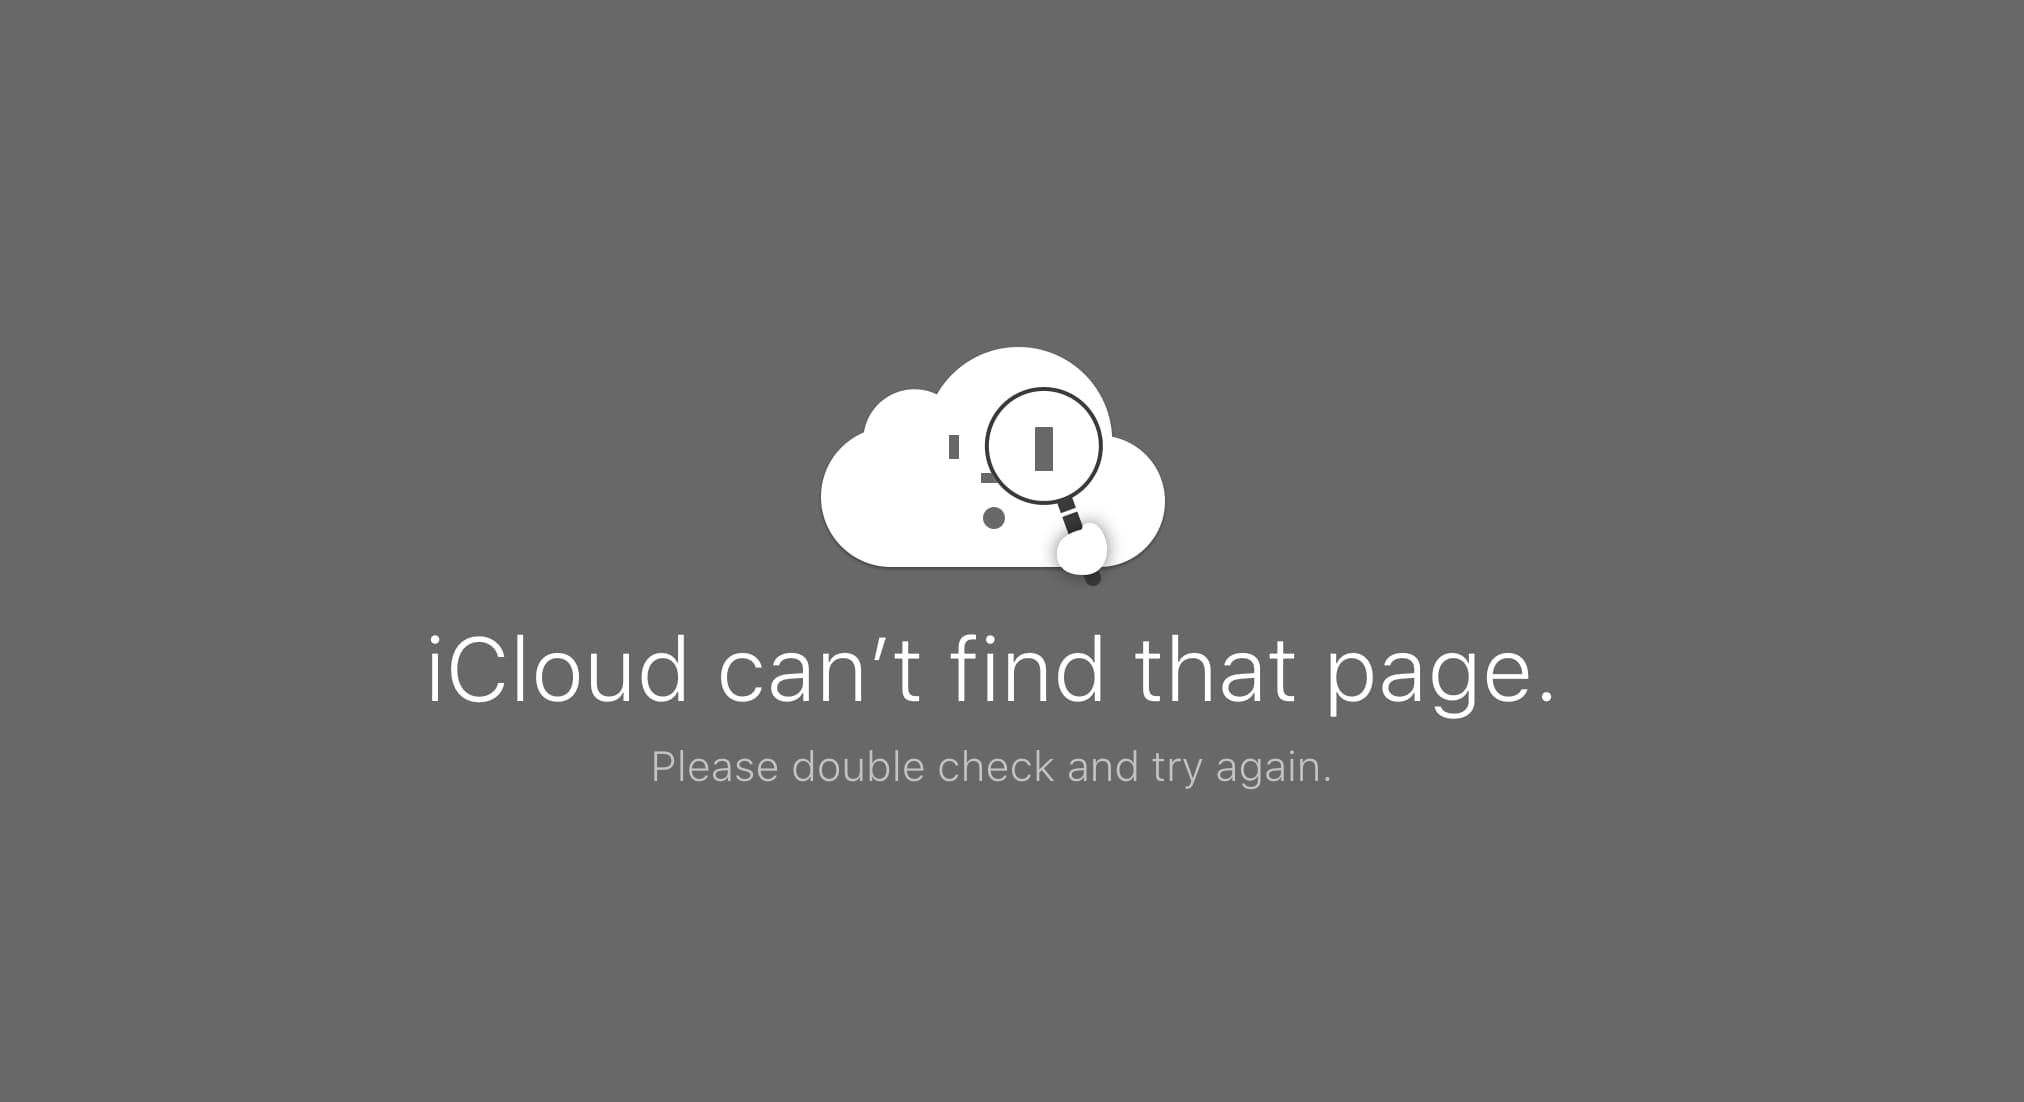
After this, visiting your shared album website link will show an error saying, ‘iCloud can’t find that page.’
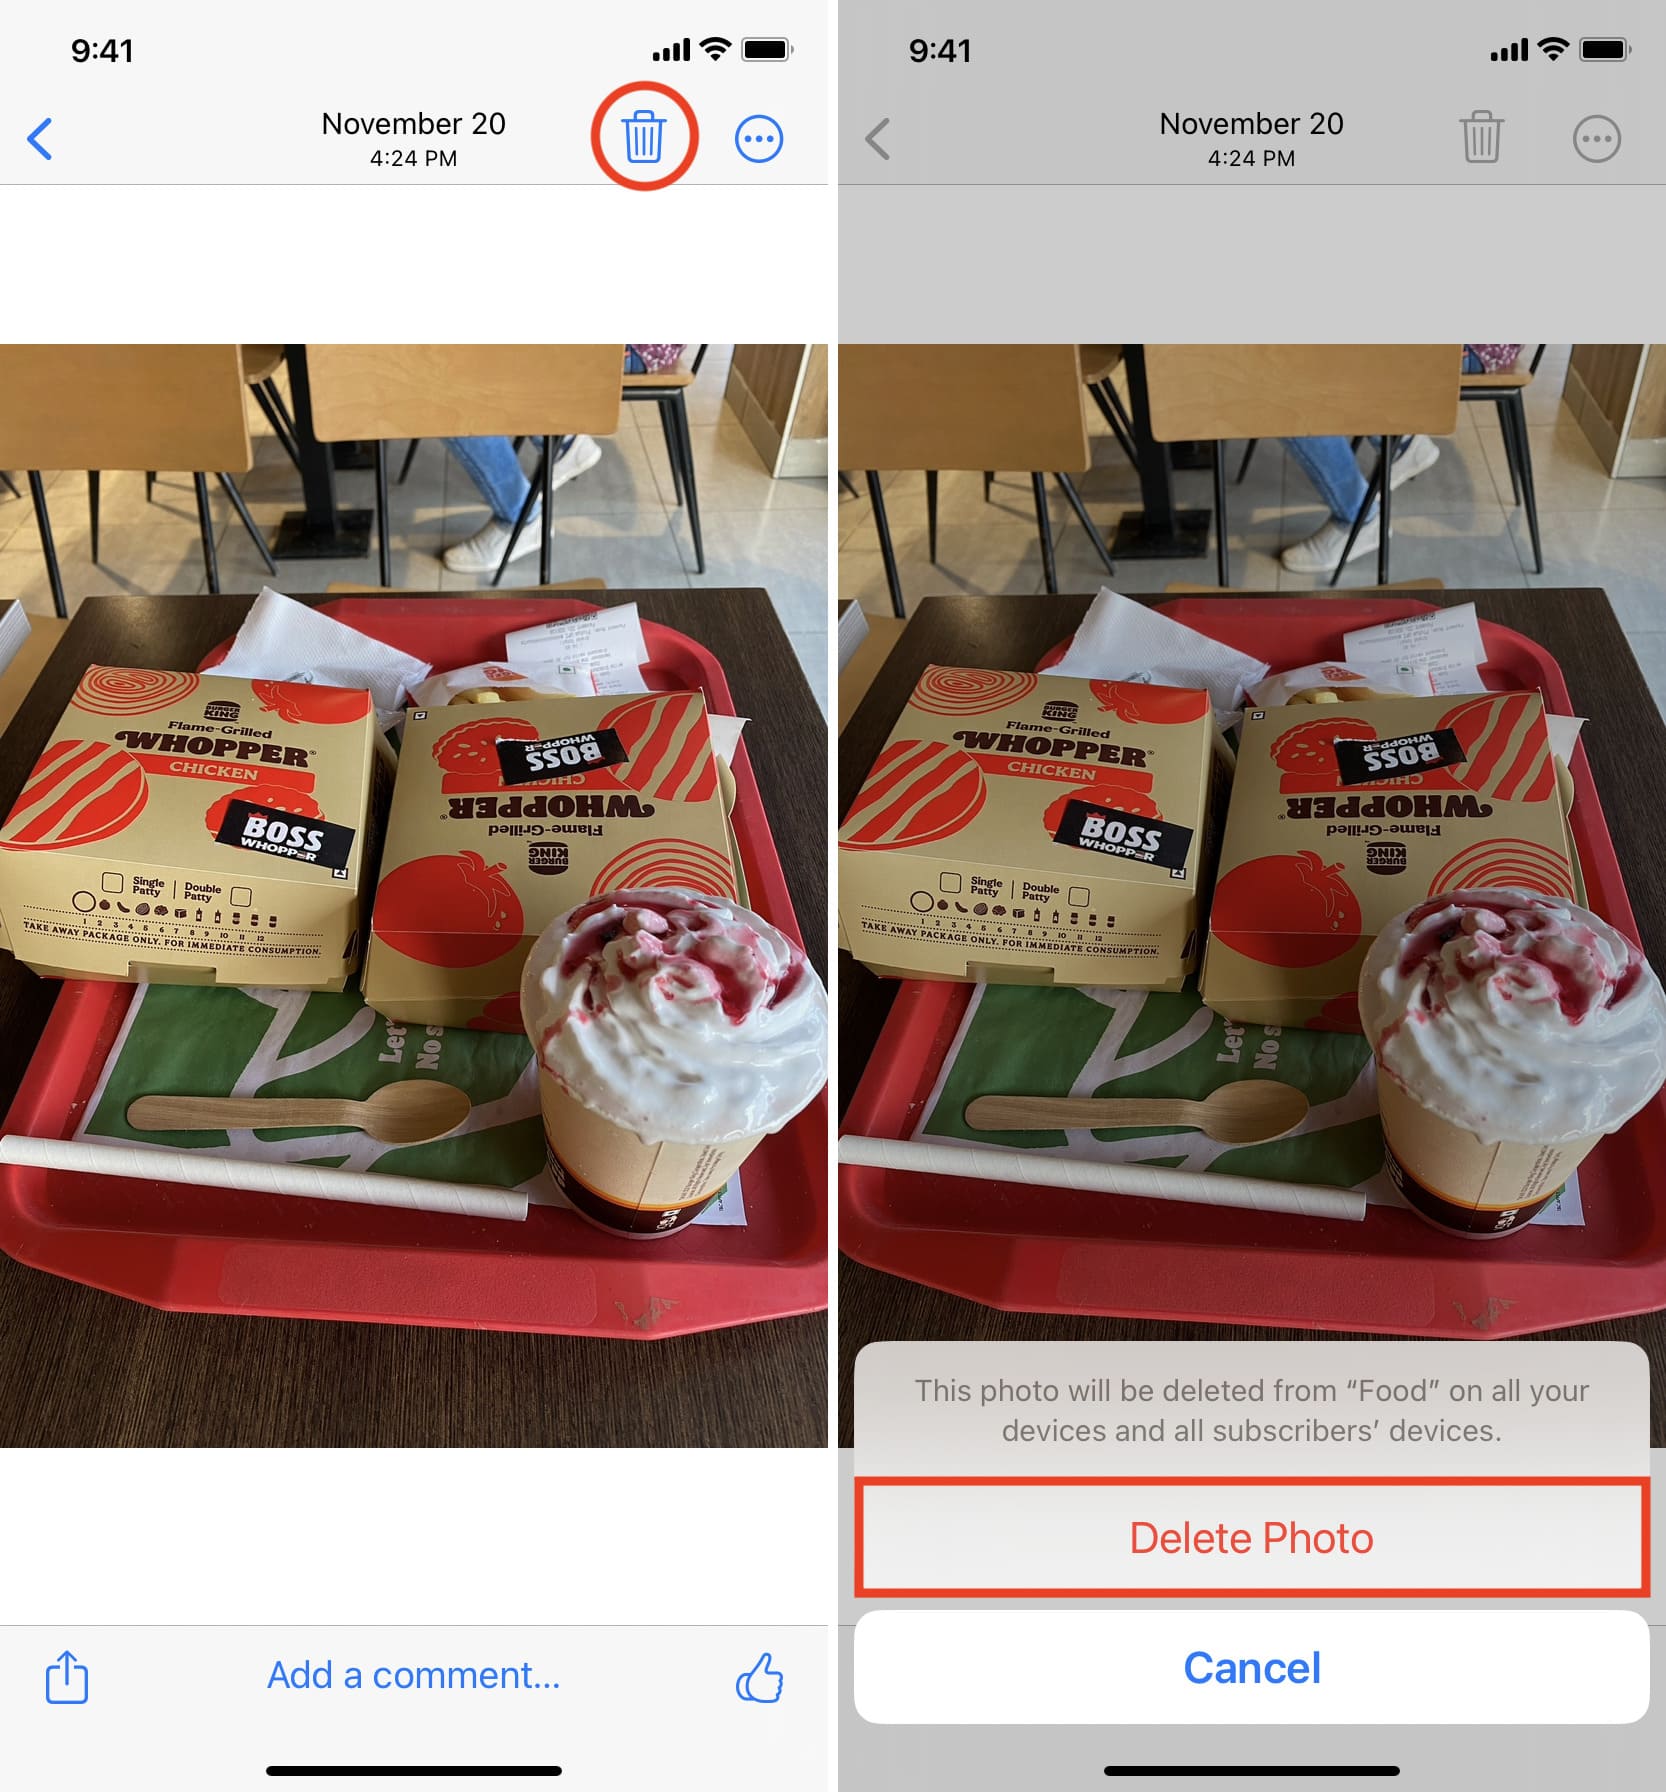
Delete the photo or video
Open the shared album on your device and tap the media you want to remove from the public website. From here, tap the trash can icon and hit Delete Photos. This image will be removed from that particular shared album and also from the public website. When anyone with the shared album website link revisits that link or refreshes it, that photo won’t show up any longer.
Finally, if you entirely delete that shared album, it will also remove its corresponding public website. Here’s how to do that:
- Go inside the shared album and hit the People icon.
- Tap Delete Shared Album.
Yes, there are dozens of sites and services for sharing photos. But for quickly sharing a specific set of photos, for free, we are not sure many of them are better suited than this.
Related tips: