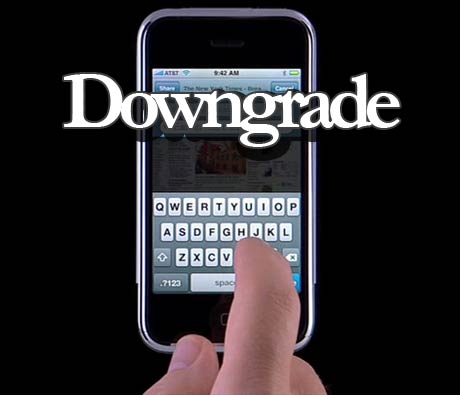
This step by step guide will show you how to downgrade your iPhone iOS 4.0.2 to iOS 4.0.1. These steps are pretty simple but there is one major requirement: you must have your SHSH files saved on Saurik's server. There is absolutely no way around it. If you don't have your SHSH, you won't be able to downgrade your iPhone.
In this tutorial, we will see how to downgrade the iPhone from 4.0.2 to 4.0.1 but the steps are the same if you want to downgrade to iOS 4 or even 3.1.3.
There are several methods used to downgrade the iPhone. We will learn the method that uses TinyUmbrella. No file editing will be necessary.
How to Downgrade from iOS 4.0.2 to 4.0.1
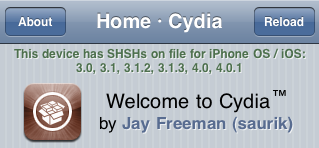
Step 1: Let's download your SHSH blobs from Saurik's server to your computer. To do so, download TinyUmbrella and plug your iPhone in. Select the "Advanced Options" box. Also select the firmware version to which you wish to downgrade. Finally, select "Cydia" under "Request From". Then hit "Save My SHSH". This will grab your SHSH files from Saurik's servers and save them on your computer.
Step 2: Download the firmware to which you wish to downgrade to from our iPhone downloads section. Save it to your desktop.
Step 3: Put your iPhone in DFU Mode. To do so, launch iTunes and plug your iPhone in. Press and hold the Home and Power button together for 10 seconds. After 10 seconds, release the Power button while still holding the Home button until iTunes pops up and says it has found an iPhone in recovery Mode.
Step 4: Run TinyUmbrellaand click the "Display SHSHs" button to make sure your SHSH blobs were downloaded to your computer. Once done, click "Start TSS Server".
Step 5: Now we're going to restore to the firmware you want. To do so, launch iTunes and plug your iPhone in. Hold to SHIFT key (Windows only) or ALT/Option key (Mac only) while clicking on Restore. Make sure you hold the key while clicking Restore. A window will open. Simply select the firmware you downloaded in step 2.
Step 6: Your iPhone will start the restore process. You will most likely get several errors (error 1011, 1013, and 1015) but that's ok, don't worry about those.
Step 7: Finally, we need to get your iPhone out of recovery mode. To do so, simply click "Kick Device Out of Recovery" in TinyUmbrella.
Done!
You should now be back on a previous iOS, giving you the ability to jailbreak and unlock.