Mac

Stay up-to-date on the latest Mac news, and tutorials. Get expert tips and tricks to optimize your Mac’s performance and learn about the latest Apple products and software updates. Discover the best Mac apps and accessories to enhance your user experience.

How to redeem iTunes or Apple Music gift cards

If you don't set up one of the supported payment methods for your Apple ID, you won't be able to upgrade your iCloud storage or buy music, movies and TV shows from iTunes Store, apps from App Store and Mac App Store, books and audiobooks from iBooks Store and more.

That's where an iTunes or Apple Music gift card should come in handy.

Upon redeeming, the amount shown on the card is added to your Apple ID in the form of good-as-cash credit that can be used for each purchase you make in Apple's content stores.

In this tutorial, you'll learn about the types of gift cards Apple supports, how they should be used, as well as how to redeem your iTunes or Apple Music gift card and apply the credit toward an individual Apple Music membership or to top up your Apple ID balance.

About iTunes and Apple Music gift cards

iTunes gift cards and Apple Music gift cards can be purchased from Apple, PayPal, Amazon, eBay, Best Buy and a number of other retailers. iTunes gift cards typically come in $25, $50 and $100 denominations. Apple Music gift cards are currently available in $30 and $100 denominations for three or twelve months of service, respectively.

You can buy them in physical form for delivery via mail or opt for a digital gift card, in which case your redemption code will be delivered straight to your inbox.

The 16-digit redemption code is hidden underneath the label on the card's back.

The redemption code always starts with an “X”.

The redemption code may appear in different places on the back of your card.

Redeeming an iTunes gift card adds store credit to your Apple ID.

Store credit is used for each purchase you make in iTunes Store, App Store or iBooks Store until it's gone. iTunes billing system always uses your store credit first, as long as the value of the item that you're buying is less than or equal to the value of your credit balance.

If you don't have any store credit left, the payment method that you designate when you sign up for an Apple ID is charged for the entire purchase.

You can use your store credit to buy the following items:

Apps from App Store and Mac App Store In-App Purchases Songs, albums, movies, TV shows and more from iTunes Store Books and audiobooks from iBooks Store iCloud storage

Store credit cannot be used to purchase more gift cards or iTunes Gifts.

NOTE: Some purchases might require that you have a credit card on file, even if you're using your credit balance to make the purchase. For instance, you must have a credit card on file in order to use store credit to pay for your iCloud storage upgrades.

You cannot use store credits for:

App gifting—When you gift an app or media item to someone else the payment method on file is always billed for the entire purchase, not the store credit. Family Sharing—You cannot share your store credit with other family members.

Even if a Family Sharing member buys something and the family organizer has store credit on their account, the item cost is still billed to the organizer's payment method on file rather than being deducted from their store credit.

TUTORIAL: How to gift apps

If a Family Sharing member with a credit on their account buys something from Apple's content stores, the amount is billed to their own account unless there's a remainder, in which case it bills to the family organizer's payment method.

You can use the credit from your Apple Music gift card to:

Sign up for a new Apple Music membership Extend your Apple Music membership by the number of months shown on the card Credit the amount to your Apple ID, like an iTunes gift card

Read Apple's support document for more on how iTunes Store purchases are billed.

How to redeem iTunes or Apple Music gift cards on iPhone and iPad

1) Open iTunes Store, App Store or iBooks on your iOS device.

2) In iTunes Store, App Store or iBooks, tap the Featured tab, then scroll to the very bottom of the screen and tap the Redeem option.

3) Sign in with the Apple ID that you use for iTunes Store or Apple Music purchases.

Tip: You can quickly get to the redeem feature by visiting the link below on your Apple device:

To redeem an iTunes gift card, follow this link To redeem an Apple Music gift card, follow this link

TIP: If your device has 3D Touch, you can press the iTunes Store or App Store icon and select the Redeem option from the Quick Actions menu on your Home screen.

4) Choose whether you'd like to type in your code manually or have the card scanned:

Scan the redemption code—If you have a physical gift card with a box around the code, use this option to redeem it via your built-in camera. Tap Use Camera, then hold the back of the card up to your iPhone's camera until it scans the code. Only gift cards with a focus box around the redemption code are redeemable via a camera. This feature is not available in all countries and regions. Type in the redemption code manually—Tap the field labeled ”You can also enter your code manually”, then peel off the label on the back of the card and type in the redemption code or paste the code from your purchase confirmation email.

When you redeem an iTunes gift card, your updated store balance appears onscreen. An error message appears if you try to redeem a gift card that's already been used.

Upon redeeming an Apple Music gift card, you're given the choice between topping up your iTunes store credit or using the code toward an individual Apple Music membership.

This is what happens if you choose to use the code for your Apple Music membership:

Apple Music members—Applying the credit to your ongoing membership extends your date of renewal by the number of months shown on the card. Apple Music non-members—Applying the credit signs you up for a membership.

If you've never been an Apple Music member, you can still get your free three-month trial in addition to the number of months your Apple Music gift card card is worth.

5) In the upper-right corner, tap Done to finish the process.

If you'd like to redeem another iTunes or Apple Music gift card, tap Redeem Another Code.

TIP: If you received your gift card via email, click the Redeem Now link in the email.

To get information about your iTunes Store or Apple Music balance:

iTunes Store balance—You can find your store balance underneath your Apple ID at the bottom of the Featured tab in iTunes Store, App Store or iBooks on your iOS device. Apple Music balance—To view your Apple Music membership, go to Settings → [your name] → iTunes & App Store and tap your Apple ID at the top of the screen. Tap View Apple ID, then Subscriptions. From the list, choose the subscription that you want to see more information about.

Your account balance automatically updates in iTunes Store, App Store and iBooks Store after redeeming the card. If your store credit does not update automatically, sign out and back in on all of your devices for it to refresh properly.

How to redeem Apple Music gift card in iOS Music app

1) Open the Music app on your iOS device.

2) Switch to the For You tab at the bottom of the screen.

3) Tap your profile image in the upper-right corner.

4) Tap the Redeem option.

5) Use your iPhone to scan the redemption code on the back of the card or enter it manually, then tap Redeem to continue.

7) Tap Done when finished redeeming the code.

How to redeem Apple Music gift card on Android

1) Open the Apple Music app on your Android device.

You can download Apple Music for Android free from Google's Play Store.

2) Tap tap the Menu icon in the upper-left corner.

3) Tap your Apple ID.

4) Tap Redeem.

5) Enter the code from the back of the card, then tap Redeem again.

An error message will appear if you try to redeem a card that's already been used.

How to redeem iTunes or Apple Music gifts card on Mac and Windows PCs

1) Open iTunes on your Mac or Windows PC.

2) Choose Music, Movies, TV Shows or Apps from the popup menu near the top-left corner, then click the Store tab near the top of the screen.

3) Click the Redeem link under the Quick Links heading on the right side.

Tip: Alternatively, choose the Redeem option from iTunes' Account menu.

To get to the Redeem feature faster, visit the link below on your computer:

To redeem an iTunes gift card, follow this link To redeem an Apple Music gift card, follow this link

4) Enter the password for the Apple ID you use for iTunes Store purchases or your Apple Music membership, then press the Return or Enter key on your keyboard, or click the Sign In button.

5) Choose how you'd like to redeem the code on the card:

Scan the redemption code—Use this option to redeem a physical card via your Mac's built-in camera. Click the Use Camera button, then hold the back of the card up to the FaceTime camera until it scans and redeems the code. Only gift cards with a focus box around the code are redeemable via a camera. This feature is not available in all countries and regions. Type in the redemption code manually—Click inside the field labeled ”You can also enter your code manually,” then type in the redemption code from the back of the card or paste it from your purchase confirmation email.

6) Click Redeem to continue.

You'll be asked if you'd like to apply the credit toward your individual Apple Music membership.

If not, select the option Use Credit for iTunes or App Store to add the amount shown on the card to your Apple ID store balance like a regular iTunes gift card.

Your updated store balance appears onscreen.

7) Click Done to finish redeeming the card.

To redeem an iTunes gift card in iBooks or App Store on your Mac:

iBooks—Open the iBooks app from your Dock, Launcher, Spotlight or the Applications folder. In the upper-left corner, click the iBooks Store button, then click the Redeem link underneath the Quick Links heading on the right side. App Store—Open the App Store app from your Dock, Launcher, Spotlight or the Applications folder. Click the Featured tab at the top, then click the Redeem link underneath the Quick Links heading on the right side.

An error message appears if you try to redeem a card that's already been used.

Related tutorials

You may find the following how-tos useful:

How to gift iTunes or App Store credit on iPhone and iPad How to redeem iOS app promo codes How to redeem Apple TV app promo codes Redeeming iTunes gift cards with iPhone's camera Redeeming iTunes gift cards with Mac's camera That's all, folks!

If you have a question, post a comment below and we'll do our best to answer it. Please share this tutorial on social media and pass it along to the folks you support.

Submit your ideas regarding future coverage via tips@iDownloadBlog.com.

Things 3 is out with overhauled interface and multiple new features

German developer Cultured Code on Thursday released Things 3, a major new iteration of its powerful personal task manager for iPhone, Apple Watch, iPad and Mac. Things 3 brings out a beautiful timeless new design with delightful interactions and animations. Aside from the new look and feel, the refreshed app is packed to the gills with a host of new features.

Released as three separate apps (they've kept the current pricing), Things 3 is Cultured Code's first paid update for existing users since versions 1.0.

Here's what developers had to say about the app's gorgeous new UI:

The all-new Things comes with an all-new design. It's not just how it looks—but also how it works, and how it feels. The interactions are delightful. The animations are smooth. The content is more structured. The concepts are clearer.

Open a to-do and you'll immediately get a sense of how the new apps feel.

Nicely animated transitions expand the selected to-do into an empty white piece of paper. You can add additional details to your to-do, neatly tucked away in the corner until you need them.

“There are no distractions here, it’s just you and your thoughts,” said developers.

The choice is yours: you can create either a simple to-do that looks like text on a piece of paper or opt for a richer to-do which may include additional details such as tags, checklists (a new feature for to-dos in Things 3), a start date, a deadline and so forth.

Speaking of to-dos, Things 3 introduces an all-new Magic Plus Button.

Found in the corner of the screen, you can tap it to quickly add a new to-do or actually drag the button to a particular list in order to generate a to-do in a specific location. Plus, managing to-dos is now way easier than before with expanded support for gestures, like dragging and dropping, swiping, tapping to expand and more.

Seasoned Things users will be delighted to know that developers have implemented one of the most-requested features: time-based reminders. For those to-dos you absolutely cannot miss, adding a reminder will give you peace of mind.

While scheduling a to-do in Jump Start, click Add Reminder and set the time. There are three ways to set the time: manually, using the app's natural language parser (just type “Wed 8pm” or some such, and you're all set) or you can speak to Siri (“Remind me to call Seb at 5am.”)

Watch the promotional video for Things 3.

https://www.youtube.com/watch?v=2R6o5t0VK_A

Things 3 now supports headings to break up complex projects into sections.

And with the app's Magic Plus Button, you can create and place headings in new projects like a pro. The app's cleaner design extends to your Today and Upcoming sections which now combine calendar events and to-dos into one unified view with a timeline at the top, giving an outline of your schedule.

A new This Evening section is your at-a-glance overview of any to-dos that you won’t get to until later in the day, like things you can only do when you get home. The This Evening section is a handy way to keep these to-dos separate from the rest, in their own discrete list.

And to help you find a needle in the haystack, Things 3 now includes a Quick Find feature.

Just pull down on any list to reveal search, which can now find content across the entire app. Quick Find also includes handy shortcuts to your to-dos, lists, tags and more.

Type Travel, another new feature in Things 3, lets you navigation to any project, area or to-do in the app. On iPad, you can now swipe away the sidebar and focus on just the current list you’re working on, both in portrait and landscape orientations.

On your Mac, Things now has a Slim Mode which cuts out distractions so you can focus on the task at hand. To enter this mode, collapse the sidebar with a two-finger swipe. Slim Mode is especially great when you’re working in macOS's Split View multitasking mode.

You can even open multiple windows in Slim Mode and drag and drop items between them.

https://culturedcode.cachefly.net/things/videos/2017-05-03-allnewthings-when/video.mp4

Developers have completely rewritten core layers of the apps, which are now shared between macOS and iOS for increased reliability. The Apple Watch app has been updated as well (it now shows checklists and headings), there's a new structure for Areas in the iOS app and you can now import data from Wunderlist or OmniFocus into Things 3.

And with TouchBar support, owners of the new MacBook Pro can take advantage of convenient access to the app's most-used commands.

Things is fully integrated with all the latest iOS technologies: Apple Watch, Calendars, Siri, Reminders, Today Widget, Quick Actions, Action Extension, Handoff and Notifications.

The apps all stay updated via Things Cloud, which is the push sync service that Cultured Code custom-built for the app. Unfortunately, iCloud syncing is not supported in Things.

For the complete overview of what's new in the app, visit the official Things website.

Things 3 for iPhone and Apple Watch is $9.99 on App Store.

Things 3 for iPad is $19.99 on App Store.

Things 3 for Mac is $49.99 on Mac App Store.

To celebrate the launch of Things 3, all apps are 20 percent off until next Thursday, May 25.

A 14-day trial of Things for Mac is available via the Cultured Code website.

Tim Cook talks assistive technologies with Accessibility evangelists

Apple CEO Tim Cook sat down with three YouTubers who are Accessibility evangelists to discuss the importance of the assistive technologies built into the company's iOS, macOS, tvOS and watchOS platforms.

James Rath, a legally blind filmmaker; Tatiana Lee, a model, actress and lifestyle blogger; and Rikki Poynter, a North Carolina-based writer and deaf awareness activist, all published their video interviews with Apple's chief on their respective YouTube channels on Wednesday.

James Rath interview

https://www.youtube.com/watch?v=kXy8KcONTSs

Rikki Poynter interview

https://www.youtube.com/watch?v=t6_iOVSavdE

Cook explained to Poyter what Apple is all about when it comes to Accessibility:

Apple is founded on giving people power to create things, to do things that they couldn't do without those tools. And we've always viewed accessibility as a human right. And so just like human rights are for everyone, we want our products to be accessible for everyone.

He added that accessibility should be a basic human right:

It's a basic core value of Apple. We don't make products for a particular group of people. We make products for everybody.

We feel very strongly that everyone deserves an equal opportunity and equal access. So we don't look at this thing from a return on investment point of view—I've been asked that before. The answer is no, I've never looked at that. We don't care about that.

A lot of these Accessibility features, everyone can use. With HomeKit, I use HomeKit every day and control my house with my voice.

“It’s a basic core value of Apple,” said Cook.

Tatiana Lee interview

https://www.youtube.com/watch?v=58ZZFUDIM0g

Lee's whole video was shot with her iPhone 7 and edited using Apple's new app Clips.

Cook did the interviews to honor Global Accessibility Awareness Day, an initiative that promotes inclusion when it comes to creating products, content and experiences for everyone.

The company is currently highlighting apps on App Store that implement Accessibility features.

Lastly, Apple posted seven inspiring videos showcasing how people with disabilities are using assistive technologies built into iPhone, iPad and Mac. For the full overview of the extensive assistive features built into Apple products, check out its dedicated Accessibility webpage.

Bloomberg: upgraded MacBook lineup coming at WWDC next month

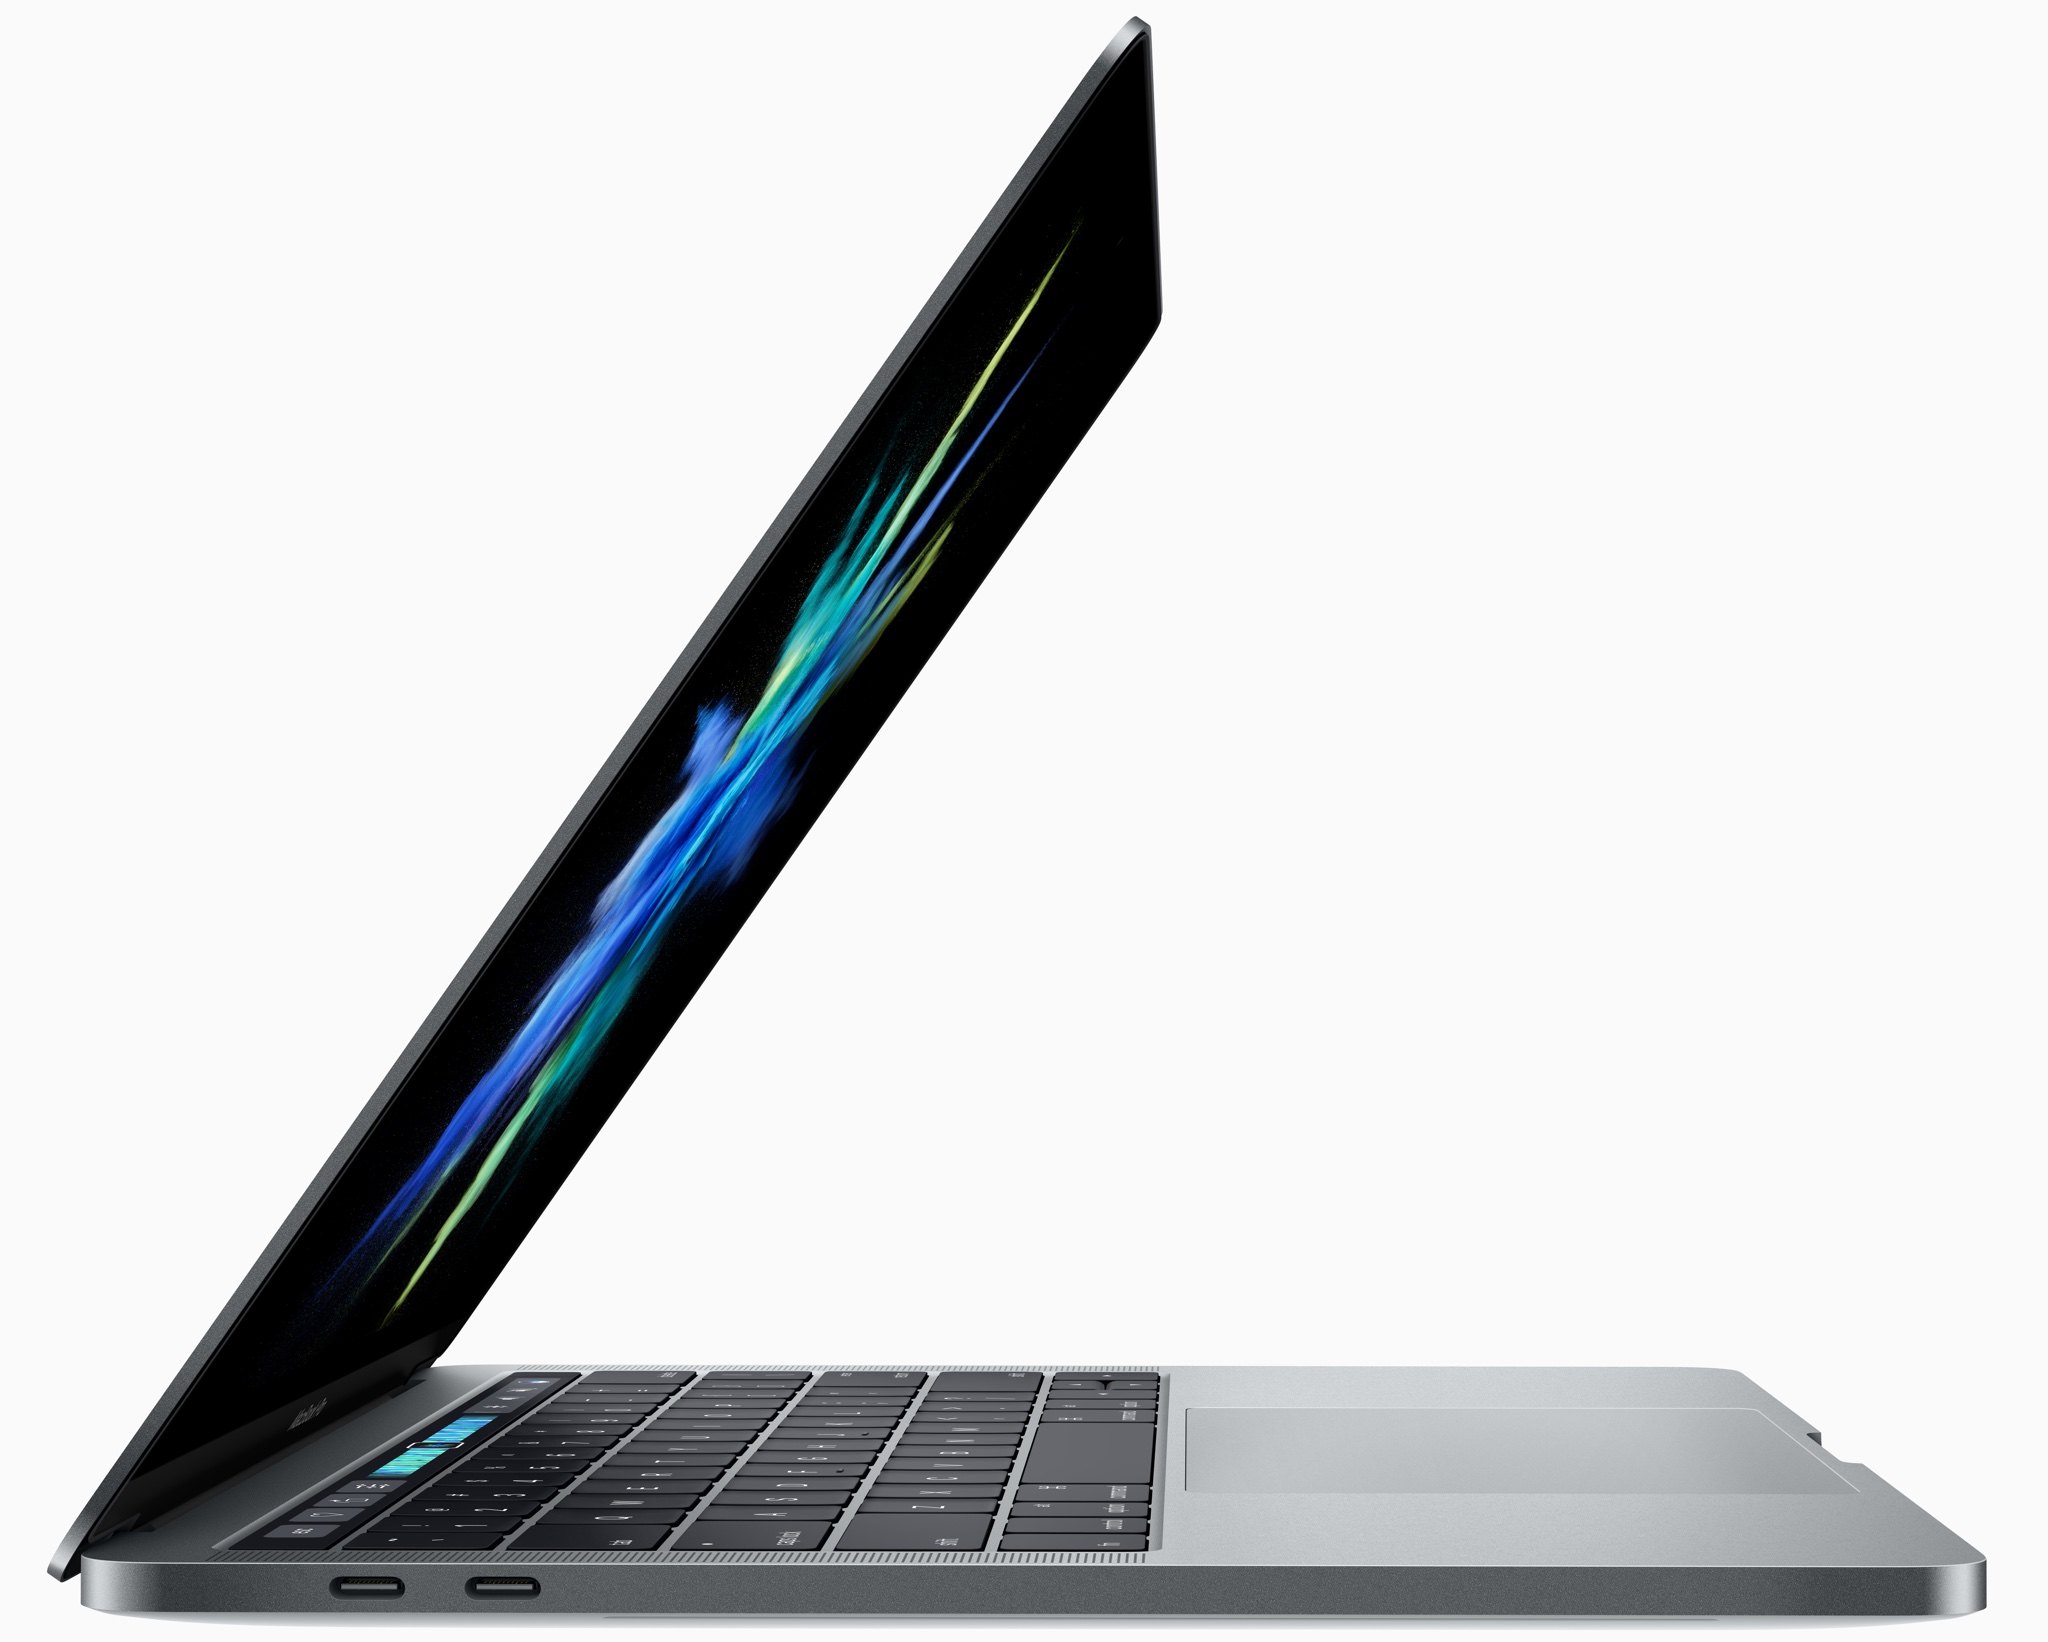
Upgraded MacBook Pro models along with a second-generation twelve-inch MacBook Air with a faster Intel chip and possibly a refreshed MacBook Air are all reportedly coming at Apple's annual conference for app developers next month.

Bloomberg claimed Tuesday that MacBook Pro will get a faster Intel Kaby Lake processor. A new version of the current twelve-inch MacBook would pack in a faster Intel chip, too.

It should be noted that the Mac maker hasn’t announced new hardware at WWDC since 2013, when it launched Mac Pro and updated MacBook Air.

Apple and Intel declined to comment.

Here's a brief overview of the rumored MacBook upgrades:

MacBook Pro—The same looks as the latest model, but with Intel's faster Kaby Lake chips and updated internal architecture. It's unclear if Apple's rumored internally designed ARM-based chip for managing low-power mode is part of the new models. 12-inch MacBook—Last updated in spring 2016 with a rose gold color option, the ultra-thin machine will get a faster Intel chip. MacBook Air—Apple's cheapest laptop has not received a speed boost since 2015, but its sales remain “surprisingly strong”. The company “has considered updating” the MacBook Air notebook with a new processor.

Fun fact: it's been almost seven years since Apple last redesigned the popular Air.

In the March quarter, Apple sold 4.2 million Mac desktops and notebooks, generating fourteen percent more revenue on these systems than in the year-ago quarter.

Previously, it pledged to release a modular Mac Pro system, all-new pro displays, refreshed Mac mini models and major upgrades to its all-in-one iMac desktop with better specifications.

As mentioned, the upgraded Mac notebook lineup may be announced during Apple's WWDC keynote, which takes place on Monday, June 5, at 10am Pacific Time.

Asides from previews of the next major versions of iOS, watchOS, tvOS and macOS, Tim Cook & Co. may provide other updates during the keynote address, including announcements related to the company's rumored AI-driven Siri smart speaker, 10.5-inch iPad Pro model, 4K-capable Apple TV and the discontinuation of the iPad mini lineup.

How to delete old Time Machine backups

Do you use macOS's incredibly useful zero-configuration Time Machine feature to keep the personal files, settings and documents residing on your Mac safely backed up to an external disk? If so, is your backup disk nearly full? The best way to make room on your backup disk is to delete old Time Machine backups using Finder.

For example, the disk in my AirPort Time Capsule is nearly full because I have backups dating back to 2010. In this day and age of iCloud Drive and other cloud-storage services, keeping years worth of backups is kind of useless. That precious disk space could be put to better use for storing your photos and videos, for example.

In this tutorial, you will learn how to delete old Time Machine backups to help clean up your disk and regain storage space on it.

Deleting old backups should be your first order of business in situations when your Time Machine backup disk runs out of space. By default, Time Machine deletes older backups to make room for new ones as your backup disk fills up.

There are a couple ways to remove entire backups created on specific dates. We will describe both, but note that Apple seem to prefer the first method

How to delete old Time Machine backups

1) Click the Time Machine icon in your Menu Bar to enter Time Machine.

2) Navigate through the interface to the desired date.

3) Once you have located the day you want to delete from your backup, click on the gear icon and select Delete Backup.

4) You will be asked to confirm you indeed want to delete the backup, and you may be ask to enter your administrator password too. Once done, the backup for that specific day will be deleted.

How to remove old Time Machine backups using Finder

1) Click the desktop and open a new window by selecting New Finder Window from the File menu, or press the Command (⌘)—N keys on your keyboard.

2) Connect the disk containing your Time Machine backups to the computer and wait until its name appears underneath the Devices section in the Finder sidebar, then click it.

You may be asked to enter your administrator name and password to continue. If you use AirPort Time Capsule, you may be asked to enter a password to access the backup disk.

3) Navigate to the “Backups.backupdb” folder on your Time Machine backup disk as you would other folders. It should be a top-level folder of your backup drive.

4) Once inside the “Backups.backupdb” folder, navigate to the sub-folder named with your Mac computer's name. For instance, if your Mac is named “iMac Retina” in System Preferences, Time Machine will store backups inside the “iMac Retina” sub-folder.

TUTORIAL: How to change your Mac computer's name

5) You will see a bunch of sub-folders, each prefixed with the date of the backup in the YYYY-MM-DD format. For example, backups of your iMac created on April 19, 2017 would we stored in the sub-folder with the name beginning with “2017-04-19”. To delete a desired backup sub-folder, right-click or Control (⌃)-click it, then choose Move to Trash from the popup menu.

This will delete all copies of a backed-up file or folder from your Time Machine backup disk.

6) Repeat the process for other full-day backups you'd like to remove. When done, disconnect the disk by selecting its icon on the desktop, then choose Eject from Finder's File menu.

While you can safely delete sub-folders within the “Backups.backupdb” folder, you are not allowed to delete individual items inside the dated folders.

You're wholeheartedly discouraged from using Terminal or any other app other than Finder to move, copy or delete items from the Backups.backupdb folder.

You also cannot delete items from local snapshots stored on your internal drive.

To save space on the backup drive, why not exclude individual files or entire folders of files—like your Applications or Downloads folder—in the Time Machine preferences window?

That's all, folks!

If you have a question, post a comment below and we'll do our best to answer it. Please share this tutorial on social media and pass it along to the folks you support.

Submit your ideas regarding future coverage via tips@iDownloadBlog.com.

macOS 10.12.5 fixes issues with USB headphones & Windows 10, lays the groundwork for future macOS releases

Apple today released the mostly maintenance macOS Sierra 10.12.5 software update alongside updates to iOS, watchOS and tvOS. According to release notes accompanying the download, 10.12.5 fixes issues with USB headphones and Windows 10 installations while laying the groundwork for future macOS releases.

Plus, this version of macOS “enhances compatibility of Mac App Store with future software updates.” Apple is expected to preview the next major version of macOS at its annual developers conference next month.

macOS Sierra 10.12.5 can be installed via the Mac App Store's Updates tab.

Read Apple's support doc for detailed information about the update's security content.

Safari 10.1.1, which comes included in the 10.12.5 update, patches for more than half a dozen WebKit-related vulnerabilities while fixing yet another instance of address bar spoofing that could fool users into believing they're visiting a genuine rather than a maliciously crafted webpage designed for phishing attacks.

It's available for OS X Yosemite 10.10.5, OS X El Capitan 10.11.6 and macOS Sierra 10.12.5.

A minor update to iTunes for Mac and Windows was also pushed today.

iTunes 12.6.1 comes with unspecified app and performance improvements along with a fix for a WebKit exploit on Windows 7 and later which could result in arbitrary code execution after processing maliciously crafted web content.

Safari 10.1.1 for Mac fixes yet another instance of address bar spoofing

Safari 10.1.1, pushed out as part of today's minor macOS Sierra 10.12.5 software update, fixes yet another instance of address bar spoofing. This is good news because the browser can now protect you from phishing attacks that would typically attempt to fool you into believing you were visiting a genuine website rather than a maliciously crafted webpage.

According to the company's security document, the software fixes a flaw where visiting a malicious website may lead to address bar spoofing. “An inconsistent user interface issue was addressed with improved state management,” states Apple.

Even folks who are extremely mindful of phishing are susceptible to address bar spoofing.

The sophistication of today's phishing attacks came to light when Chinese security researcher Xudong Zheng demonstrated how easily users could be fooled into visiting a fake website that seemingly shows the correct URL in the address bar.

To protect yourself from such attacks in the future, manually type in the URL of the website you want to visit or choose your favorite website from Safari's Bookmarks menu. Of course, you should avoid clicking any suspicious links in an email message, even if they appear to originate from a contact you personally know.

The patched vulnerability was discovered in Safari for macOS, not for iOS.

Apple credits Zhiyang Zeng and Yuyang Zhou of Tencent Security Platform Department with the discovery of the vulnerability CVE-2017-2500 and Zhiyang Zeng of Tencent Security Platform Department with the discovery of the vulnerability CVE-2017-2511.

Moreover, Safari 10.1.1 fixed an issue in Safari's history menu that could lead to an application denial of service after visiting a maliciously crafted webpage. The issue was addressed through improved memory handling.

Lastly, Safari 10.1.1 also includes patches for as many as seven vulnerabilities that were discovered in the WebKit rendering engine, five of which dealing with universal cross site scripting, while fixing an issue with WebKit's Web Inspector where an app could execute unsigned code.

Safari 10.1.1 is available for OS X Yosemite 10.10.5, OS X El Capitan 10.11.6 and macOS Sierra 10.12.5. Apple also released a minor update to iTunes for Mac and Windows today.

iTunes 12.6.1 contains unspecified app and performance improvements and a fix for a WebKit exploit on Windows 7 and later which could result in arbitrary code execution after processing maliciously crafted web content.

iTunes 12.6.1 with minor app and performance improvements now available

Alongside public releases of the iOS 10.3.2, watchOS 3.2.2, tvOS 10.2.1 and macOS Sierra 10.12.5 software updates for iPhone, iPad, iPod touch, Mac, Apple Watch and Apple TV, Apple earlier this morning also posted a minor update to iTunes for Mac and Windows PCs.

iTunes 12.6.1 contains only minor app and performance improvements, according to Apple's release notes.

A security document reveals that the app fixes a WebKit exploit on Windows 7 and later which may allow arbitrary code execution after processing maliciously crafted web content.

“Multiple memory corruption issues were addressed with improved memory handling,” Apple states. The vulnerability was discovered by the user “lokihardt” of Google Project Zero.

Satechi’s new hub gives your MacBook Pro ports for USB, 4K HDMI, SD/microSD & more

Popular Apple accessory maker Satechi today launched a sleek and compact hub that adds a bunch of missing ports to your MacBook Pro (late-2016 model), including two USB 3.0 ports (so you can charge your iOS devices without having to purchase a new cable), an HDMI port with support for 4K video output, a pair of SD/microSD memory card readers and more.

The hub has two Thunderbolt 3 dongles that take up both USB-C ports of the new MacBook Pros with Touch Bar (don't worry, you also have an additional passthrough Thunderbolt 3 port).

Here's a quick overview of all the ports on this hub:

Thunderbolt 3 (1x)—Data transfer speeds up to 40 Gb/s are supported. In addition, the port supports a single 5K display or two 4K external displays at 60Hz with passthrough charging for 13 (61W) and 15-inch (87W) MacBook Pro models HDMI (1x)—Video output in 1080p at 60Hz or 4K at 30Hz is supported USB 3.0 (2x) and USB-C (1x)—Transfer speeds of up to 5 GB/s are supported SD/microSD (1x)—Transfer speeds of up to 104 MB/s are supported

And now, watch Satechi's promotional video for the device.

https://www.youtube.com/watch?v=sTq9PorggHY

Priced at $100, the aluminum-clad Type-C Pro Hub is compatible with both Touch Bar and non-Touch bar MacBook Pro models. As a bonus, Satechi is offering these in two finishes, Silver and Space Gray, to complement your notebook.

You can buy the new Type-C Pro Hub starting today on Amazon..