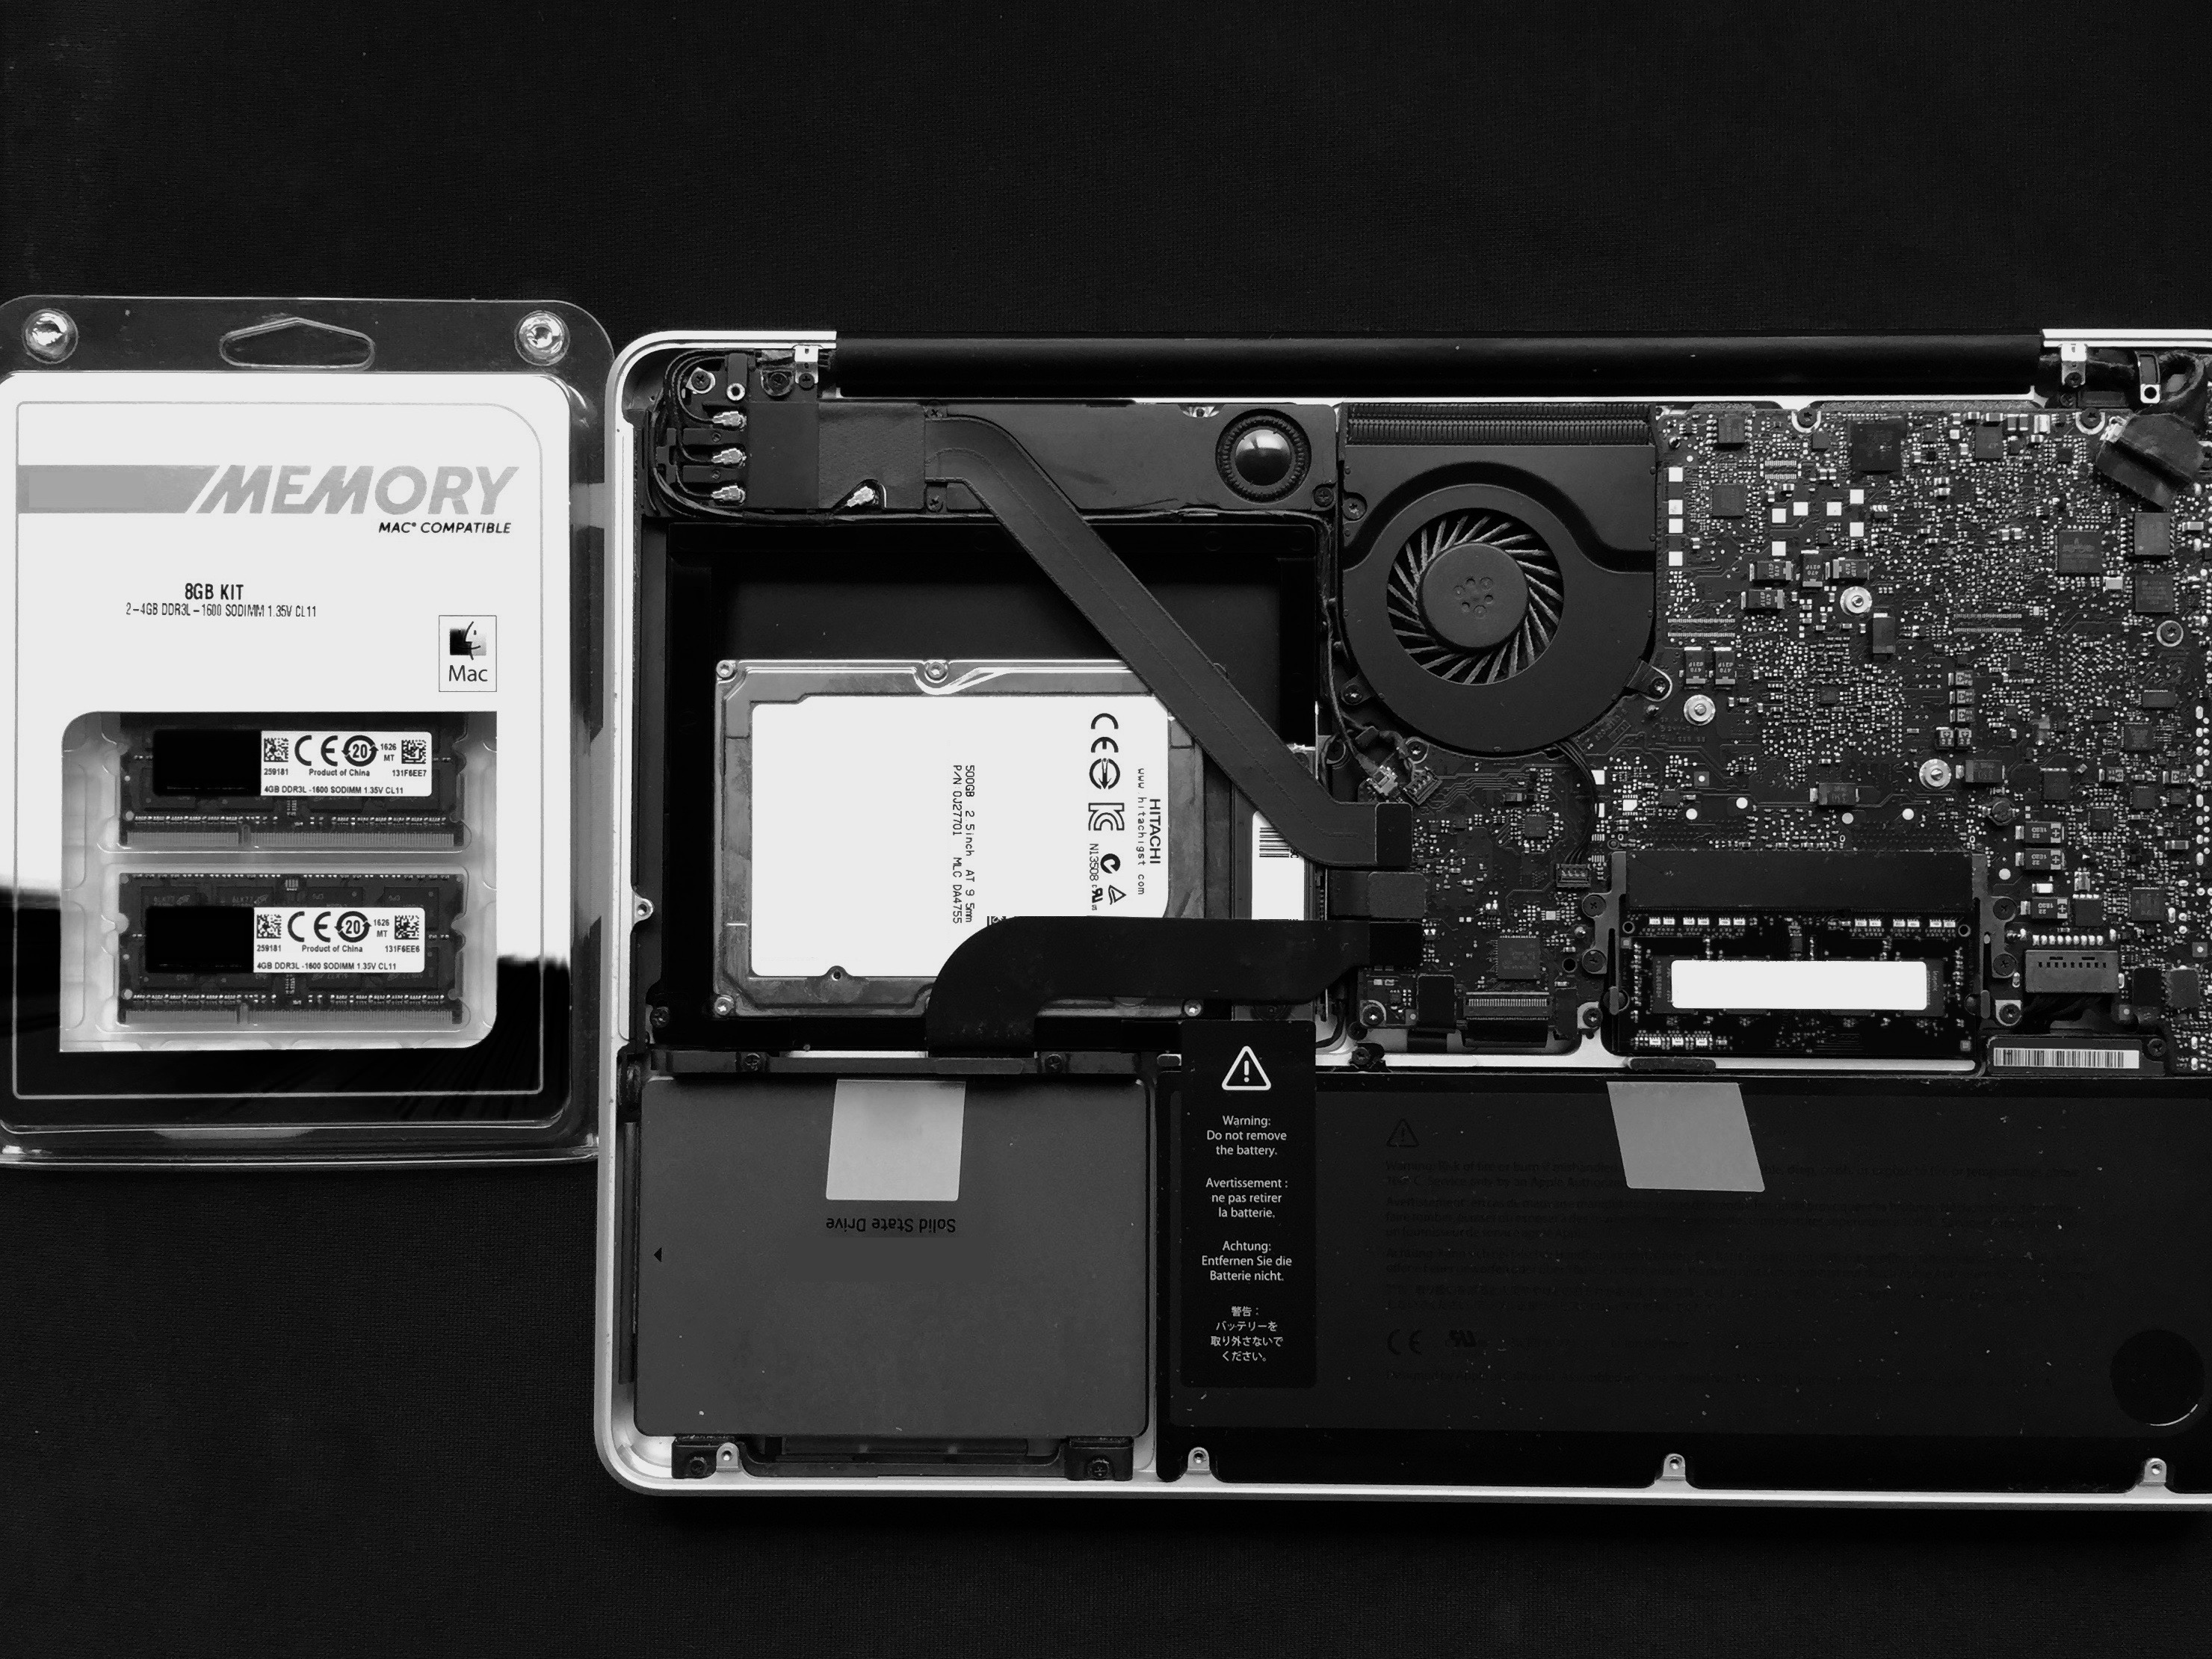
If you’ve been experiencing strange behaviour from your computer, or have recently upgraded or replaced your RAM, it might be a good idea to test its integrity. This ensures that it is installed correctly, that no part of it has failed, and that it has no intermittent problems.
I personally test my RAM after any internal modifications to my computers, using the stalwart utility for the purpose, MemTest86. It’s a memory diagnostic utility which has been around for ages, and is still receiving updates for UEFI systems.
The tool works on Linux, Windows, and Mac, so you can test the RAM of pretty much any computer you have. For the purposes of this guide, I will be using Mac. The Linux process is very similar, but for that and Windows, I advise you check the MemTest86 documentation that comes with the software download.
I have split the guide into three parts: creating the MemTest86 USB, running the test, and reverting the USB afterwards (if you don’t wish to keep it for future testing that is). The reason it’s best to make a USB to test, rather than running it from within the OS, is that it frees up the full amount of memory for testing. When booted to an OS, much of the RAM is allocated and cannot be efficiently tested for errors.
Creating the USB
1) Download the latest version of MemTest86 for free from the official website. You do not need to buy a Pro copy. Place the downloaded .img file on your Desktop.
2) Insert a USB stick and ensure any data on it is backed up, as we will be wiping the entire drive.
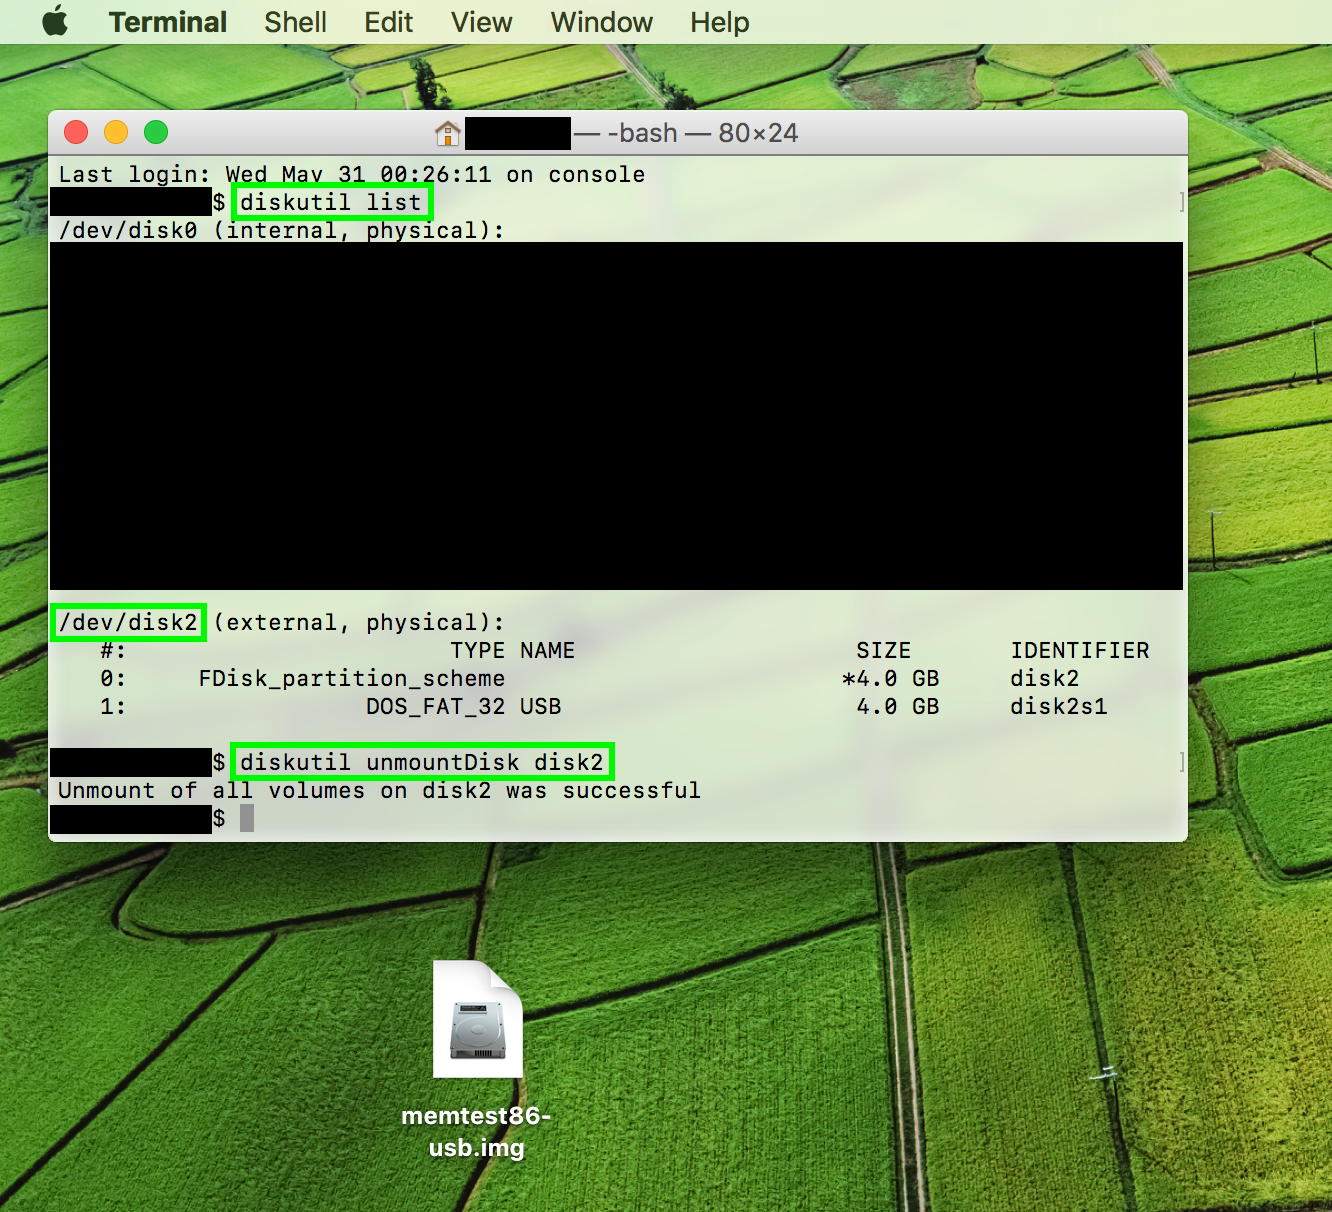
3) Open a Terminal window and issue the following command to see a list of your connected drives:
diskutil list
4) Make a note of which disk number your USB has been assigned. As you can see in the image below, my USB is disk2.
Your USB may have a different disk number assigned to it. Make sure you have the right one or you could end up wiping the wrong disk by mistake!
5) Enter the following Terminal command, replacing the N in diskN with your disk number, noted down in Step 3:
diskutil unmountDisk diskN
As you can see from the above image, Terminal should respond with a successful unmount of the disk in question.
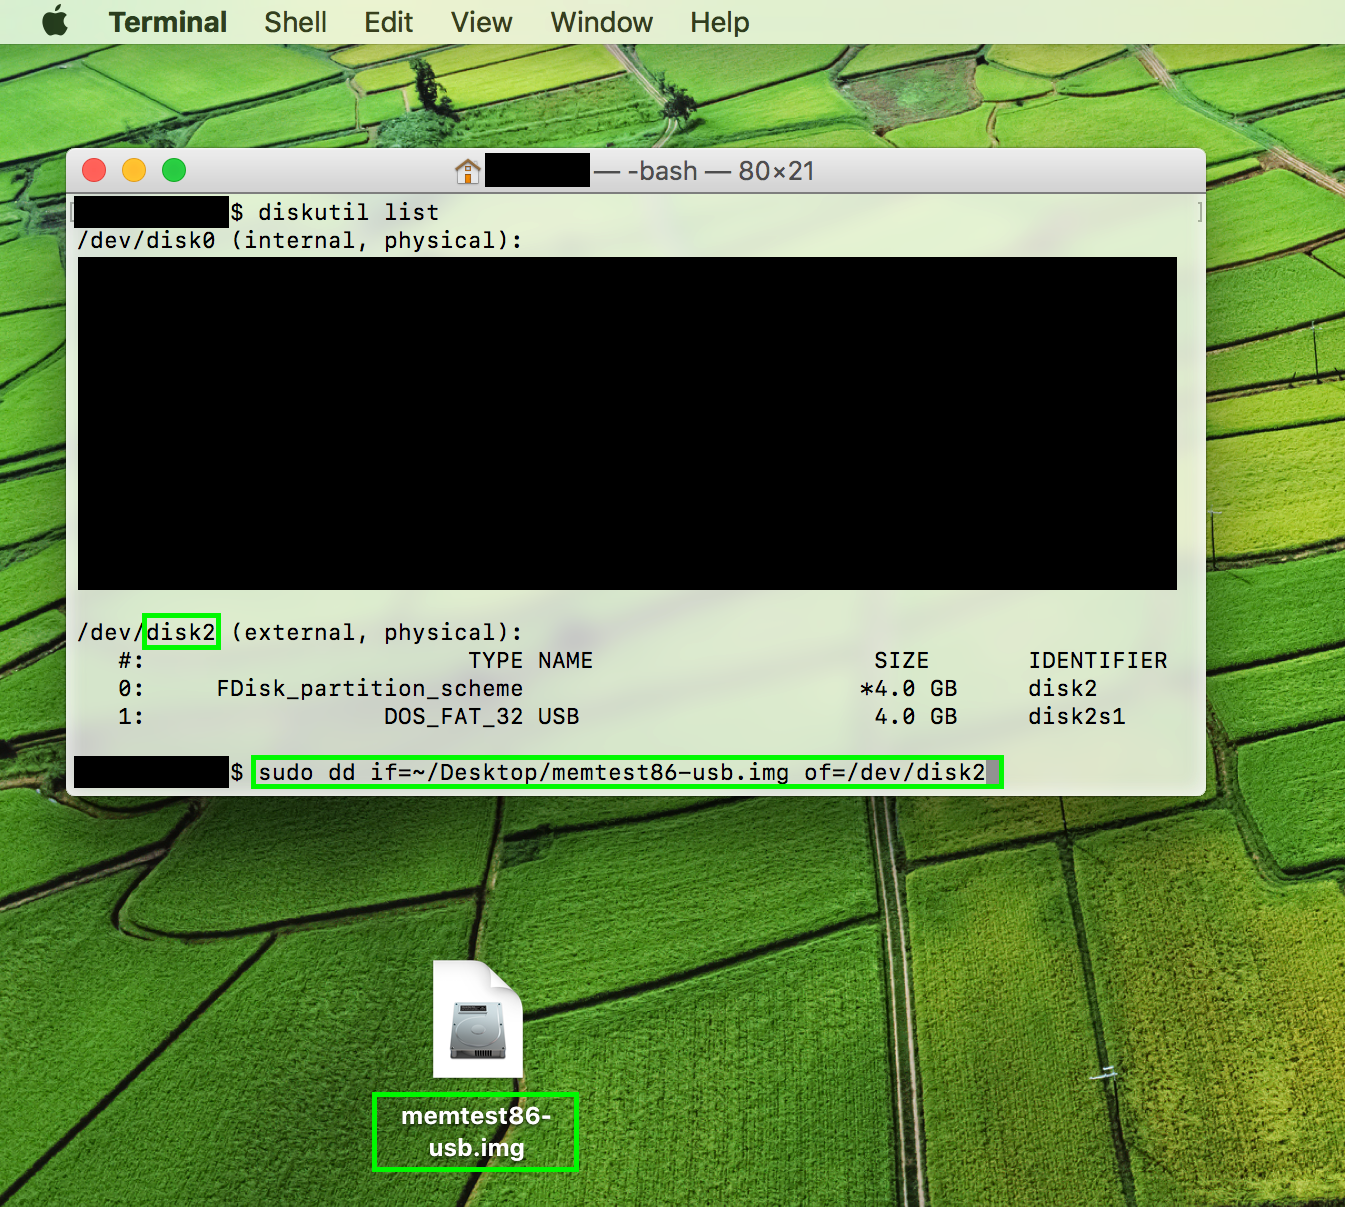
6) We’ll now transfer the MemTest86 program to the USB drive, with the following command:
sudo dd if=~/Desktop/memtest86-usb.img of=/dev/diskN
Replace ~/Desktop/memtest86-usb.img with the location and name of your MemTest86 image, though if you put it on the Desktop in Step 1, it should be the same as you see above. Replace the N in diskN with your disk number, as in Steps 4 and 5. Enter your account password if/when prompted.
Wait a few minutes for it to finish. When it’s done, the USB drive will reappear on the Desktop, and Terminal will report the following:
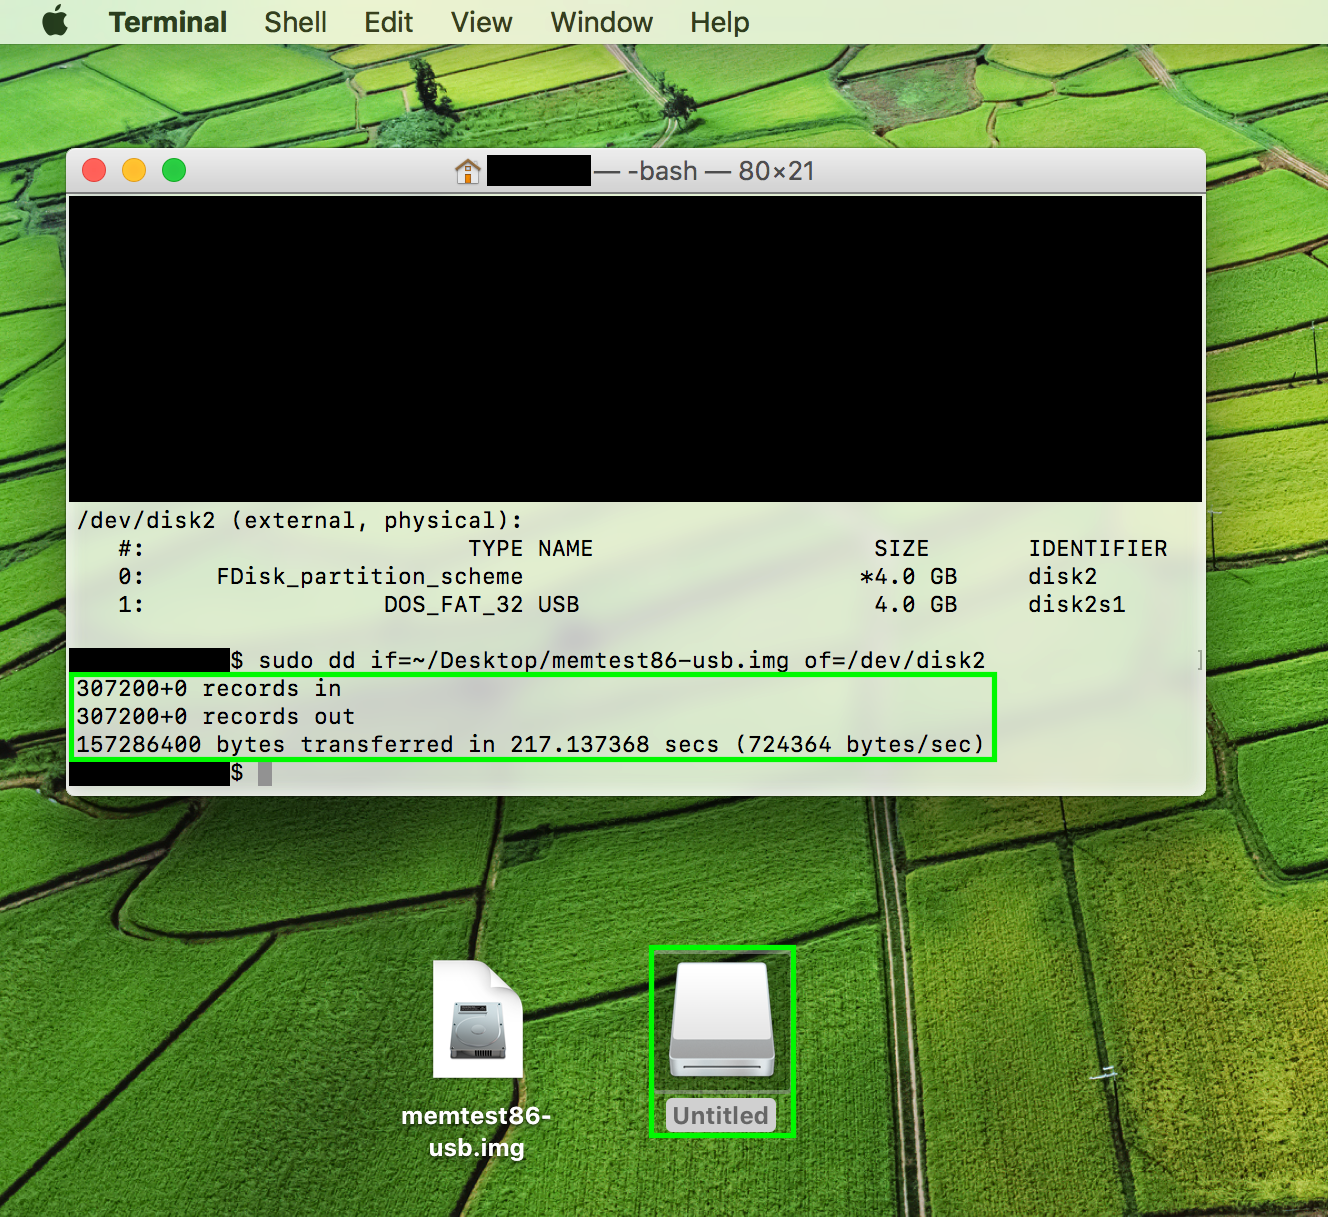
We’re now ready to boot from our USB drive and run MemTest86.
Using MemTest86
1) Shut down your computer, and ensure your USB drive is plugged into it.
2) Boot the computer from the USB. On a Mac, this means booting the computer whilst holding the option/alt (⌥) key. A menu will appear:

Select the USB drive with MemTest86 on it to boot from. Mine was labelled as EFI Boot. Some initial configuration screens may appear:

You should then see the splash screen:
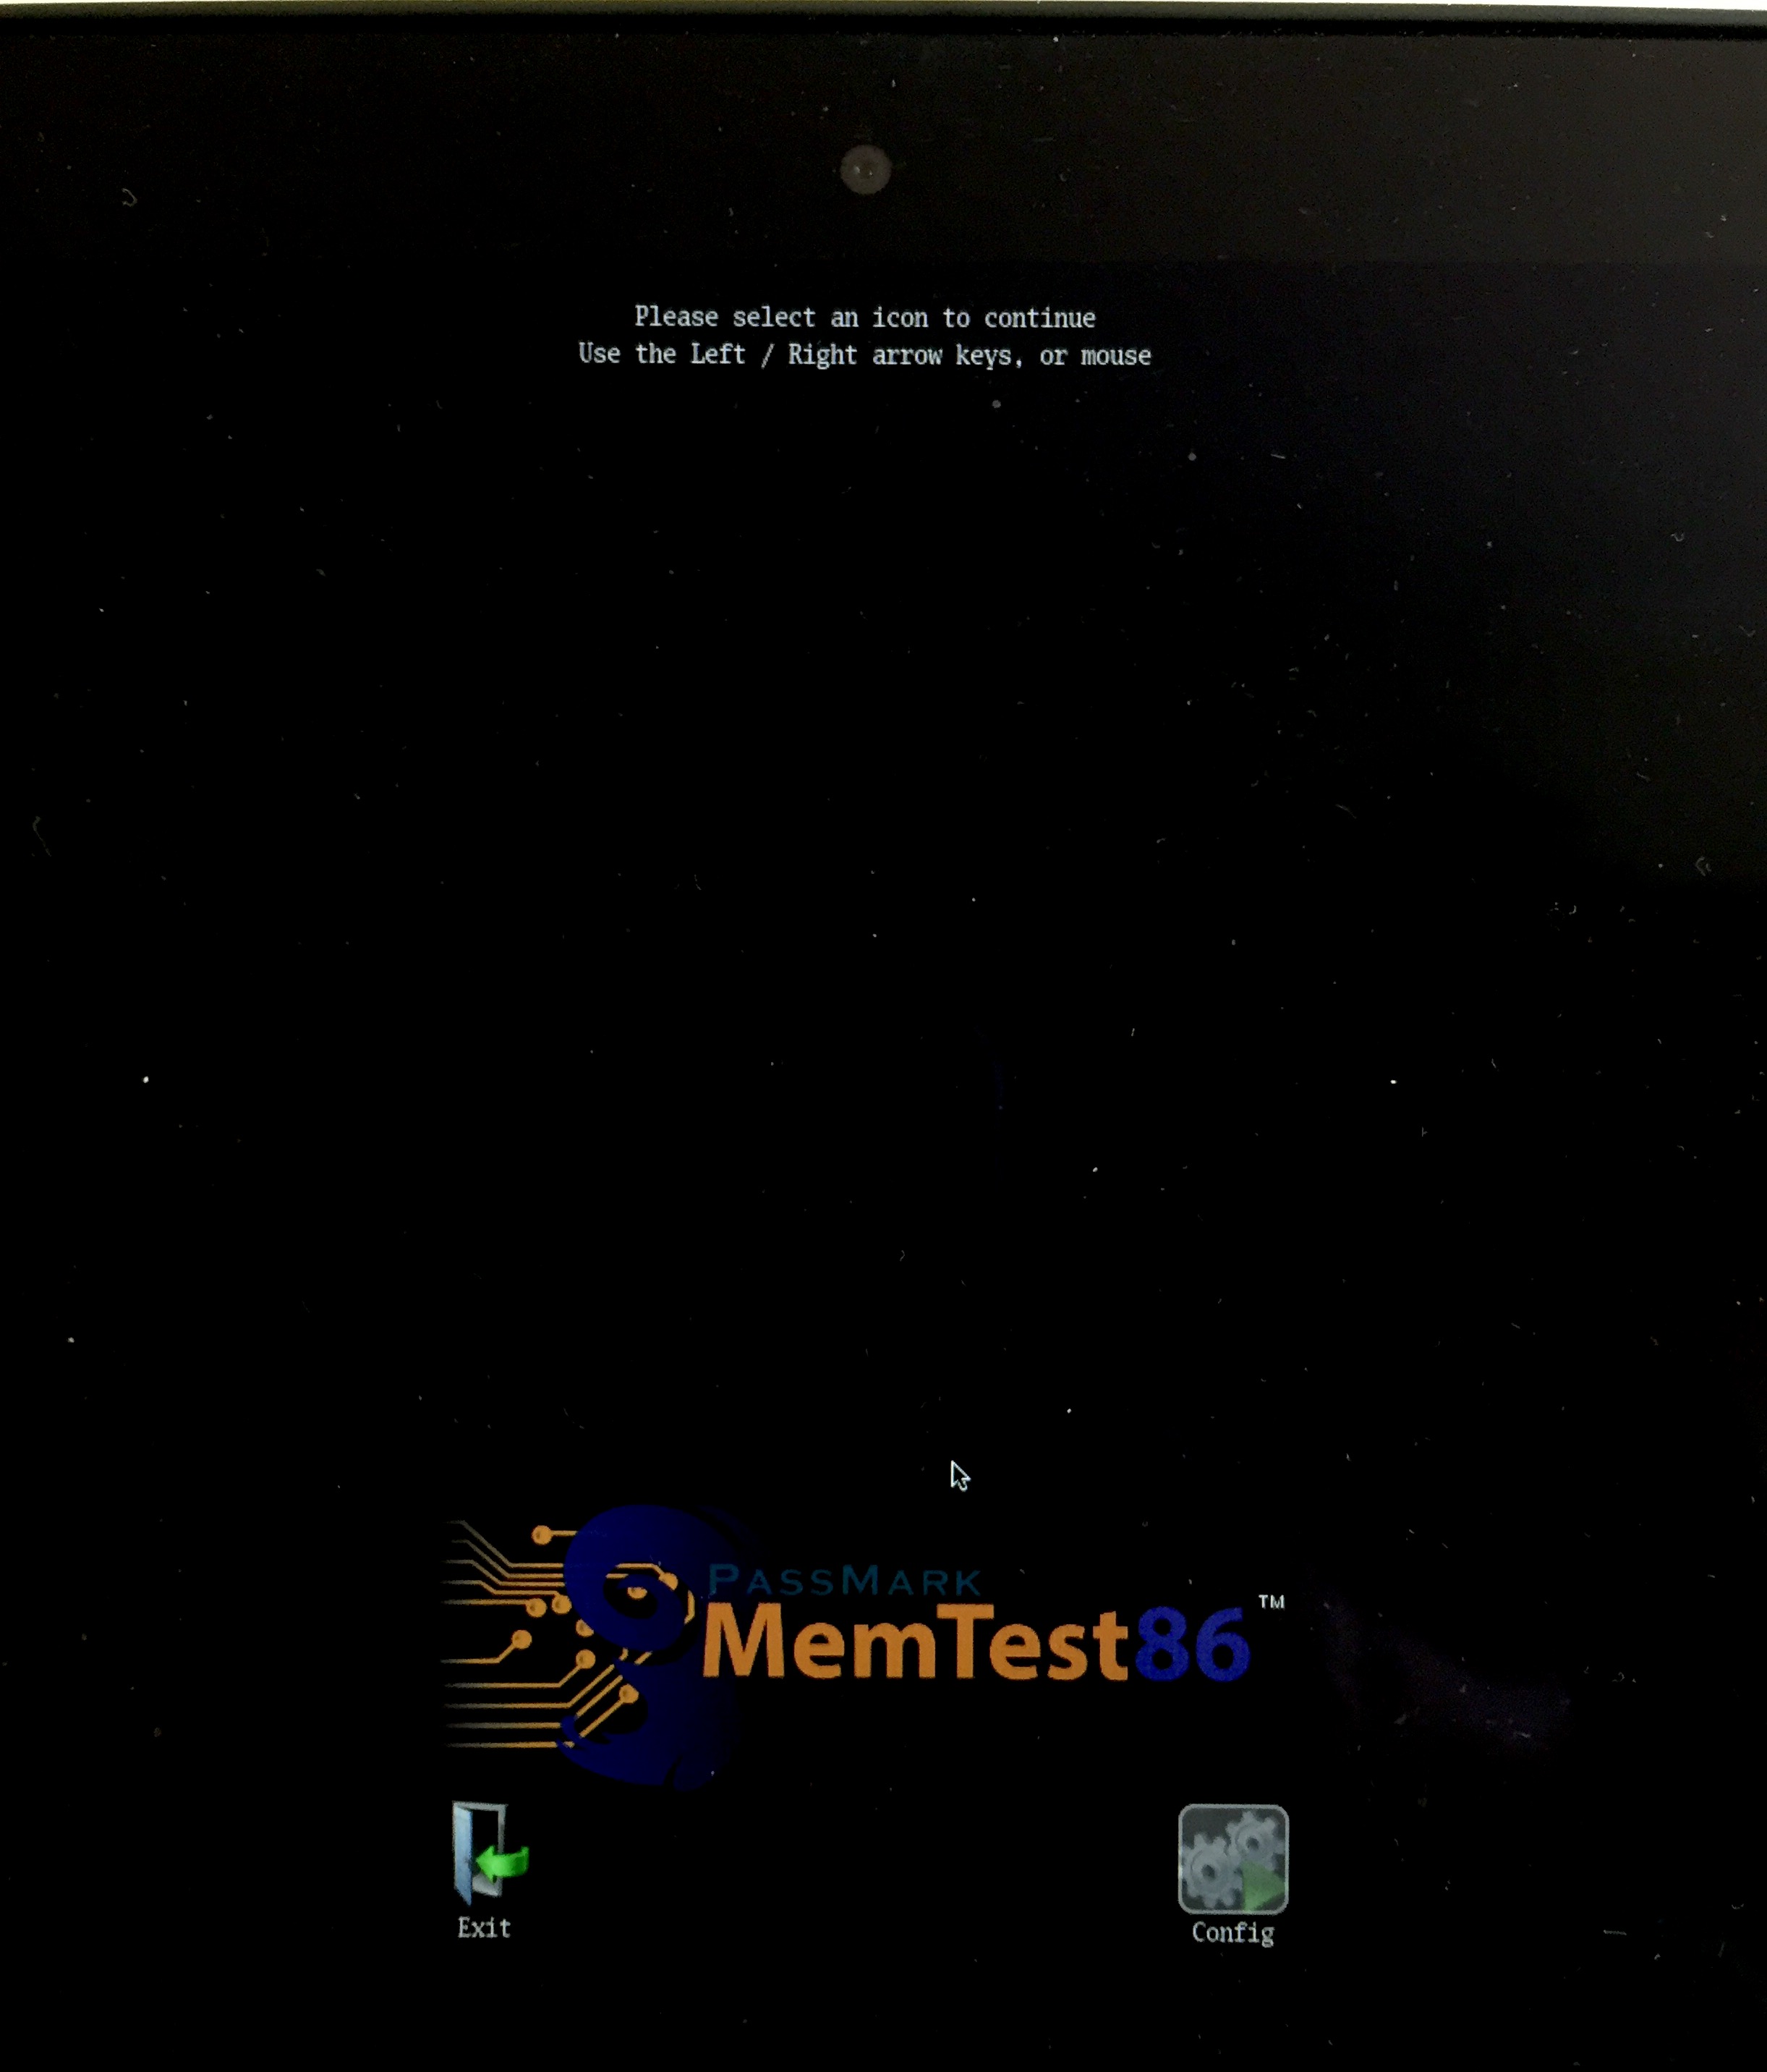
3) Use the arrow keys to select the Config icon, and hit Enter to configure your RAM test.
4) The configuration screen has several sections. You can navigate between them by pressing the keyboard key corresponding to the letter in brackets in the title of the section. For example, as you can see from the picture below, if I want to look at the (T)est Selection section, I would press the letter T.
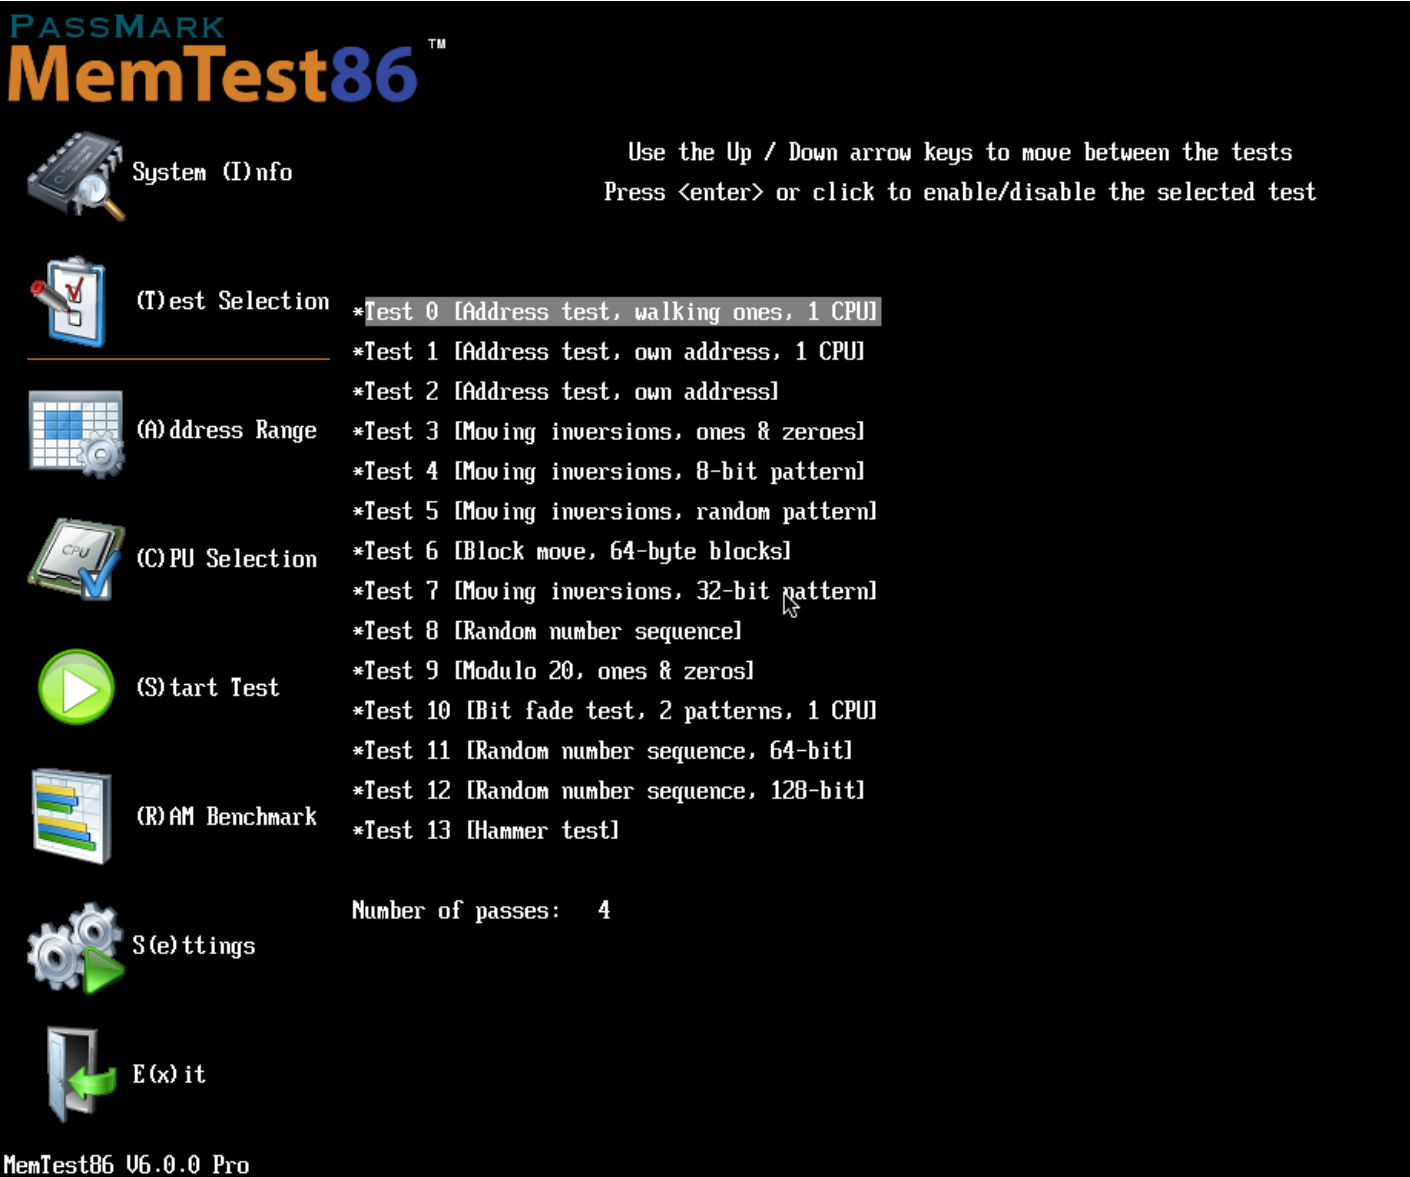
5) If you are unsure of specific configurations, I recommend sticking with the defaults. The default configuration is very thorough, and runs 4 passes of the full barrage of RAM tests. For more information on customising the tests, consult the documentation that comes with the download. Four passes is recommended, as some memory errors are sporadic and may not appear in a one-pass run. After configuring (or to run immediately with the defaults), press S to (S)tart Test.
6) The tests will now run. A readout will be shown on screen throughout, showing their progress.
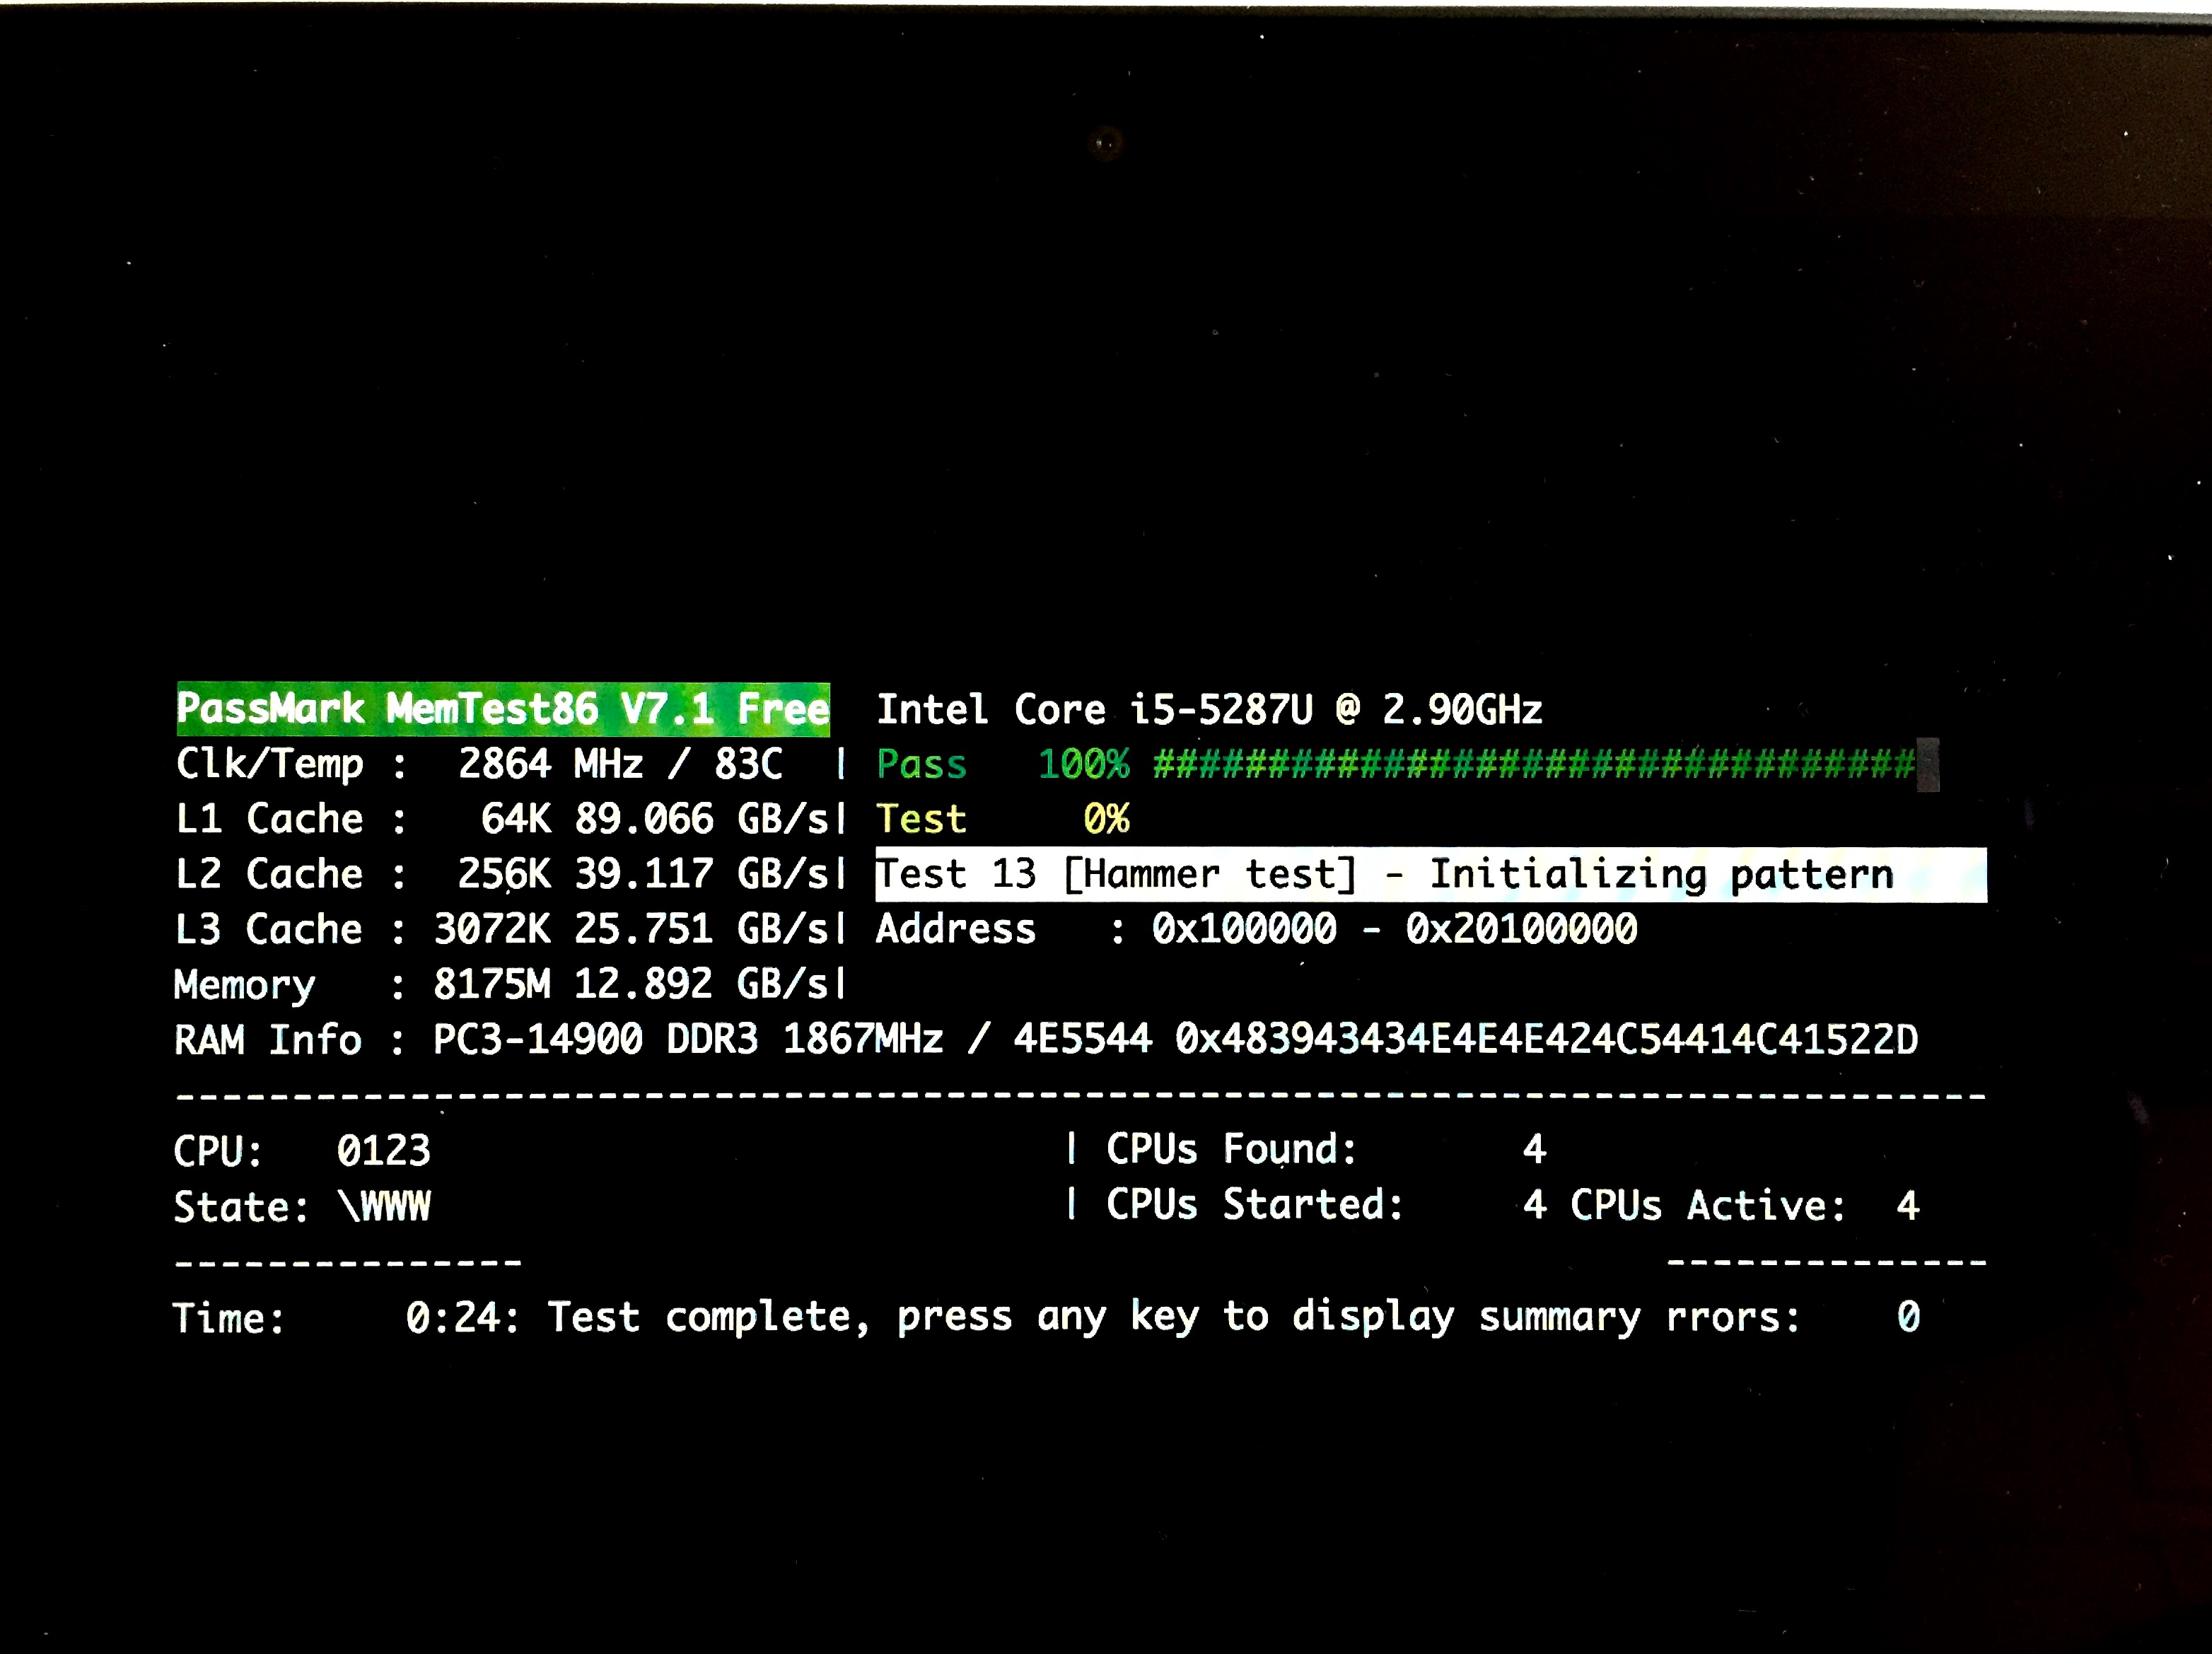
The tests will take quite a while. Ensure your computer is connected to power, and that you have allowed enough time for them to finish.
To skip any given test, or cancel the entire test before finishing, press esc, and use the subsequent menu.
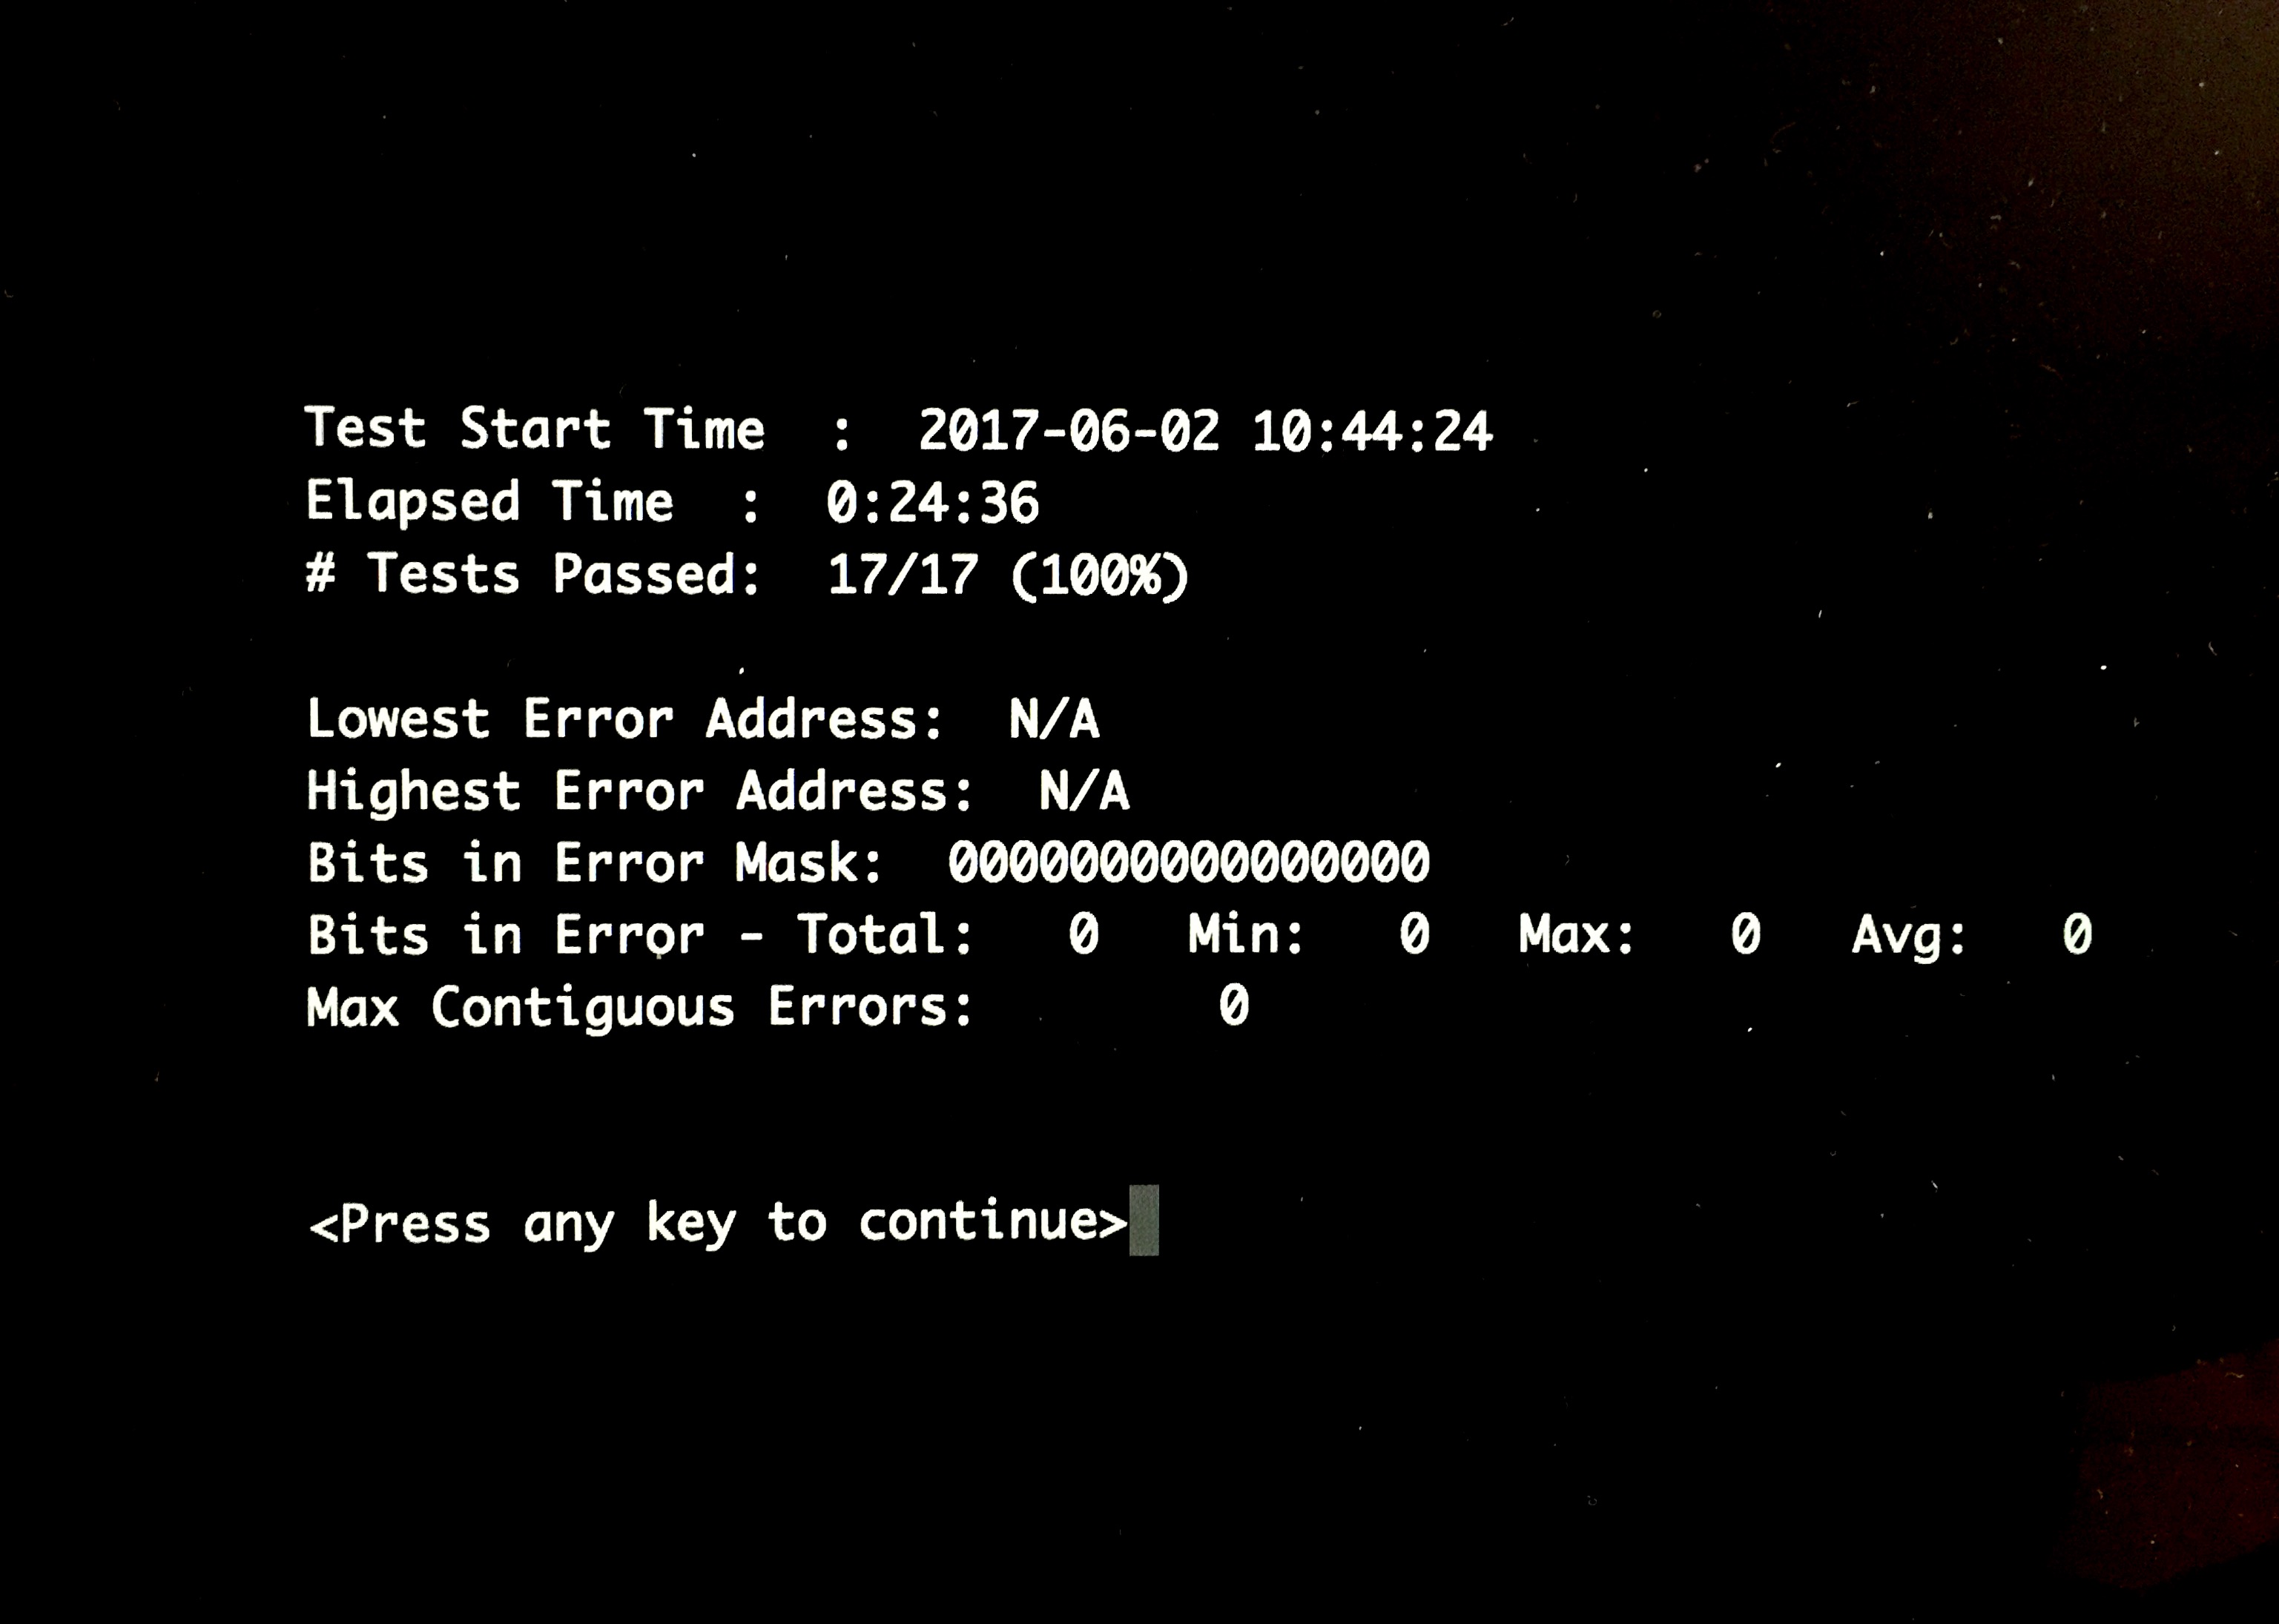
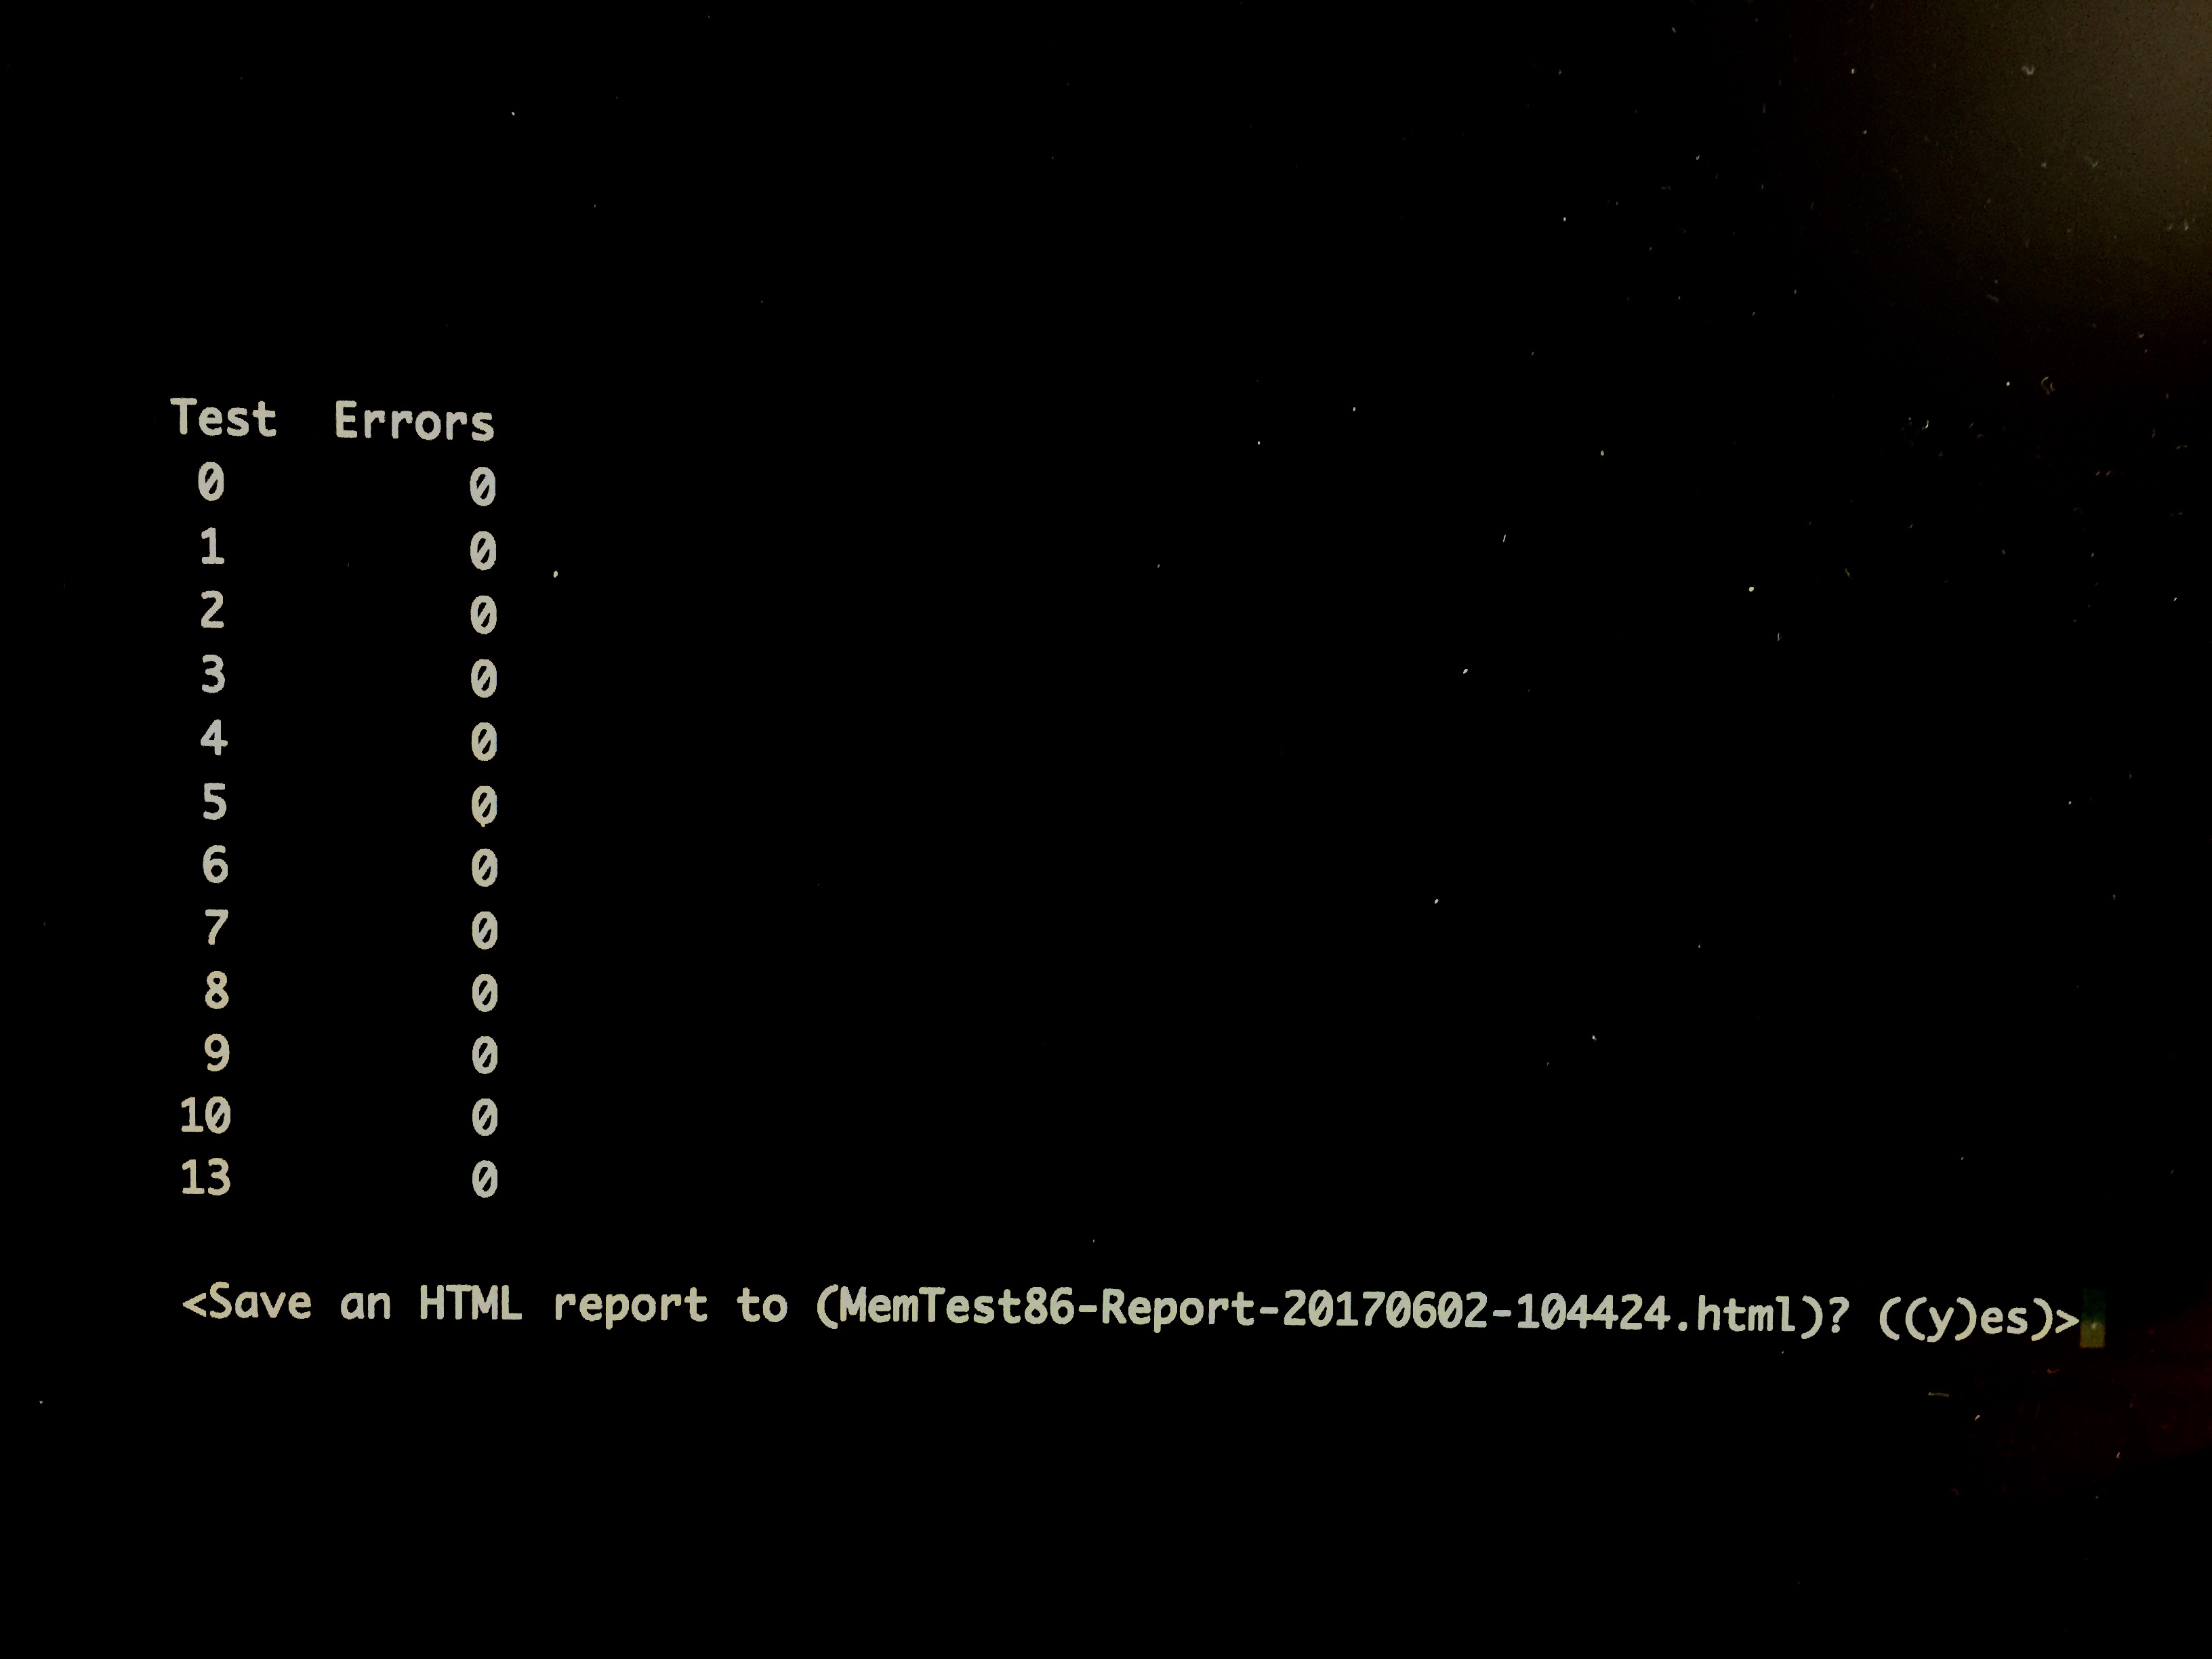
7) Once finished, some summary screens will appear. Check these screens to see if they report any errors in the integrity of your RAM. There is also an option to save a log of the tests.
8) When finished, simply reboot your computer to return to the normal operating system.
Restoring your USB drive
In order to regain all the space on your USB stick, it is recommended to zero the MBR when reverting it, and not simply reformat the drive over the top of the MemTest86 installation. If you have many USB sticks, you might want to keep this one aside for future memory testing of your machines. If you want to remove MemTest86 and get your drive back, follow the instructions below:
1) Insert your MemTest86 USB drive, and open a Terminal window.
2) Enter diskutil list at the prompt to see a list of connected drives.
3) Note the drive number of the MemTest86 USB stick. In my case it was disk2.
Your USB may have a different disk number assigned to it. Make sure you have the right one or you could end up wiping the wrong disk by mistake!
4) Type diskutil unmountDisk disk2 to unmount the USB so we can format it.
5) Enter the following command to zero the MBR of the drive:
sudo dd if=/dev/zero of=/dev/diskN bs=512 count=1
Replace the N in diskN with your USB’s drive number from Step 3. Enter your account password if/when prompted.
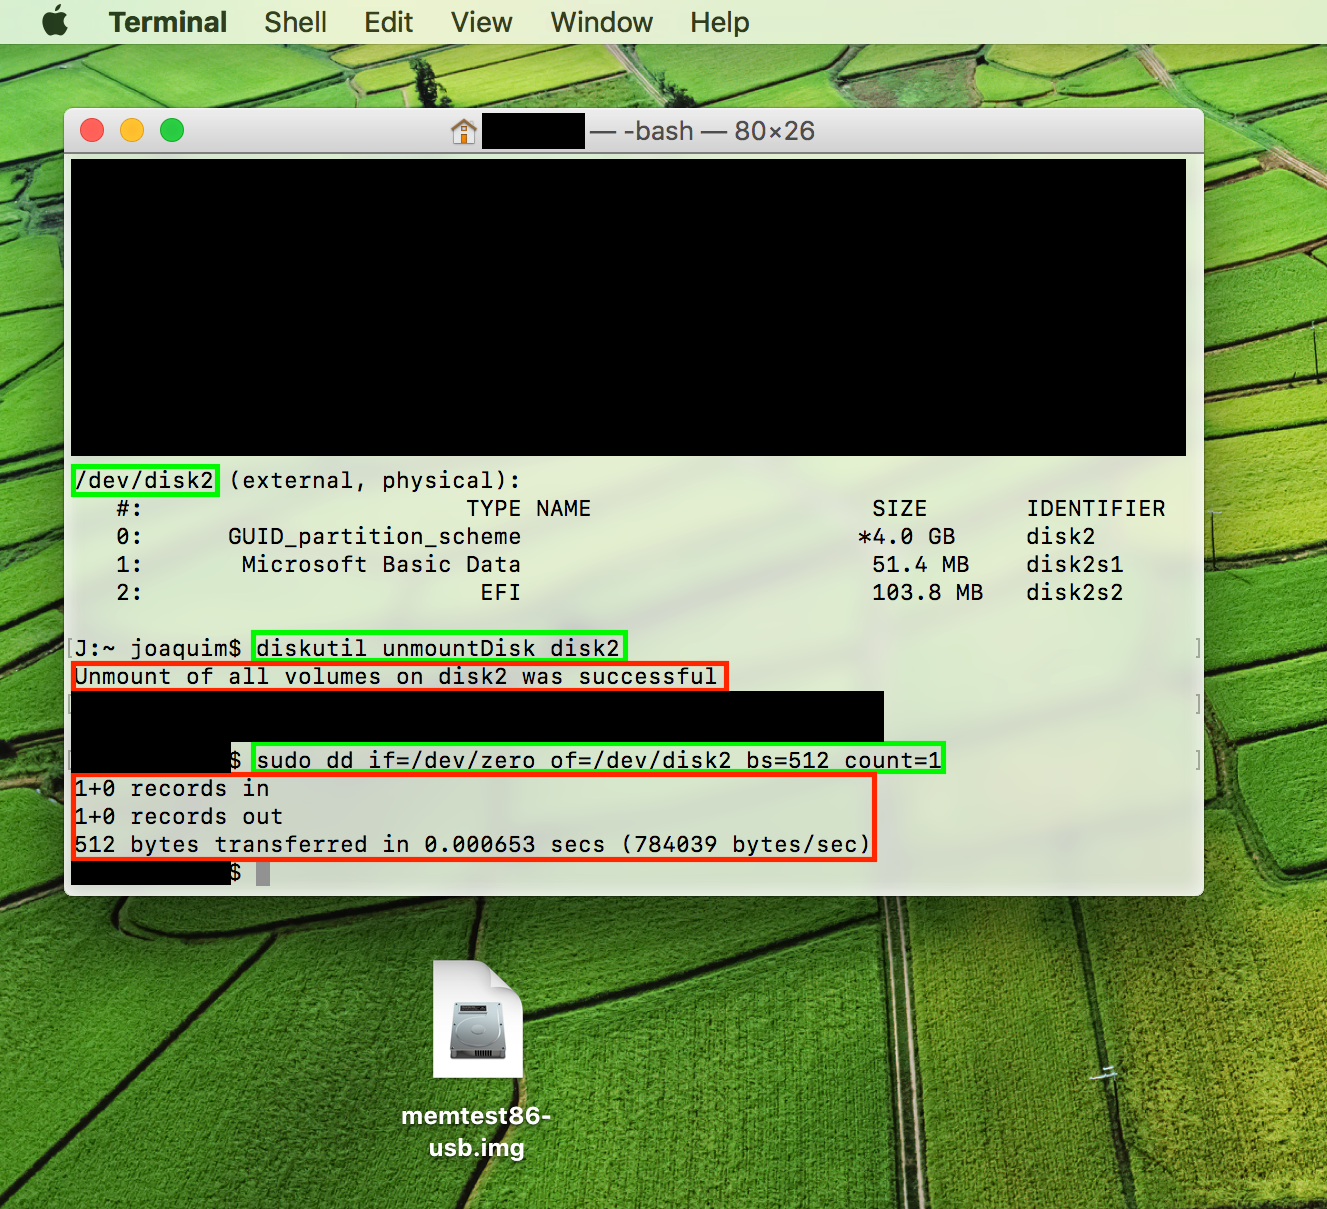
6) You should now see output as in the image above (which also shows the preceding four steps visually). Once you see that, unplug and replug your USB stick. The computer may report that the disk is not readable. Don’t panic, we just need to format it!
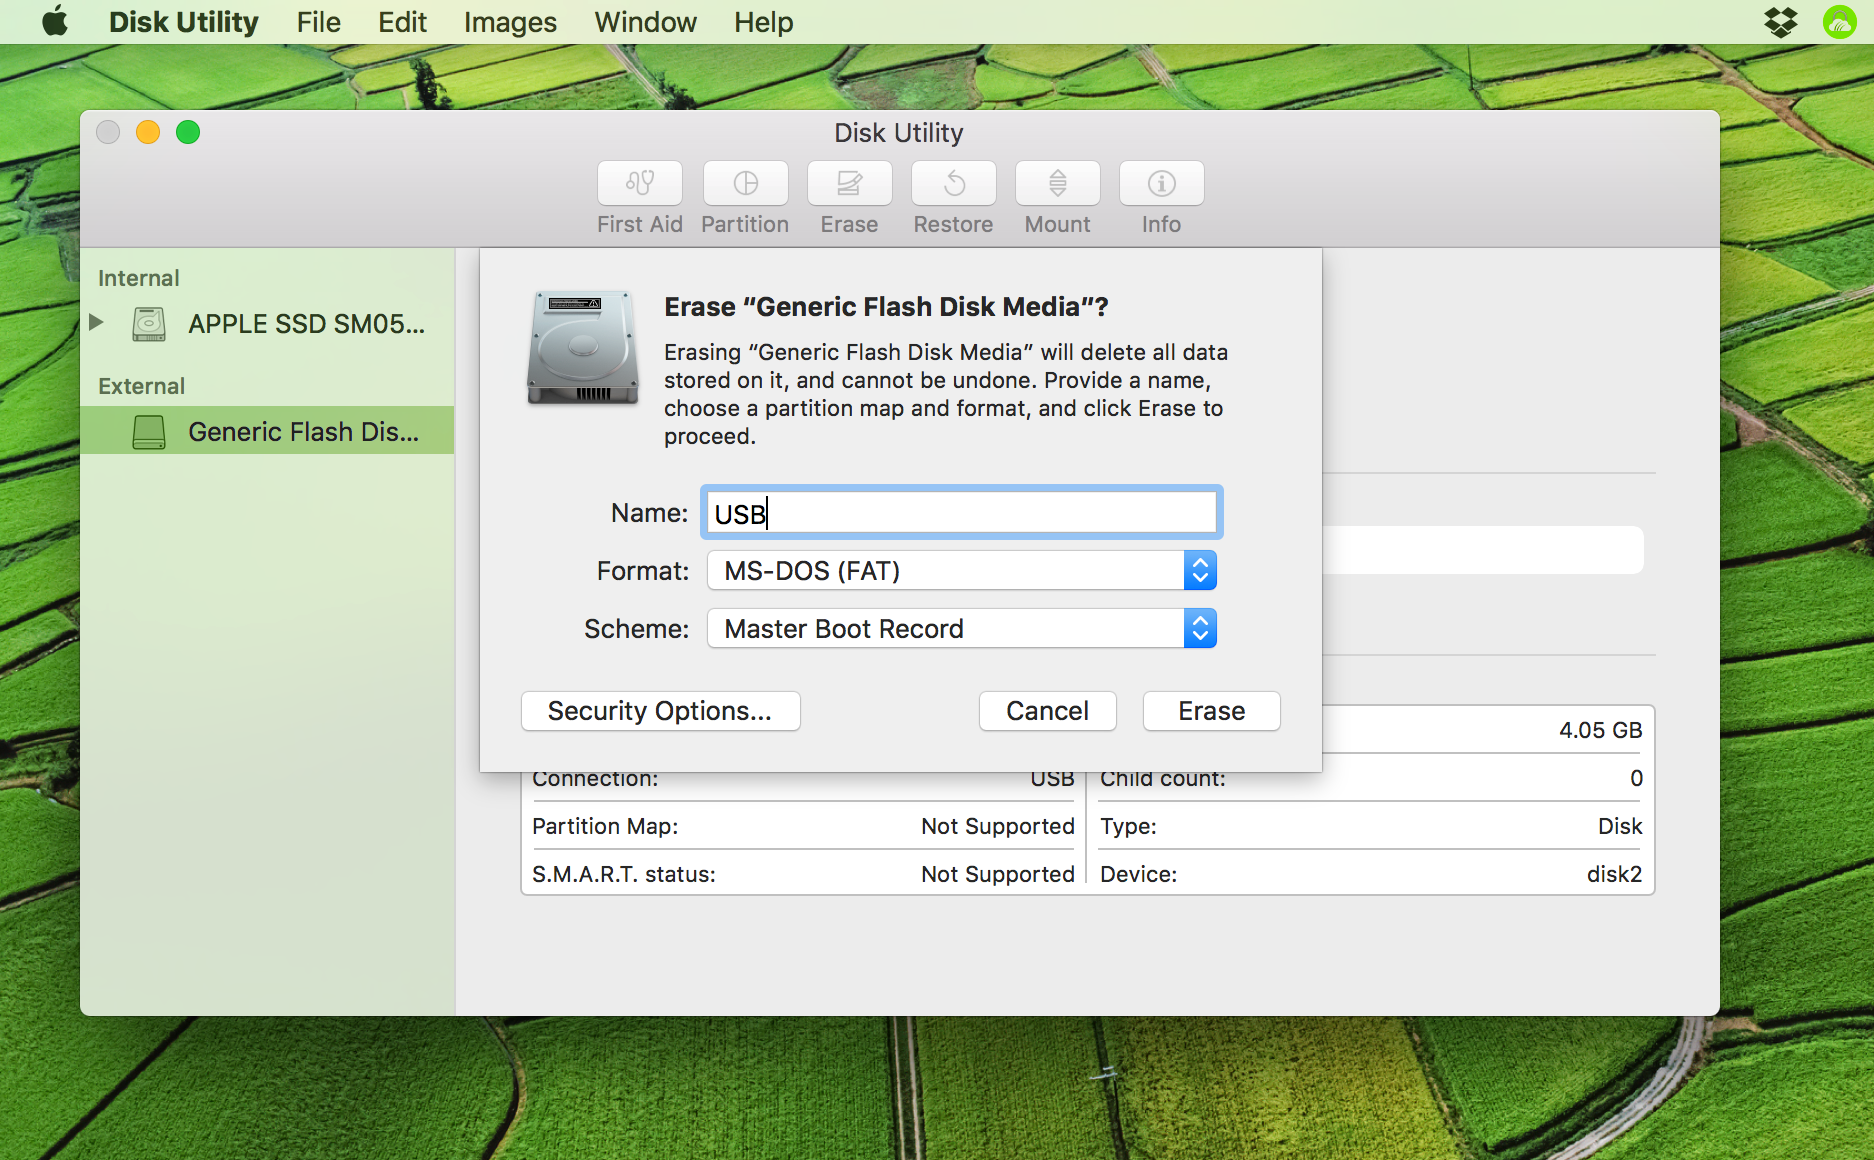
7) Open up Disk Utility, select the drive in the left-hand sidebar, and click Erase to format it as desired. You will need to select both formatting and partition scheme, as we have removed the previous partition scheme when erasing the drive.
When the USB reappears on your desktop, it has been successfully re-formatted and mounted.
And you’re done! Testing your RAM for errors is good practice to prevent catastrophic data loss at a later date, and is especially advisable following RAM swaps, upgrades, or any internal work which involved removing components of the computer.
Let me know if you have any trouble with this guide, or if you have any requests for guides you’d like to see!