Learn how to edit vertical videos without black bars in iMovie on your Mac, iPhone, or iPad, and make sure they look great in portrait orientation. This is particularly handy if you want to post your videos to Instagram, TikTok, YouTube Shorts, etc.
iMovie is designed to produce 16:9 aspect ratio videos that go well with playback on TV, computer screens, and mobile phones in landscape orientation.
However, with the rise of vertical content pushed by TikTok, Snapchat, YouTube Shorts, Instagram, and such, you may want to edit vertical videos you take on your iPhone and export the final single file in the same vertical aspect ratio.
We will help you do that using iMovie on macOS and iOS.
Create video without black bars in iMovie for Mac
There are two easy ways to do this, and we have listed both of them here.
Using App Preview mode
iMovie has a little-known option called App Preview, which allows app developers to create video previews to be featured along their apps in the App Store. This feature is by far the quickest and easiest way to work with vertical videos without black bars on your Mac.
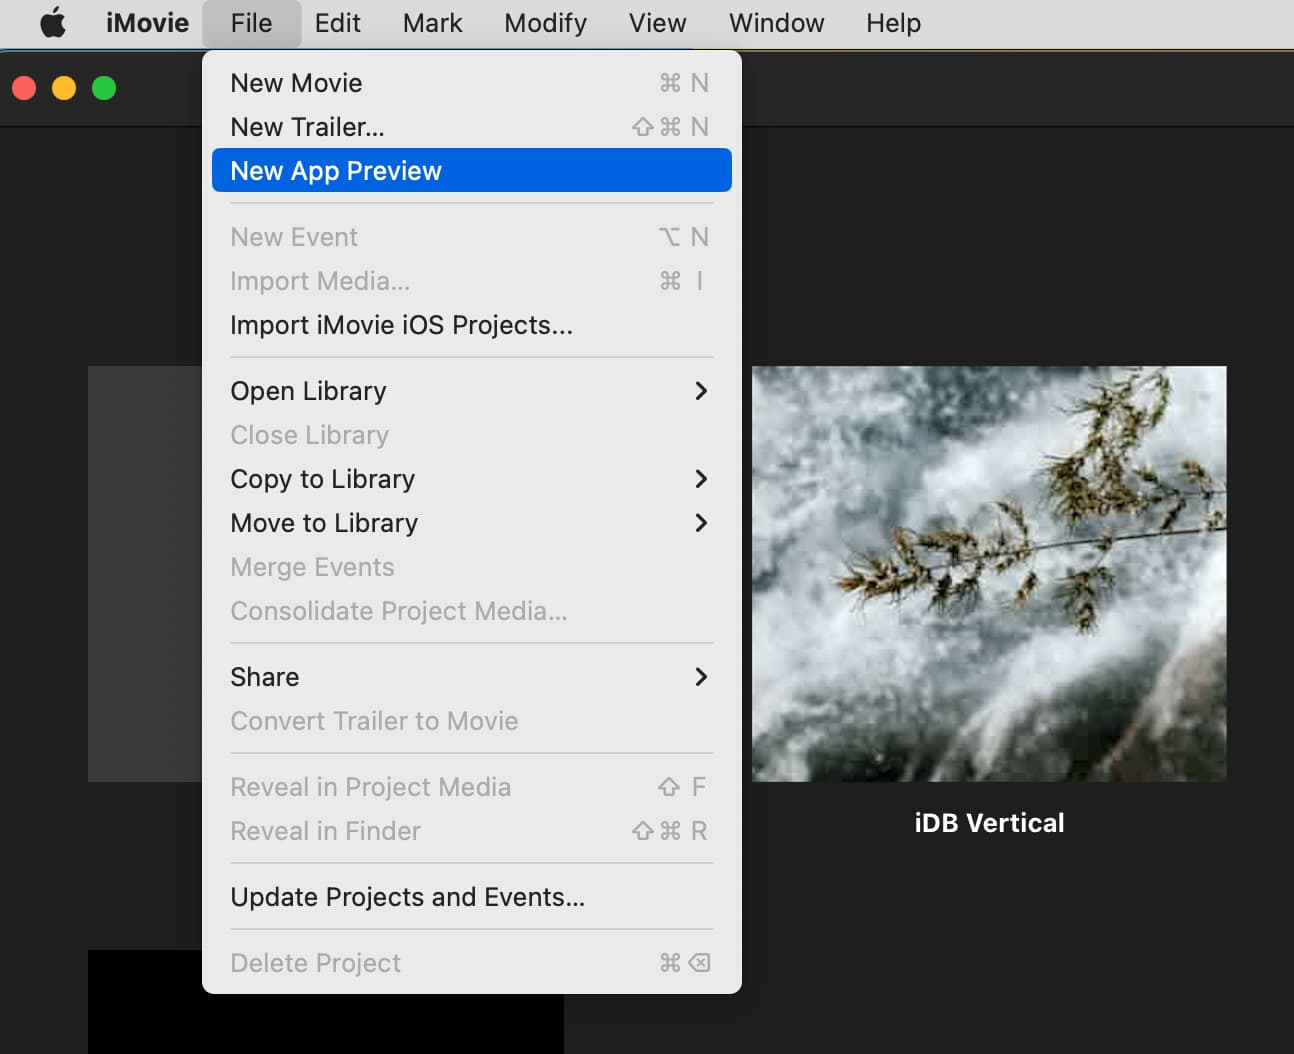
1) Open iMovie and click File > New App Preview from the top menu bar.
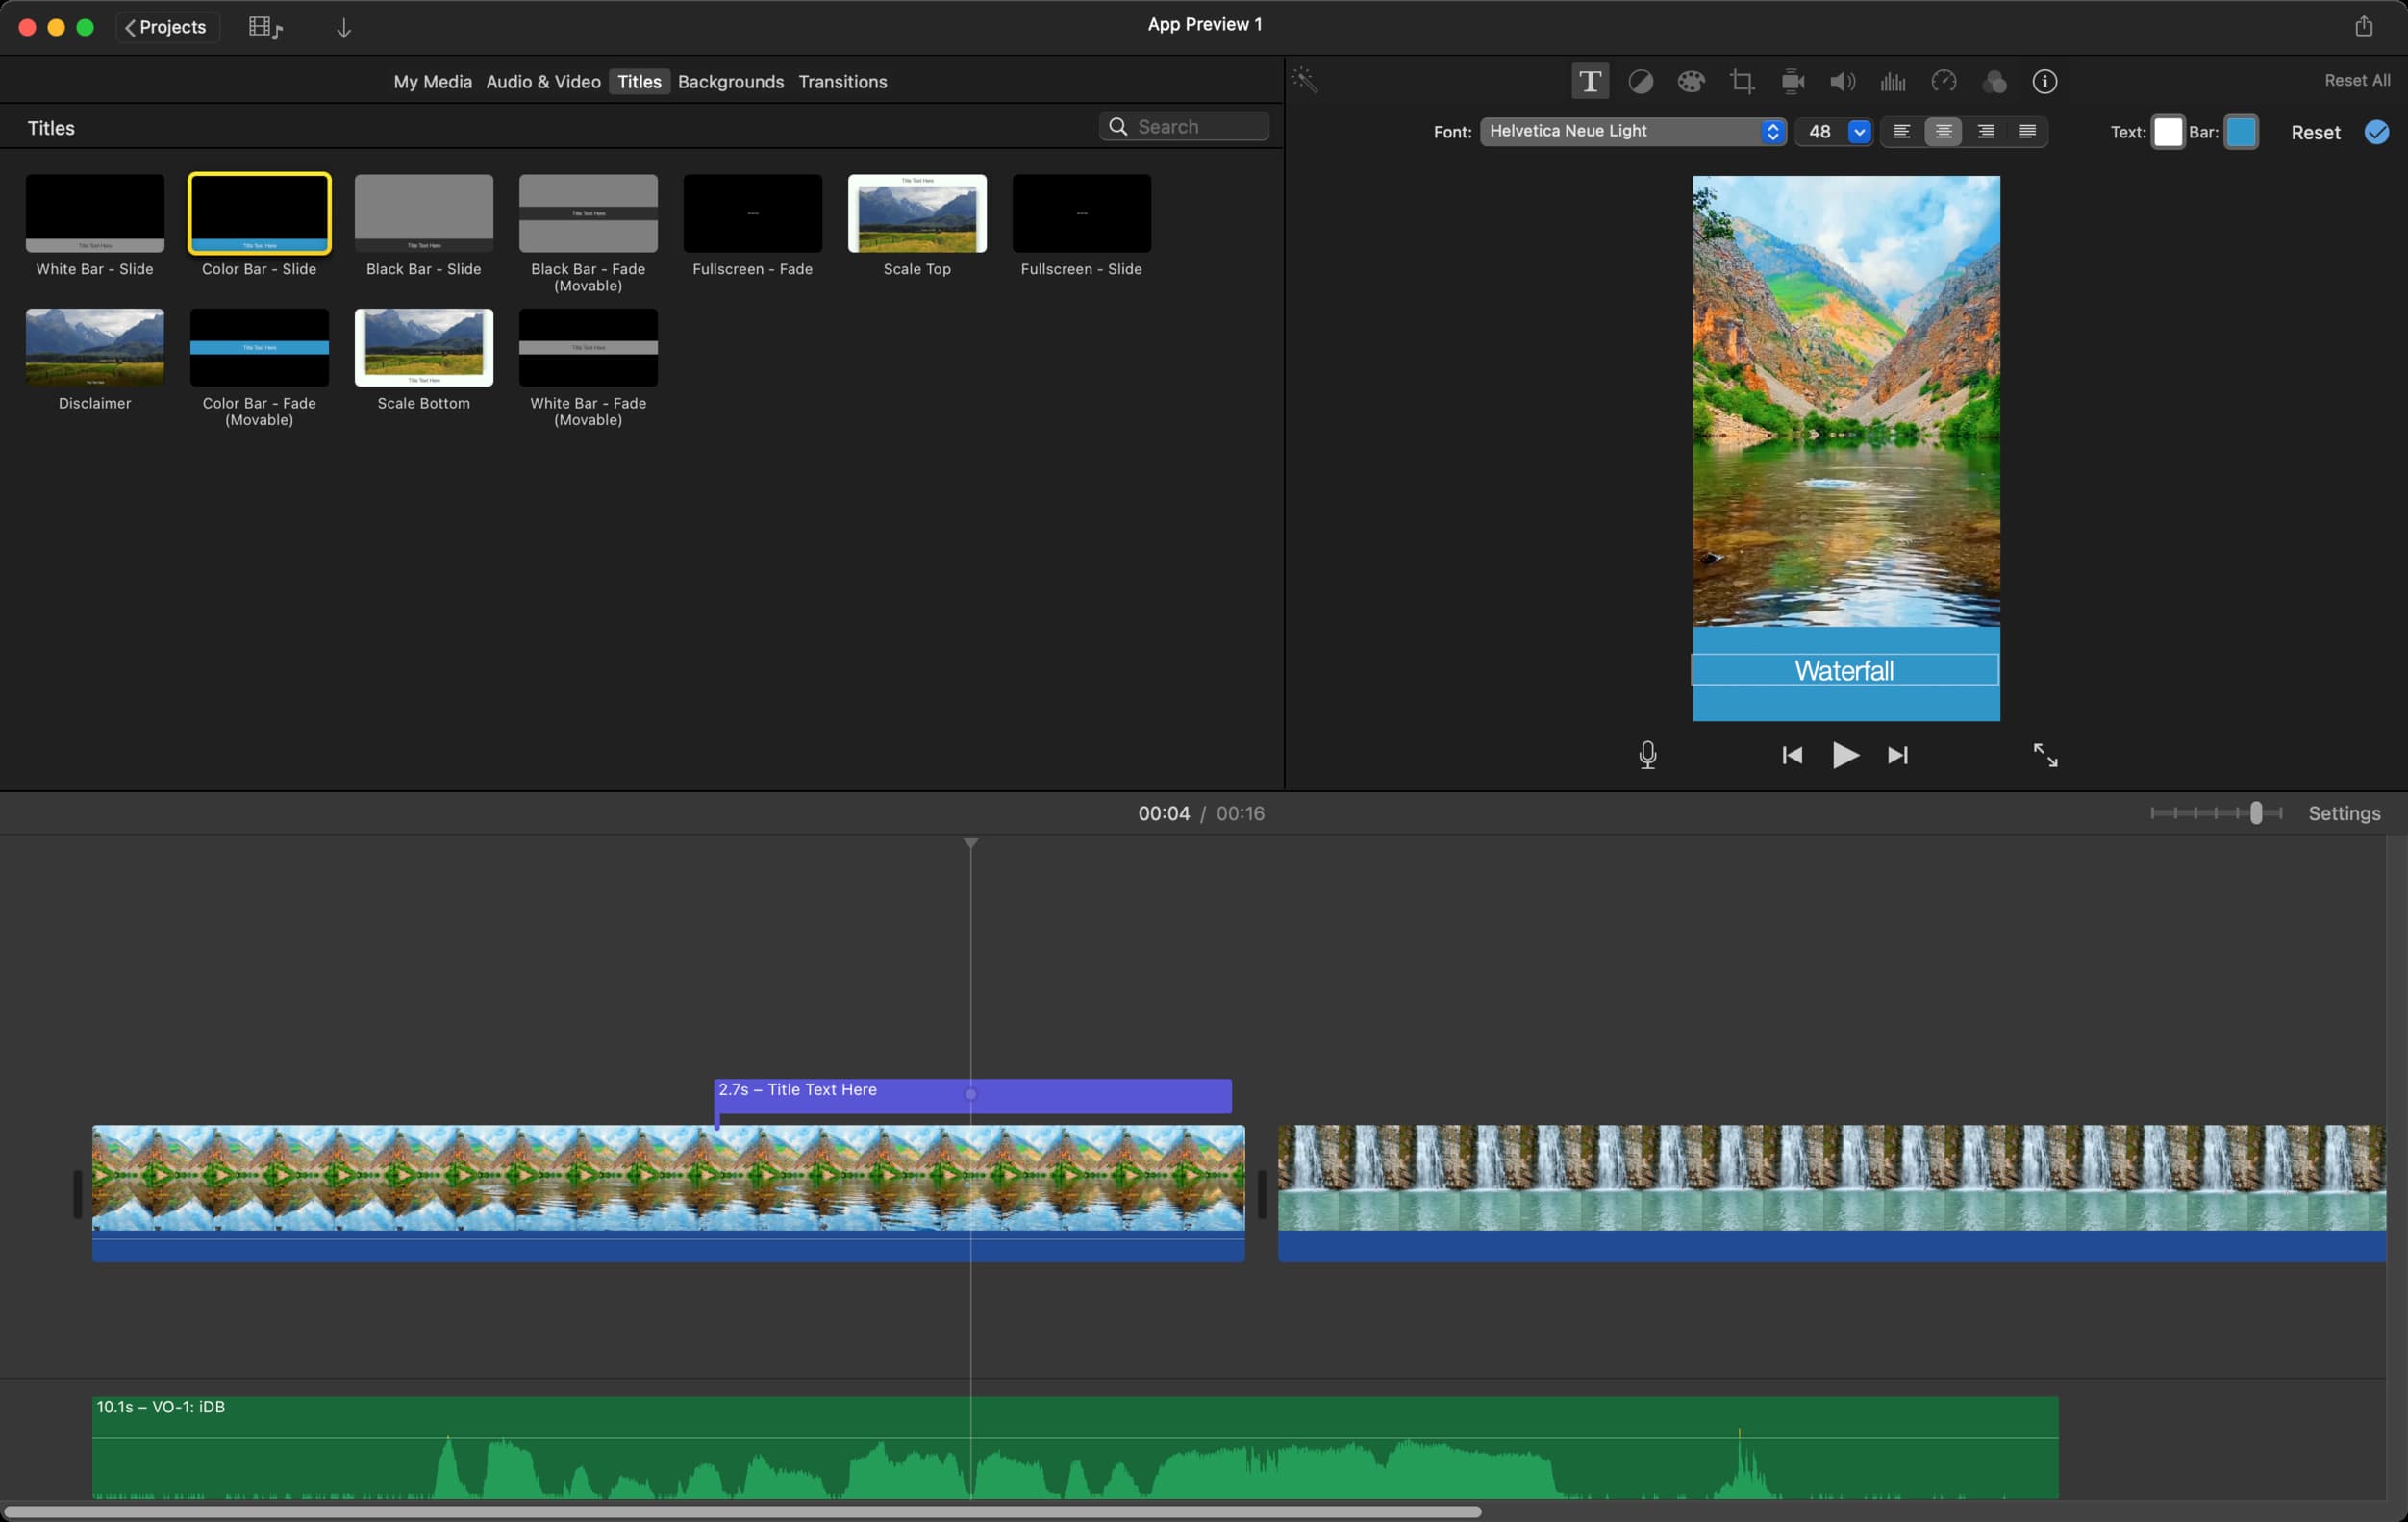
2) Add your vertical videos to the editing timeline.
3) Edit it as you like. You can also click Titles from the top and pick an option to add text.
4) Finally, click the share button from the top right and choose App Preview to export the video as an MP4 file in 1080 x 1920 HD resolution or use the standard Export File option.
Another method that involves rotating, exporting, and rotating the video again
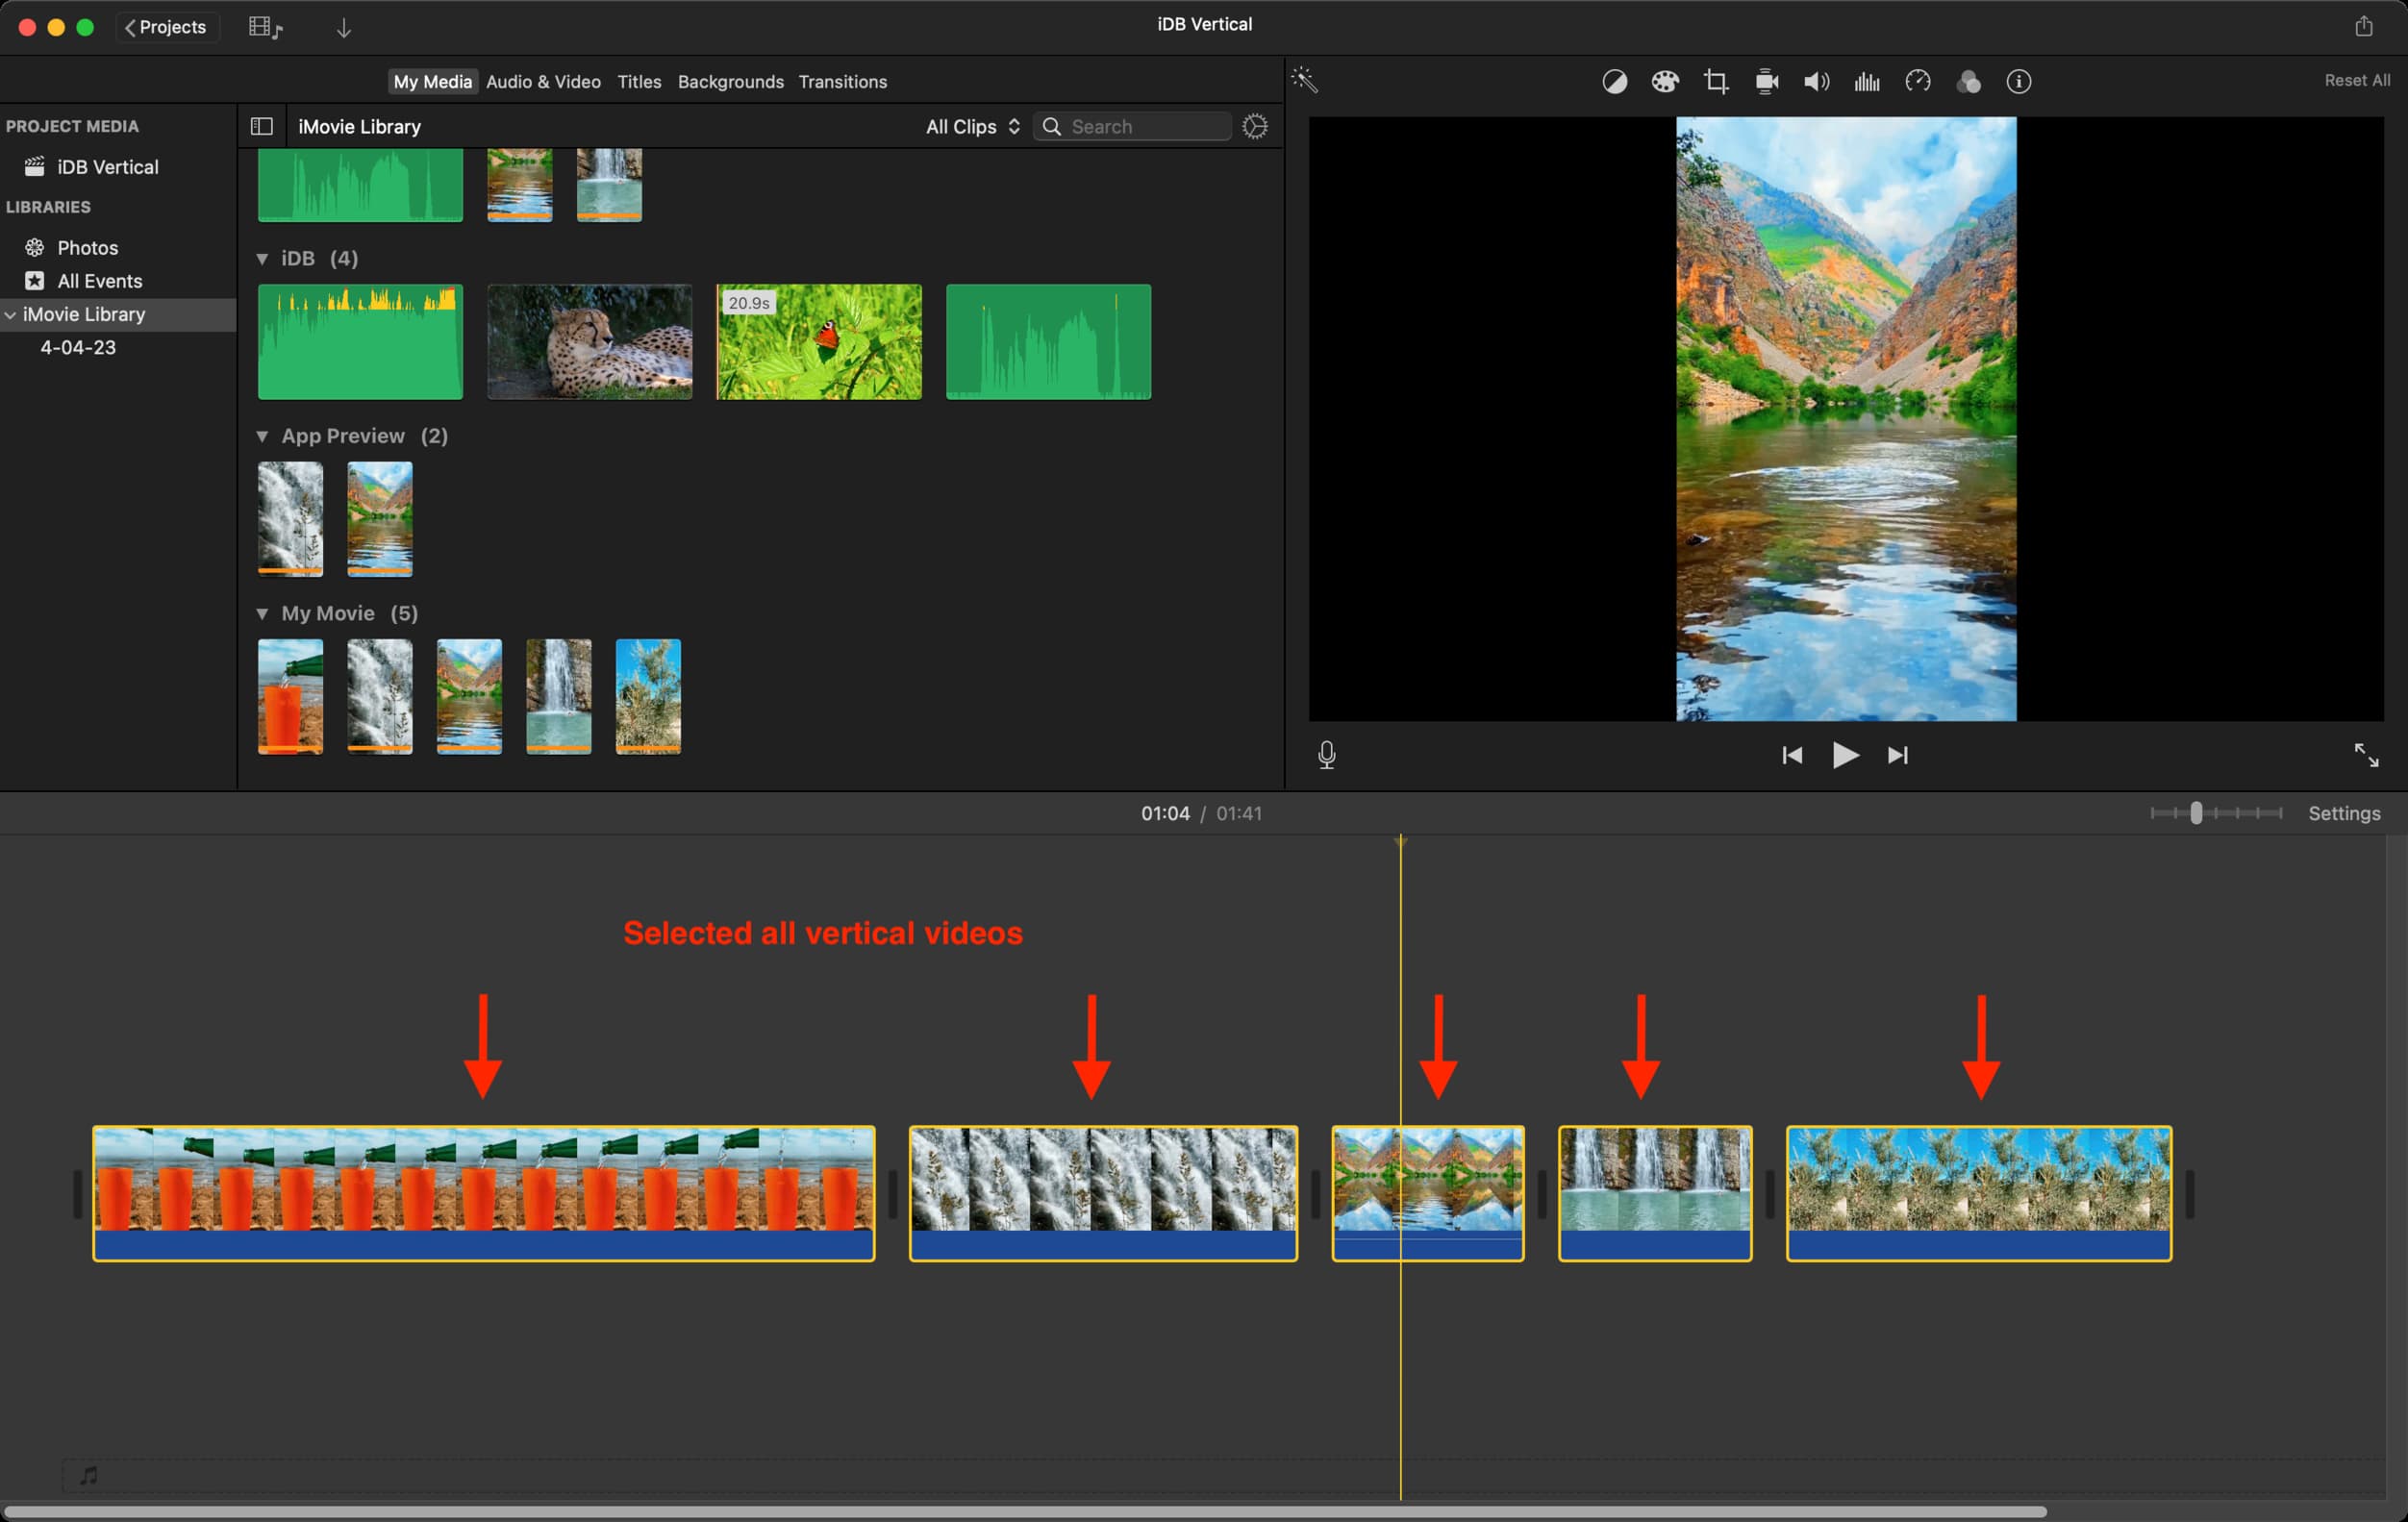
1) Create a project in iMovie on your Mac and add vertical videos to the editing timeline.
2) Select one vertical video in the lower editing timeline, and it will have a yellow border signifying it’s selected. Now, hold the Command key and click all vertical videos in the timeline to select them.
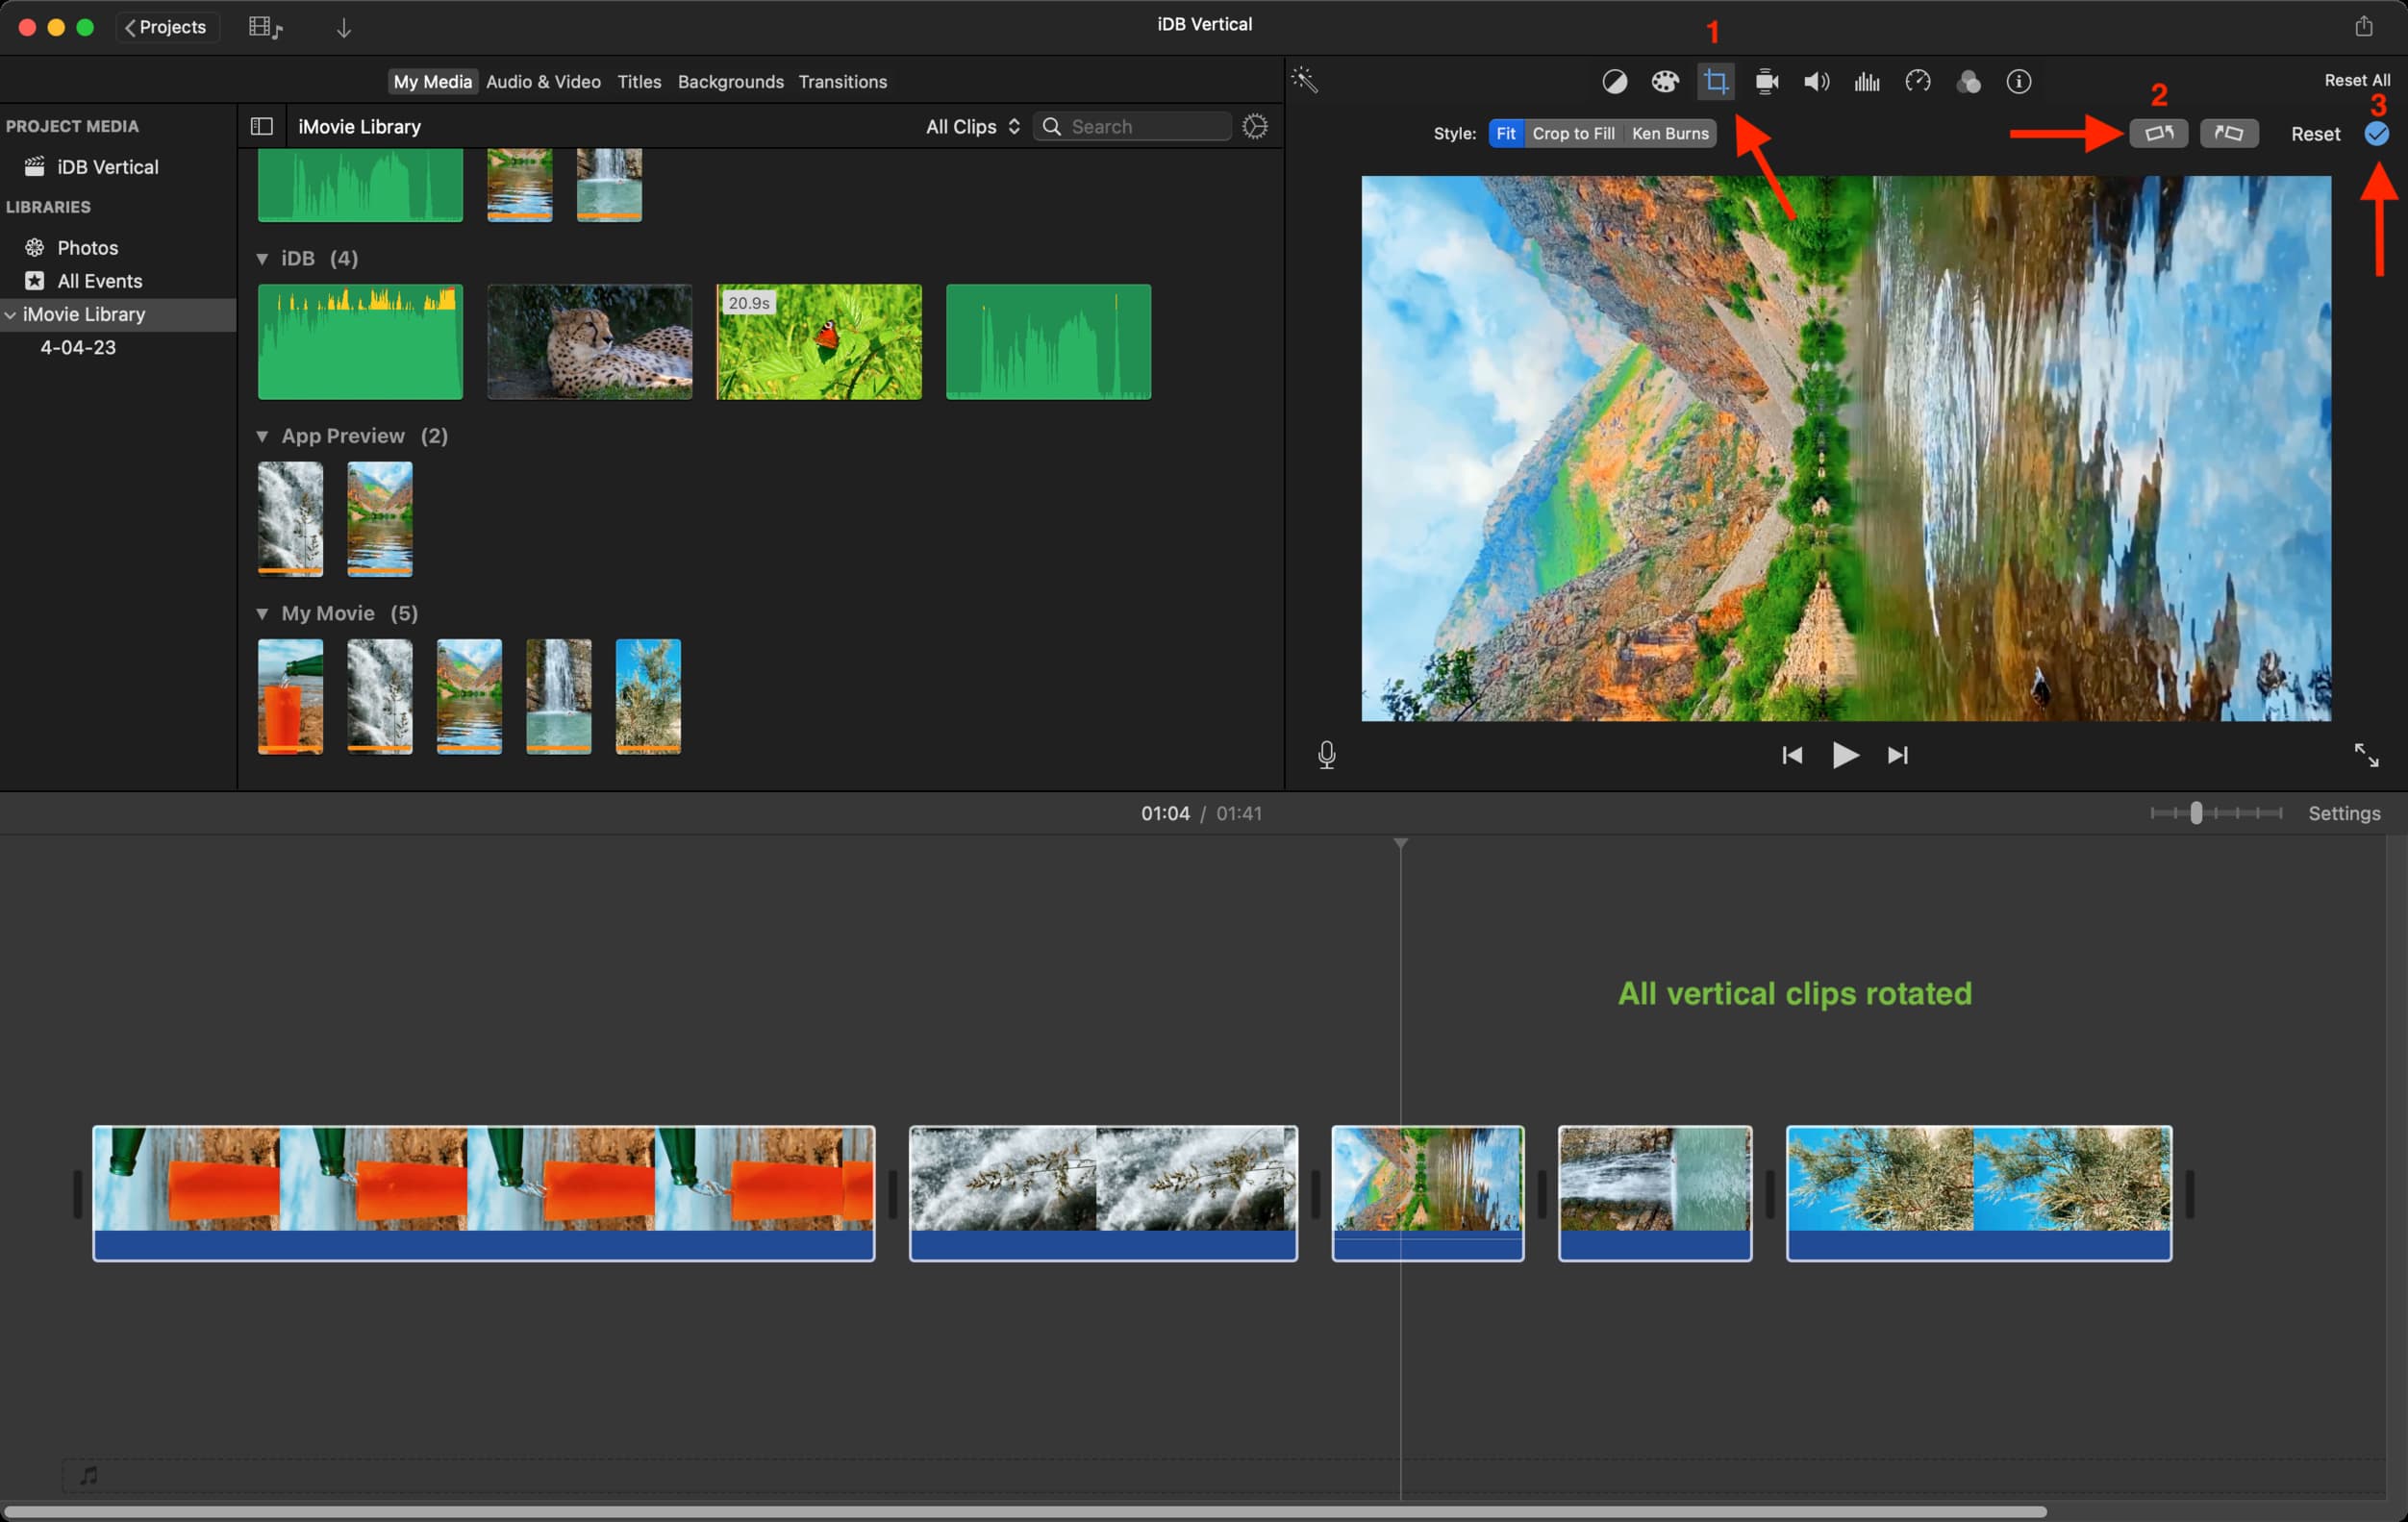
3) Click the crop icon from the top of the preview section.
4) Follow it by hitting the rotate button, and it will turn all the vertical videos. After that, click the little blue tick icon.
5) Optional: You can trim the individual rotated clips and make other edits like adding music/sound effects, voiceover, etc.
Just remember not to click Titles and add text, as they can’t be rotated and will appear in landscape orientation, thus not aligning with your vertical videos. To add text to vertical videos, you should use iOS apps like InShot. Or, add text directly using the social media app’s built-in tools when posting the video to that platform.
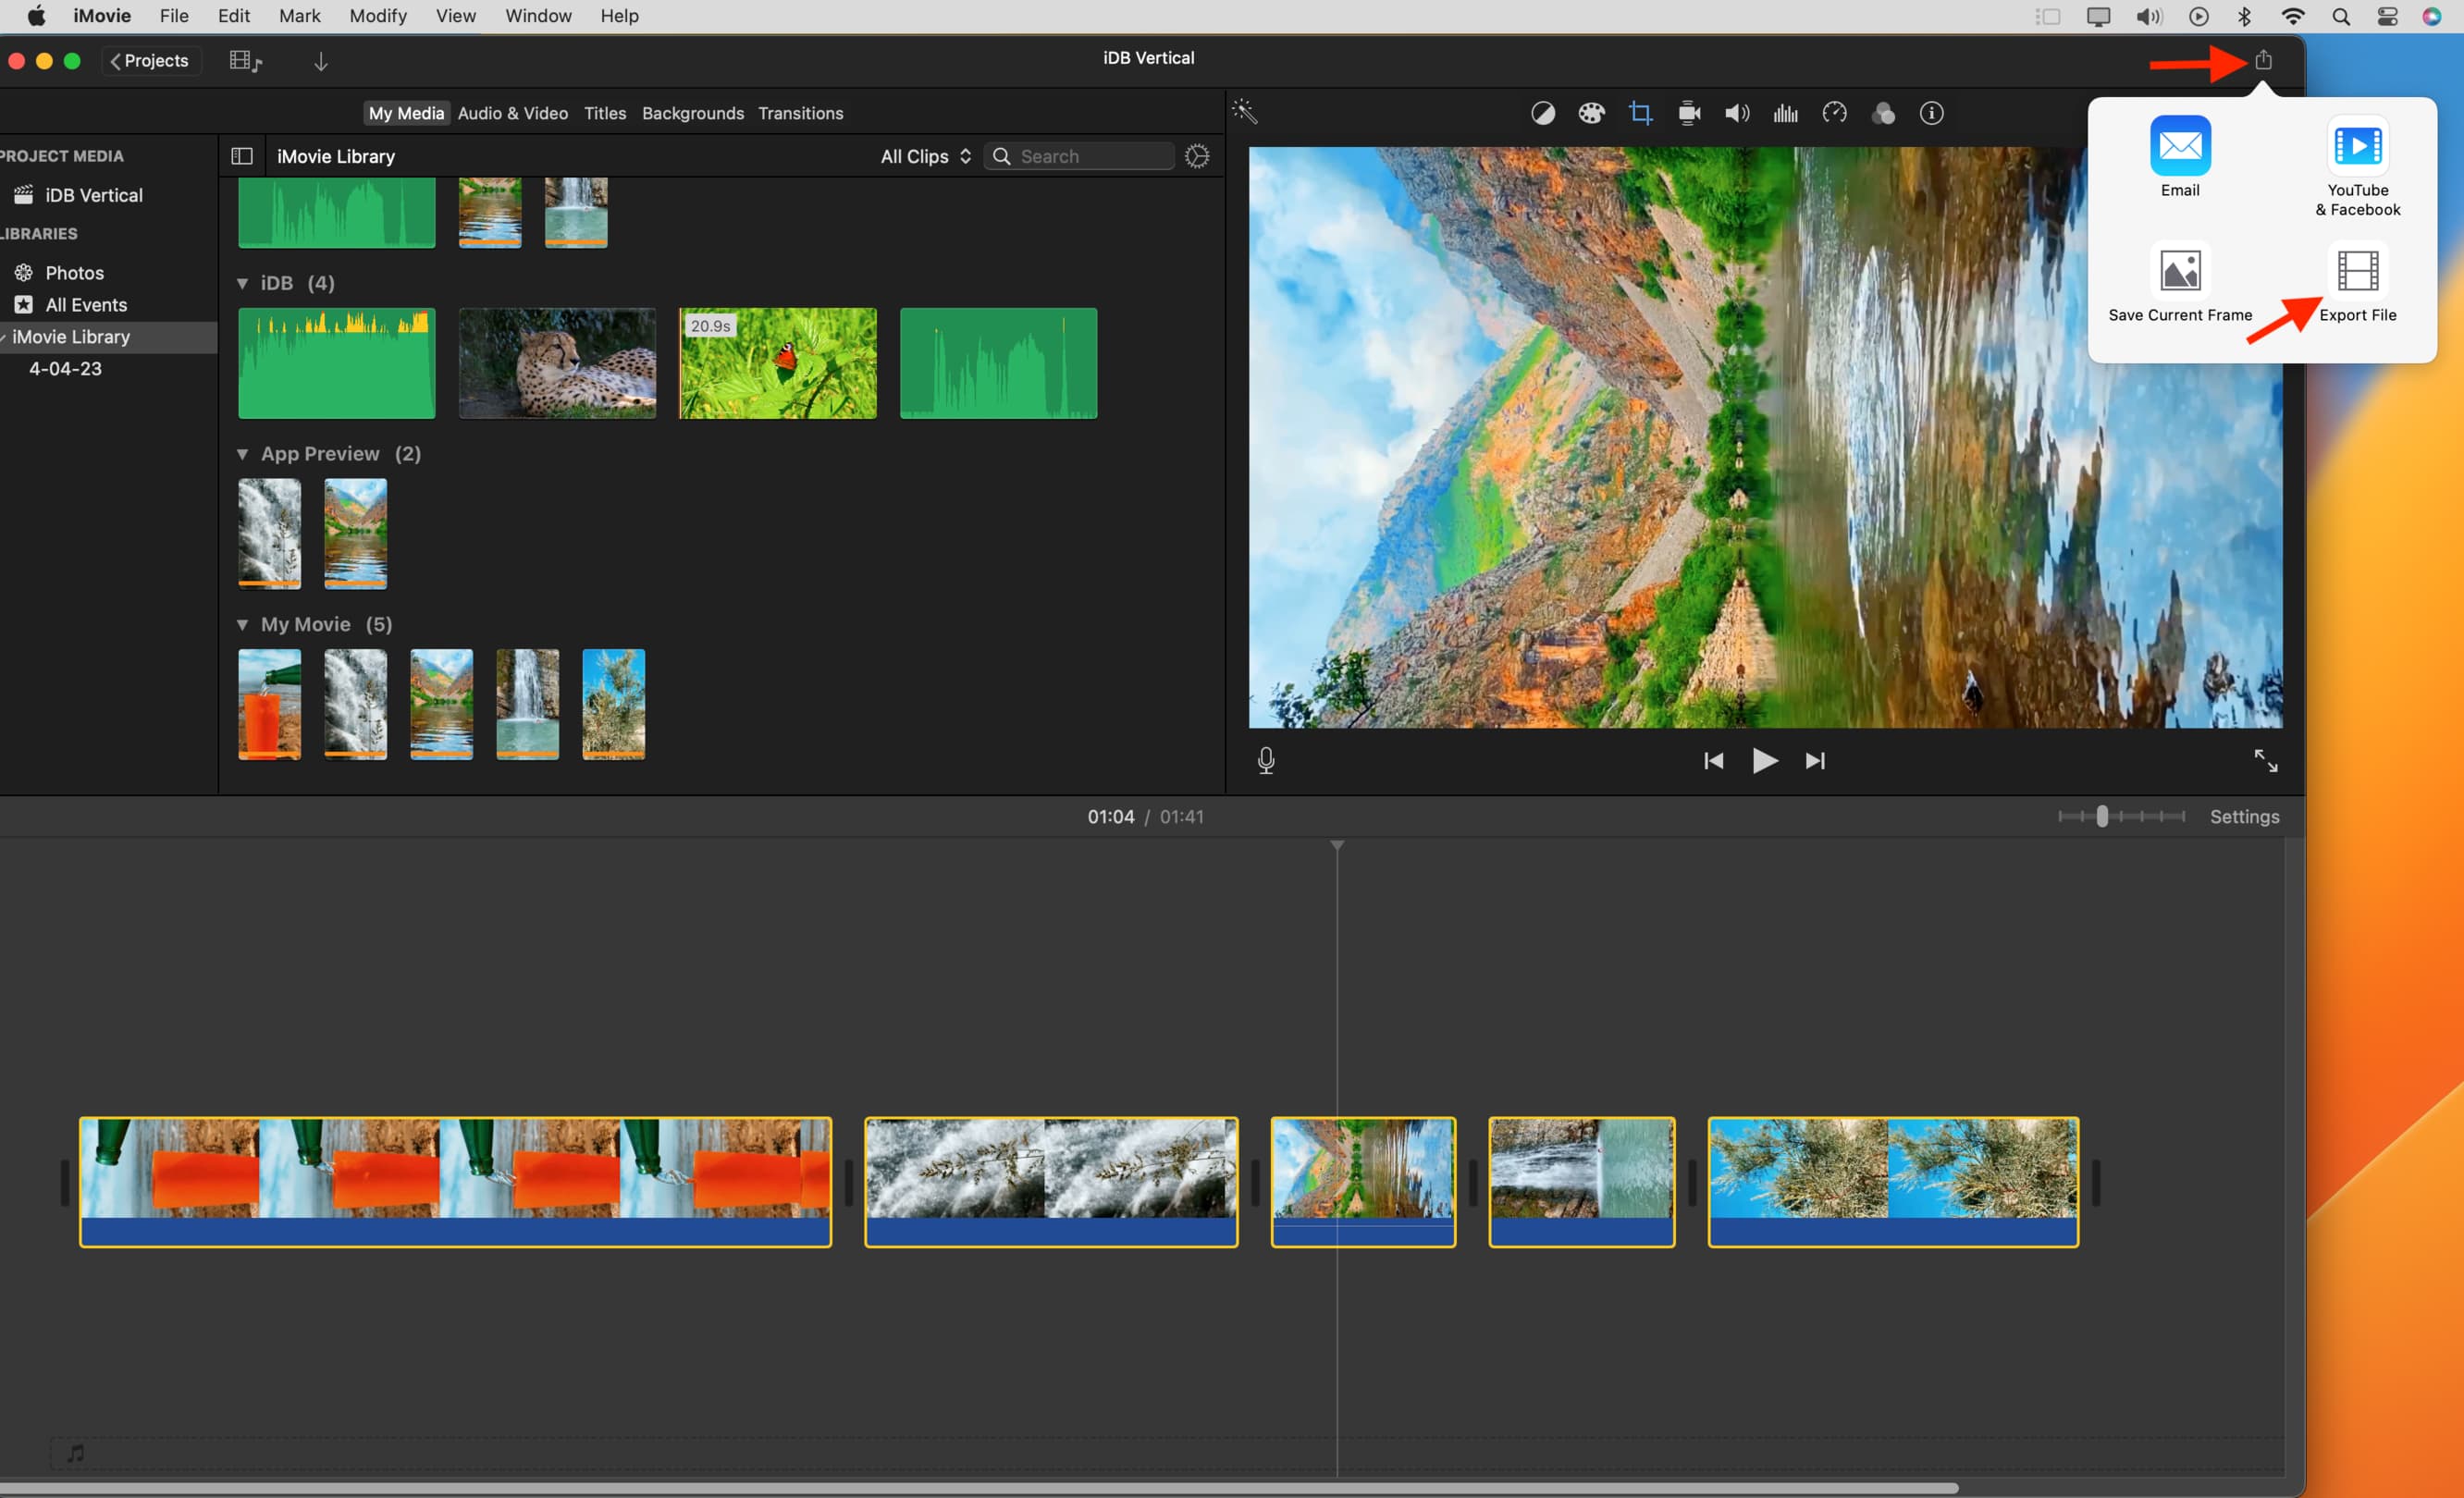
6) With all done, click the share icon, export the file, and save it.
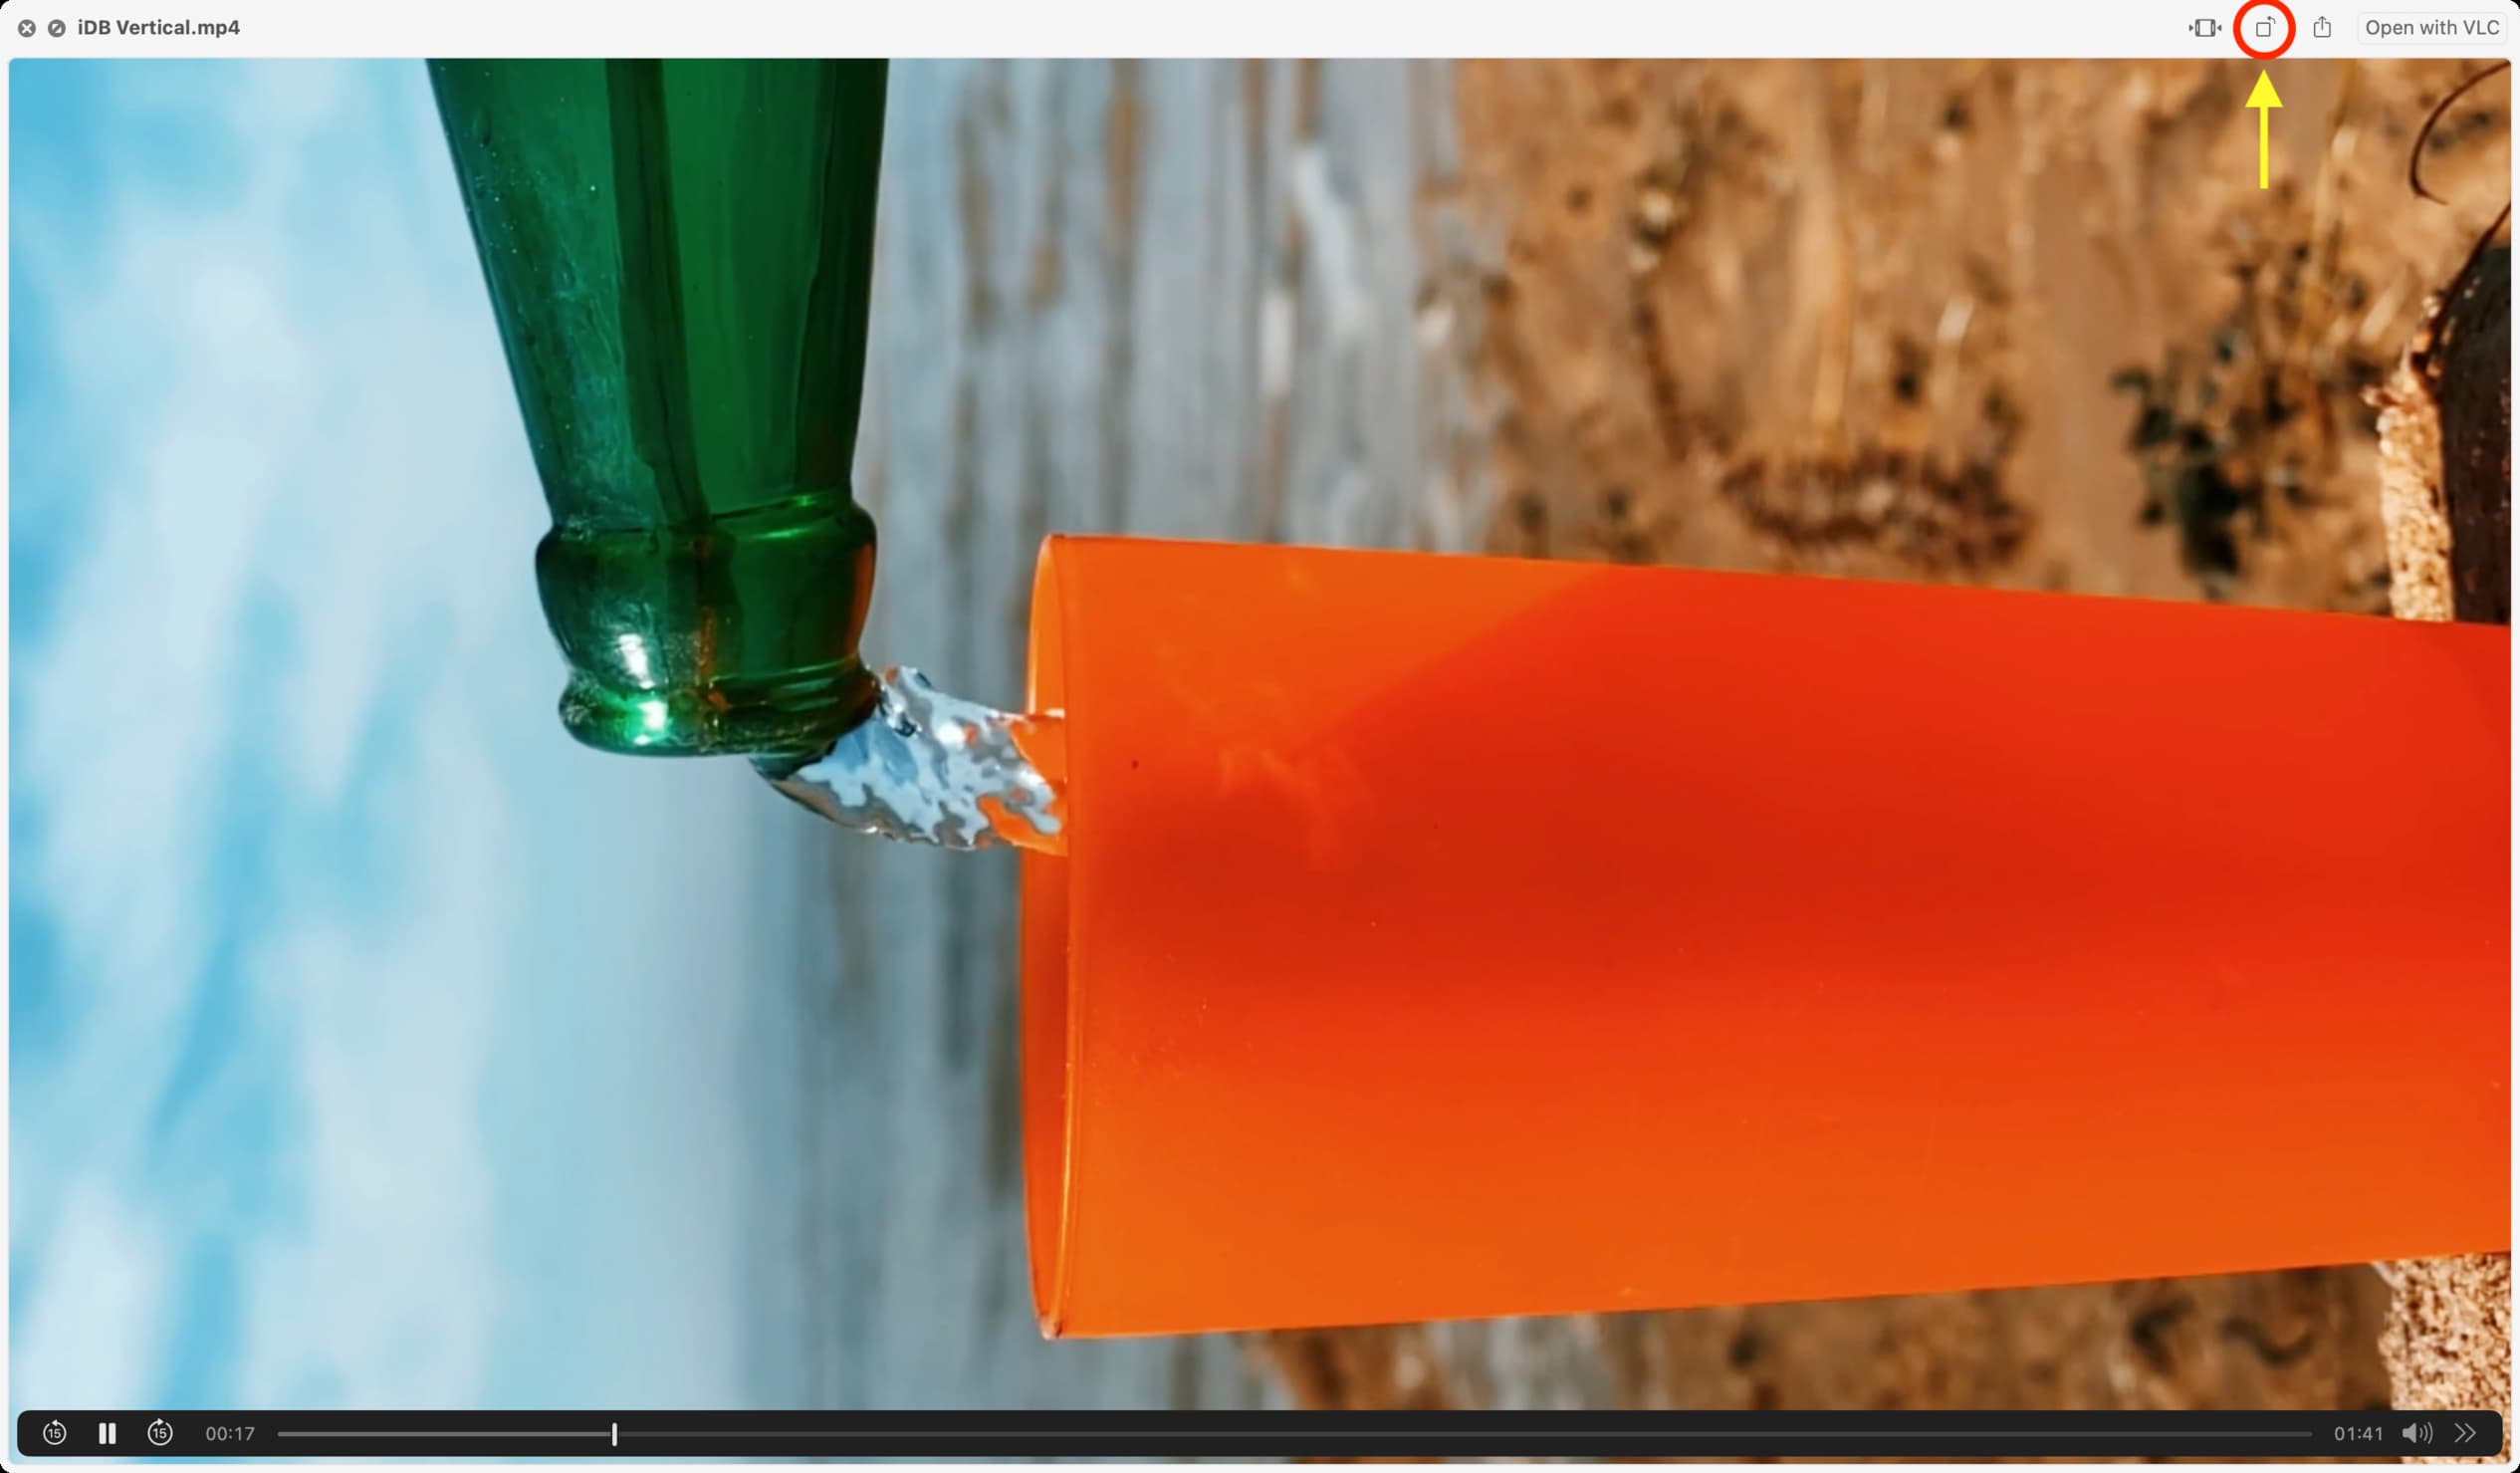
7) Once the file is saved to a Finder folder, select it and hit the space bar on your keyboard. Doing so will open the video in a popup player. From here, click the rotate button to make the video vertical.
Finally, hit the space bar again, and it will save the changes.
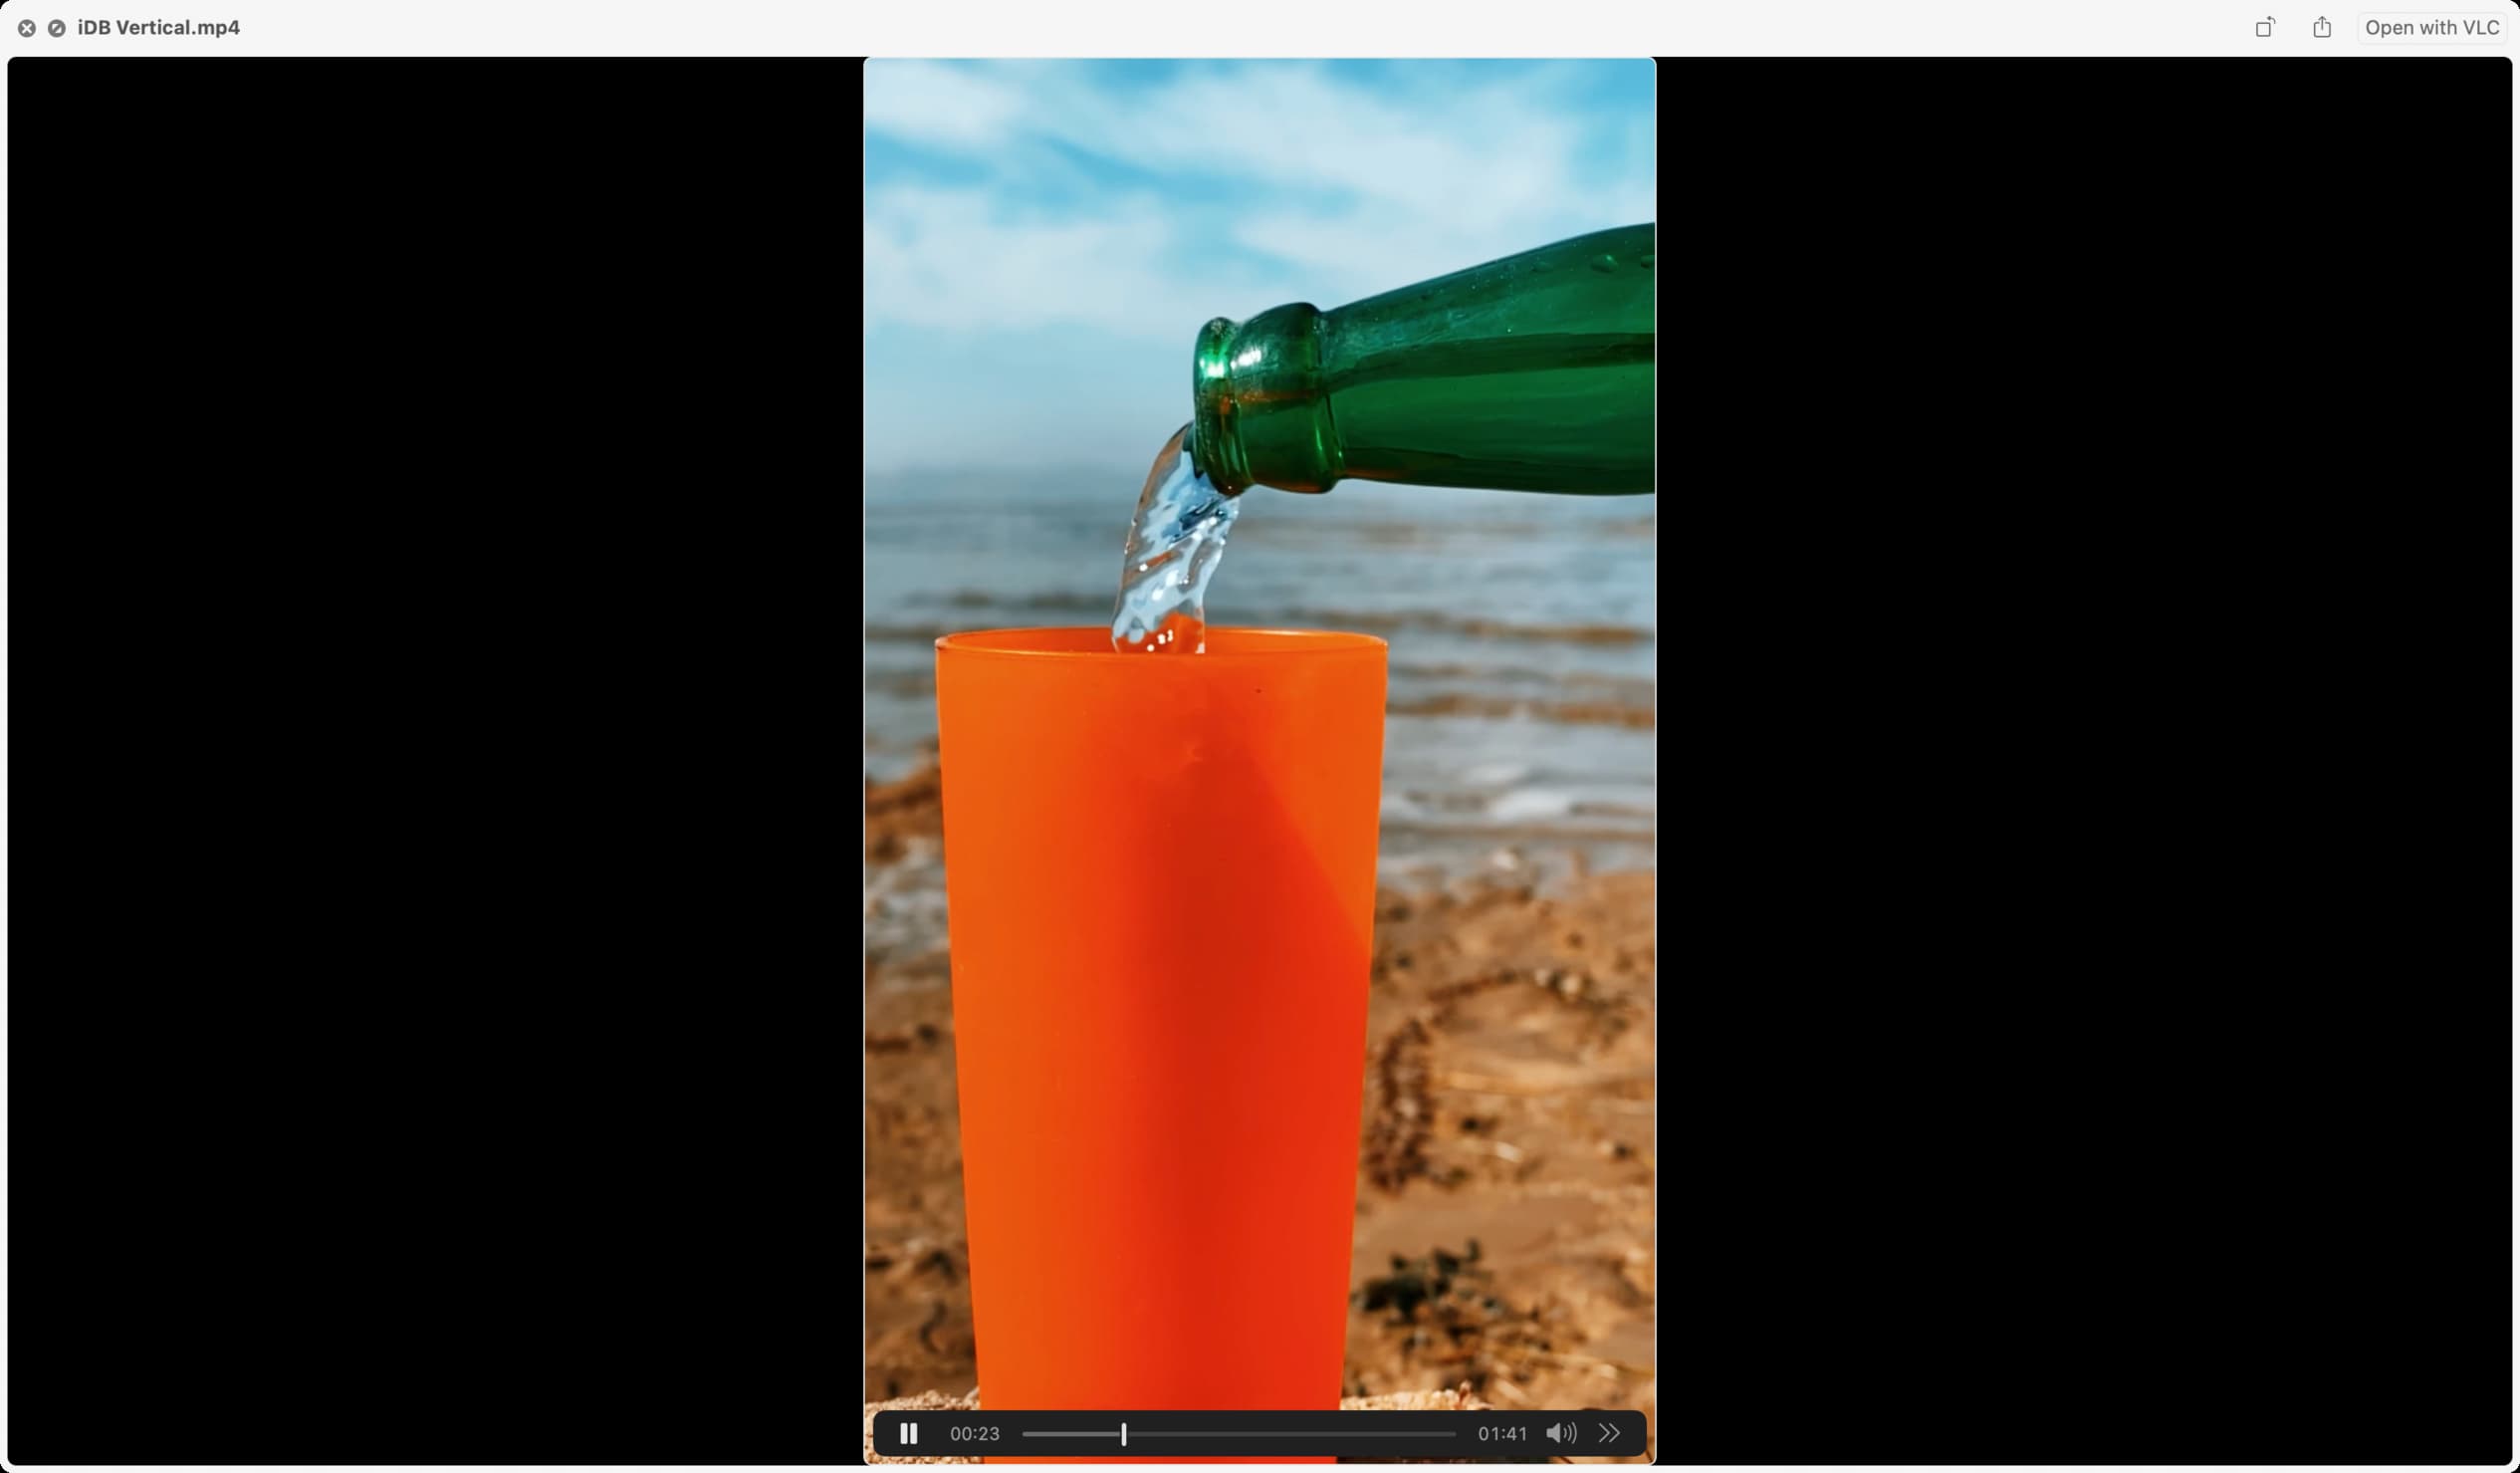
You have your vertical video now. When you play it or AirDrop it to your iPhone, it will have its vertical look without black bars on the sides. You can keep it in the Photos app or post it on social media.
Create video without black bars in iMovie for iPhone or iPad
Unfortunately, there is no easy way to create a vertical video without black bars in iMovie for iPhone and iPad. Instead, you will have to jump through a couple of hoops to get the job done.
The main principle of working with vertical videos in iMovie on iOS is similar to the second method mentioned above. All you have to do is rotate the video on the iMovie editing timeline > make your desired edits > export it > and then rotate it back to vertical orientation:
1) Open iMovie on your iPhone or iPad, tap Start New Project, and choose Movie.
2) Now, select your vertical videos and Create Movie.
Once the vertical videos are added to iMovie, you will notice the empty black bars on the left and right sides of the video on the top preview screen. We have to eliminate this.
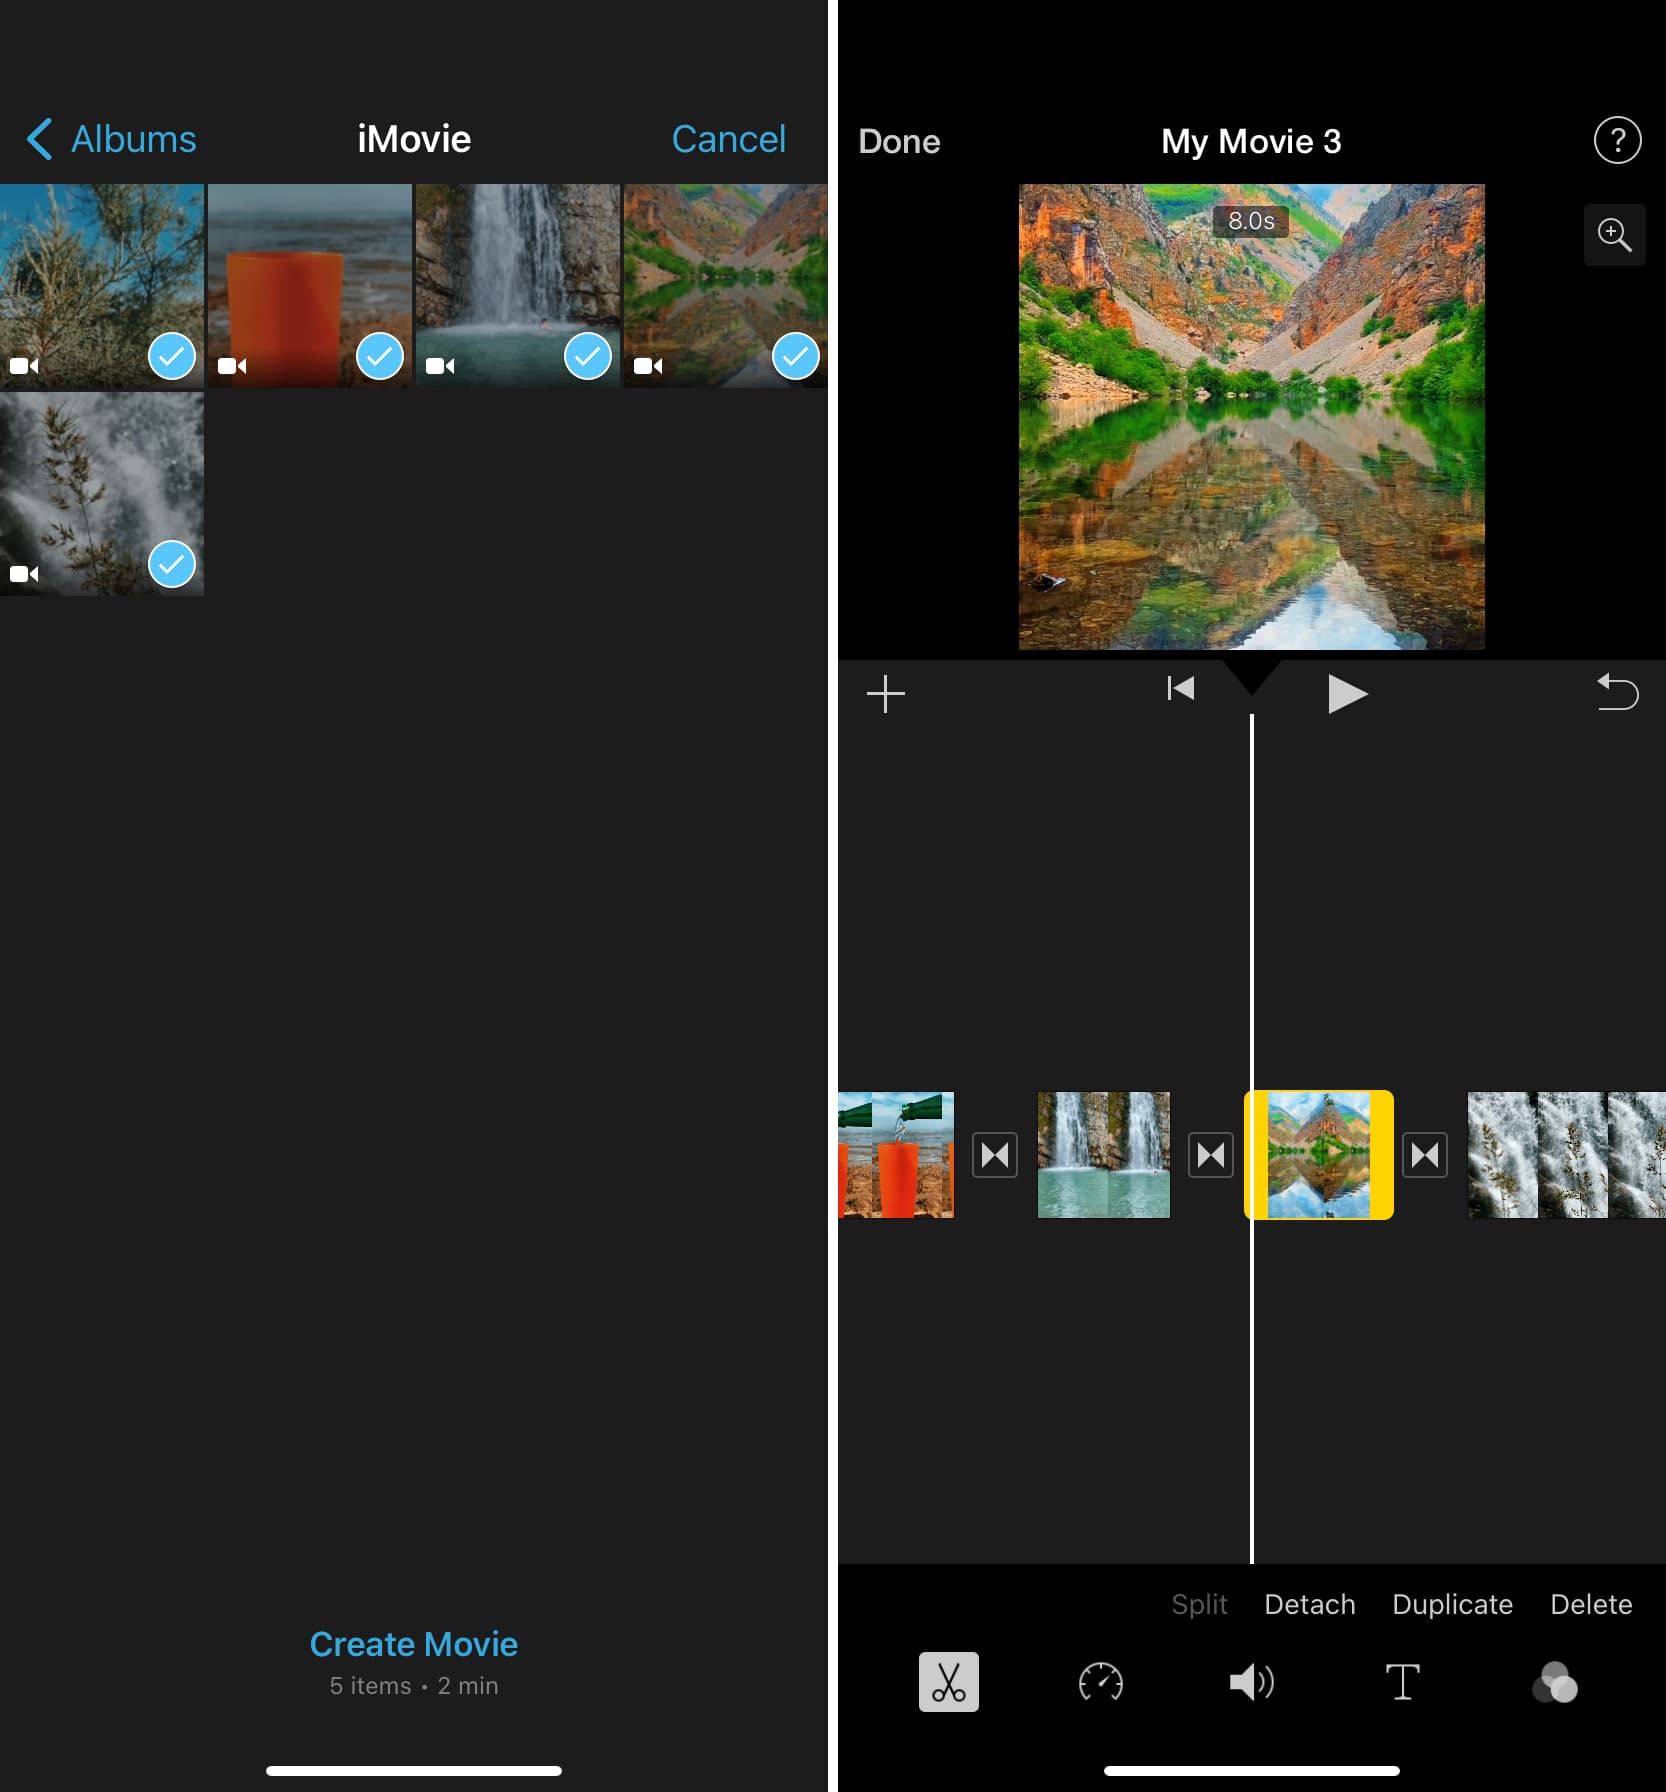
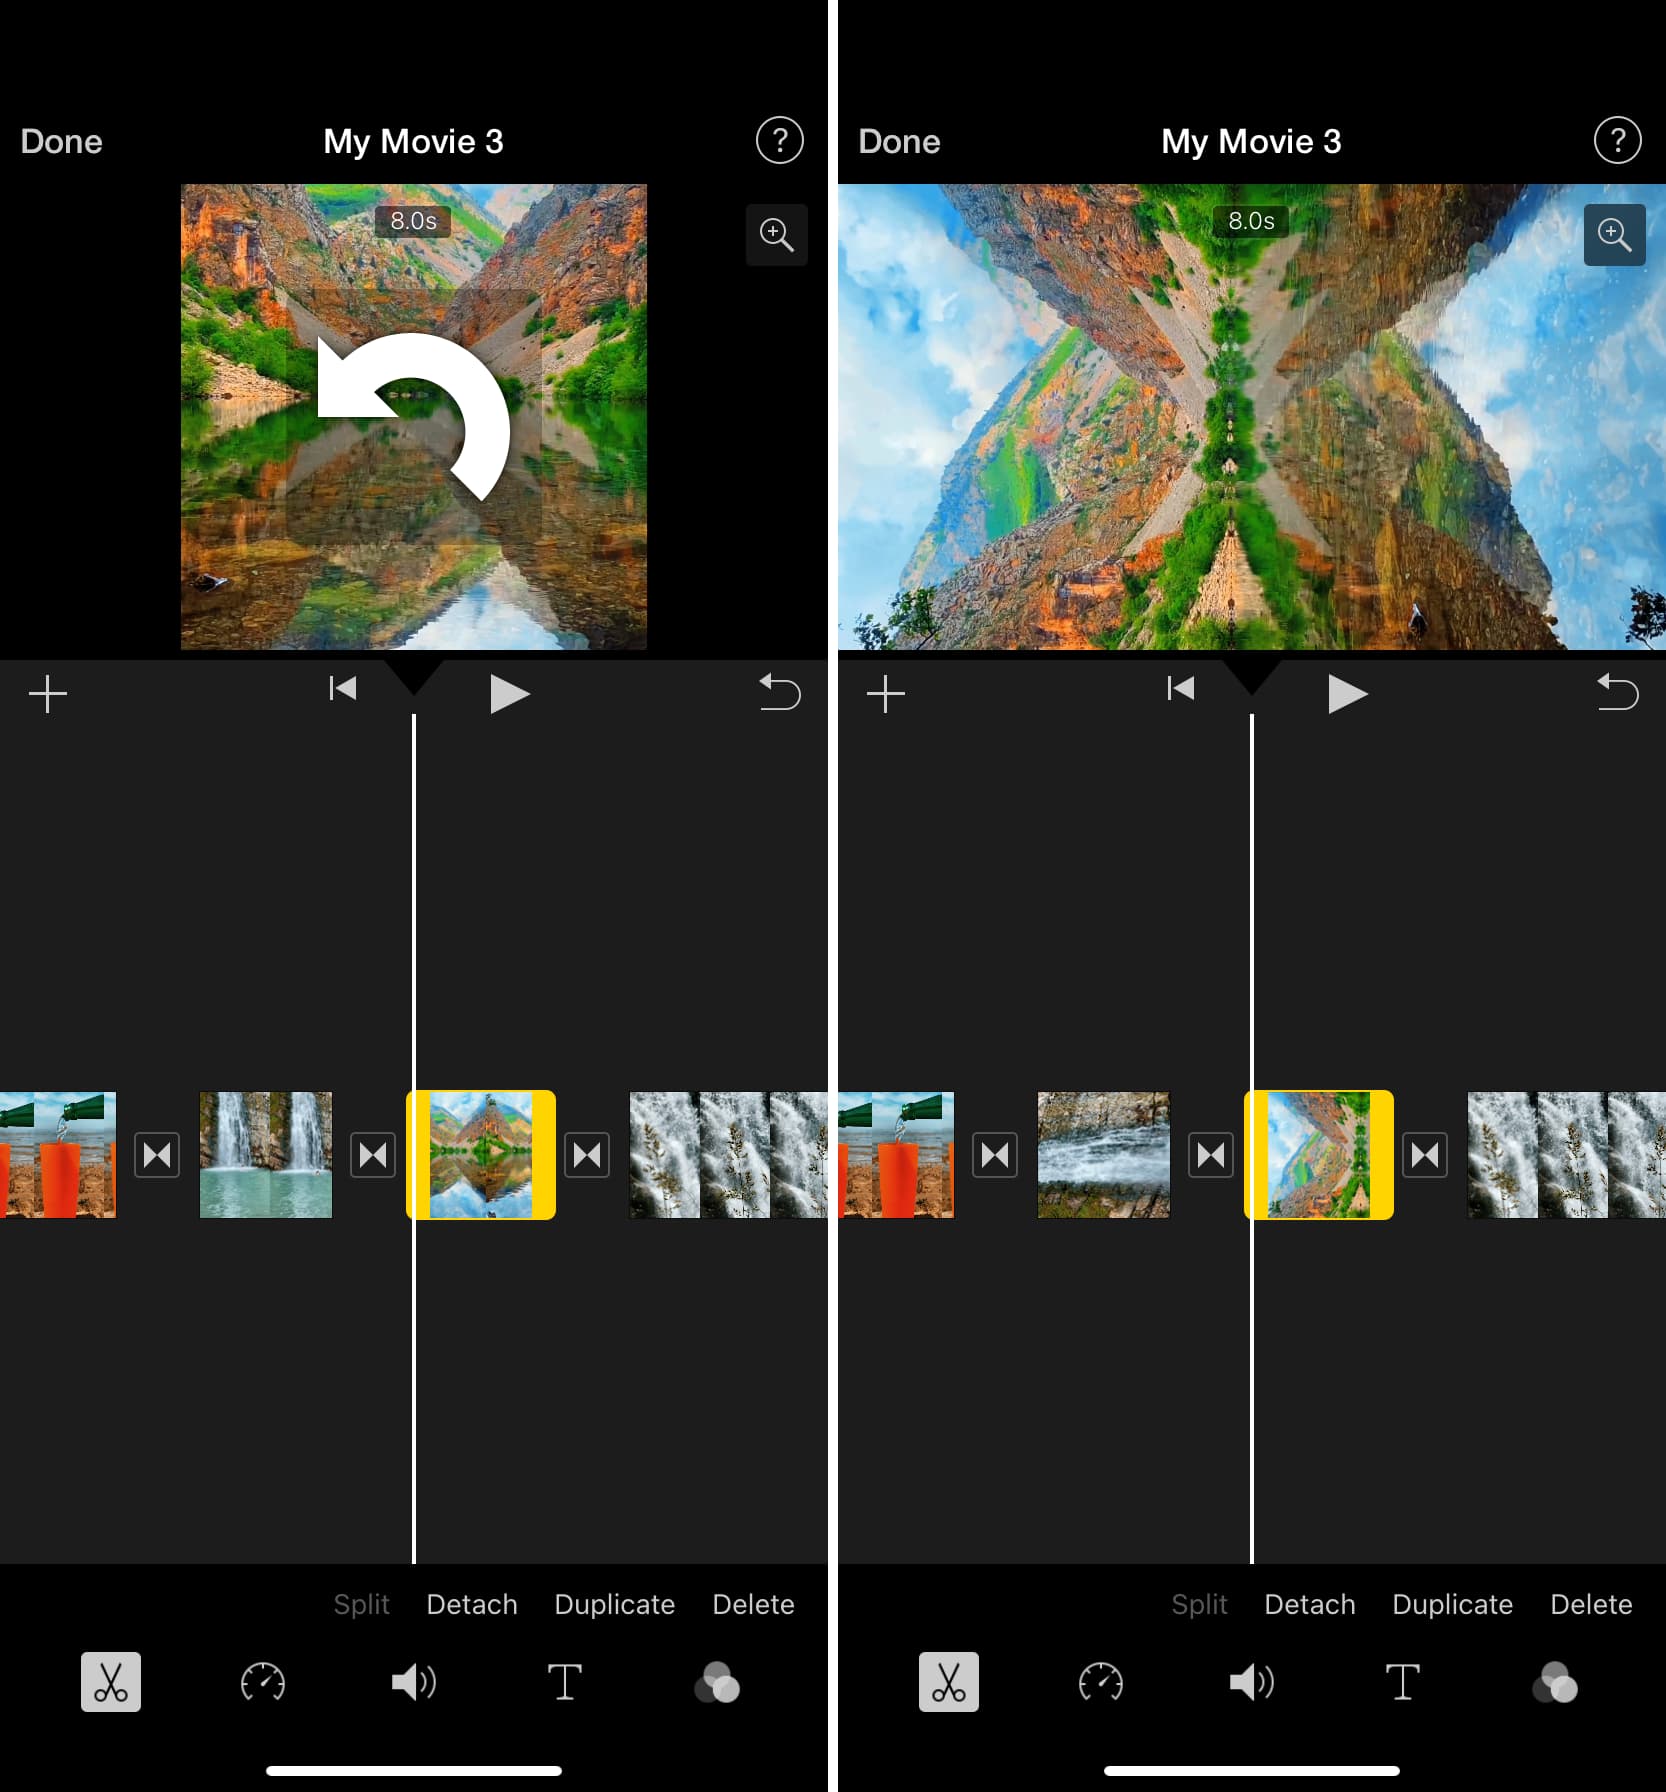
3) Tap a video in the timeline to select it. Now, place two fingers on the top preview and rotate your fingers counterclockwise (anticlockwise). You will see a white curved arrow icon signifying rotation. Try again if you don’t see this arrow.
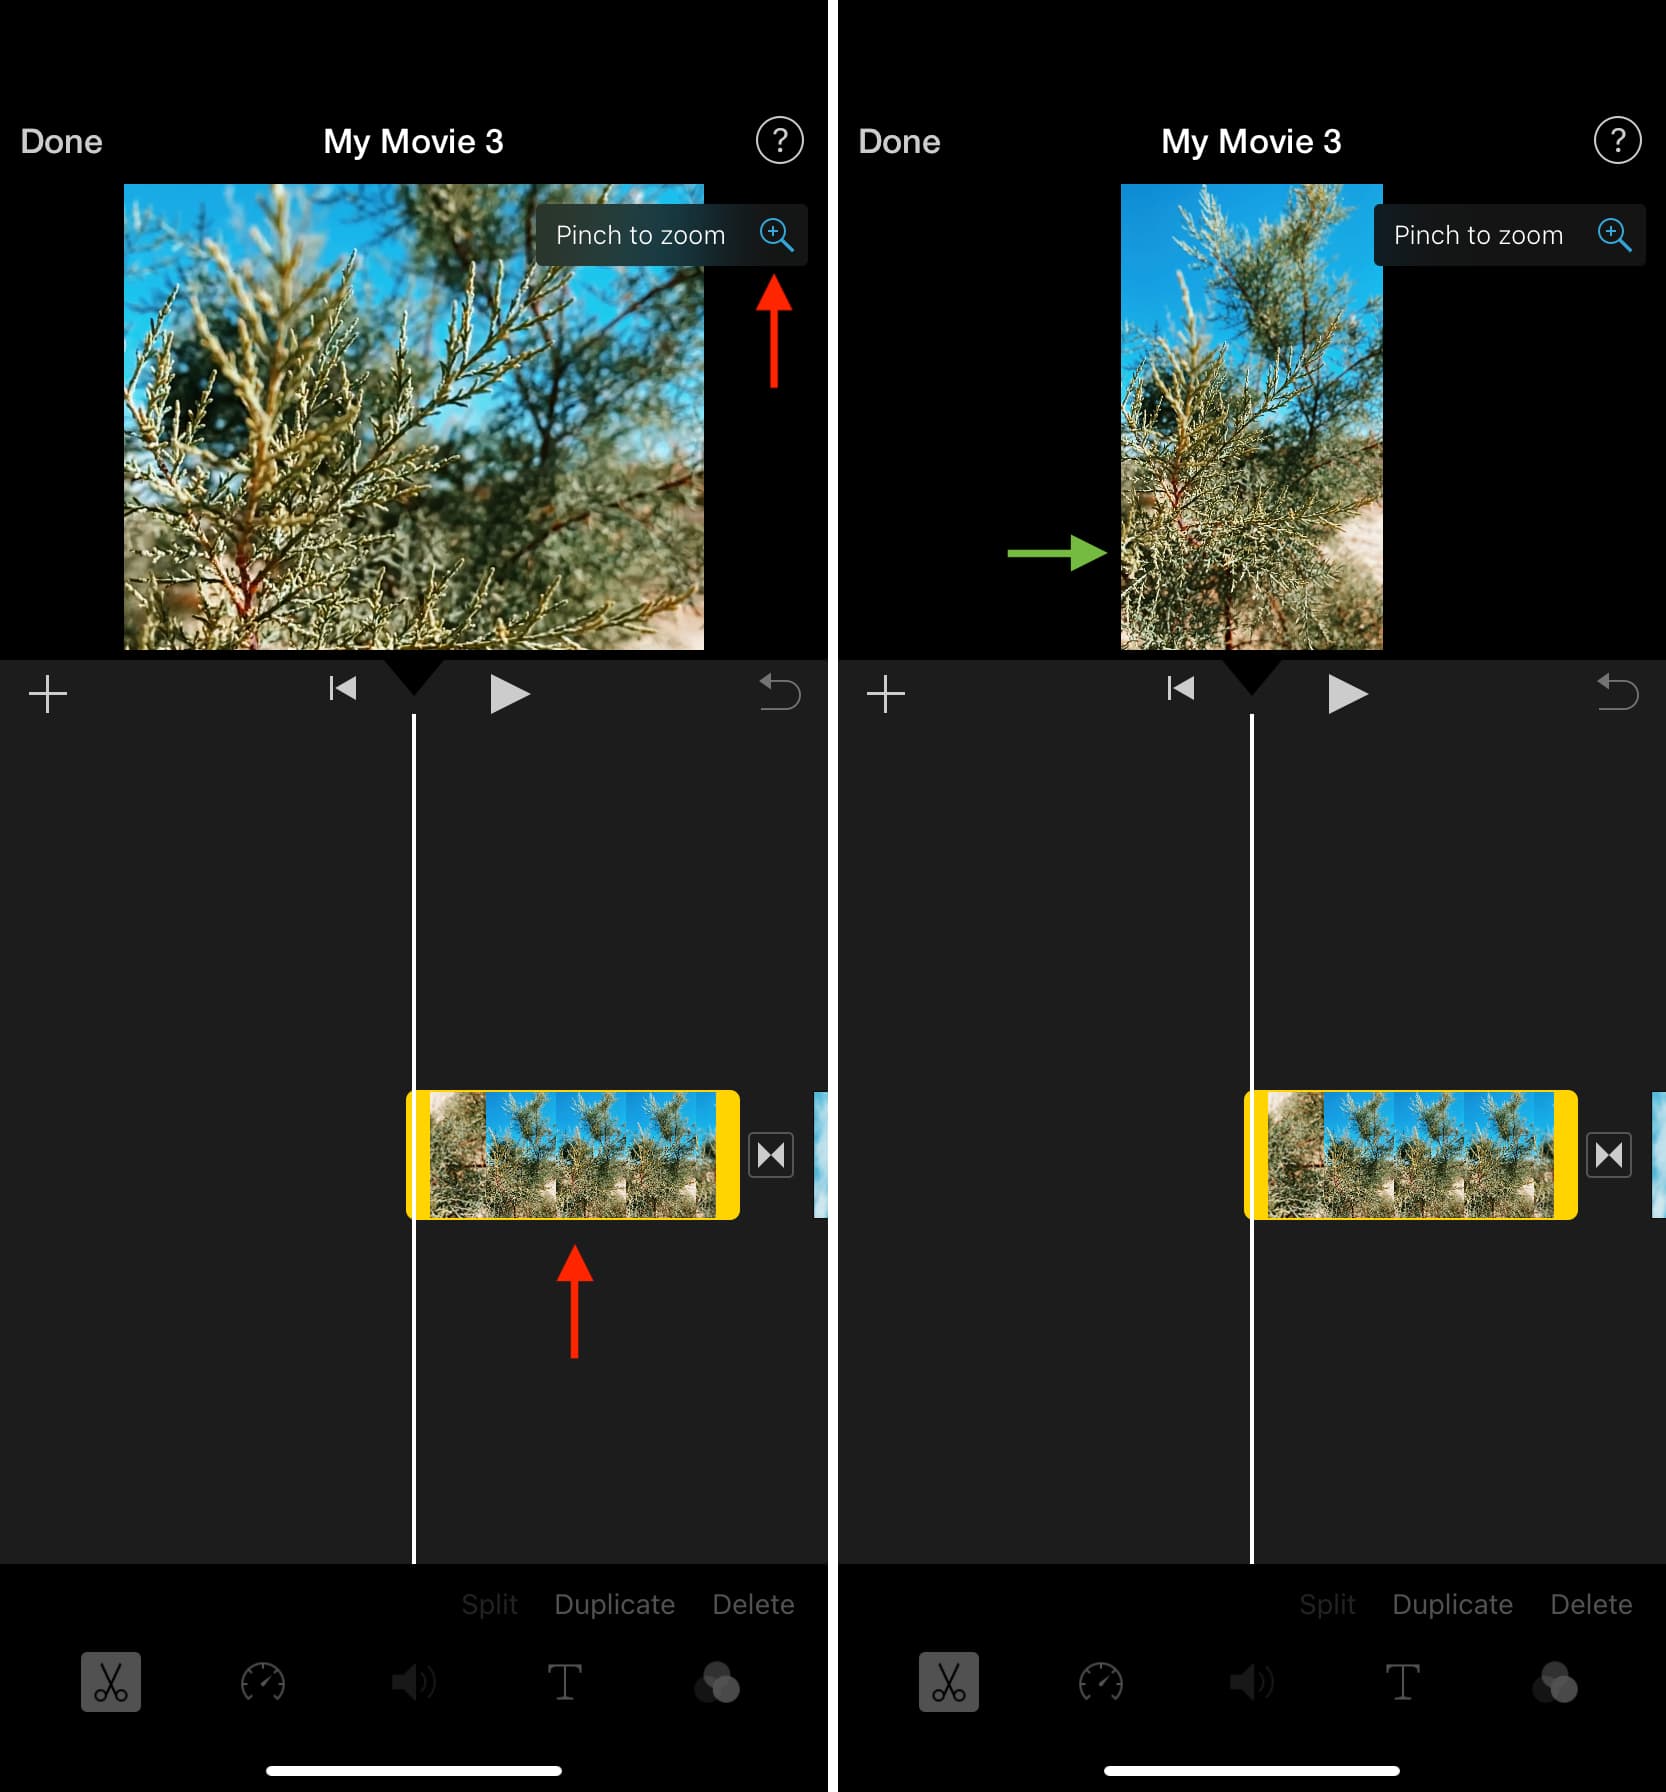
Note: If the vertical video appears zoomed with the top and lower parts cropped, tap the video in the timeline. After that, tap the plus icon from the top and then pinch in using two fingers to have the entire thin vertical video on the preview.
4) Select other vertical clips in your iMovie timeline and follow the above steps to rotate them.
5) Optional: Trim, add sound, change playback speed, and make other editing changes if required.
6) Finally, tap Done > share icon > Save Video to export this video in the familiar Photos app.
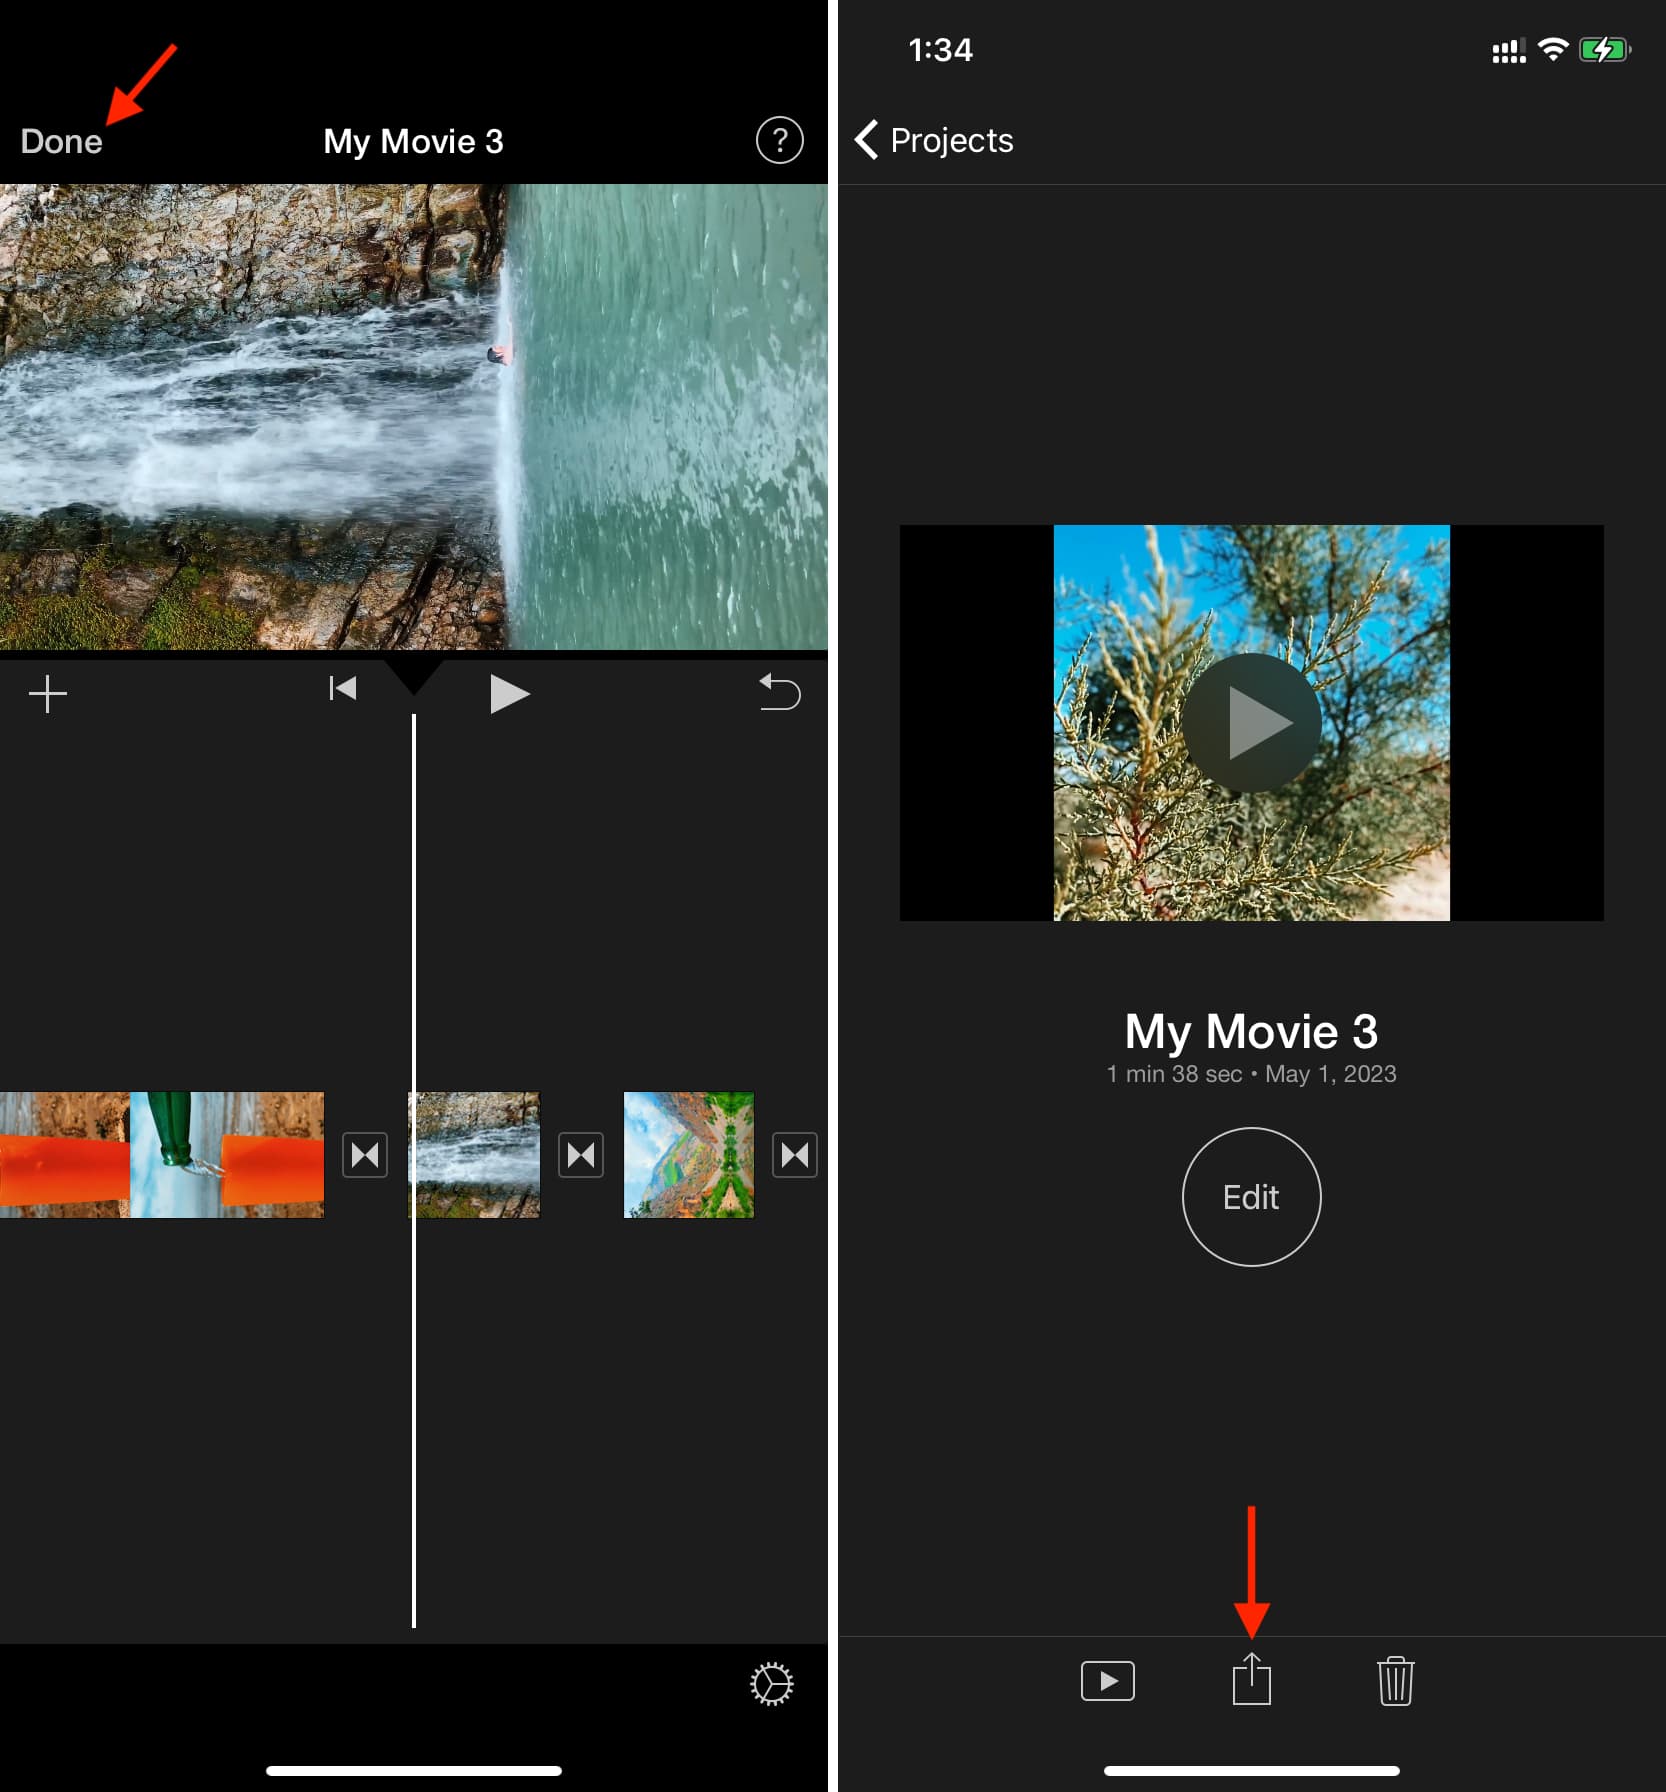
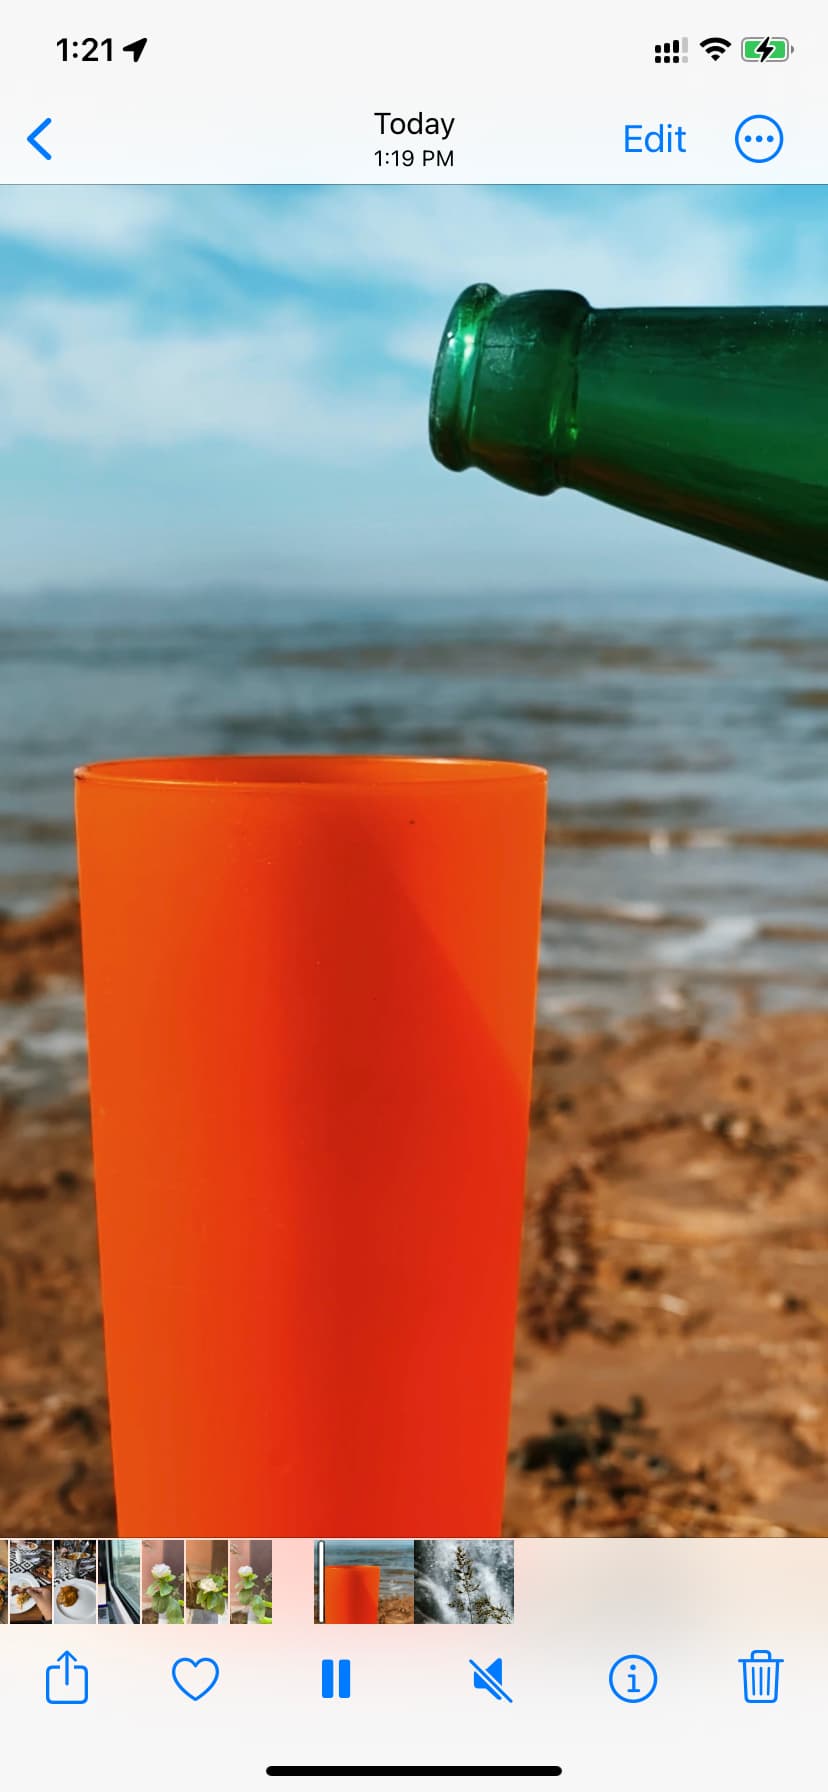
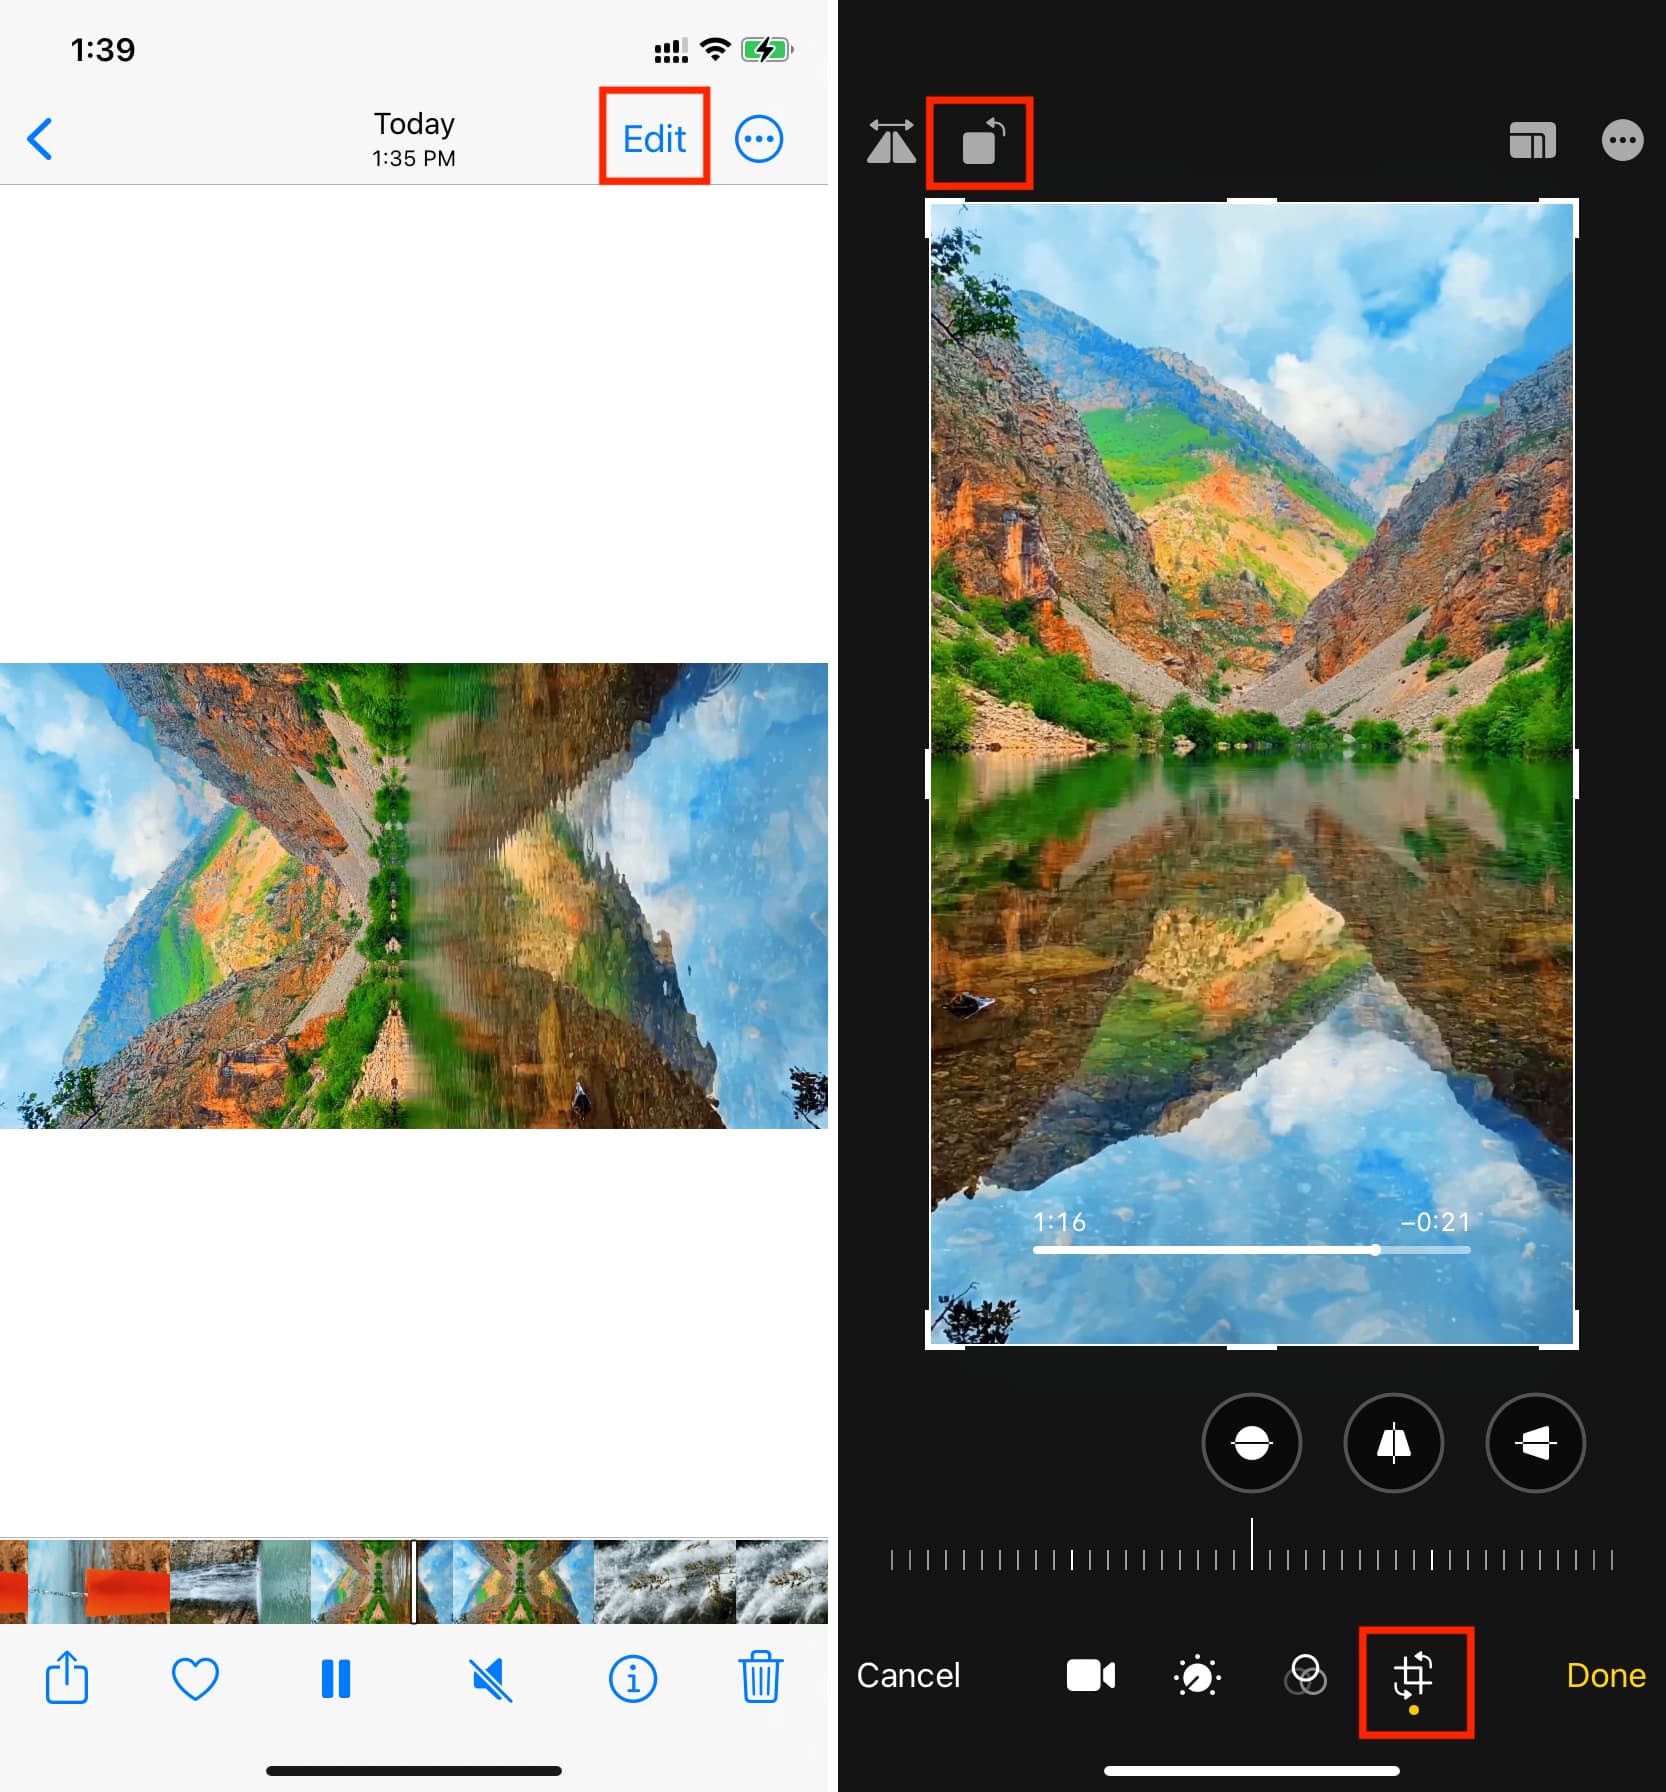
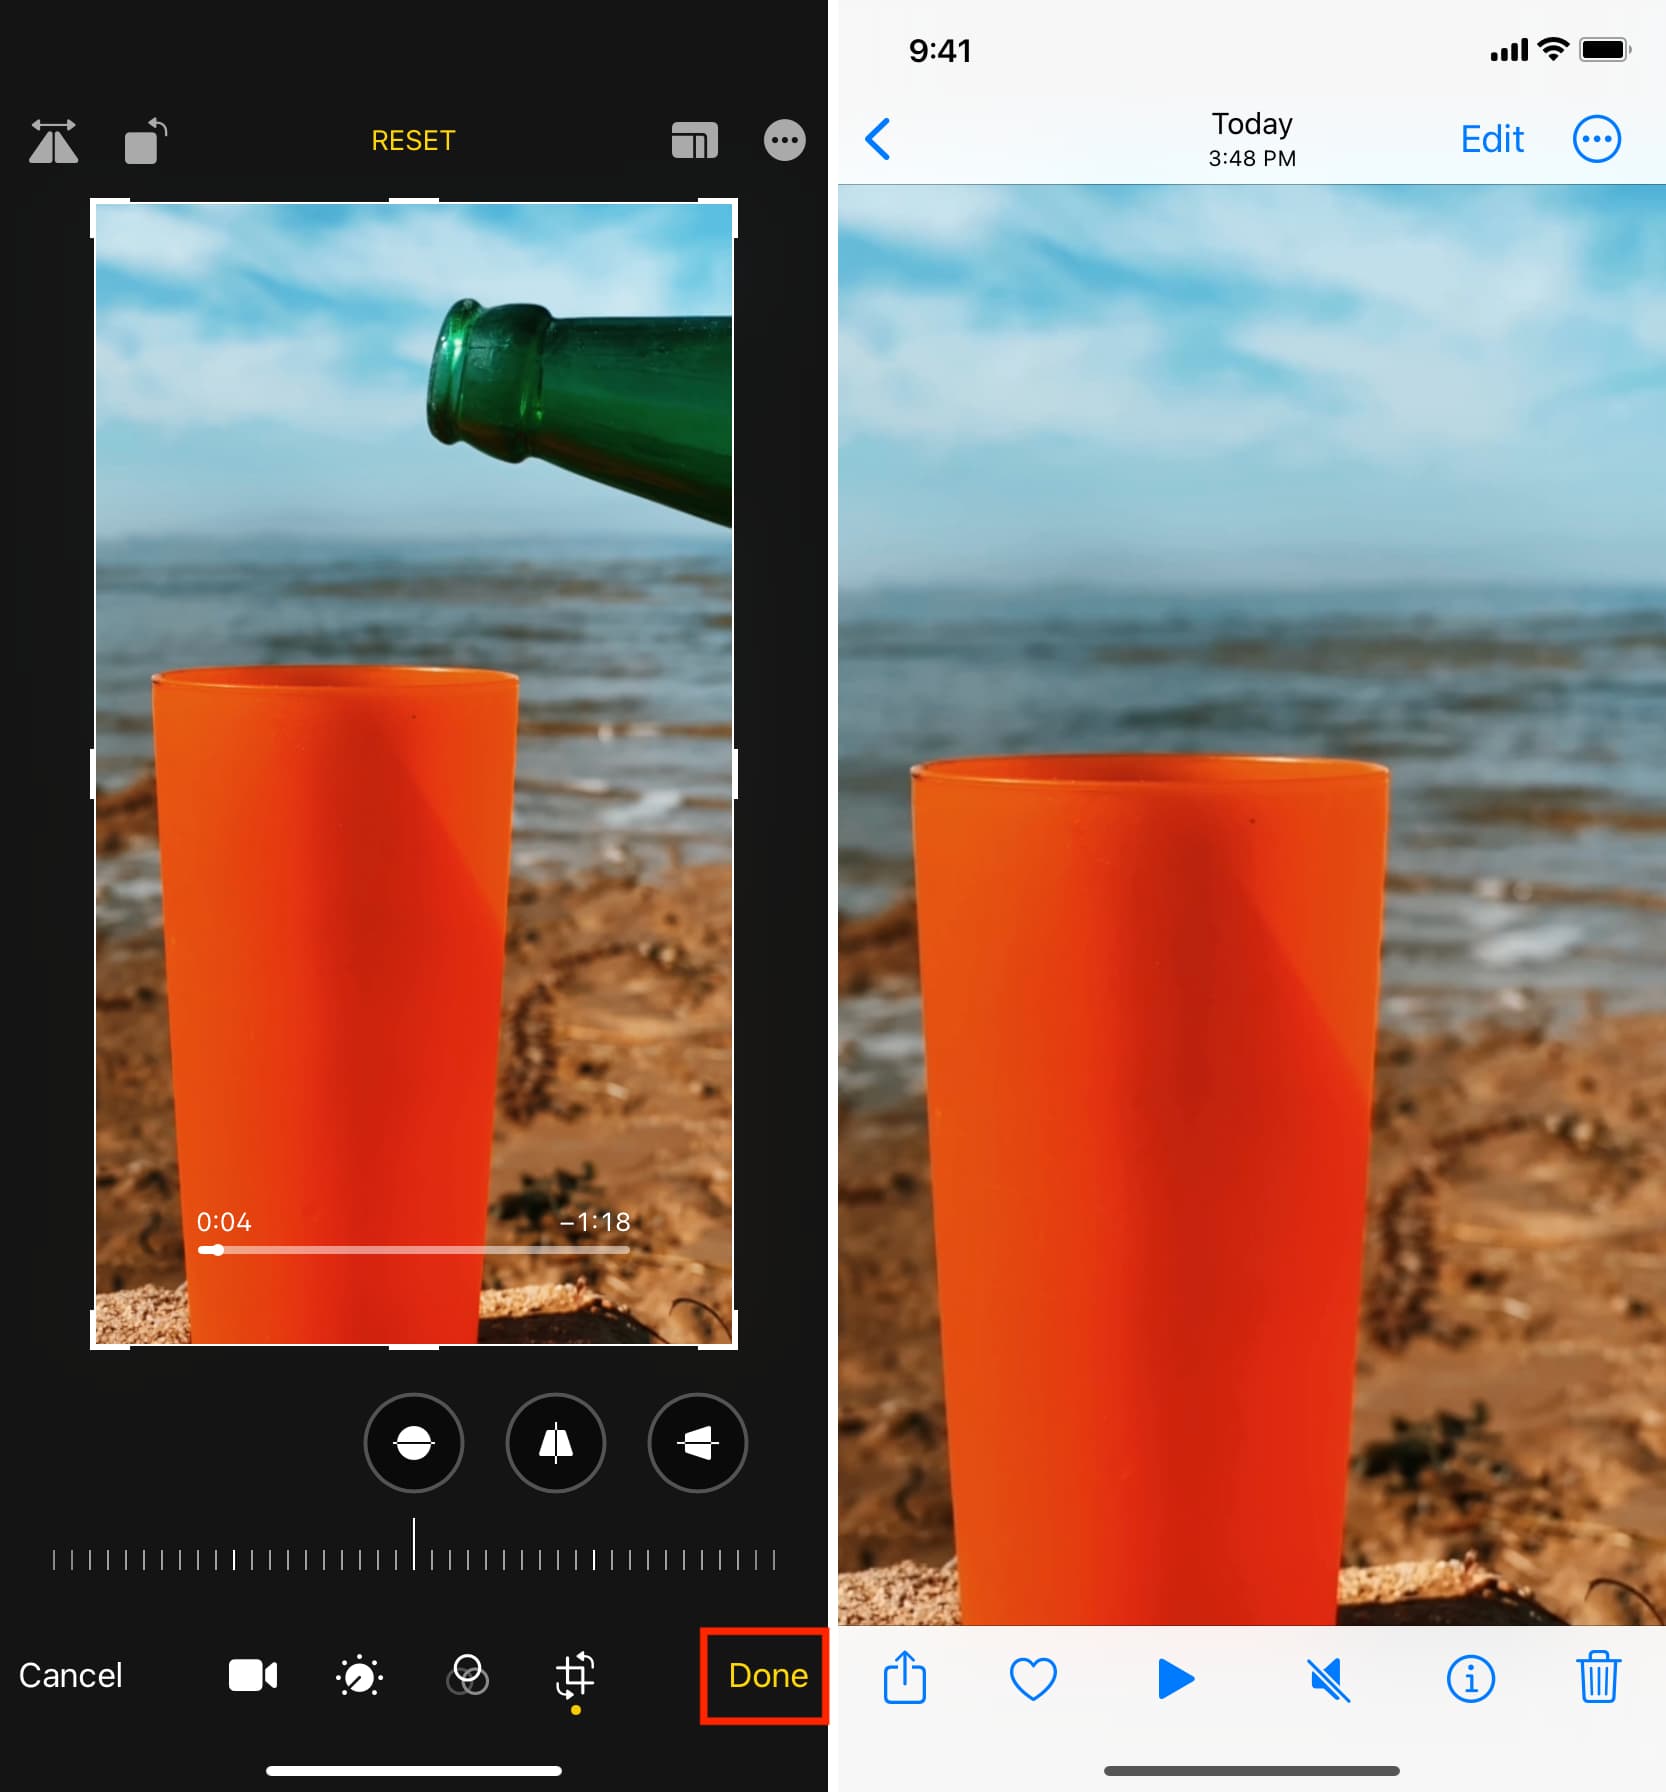
7) Go inside the Photos app and open this video. Next, tap Edit.
8) Tap the crop tool icon and use the rotate button to make this video vertical again.
9) Finally, tap Done to save it.
You have your vertically edited video ready to be posted on your favorite social media platform!

Remove vertical black bars from an existing video
A different approach you can take is to edit your video as you’d normally do in iMovie and export it. The landscape video will have empty black bars, which you can get rid of using the Photos app on your Mac, iPhone, or iPad.
On Mac
1) Open the video inside the Photos app. The easiest way is to launch the Photos app and drop the video from Finder to the Photos app window.
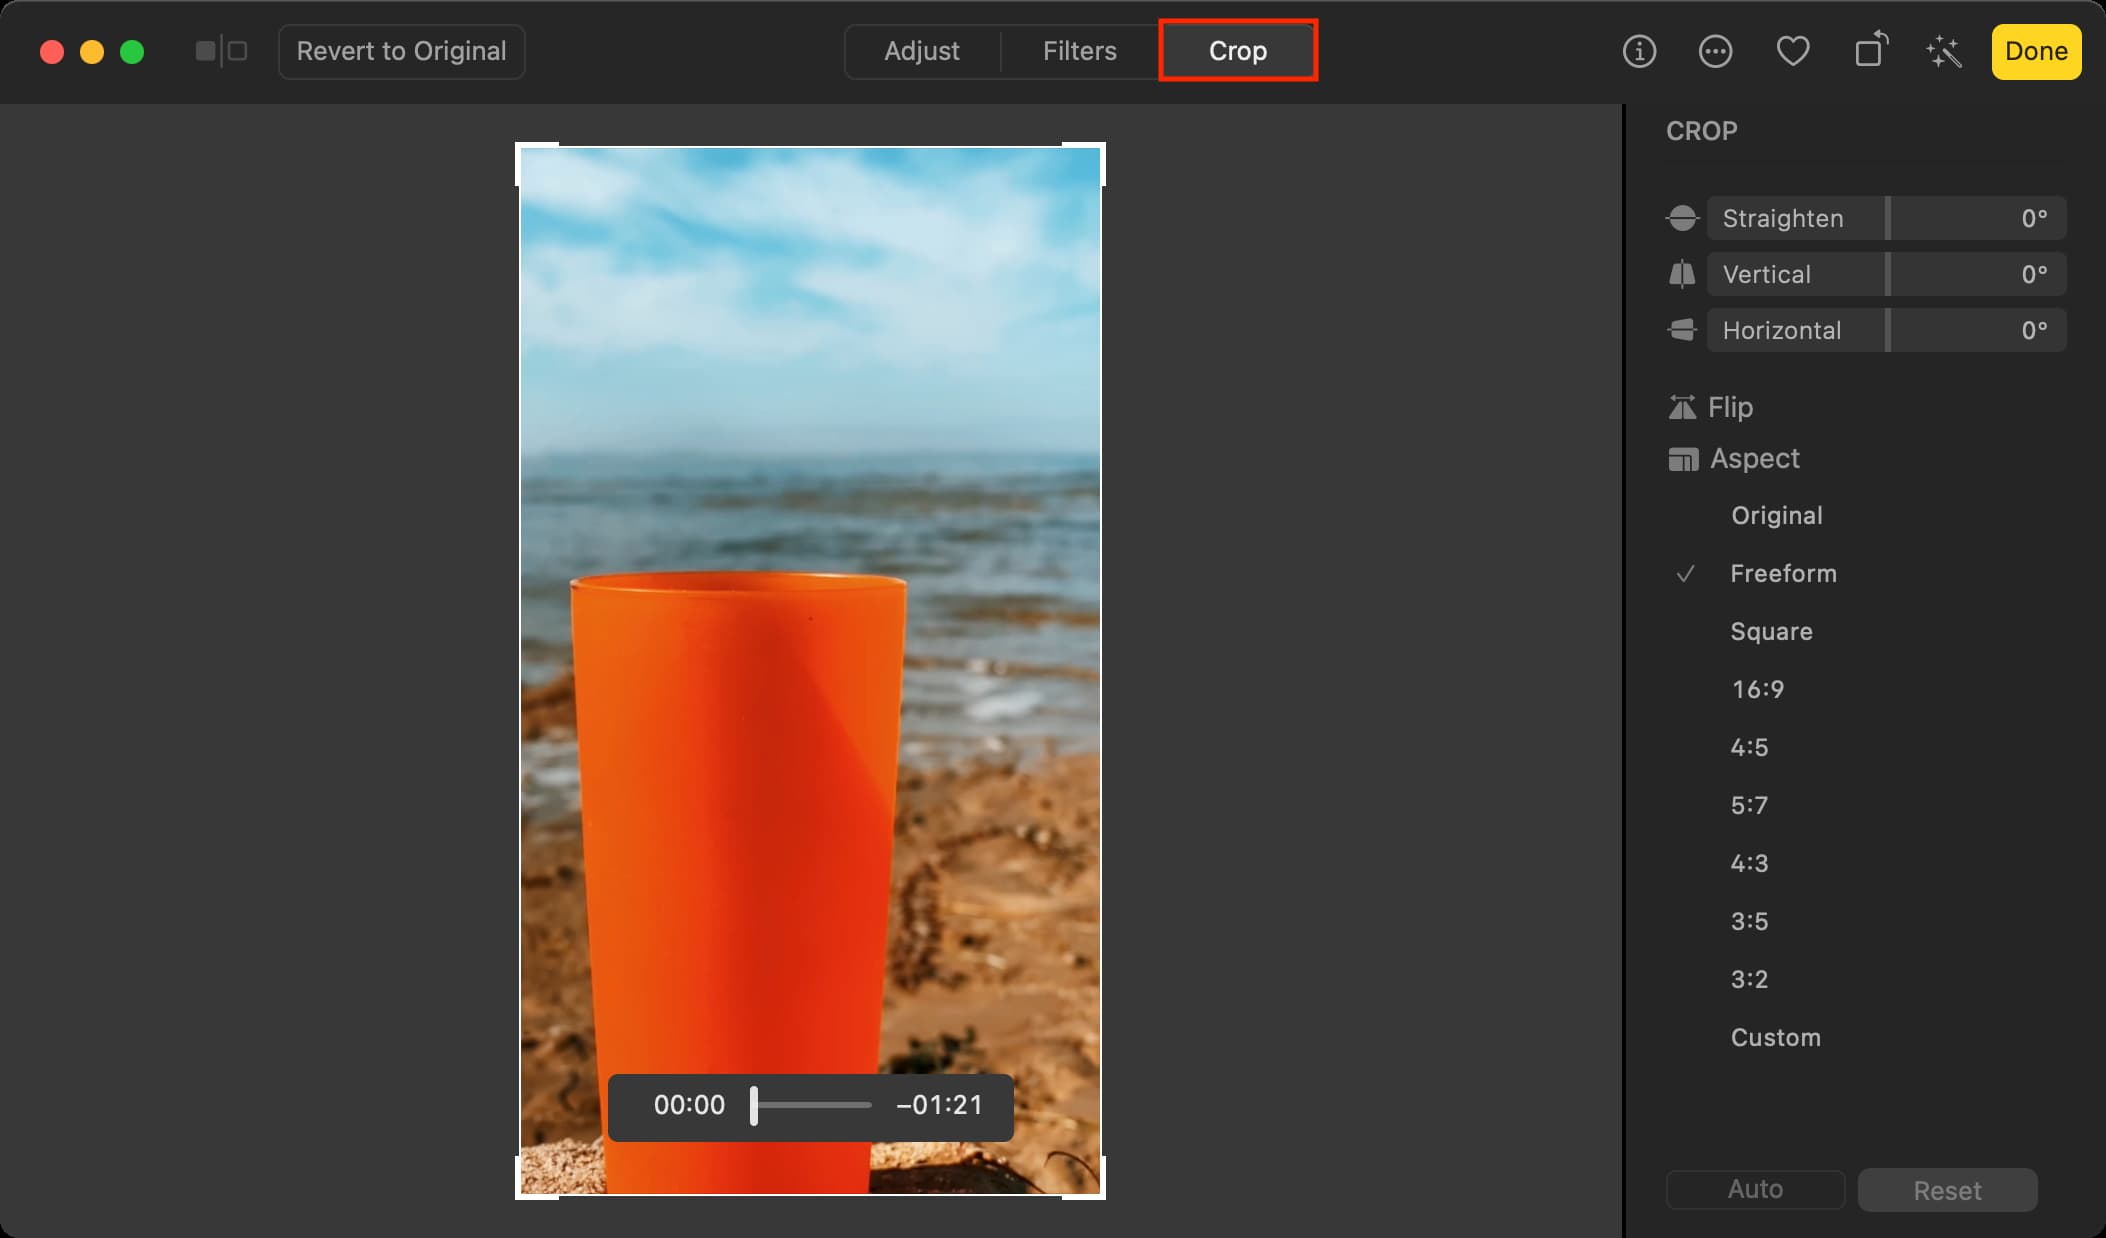
2) Double-click the video in the Photos app and click Edit.
3) Go to the Crop section.
4) Place the pointer on the left and right edges of the crop tool and drag it to get rid of the black area.
5) Finally, click Done to save the video without the unwanted black bars.
You can move this edited video back to a Finder folder by simply dragging it out of the Photos app and dropping it over the Desktop or a folder.
On iPhone or iPad
1) Go inside the Photos app and tap the video to open it.
2) Tap Edit.
3) Now, tap the crop icon and adjust the cropping zone to remove the black bars from the left and right sides of the video.
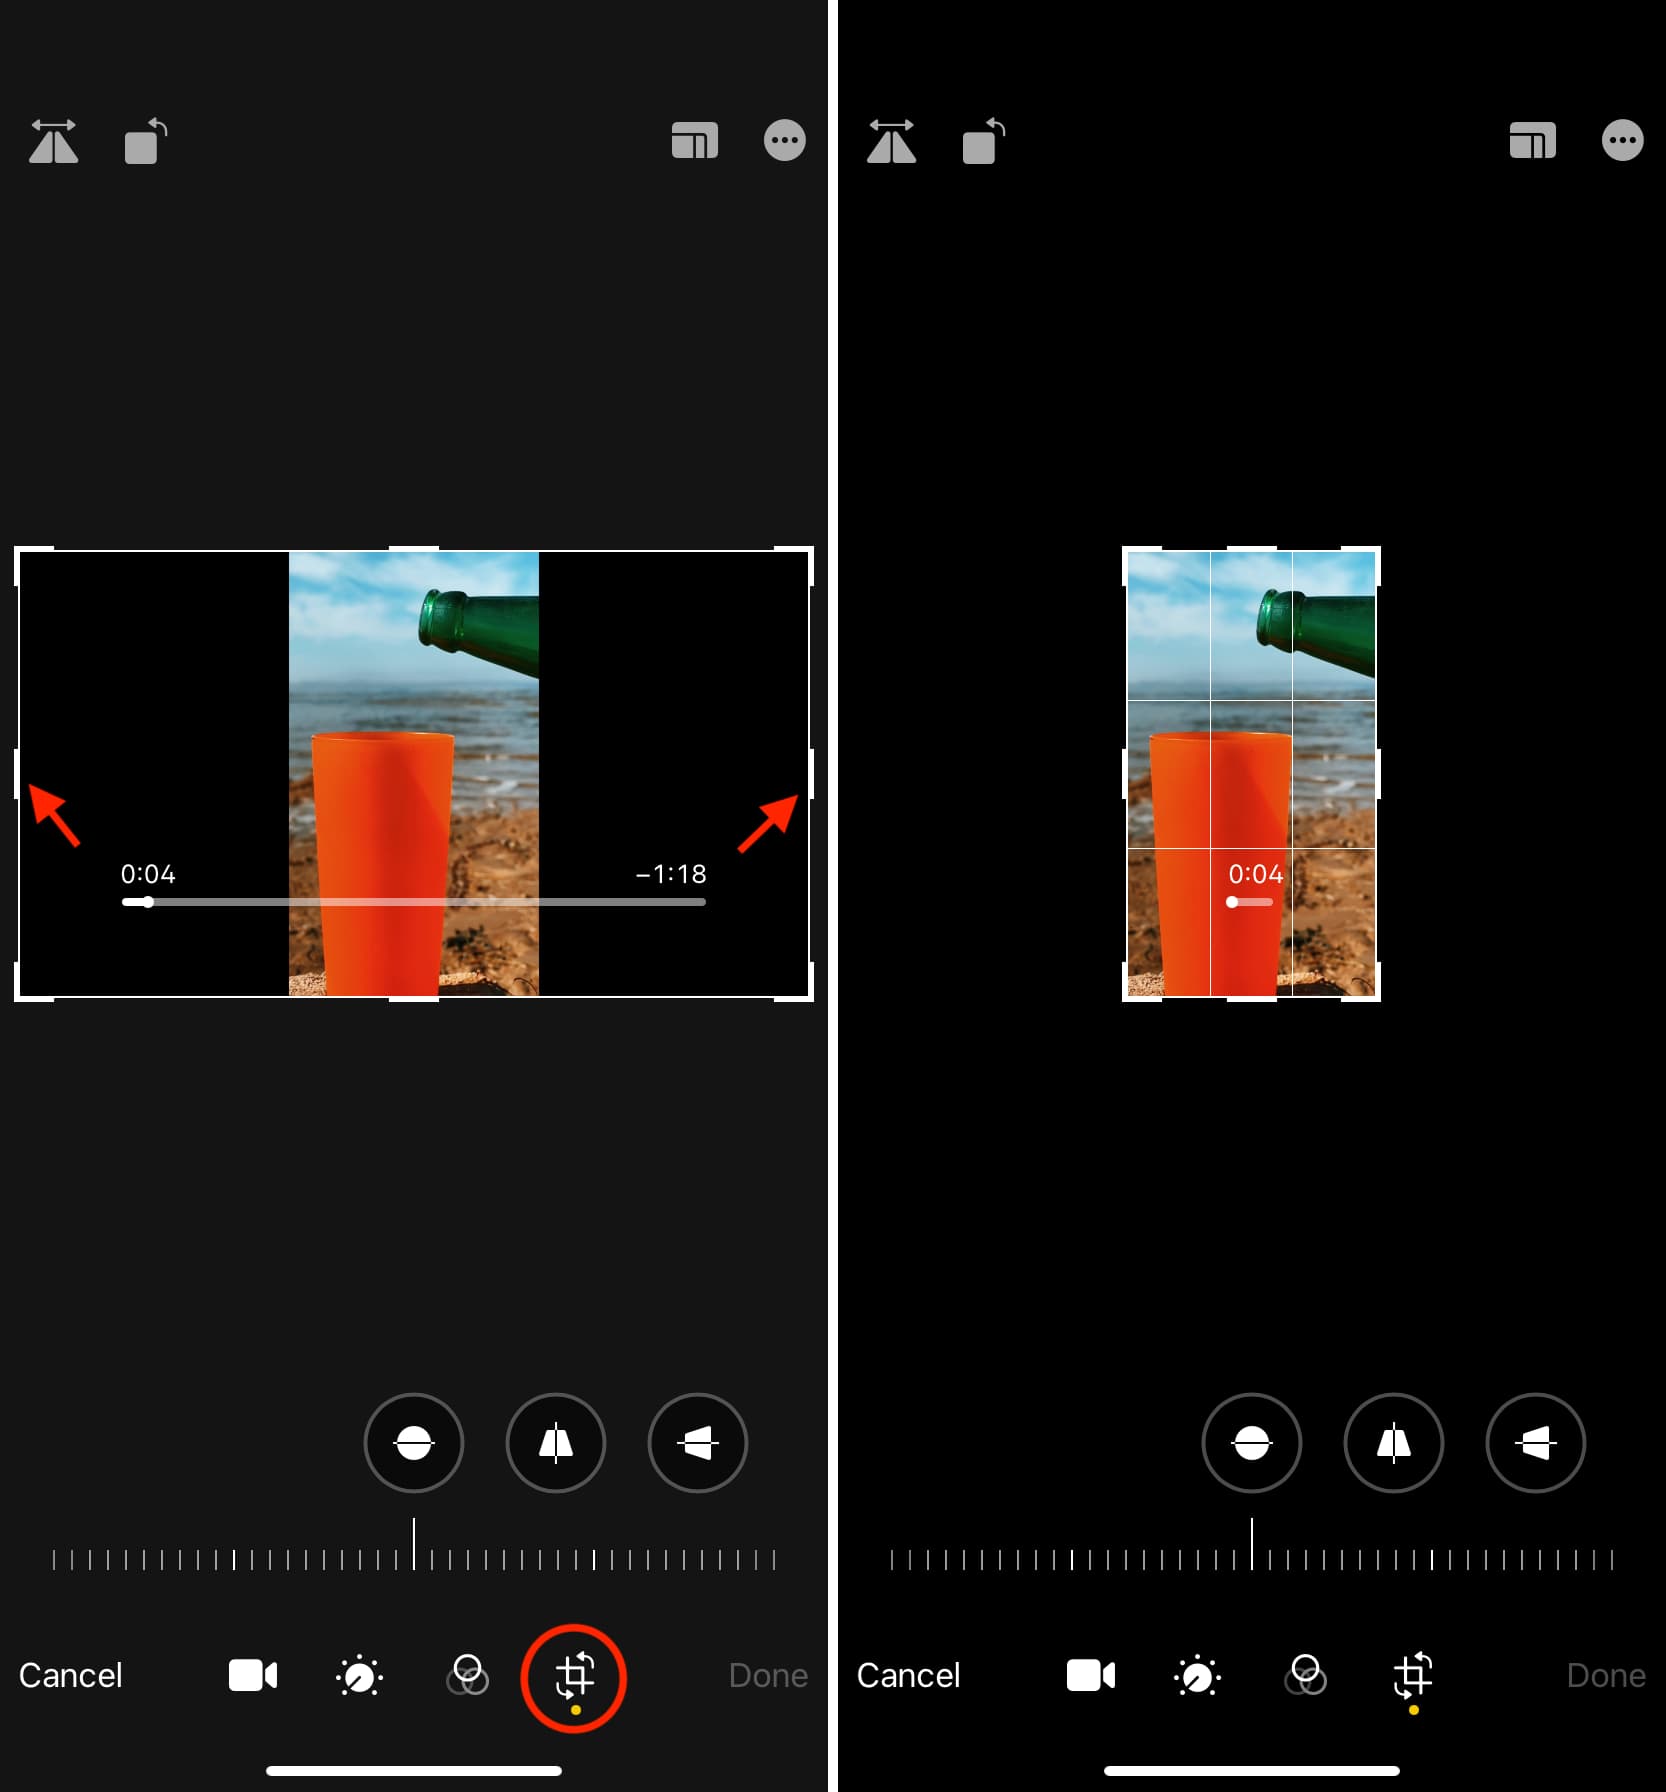
4) Finally, tap Done to save the video in vertical orientation without the unnecessary black bars.
iMovie alternative for iOS
Finally, you can use the InShot Video Editor app to merge vertical video clips, add text, and make many other edits on your iPhone or iPad. The app is free, easy to use, and overall excellent.
Do more in iMovie: