If you love playing games on your Nintendo Switch as much as I do, then you probably already know about the handy screenshot feature. Maybe you capture shots of high scores or levels you’ve tackled. And while it’s great you have an album to see all your screenshots, maybe you’d like to do a bit more with them.
You might want to post those awesome gaming moments on social media. You may want to brag to a pal that you got further in the game than they did. Or, you might even want to help a friend who is new to a game by showing them how to do something.
Whatever the reason, you can take those Nintendo Switch screenshots and plop them right onto your iPhone. From there you can send, share, post, or do whatever you like with them. Here’s how it’s done.
Capturing and viewing screenshots on Nintendo Switch
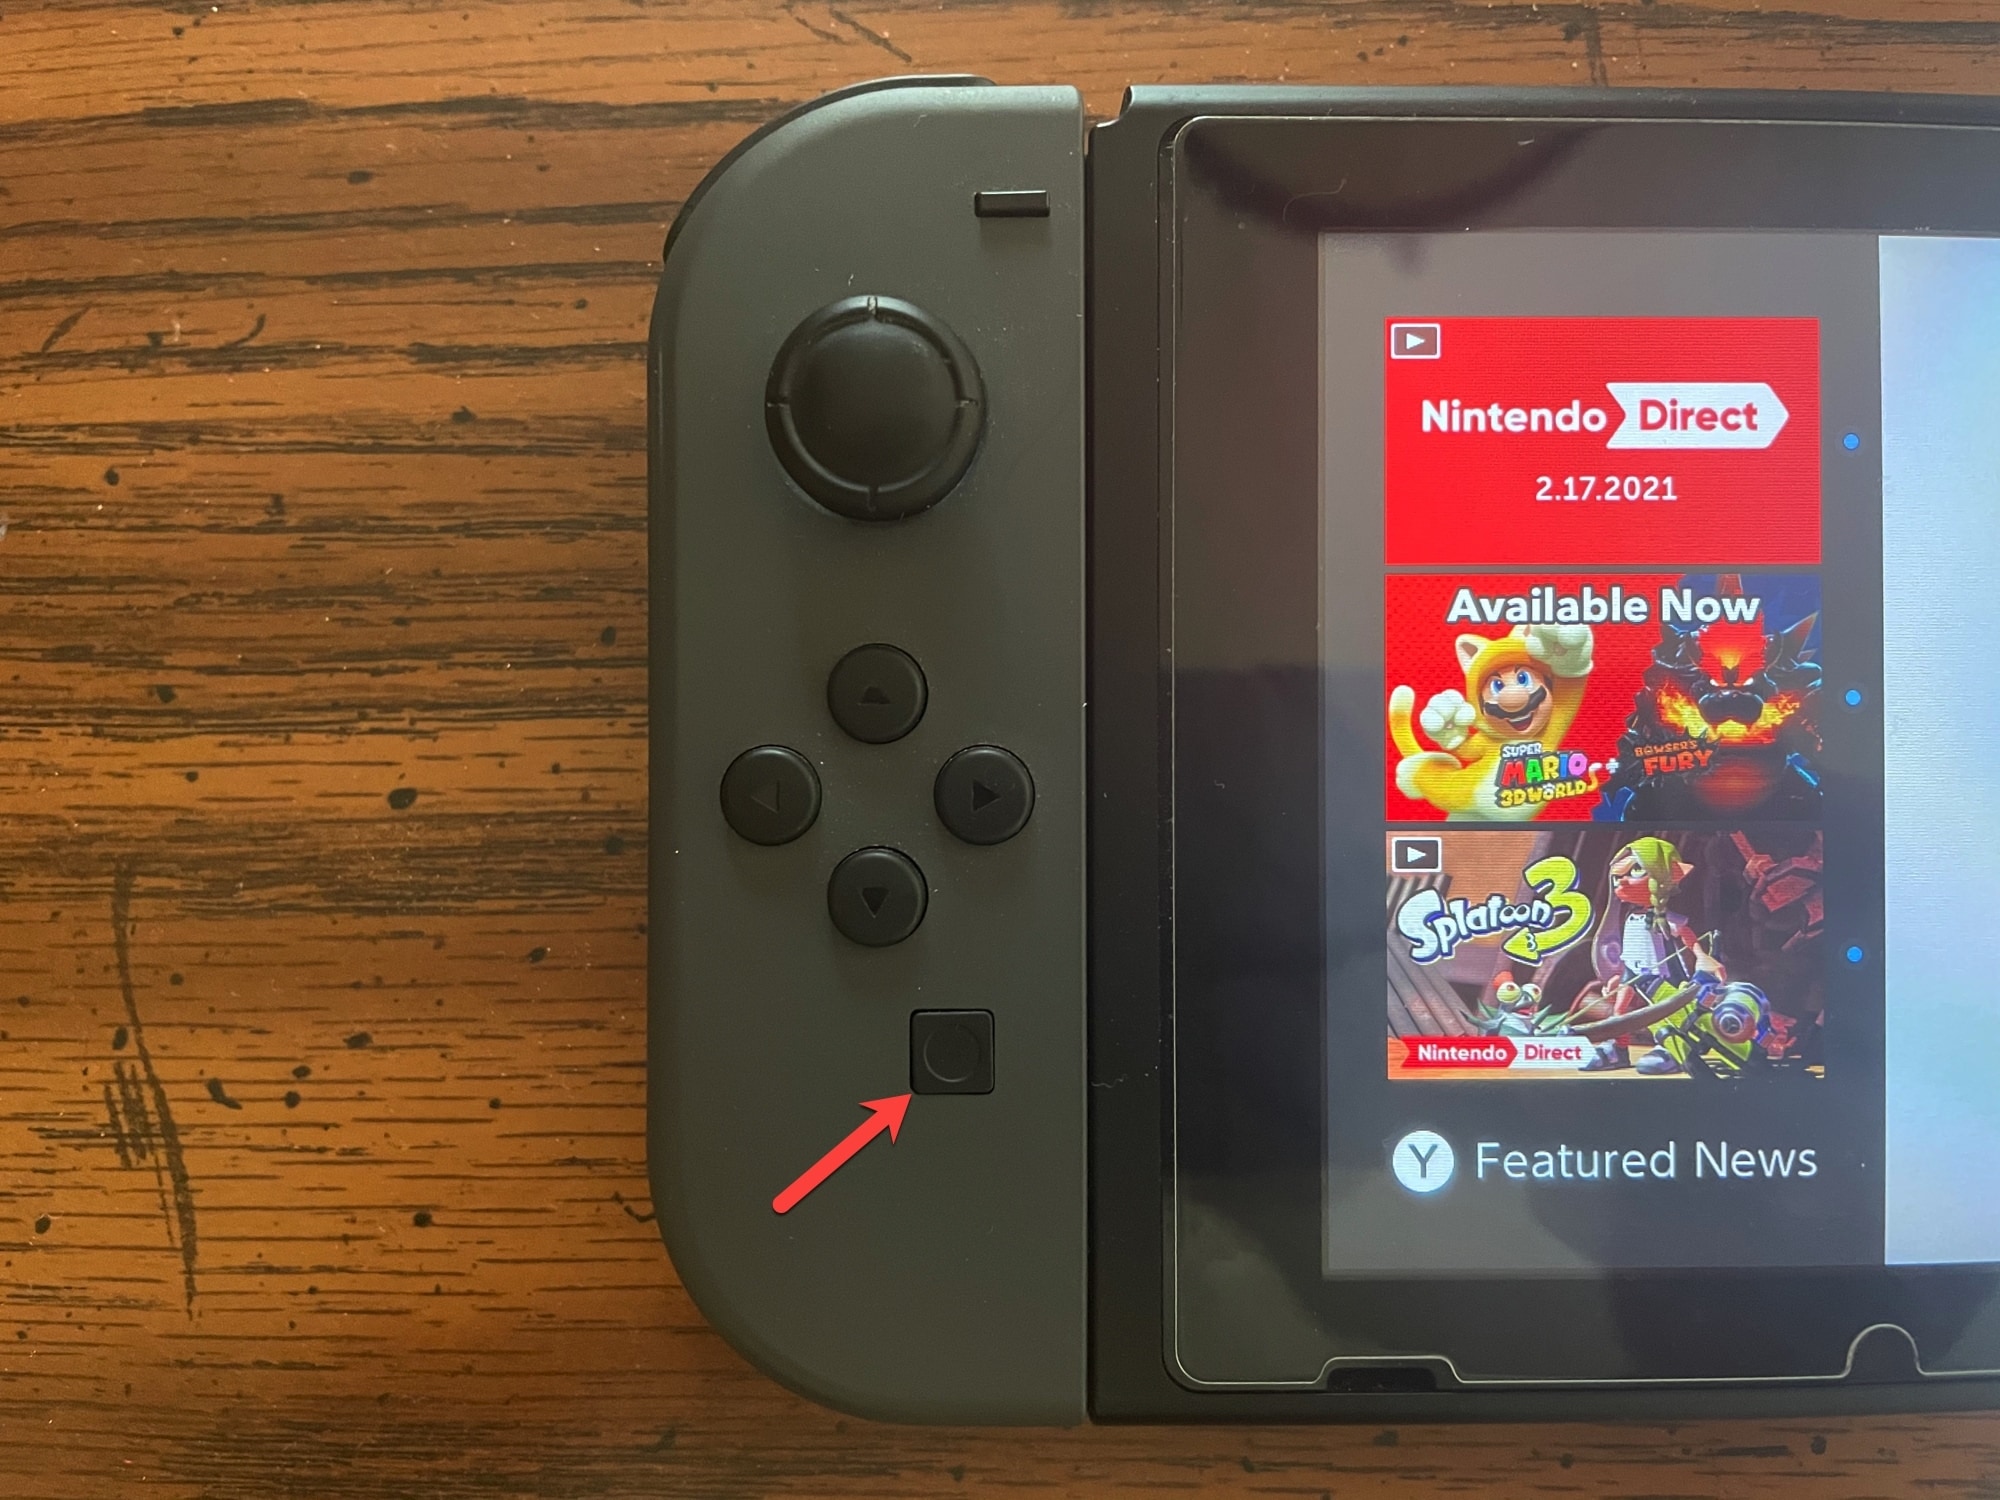
As a reminder or if you’re new to the Switch, it’s a simple button press to capture a screenshot. Press the square button with the circle on it that’s on your left Joy-Con. You’ll hear a camera sound, just like when you capture a screenshot on your iPhone. You’ll also see a brief message on the top left of the screen that your shot was captured.
To view your screenshots, just open the Album. This icon is at the bottom of the Home screen.
Send screenshots to your iPhone
When you have one or more screenshots that you want to put on your iPhone, the steps are simple enough.
1) Go to the Album and select a screenshot to open it.
2) On the bottom right, you’ll see a Sharing and Editing option. Click the A button.
3) Pick Send to Smartphone on the left.
4) In the prompt, you can choose to send Only This One or Send a Batch.
If you pick Send a Batch, you’ll be directed to your Album where you can select all the shots you want. As you pick each one, this places a checkmark on it. Hit Send.
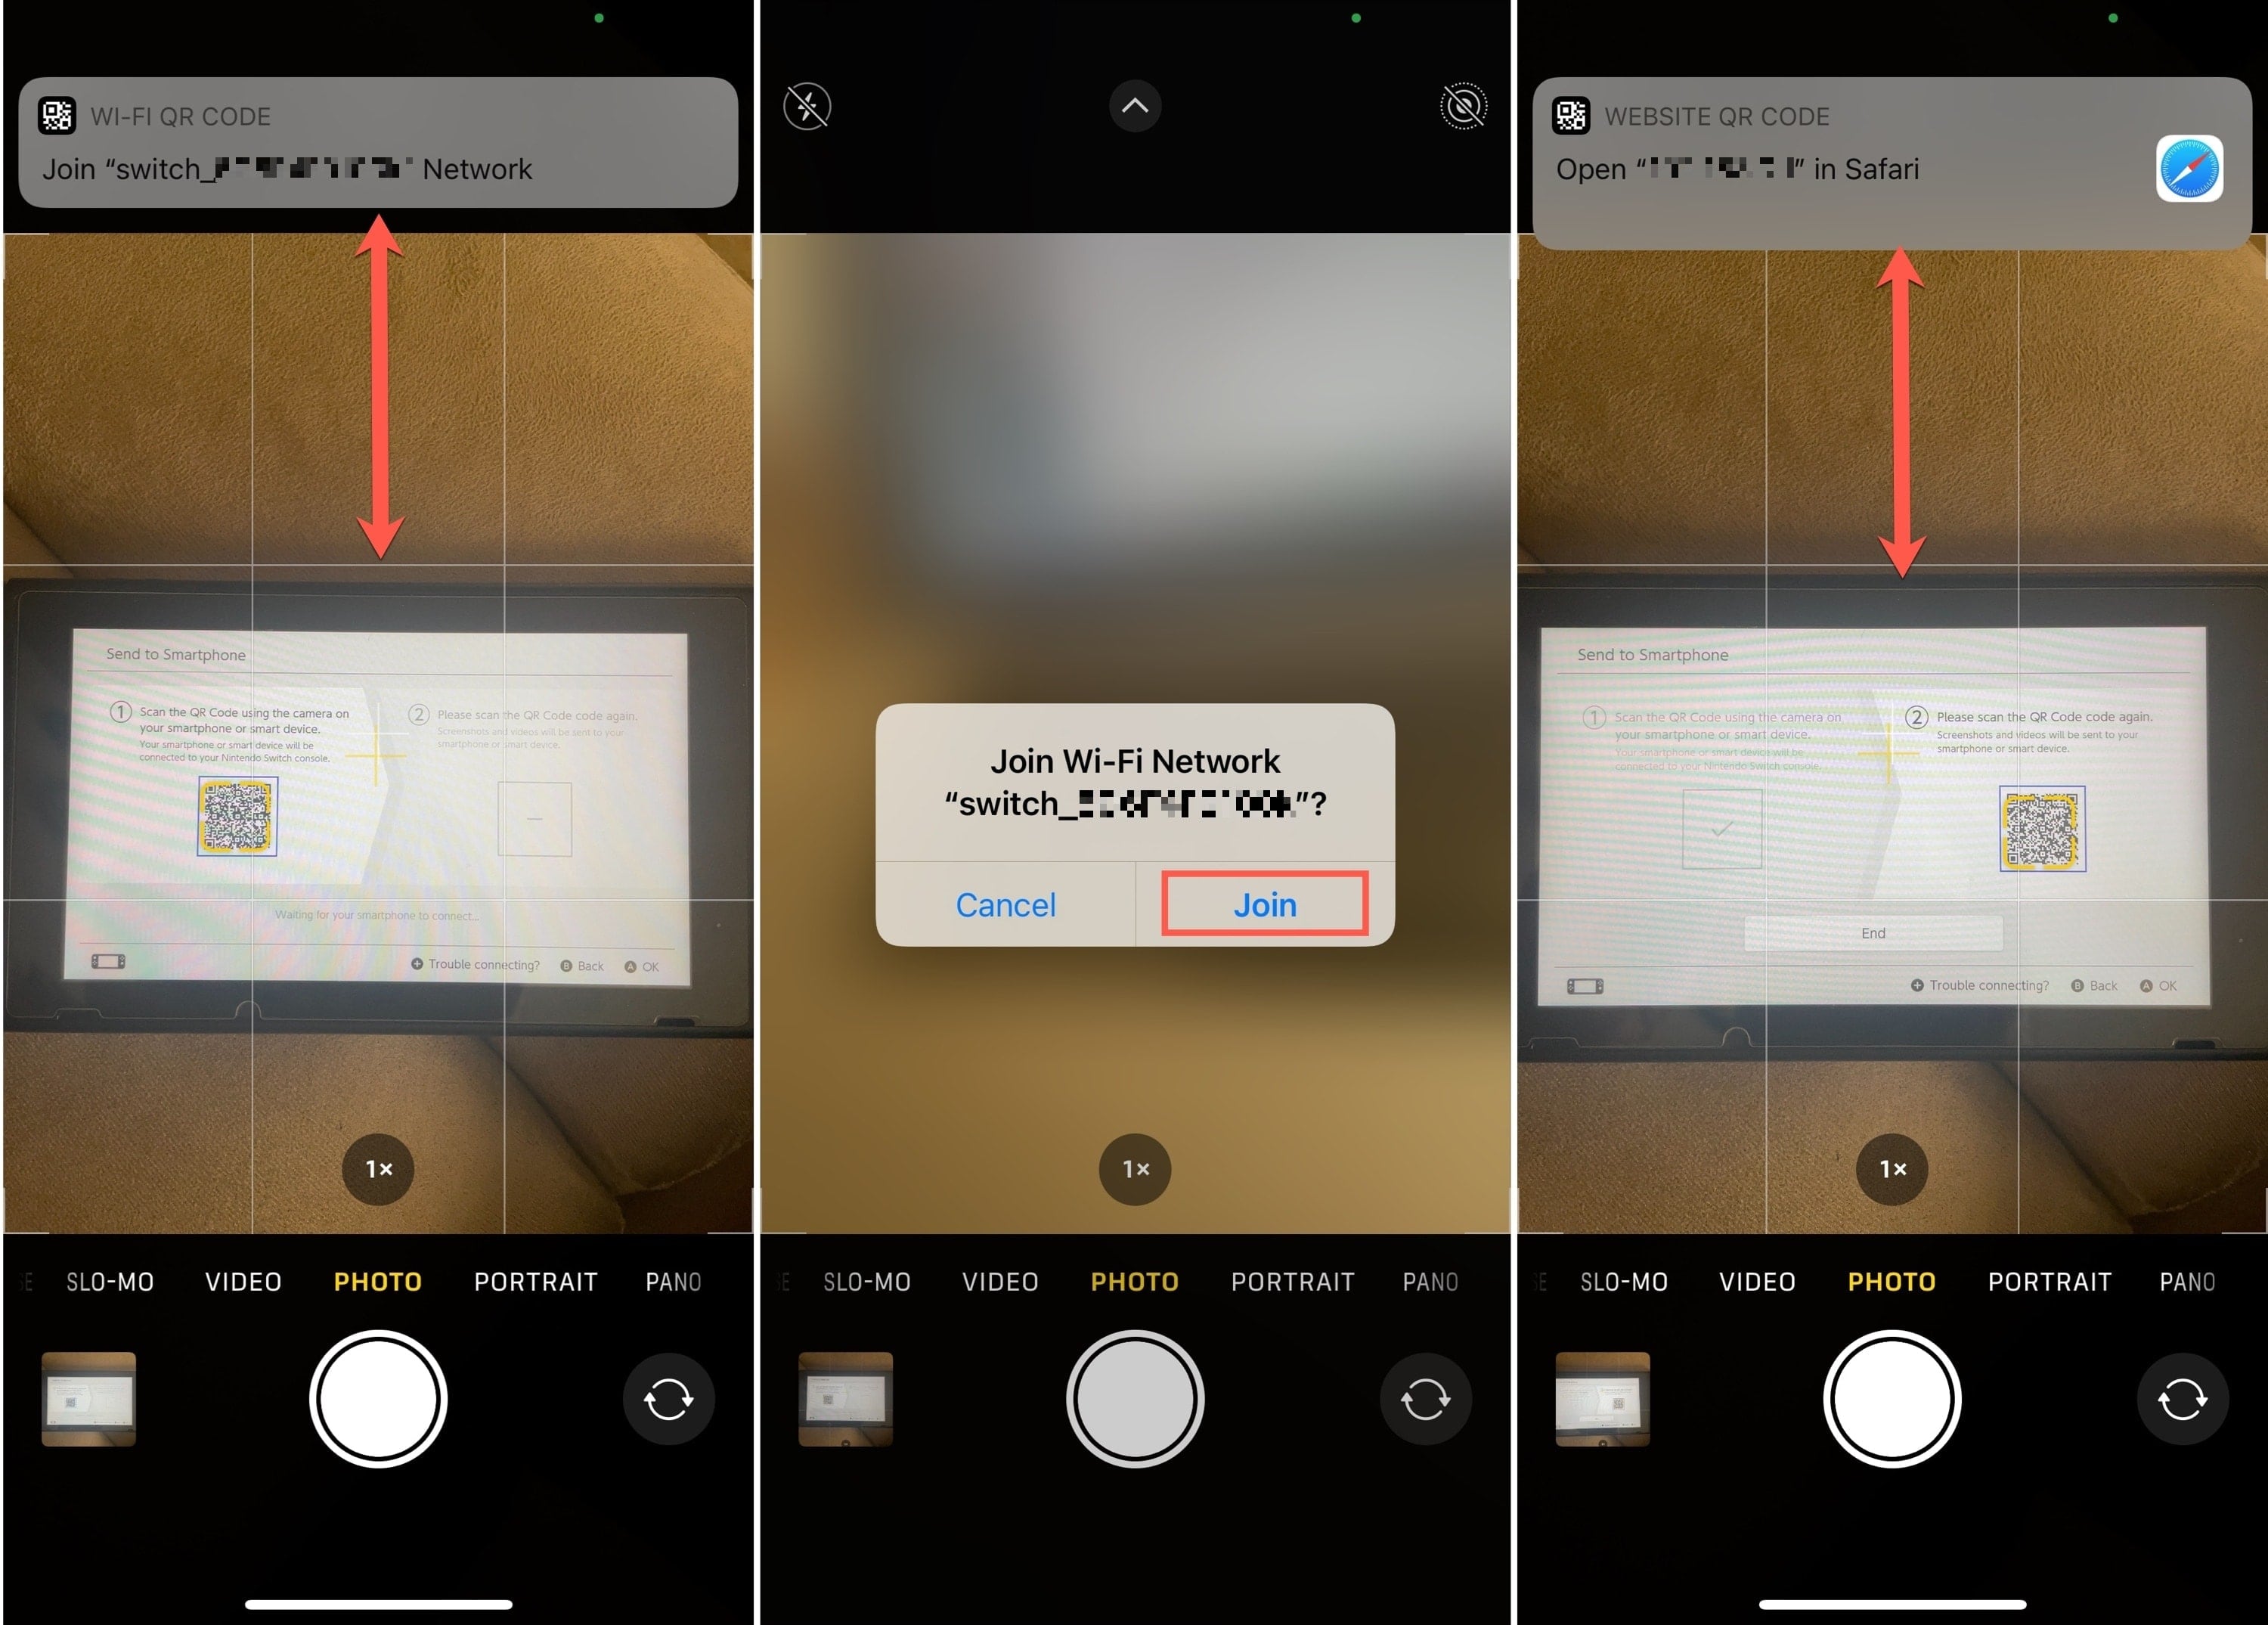
5) Your Switch will then display a two-step process with QR codes. Scan the first code with your iPhone and tap the message that appears at the top of your iPhone screen. Then, tap Join. This basically connects your iPhone to your Switch network.
6) Scan the second code which becomes available after successfully connecting the devices with the first QR code.
7) Tap the message to Open in Safari that displays at the top of your iPhone screen.
8) You’ll see the screenshots pop up in Safari on your iPhone. From there, tap and hold a screenshot to save, share, or copy each one.
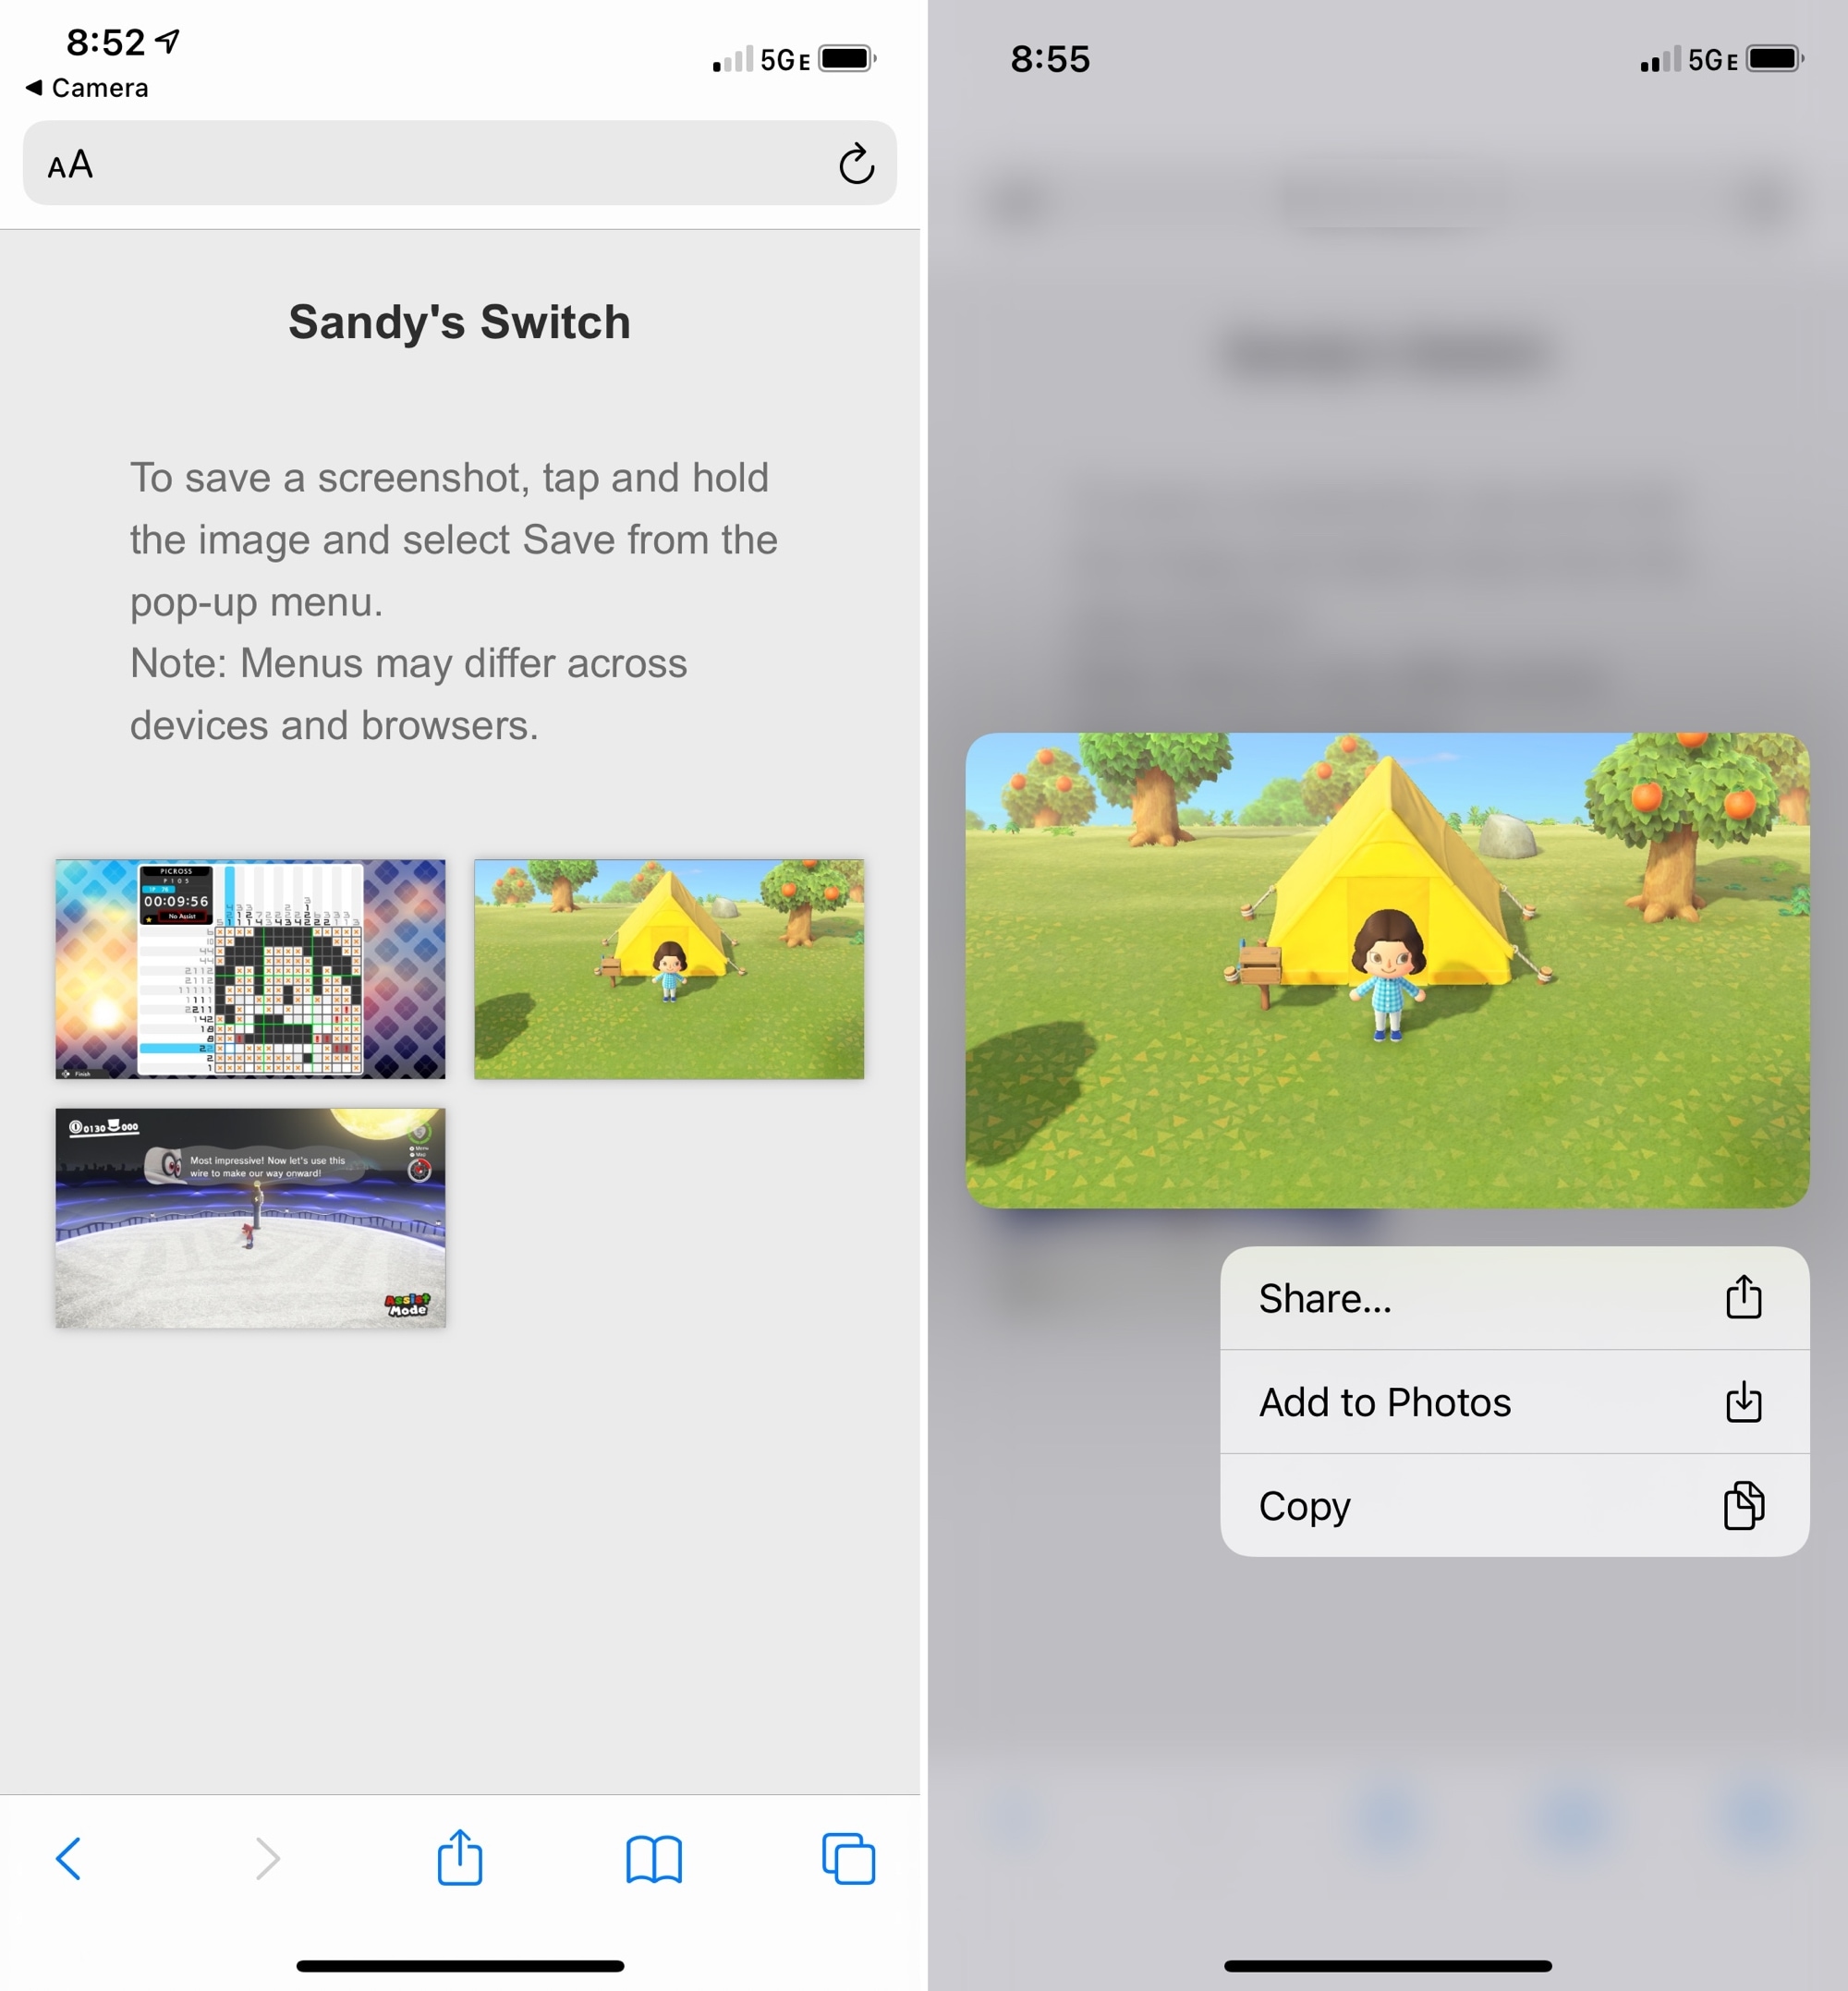
9) When you finish, tap End on your Switch.
Note: Nintendo Switch will not capture screenshots of some things such as your Album or steps in the above process.
Share your Switch shots
It’s great to be able to look through your Nintendo Switch Album for terrific screenshots of gameplay. But it’s even better to share those shots with your friends who play the same games.
Are you going to share some of your Nintendo Switch screenshots? Let us know!