If you use more than one printer with your Mac, it’s important to know how to choose the default printer. This is useful if you take your Mac to your physical office, school, or library and then return to your home office. And if you share your Mac and printer with others, giving a name and location to your equipment is also helpful.
In this tutorial we’ll show you how to set your default printer as well as change its name and location on your Mac.
Set your default printer on Mac
Open the printer settings on your Mac by selecting System Preferences > Printers & Scanners from your Dock or menu bar. Then use one of these options to set a default printer.
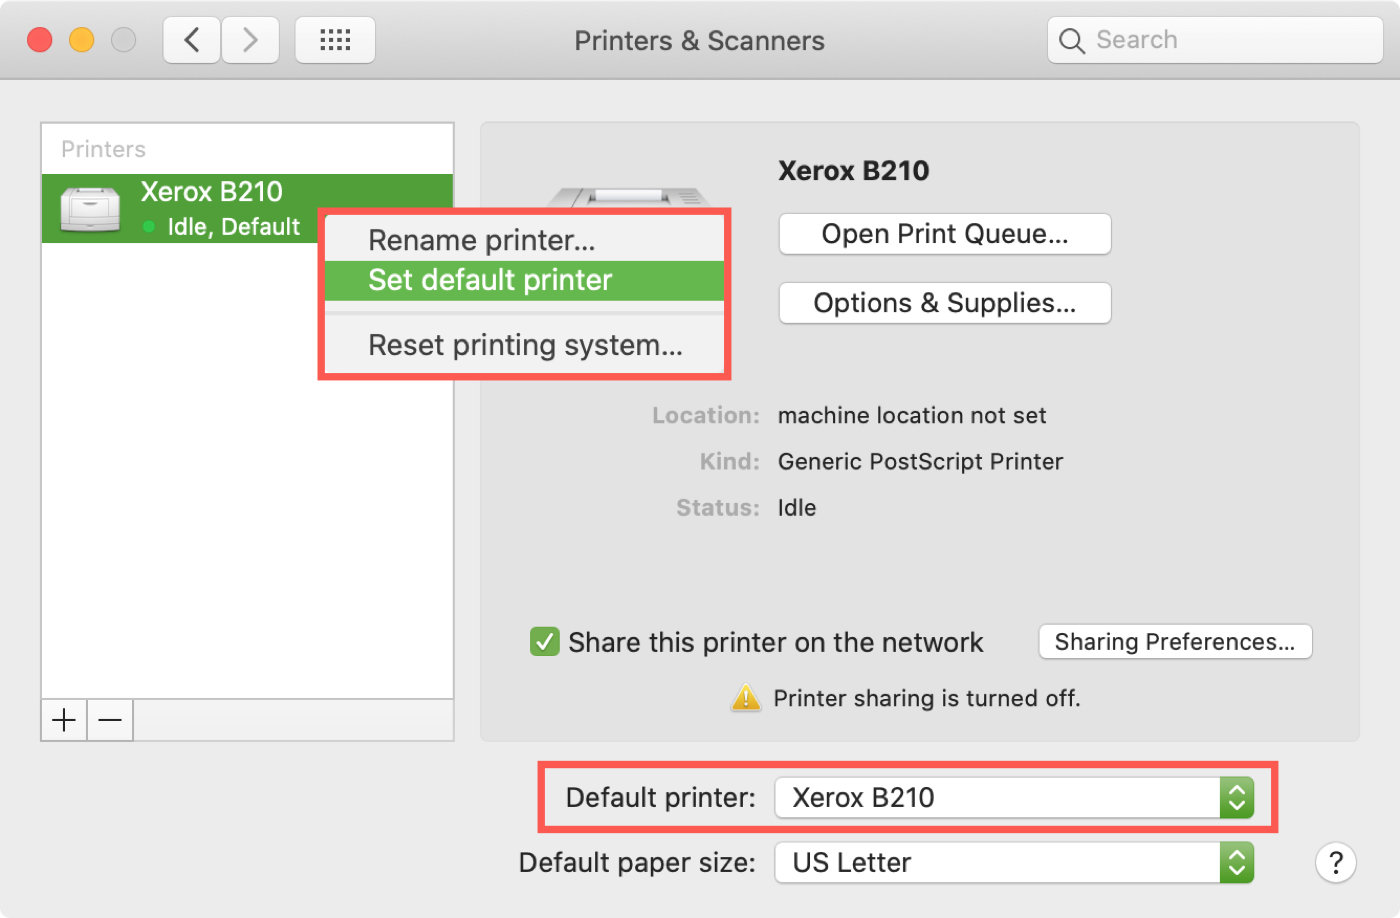
If you have a specific printer that you want to be set as the default, you can right-click or hold Control and click the printer in your list. Then select Set default printer. Alternatively, you can choose the printer name in the Default printer drop-down box. You’ll then see “Default” listed for the printer you pick.
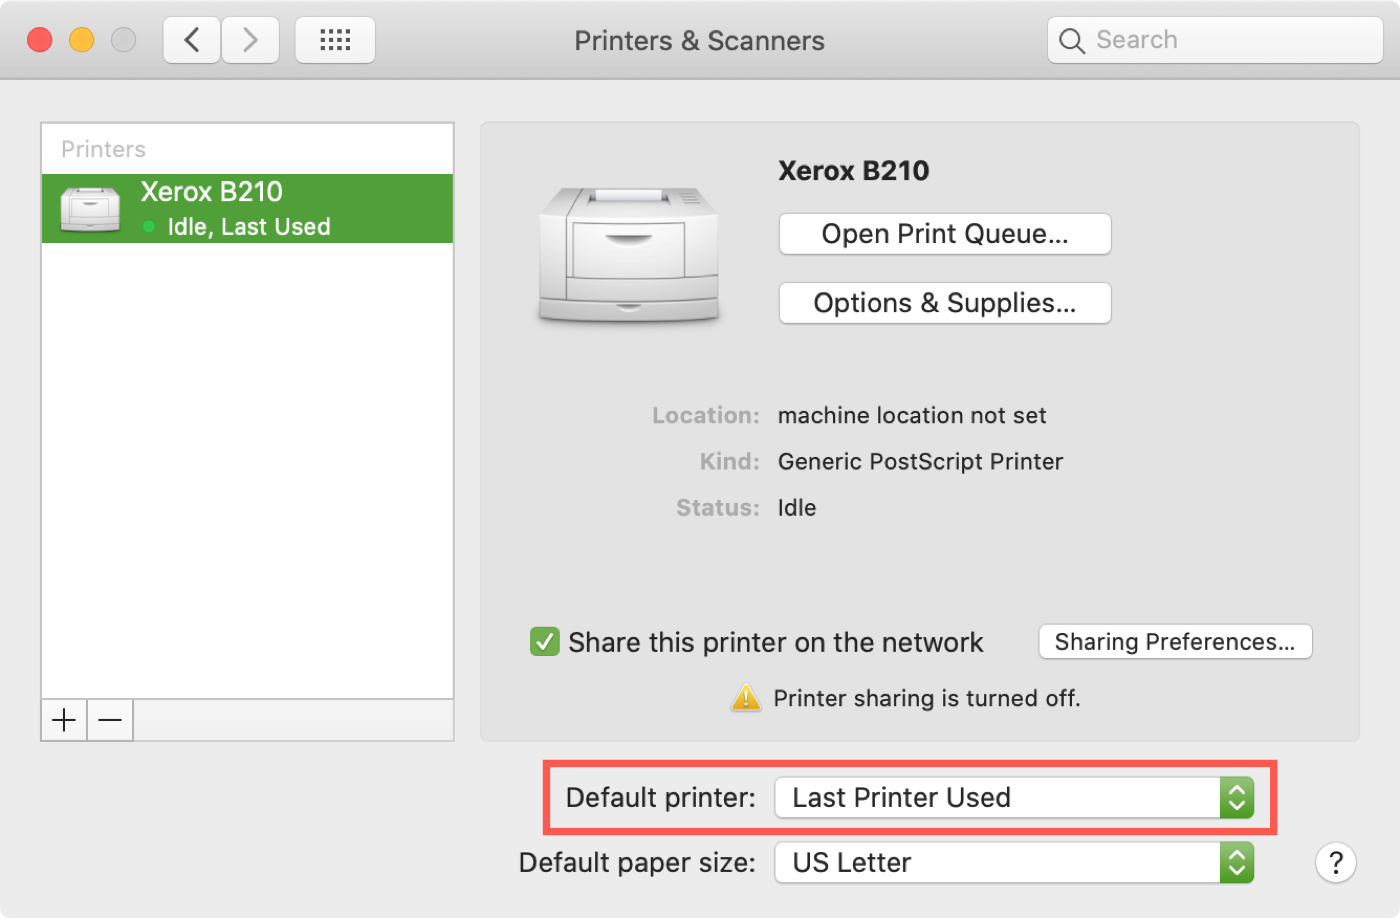
If you want the default printer for your Mac to be the one you last used, pick Last Printer Used in the Default printer drop-down box. Your Mac is smart enough to remember the last printer you used. Just be cautious if you select this option because if your Mac travels with you, you may end up printing on a printer at a different location.
You can close the Printers & Scanners window if you’re finished or continue below to change the name or location.
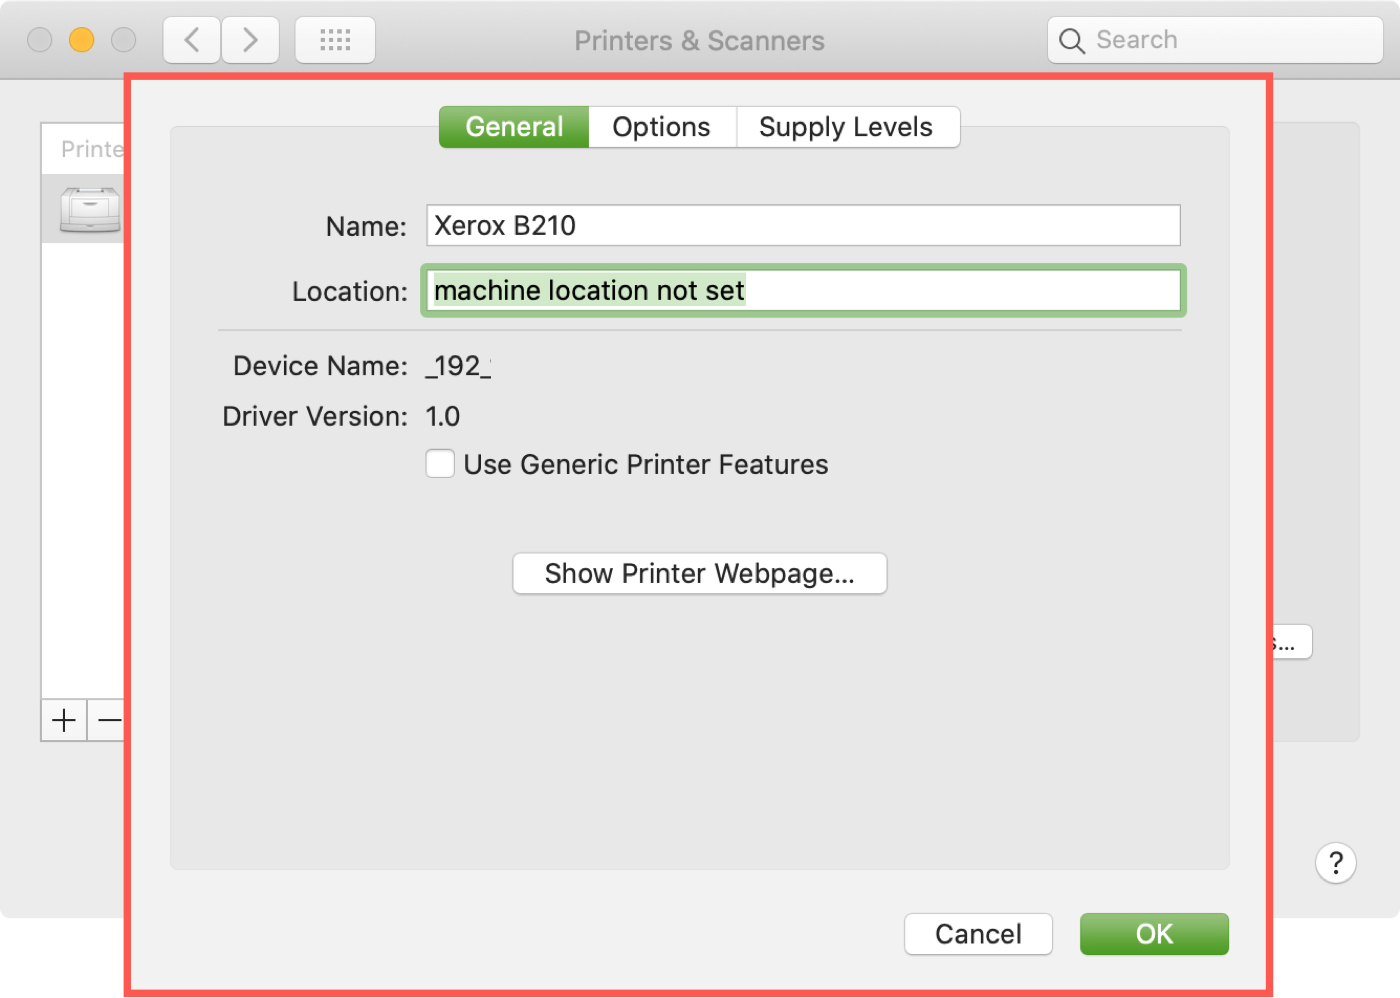
Change your printer’s name and/or location
You can change the name of your printer, its location, or one or the other. You’ll take care of this in the same area as setting the default. So if necessary, head back to System Preferences > Printers & Scanners.
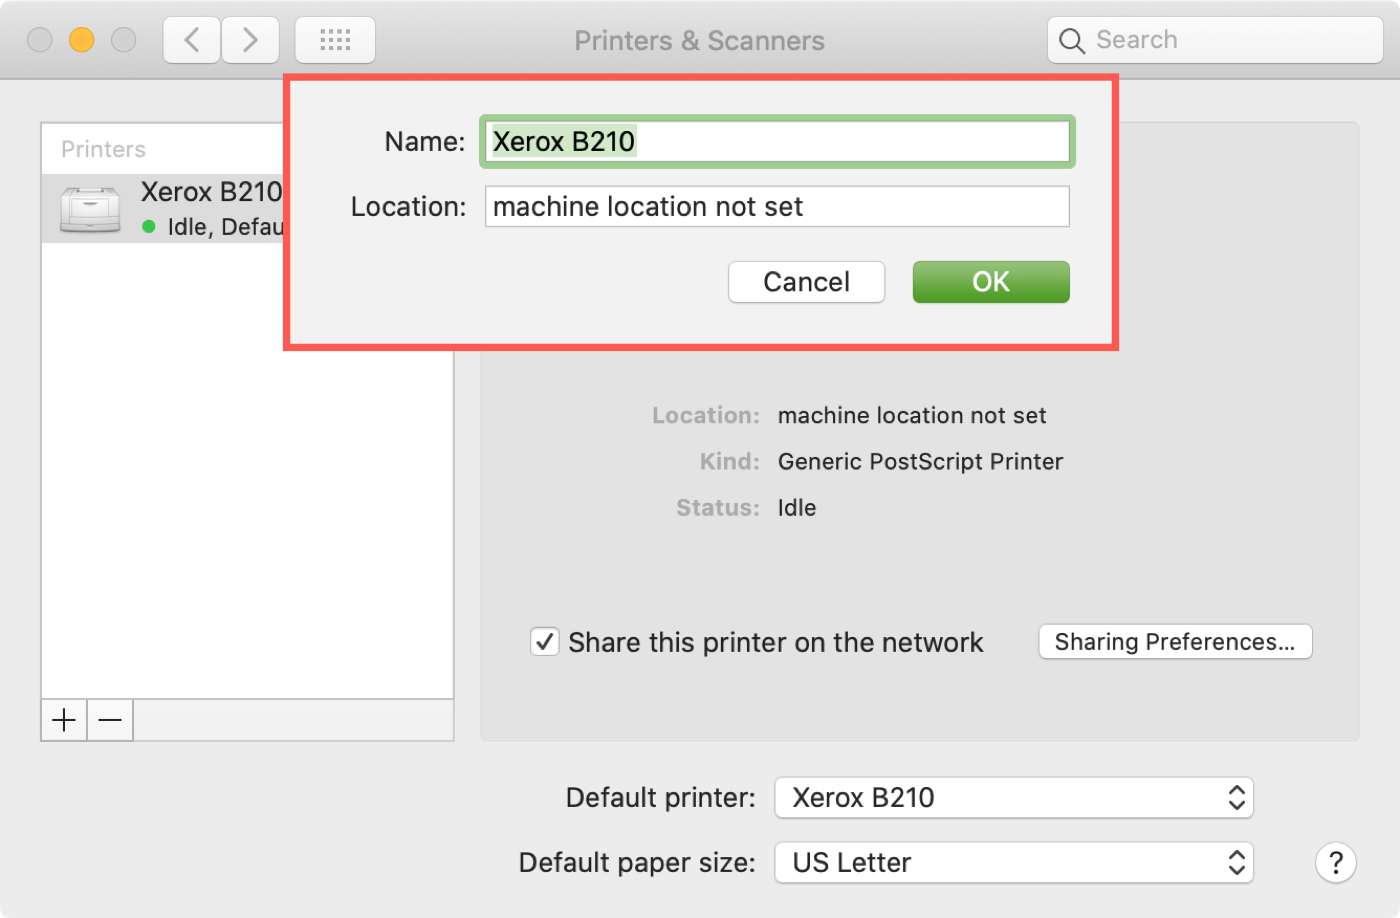
To rename your printer quickly, you can right-click or hold Control and click the printer in your list and select Rename printer. Give it a new name and click OK. You’ll notice that you can change the location in the pop-up window too.
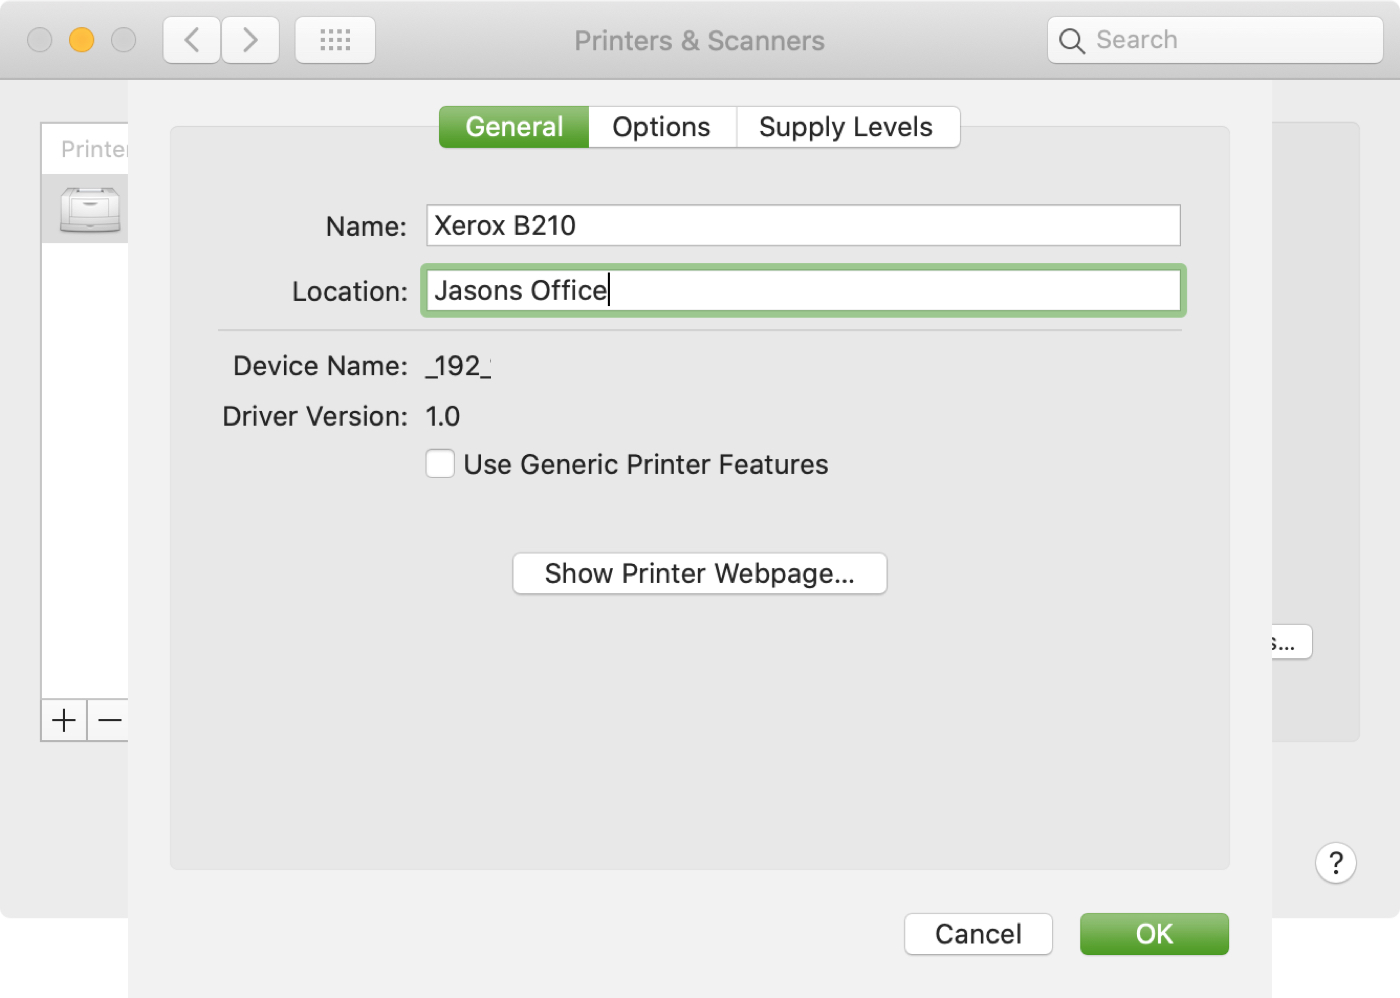
Alternatively, select the printer in your list and click the Options & Supplies button. Make sure you’re on the General tab, give your printer a new Name and Location, and click OK.
When you finish, close the Printers & Scanners window.
Wrapping it up
When you add a printer to use with your Mac, there are small things you don’t initially think about. Setting a default printer, if you have more than one, and giving it a name and location all users on your Mac will recognize are a few of them.
Have you run into any problems printing from your Mac? If so, how did you resolve them? Feel free to share your thoughts or comments below or hit us up on Twitter!