Whether you’ve jailbroken with the checkra1n tool and fancy reverting back to a vanilla version of iOS or you merely want to uninstall checkra1n to try a different jailbreak tool, the checkra1n jailbreak includes a convenient built-in utility for removing the jailbreak with just a few simple taps.
In this tutorial, we’ll show you how to remove the checkra1n jailbreak without completely restoring your iPhone or iPad. This method is traditionally recommended over a full-blown device restore because it doesn’t erase your data and it preserves your version of iOS. The latter is especially useful if you’re removing checkra1n to try another jailbreak since other jailbreaks can be picky about the versions of iOS they support.
How to remove the checkra1n jailbreak
If you’re ready to remove the checkra1n jailbreak from your iPhone or iPad without restoring your handset completely, then simply follow the steps outlined below:
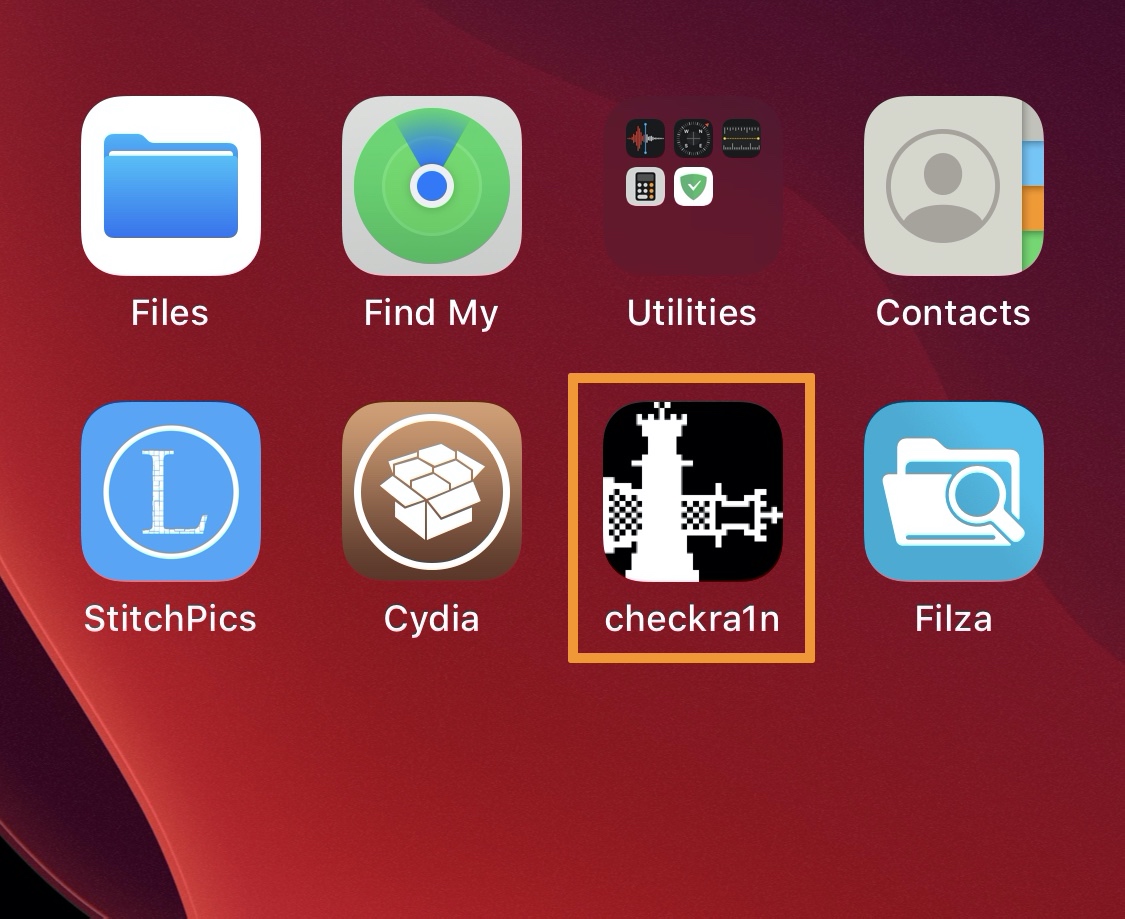
1) From the Home Screen, launch the checkra1n app:
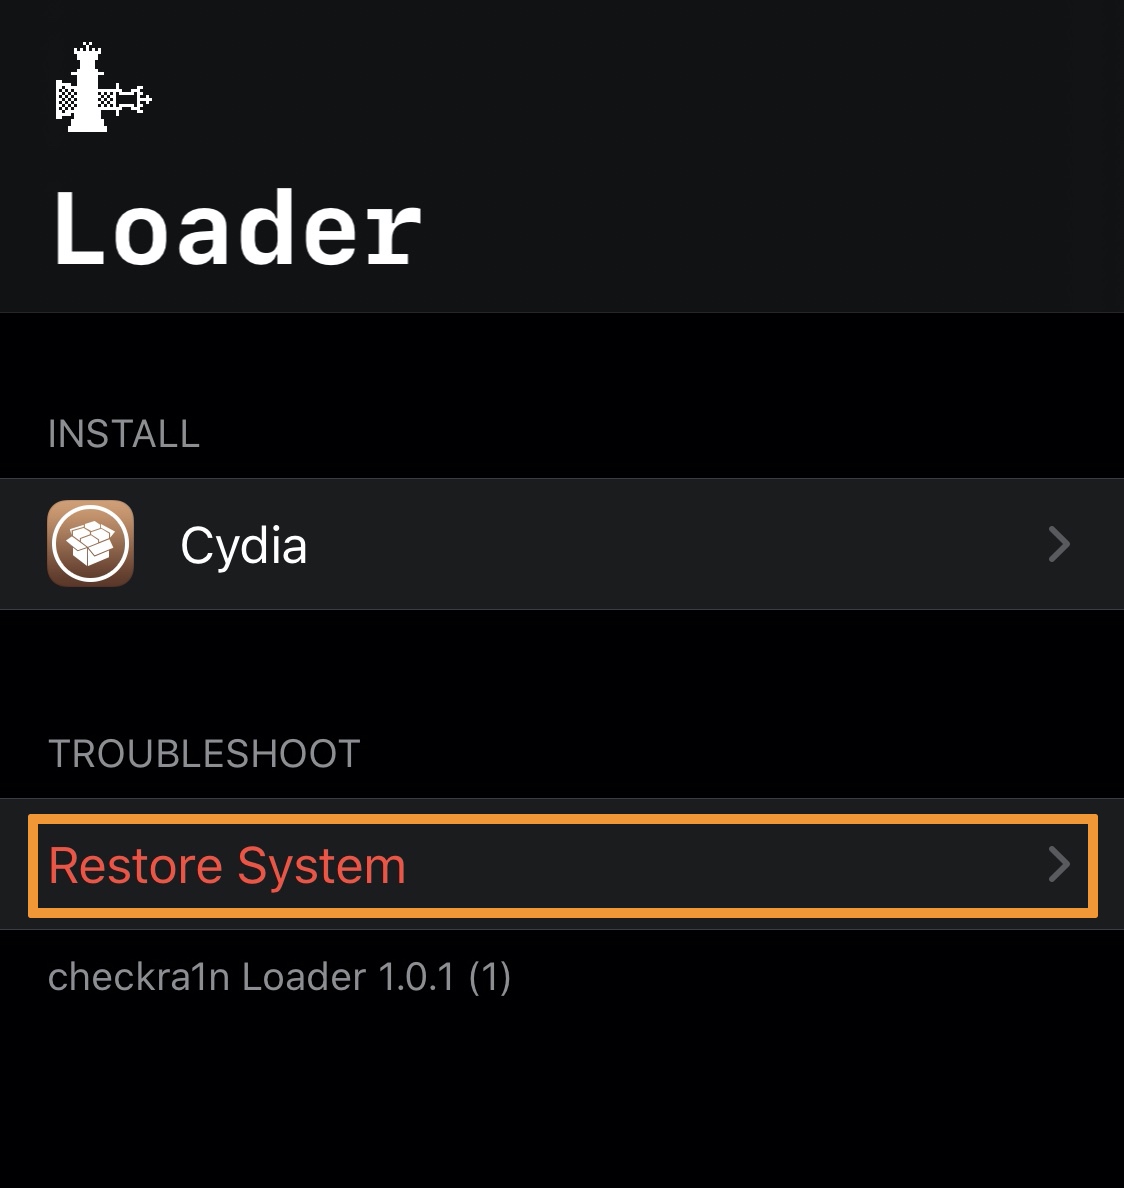
2) Once the checkra1n app launches, tap the red Restore System option:
3) In the warning prompt that appears, tap the red Restore System button:
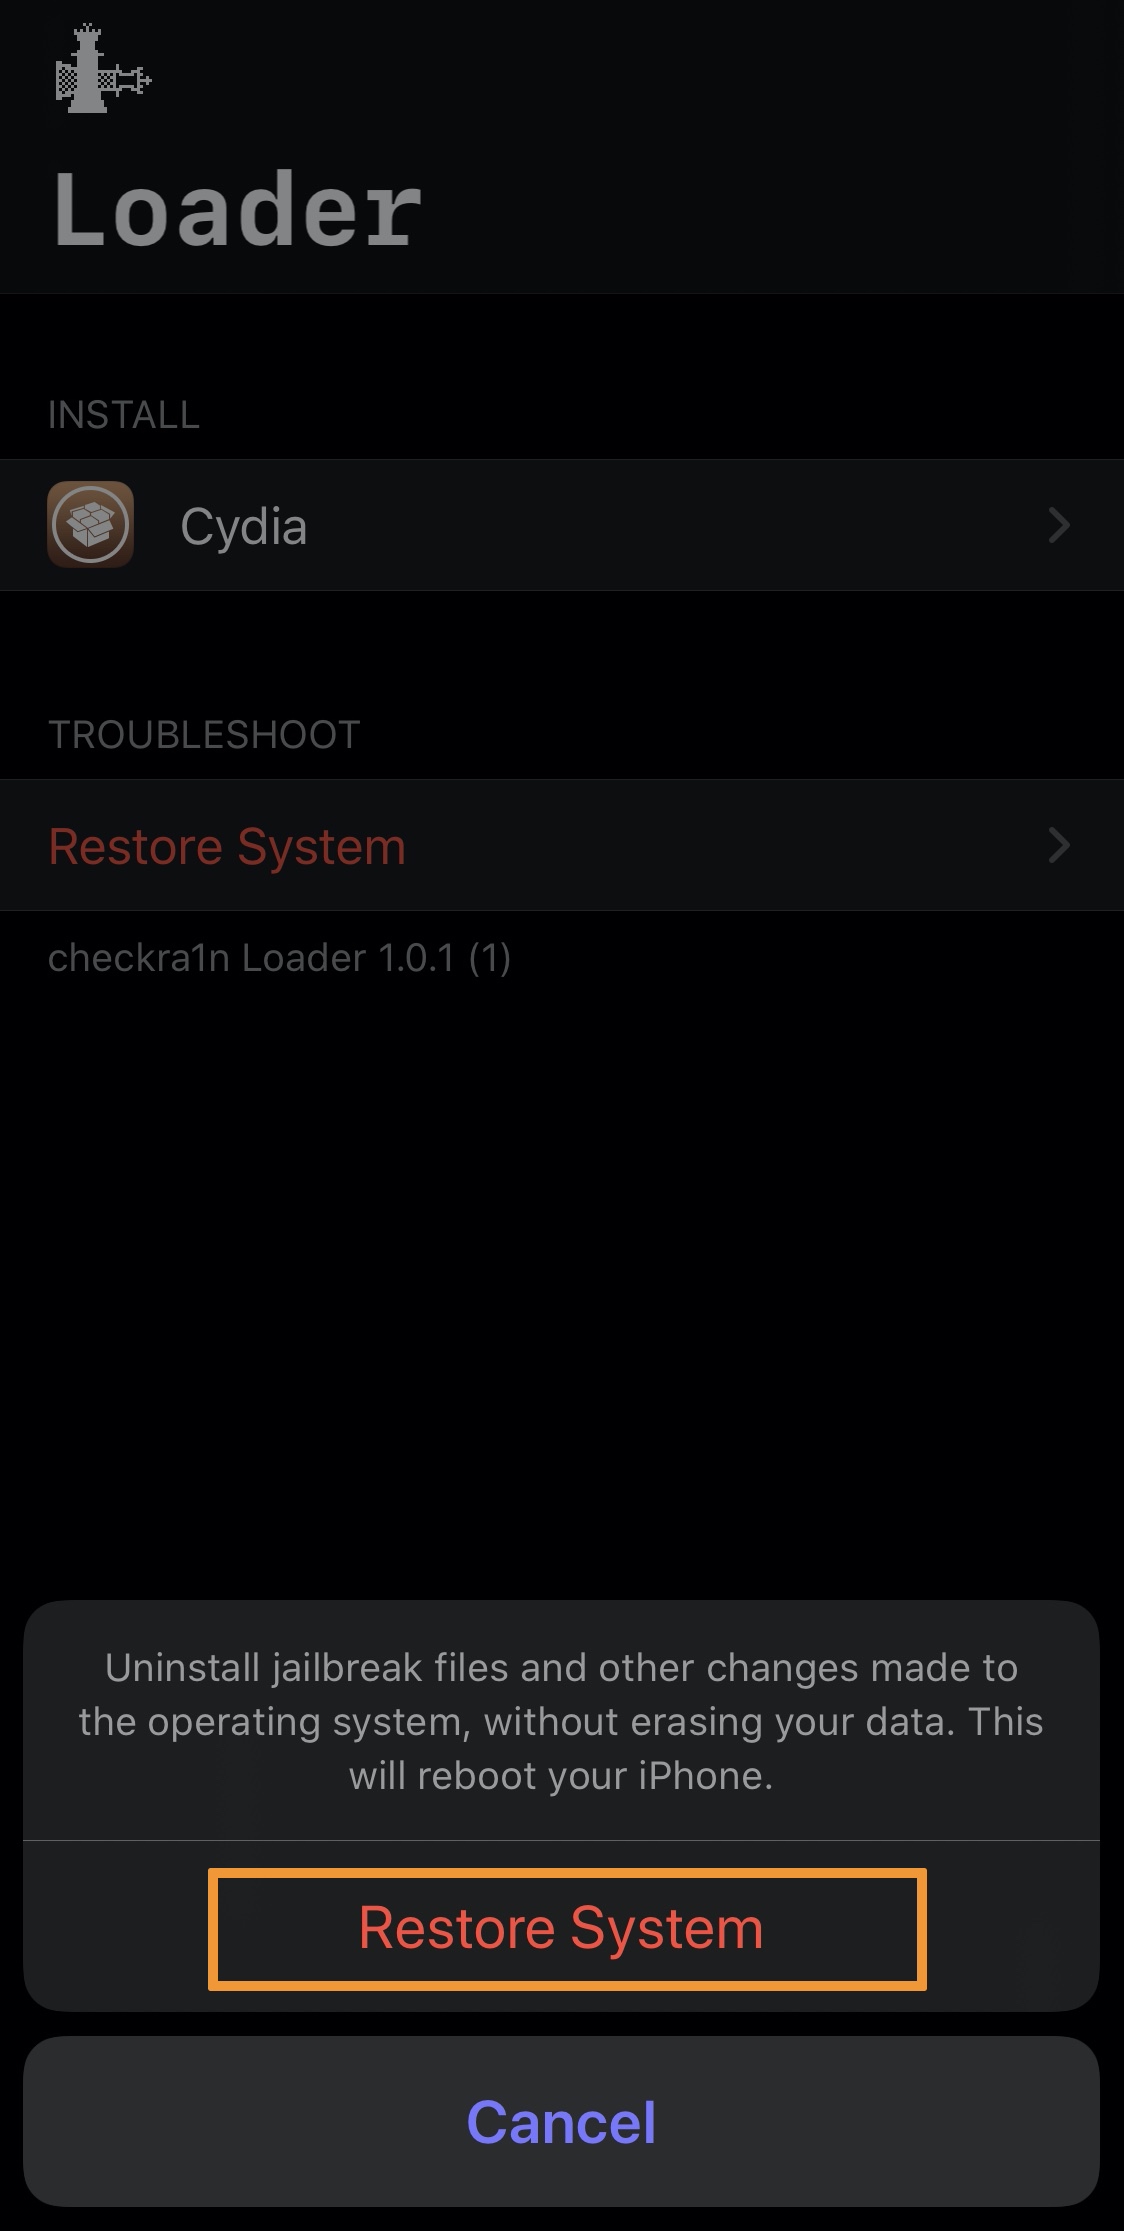
Your device will now reboot.
4) After your device boots back up, you’ll find that checkra1n, Cydia, and all your jailbreak files have been removed:
Congratulations, you’ve just removed the checkra1n jailbreak from your handset!
You will notice that all your apps, their data, and iOS’ settings are left intact; this is by design, making it easier to un-jailbreak your iPhone or iPad without creating any unnecessary frustration.
Conclusion
You can now continue using your device as it was intended from Apple, or you can download and use another jailbreak tool to enjoy your favorite aftermarket extensions. It’s worth noting that you can also re-jailbreak with checkra1n at any time.
What brought you to remove the checkra1n jailbreak from your device? Let us know in the comments section below.