Learn how to resize a video directly on your iPhone or iPad to save space on your device or simply shrink its dimensions.

The photo and video editor on your iPhone and iPad has come a long way, but it still lacks some very basic features, such as the ability to resize or compress a video directly from the device.
There are various reasons why you may want to shrink a video. It might be to reduce the overall size of the video to save space on your device, or to upload a video to a website that requires specific dimensions.
But first, we need to agree on some basic terms.
Compressing a video means reducing its file size. This can usually be done in a couple of ways.
You can reduce a video’s file size by changing its frame rate (the number of frames displayed per second) or by reducing its dimensions. The result is a video that may not be as crisp as the original but can take up much less storage space on your device. If you’re interested, we have a separate tutorial on compressing videos on iPhone and iPad.
Resizing a video means changing its dimensions, usually to make it smaller. When resizing a video, the image quality can remain the same, but the total file size will likely decrease because the video is effectively smaller.
Resize iPhone or iPad video
If all you want to do is to change the dimensions of a video without affecting its image quality, the app will do that, and more if necessary.
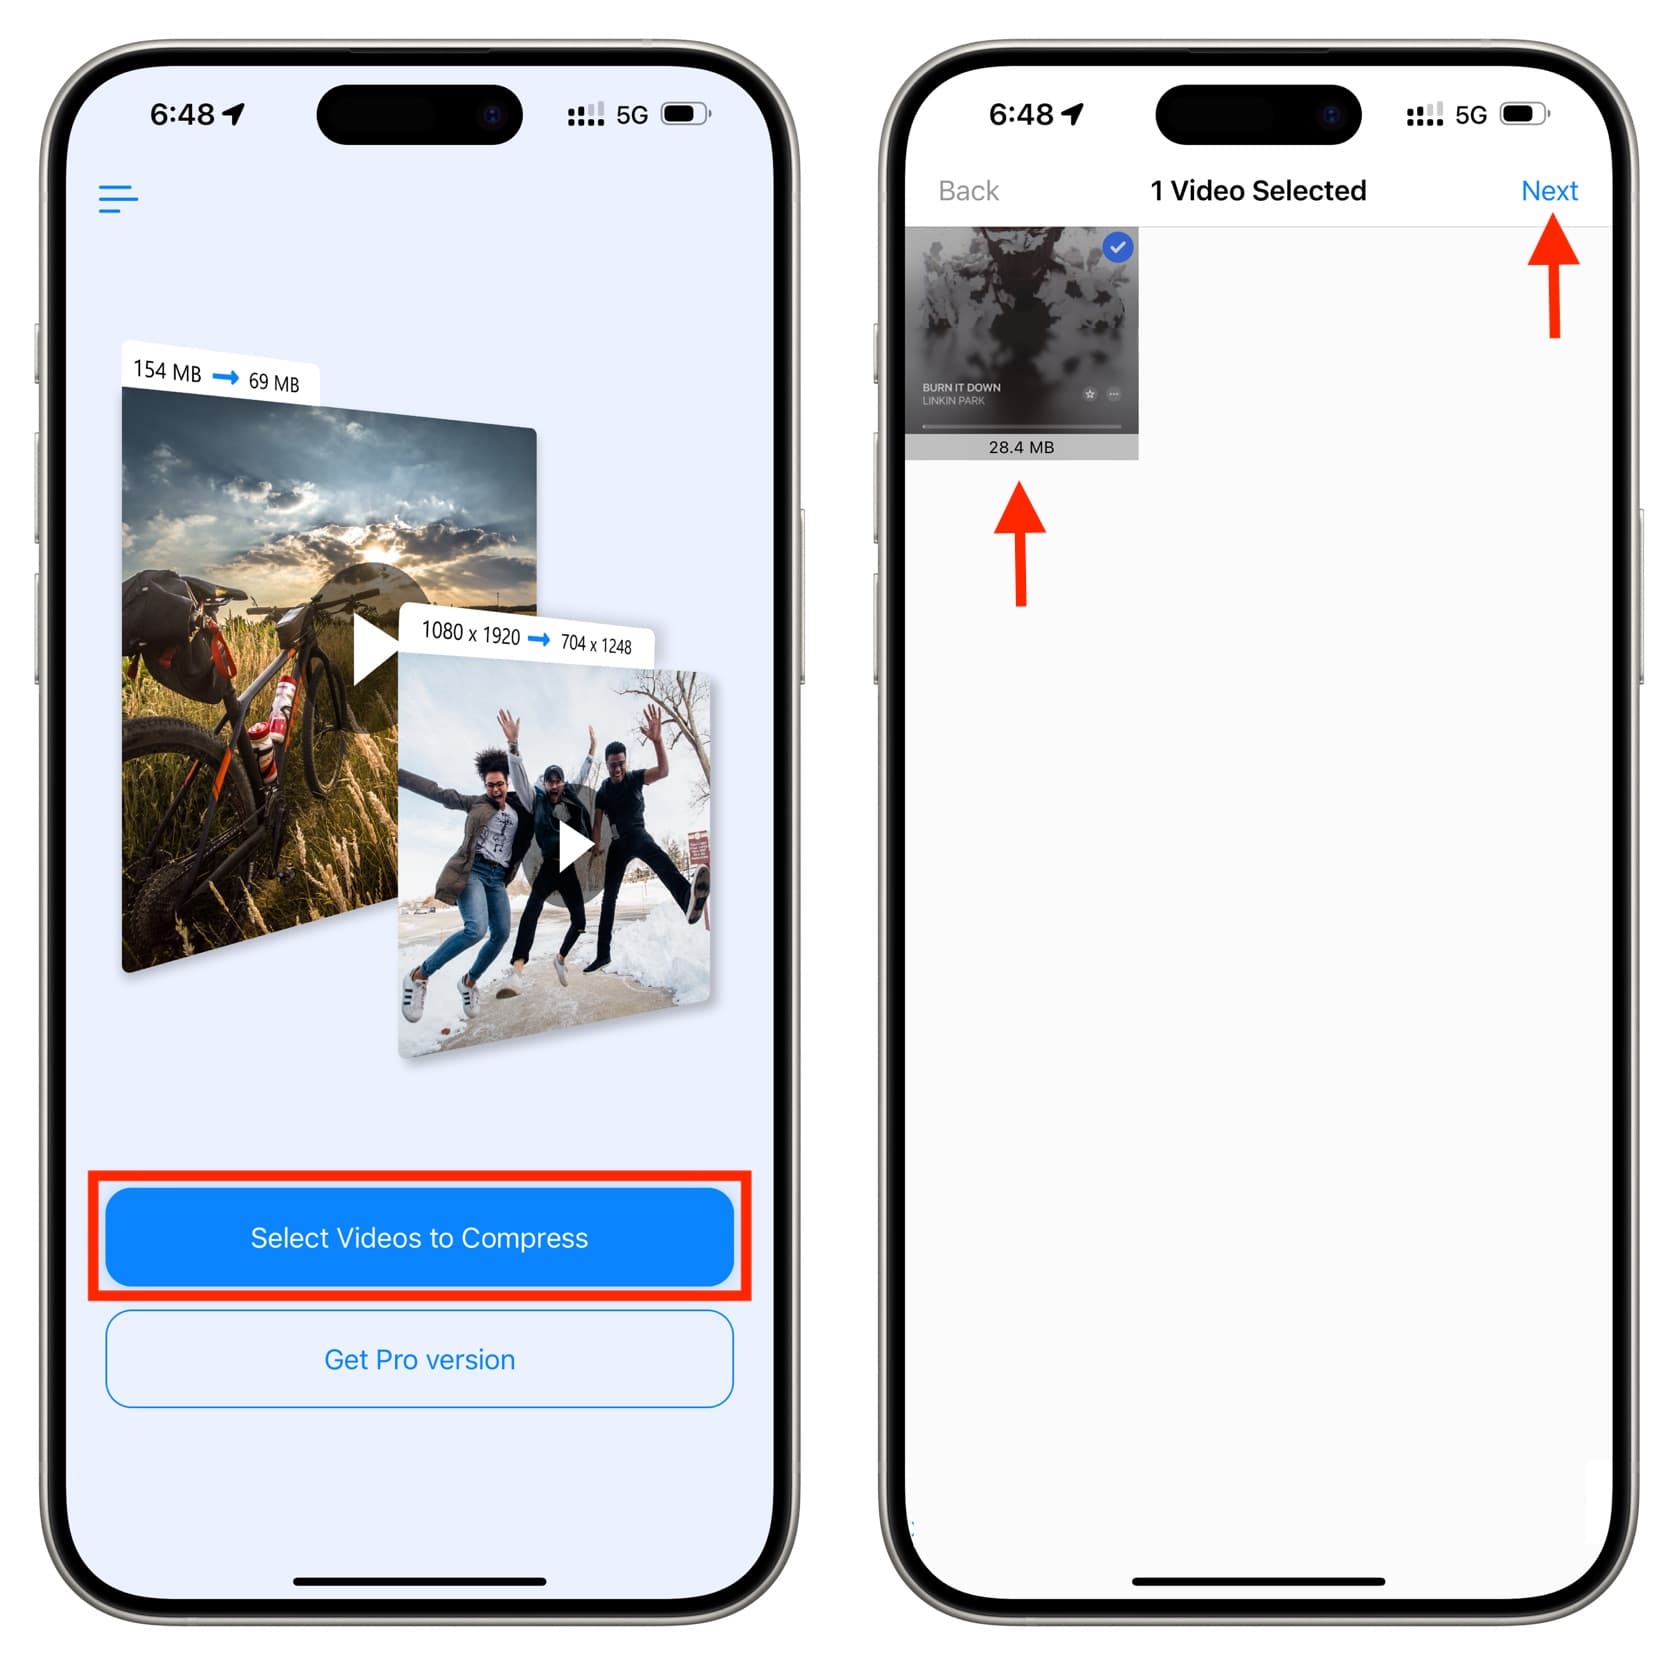
1) Download Compress Videos for free from the iOS App Store and open it.
2) Tap Select Videos to Compress. Then, select one or more videos you want to resize and tap Next.
3) On the Compression Settings screen, make sure you leave the frame rate as high as possible. Then, use the Video Dimensions slider to resize the video to your liking. Note that the slider automatically keeps the correct dimension proportions, so you don’t end up with a video of a different aspect ratio from the original one.
4) Once you have selected the right video dimensions, tap the Compress button.
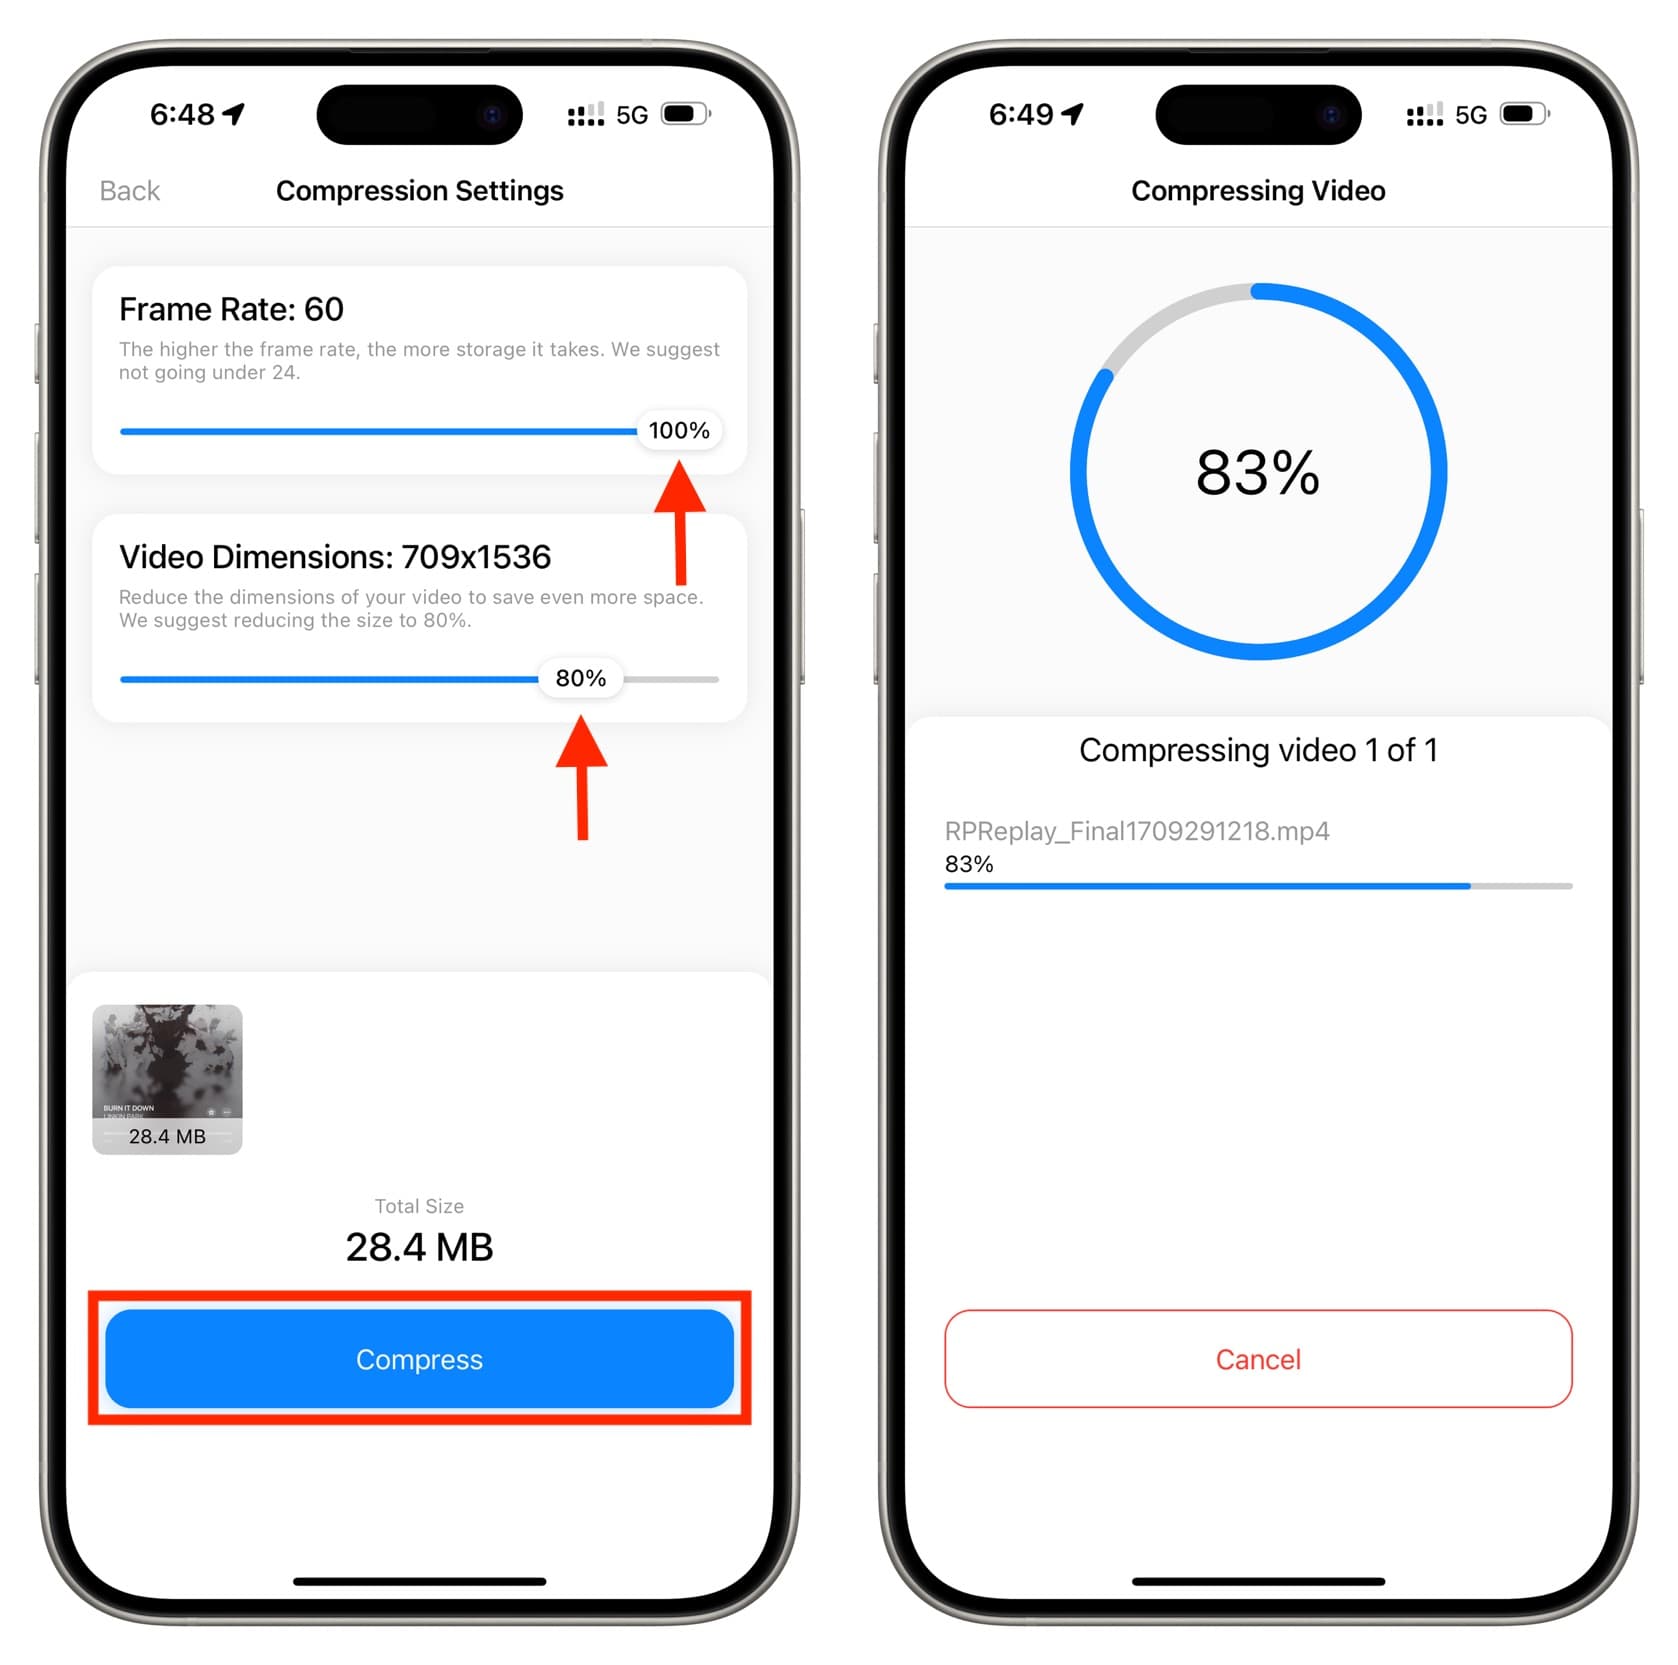
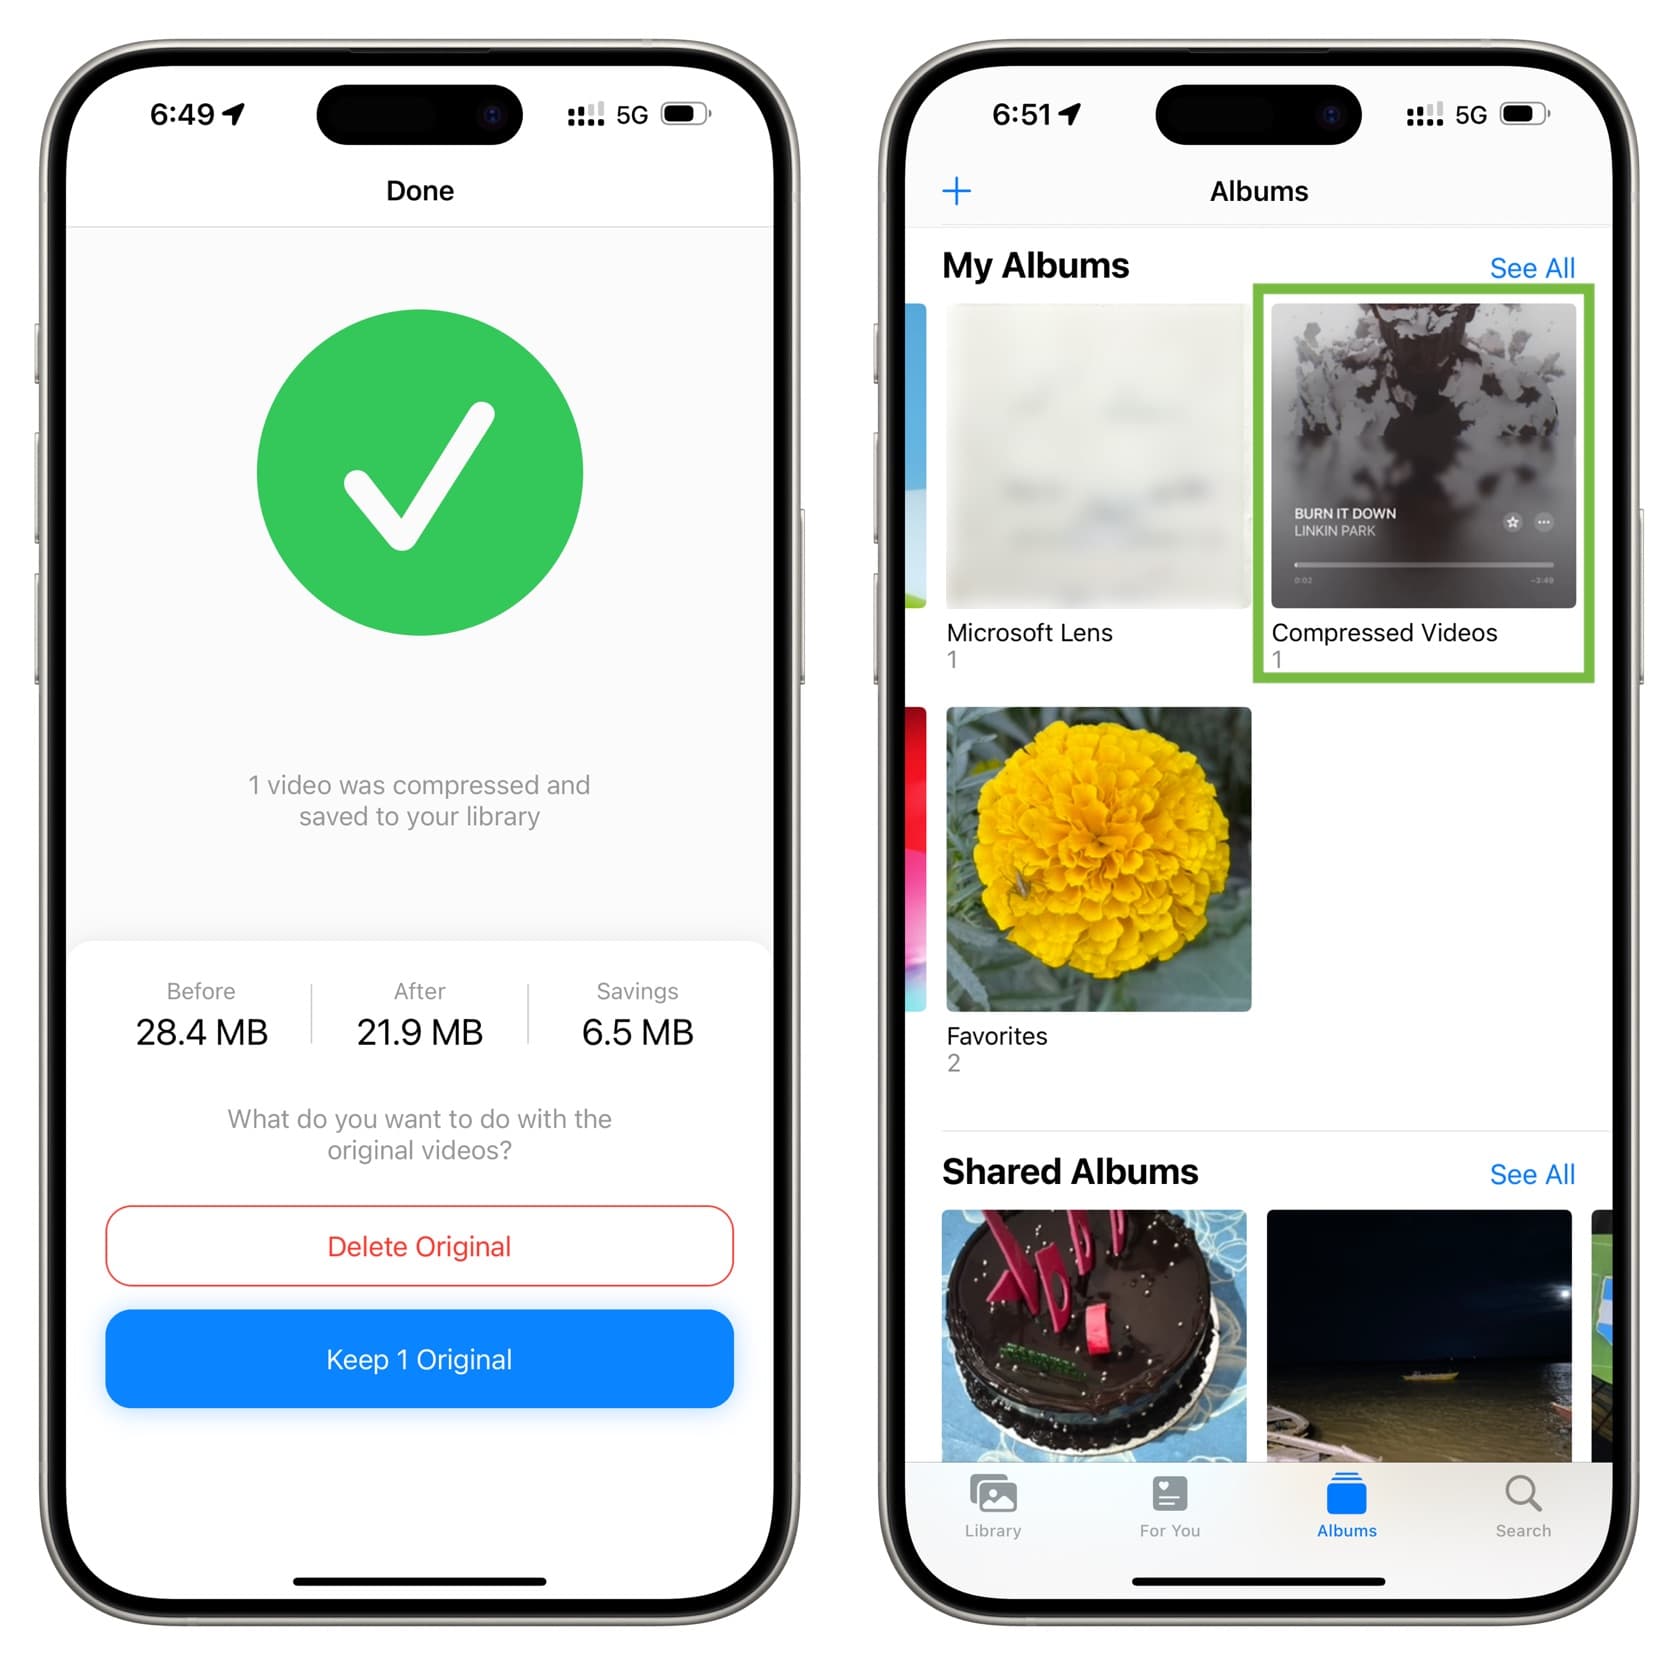
The app will process your video and save a copy of it to your library. The resized video will also be saved to a new album called Compressed Videos in your Photos app.
As you can tell, the process is very simple, so much so that one might wonder why Apple didn’t bake this feature into the stock Photos app.
On a related note: How to compress photos on your iPhone and iPad