Thanks to Apple’s Handoff feature, you can easily transfer audio between your iPhone and your HomePod. That includes music, podcasts, and even phone calls.
In this step-by-step tutorial, we’re going to show you how to transfer an ongoing phone call and music or podcasts from your iPhone to your HomePod, and vice versa.
What you can transfer from iPhone to HomePod
- Phone calls.
- Besides standard phone calls, Handoff to HomePod will also work with other calling apps that integrate Apple’s CallKit framework, like WhatsApp or Skype.
- Apple Music in the iOS Music app.
- Podcasts from the Apple Podcasts app.
- Audio from other apps. I have tested it with Spotify, YouTube, VLC, and YouTube Music. Audio Handoff works perfectly with all these services.
Prerequisites
1) Before you can use this feature, be sure that Handoff is enabled. To verify this, go to iPhone Settings > General > AirPlay & Handoff. From here, make sure Handoff and Transfer to HomePod are switched on.
2) Handoff also requires that both the phone and the speaker are signed in to iCloud with the same Apple ID.
- On iPhone: Go to Settings app > your name from the top. Here you’ll see your Apple ID email below your profile picture.
- For HomePod: Open the Home app on your iPhone > select your HomePod > scroll down, and you’ll see the Apple ID under Primary User.
3) Make sure your iPhone has Bluetooth and Wi-Fi turned on. Note: On HomePod, Wi-Fi and Bluetooth are always on.
4) Finally, remember that the devices must be on the same Wi-Fi network. Handoff uses Bluetooth for proximity information, meaning it “just works” when the devices are near each other.
Note: You can’t automatically Handoff music or calls from your iPad or Mac to HomePod. But you can manually select HomePod as the audio output.
Automatically transfer audio from iPhone to HomePod
- Play a song or podcast on your iPhone in Apple Music, Spotify, YouTube, YouTube Music, or any such app.
- Bring your iPhone close to your HomePod. Simply holding the phone near the top of your HomePod will do the trick.
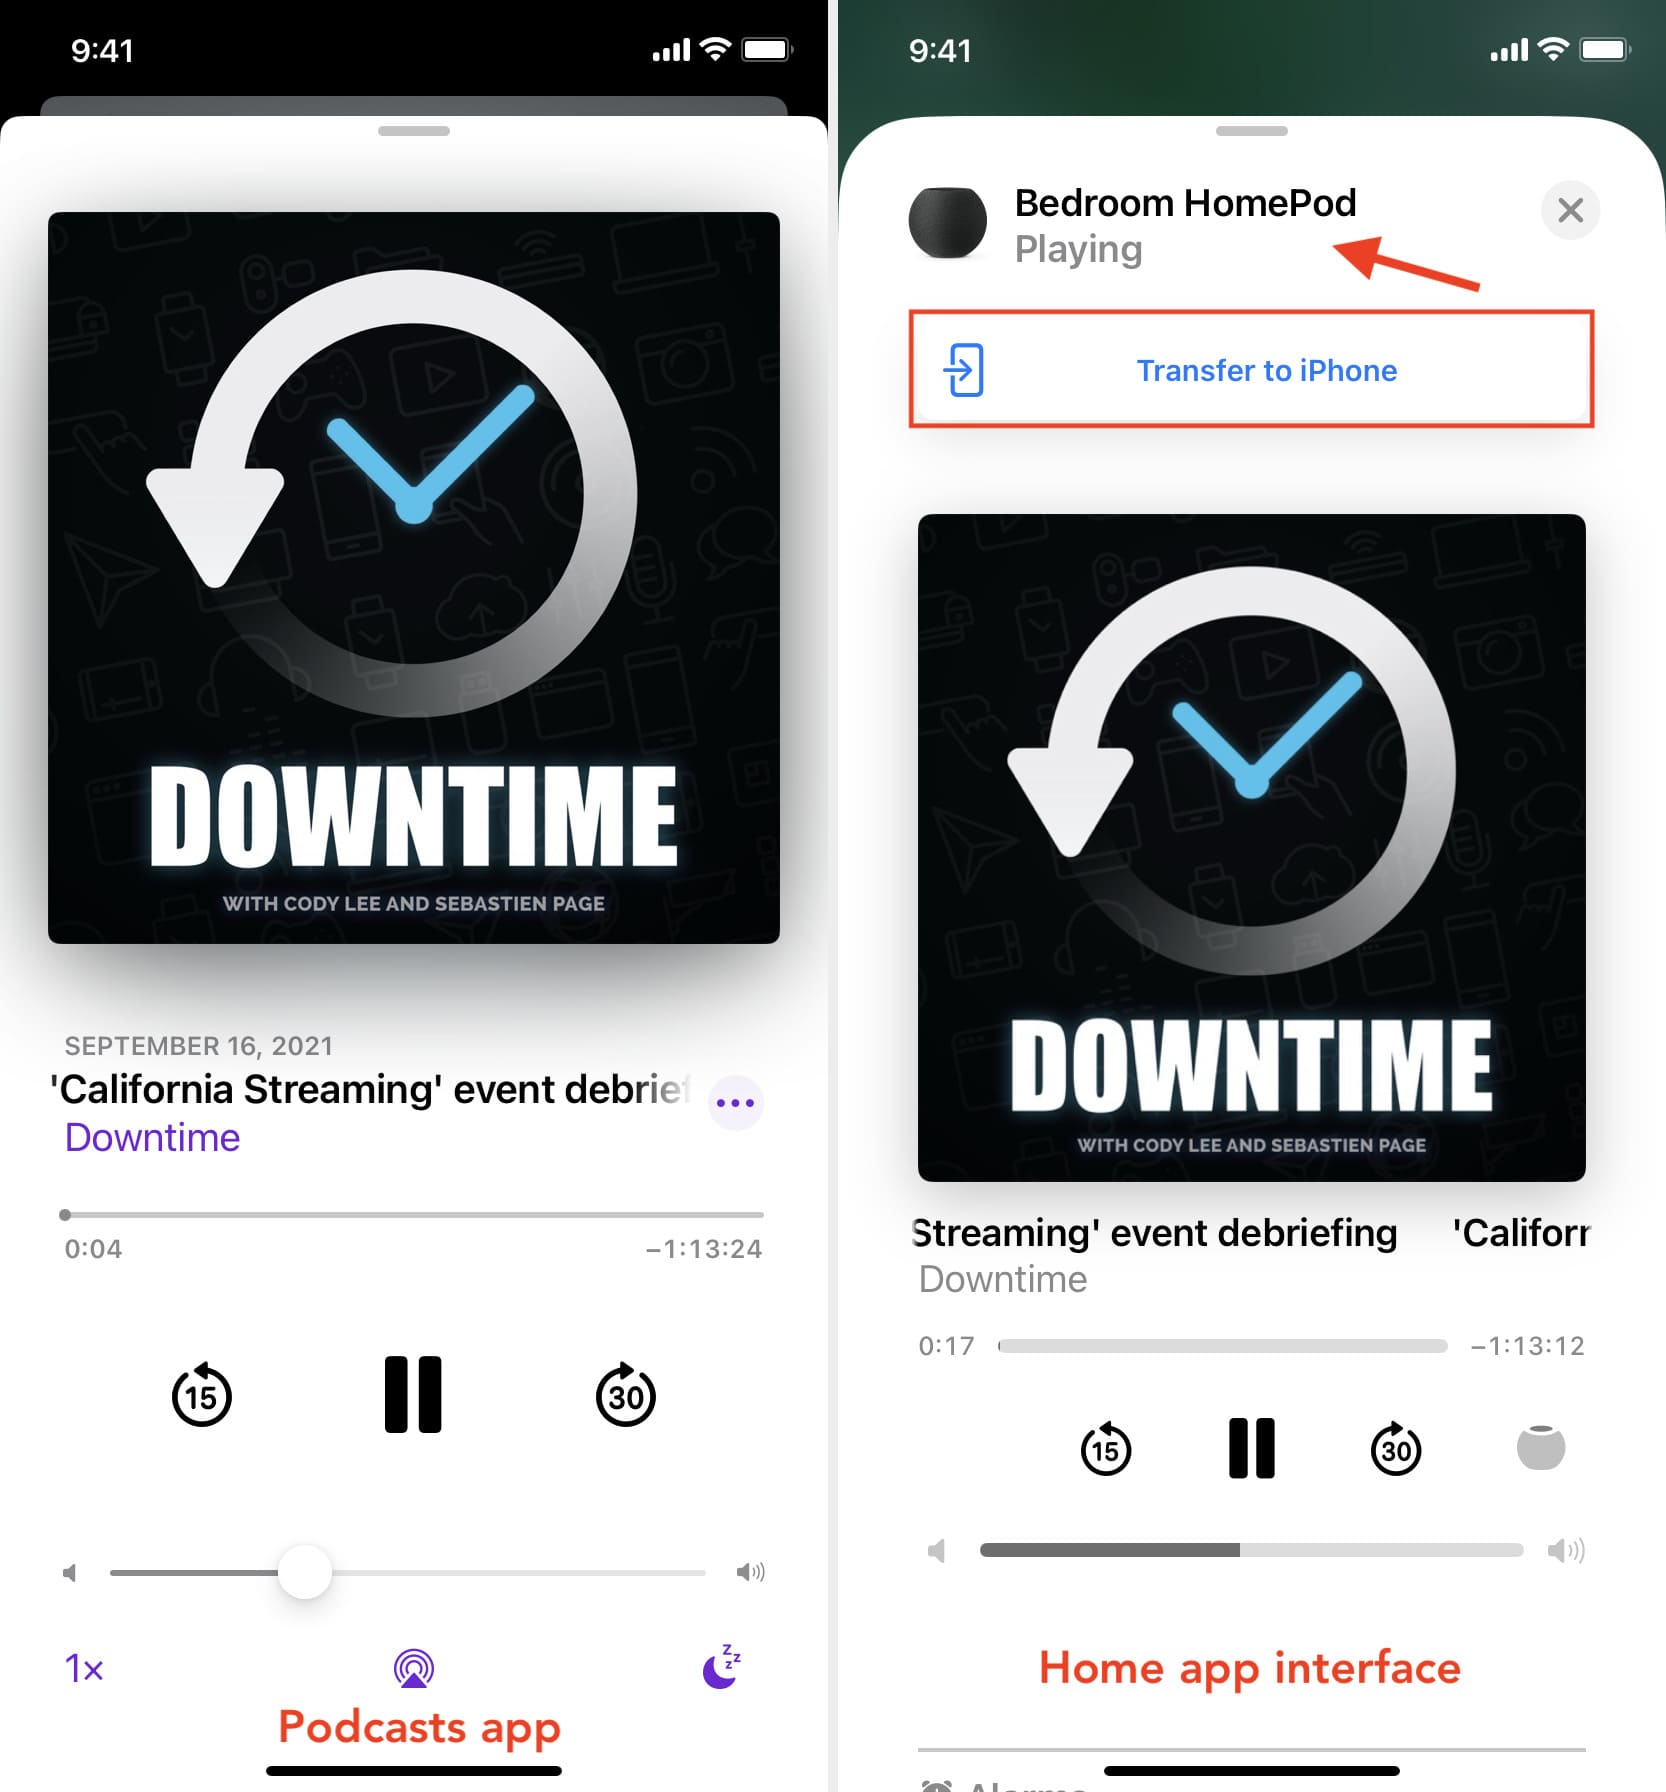
The audio stops on your iPhone and resumes playing on HomePod right where you left off. Besides that, you may also see that the Home app interface slides up on your iPhone, showing what’s playing. On this screen, you may also see a button that lets you transfer the audio back to your iPhone.
Transfer audio from HomePod back to iPhone
- To take your audio with you, simply move the iPhone away from your wireless speaker. That is, go out of the Wi-Fi range.
- Besides that, you can tap the Transfer to iPhone button inside the Home app (if you see it).
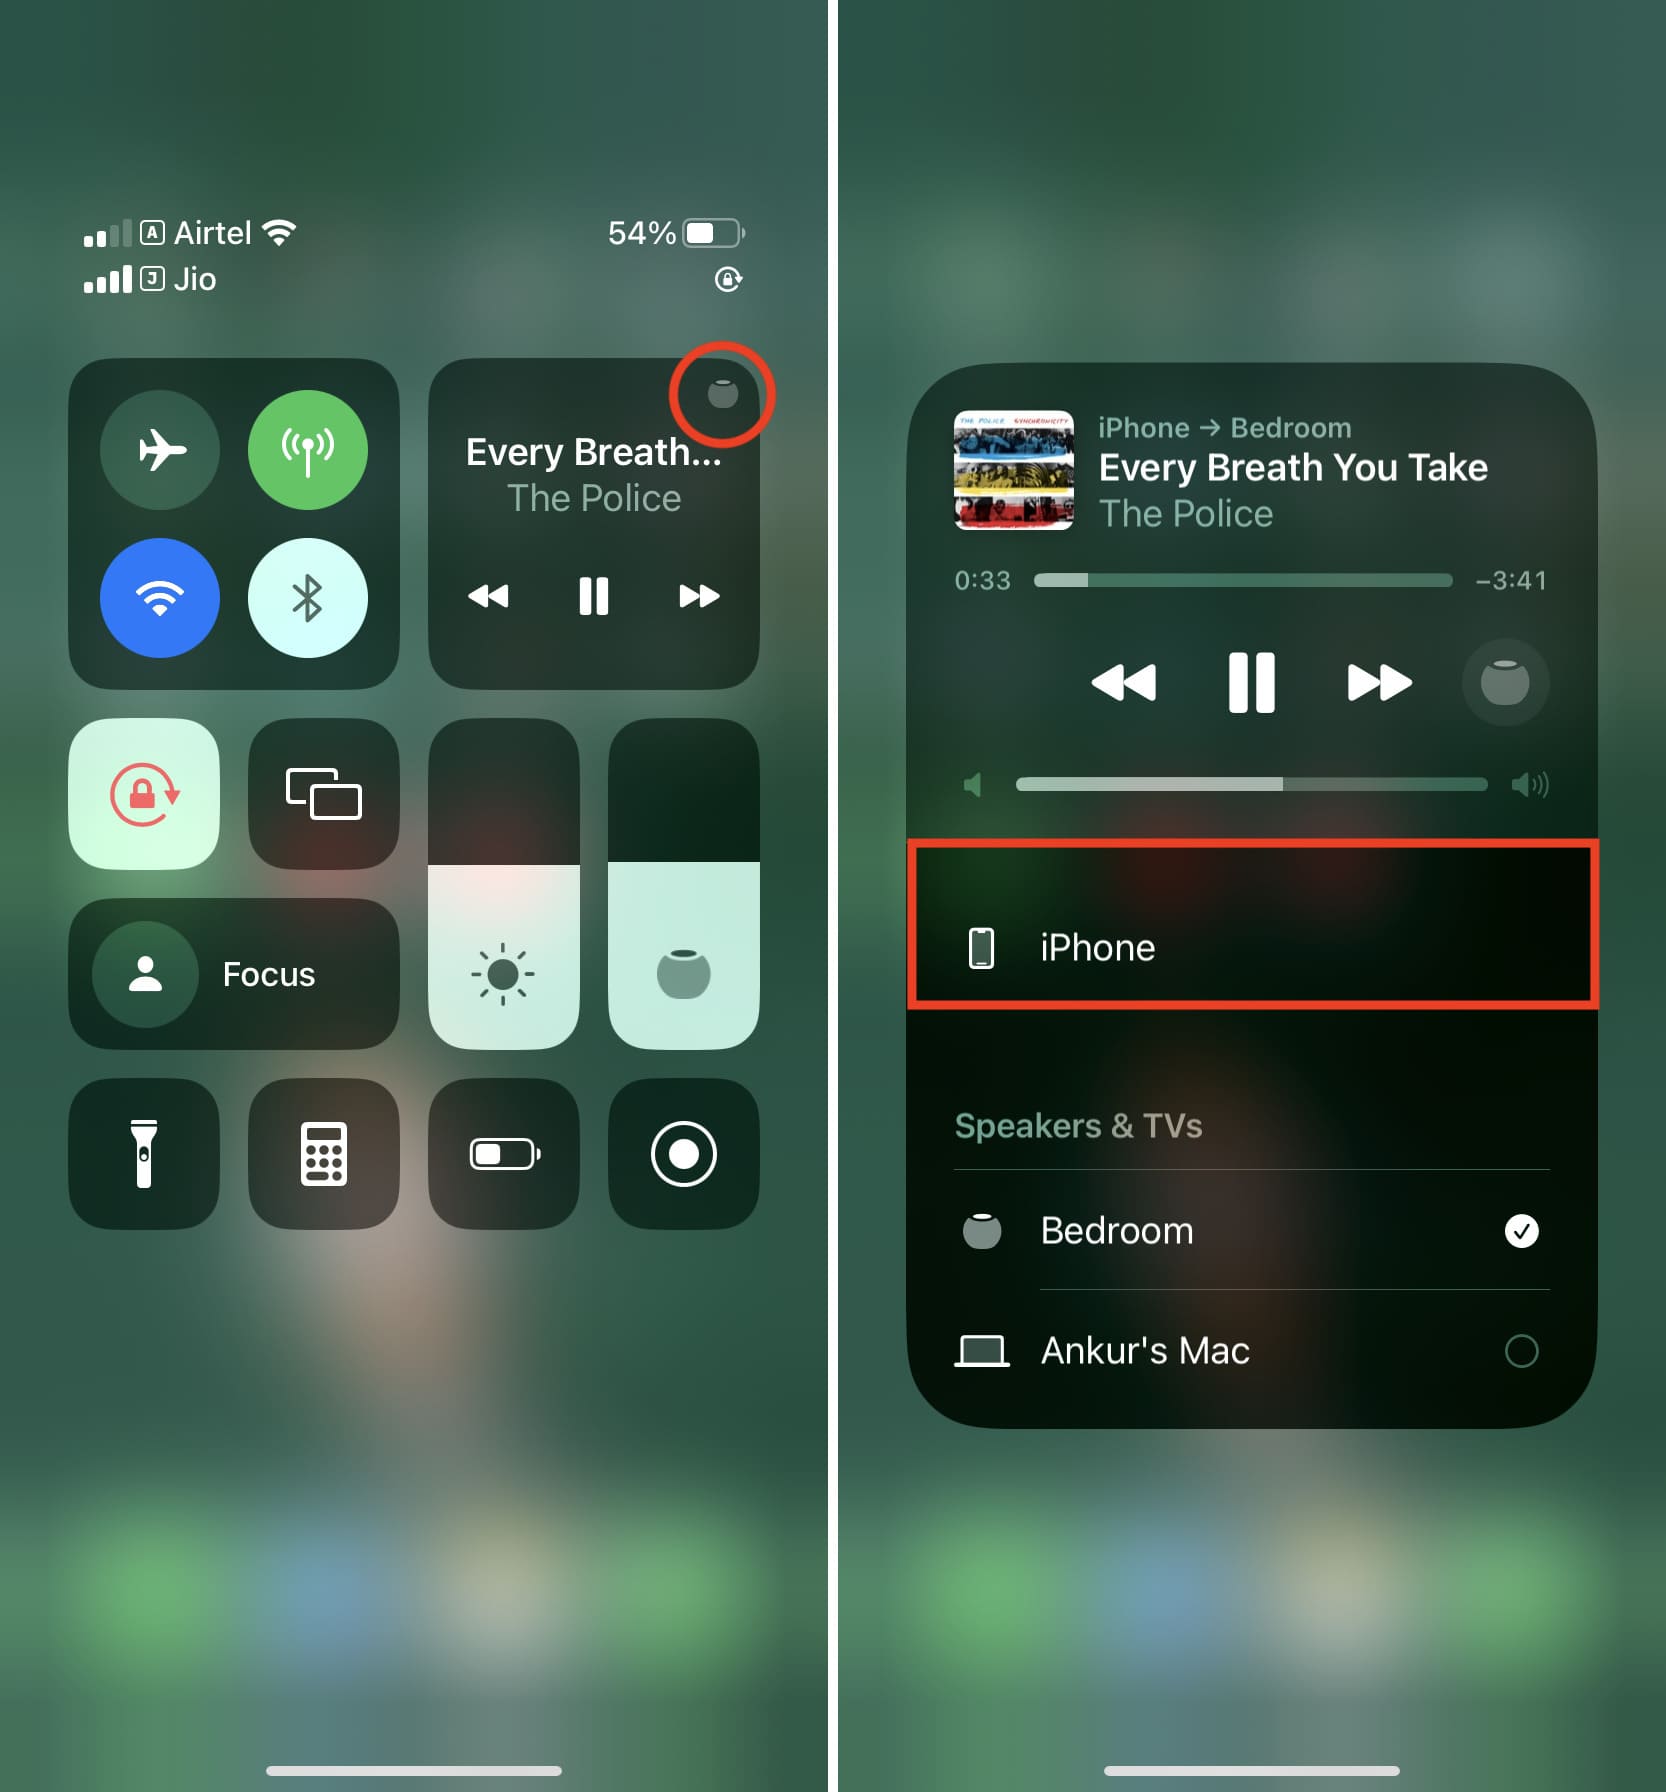
- And finally, you can always open the iOS Control Center, tap the HomePod icon and select your iPhone as the audio output.
Transfer an ongoing call from iPhone to HomePod speaker
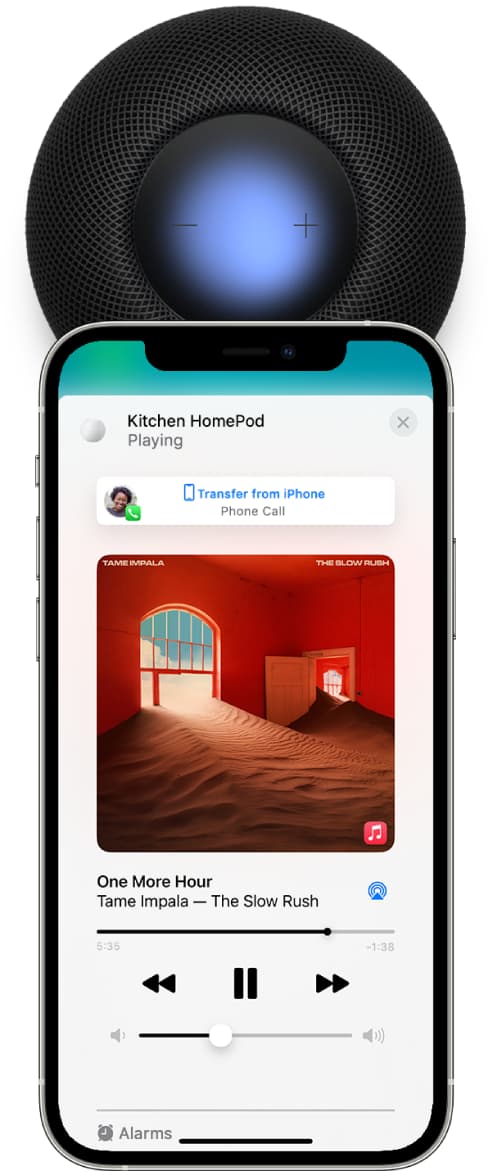
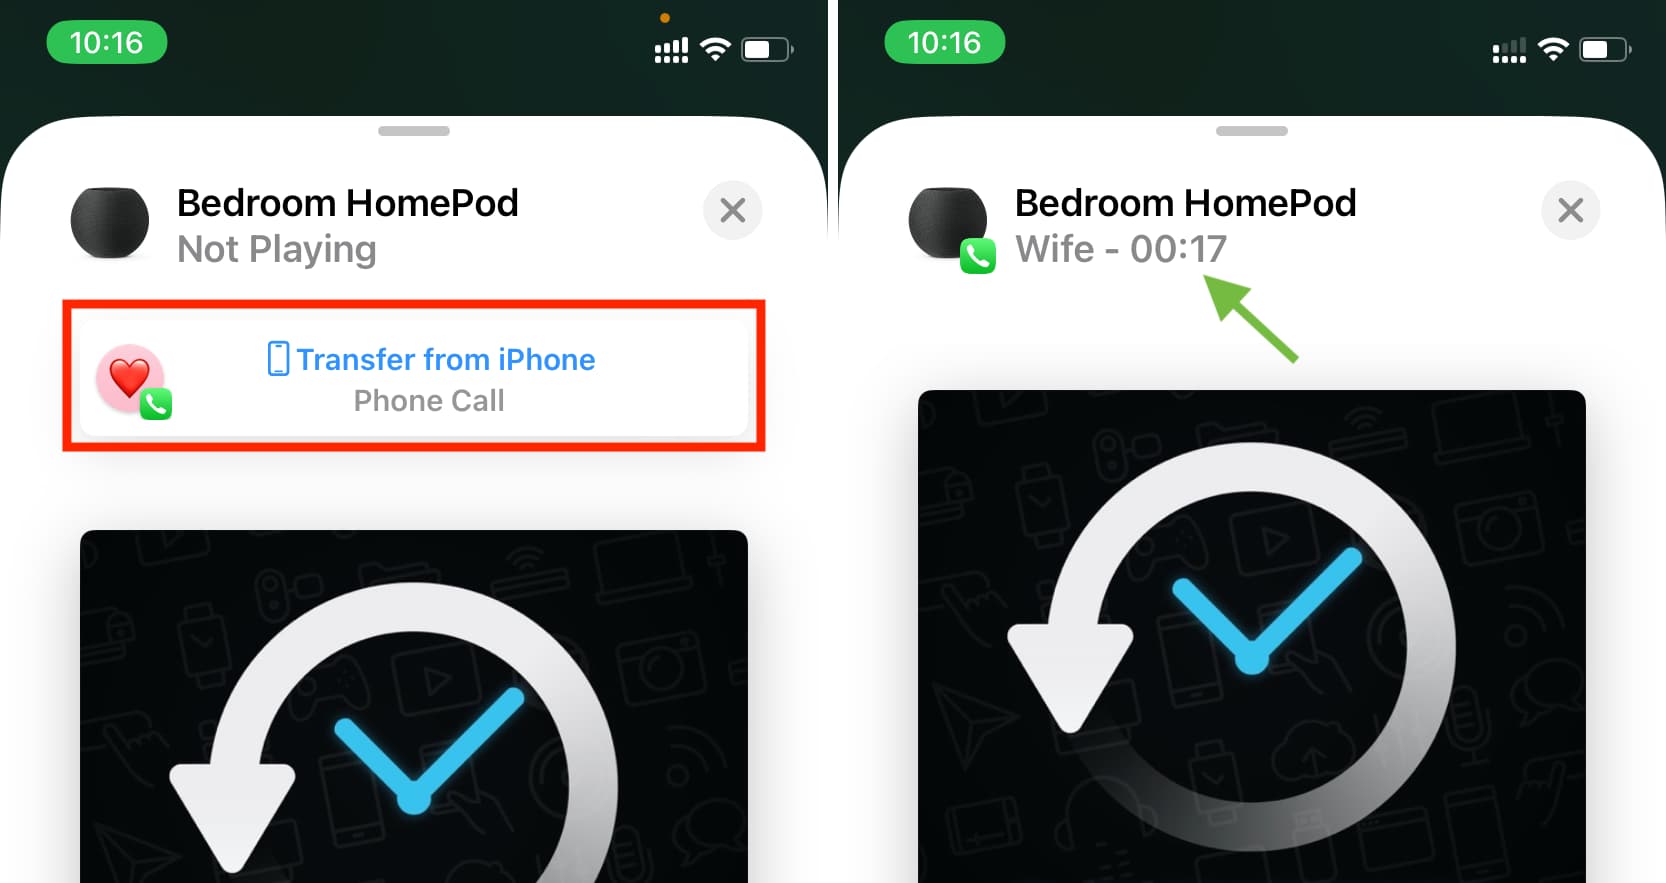
When you’re on a phone call, bring your iPhone near the top of your HomePod. Unlike music transfer, the phone call will not move automatically to your HomePod (for privacy reasons, as you may not want people in your house to hear your call). However, the Home app interface will appear on the screen, and you’ll see a button saying Transfer Phone Call from iPhone. Simply tap that, and it will move your ongoing call from iPhone to HomePod, without disconnection!
Besides that, you can always manually select your HomePod for calls. Here’s how:
- Make or receive a call on your iPhone.
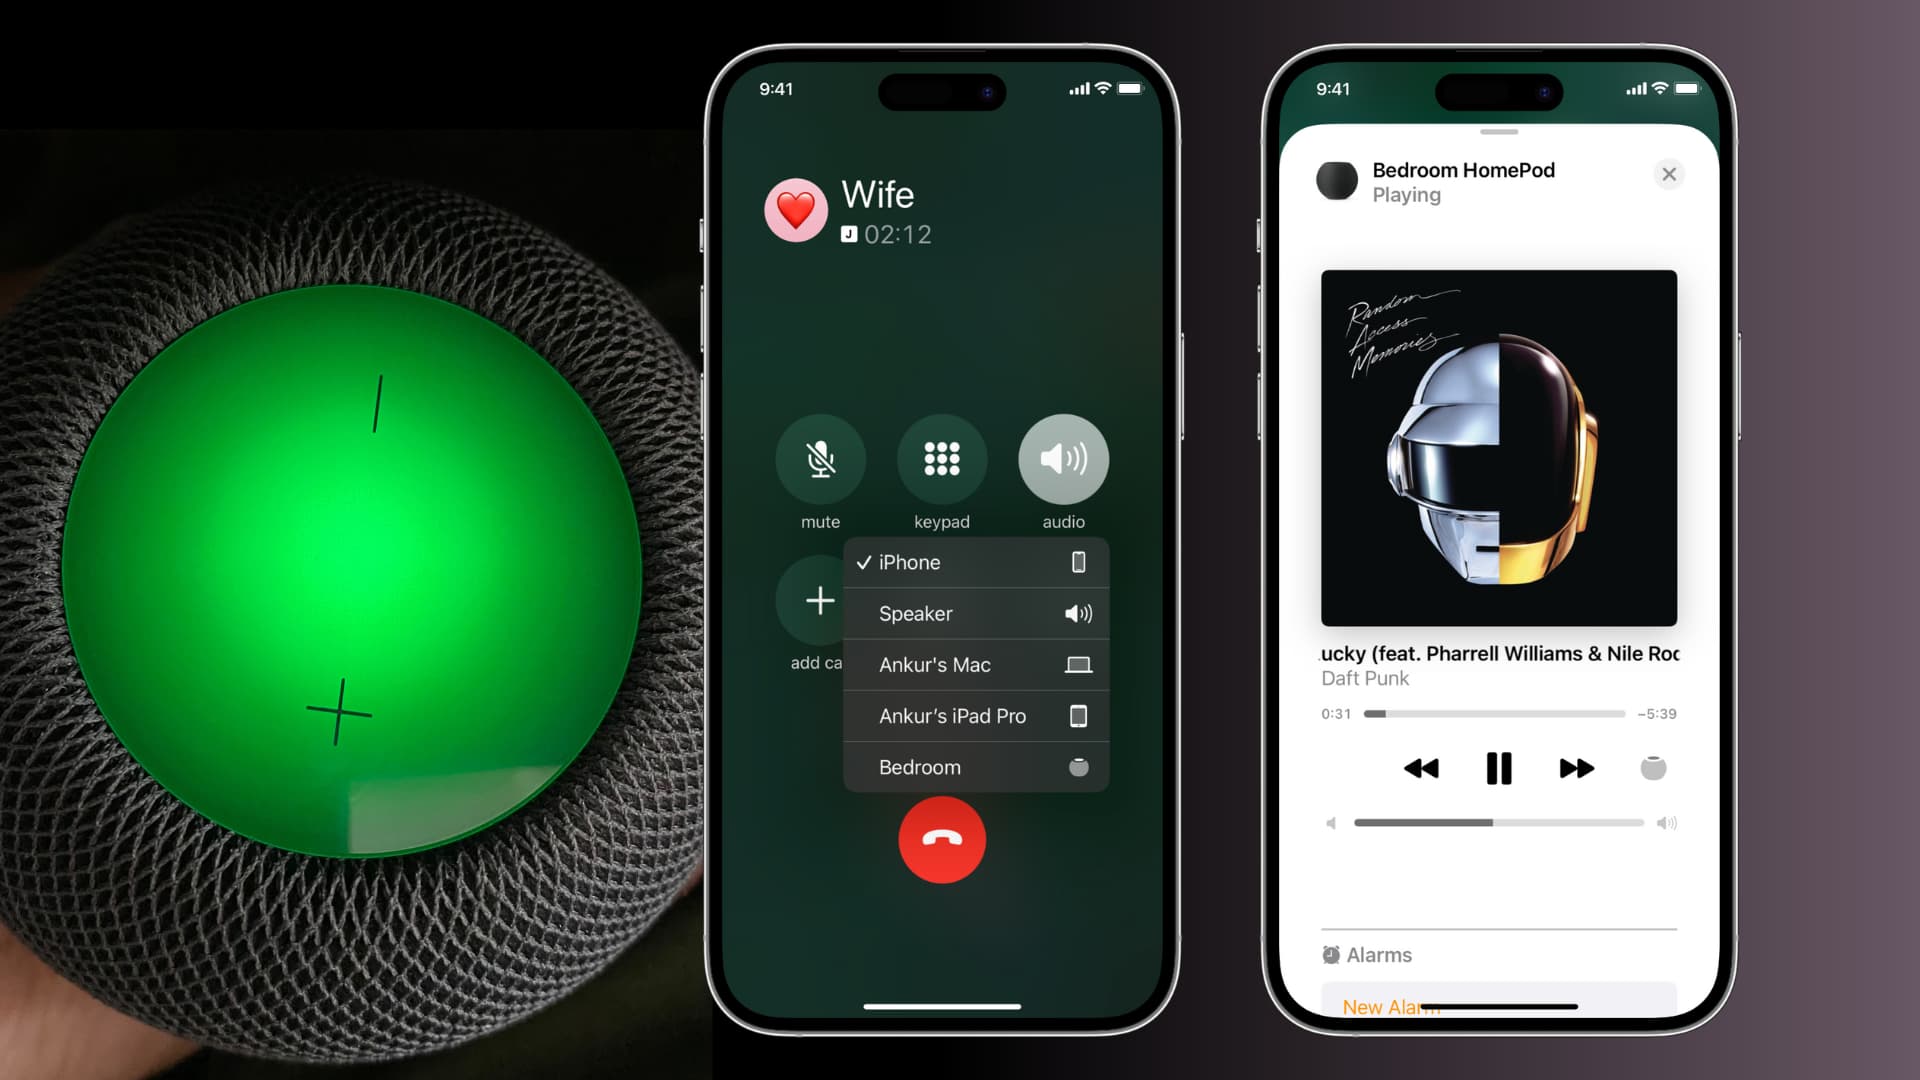
- During the call, tap the audio button in the Phone app.
- Choose your HomePod from the list.
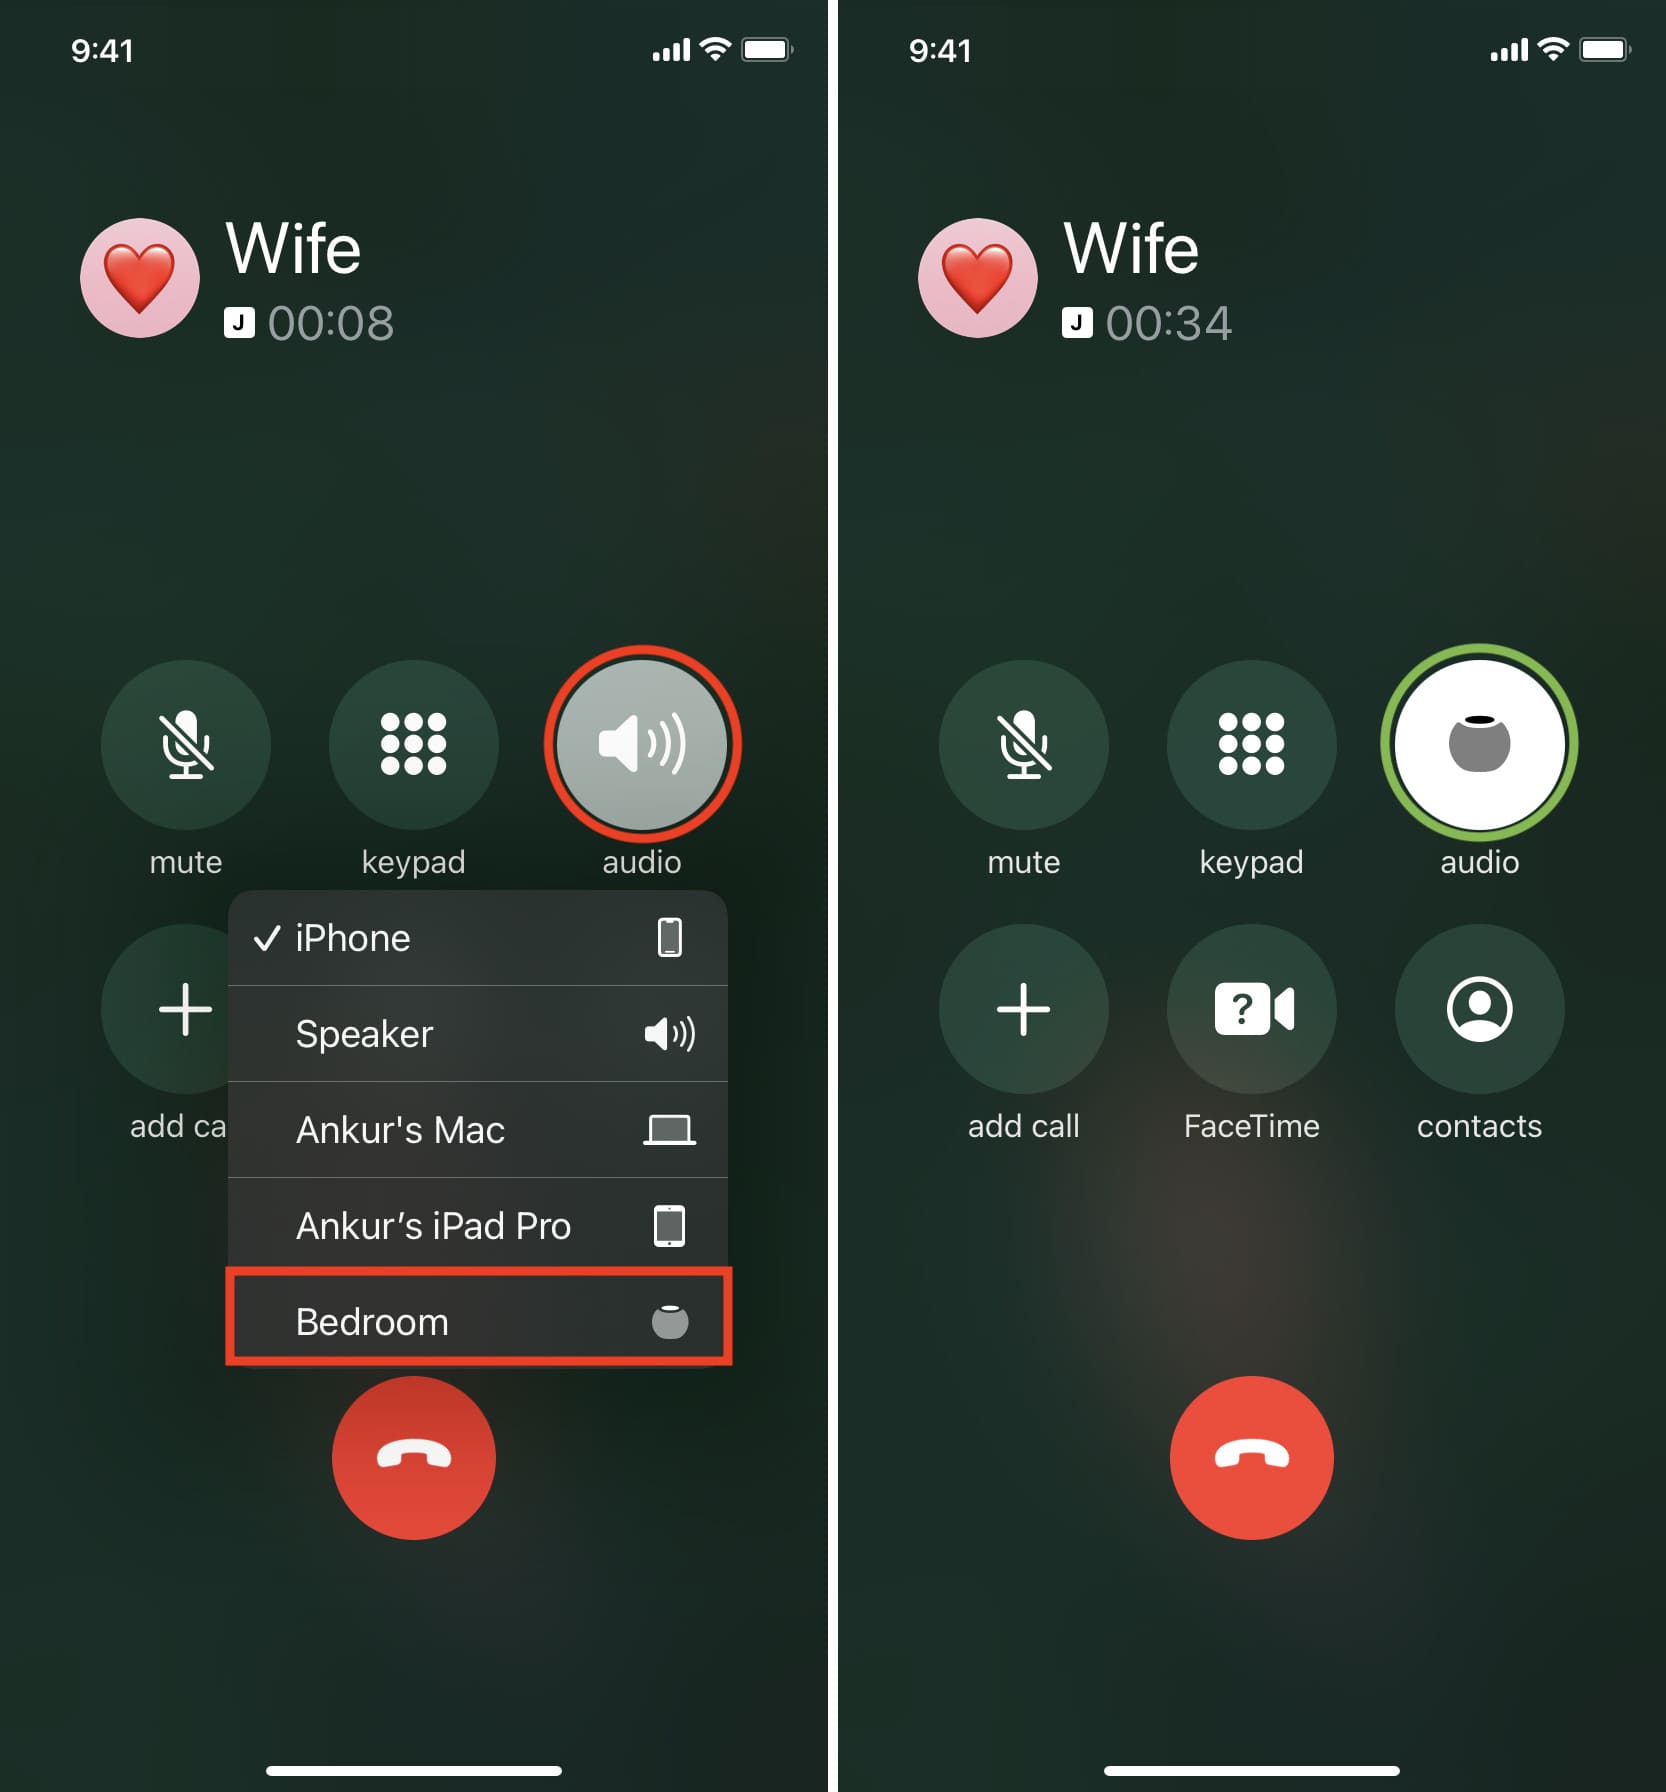
When the audio from the call connects to your HomePod, a green light appears on its top.

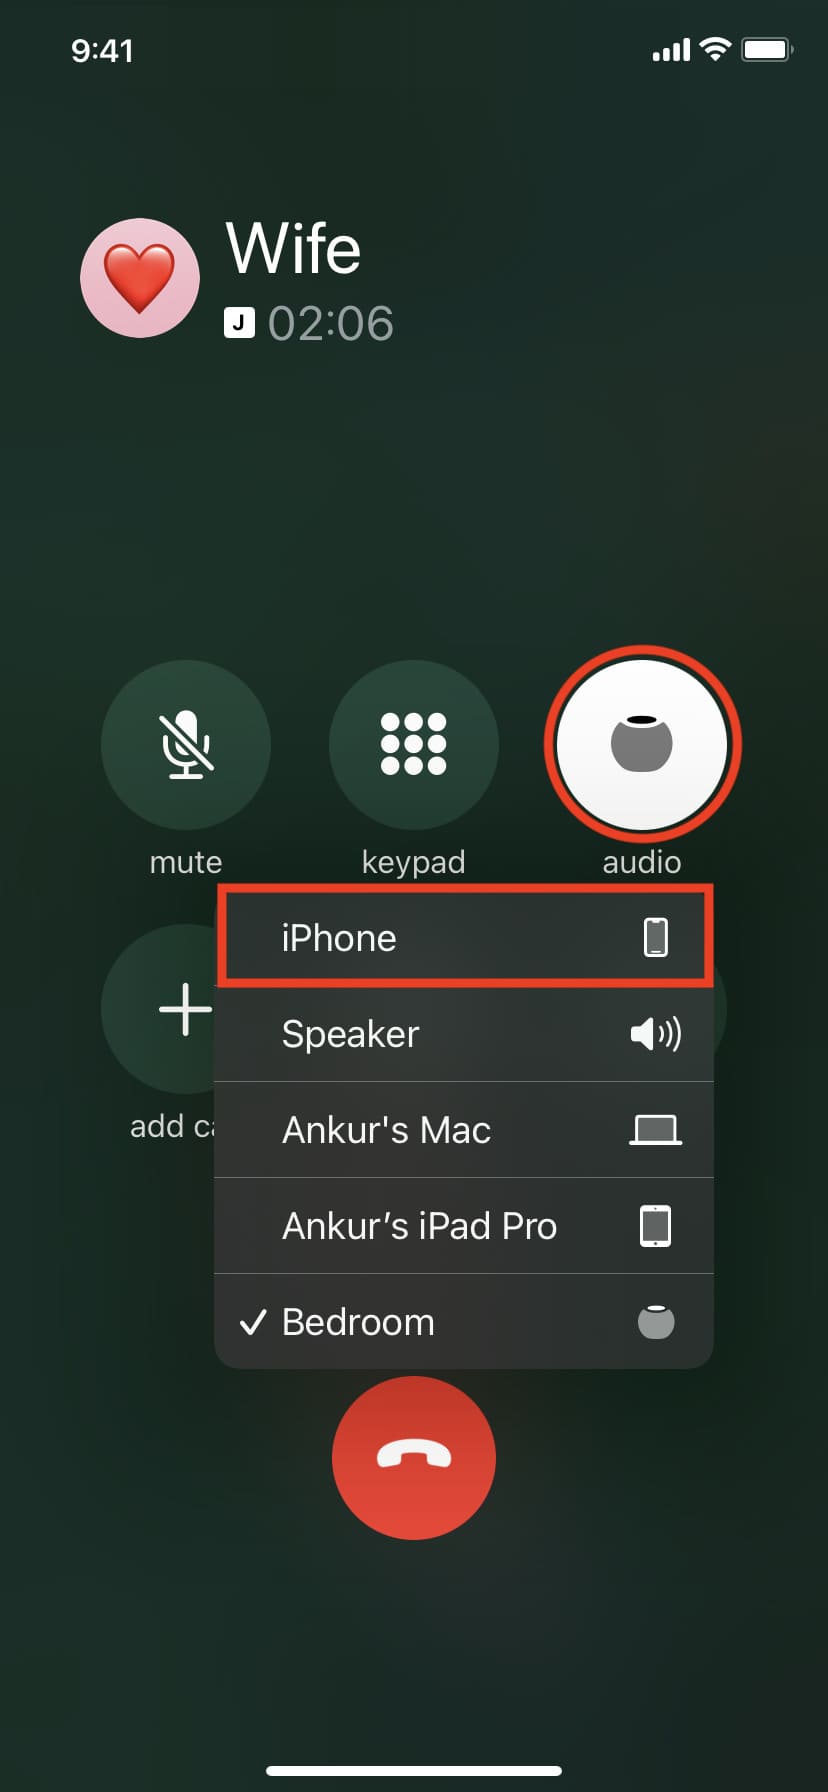
Transfer the call from HomePod back to your iPhone
Suppose you’ve already transferred an incoming or outgoing phone call to your Siri-driven speaker. In that case, you can switch its audio back to your iPhone at any time by tapping the audio button on your phone and choosing iPhone from the list. If you pick Speaker, the sound will come out from your iPhone’s speaker.
Related tips: