Do you use macOS’s incredibly useful zero-configuration Time Machine feature to keep the personal files, settings and documents residing on your Mac safely backed up to an external disk? If so, is your backup disk nearly full? The best way to make room on your backup disk is to delete old Time Machine backups using Finder.
For example, the disk in my AirPort Time Capsule is nearly full because I have backups dating back to 2010. In this day and age of iCloud Drive and other cloud-storage services, keeping years worth of backups is kind of useless. That precious disk space could be put to better use for storing your photos and videos, for example.
In this tutorial, you will learn how to delete old Time Machine backups to help clean up your disk and regain storage space on it.
Deleting old backups should be your first order of business in situations when your Time Machine backup disk runs out of space. By default, Time Machine deletes older backups to make room for new ones as your backup disk fills up.
There are a couple ways to remove entire backups created on specific dates. We will describe both, but note that Apple seem to prefer the first method
How to delete old Time Machine backups
1) Click the Time Machine icon in your Menu Bar to enter Time Machine.
2) Navigate through the interface to the desired date.
3) Once you have located the day you want to delete from your backup, click on the gear icon and select Delete Backup.
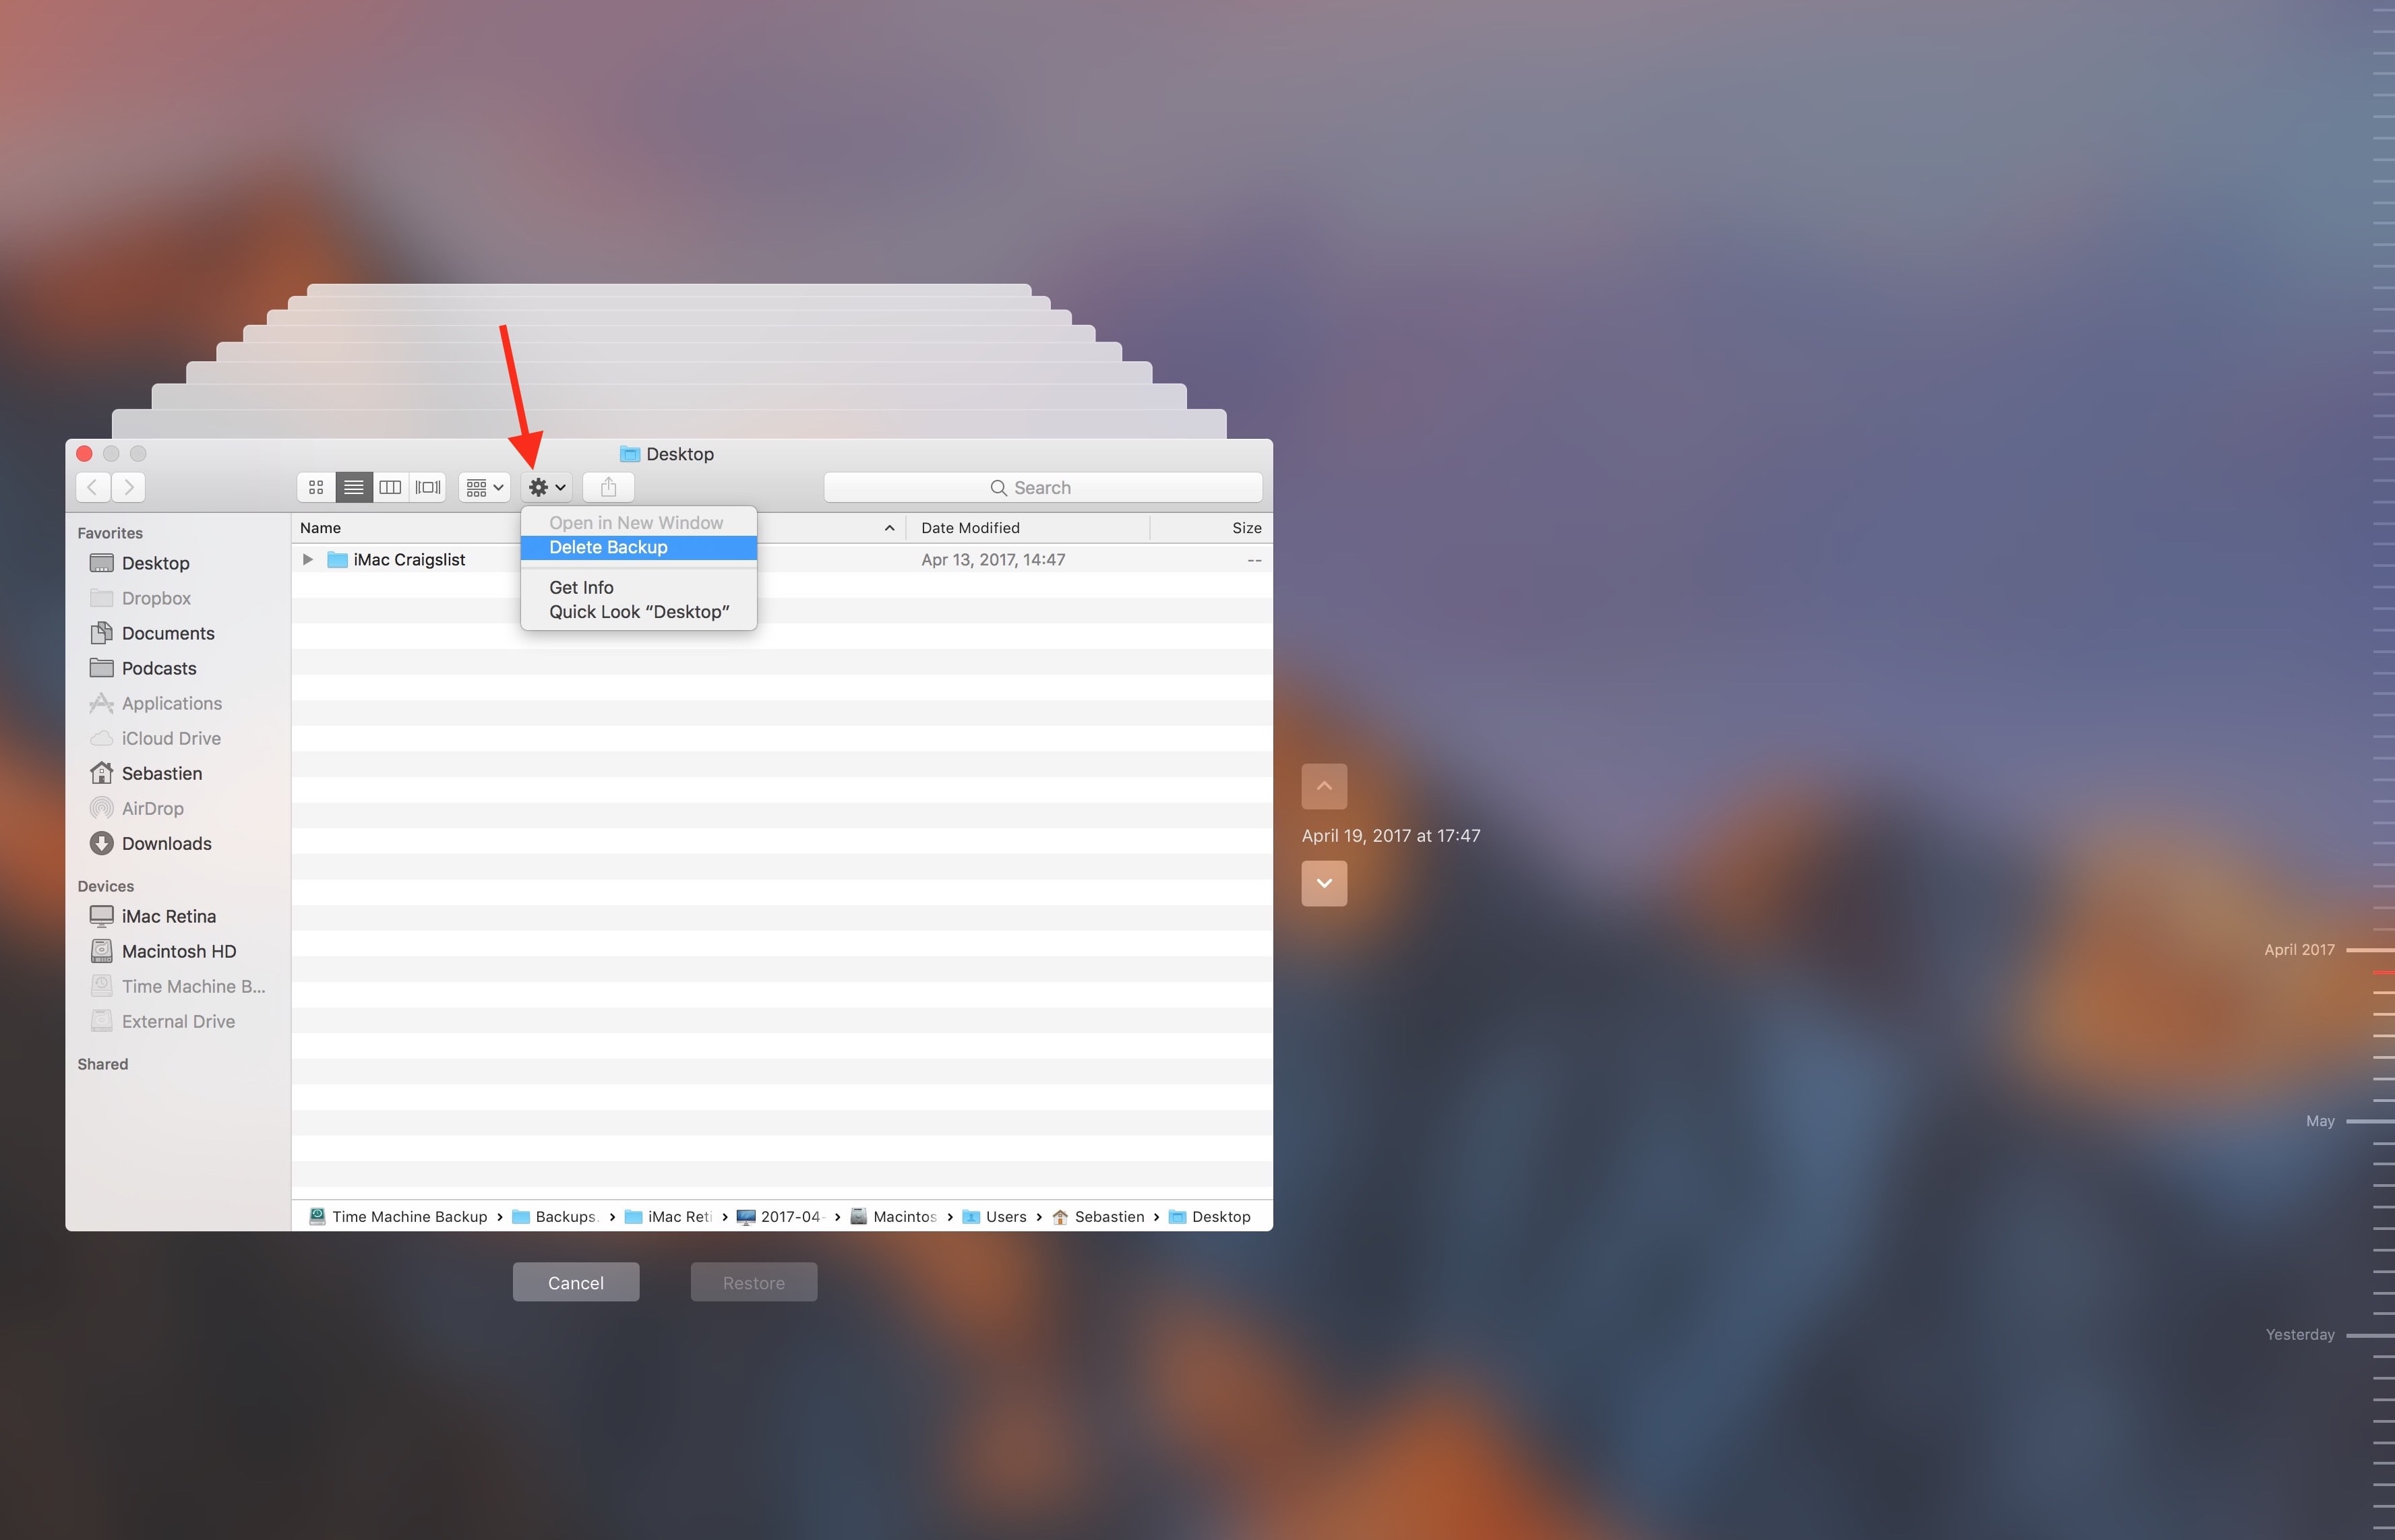
4) You will be asked to confirm you indeed want to delete the backup, and you may be ask to enter your administrator password too. Once done, the backup for that specific day will be deleted.
How to remove old Time Machine backups using Finder
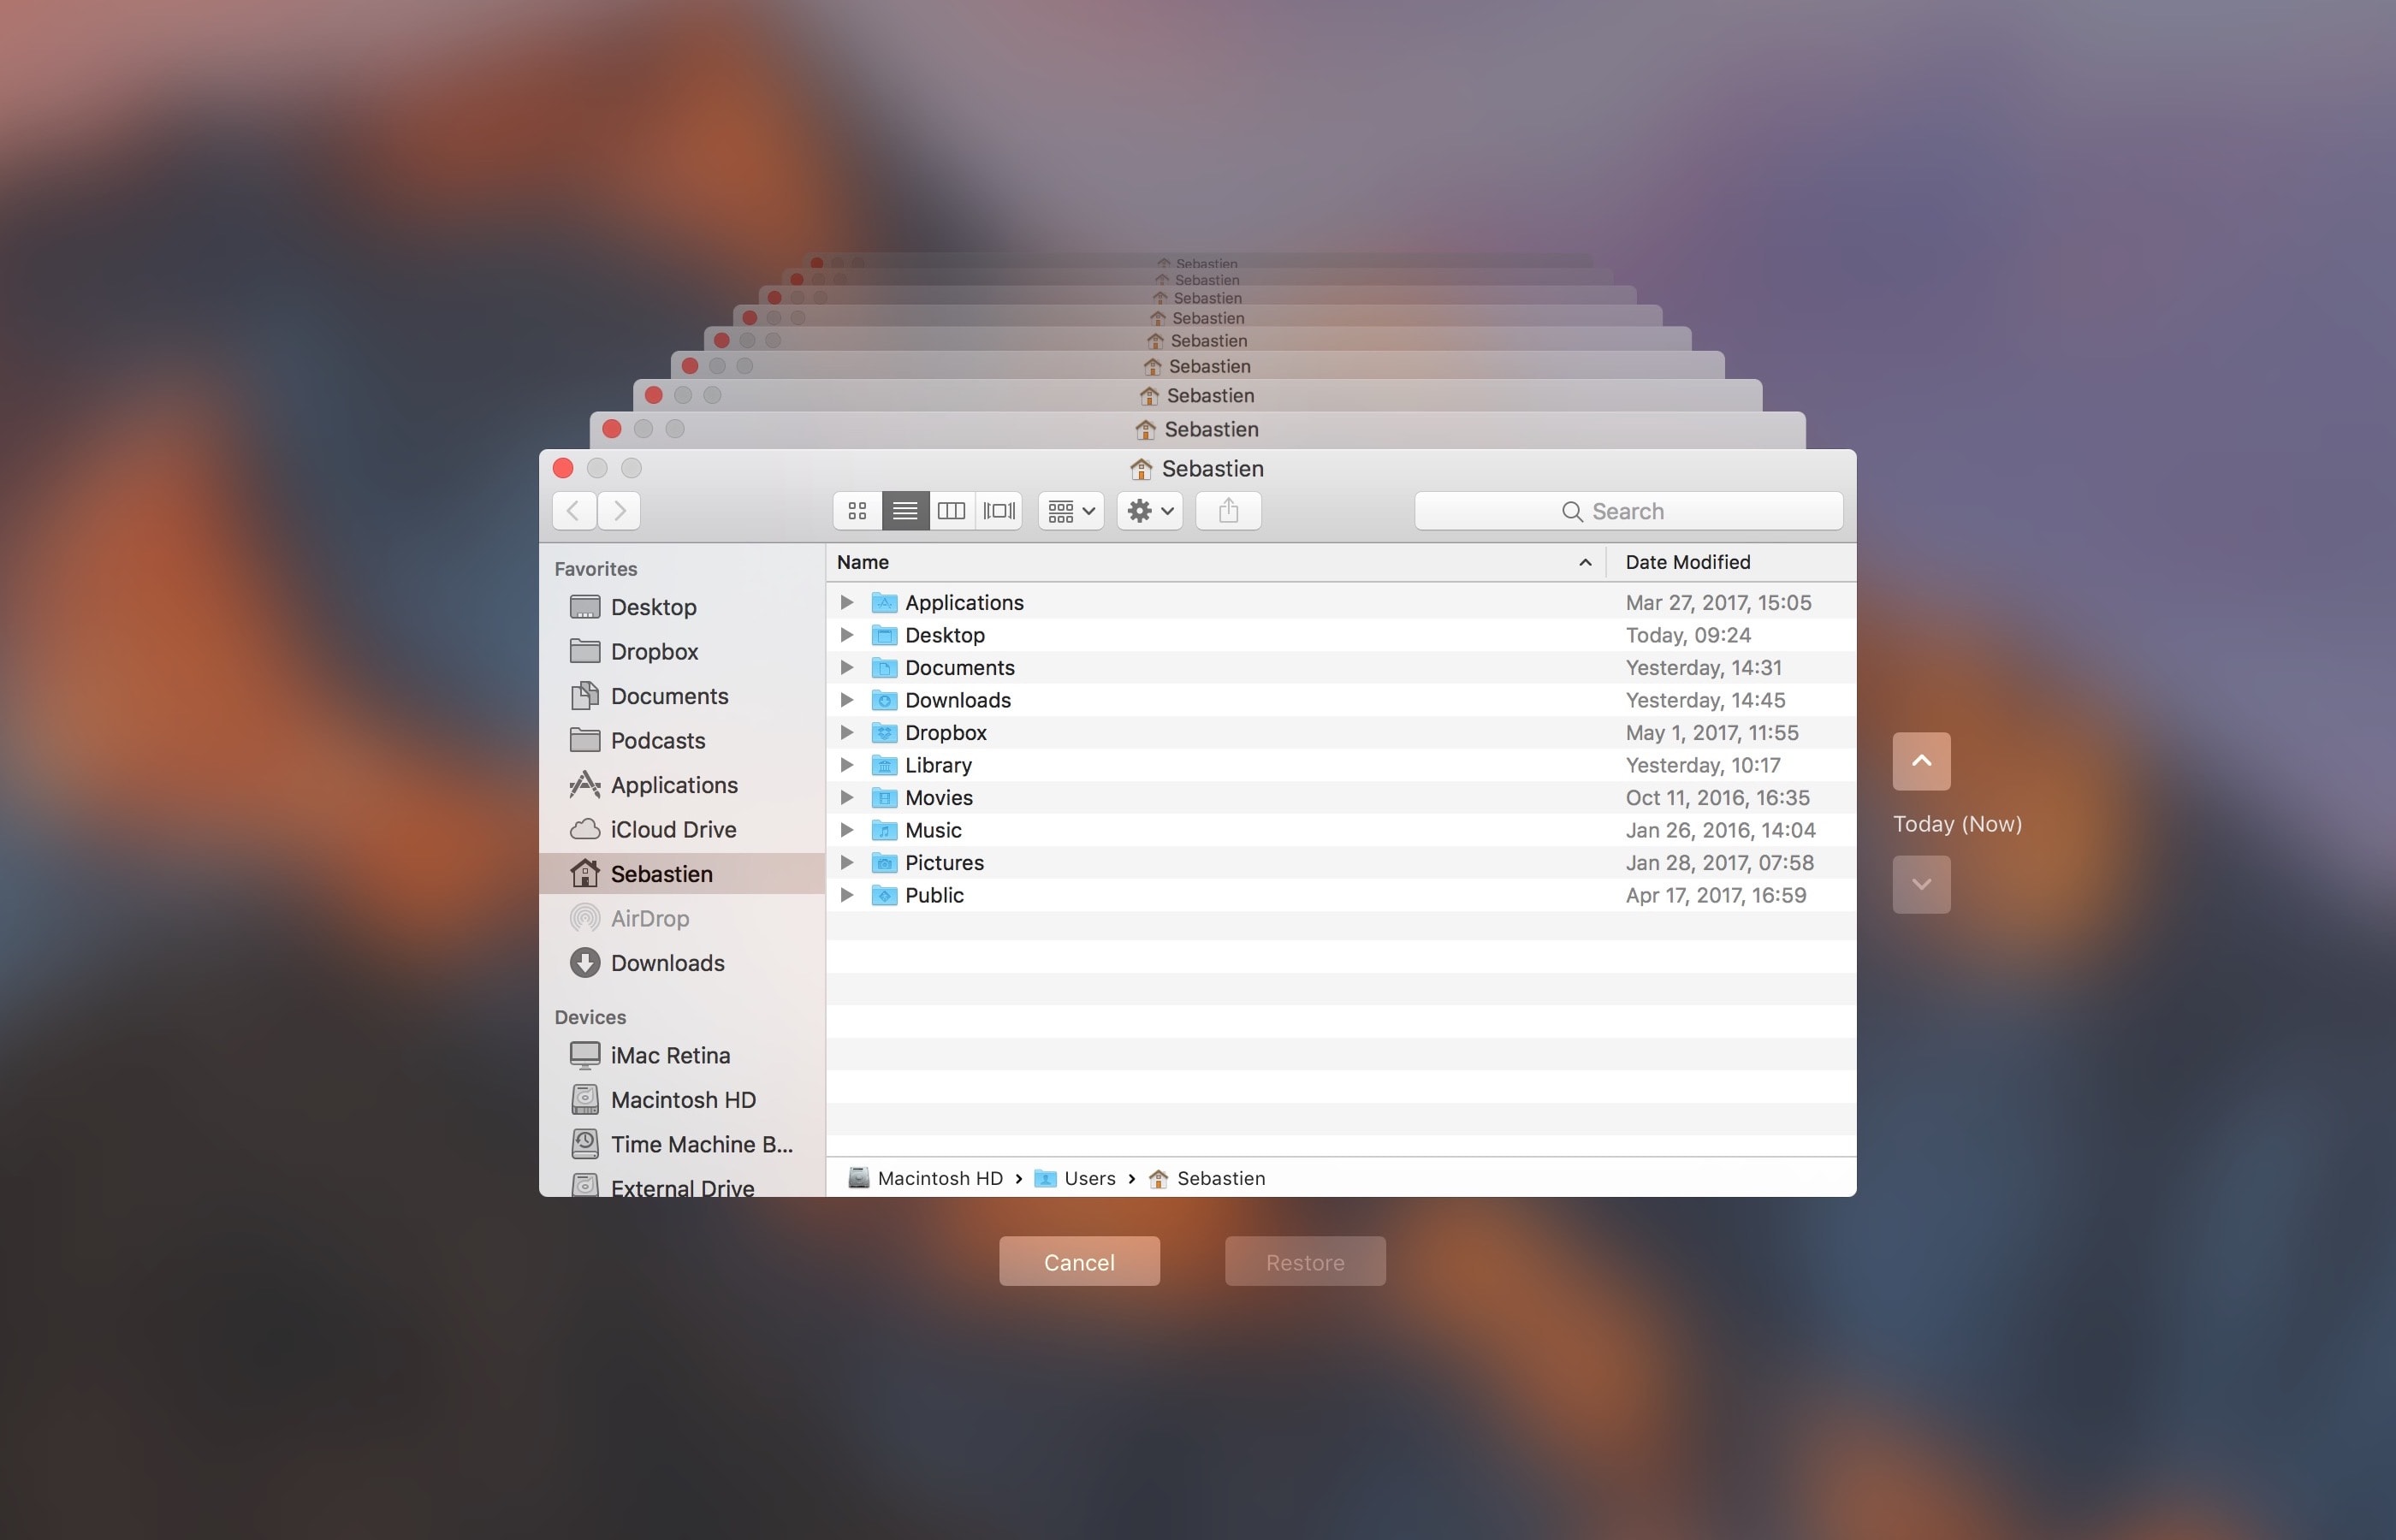
1) Click the desktop and open a new window by selecting New Finder Window from the File menu, or press the Command (⌘)—N keys on your keyboard.
2) Connect the disk containing your Time Machine backups to the computer and wait until its name appears underneath the Devices section in the Finder sidebar, then click it.
You may be asked to enter your administrator name and password to continue. If you use AirPort Time Capsule, you may be asked to enter a password to access the backup disk.
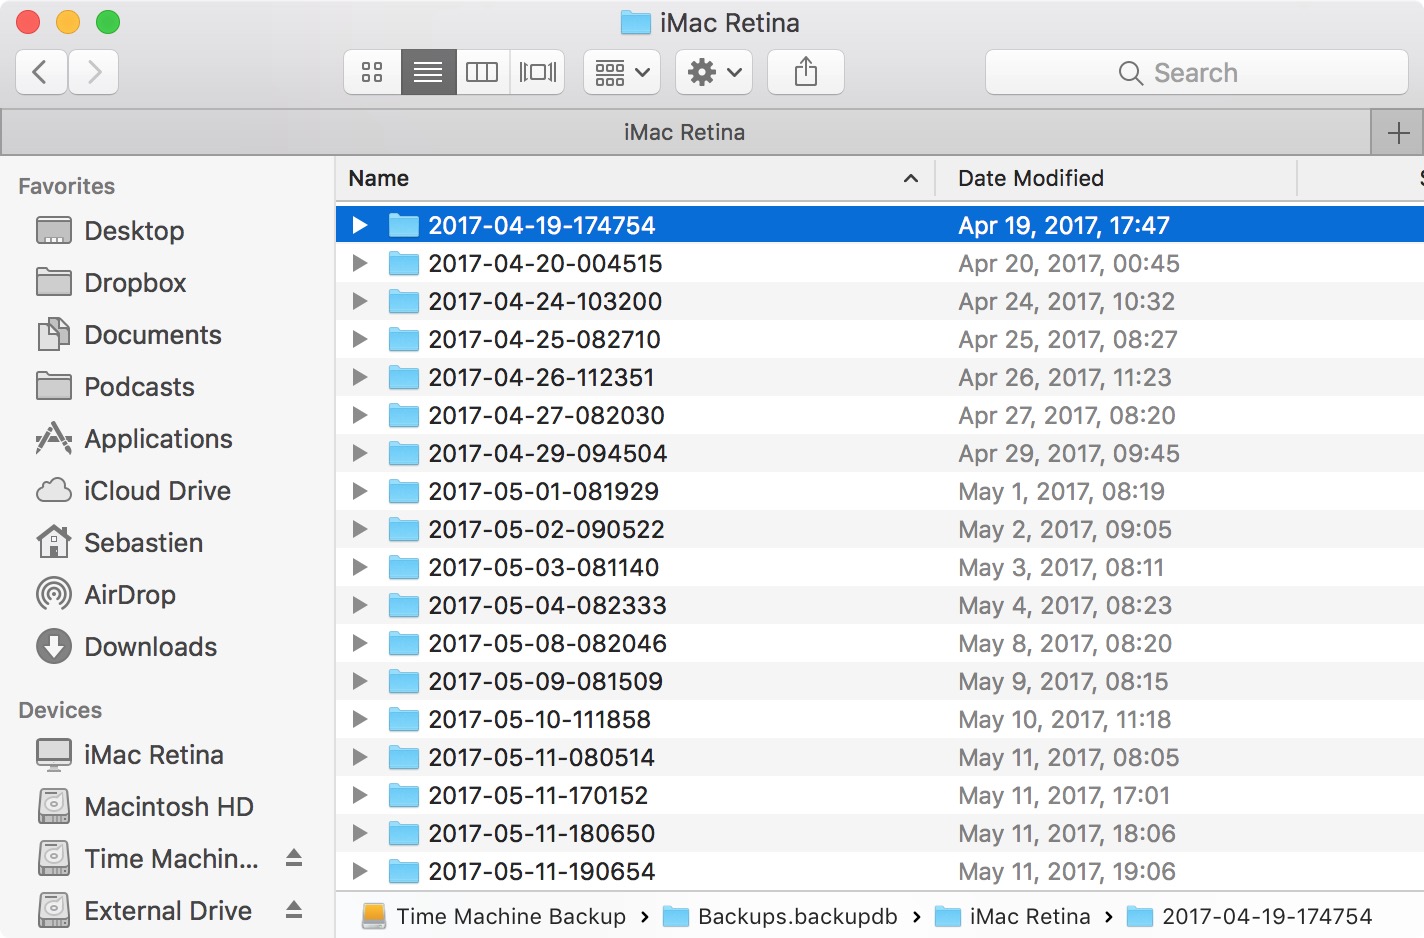
3) Navigate to the “Backups.backupdb” folder on your Time Machine backup disk as you would other folders. It should be a top-level folder of your backup drive.
4) Once inside the “Backups.backupdb” folder, navigate to the sub-folder named with your Mac computer’s name. For instance, if your Mac is named “iMac Retina” in System Preferences, Time Machine will store backups inside the “iMac Retina” sub-folder.
TUTORIAL: How to change your Mac computer’s name
5) You will see a bunch of sub-folders, each prefixed with the date of the backup in the YYYY-MM-DD format. For example, backups of your iMac created on April 19, 2017 would we stored in the sub-folder with the name beginning with “2017-04-19”. To delete a desired backup sub-folder, right-click or Control (⌃)-click it, then choose Move to Trash from the popup menu.
This will delete all copies of a backed-up file or folder from your Time Machine backup disk.
6) Repeat the process for other full-day backups you’d like to remove. When done, disconnect the disk by selecting its icon on the desktop, then choose Eject from Finder’s File menu.
While you can safely delete sub-folders within the “Backups.backupdb” folder, you are not allowed to delete individual items inside the dated folders.
You’re wholeheartedly discouraged from using Terminal or any other app other than Finder to move, copy or delete items from the Backups.backupdb folder.
You also cannot delete items from local snapshots stored on your internal drive.
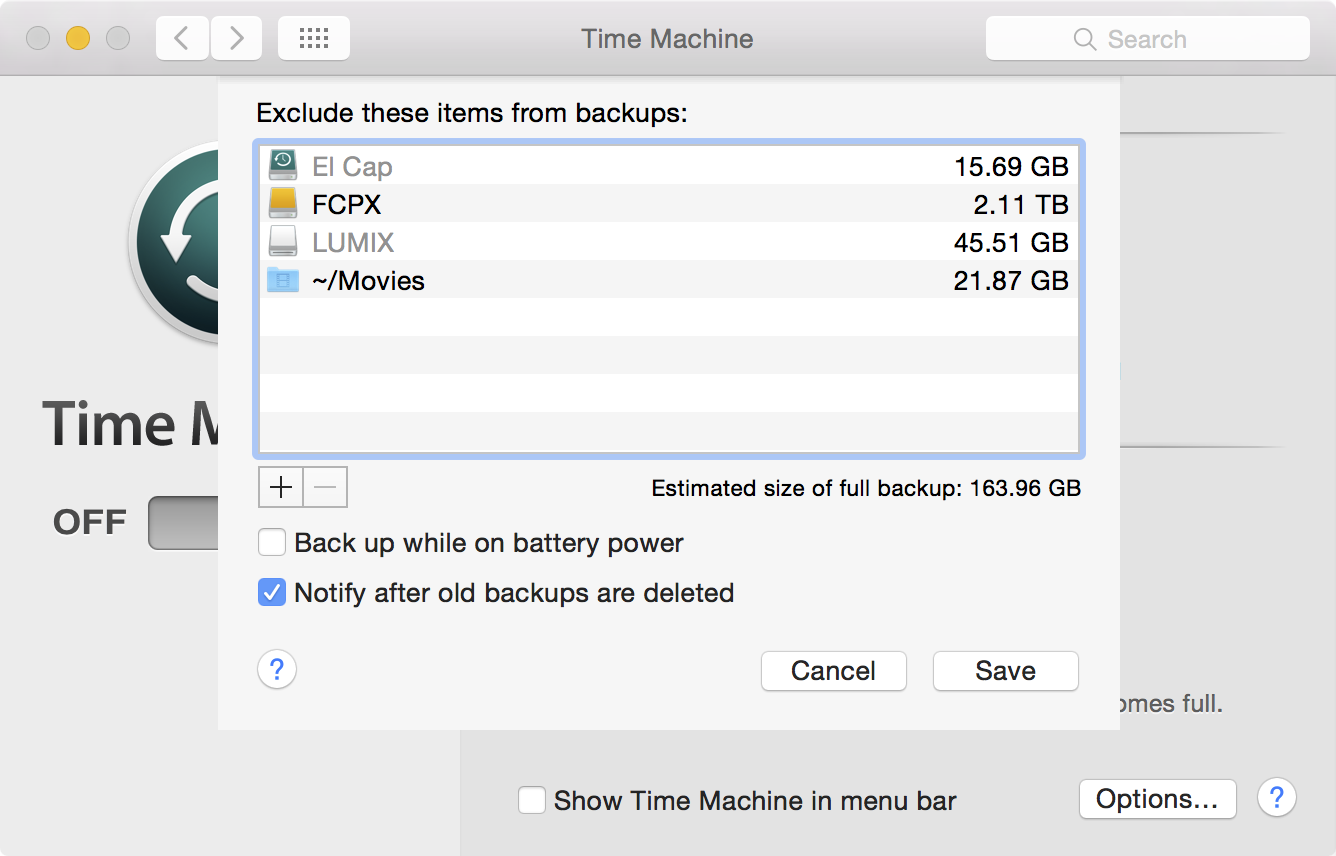
To save space on the backup drive, why not exclude individual files or entire folders of files—like your Applications or Downloads folder—in the Time Machine preferences window?
That’s all, folks!
If you have a question, post a comment below and we’ll do our best to answer it. Please share this tutorial on social media and pass it along to the folks you support.
Submit your ideas regarding future coverage via tips@iDownloadBlog.com.