If you only have a small SSD in your Mac or Hackintosh, then storage space can be at a premium. For most users, by far the largest thing saved on their boot drive is the User folder, which contains their user account. If your user folder is filling up your SSD and you want to keep that high-speed storage for the operating system and applications, then this guide is for you.
It is possible to move your entire user account onto another drive, completely separate from your macOS boot drive. This will free up space on the boot drive and allow large media folders like Music, Movies, and Downloads to reside on a larger capacity drive.
Why would you want to do that?
Before we begin, let me outline a few of the use cases for which this guide is perfect. If any of them apply, then this could be a useful endeavour for you.
- You have a Mac with a built-in Fusion Drive which you want to break apart, to use the SSD and HDD separately. Many designers and filmmakers don’t want to use an SSD as a scratch disk as it degrades their performance; they want to set an HDD as their user folder and scratch disk, leaving the SSD for the OS.
- You have a MacBook, MacBook Pro, Mac mini, or iMac, which you have added an HDD to with an after-market solution such as OWC’s Data Doubler, leaving you with both an SSD and an HDD to distribute.
- You have a Hackintosh with large capacity traditional drives alongside smaller SSD drives, and you want to make better use of the large storage drives.
- You have a Mac or Hackintosh which permanently has an external desktop hard drive connected to it, and which you are happy moving a user account onto to save space. Please note, this option is not advisable unless the external drive is always connected. If the system boots without the drive connected, you will not be able to log in to the account as the User folder will not be found.
Assuming one of these scenarios – or a combination of them – applies to you, then we are ready to begin.
Requirements
- A Mac or Hackintosh computer.
- An SSD boot drive which currently houses your OS and your user account. (It could be an HDD, but then what is the point of moving your User folder to another HDD to free space? You may as well house both on the larger drive…)
- An HDD (internal or external) to move your user folder onto.
One important note: it is very advisable to retain one user account on the boot drive for troubleshooting purposes. If you move all your user accounts to another HDD and the OS loses track of them, you will not be able to log in to any accounts, and this is difficult to troubleshoot without technical expertise. I therefore move my large, personal user account to an HDD, and leave one unused user account called “Spare” on the boot drive. Its only use is to troubleshoot and restore my other user account, in case of the other HDD failing or the link between OS and external user account being broken for any reason.
Instructions
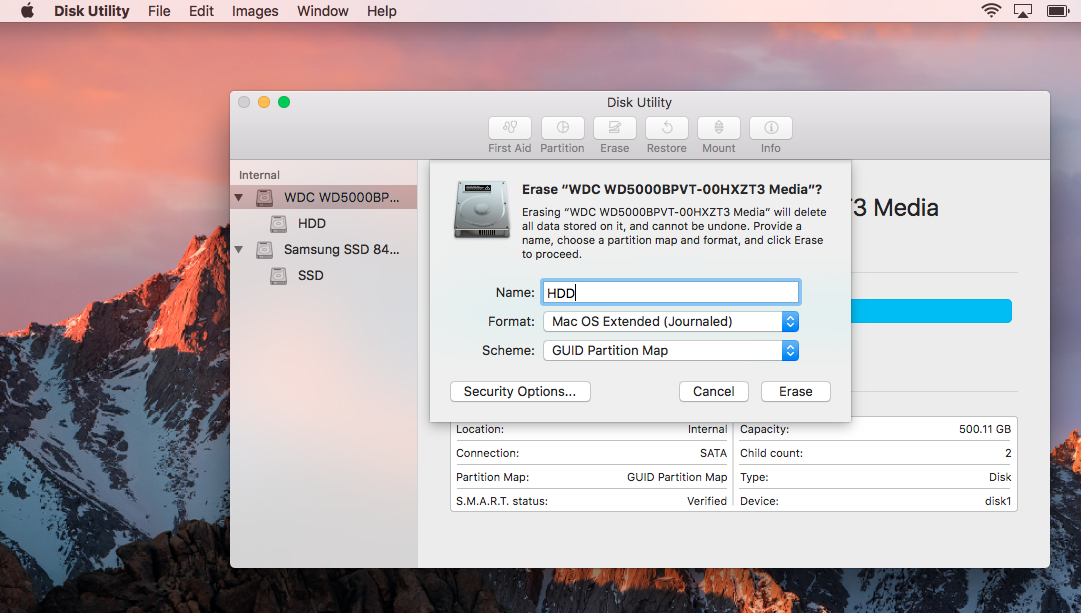
1) Ensure the SSD and the HDD are both mounted and ready. The HDD you are moving your user folder to should be formatted as GUID partition table, Mac OS Extended (Journaled). If it isn’t, you can format it with the Disk Utility application. This will wipe all existing data from the drive.
2) Navigate to your User folder on your boot drive, the SSD. The User folder will have a custom name which you set up with your account. Do not confuse it with the Users folder. The folder you want is inside Users, and will have a unique name. If you’re called Steve for example, your User folder may be called steve. In this guide, mine is called other.
3) Select the folder and copy it.
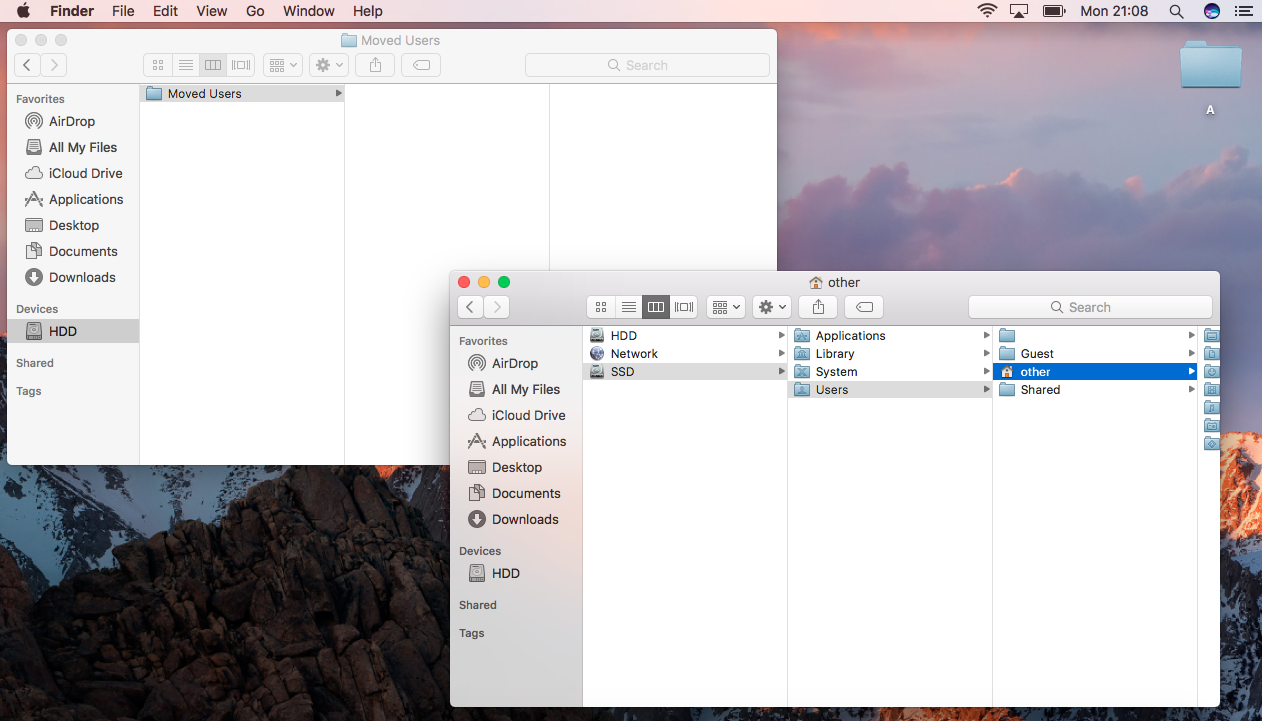
4) Navigate to your destination drive, the HDD, and paste the User folder there. You may wish to paste it inside another folder to keep things tidy. This way you can use the HDD for things other than the user folder too. For example, I have pasted mine inside a folder called Moved Users. This means I am free to store other folders on the HDD alongside it, without interfering with my user account. I often store movies and photos loose on the HDD, next to my Moved Users folder.
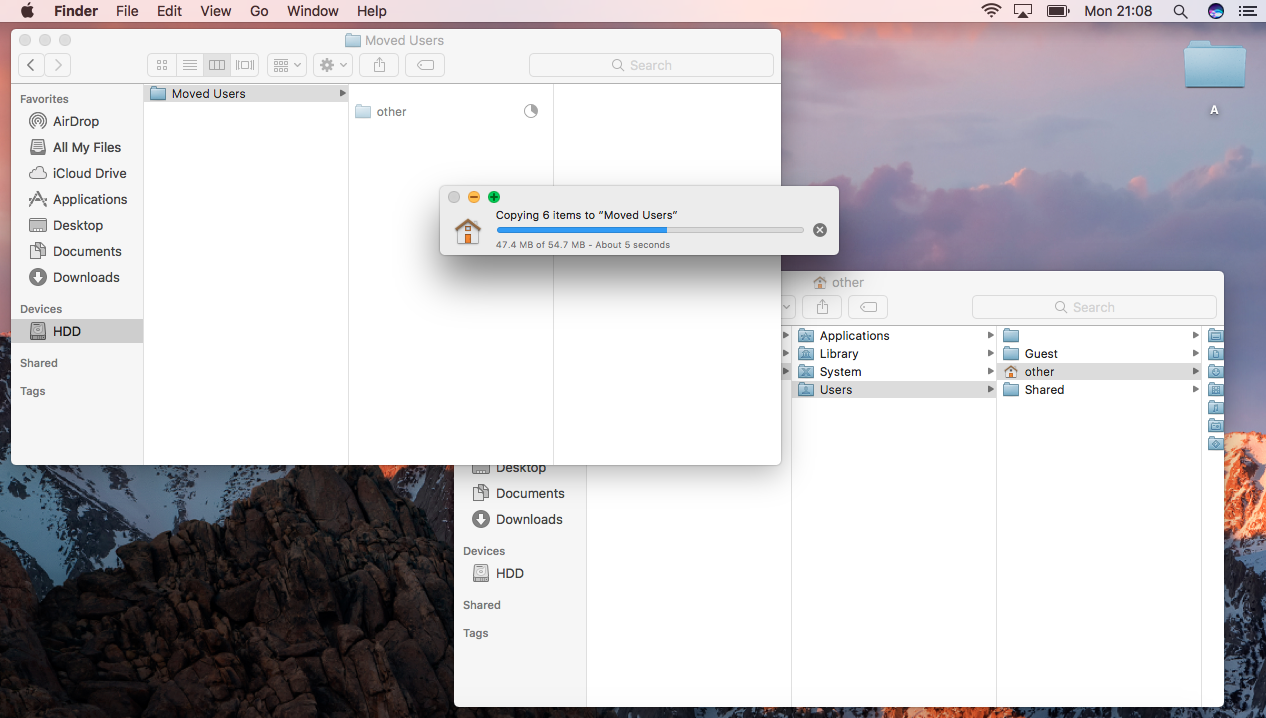
5) Once the folder has finished copying across, check to make sure all the internal folders are there. It can take a while to copy. Remember, it does contain all your music, movies, downloads, documents, pictures, desktop, etc. Make sure the User folder on the SSD is very nearly the same size as the copied User folder on the HDD.
6) Launch the System Preferences application, and click on the pane entitled Users & Groups.
7) Inside Users & Groups, unlock the pane to make changes, by clicking the padlock in the bottom-left of the window and entering your password.
8) Select your User in the left-hand sidebar, and right-click on it. An option will appear entitled Advanced Options…
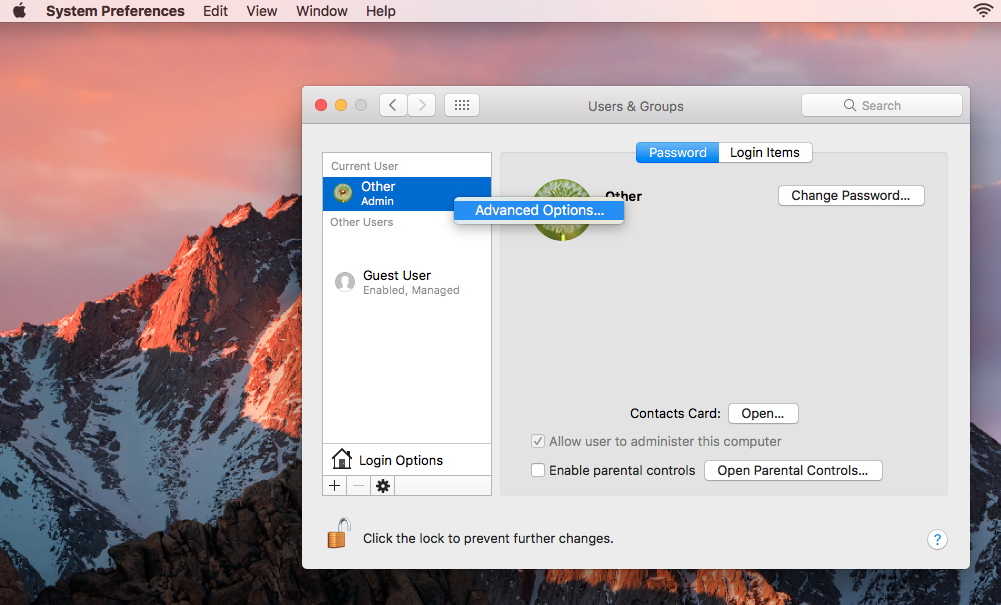
9) Select Advanced Options… and a new window will appear.
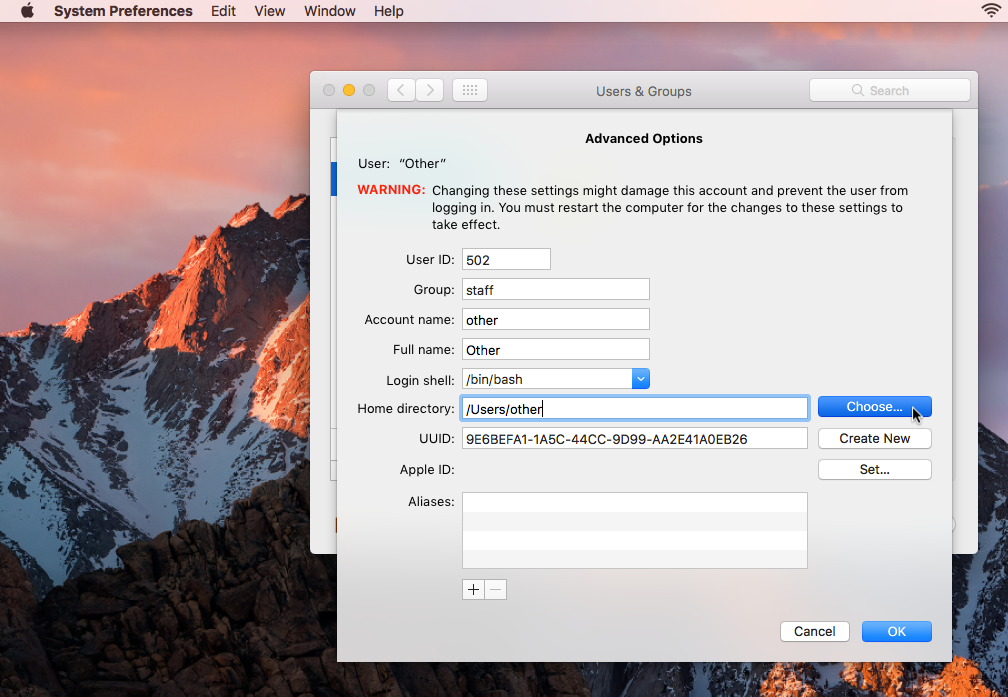
Do not edit any of the fields except the one I will mention here, it may mess up your user account.
10) Look for the field entitled Home directory: It will show your current user folder’s file path, which is probably /Users/Your-User-folder. Click on the Choose… button to the right of this field to select a new file path for the user folder.
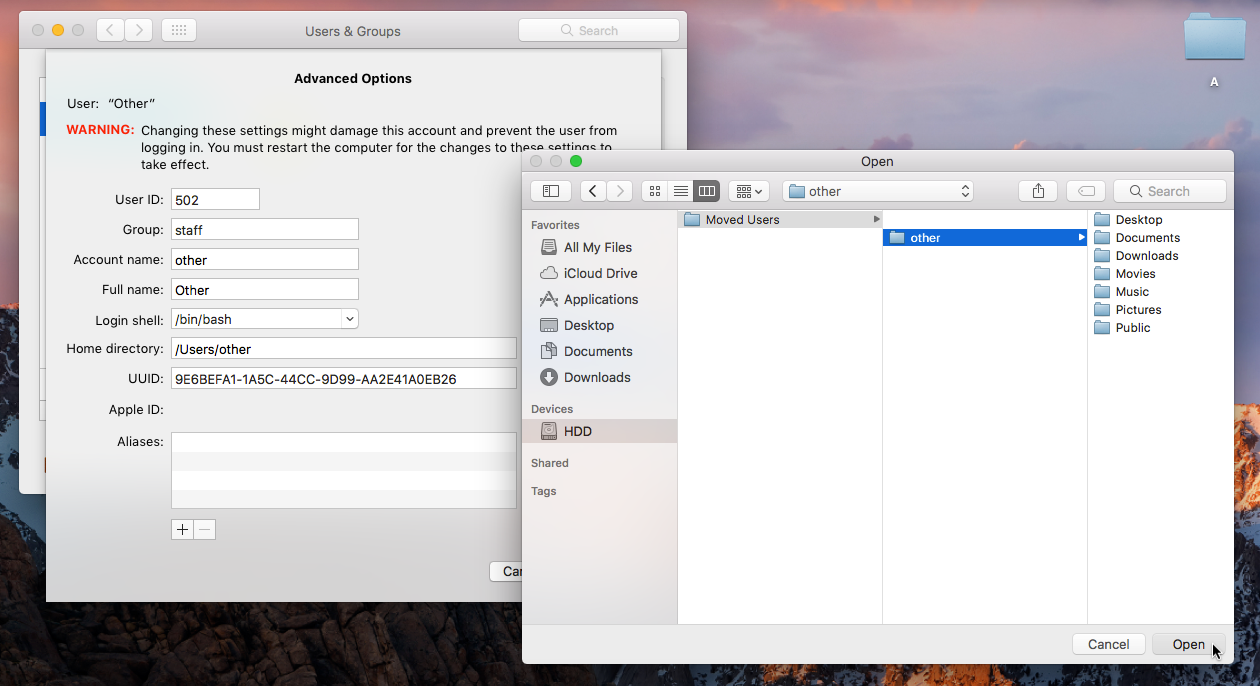
11) On the following page, navigate to the HDD, and then select the User folder which you copied to the HDD. Do not select one of the folders inside it such as Desktop by mistake; make sure it is the entire folder. My selected file path was /HDD/Moved Users/other. If you copied your user folder loose onto the HDD, yours will likely be /HDD/Your-User-folder.
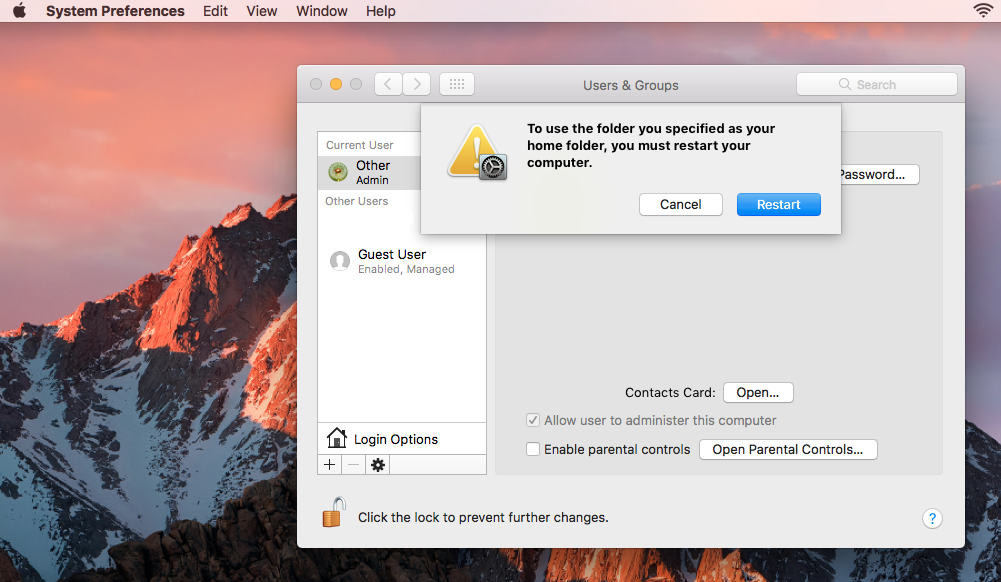
12) When you hit Open and then OK, the system will tell you that you need to restart the machine for the changes to take effect. After a reboot, the system will search for your user folder in the new location you just specified (on the HDD it has been copied to). It will no longer look for the original copy on the SSD.
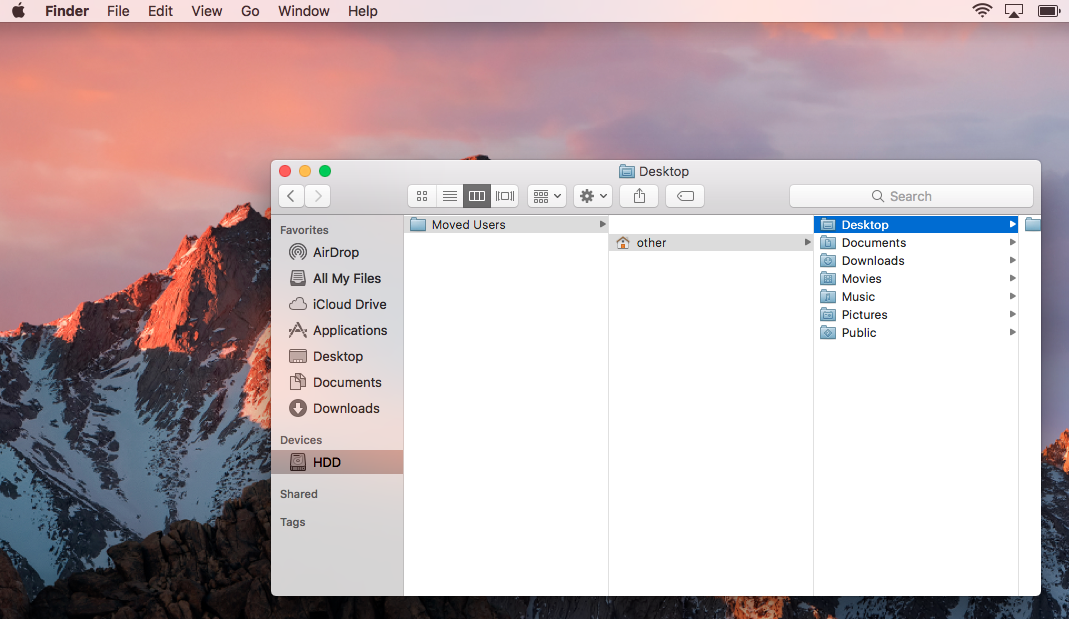
13) After restarting, check that the switch has completed successfully. There are a couple of easy ways to check this. The first is to navigate to the copied user folder on the HDD, and see if the folders for Desktop, Downloads, Pictures, etc. now have the proper folder icons, instead of the generic folder icon. The user folder which has the custom folder icons is the one the system recognises as the current user folder being used. In the following picture, you can see that other on the HDD has the house icon, and the folders inside it all have icons too, which means that the system correctly identifies it as the User folder:
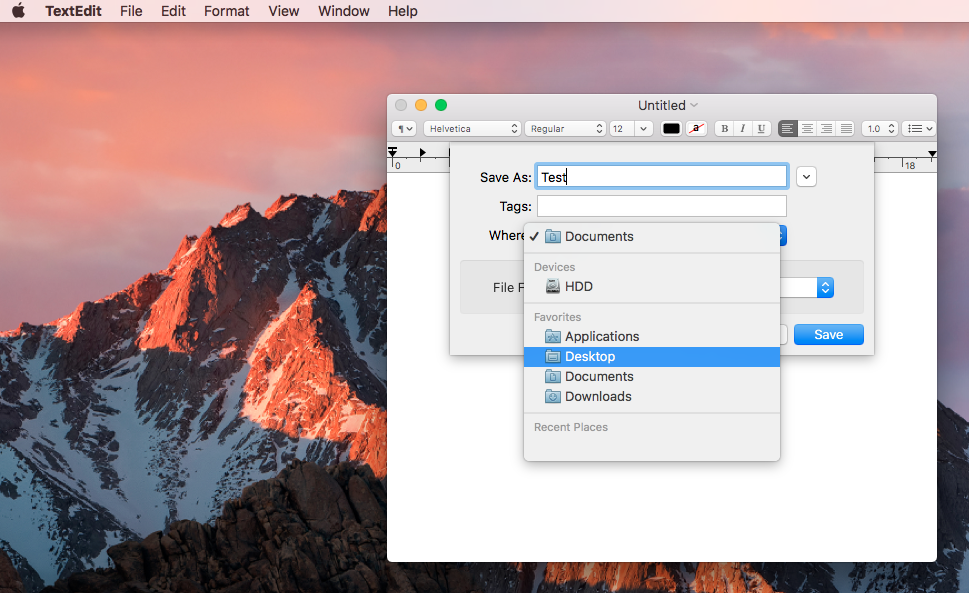
14) A second way to check that files are being written correctly to the new account location is to open TextEdit and save a blank document. For the save location, select Desktop, but make sure the Desktop folder you select to save to has the custom icon:
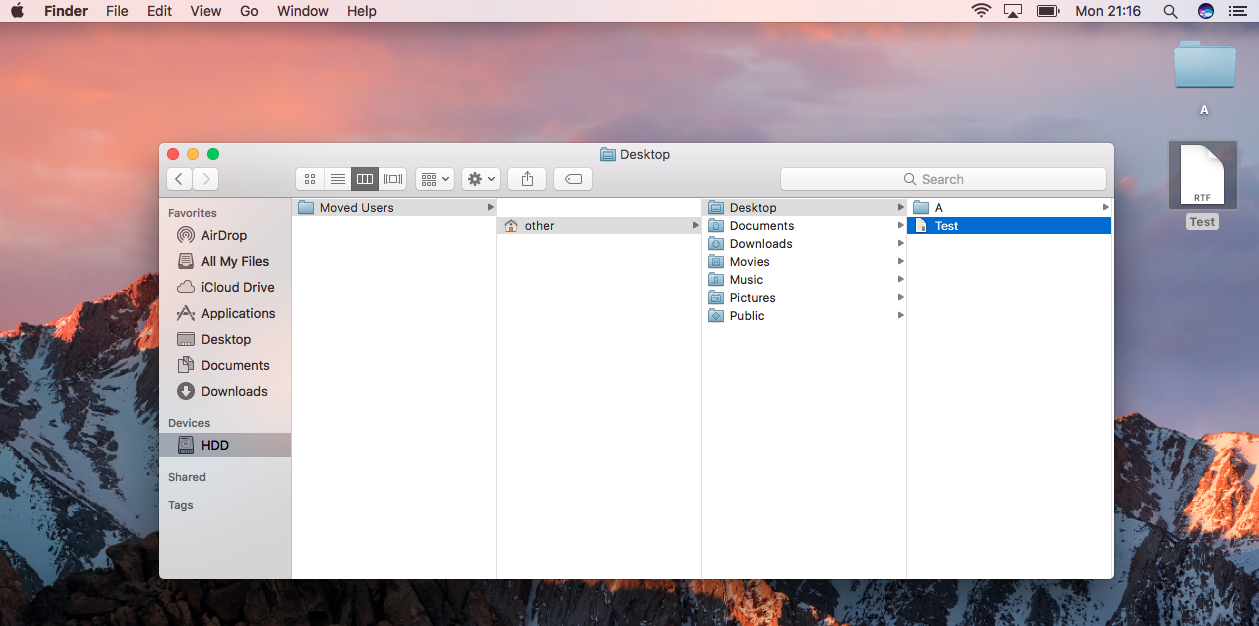
15) Once it has saved, check that it saved to the correct location, i.e. the Desktop folder inside the User folder on the HDD. Checking for the file visually on your desktop is not enough, you must ensure that it has saved to /HDD/Your-User-folder/Desktop, or whatever path you set on the HDD. See below for my example:
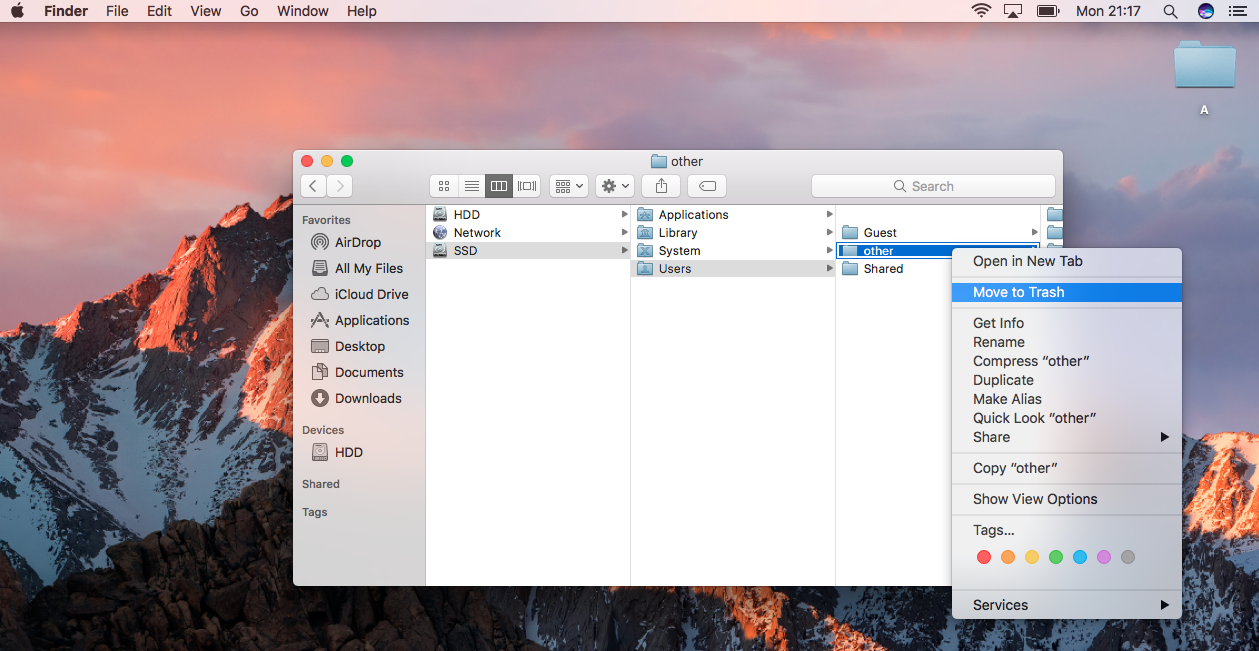
16) Once you are satisfied with the results and workings, you may navigate to the original User folder on the SSD, and delete it. You now have the space on your SSD back!
Make sure everything is working correctly with the user folder on the HDD, before deleting the original copy on the SSD.
Finite incantatem.
If you ever want to revert your changes, repeat the guide but swap around the mentions of SSD and HDD, and their respective file paths. In a nutshell:
- Copy User back from HDD to /Users on the SSD.
- Go back to System Preferences and repoint the system to the /Users/Your-User-folder on the SSD, instead of on the HDD.
- Reboot.
- Check everything is working.
- If desired, delete the now-unused copy of the User folder on your HDD to gain back the space.
Hopefully this will allow you to edit onto scratch disks without destroying SSDs, make better use of large HDDs which lie unused, and free up cramped SSD boot drives. I use this set-up on a couple of machines, one Hackintosh which needs a scratch disk for editing, and one MacBook Pro, modded to have two internal drives. It has always worked well for me, and hopefully will for you too.
Just remember, leave one unused user account on the boot drive in case of emergency.
Was this guide useful, and will you be trying it out? Need a hand with the process? Make your presence known in what lies beneath.