
Slow motion videos are one of the fun aspects of using your iPhone for videogprahy. You can record videos in 120 or 240 frames per second and then watch it play back in a much slower manner than it typically would.
On the other hand, if you don’t use your iPhone to capture video, getting the video files from your other devices to transform into slow motion is a little trickier. Fortunately, iMovie for Mac can convert your videos into slow motion, and in this tutorial, we’ll show you how.
For example, I have a dash camera in my vehicle that I like to use and grab footage from, but as you can imagine, it doesn’t record in slow motion.
One night it just happened to be raining cats and dogs outside, and Florida lightning can get pretty intense. When I got home, I wanted to share the lightning I captured on video on Facebook with my friends and family, but I wanted to slow the video down so the lightning was easier to see.
For this, I used iMovie, a free download from the Mac App Store for anyone who has bought a Mac recently. If you haven’t bought a Mac recently, you’ll have to shell out $14.99 for the app.
Using iMovie to convert videos to slow motion
If you have iMovie on your Mac, just follow the steps below and you’ll have a slow motion videos in no time:
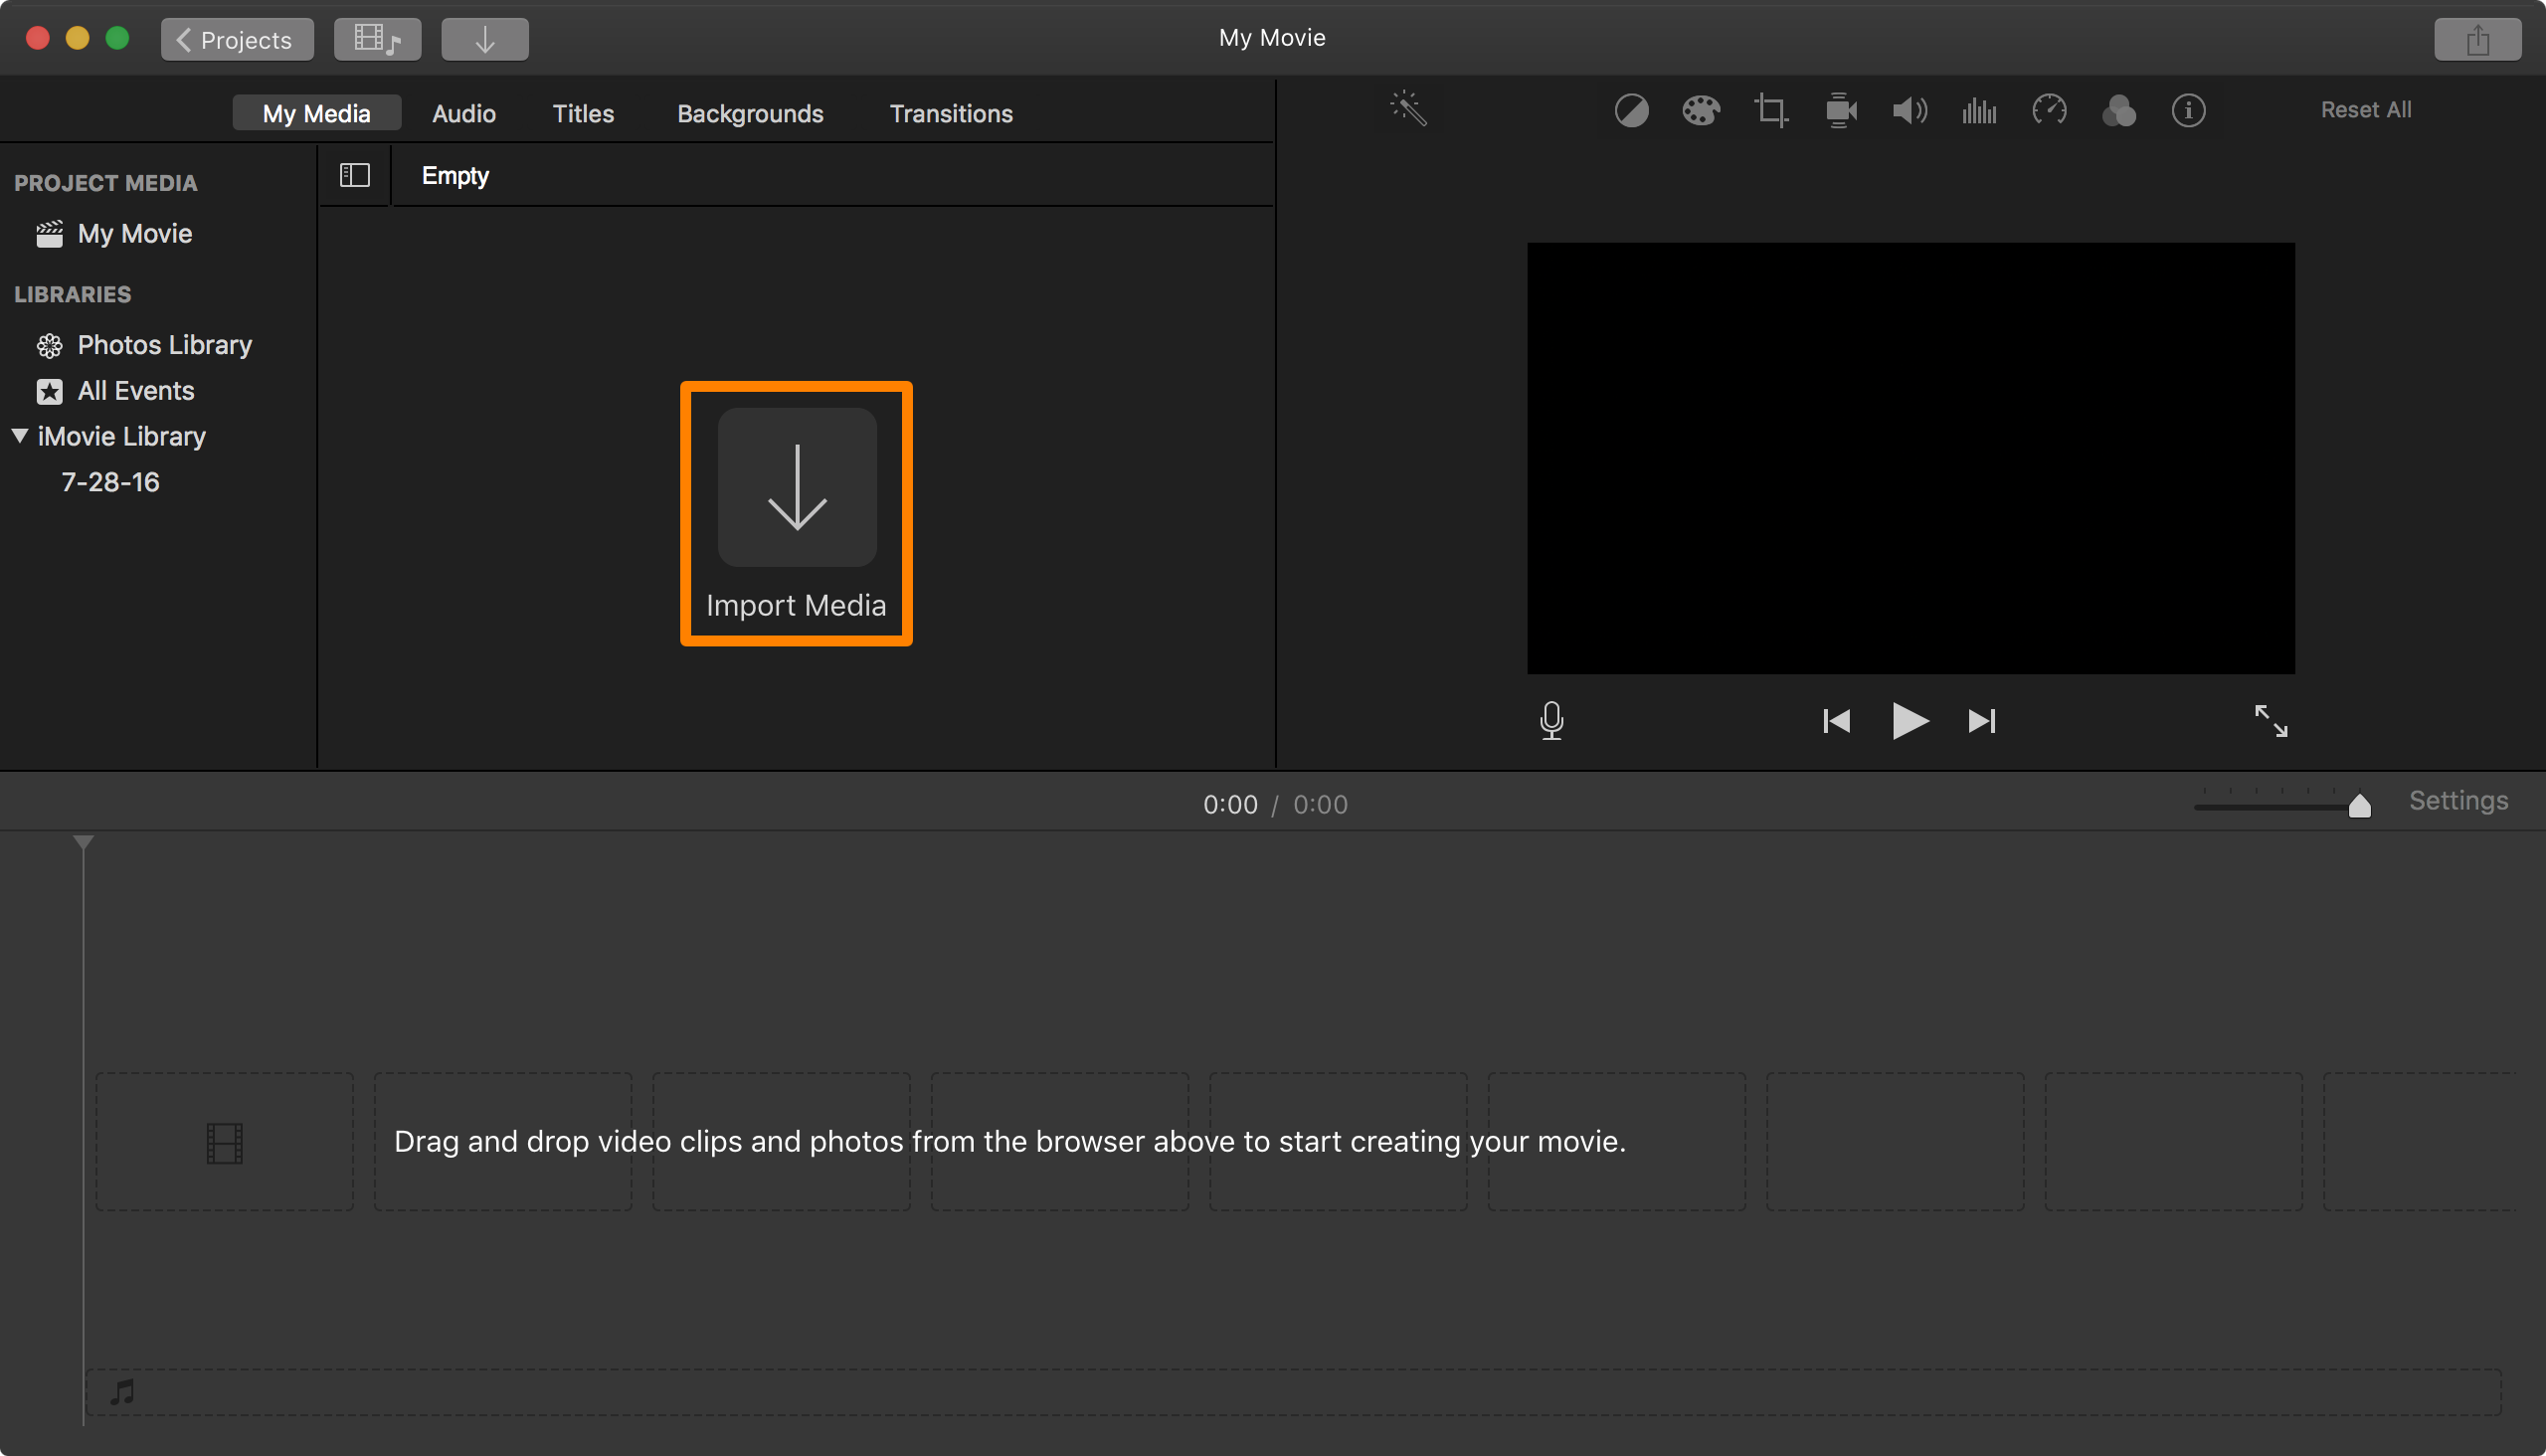
1) Launch iMovie on your Mac, and then click on the Import Media button.
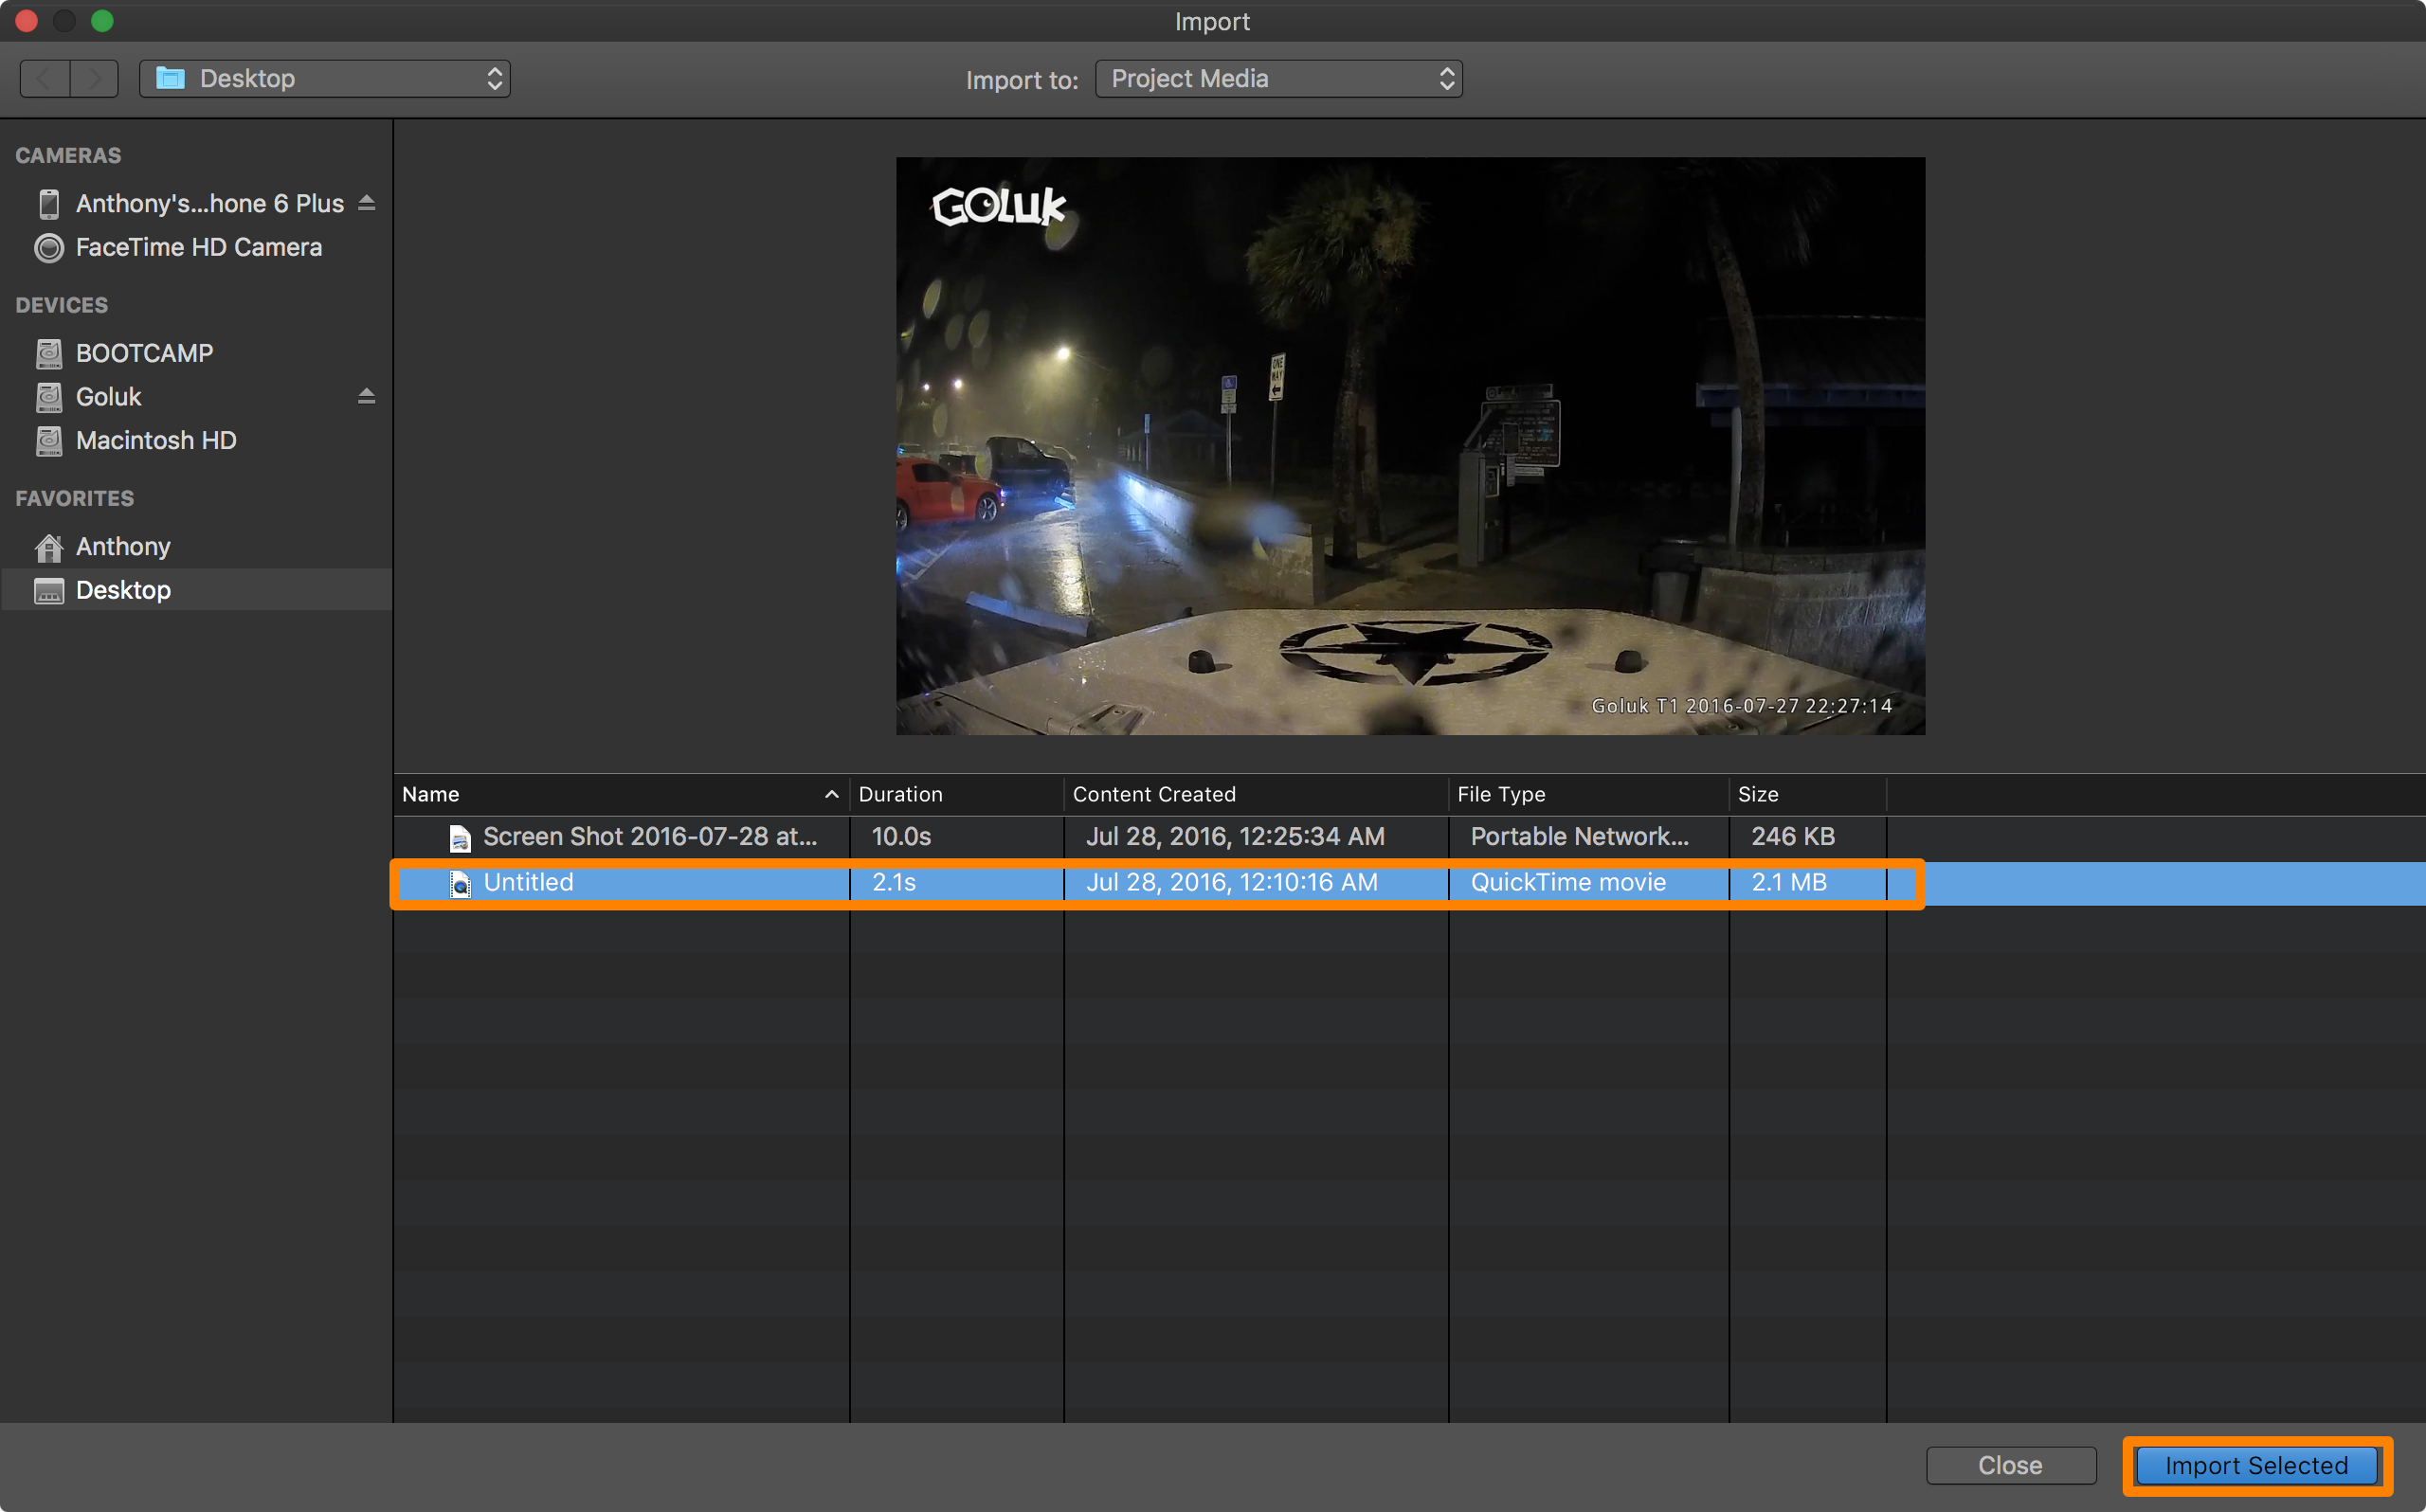
2) In the file browser, select the video file you want to convert to slow motion, then click on the blue Import Selected button.
3) Now the file is added to iMovie. You will now need to create a project. To do that, click on the Projects button.

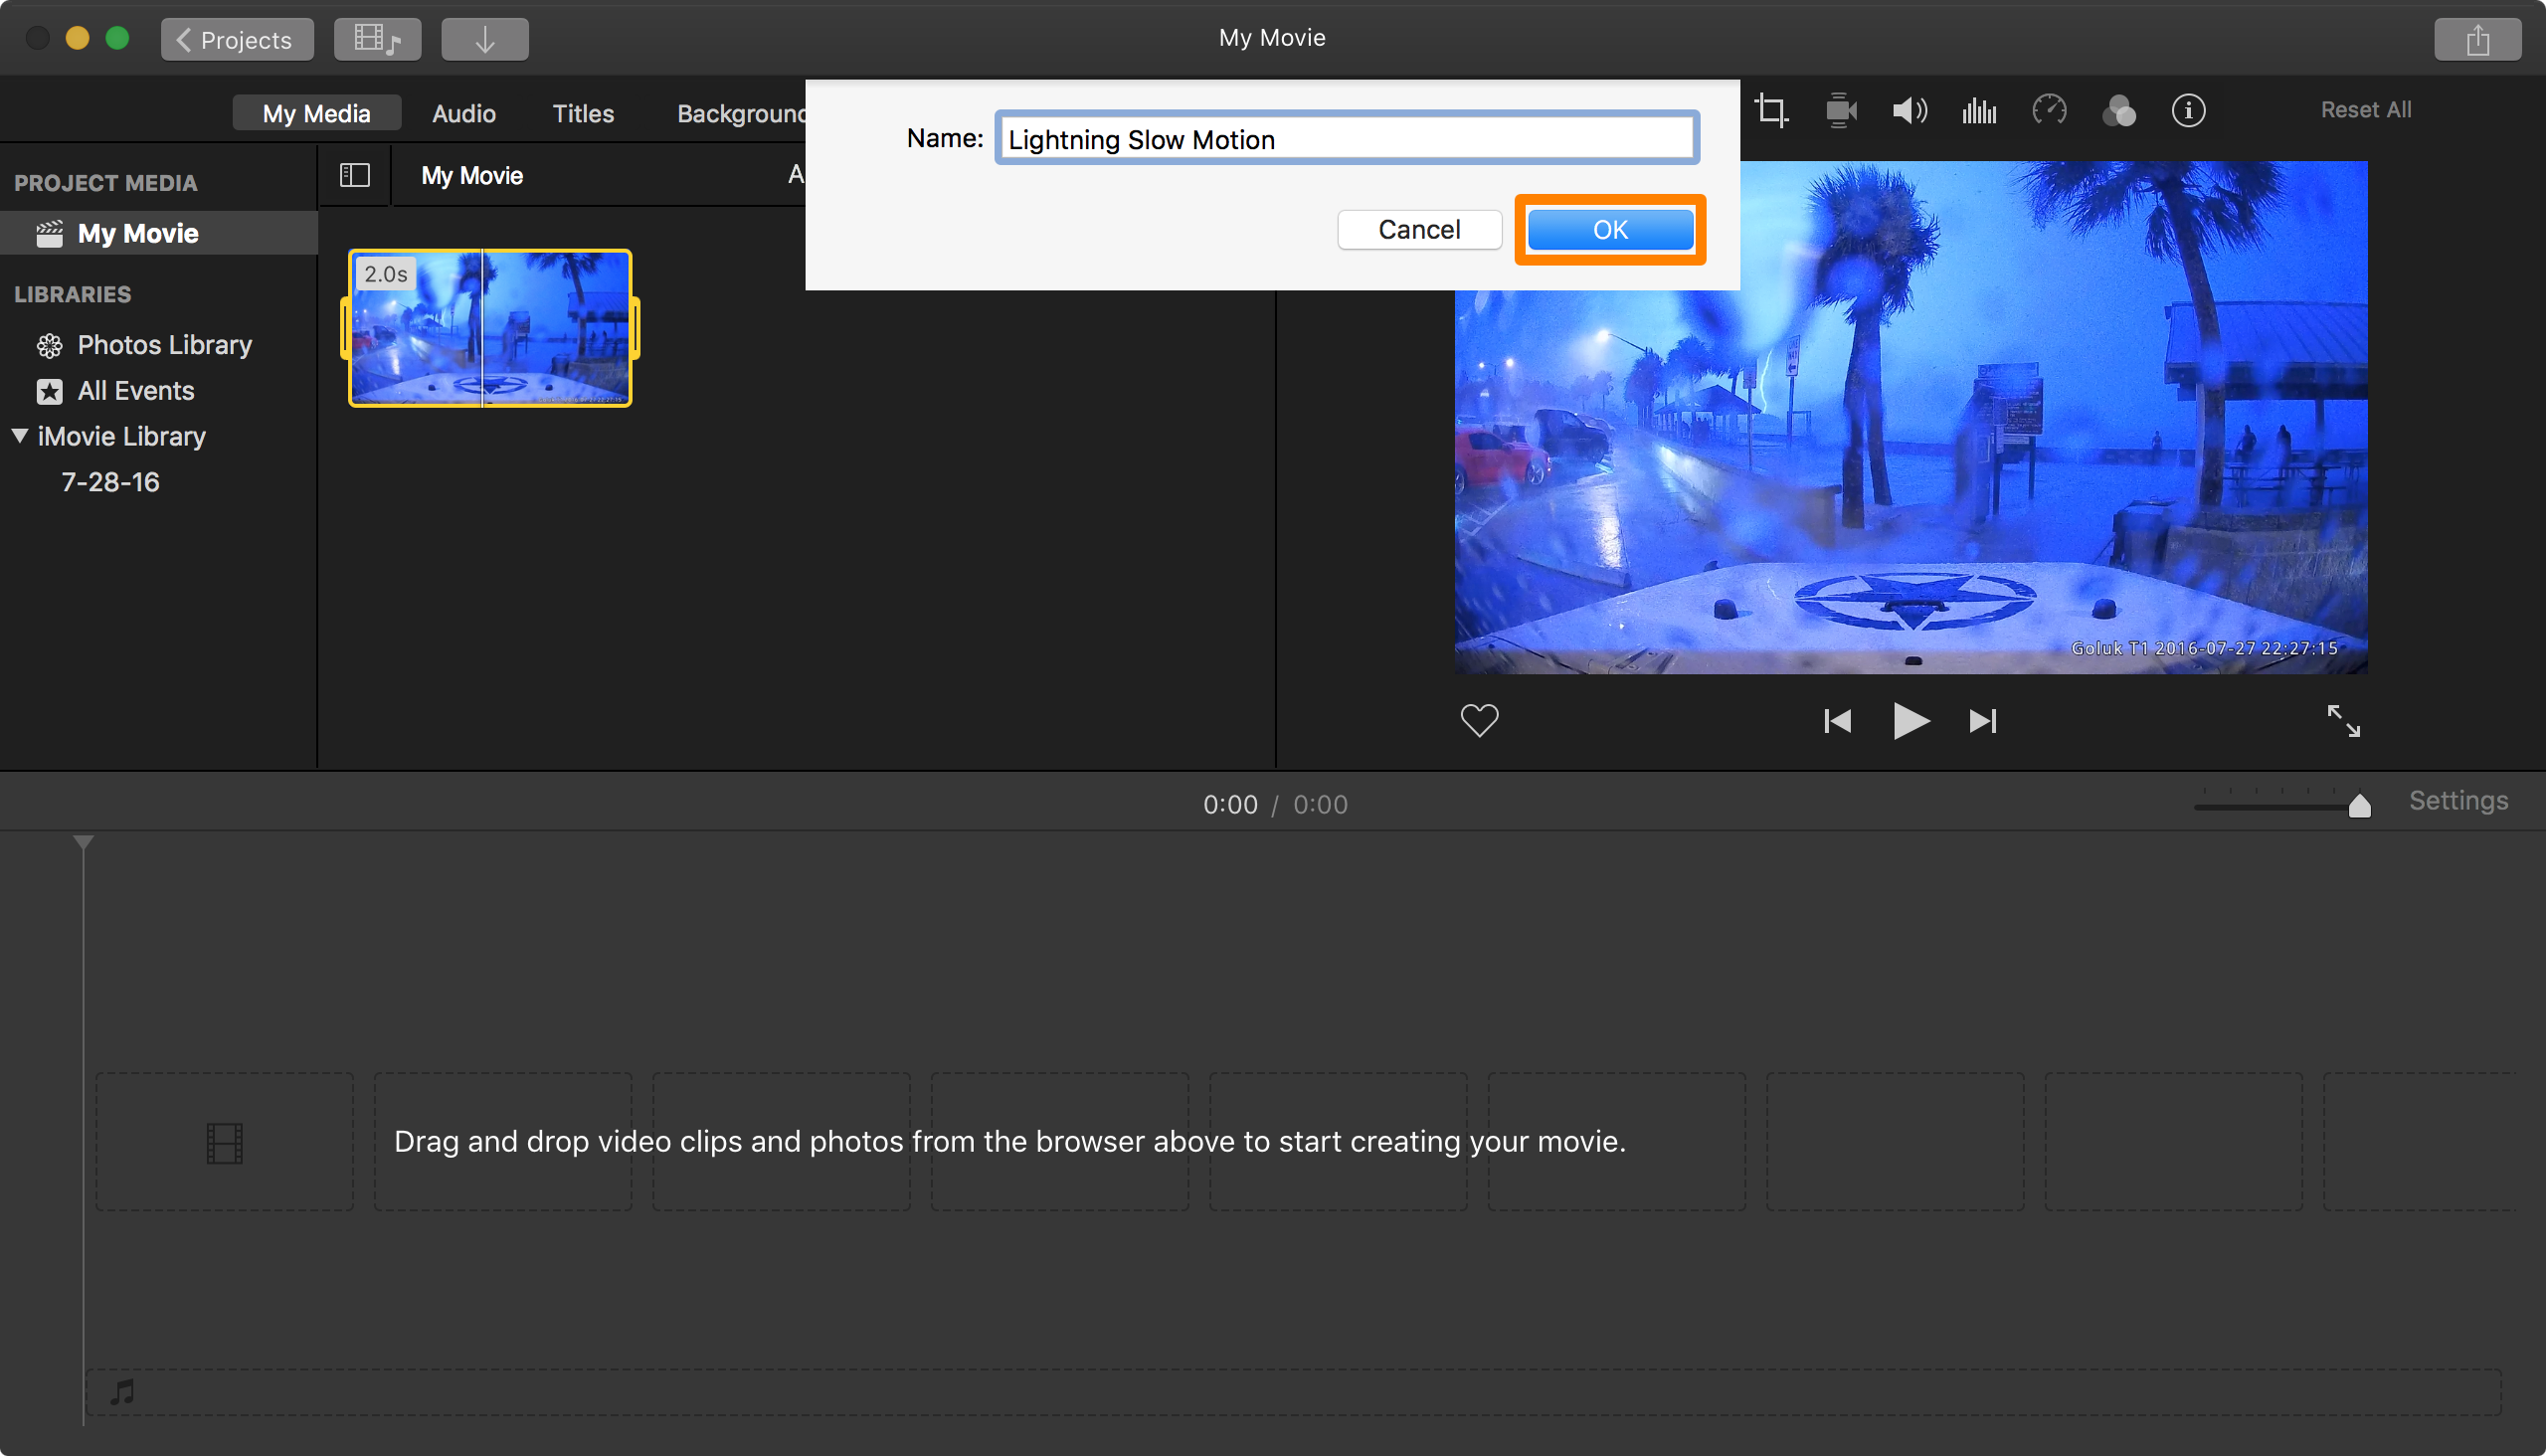
4) In the prompt, give your project a name, and then click on the blue OK button.
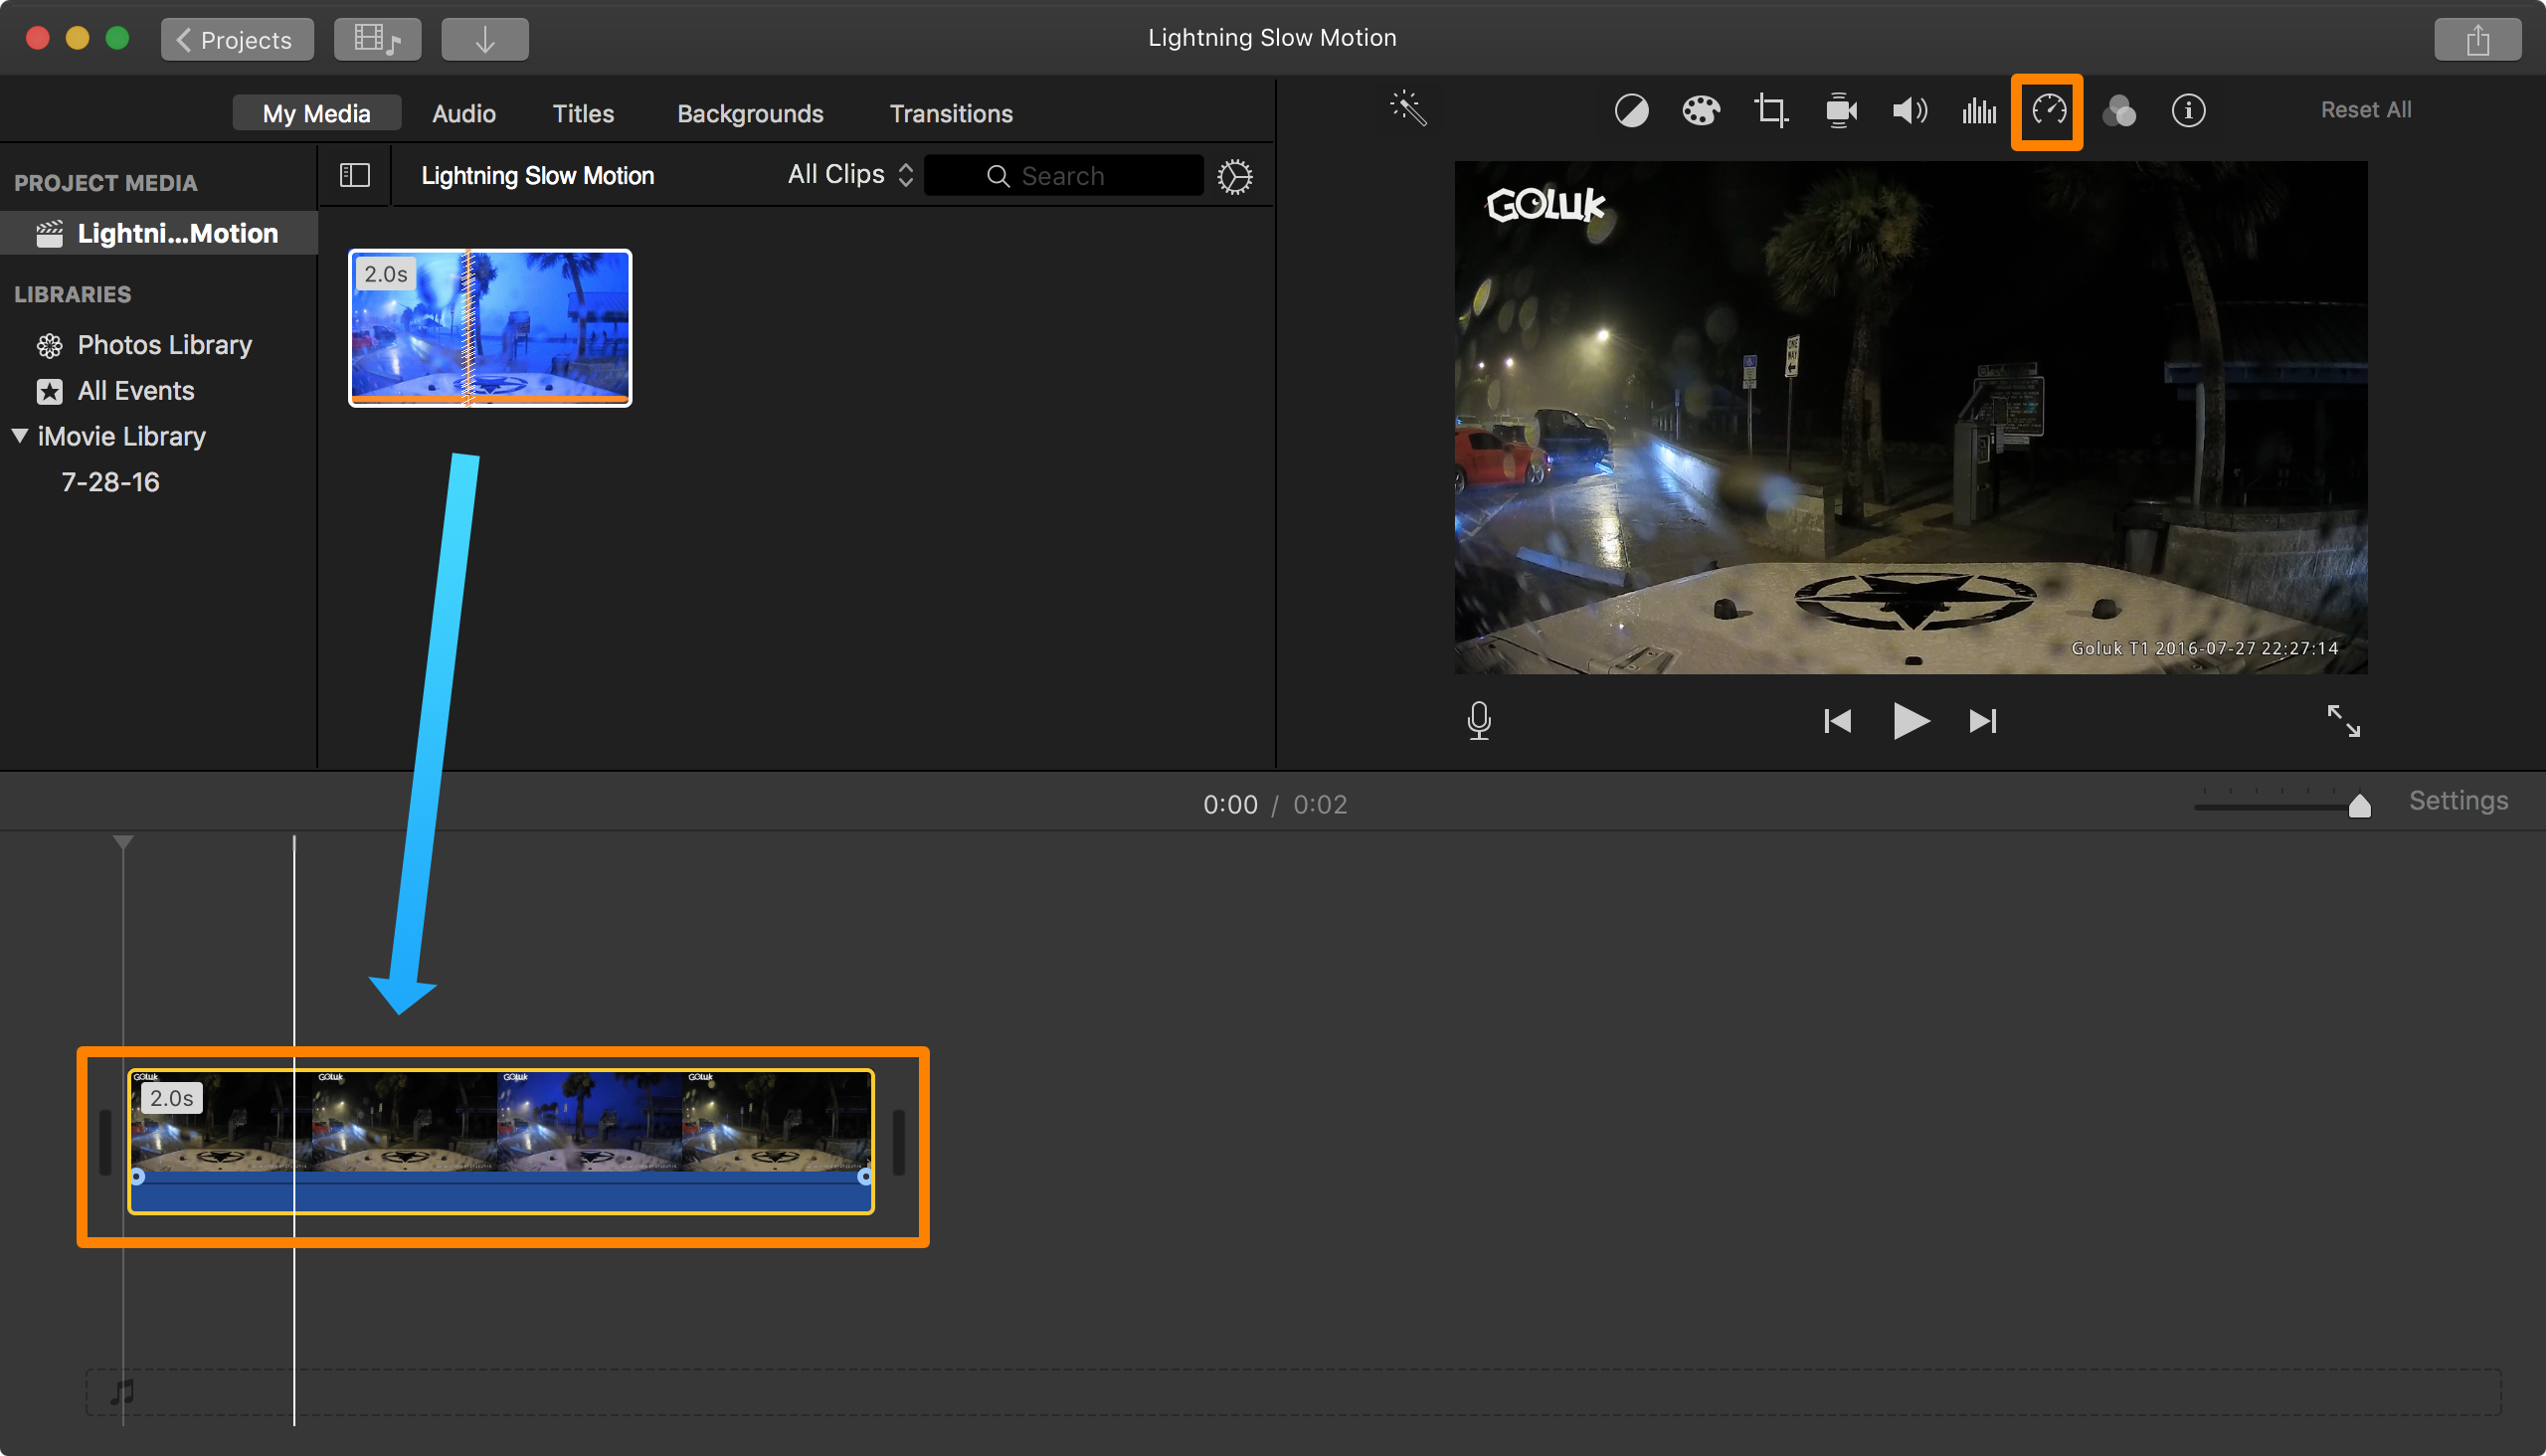
5) Now that your project is created, you can begin editing the video by dragging it into your timeline. Once you do, click on the video to select it, and then click on the Speed button:
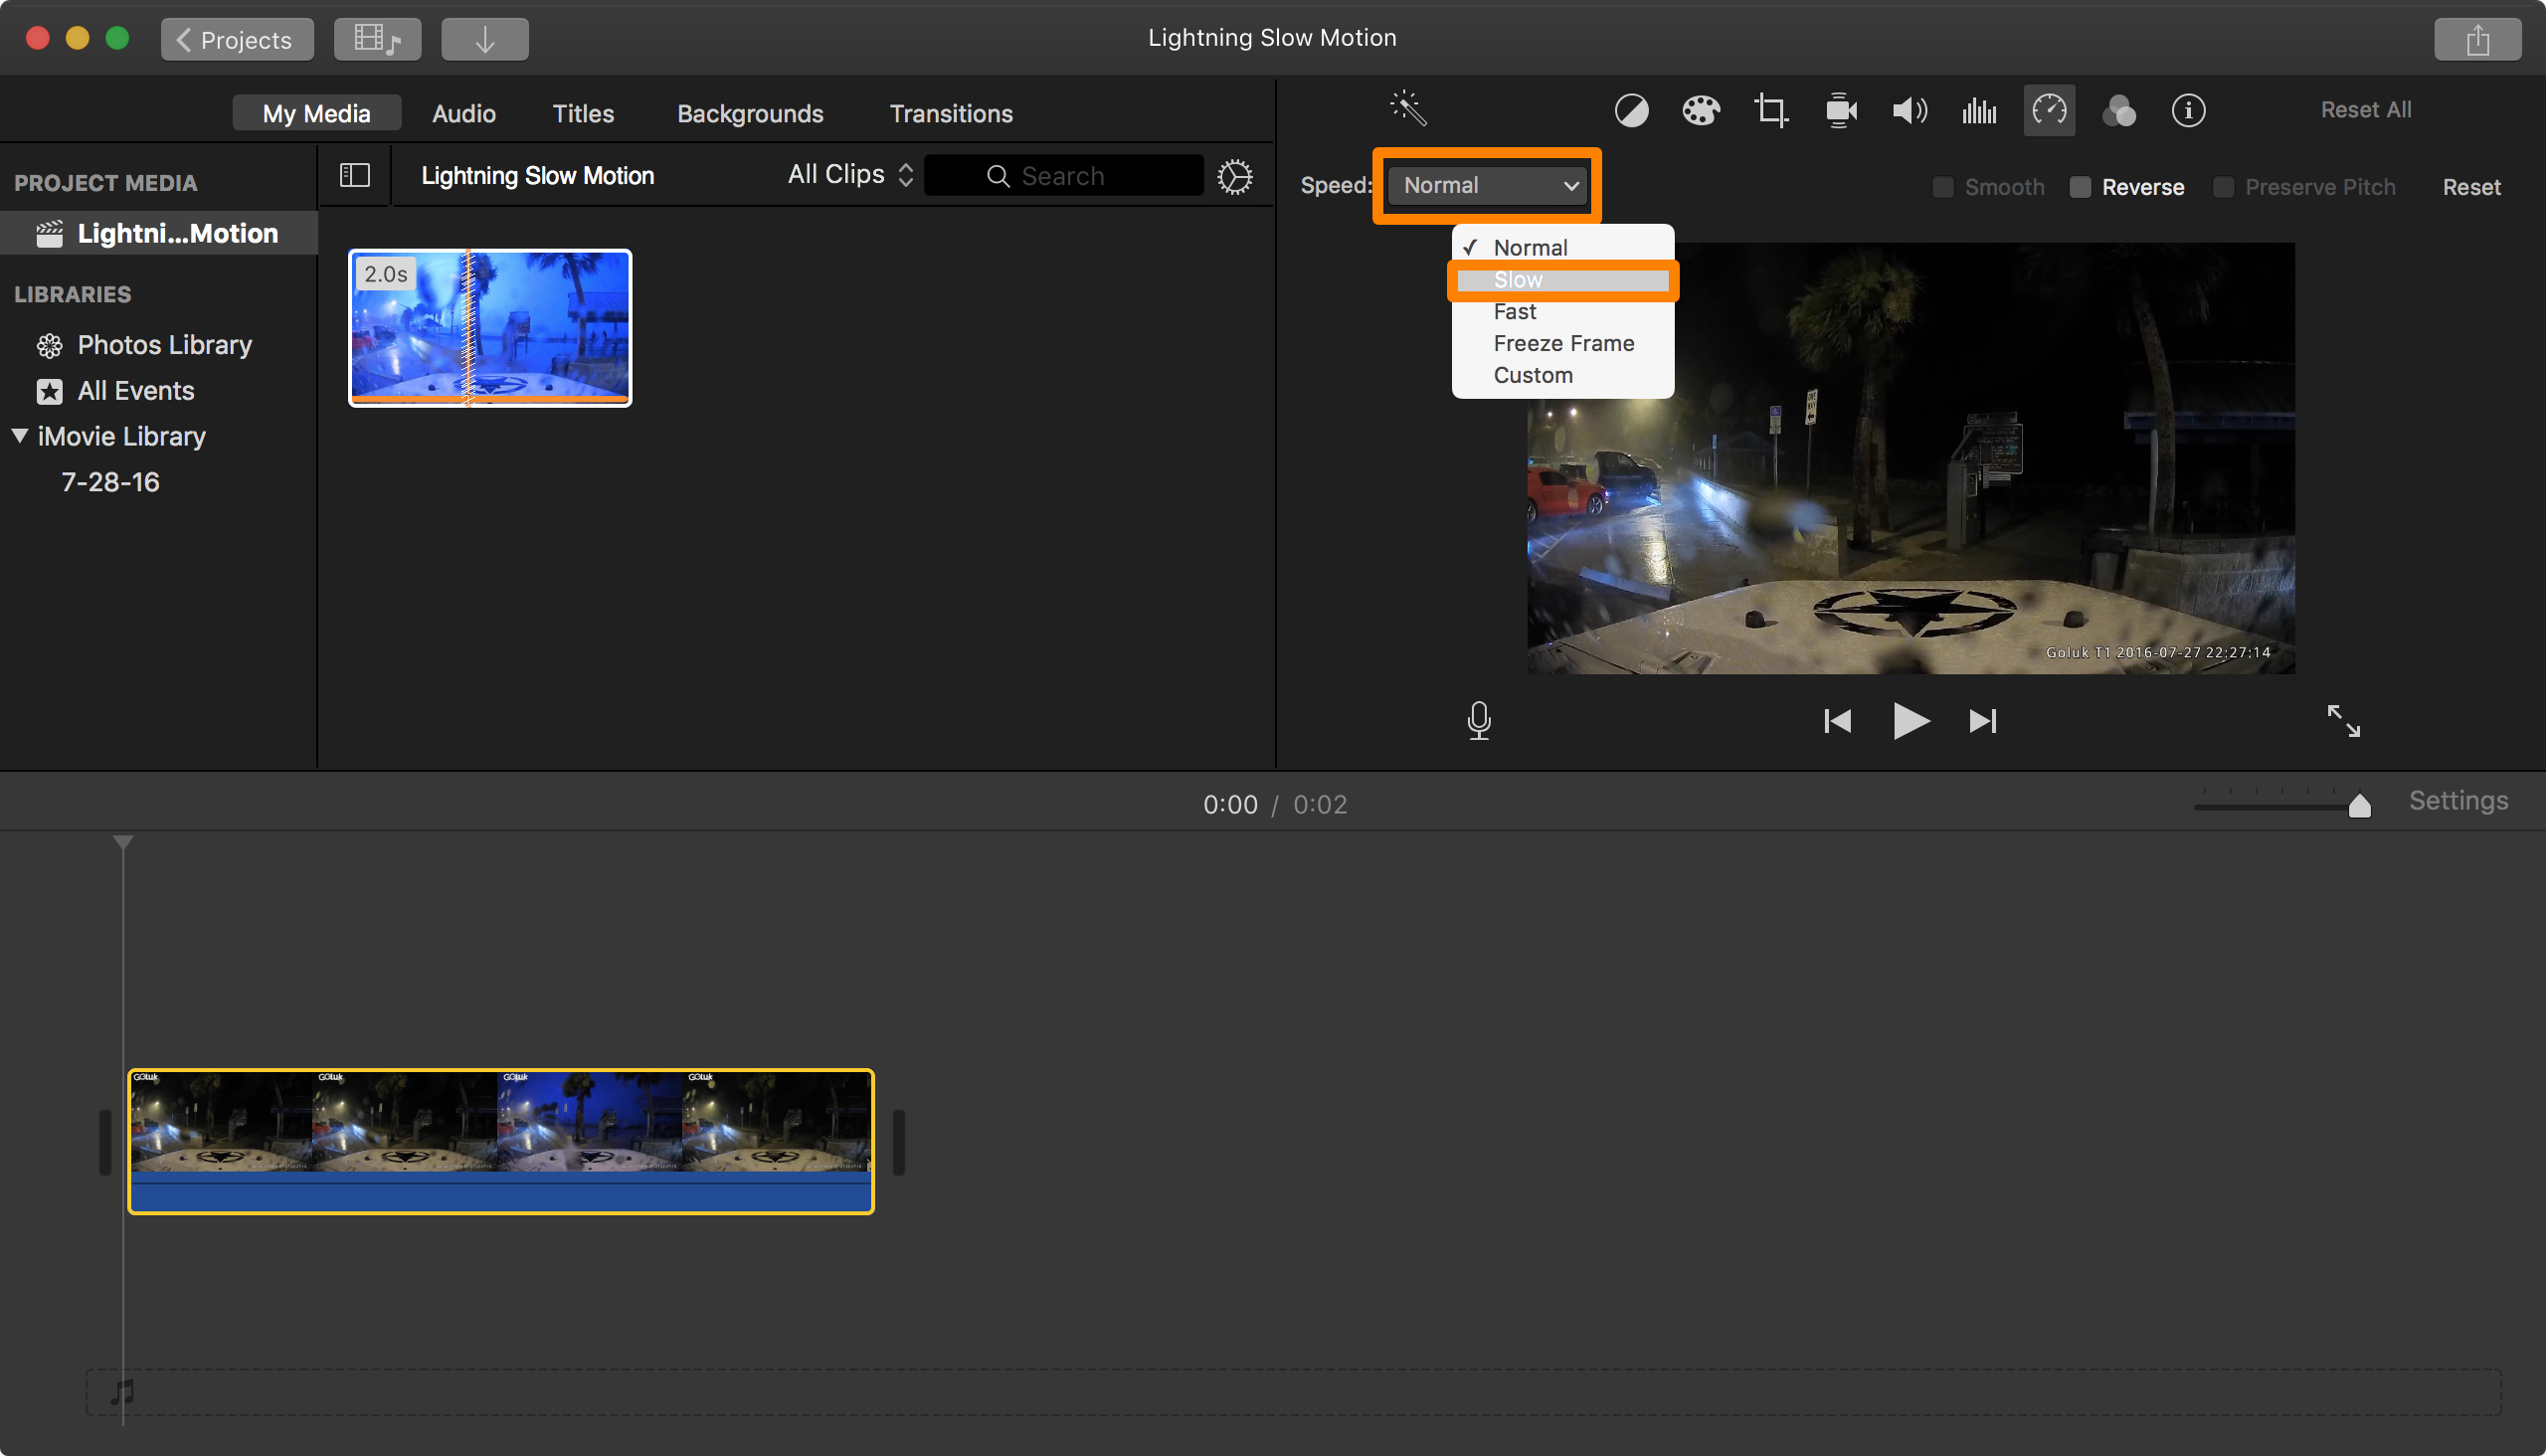
5) This will show the speed-editing interface. Click on the Speed drop-down menu and change Normal to Slow.
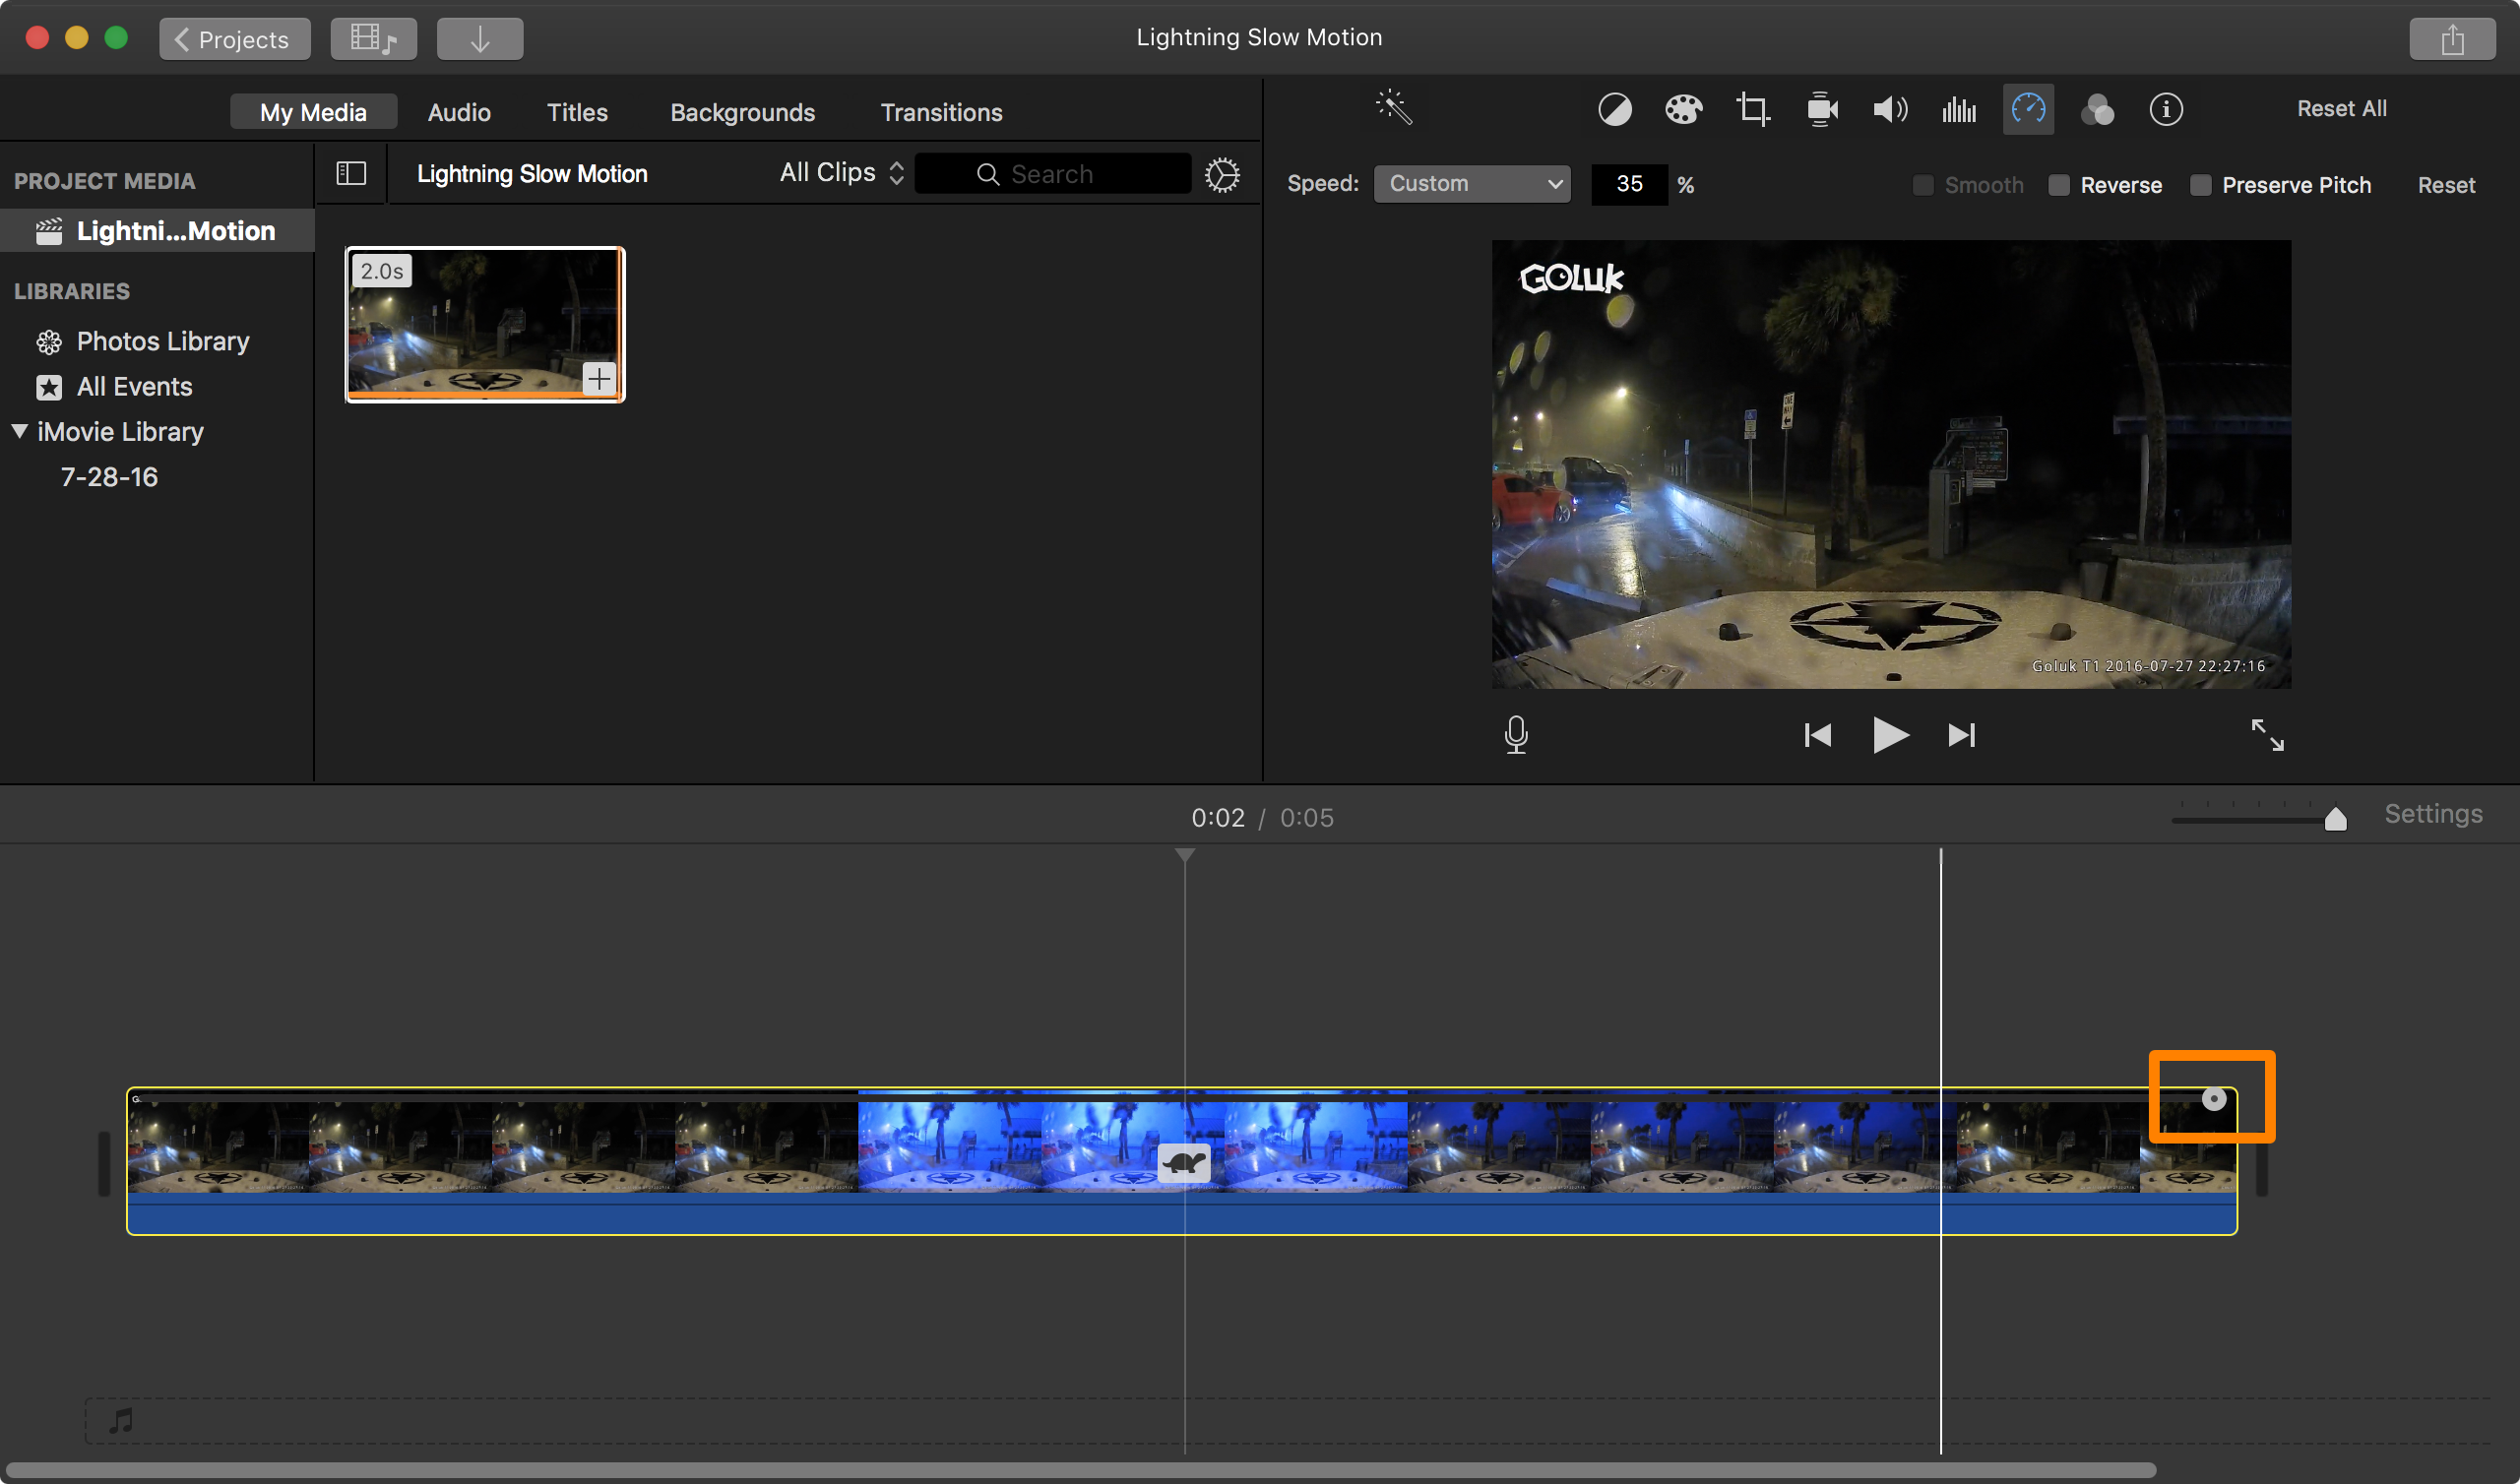
6) Your video will then be slowed down to half-speed, which doubles the video length. You can also slow the video down further by clicking and dragging on the speed slider:
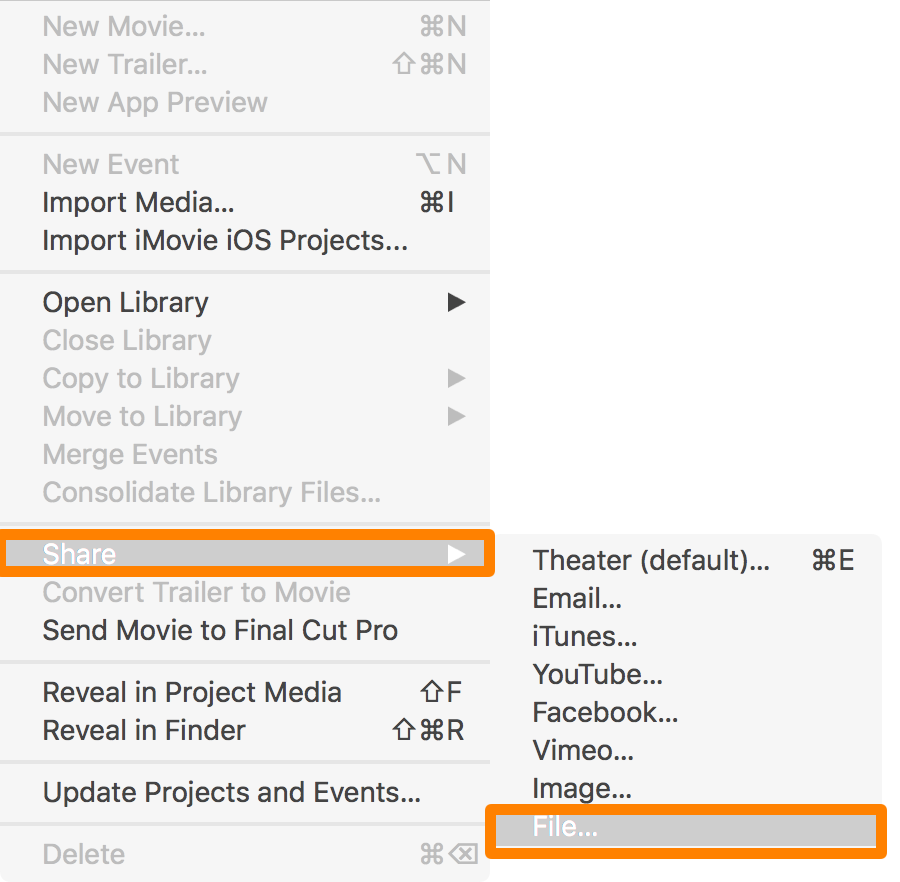
7) Once satisfied with the slow-down results, head to the Menu Bar and navigate to File > Share > File…
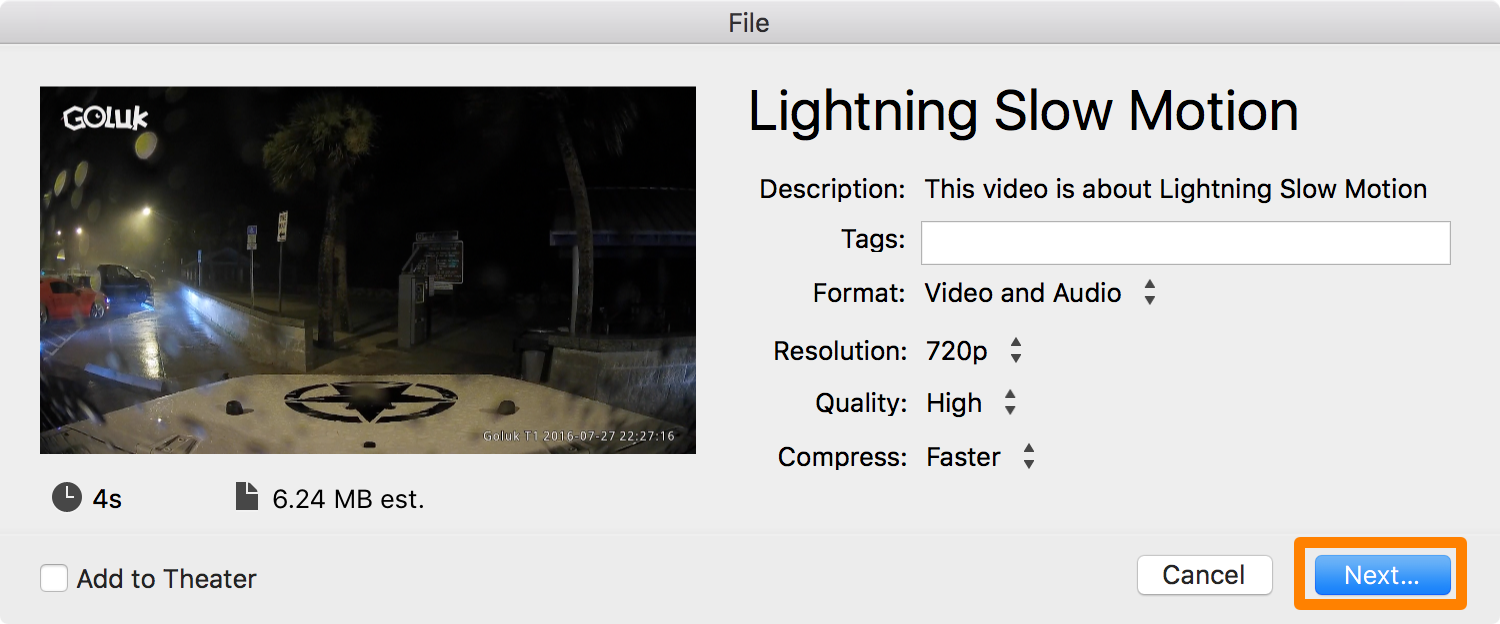
8) Give the file the attributes you want, and then click on the blue Next… button.
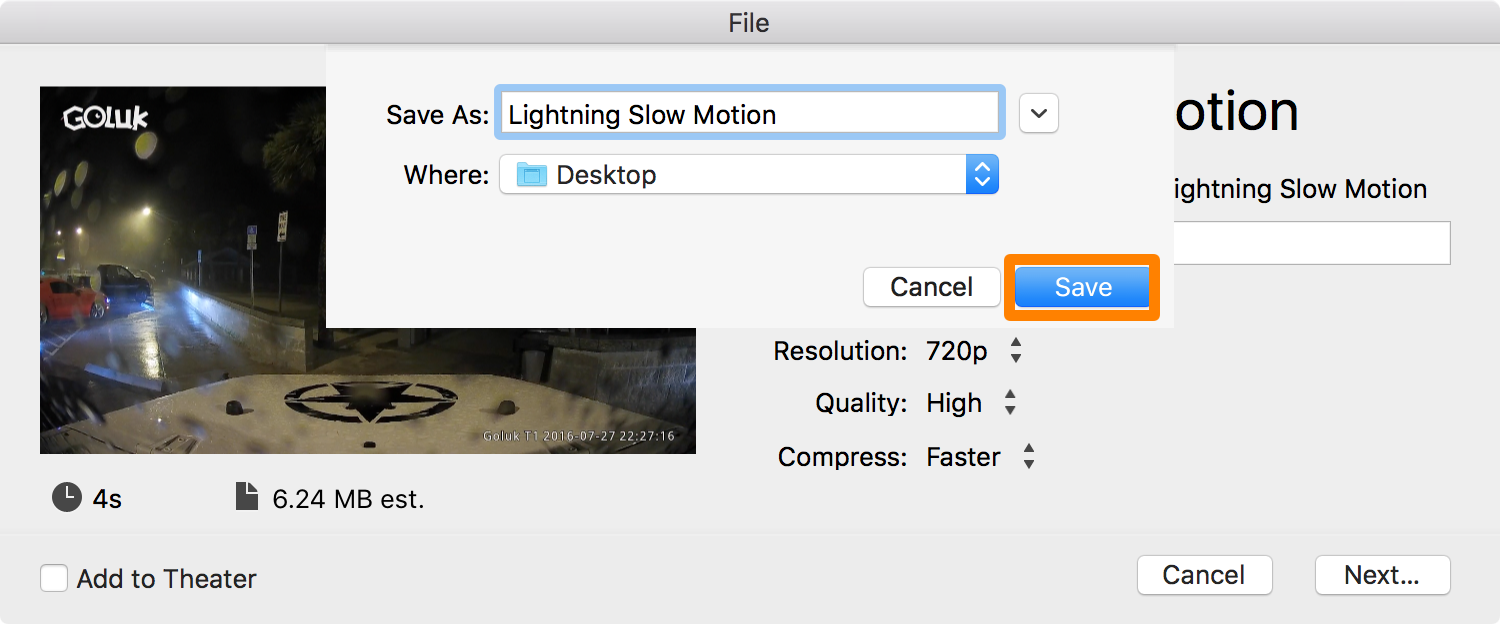
9) Now choose a name for the file and a place to save it to, then click on the blue Save button.
And that’s all there is to it!
An MP4 video file will be added to wherever you save your file to, and when you play it, it will play in slow motion instead of standard motion.
The results
What would a video tutorial be without some before and after results? I was thinking the same thing…
Here’s the footage before the modifications, showing the normal speed:

And here’s the footage after the modifications, showing the slow-motion speed imposed by iMovie on my Mac:

The slower video just lets you see so much more of the lightning at a glance, allowing your mind to process more of it at once.
Sometimes you just need a quick and easy way to convert a standard speed video to slow motion, and since your iPhone may not be your only video-recording device, you may not always have slow-motion capabilities at your fingertips.
On the bright side, iMovie lets you add last-minute slow motion edits to your videos after the fact with very little hassle at all. If you don’t already have it, then head over to the Mac App Store and download yourself a copy of this incredibly useful software.