We are back with another installment in our photo education series. Today we will share an easy tip for making your photos really pop. If you missed the first in this series, you can catch up and find out how to create beautiful HDR photos in under 3 minutes.
Do you ever take a photo of something, only to show it to your friends later and have to add “Well, you had to see it for yourself. It looked better than that.” I think we have all been there. Our photos don’t always accurately represent what we saw, and certainly they can’t represent how we felt at that moment, which in my opinion is intricately tied to the final image.
While there are countless apps available that allow you to make minor adjustments to your iPhone photos, I like to adjust mine with the many tools available in the Creative Kit by Macphun. It’s super-easy to use Creative Kit on your iPhone photos by running them inside of Photos for Mac; you’ll be creating your own masterpieces in no time.
Today, I share the first of three tips you can use on your photos for quick and effective enhancements. Each can give your photo a bit more punch, or add some artistic flair, and it only takes you a couple of minutes to do it. Follow along!
This post is part of a mini series of photography tutorials written by professional photographer Jim Nix and brought to you by Macphun. Over the course of several weeks, Jim will share quick and simple tips to dramatically improve your photos with easy-to-use professional software.
We will be using the Creative Kit by Macphun, which is a bundle of several software products, each giving you the power to make different types of edits. They work together seamlessly and can spark some serious creativity in you! The bundle is on promotion right now, and I highly recommend you take a look because it includes a huge discount as well as a bunch of extra goodies. You can also download a free trial of the Creative Kit which will let you use all the apps in the bundle with no strings attached.
1. Enhance the details in your photos
While iPhone photos actually look pretty good, I notice many times that the details are not very sharp, especially when viewed on a larger screen. In this tip, we will walk through a quick edit to bring back some of those details. We will be using Intensify, an app that is part of MacPhun’s Creative Kit and which allows you to bring amazing clarity, details, and even add some drama to your photos.
For the purpose of this tutorial, you can download a free trial of the Creative Kit, or the full version of Intensify.
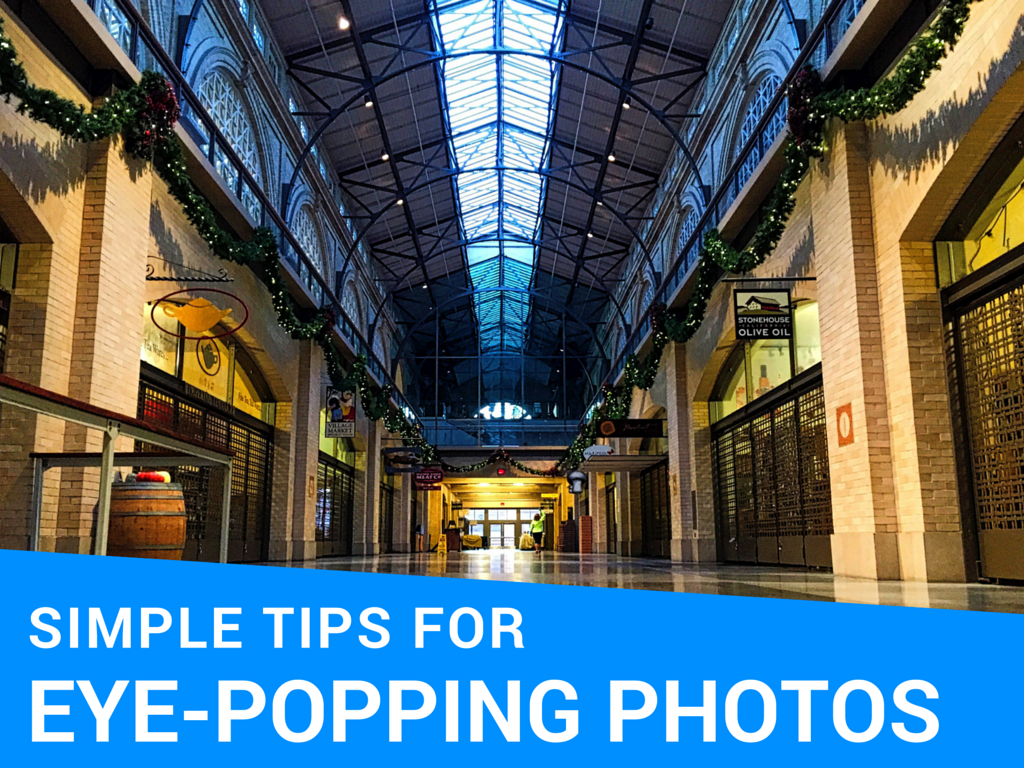
1) We begin in Apple’s Photos for Mac, and select our image, an iPhone photo of The Ferry Building in San Francisco. It’s a beautiful structure, full of details, but the base iPhone image is lacking that. You see how it looks sort of flat?

2) Once we double-click the image in Photos, we choose Edit and it takes us to this screen. We simply select Extensions, and then choose Intensify from the menu.
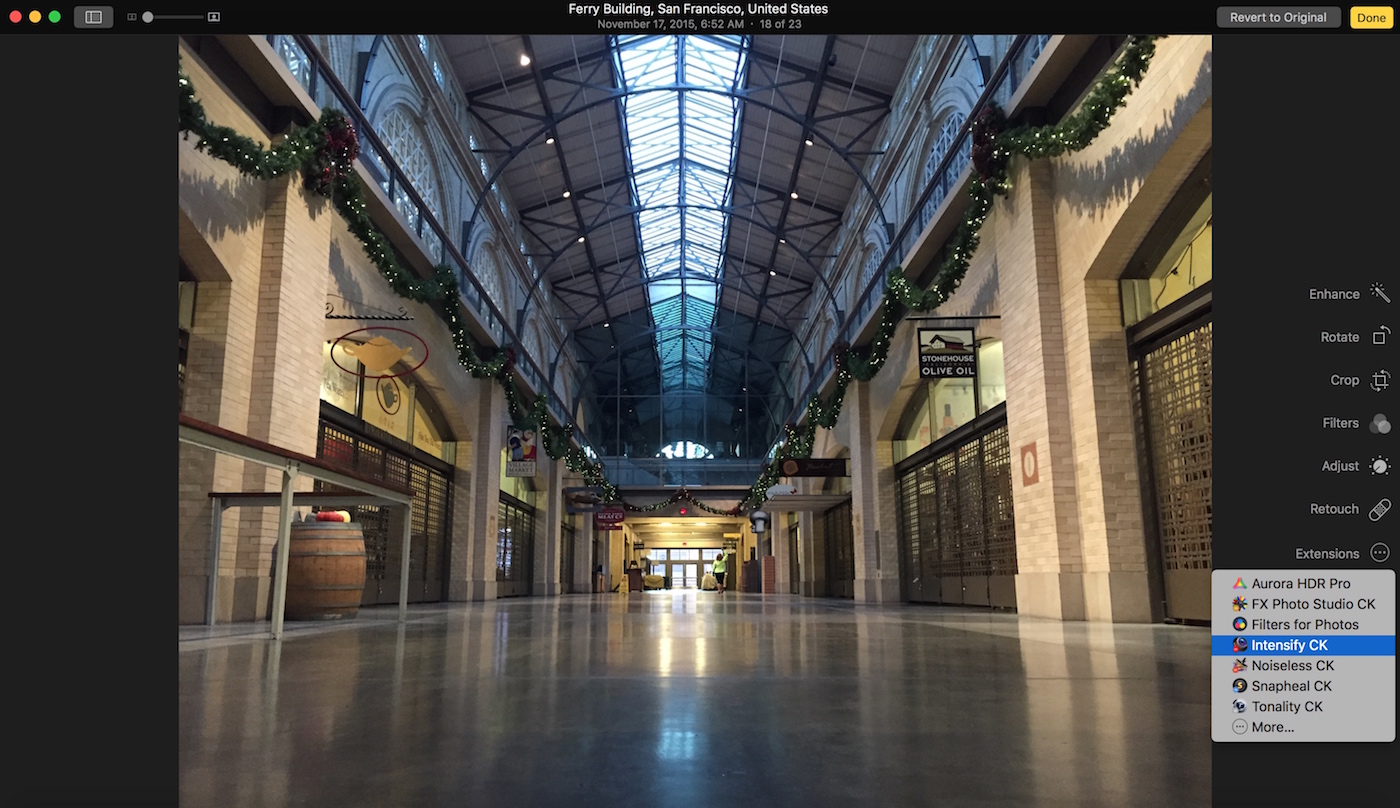
Note: If this is new to you and you are not clear how to use these products as Extensions from Apple Photos, we suggest reading this article on the Macphun site.
3) This will carry the photo over to Intensify, and you will get a landing screen that looks like this:
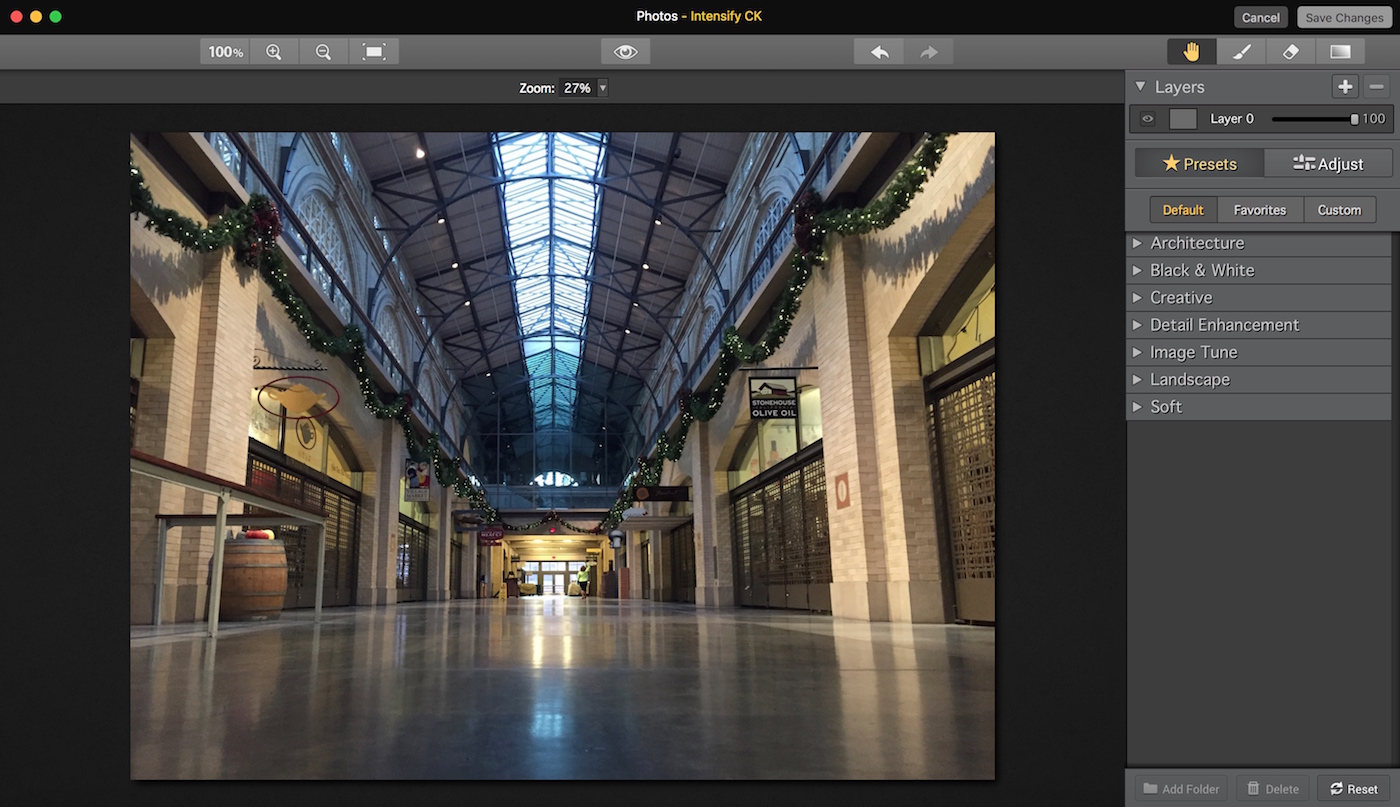
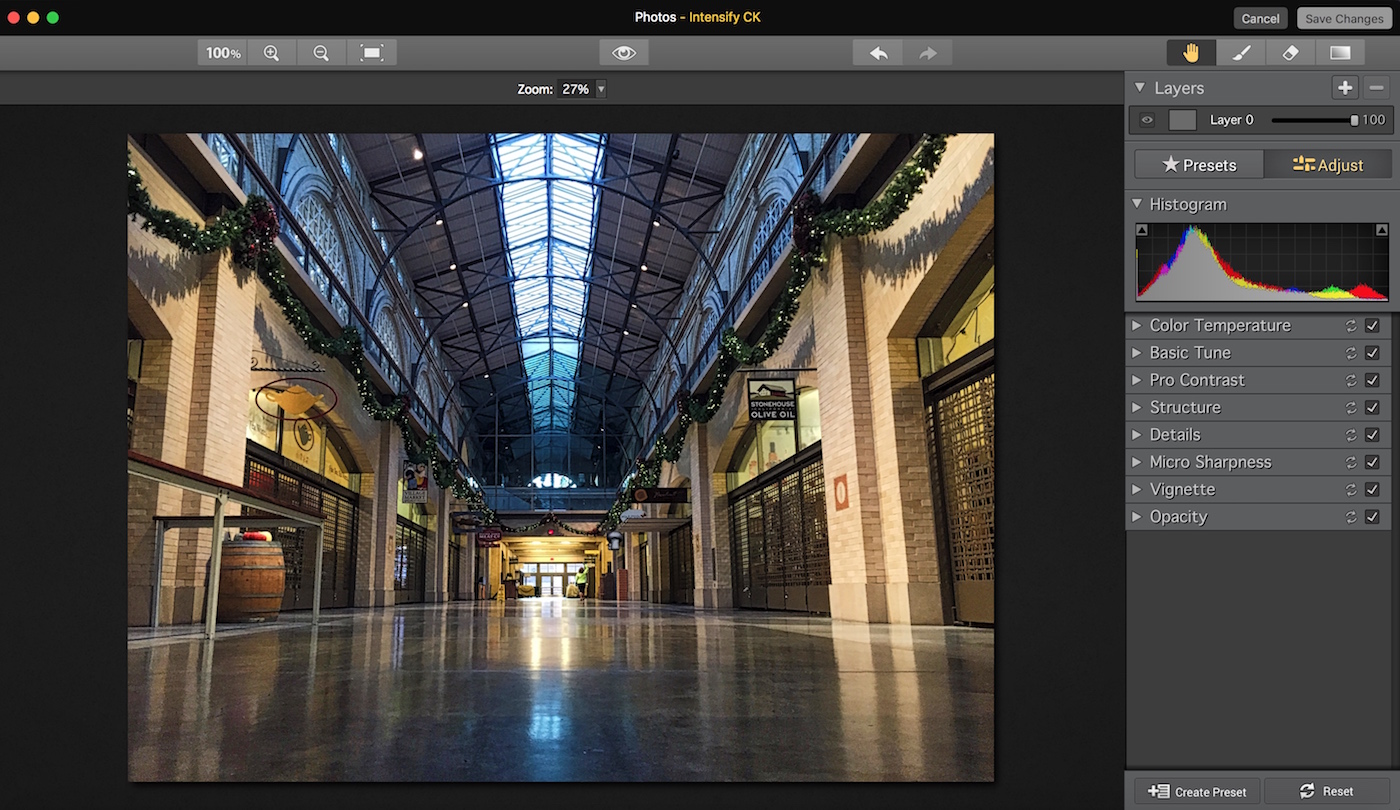
4) Notice all the menus on the right hand panel, and that Presets is currently highlighted. If you click any of them, they will open up and give you a bunch of preset options. A preset is a collection of adjustments done with a single click. I suggest taking a moment and clicking on a few, just to see what they do for your image, and to get familiar with them. We have chosen the Strong Indoor Details preset from the Architecture category, as you can see in this photo:
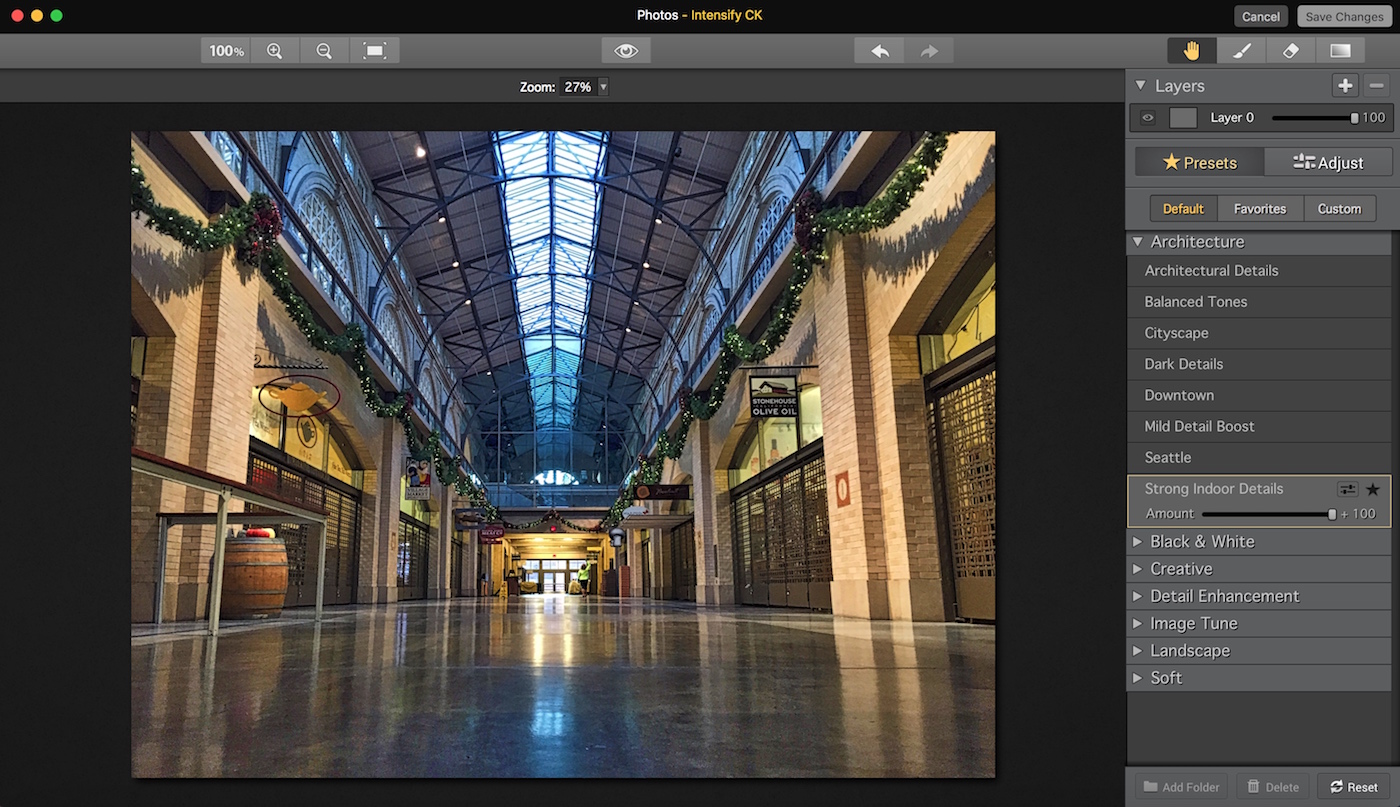
This was just a single click, and already the photo looks much better. Details are much more evident throughout the image. However, we are going to do one more quick thing while we are here in Intensify.
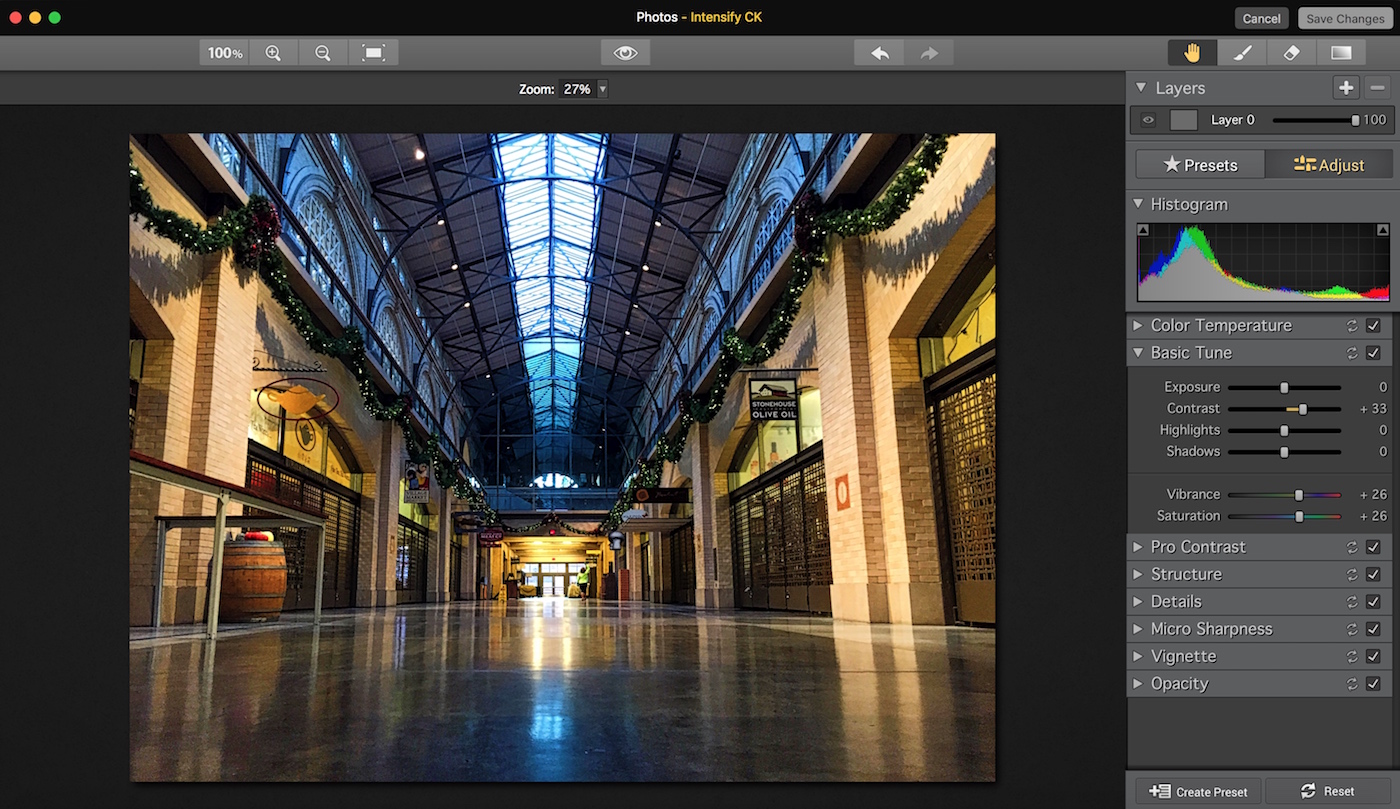
5) If you look at the upper right hand side of the screen, you will see where it says both Presets and Adjust. Presets is currently highlighted, because we are in the Preset selection menu. If you click on Adjust, you will notice that it will now be highlighted and you will have a new menu of options:
Each of the subjects listed (Color Temperature, Basic Tune, etc) is a drop-down menu with sliders, allowing you to make further adjustments to the Preset that you have currently applied to the photo.
6) We clicked on the Basic Tune menu, and it dropped down to reveal several sliders. All we did was increase Contrast to +33, Vibrance and Saturation to +26 to give the color a little more pop.
We are all done! Just click Save Changes in the upper right and you will be returned to Photos. Click Done in the Photos menu and it is saved to your library.
Here’s the final image:

2. Use creative filter effects for a new twist
Filters have been around for a long time, and when used well they can really make an impact on an image. In this tip, we will show you how to use FX Photo Studio to apply a filter to a photo and draw the viewer’s attention.
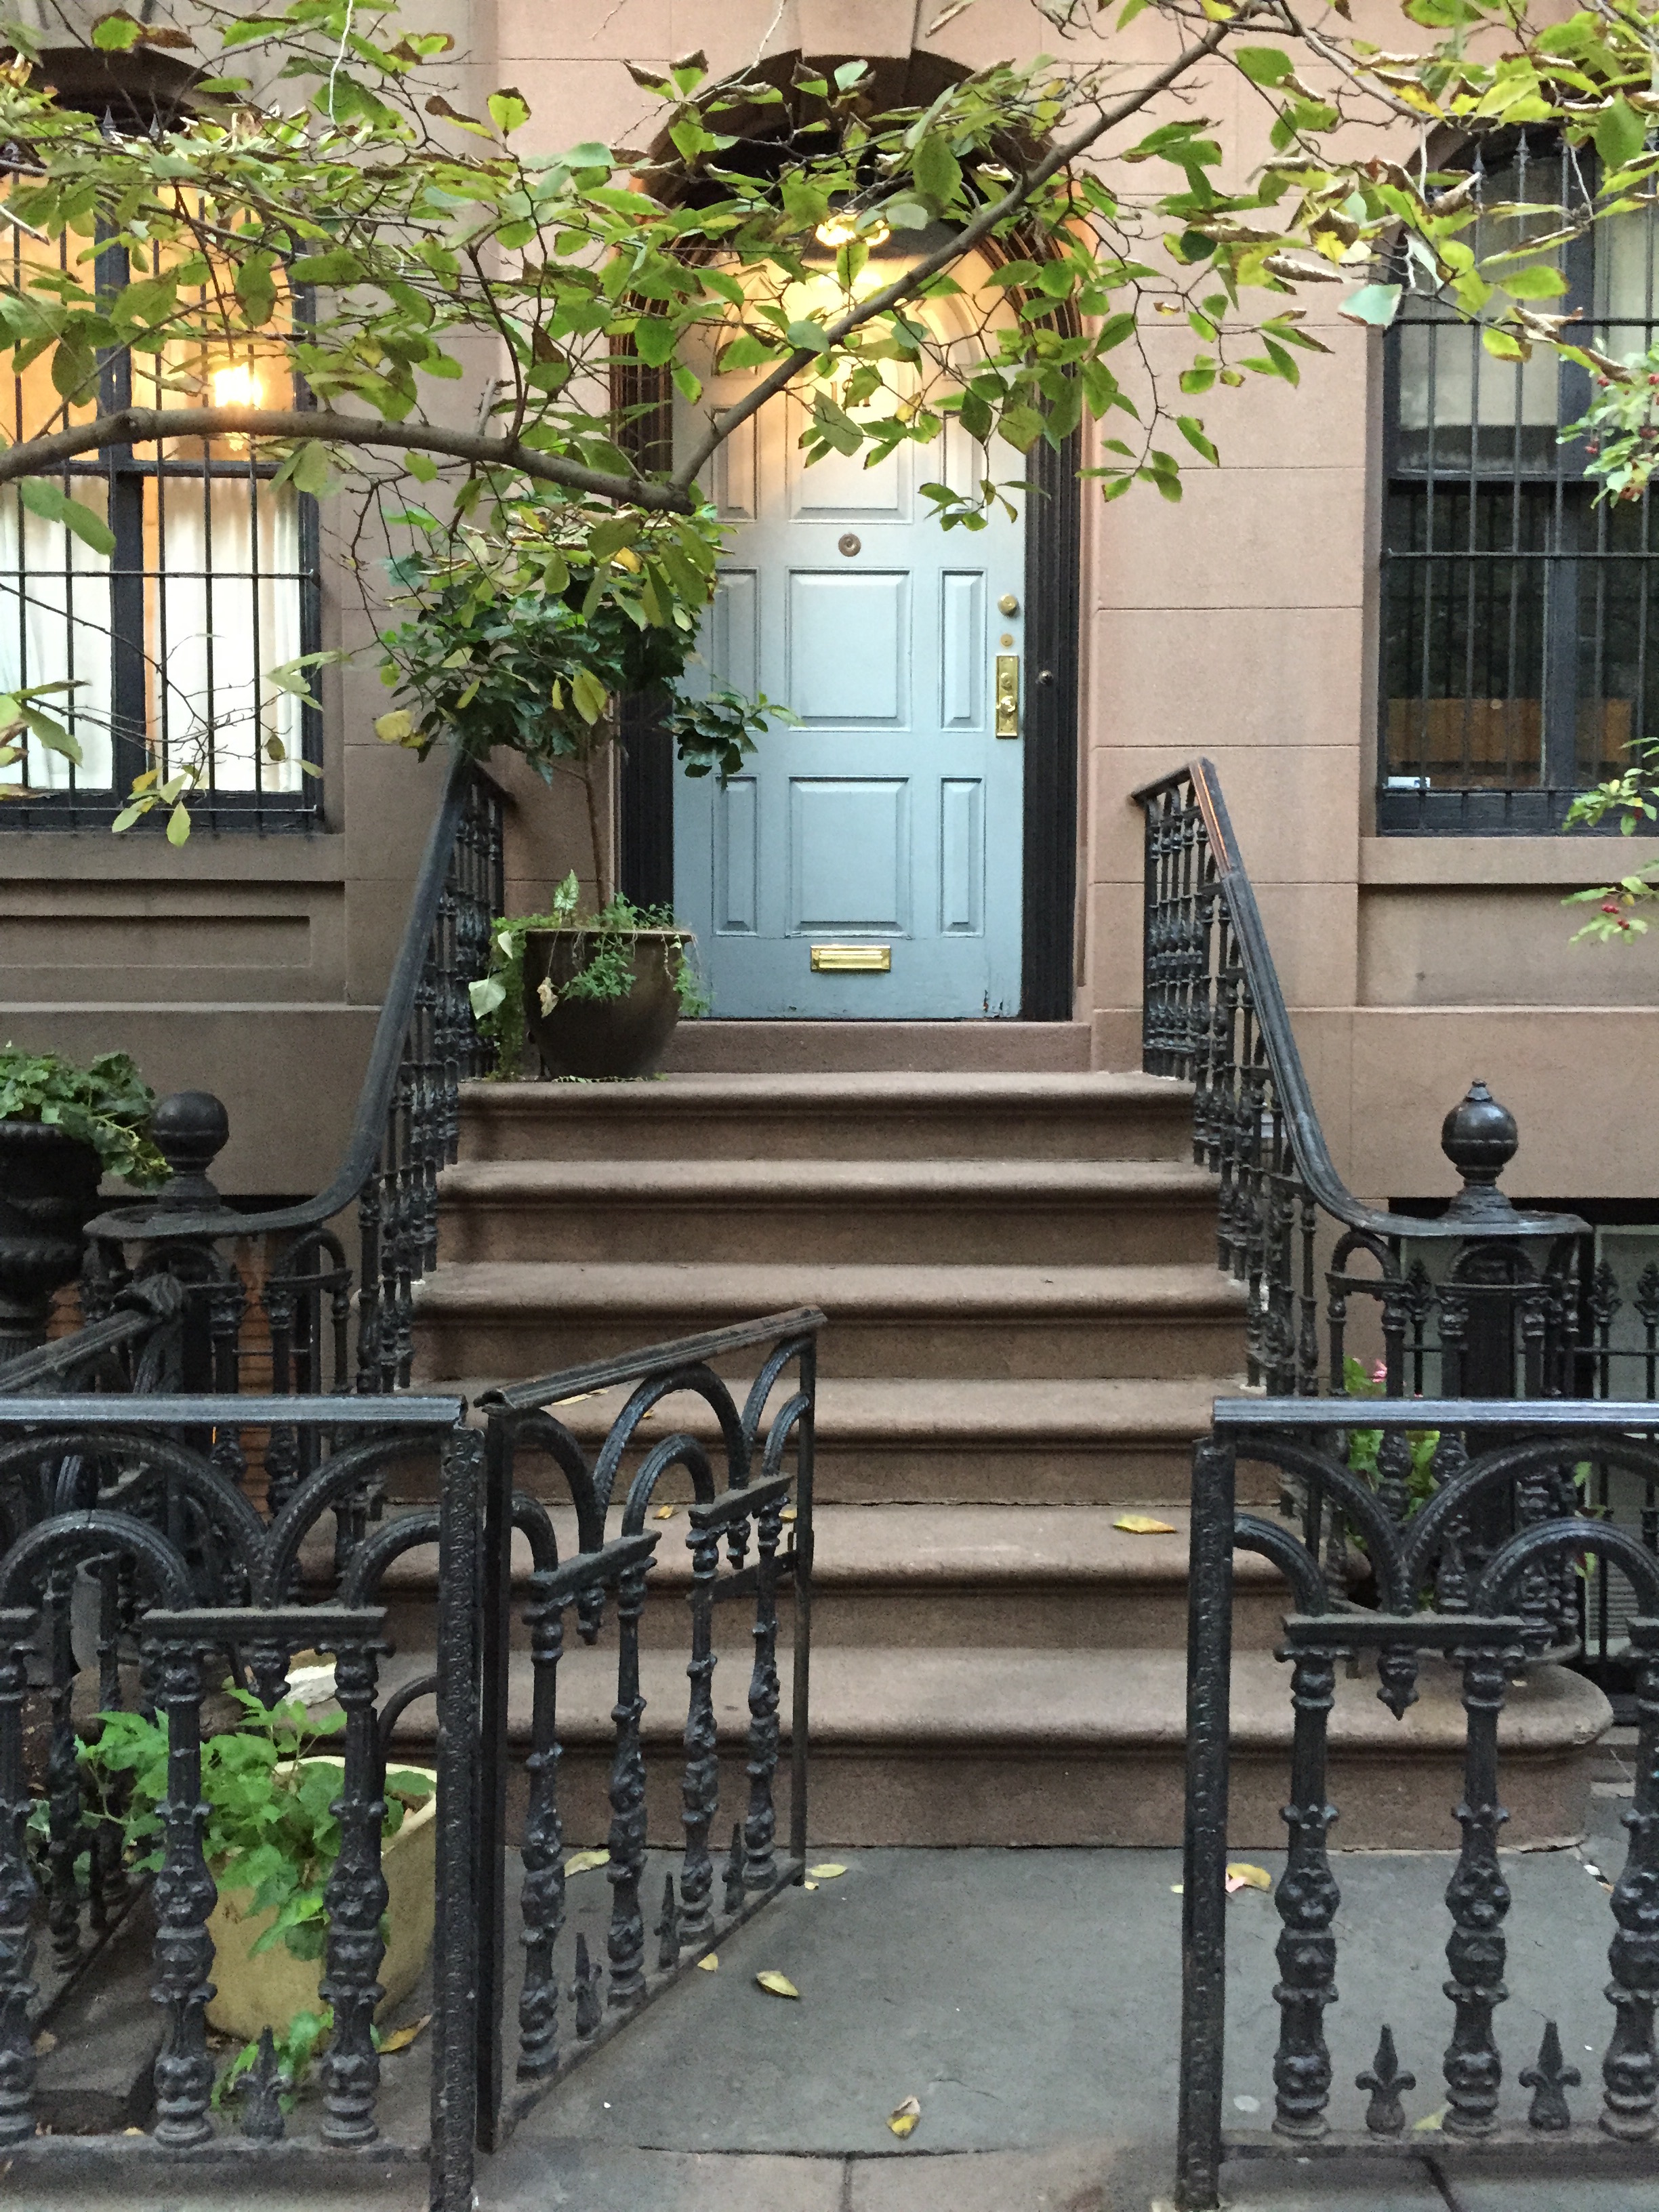
We start with this photo, which is a door that was photographed in New York City. Like the first tip, this too is an iPhone image.
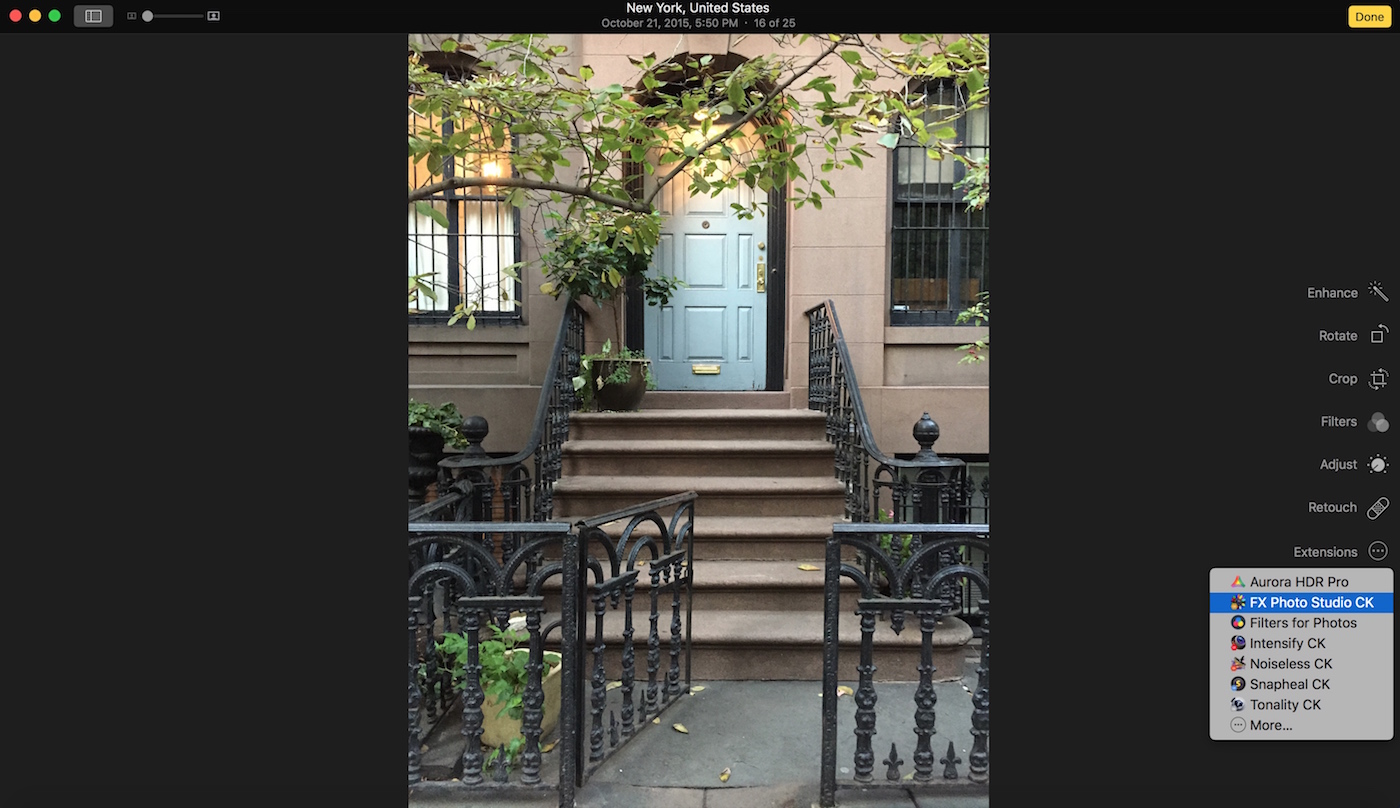
1) Again, we double-click the image in Photos to go to the Edit screen, then choose Extensions and select FX Photo Studio.
After selecting that, the image will transfer over to FX Photo Studio and you will land on this page, which is the main menu:
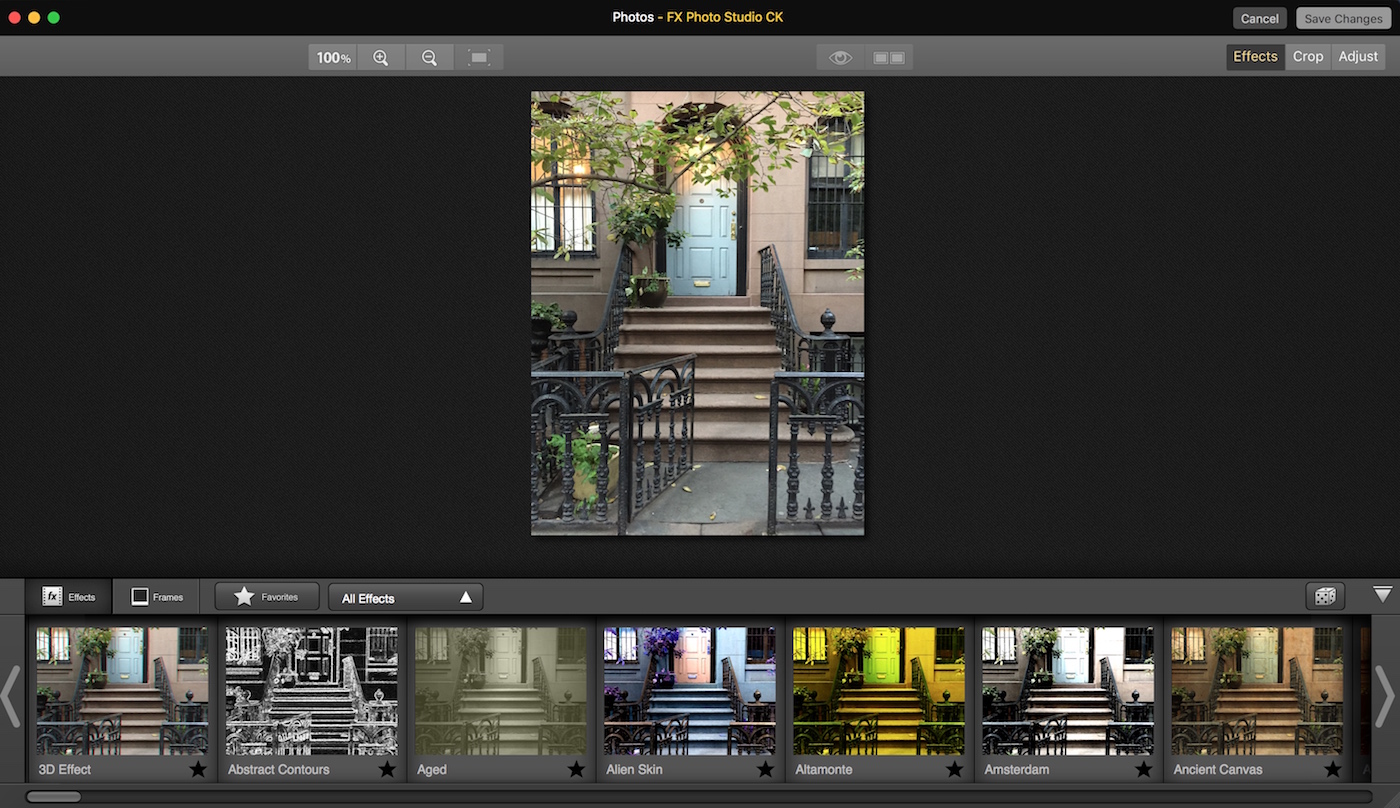
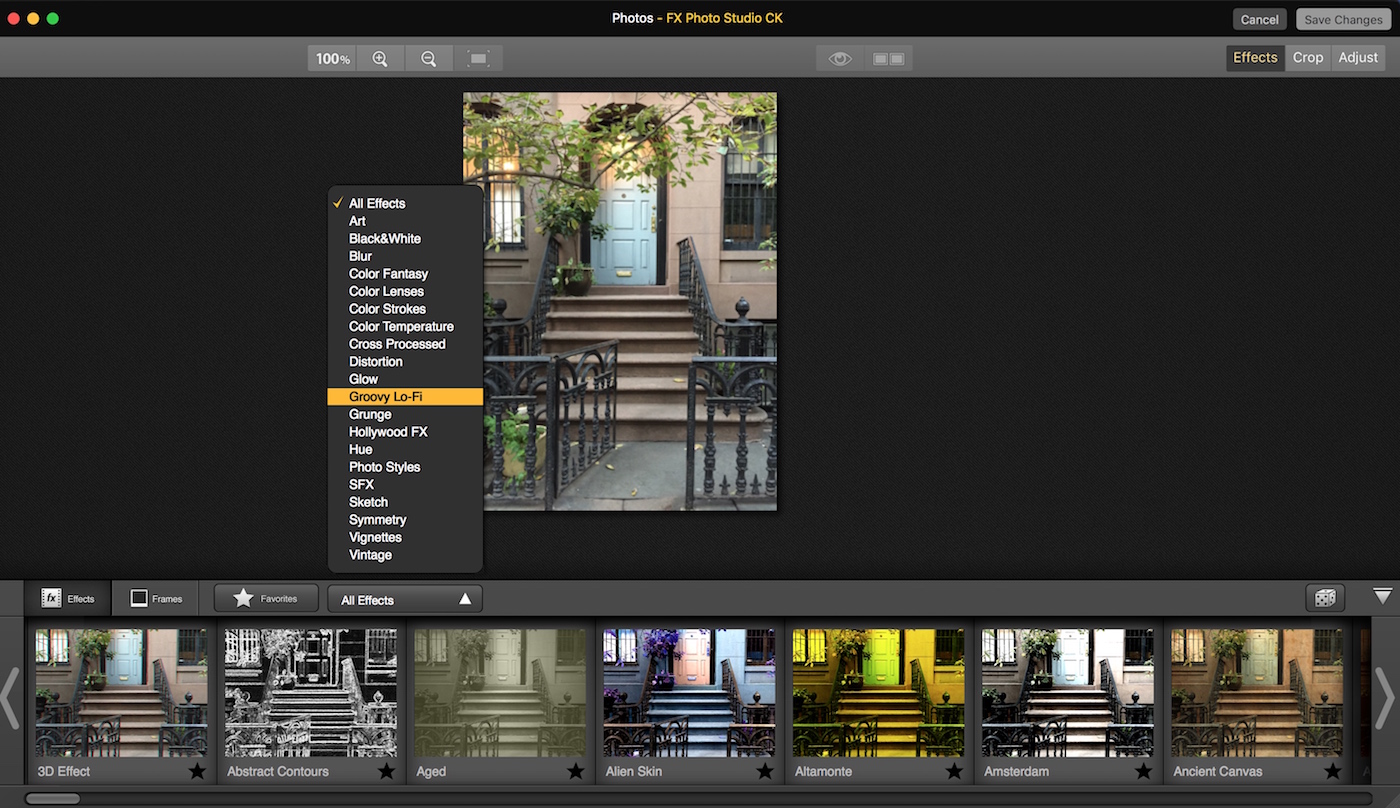
As you can see, there is a film strip along the bottom with all the filter options there (you can scroll left and right to see more filters), and right above that is a pop-up menu, labeled All Effects, which allows you to sort the filters by category.
2) We have selected the Ancient Canvas filter, so when we click that, it automatically applies across the image. As you can see, you can increase or decrease the intensity of the filter by moving the Amount slider left or right.
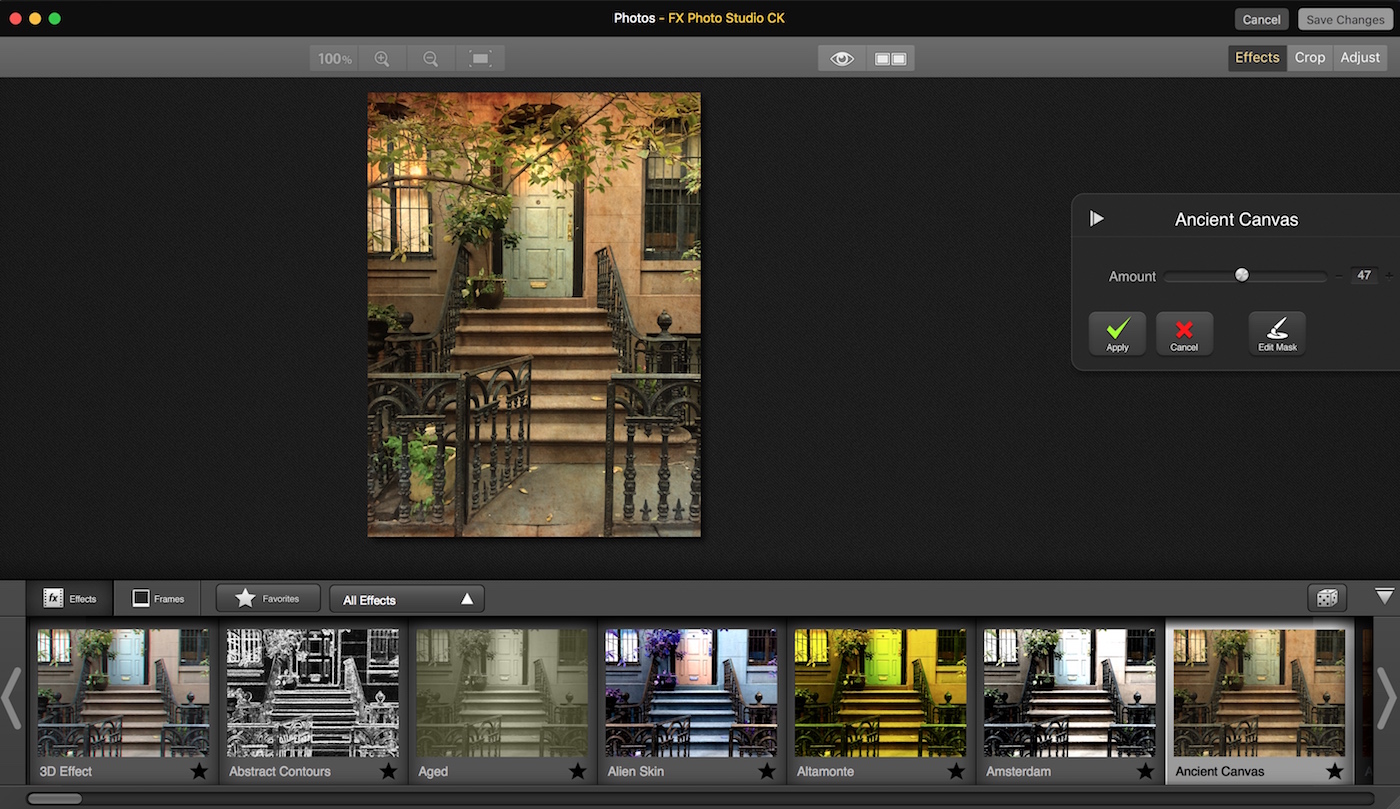
3) Now, if you like this look, just hit the Apply button and it will apply to the image. You can then click Save Changes to return to Photos with your image. But here’s a nice little trick that you can’t get with those filters on Instagram.
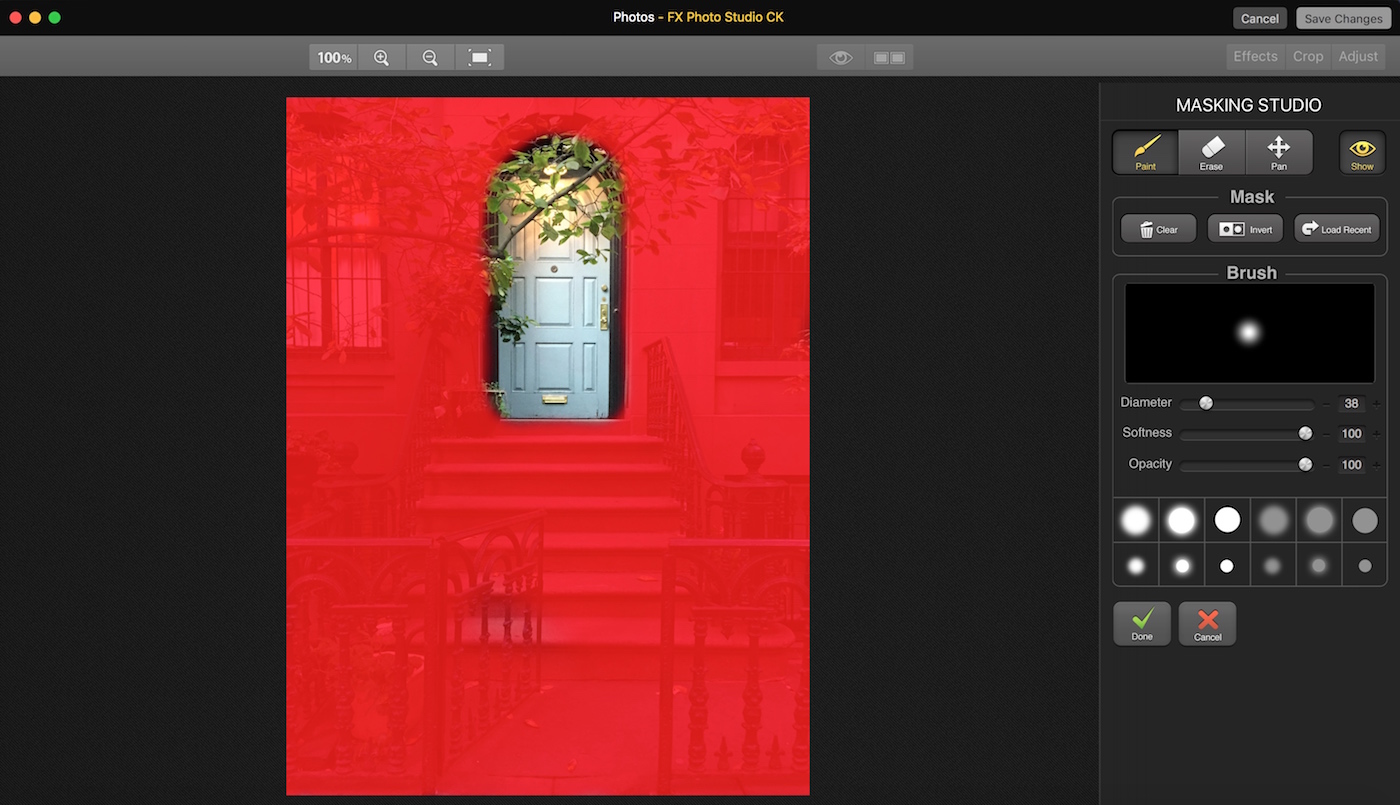
Do you see the Edit Mask button? Click on that, and you will be taken to this screen:
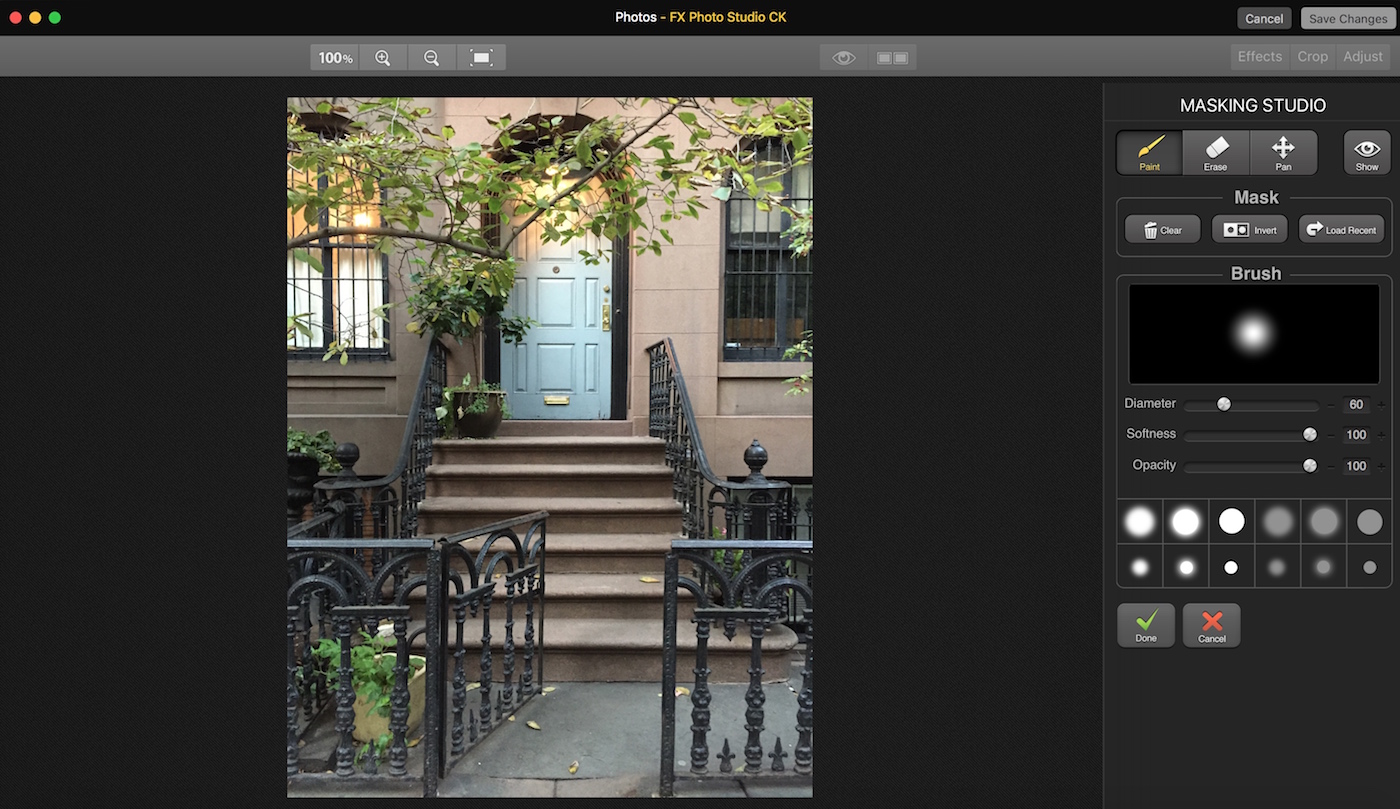
4) This is where the power of this professional software product really shines. Masking allows you to selectively apply the filter to specific parts of the photo, using a brush. You choose the diameter, size and opacity of the brush, and then just paint it into the photo where you want the filter effect to appear.
As you paint it in, the effect will be applied where ever your brushstrokes land. If you mess up, just click the Erase button next to Paint at the top, and erase it.
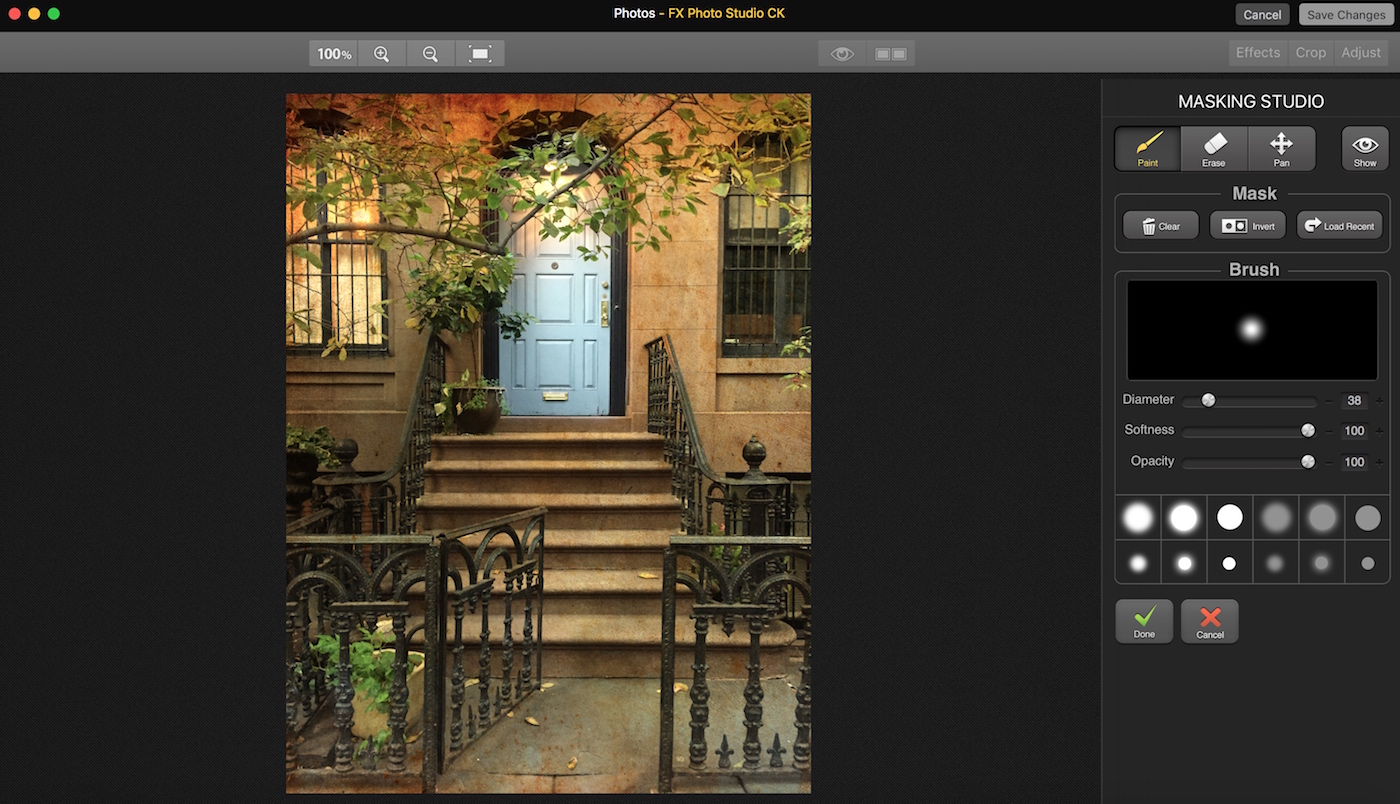
Here is how the mask looks for this image, because I am going to apply the filter to everything except the door. I like the blue door and don’t want the filter on top of that. Just click on Show to display the mask:
And here is how the photo looks with the mask hidden – notice the effect is NOT on top of the blue door.
5) Once you are satisfied, just click the green check mark/done button, and you will be taken back to the main landing page, with the filter applied where you painted it in. The “Done” button here applies to the masking only, so you have one more step to save it.
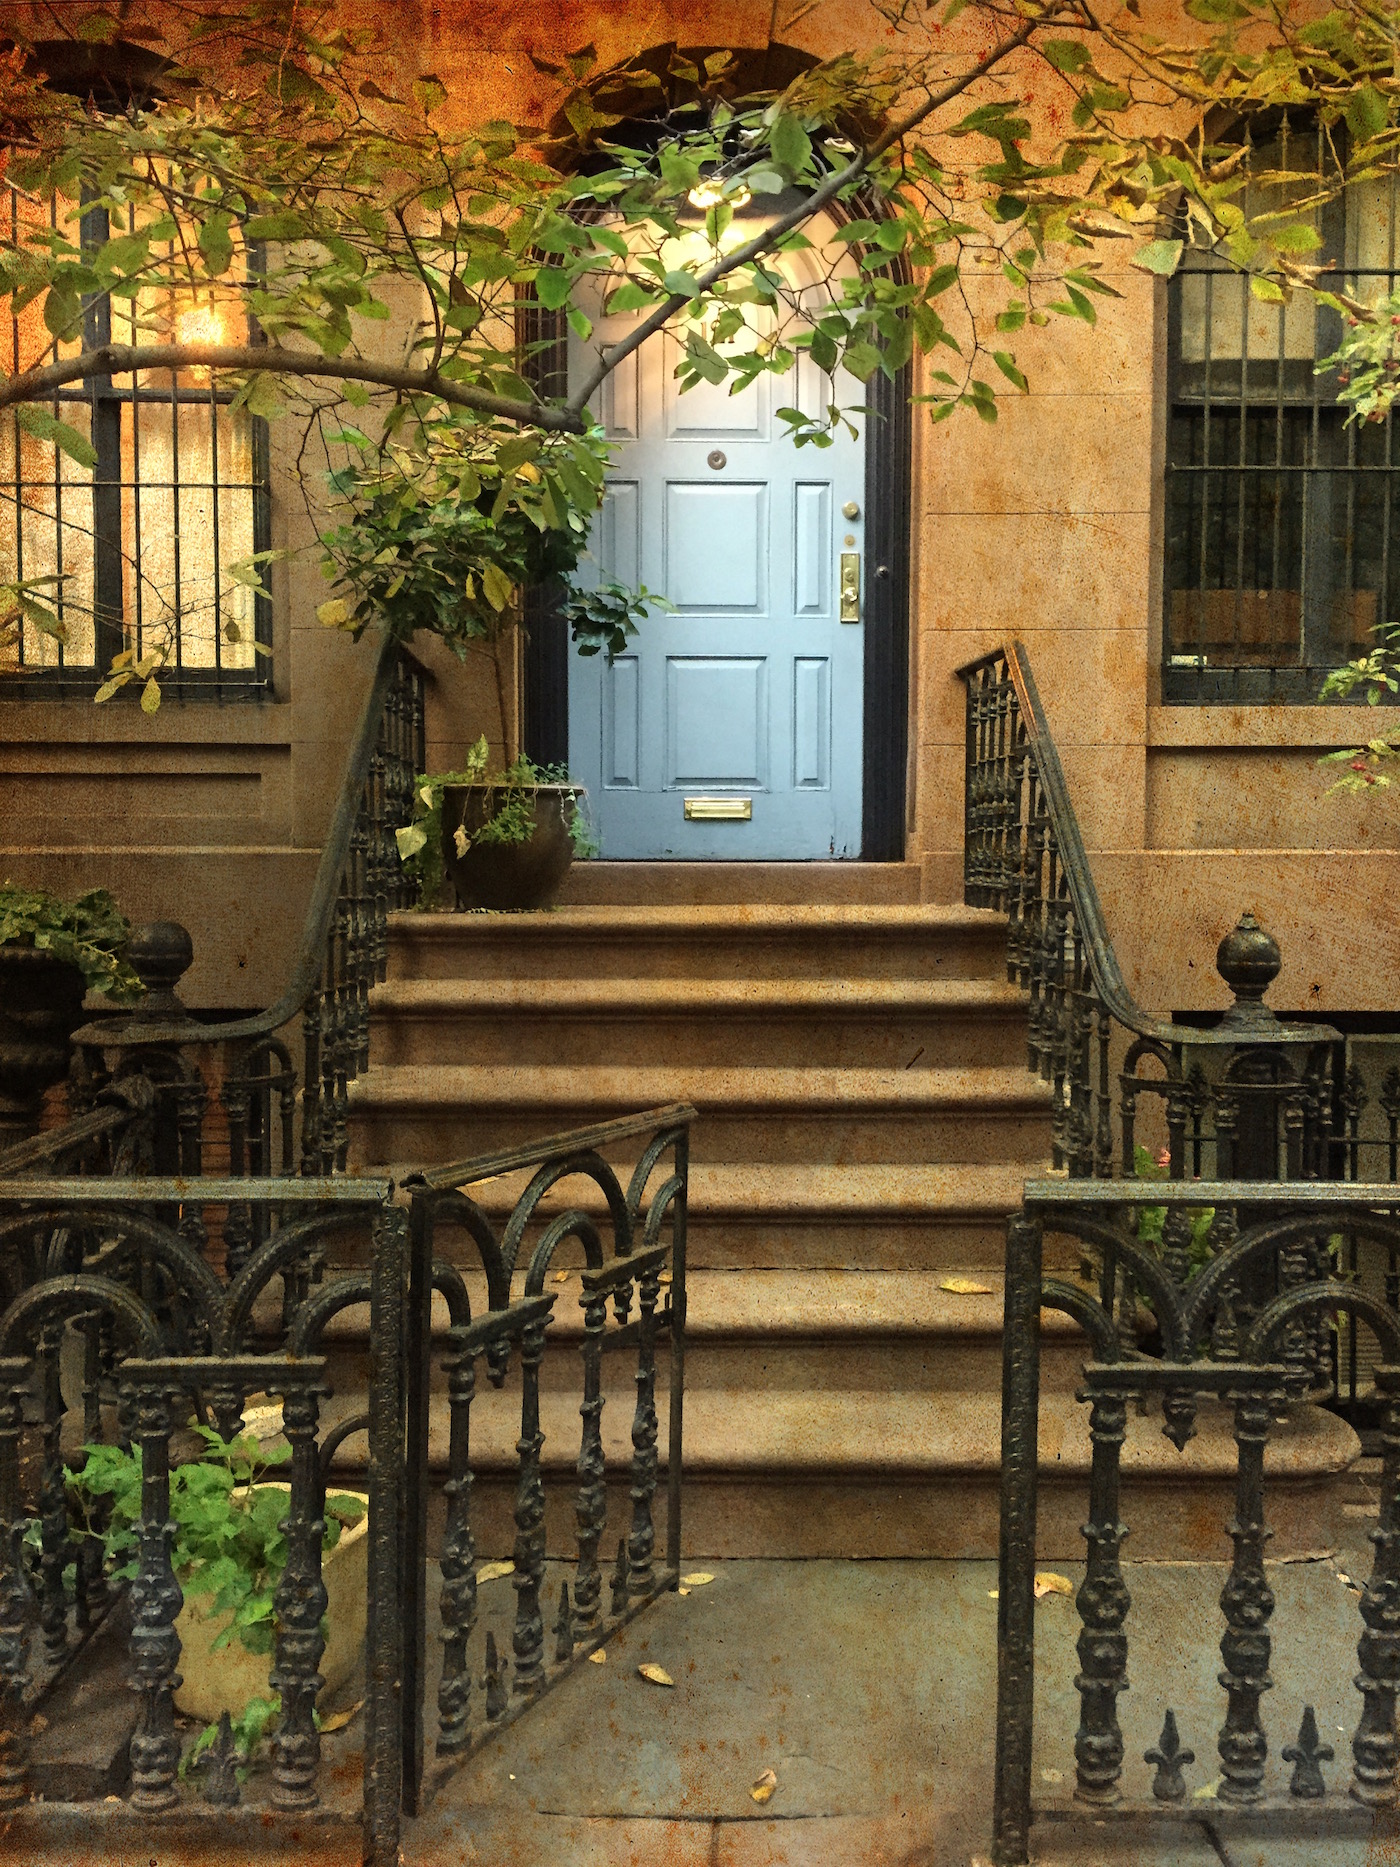
Note that I increased the slider to 100 on the below screenshot, to make the filter effect more prominent in the final result. Just click Apply one more time, then Save Changes, and your photo will return to Photos. Click Done and you will be back in your library view of Photos.
And of course, here is the final image after applying the filter selectively in FX Photo Studio:
3. Creative blurring
One of the great things about photo-editing software is being able to apply very creative effects, and this next one is right up there in terms of giving you artful tools for your photos.
We will be using another tool in Creative Kit called Focus, which allows you to add creative blurring and other focus effects to your images. You can easily take a pretty-boring image and turn it into something really interesting!
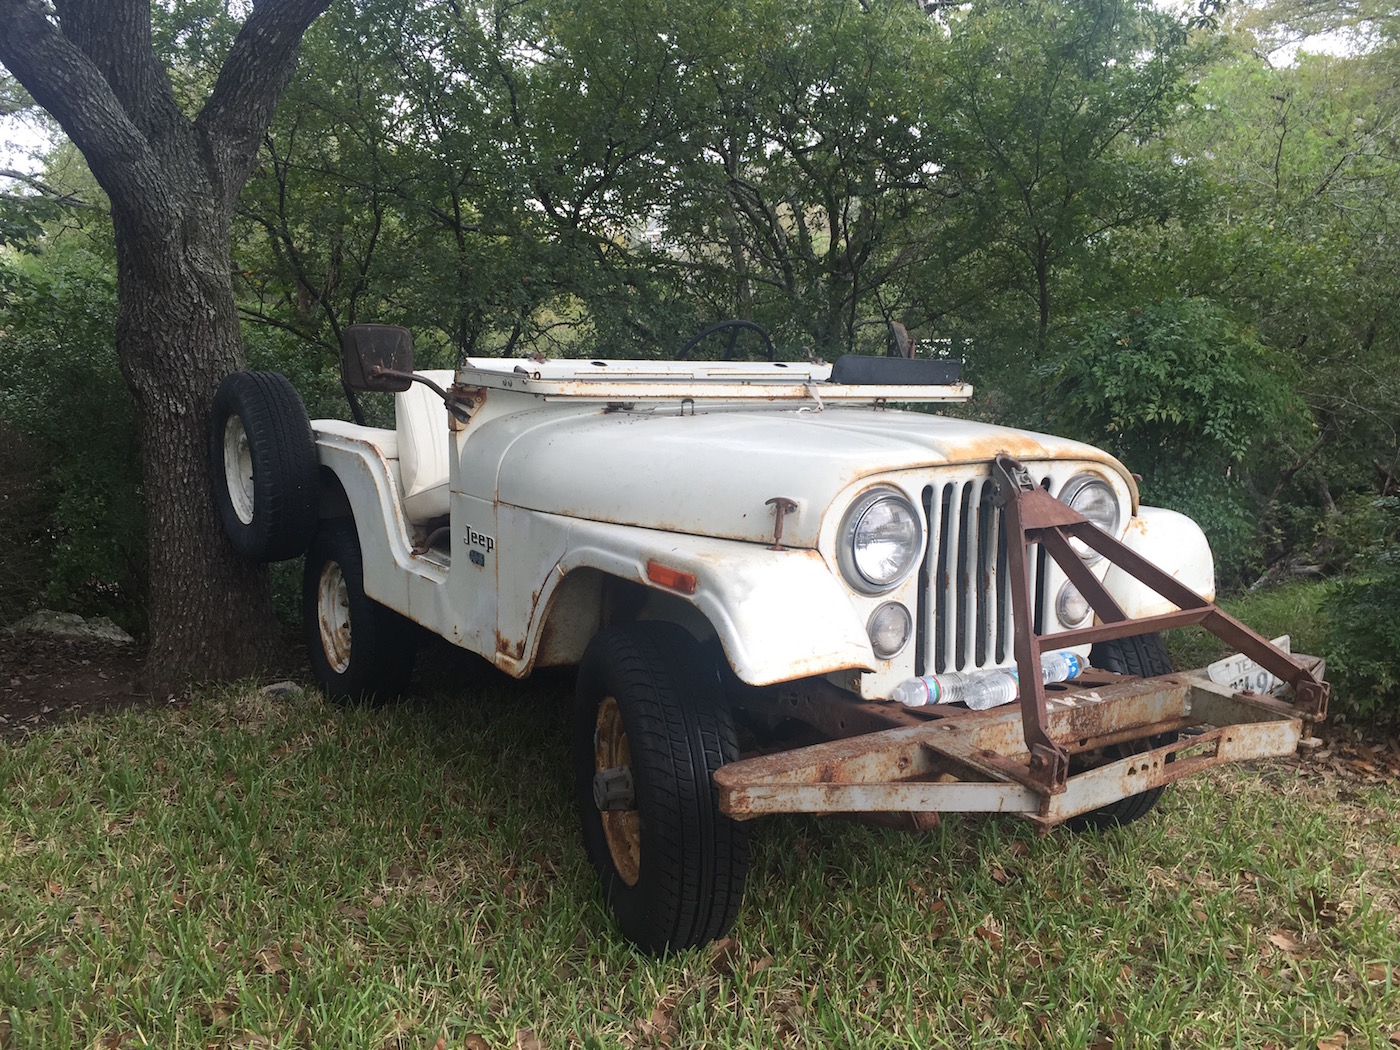
I started with this image of an old Jeep. I was out for a walk and came across it, and it caught my eye. It’s nothing special really, I guess it just drew me in. So, a quick snap with my iPhone and I was on my way.
1) The first thing you do, like on the other images, is double-click it in Photos, then choose Edit, and then choose Extensions. This extension is called Focus. Once it lands in Focus, you are presented with this view:
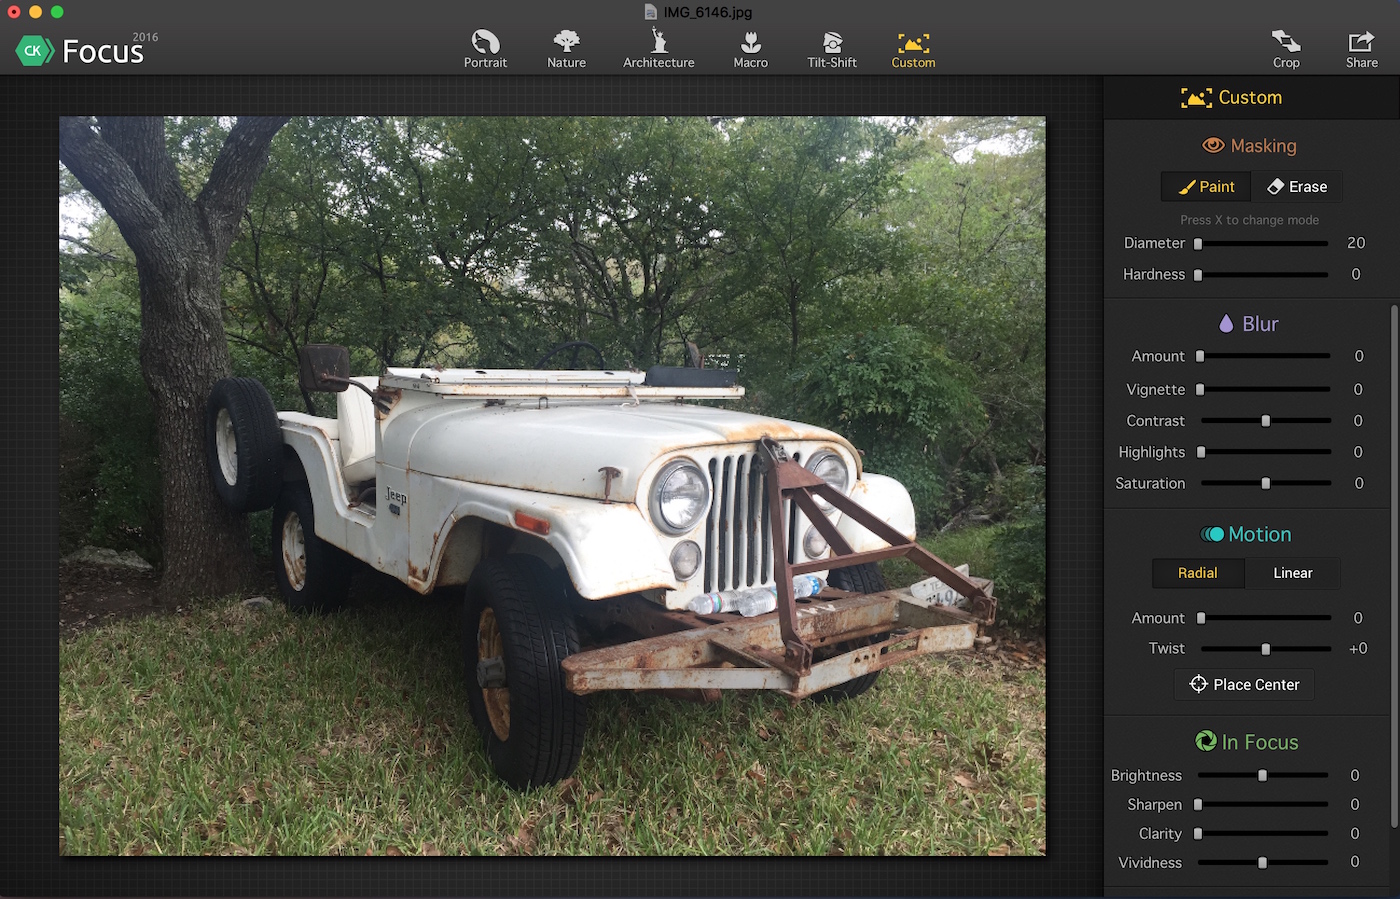
2) As you can see, there are numerous setting across the top, depending on the type of scene you are editing. Of course, you can choose any type of setting for any type of scene. These are just suggestions. But because of the odd shape of the Jeep, I chose Custom, which allows us to get very specific about the effect we are going to apply to the photo.
3) Just like in tip #2 above, we are going to mask in (paint over) the Jeep, which will isolate the Jeep from the effects you are applying. Just click on the button where it says Paint in the upper right under Masking, adjust the diameter of the brush, and start painting. Notice that I have increase the Blur slider to +54 because that helps me see how the Jeep stands out from the rest of the image:
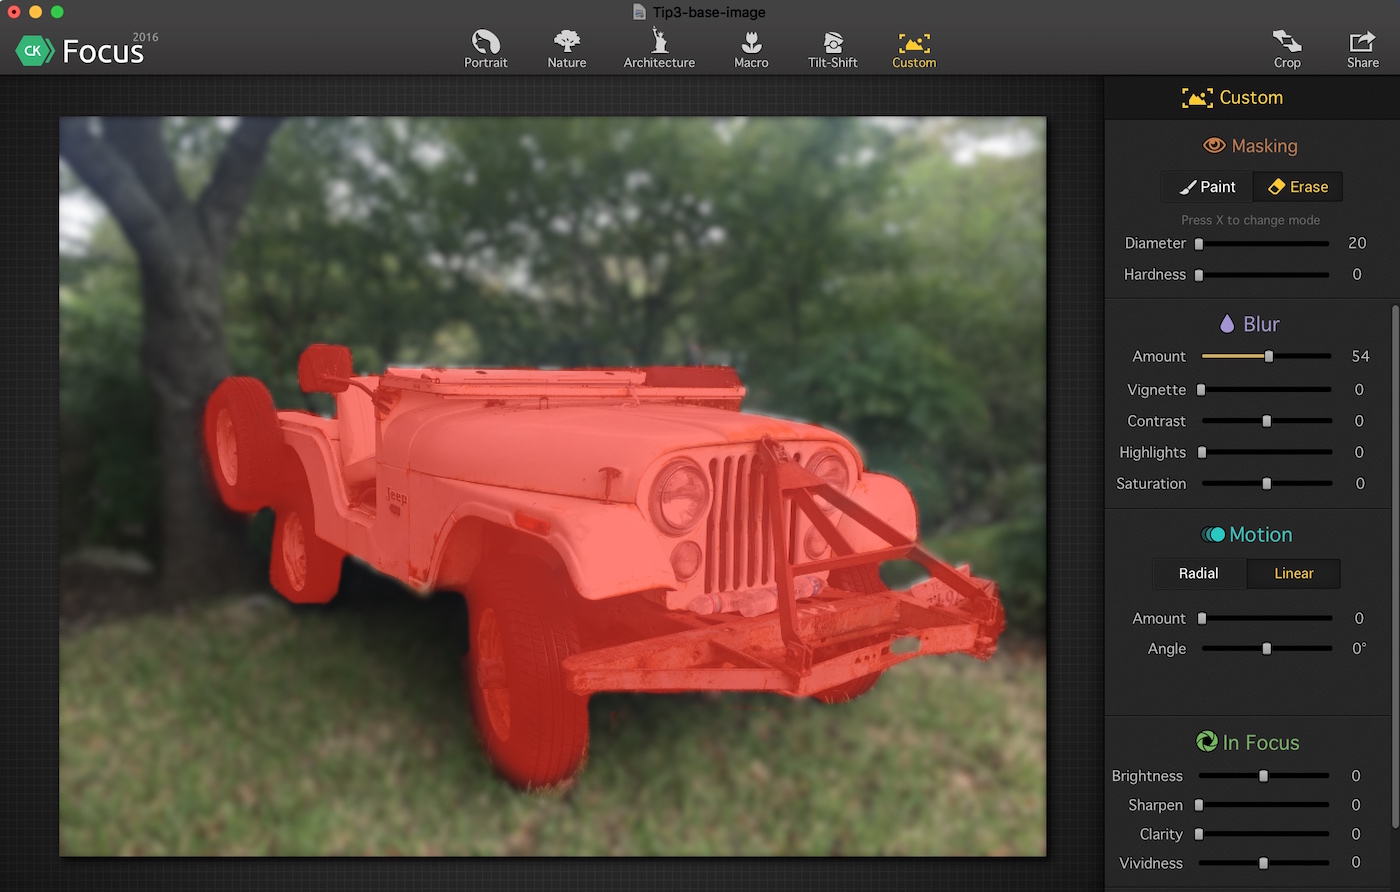
Here it is with the mask hidden, so you can see the full image:

4) Now, this is where you can get really creative with the blur effects. As you can see in the screenshot below, I have moved a LOT of the sliders in the right-hand panel. Here’s a quick summary of the adjustments I made (all visible in the right hand panel):
- In the Blur menu, I moved Amount, Vignette, Contrast and Saturation
- In the Motion menu, I moved Amount and Twist under the Radial sub-heading
- In the In Focus menu, I moved Sharpness, Clarity and Vividness
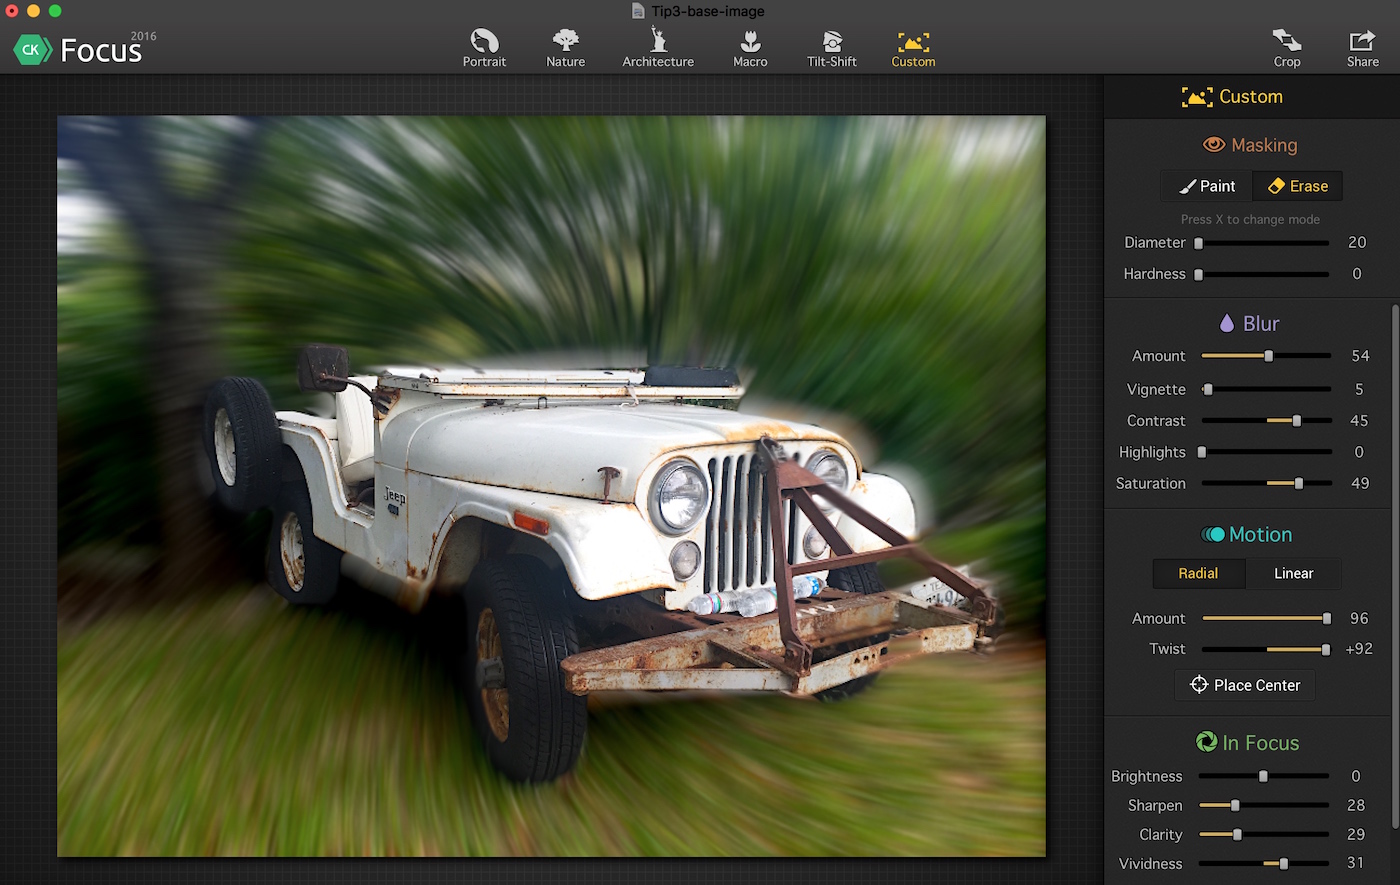
As you can see, there is really no limit with what you can do to your images in Focus. Each of the menu choices across the top have various adjustment panels on the right hand side. There is no right or wrong with any of it – this is art, not science. Experiment, take risks, do something crazy. It’s all good!
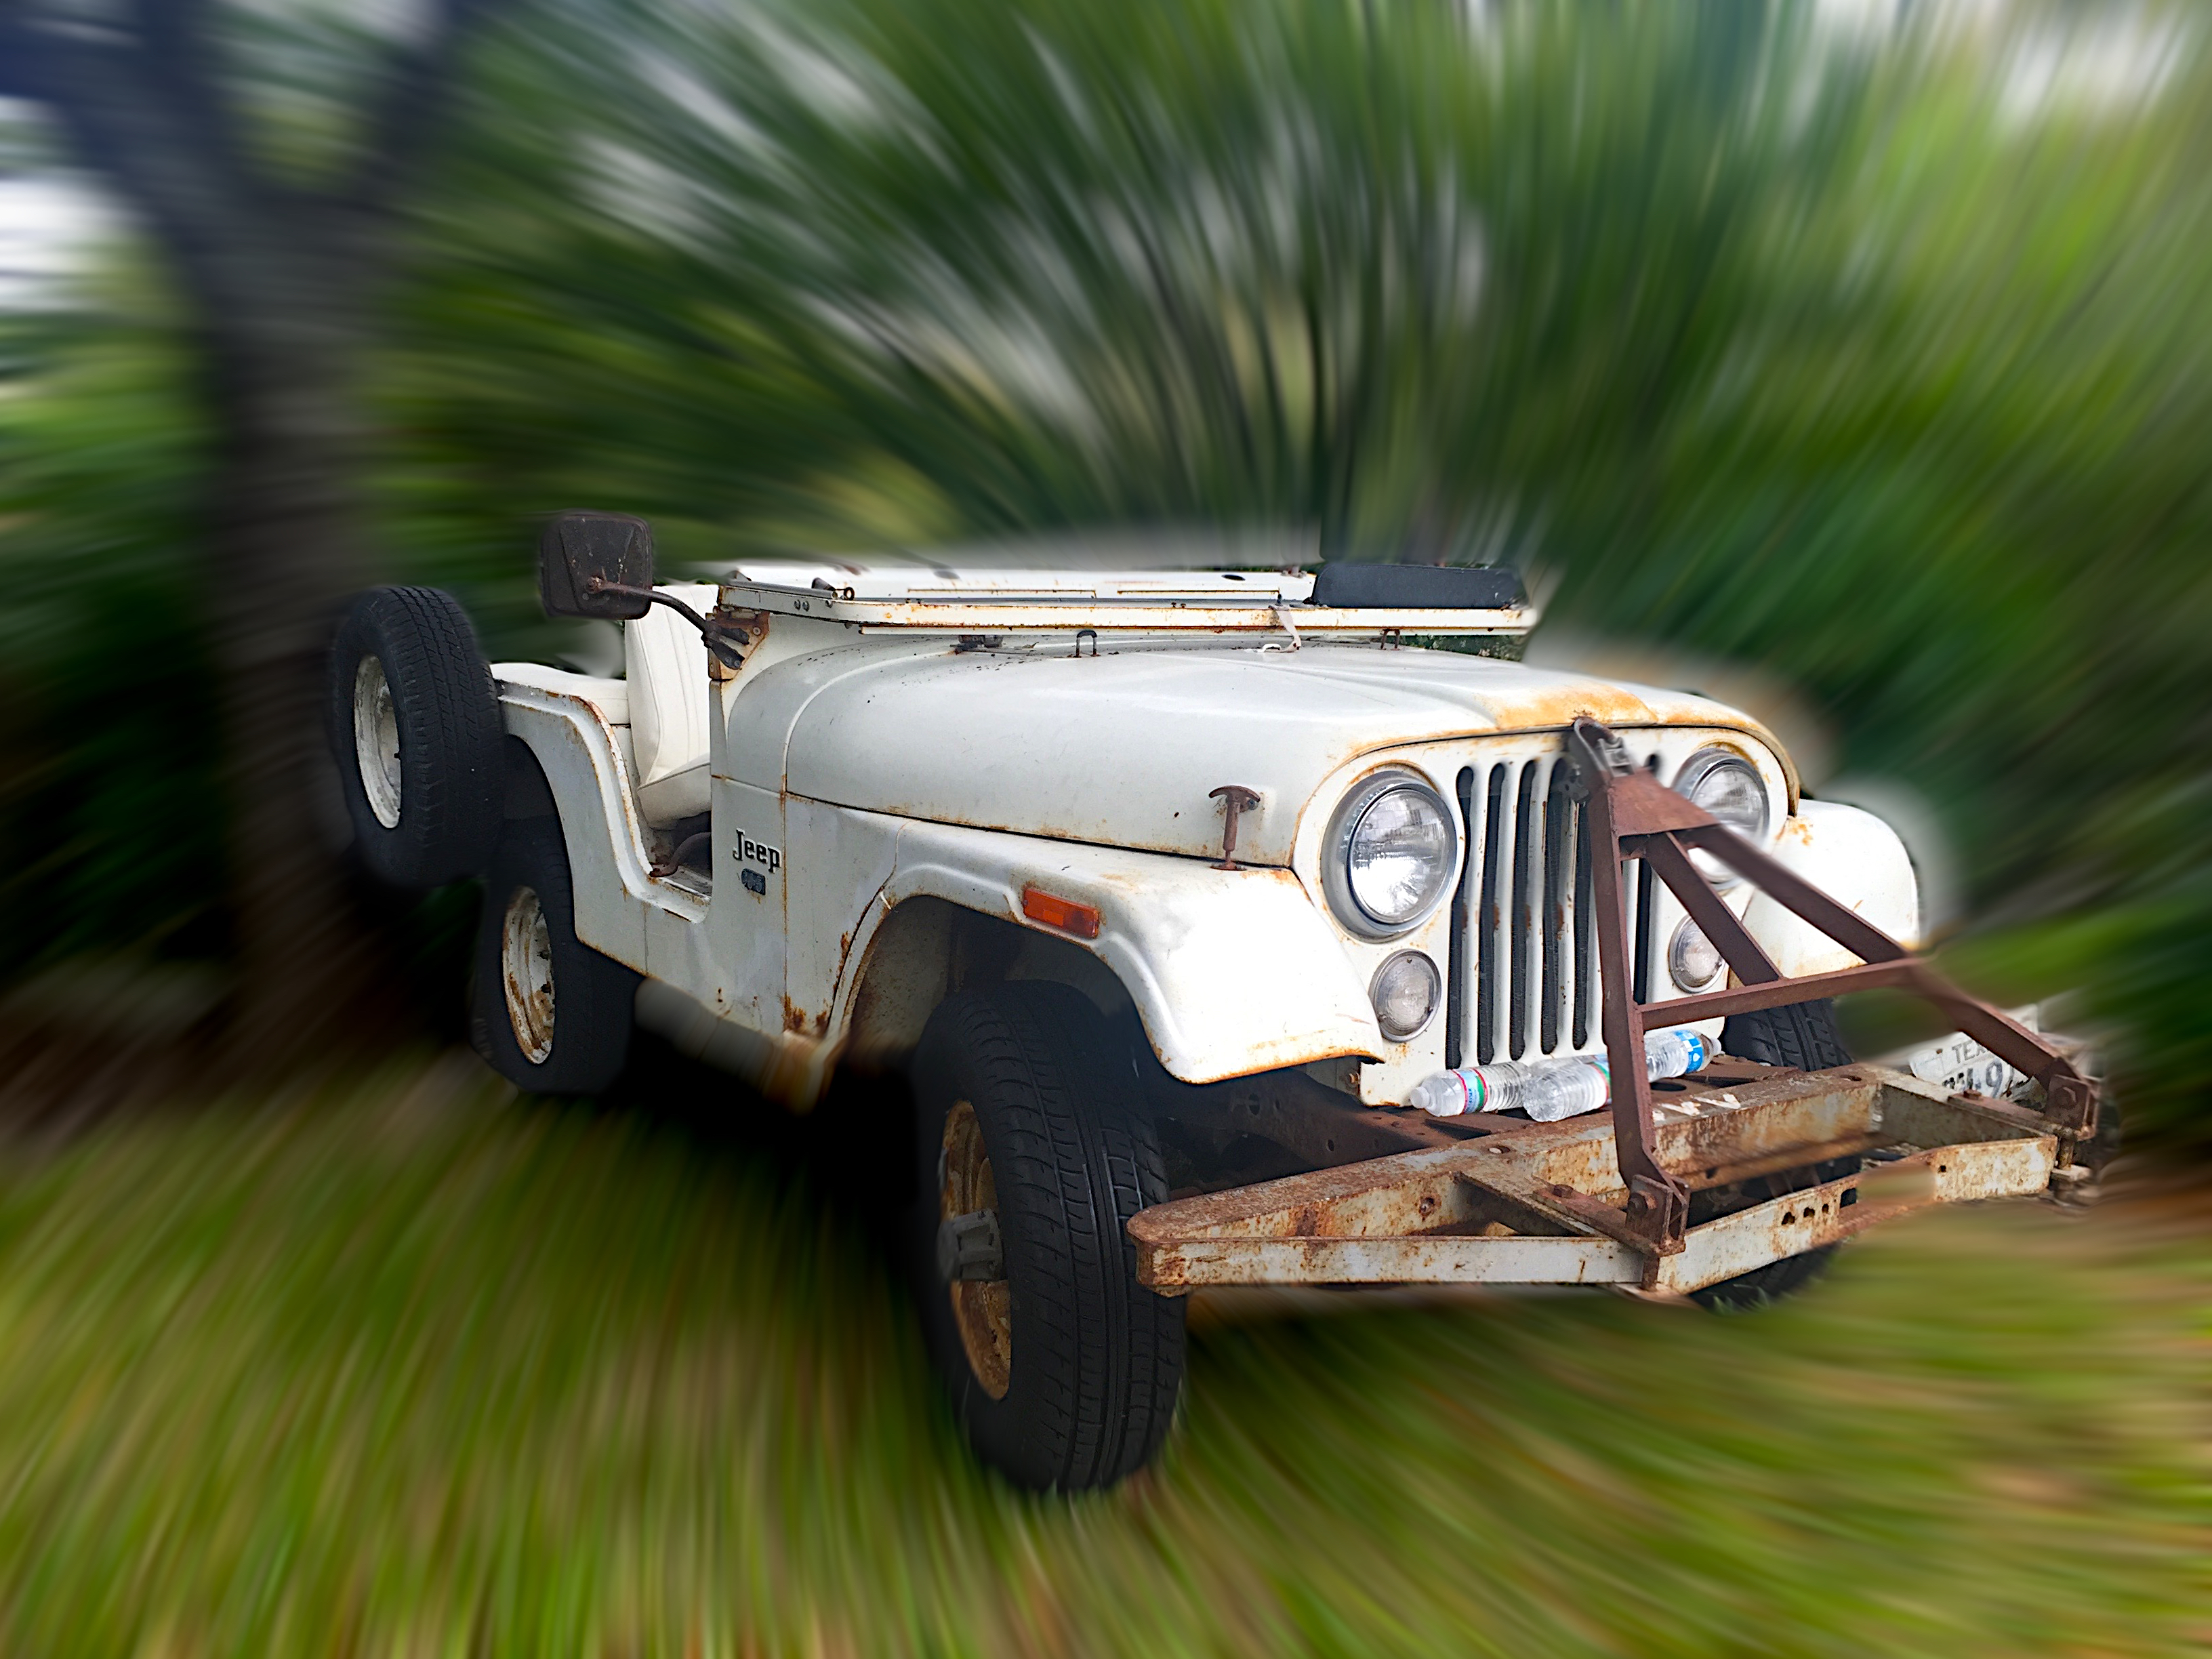
5) Once you are happy with the result, save your work back into Photos and you are all done!
Here is the image after all of those changes:
That’s it for today: 3 quick and easy tips to give your images a bit more punch. Thanks for following along, and please leave any questions or comments in the field below. Have fun out there!
Jim Nix is a traveler, photographer, and wanderlust sufferer. He aims to inspire others with his photos, tips, adventures and more on his blog . You can connect with him on Facebook, or YouTube.