In this tutorial, we’ll guide you through the easy process of transferring your purchased music, movies, television shows, ringtones, podcasts, and books from an iPhone or iPad to a Mac or Windows PC.
Even if you don’t sync your iPhone or iPad to your Mac or Windows PC, you might still want to make a backup of iTunes Store purchases you have made on your iOS device for safekeeping.
Note: With the introduction of so-called App Thinning technologies from iOS 9 or later, it is no longer possible to transfer purchased apps, as these downloads are now tailored specifically to your iOS device. For example, iPad-related assets are omitted from an app you have downloaded onto your iPhone.
Authorize the computer
Before you transfer purchases, ensure that your computer is authorized with the same Apple ID you used to make the purchases. To do that:
- Open the Music app on a Mac running macOS Catalina or later and click Account > Authorizations > Authorize This Computer. Next, use your Apple ID to sign in.
- If your Windows PC or old Mac has iTunes, open it and click Store > Authorize This Computer, enter your Apple ID and password, and click Authorize.

Note that if you purchased content from the iTunes Store on your iOS device using multiple Apple IDs, you’ll need to repeat the process and authorize your computer for each one in iTunes in order for all purchased content to transfer successfully. You can authorize a single computer running iTunes with up to five different Apple IDs.
Transfer purchased media from iPhone and iPad to a computer
Here are the steps for both iTunes and Mac’s Music app.
- Launch iTunes on your Mac or Windows PC.
- Connect your iOS device to the computer with a USB cable and wait until iTunes recognizes it.
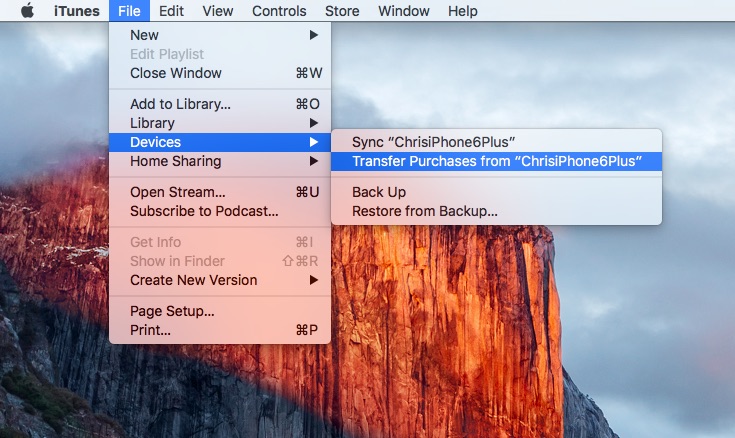
- Select File > Devices > Transfer Purchases from “[device name]” in the iTunes menu (on Windows, hold down the Control and B keys on your keyboard if the iTunes menu bar is not visible.
As mentioned, this feature works only for media content bought from the iTunes Store and does not apply to apps purchased on an iOS device running iOS 9 or later. Additionally, music imported from audio CDs and synced to your iOS device or content received from other sources and imported into apps on your iPhone and iPad won’t get copied from your device to the iTunes library using the aforementioned method (this data is, however, stored on your computer when you perform a backup of an iOS device in iTunes).
If you’re on a newer Mac with macOS Catalina or later:
- Connect your iPhone to your Mac with a cable. Trust the computer if you’re prompted.
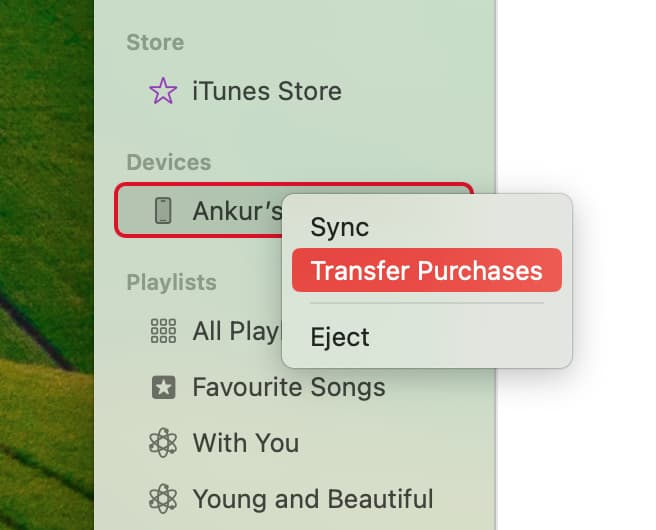
- Open the Music app, and you will see the iPhone in the left sidebar under the Devices heading.
- Right-click over the iPhone name and choose Transfer Purchases.
Enable Automatic Downloads
If you hate the idea of connecting your iOS device to your computer with a cable, you can enable Automatic Downloads in iTunes, Music, and TV. This will prompt iTunes or the media app to download all iTunes Store media purchases made on other devices each time you launch it.
Go to iTunes > Preferences and click the Downloads tab. Now tick the boxes next to Music, Movies, and TV Shows underneath the Automatic Downloads heading, and also enable the “Always check for available downloads” option.
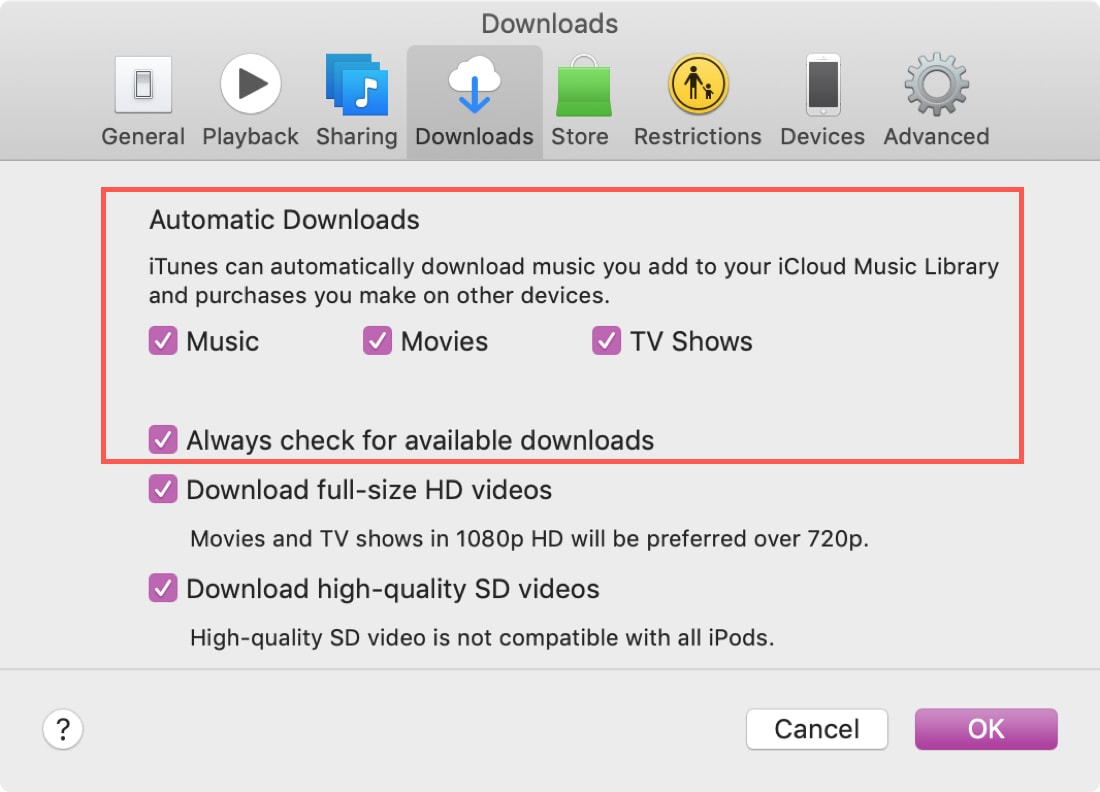
You can also tell iTunes to download video purchases in HD or SD resolution by ticking the respective boxes.
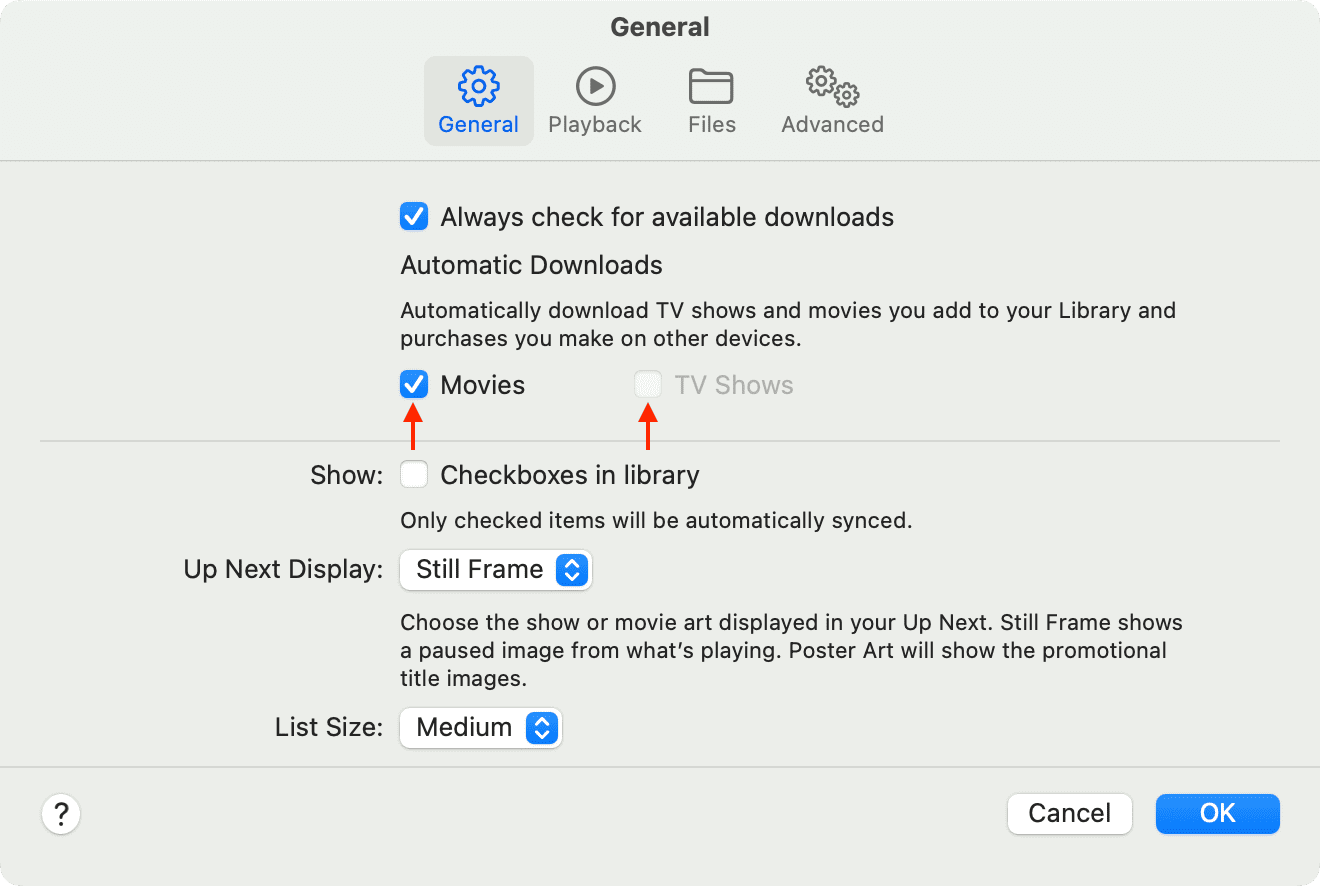
On newer Macs, you can go to Music or TV settings and check the box for Automatic Downloads.
Where does iTunes store my transferred purchases?
Your purchased music, movies, and TV shows are copied into your iTunes library. In addition, all podcasts from your device’s Podcasts app are copied into your iTunes library.
Related: How to move iTunes library to an external drive
What about my purchased books?
All your PDF documents imported into Books, along with electronic books purchased on the Books Store, are transferred to the Books app on your Mac. Rather than store this content in your iTunes library, the Books app puts your books and PDFs inside the ~/Library/Containers/com.apple.BKAgentService/Data/Documents/iBooks/Books folder on your Mac.
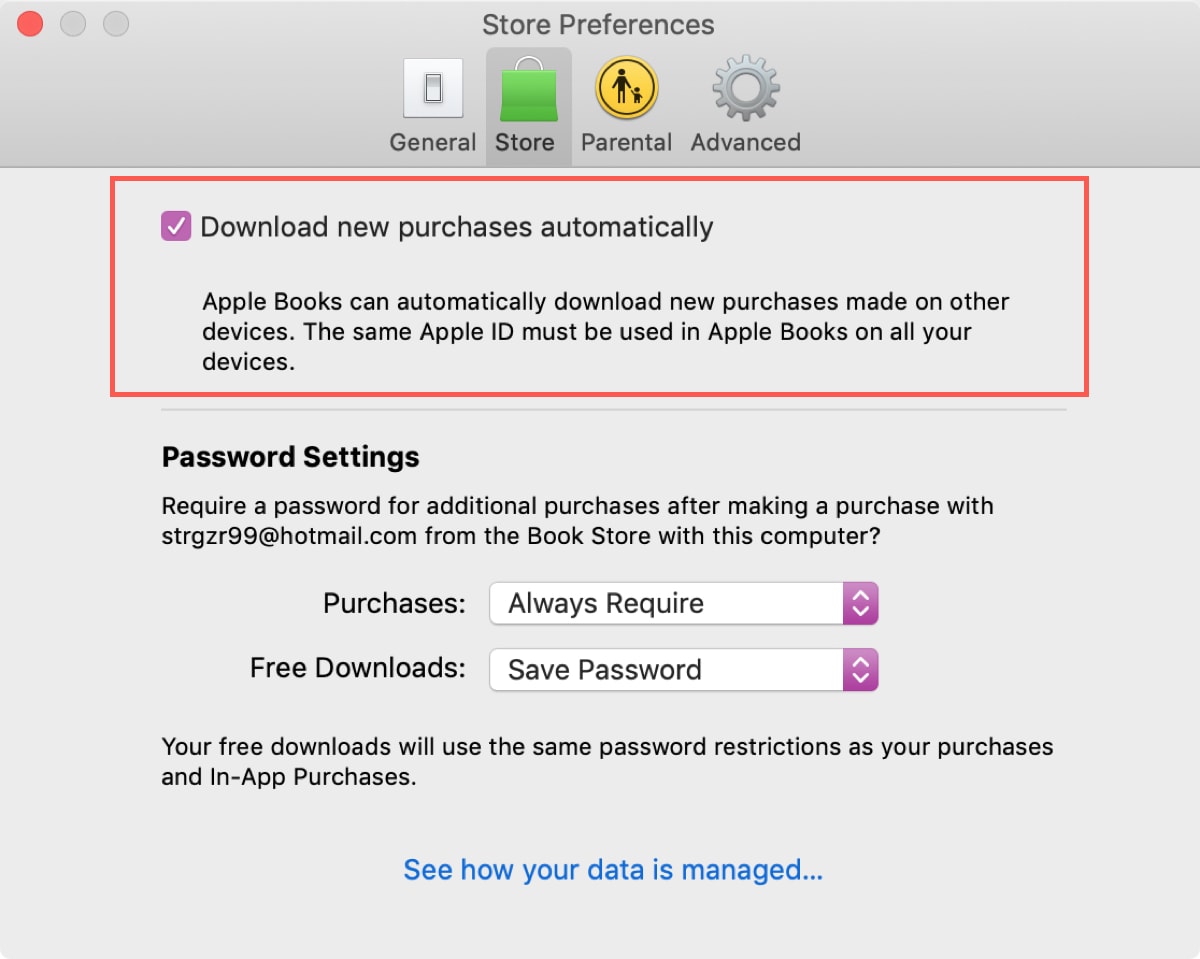
It’s advisable to enable automatic downloads for books purchased on other devices. To do so, open the Books app on your Mac, select Preferences in the Books menu, click the Store tab, and then tick the box next to “Download new purchases automatically.” On newer Macs, you will find this option under the General section.
Now, every time you open Books, the app will check for new purchases made on other devices and automatically download them to this computer.
You can also force this check manually by choosing Store > Check for Available Downloads in the Books menu. If you back up your Mac with Time Machine or a third-party backup solution, make sure to include in your backups both your iTunes library file and the aforementioned path for Books for Mac.
Check out next: How to back up your iPhone and iPad to iCloud or a computer