Starting with the release of iOS 9.0.1, Apple has increased your security by defaulting to 6-digit passcodes on Touch ID devices. “If you use Touch ID, it’s a change you’ll hardly notice,” says Apple.
Compared to 4-digit passcodes which have 10,000 possible combinations, their 6-digit counterparts strengthen your security with one million possible combinations, meaning 6-digit passcodes will be a lot tougher to crack.
Non-Touch ID iPhones and iPads still default to less secure 4-digit passcodes, however. You can enable a 6-digit passcode with a quick trip to Settings, here’s how.
About iOS passcodes
Setting up a passcode is your first line of defense against unauthorized access. If you own an iPhone 7 or later, iPad Air 2 or iPad Pro or later, you can use Touch ID but only in conjunction with a passcode.
You will need to enter your passcode if you:
- Turn on or restart your device
- Slide to unlock your screen on devices without Touch ID
- Make five failed Touch ID attempts in a row
- Haven’t unlocked your device in more than 48 hours
- Enroll or delete fingerprints
- Open Touch ID & Passcode in the Settings menu
- Update to a new iOS version
- Erase your device
On the iPhone 3GS and later, all iPads and third-generation iPod touch and later, setting up a passcode enables data protection with built-in hardware encryption that protects the hardware encryption keys with your passcode.
“This provides an additional layer of protection for your email messages attachments, and third-party applications,” says Apple.
How to enable 6-digit passcode on non-Touch ID devices
As mentioned, Touch ID-enabled iPhones and iPads with iOS 9.0.1 or later have six-digit passcodes enabled by default. But if you own an older device without Touch ID, or are still on iOS 9.0, you can transition to stronger passcodes with just a few taps.
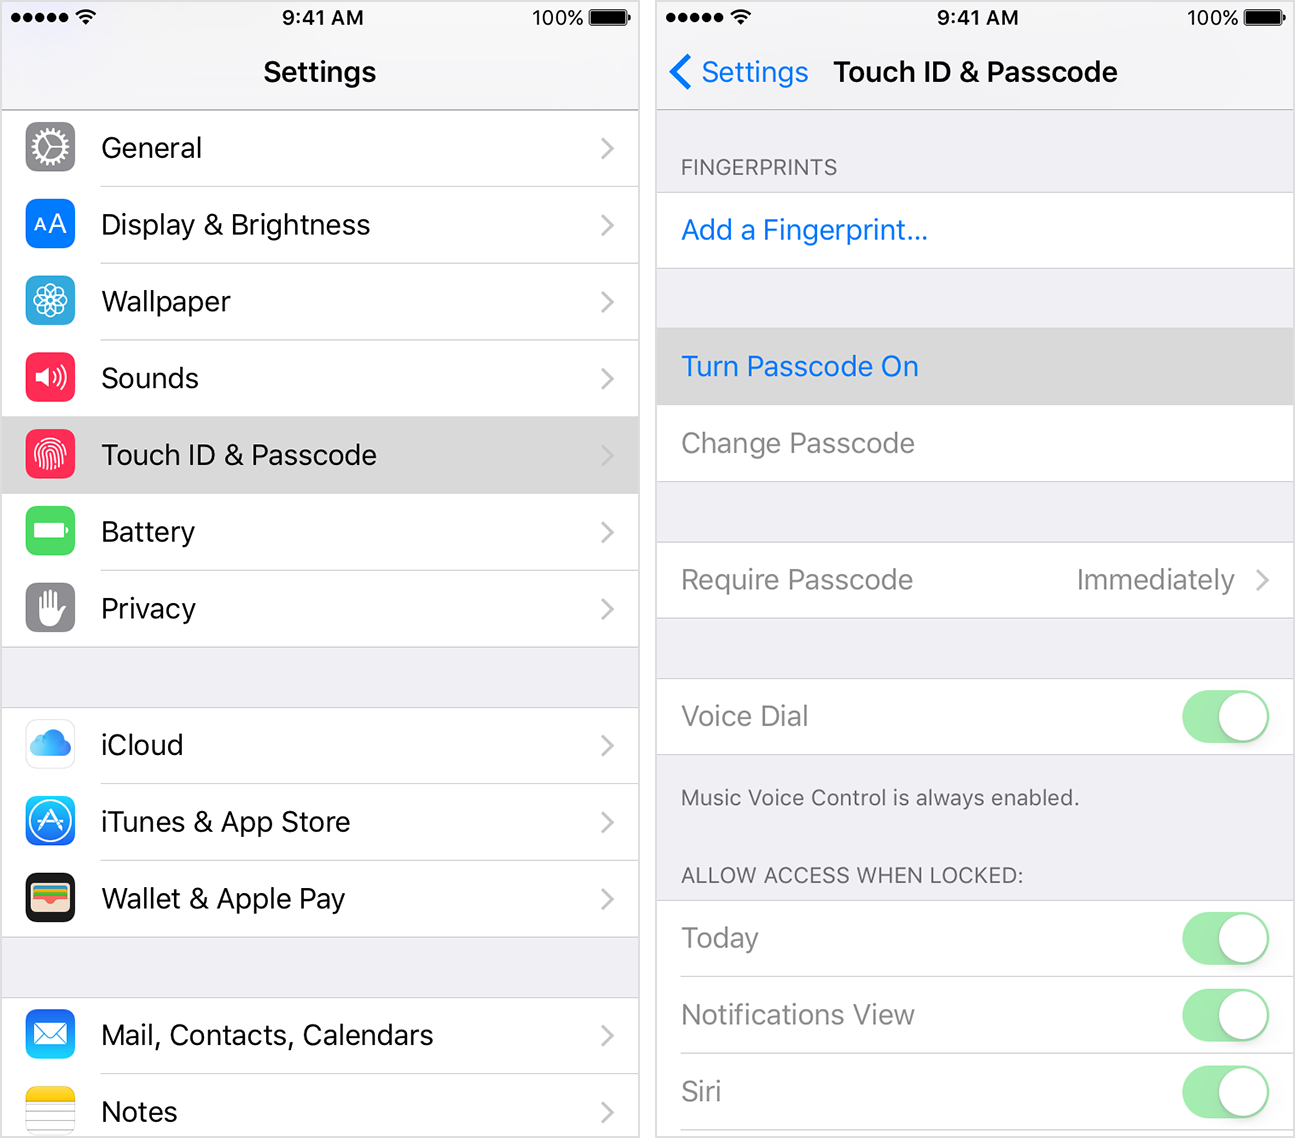
Step 1: Open Settings on your iPhone, iPod touch or iPad.
Step 2: Navigate to the Passcode section on your non-Touch ID device, or tap on Touch ID & Passcode on Touch ID-enabled iOS devices.
Step 3: Tap the Turn Passcode On option if you haven’t set up a passcode on your device yet.
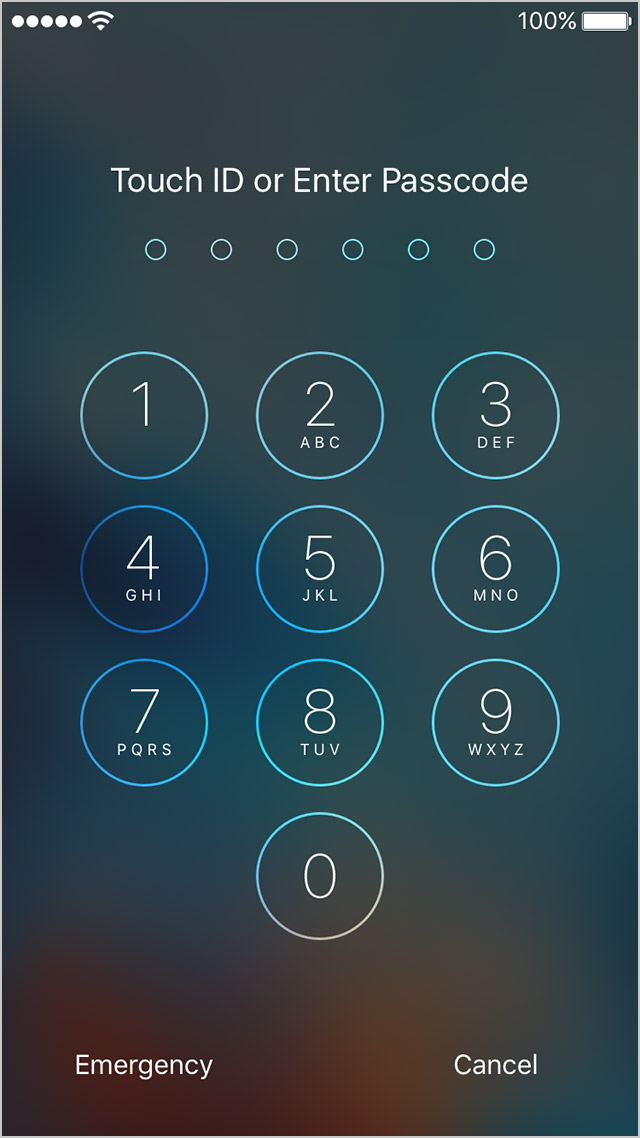
Step 4: Choose your six-digit passcode on the next screen.
Step 5: Re-enter your passcode again to confirm it and activate it.
Other passcode settings
To change your existing passcode, tap Change Passcode. You’ll need to enter your old passcode before typing in a new one. You can also turn off passcode protection, which you’re totally discouraged from doing if you value your privacy and security.

To further bolster your security, tap Require Passcode and choose whether iOS will ask for your passcode Immediately, After 1 minute, After 5 minutes, After 15 minutes, After 1 hour or After 4 hours.

Shorter times, of course, are more secure.
“Immediately” means that a passcode will be required as soon as you lock your device, or it enters sleep after a predetermined period of inactivity, as defined under Settings → General → Auto-Lock.
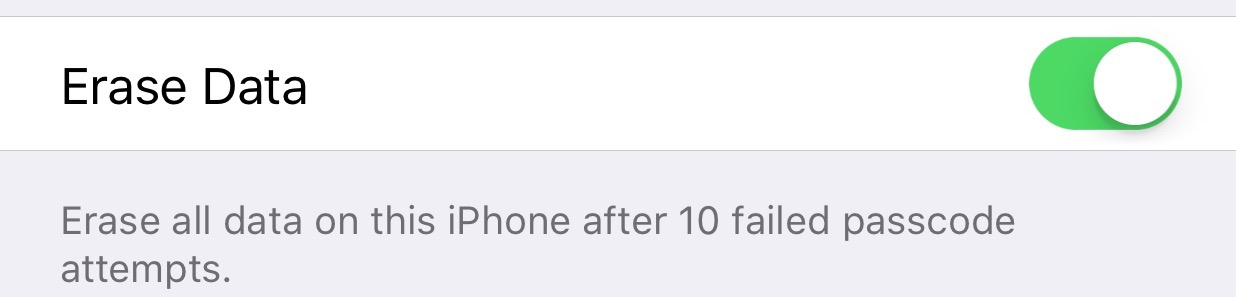
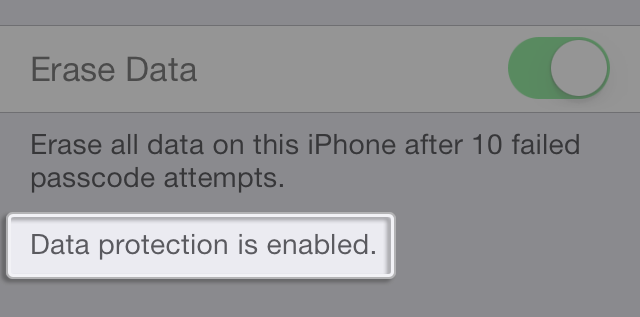
If you are using Touch ID to unlock your device, only the Immediate option will be available in the Require Passcode section. To make iOS erase all data on this device after ten failed passcode attempts, flip the Erase Data switch to the ON position.
Further below, you can allow or disallow access to the following features when your device is locked: the Today section within the Notification Center, the Notification Center itself, Siri, Wallet and the Reply with Message feature.
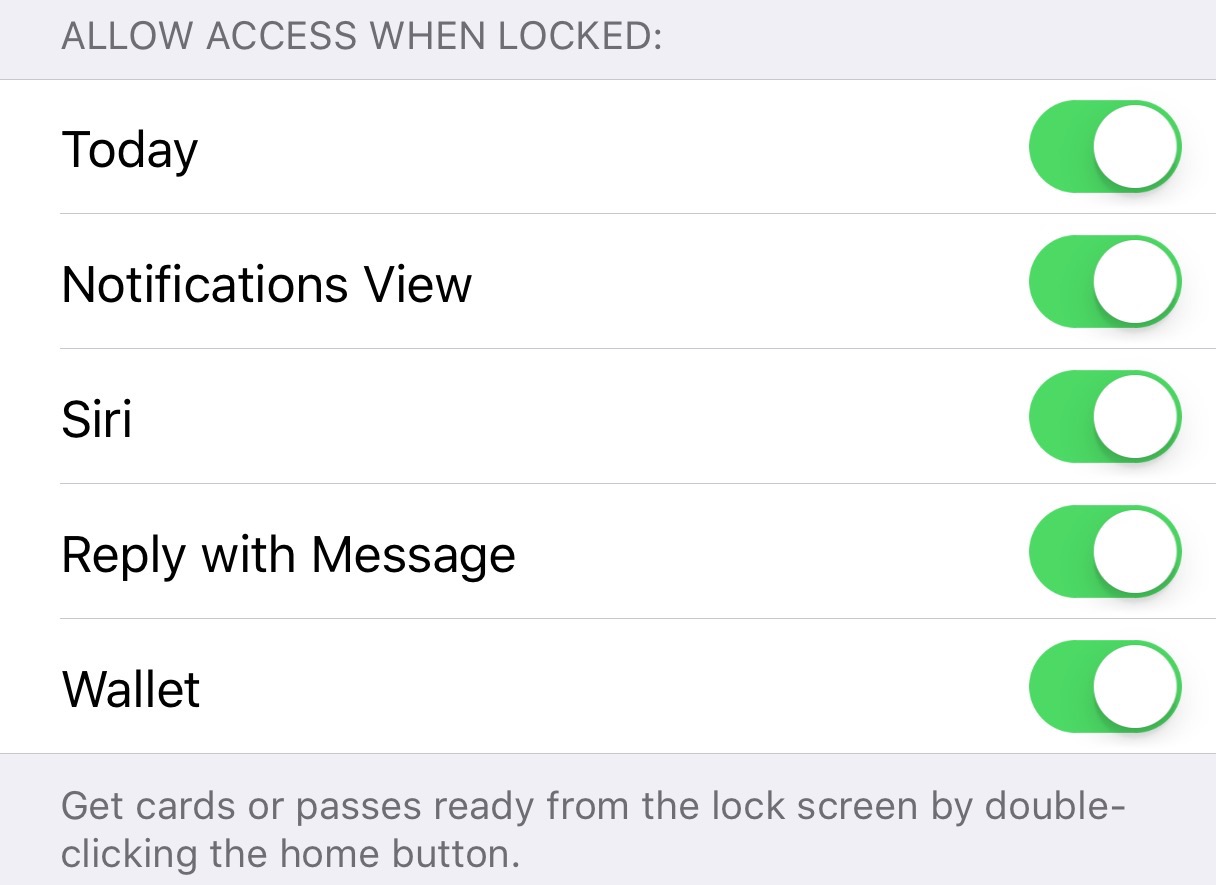
Disabling Siri on the Lock screen is a preferred security precaution which prevents anyone with access to your device to ask Siri to message people, pull contact information and so forth.
To switch between six and four-digit numeric codes, a custom numeric code or a custom alphanumeric code for your passcode, tap on Passcode Options.
Keep in mind that you must always punch in your passcode after restarting an iOS device, even if you have set up Touch ID to unlock it with your fingerprint.
Passcode tips
To maximize passcode security, do the following:
- Set Require Passcode to Immediately.
- Disable Simple Passcode to use a longer, alphanumeric passcode that’s inherently more secure, or a six-digit passcode.
- Enable Erase Data to automatically erase the device after ten failed passcode attempts.
Optionally, choose which services can be accessed from the Lock screen. Keep in mind that you don’t need to enter your passcode when answering a call from the Lock screen.
Troubleshooting passcodes
Can’t change passcode settings?
Sometimes, iOS’s Passcode settings might be unavailable, grayed out or dimmed. This can happen if you’re using a configuration profile that requires a passcode, which is common with business or education devices. You will need to contact your company’s administrator to give you access to the Passcode section.
Entered the wrong passcode too many times?
If you enter the wrong passcode too many times, your iPhone, iPod touch or iPad will disable itself temporarily and a message will appear, saying that the device is disabled.
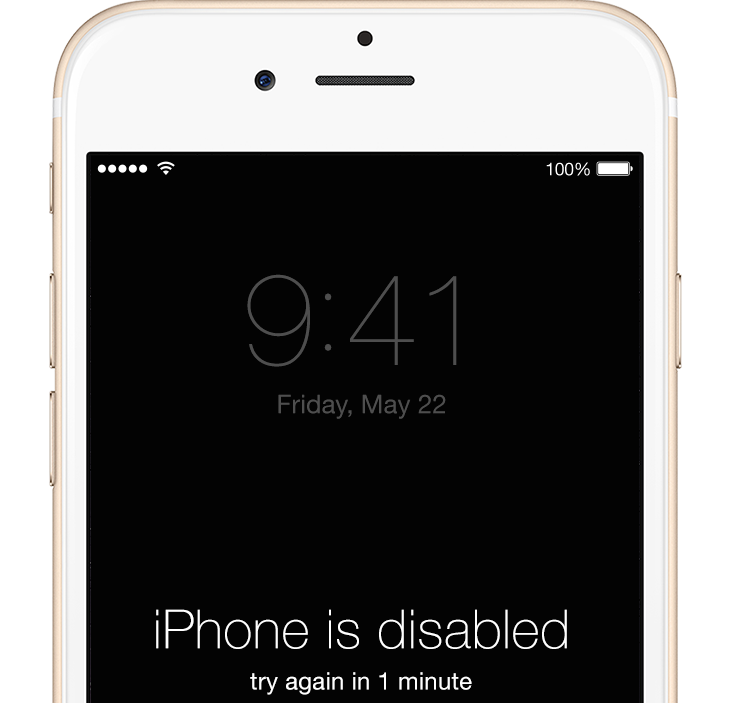
There’s not much you can do at this point other than erase the device, which deletes all of your data and settings, and restore it from the most recent iTunes or iCloud backup. It’s good practice to force a manual backup before changing your passcode, just in case you have a restore point in case you forget it.
Entered the wrong passcode ten times?
After ten failed passcode attempts, iOS will wipe all data on your device if the Erase Data switch is set to the ON position in your Passcode settings. Otherwise, it will disable itself (see the previous section).
Forgot your passcode?
You must erase your device and set it up as new, or restore it from a previously created iTunes or iCloud backup, in order to remove the passcode. “Unless you made a backup before you forgot your passcode, there isn’t a way to save your device’s data,” Apple cautions.
How to verify if Data Protection is enabled
As mentioned, iOS uses your passcode to encrypt both your data and the hardware encryption keys with it. To verify that data protection is enabled after the passcode is set, scroll down to the bottom of the Passcode screen within Settings (or Touch ID & Passcode on Touch ID-enabled devices) and check that “Data protection is enabled” is visible.
Got other passcode tips to share?
We’re all ears…
If you like this little tip, share it on social media and email us your feedback and tutorial ideas at tips@iDownloadBlog.com.