Pictures play an important part in putting together a compelling business presentation or a detailed school report, and to help, this tutorial shows you how to add images to your document, presentation, or spreadsheet in the Google Docs, Slides, and Sheets apps on your iPhone or iPad.
The steps are the same across all three Google apps, and we will be using Google Slides to demonstrate the steps below.
Note: This feature works offline — images you add and changes you make will be uploaded to Google’s servers when your phone reconnects to the internet.
Add a photo to Google Slides, Docs, and Sheets on iOS
- Open the app (Slides | Sheets | Docs) on your iPhone or iPad and go to the concerned document. You can start editing a current document by tapping it once, followed by a double-tap. Alternatively, tap the plus button to create a new file.
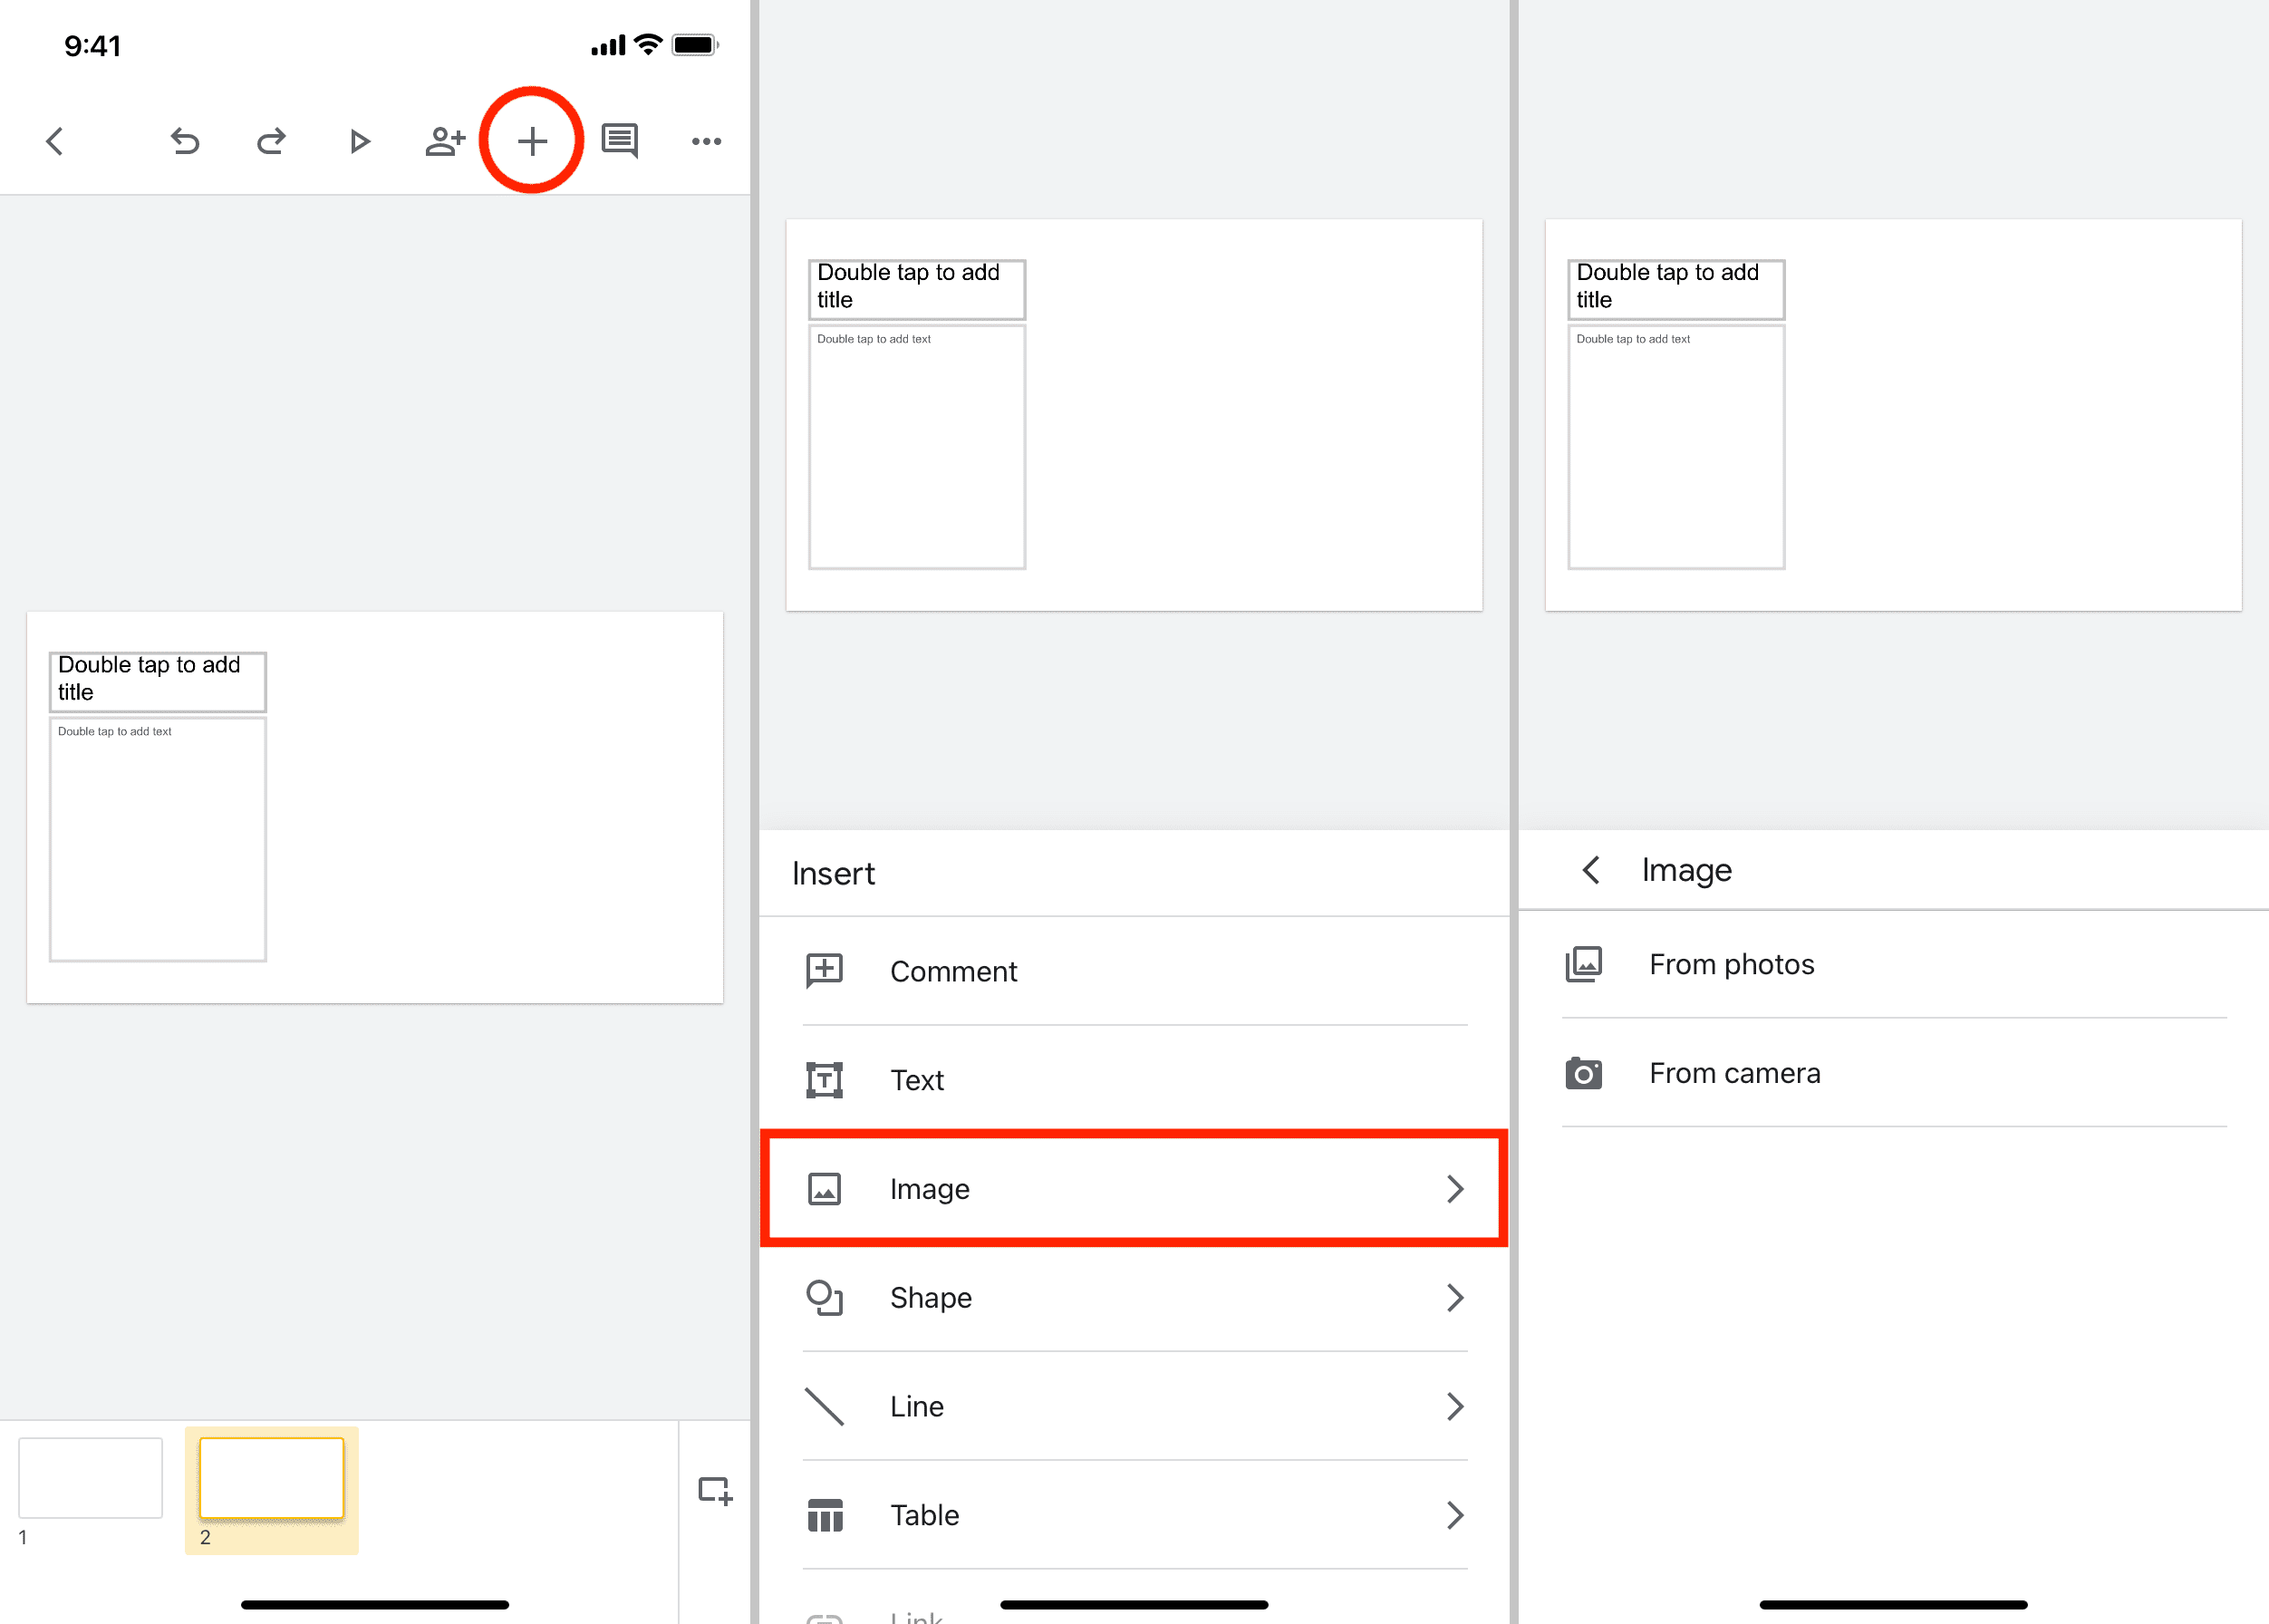
- When you’re on the editing screen, tap the plus button (+) from the top.
- Now, you have the option to insert a comment, text, image, shape, line, table, etc. Pick Image.
- Tap From camera if you want to take a picture right now and use it. Or tap From photos if the image is saved in the Apple Photos app. I’m choosing Photos.
- Tap to select one or more images from the photo picker and hit Add.
The selected image(s) will pop right into your document, slide, or spreadsheet. You can now work with it or edit it further as desired (explained below).
Edit the image in Google Docs, Slides, and Sheets
After adding the photo to your slide, document, or spreadsheet, you can tweak it to make it suitable for the job.
However, not all photo editing tools are available across all three apps. For instance, you may not be able to edit the image added to a cell in Google Sheets. Similarly, the photo editing options inside Google Docs are thin as compared to Google Slides (which I have used in the steps below).
With that said, here are your editing options and how to use them.
For most of these tools, you will have to first start by tapping the image to select it.
Reposition: Touch the photo and drag it to another spot.
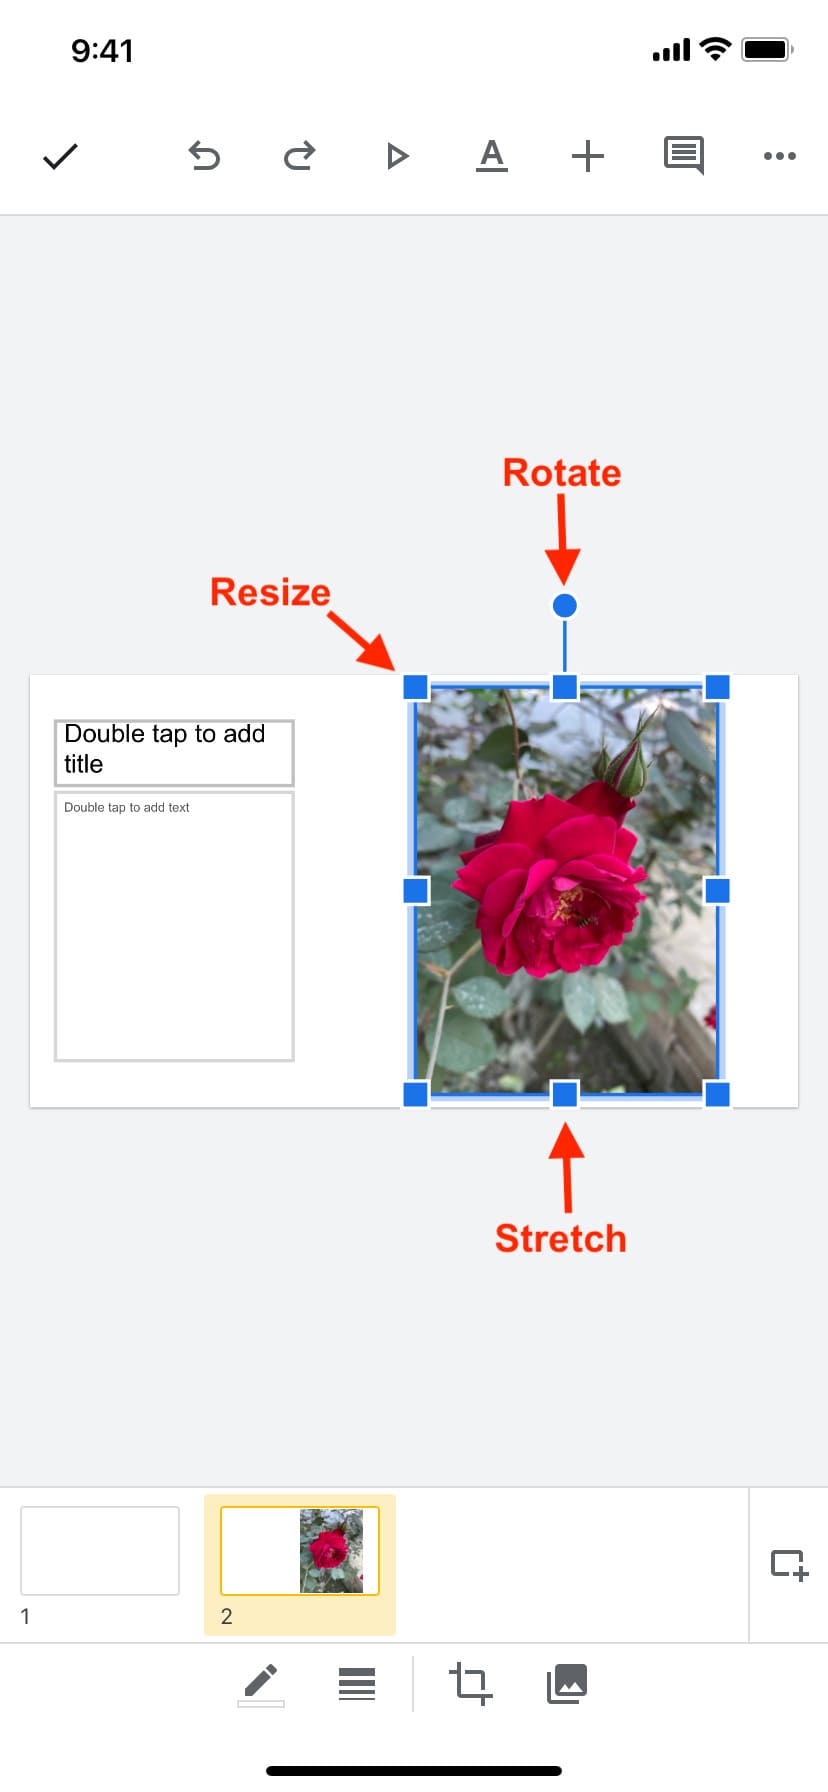
Rotate: Touch the dot sticking at the end of the axle and rotate it to turn your image to the desired degree.
Resize: Use the four blue tiny squares on the corners and drag them in or out to resize the image.
Stretch or shrink it: Drag the tiny blue squares on the four edges of the image to change how it appears.
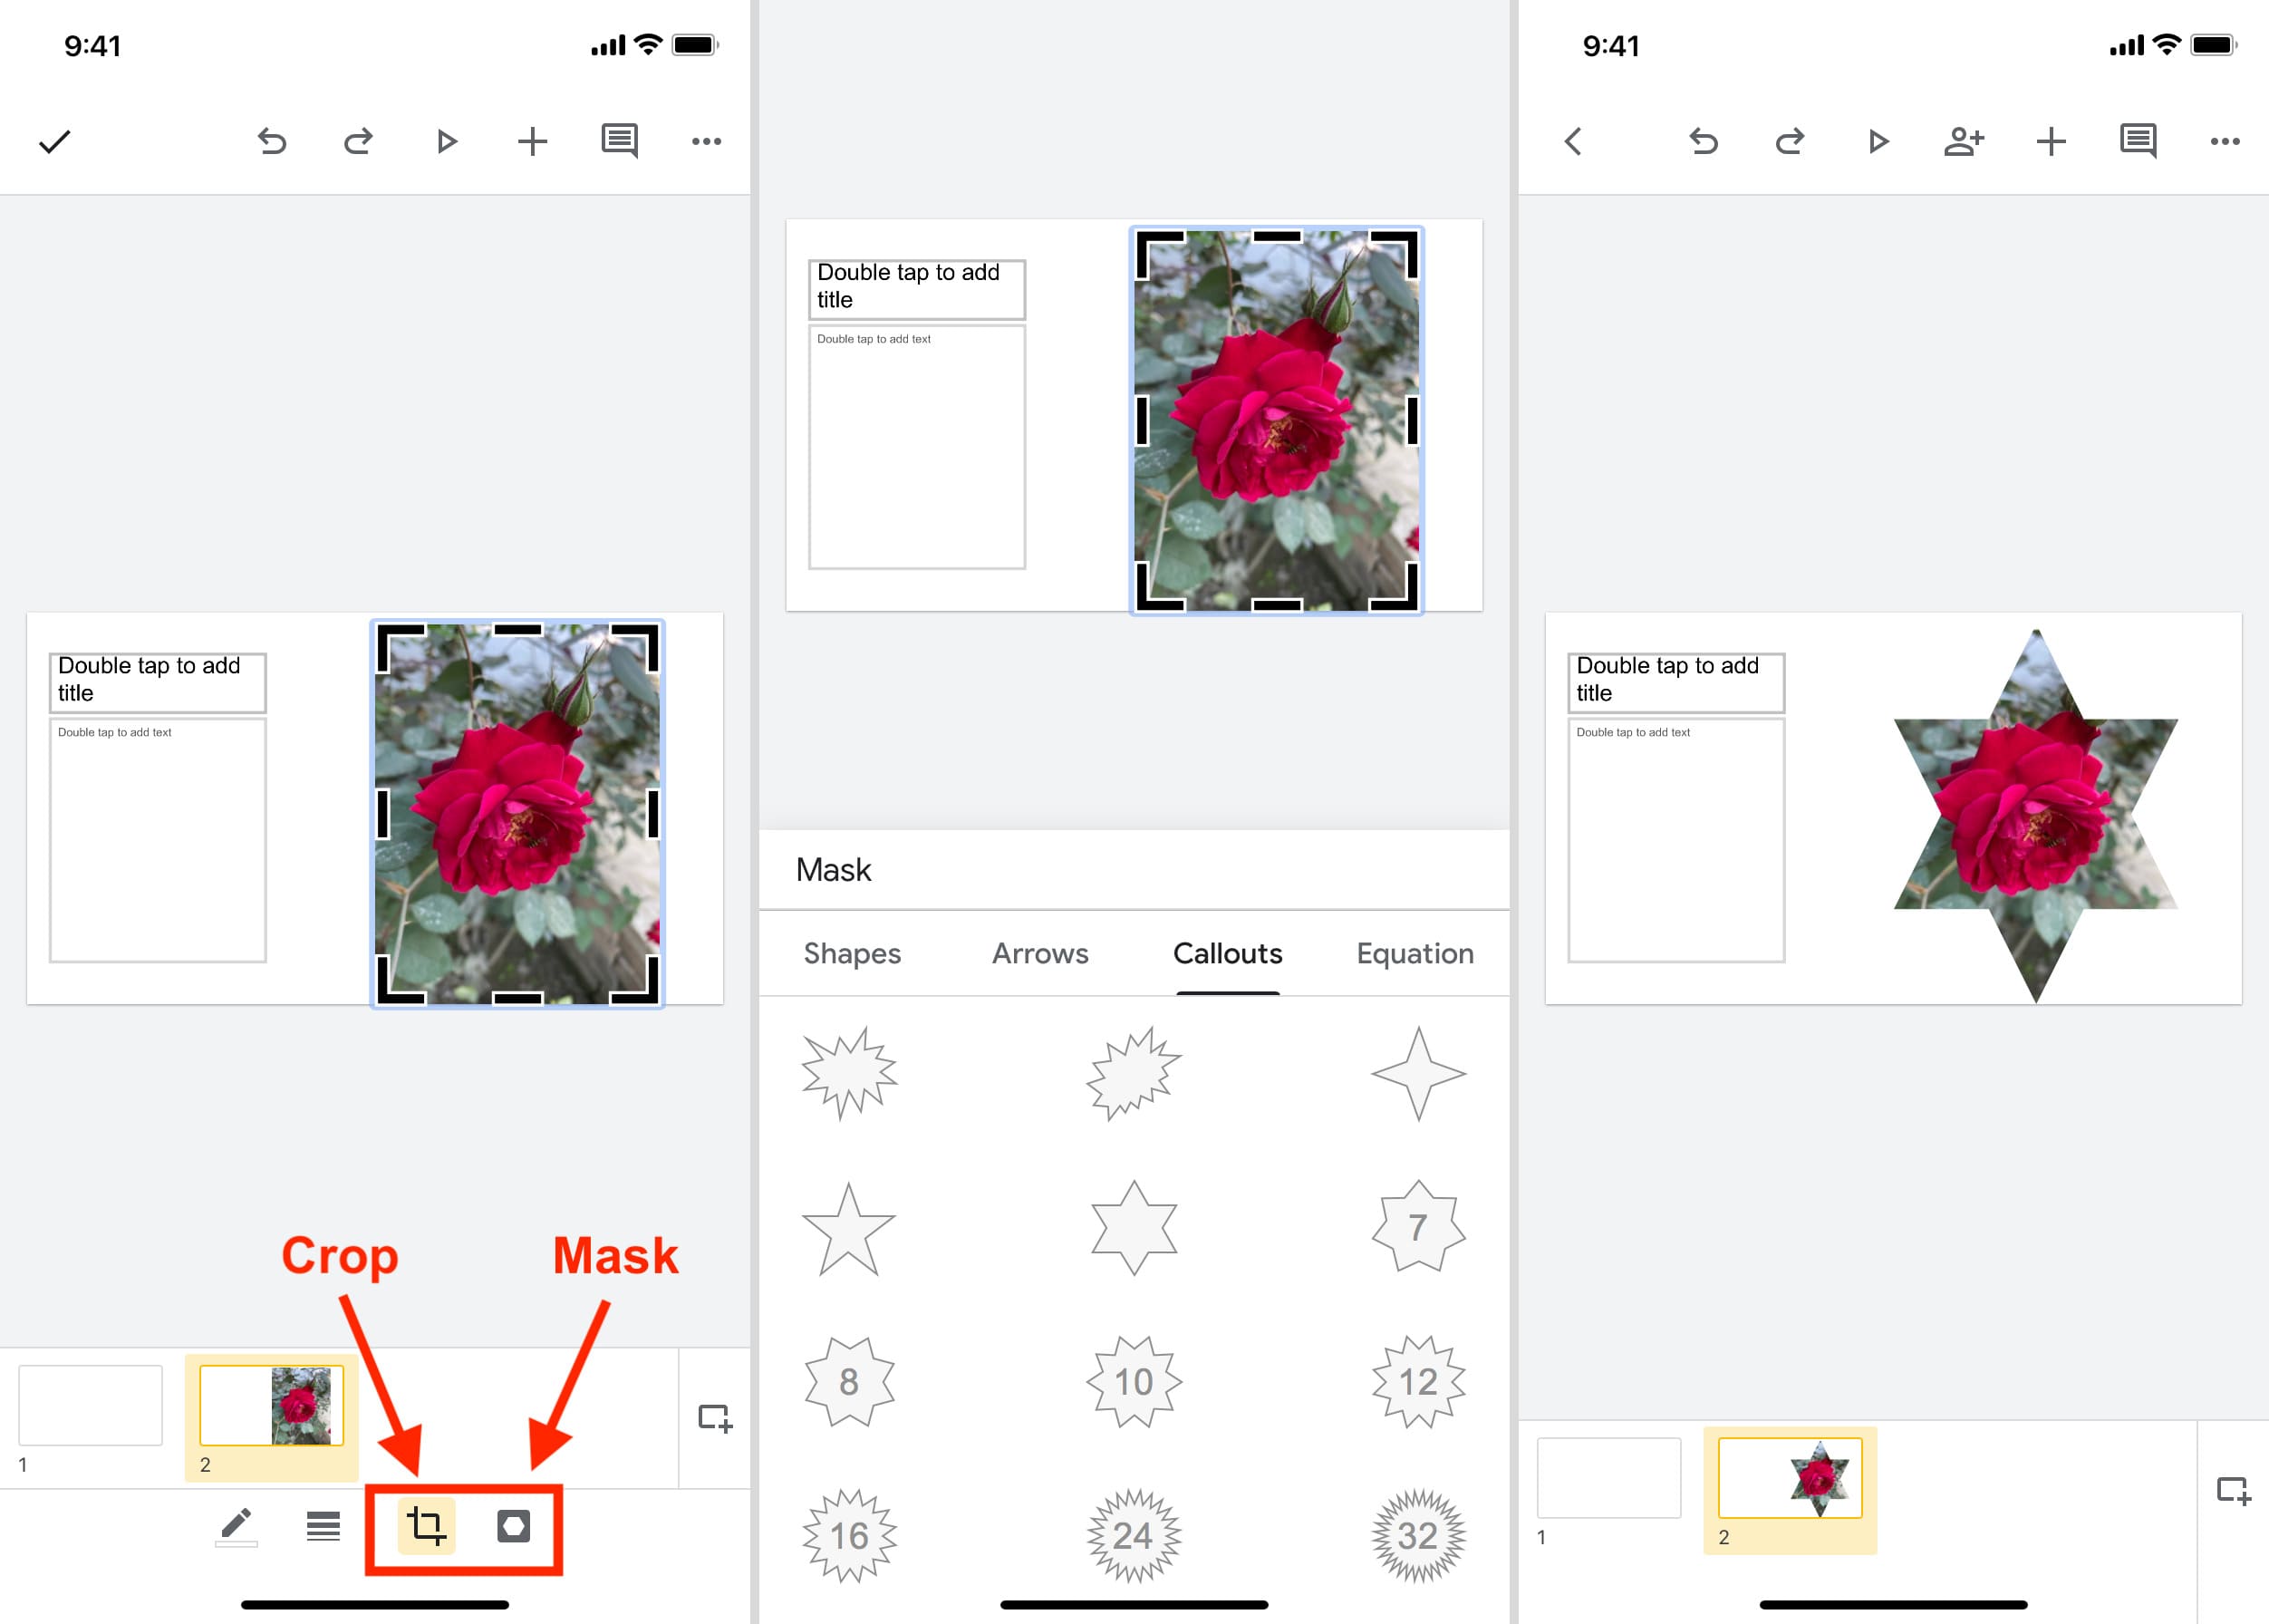
Crop: Double-tap the image or tap the crop button. Now, use the black shapes to trim out the unneeded parts.
Crop into specific shapes: Double-tap the image to enter crop mode. Next, tap the mask button and choose a shape. Finally, tap the check mark button or tap anywhere outside the image to crop it into the chosen shape.
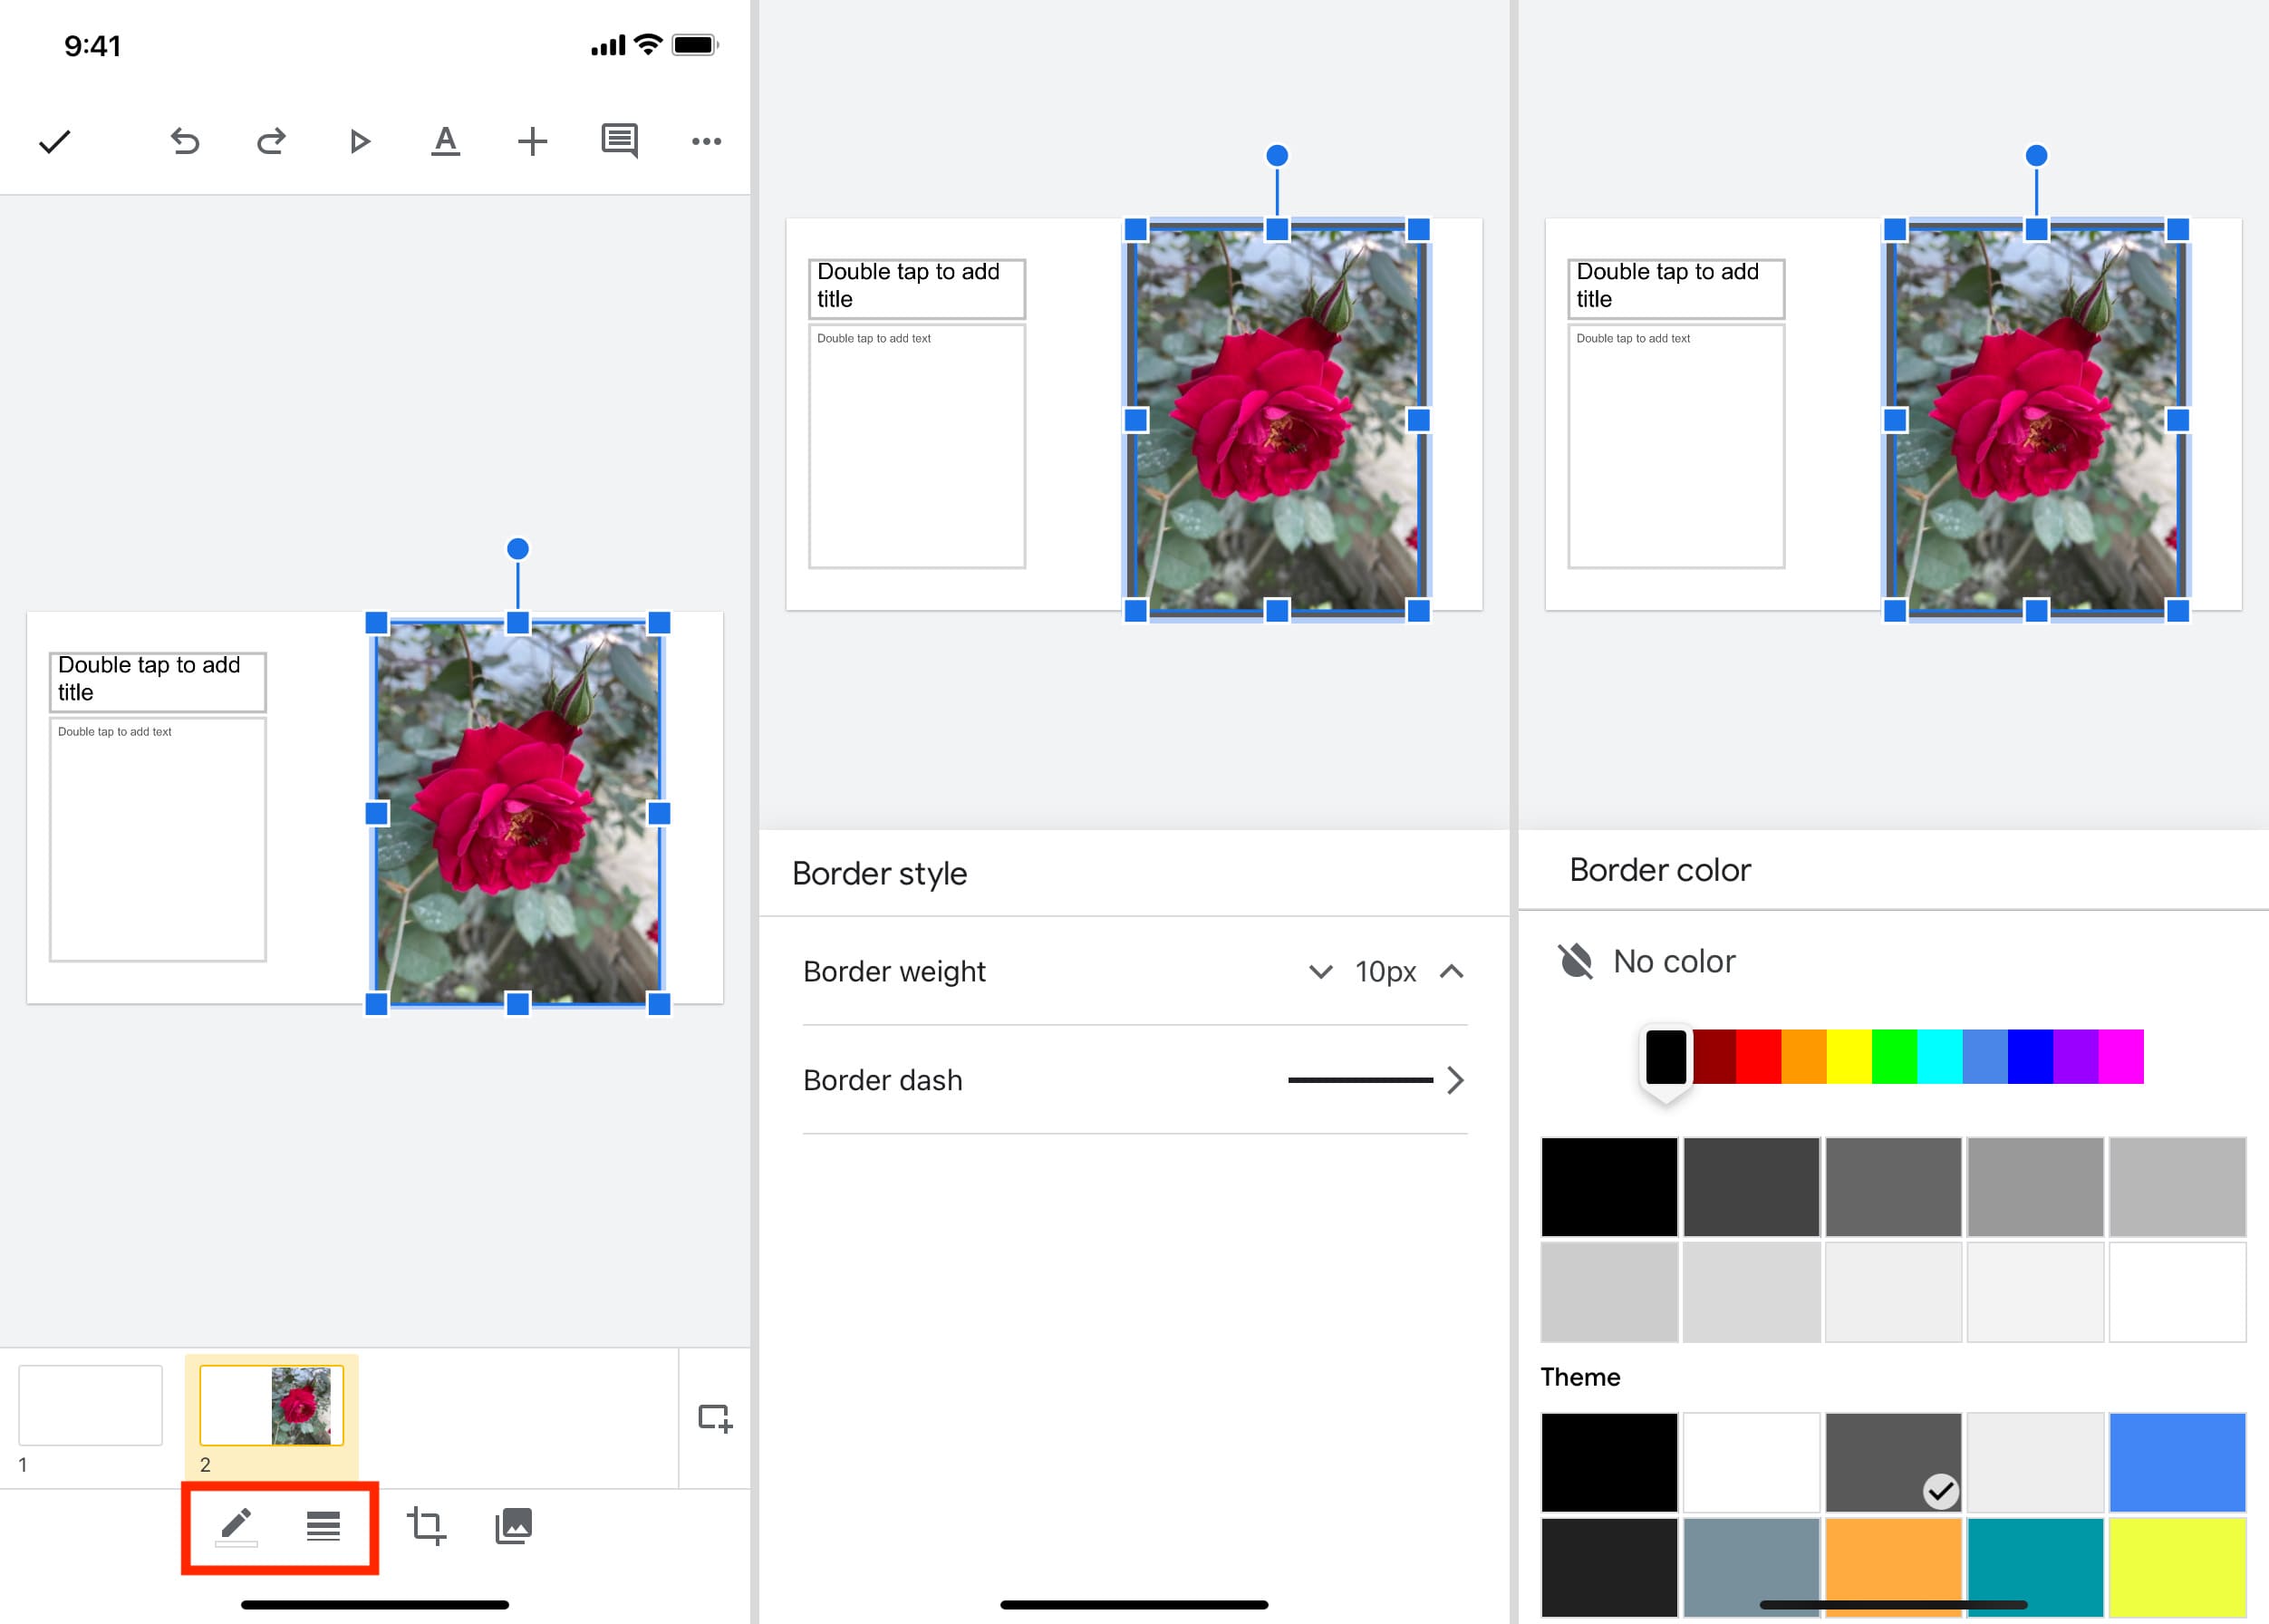
Add border: With the image selected, tap the border icon to set a border weight and pick a border style. After that, you can tap the pen icon to further change the border color and theme.
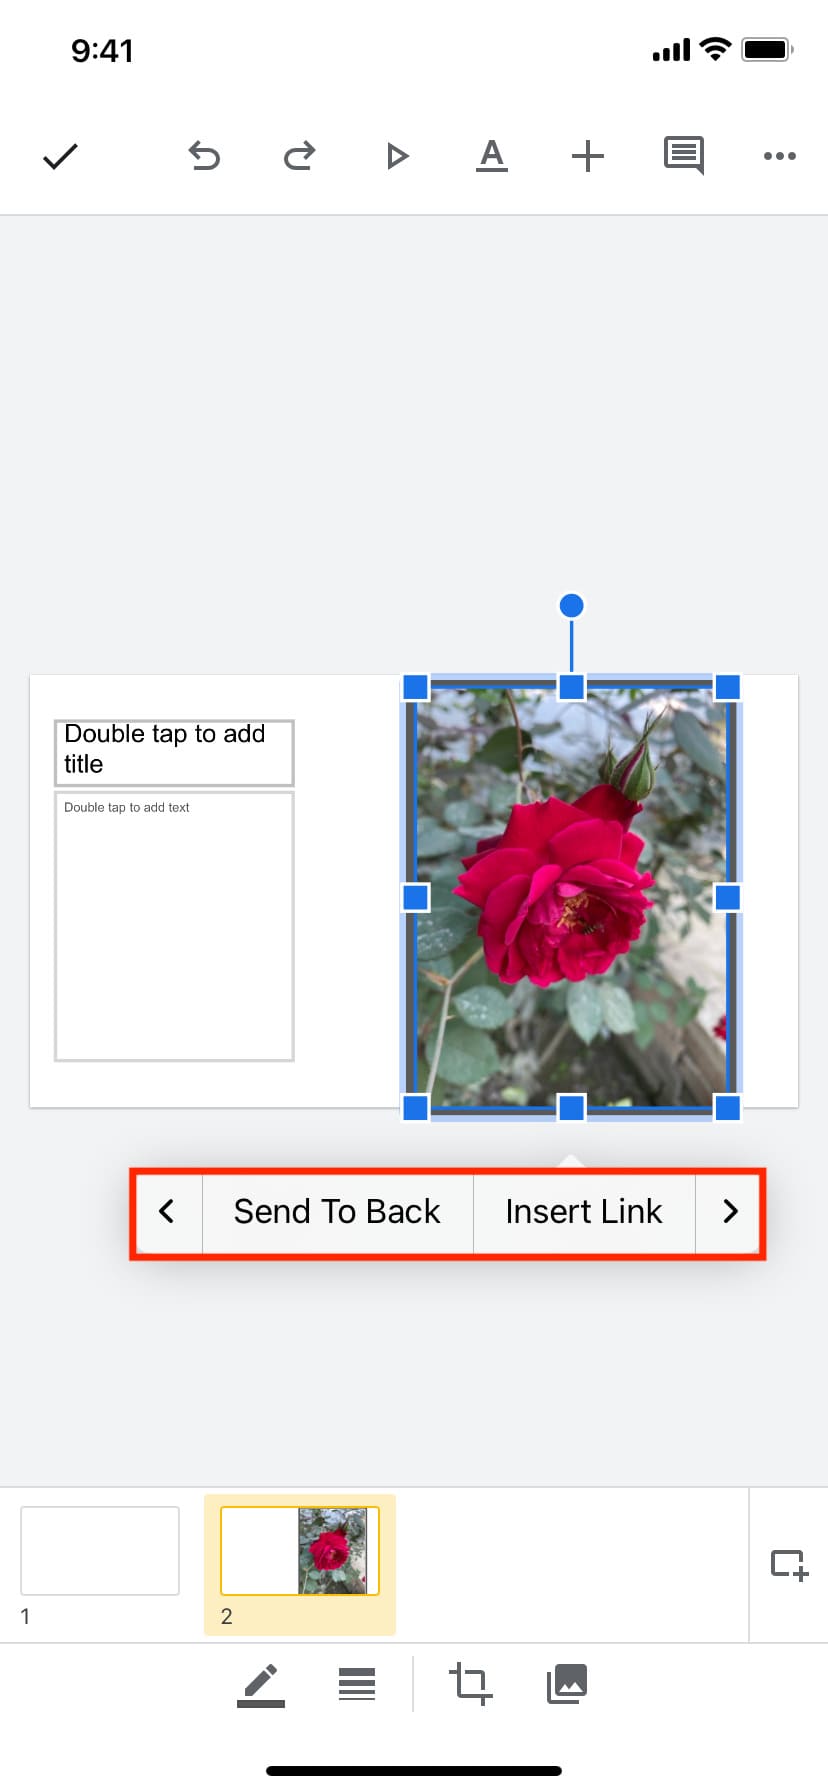
Insert URL over an image: Tap the image to bring up the iOS-style thin menu strip. From here, use the Insert Link option.
Move the image to the back or front: If you have multiple layers of images or objects, use the Move To Front or Send To Back options on the thin menu strip.
Tip: Want to copy an image from one slide to another? Touch & hold an image added to one slide, then tap the other slide thumbnail at the bottom, and drop the image there to copy it.
Check out next: How to add photos, music, or movies to Pages, Numbers, and Keynote documents