Venturing into the depths of iTunes is no longer an activity for the faint-hearted, as Apple’s gold mine is famously becoming more convoluted with every update. It is by no means impossible to keep up with the changes, but staying on top of every small cosmetic shift does pose a decent challenge today.
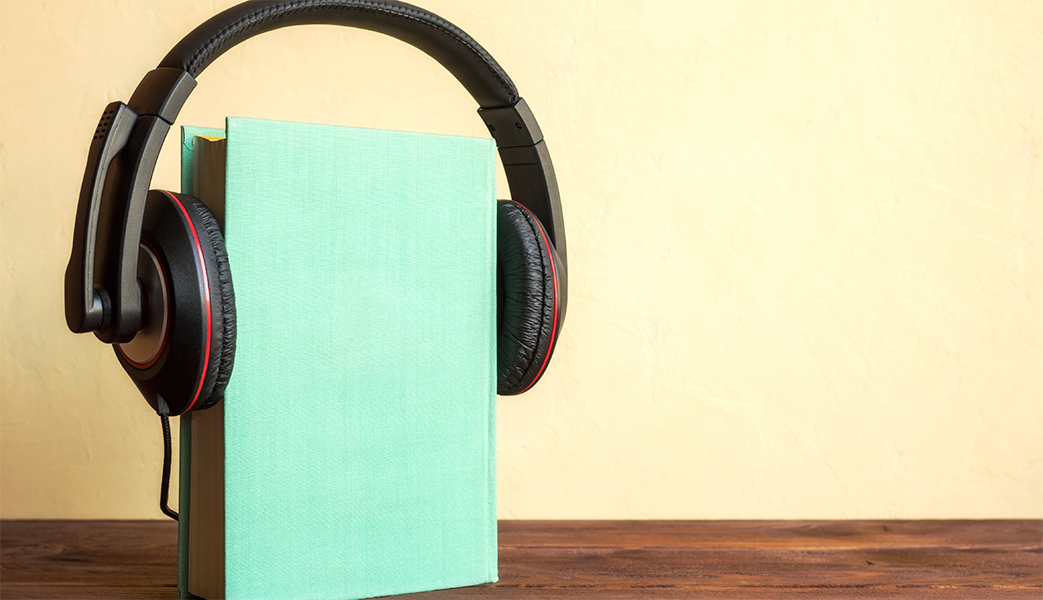
As somebody very fond of the spoken word on iTunes, I can attest that this general rule holds true for audiobooks as well. So as I was fiddling around with some old school CDs the other day and trying to move audio files within my iTunes library to the Audiobooks tab, I noticed my old methods were already outdated again. If you’re not up to speed on iTunes, here’s a refresher on how to get your talking book to properly identify as Audiobooks inside the application, followed by an encore for CD enthusiasts with regard to joining tracks during import.
How to convert Music to Audiobooks in iTunes
The following tutorial can be mirrored with all types of imports (CD, your hard drive, external hard drives) and most file formats (MP3, m4a, m4b). If you have files that were purchased through iTunes, these are alterable too. The exception is downloaded Apple Music files, which are not qualified for this fix.
With that out of the way, here is how to change an audio file to an audiobook in iTunes.
1) Import and locate the track(s) you want to convert from your iTunes Music library to your iTunes Audiobooks tab. If you are importing from a CD (granted we’re a dying breed), before you proceed learn about merging tracks in our bonus tutorial below!
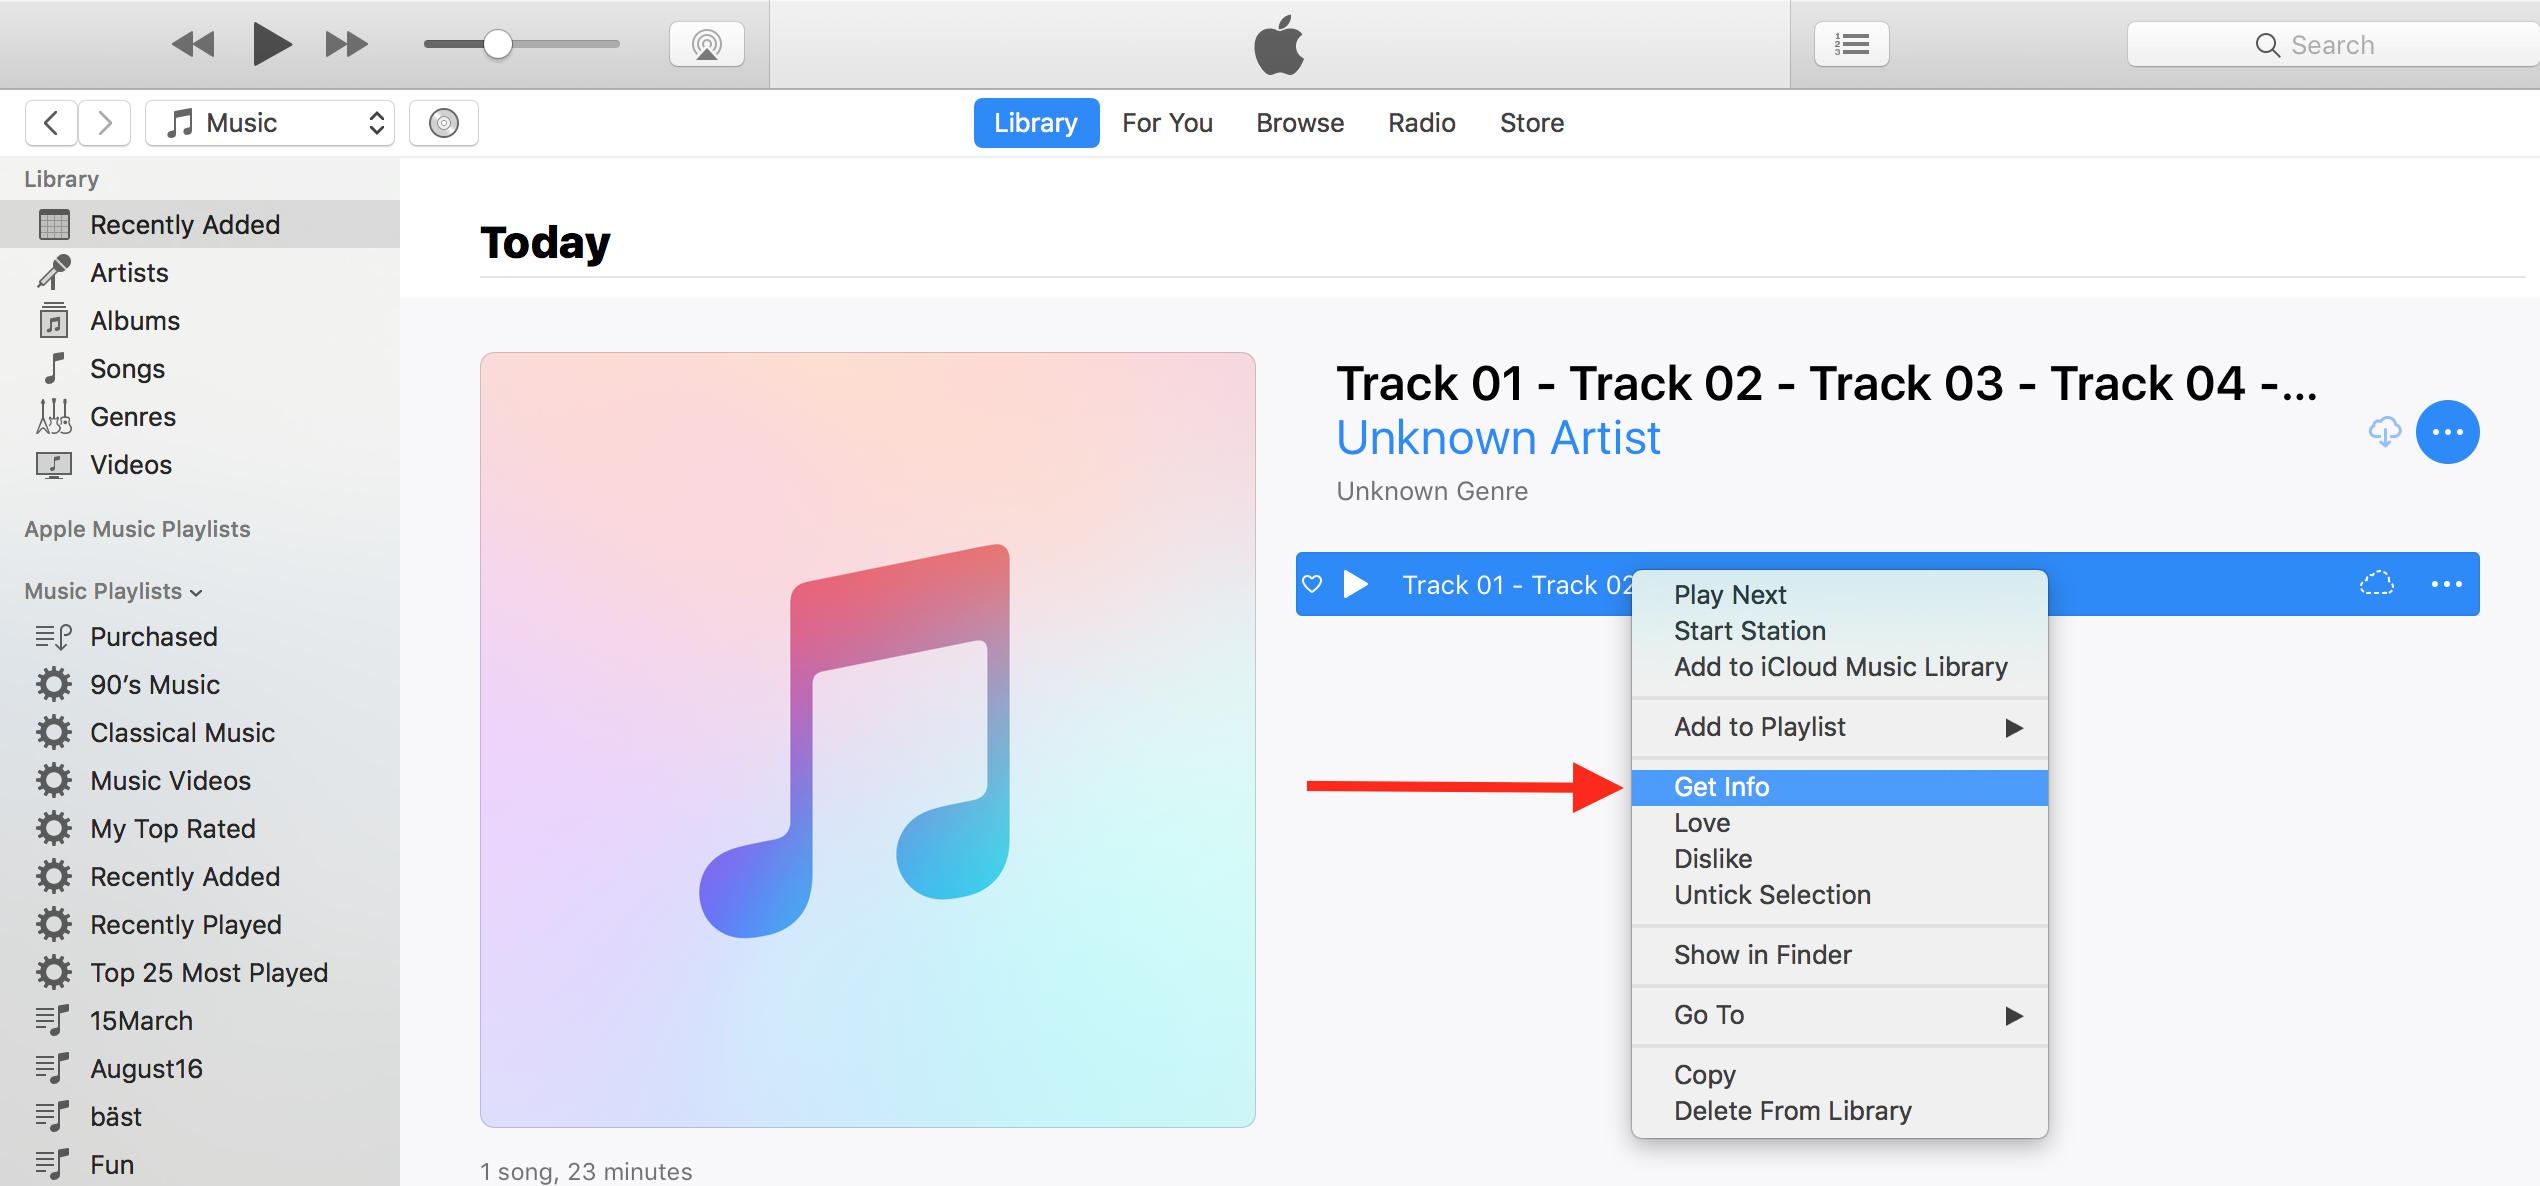
2) Found it? Sweet. In order to relocate it to Audiobooks, simply right click the audio file and select Get Info.
Note: If you have multiple tracks to move, select all of them and then click Get Info. When asked Are you sure you want to edit information for multiple items? Click Edit Items.
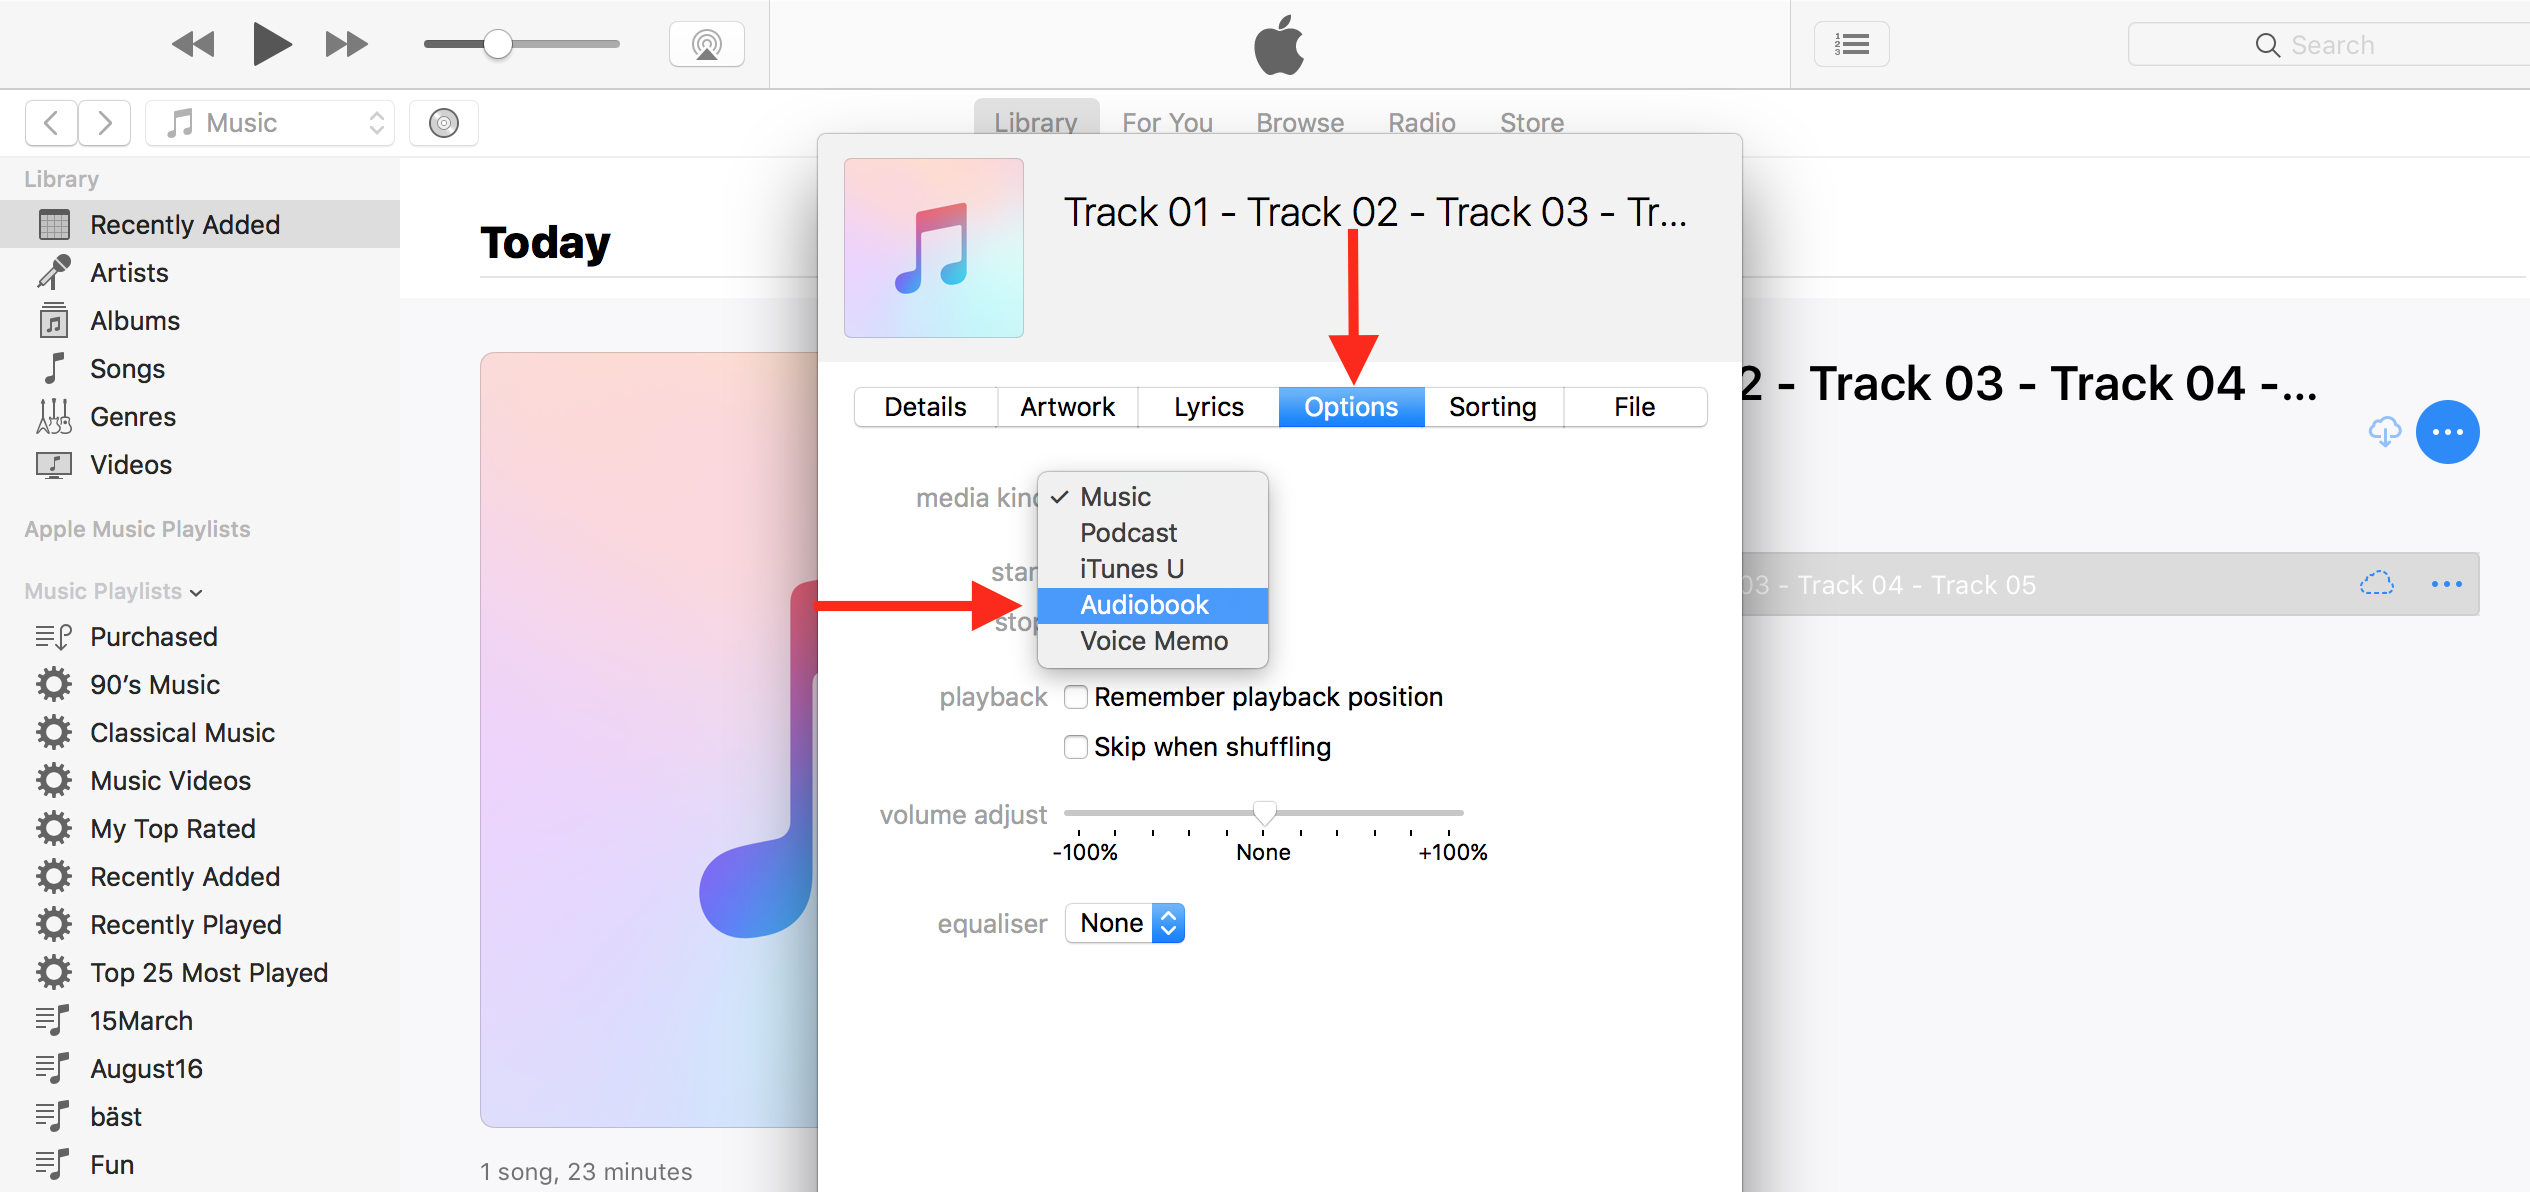
3) Select the Options tab and click the drop down menu next to media kind. Hit Audiobook and rubber-stamp Ok in the bottom right corner. As soon as this is executed, your files will be moved out of sight and filed away in the Audiobooks section.
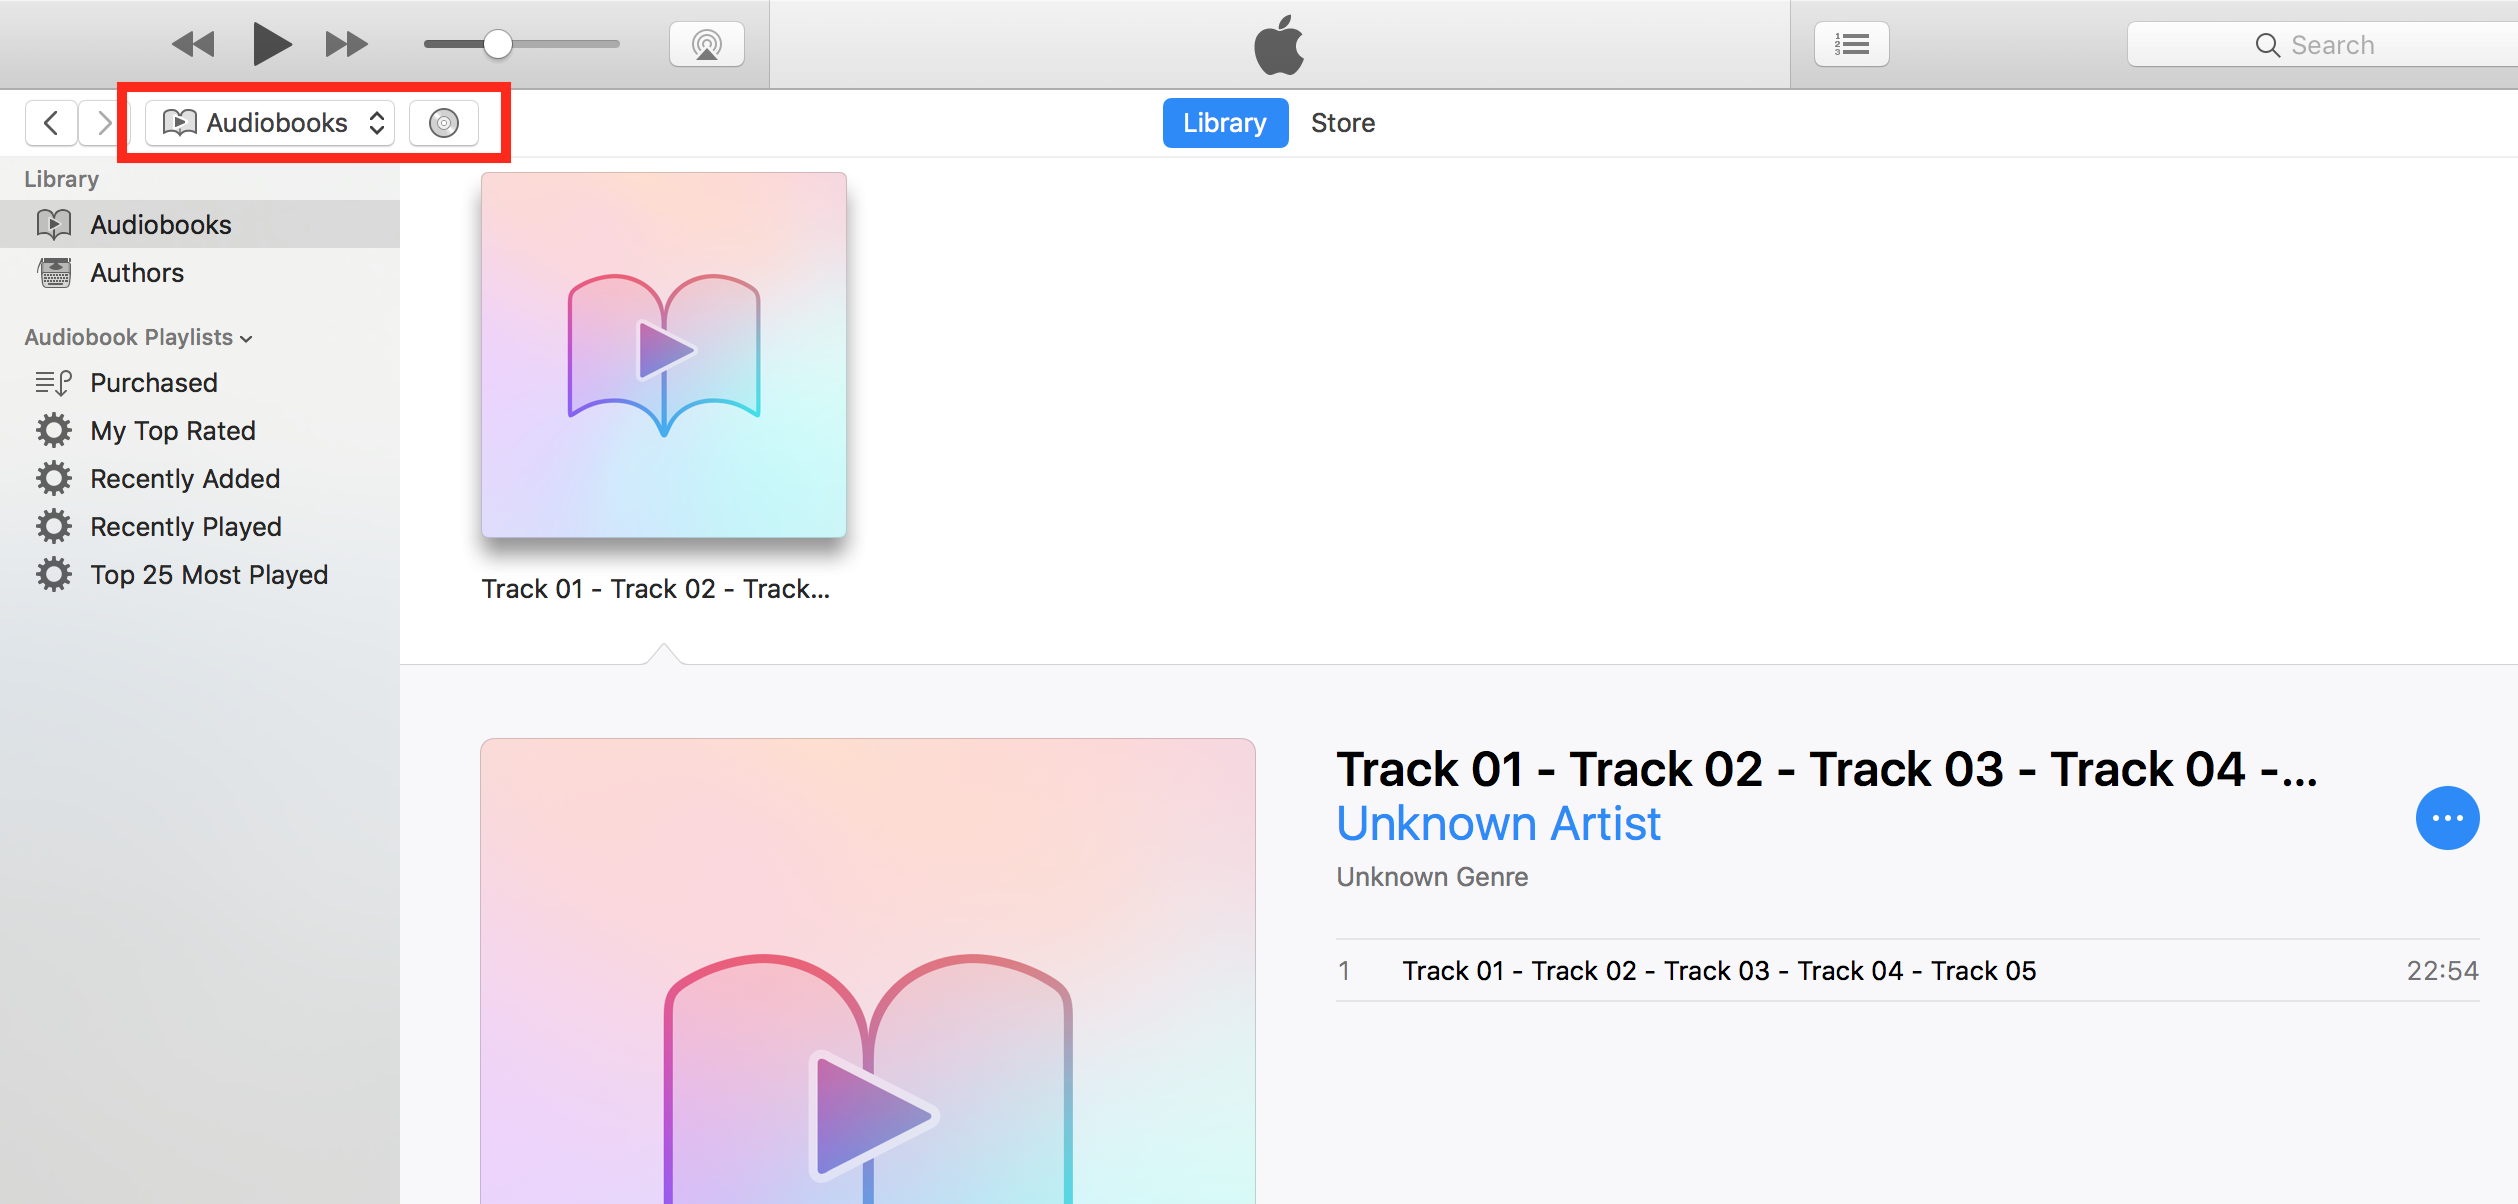
4) To double check, click the main media switch on your left hand side (encircled in red in the picture below) and select Audiobooks in the drop down menu. If everything panned out according to plan, your import is now officially an audiobook. It’s that simple!
In my example, I would next right click the album cover to fill in all details of the book and equip it with a fitting cover image, but this comes down to personal preference and I would never misuse a tutorial to tell you to embellish your iTunes files (do it!).
It goes without saying that this strategy works both ways and can be easily inverted in case you want an audiobook to appear in your music catalogue instead.
Bonus round: Merging several CD audio lines into one
Joining tracks is a very slick feature, which for reasons beyond me Apple has hidden away inexplicably well. Say you are importing an old audiobook disc that splits the story into multiple short tracks, but you would rather morph them into one longer narration. Simply take the following steps:
1) Pop the CD in and open iTunes. If the Import menu does not open automatically, click the rectangular disc icon in the upper left area of iTunes (next to the main media switch).
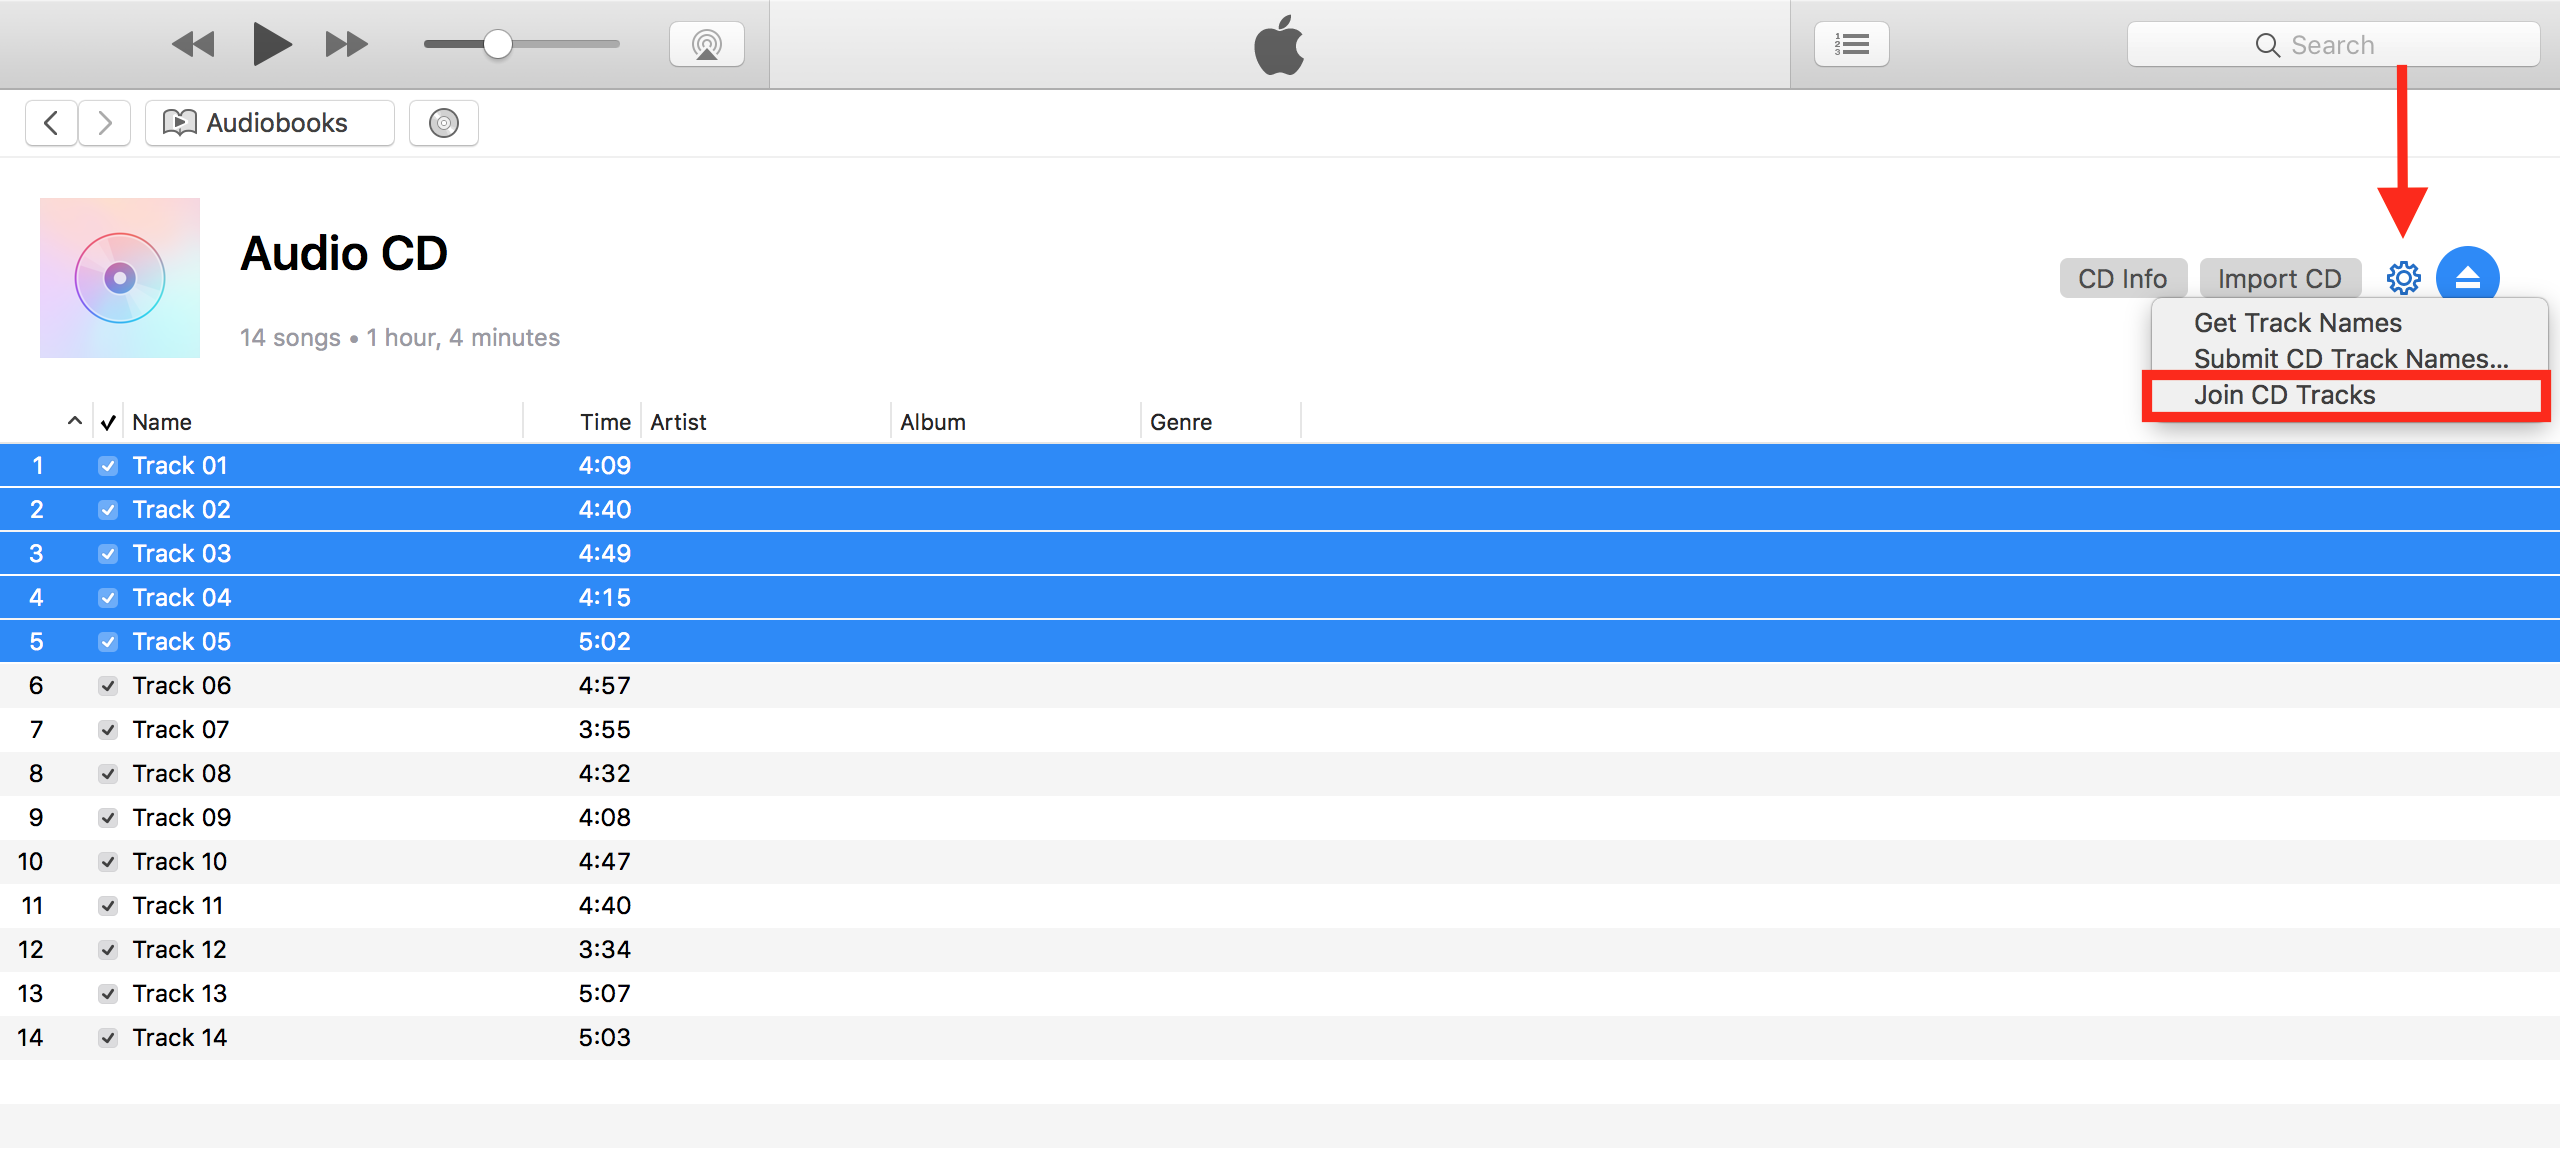
2) From here on, you are in total control regarding the audio tracks and which ones you want to import or merge. The blue cog marked in the picture below is the key to your endeavors: mark the audio lines you want merged (first!), then click the cog and find the Join CD Tracks option (second). Click to confirm your selection.
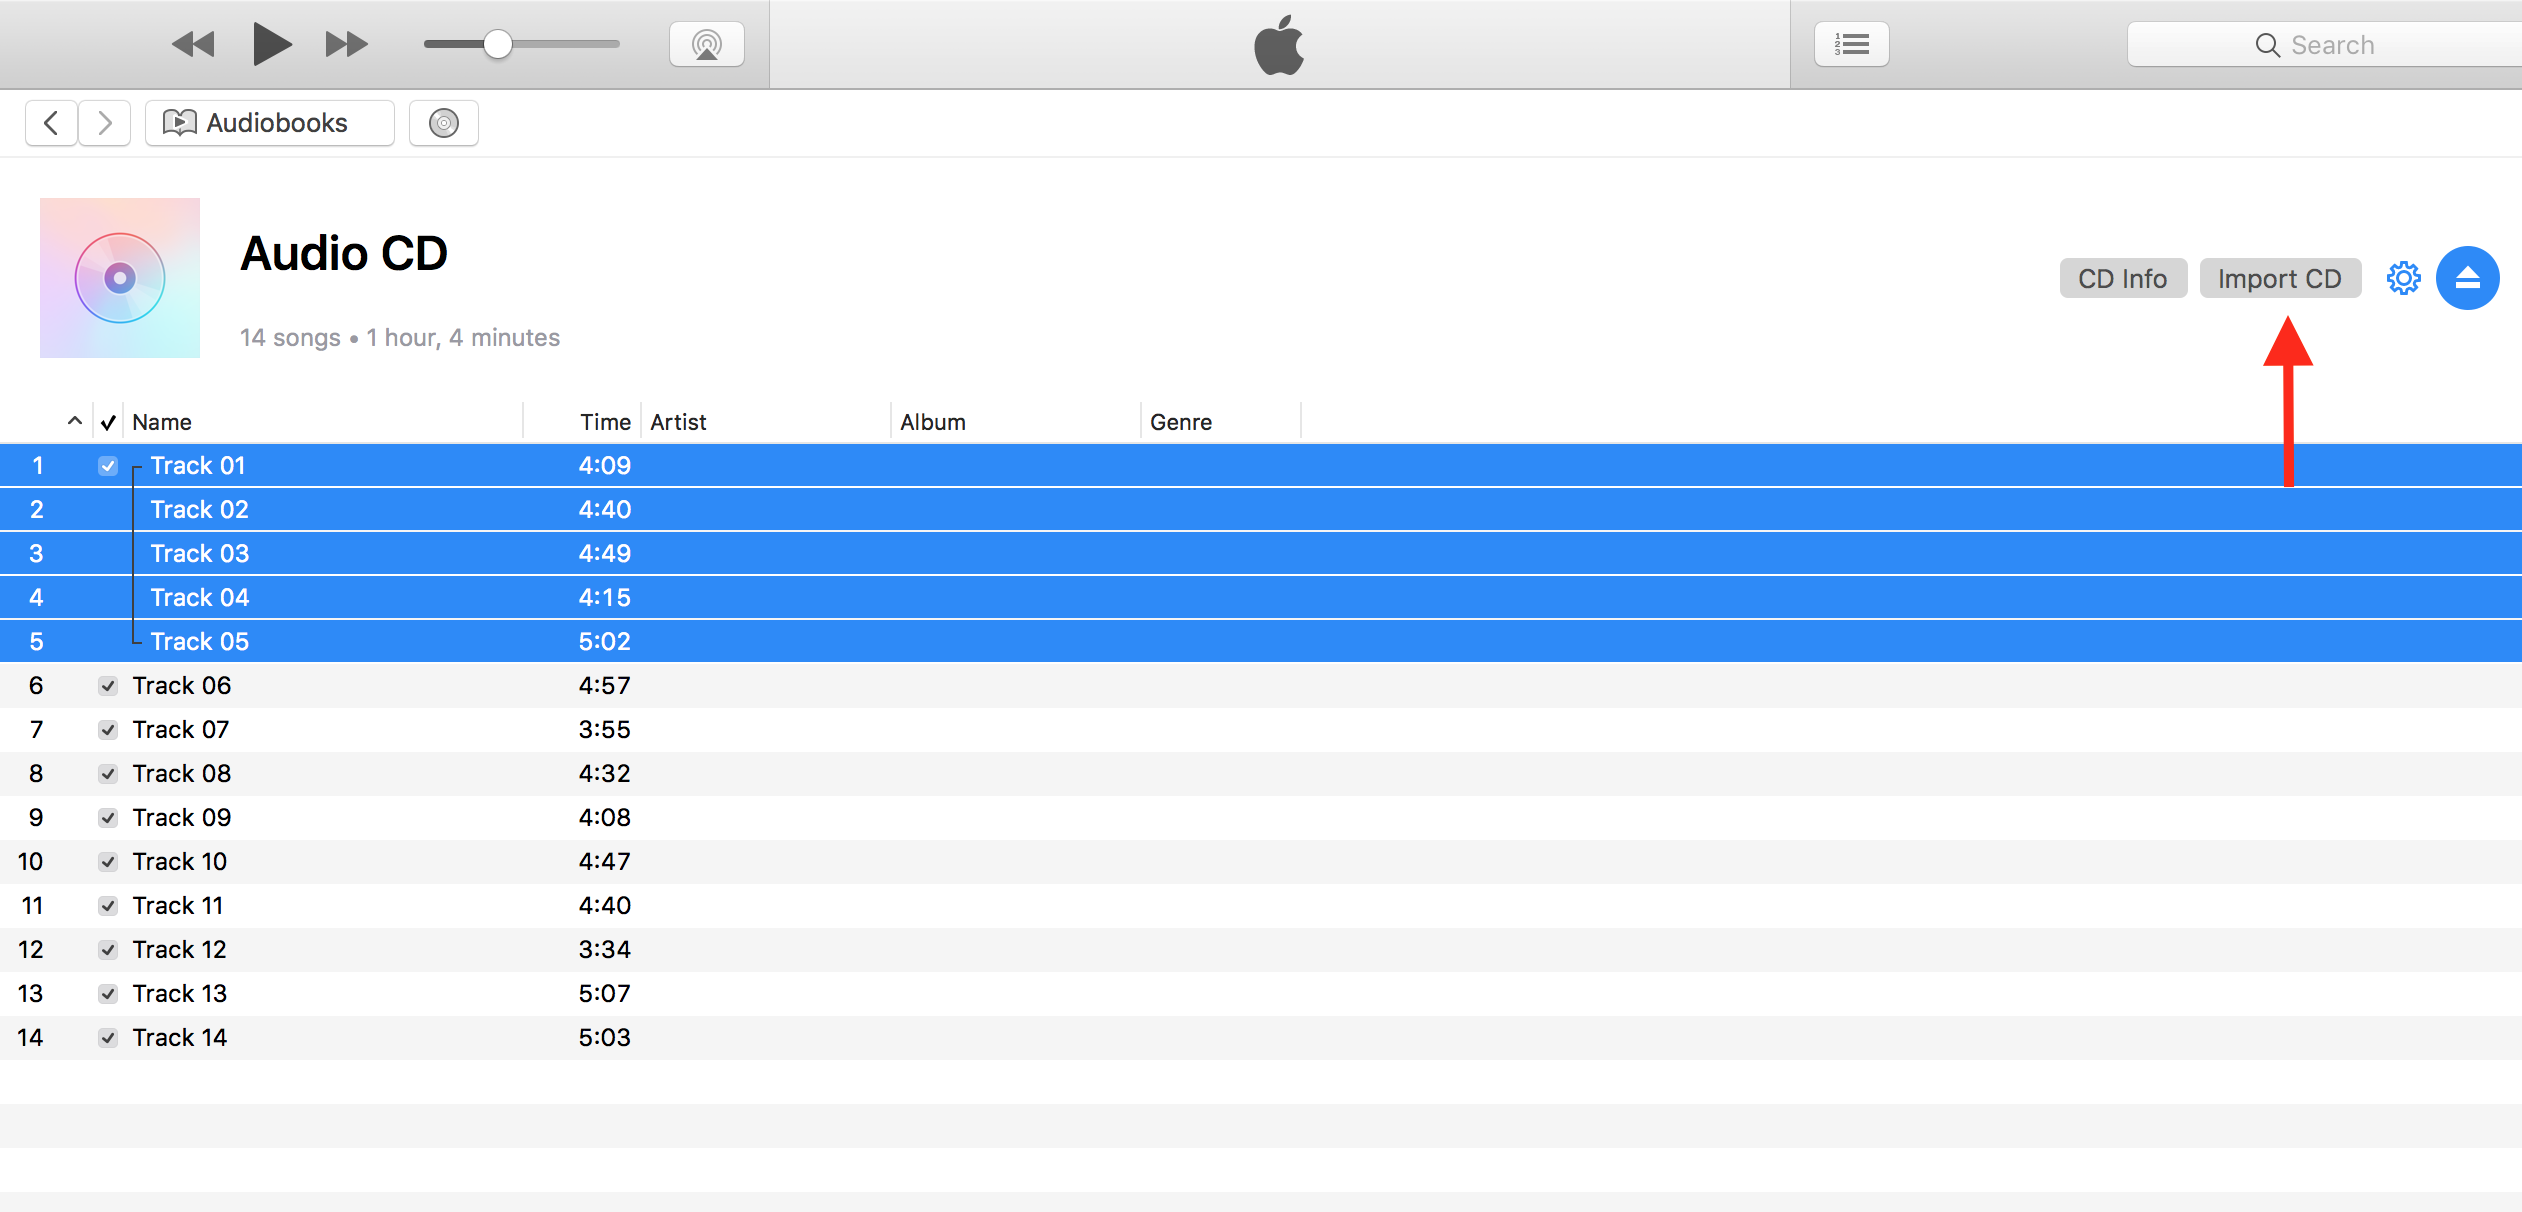
3) A line will appear and group the desired tracks together, indicating that these will be imported as one joint file. If you are satisfied with the choice and boxes ticked, proceed to Import CD.
4) At this point you don’t have to sweat it over the next pop up (any import format will do). Simply click Ok in the bottom right corner to start the operation.
5) The audio files in question will be lumped together during import and placed securely in your media library. At present, the latest addition will be categorized under Music, which you can now fix up with the help of the tutorial preceding this encore.
Happy importing and converting!