At times, you may experience slow hiccups while trying to use the internet from your home. Sometimes, these problems can be attributed to your router’s DNS settings because your ISP may not always have the best DNS server speeds.
Your DNS server settings can also affect your security as you use the internet because some DNS servers come with built-in firewalls and security measures to prevent you from opening malicious or phishing websites, while others don’t do anything at all to protect you.
In this tutorial, we’ll show you how you can edit the DNS settings on your wireless router if you’re experiencing slower internet speeds than you should be.
Slow speeds or poor security? Try changing your DNS
A poor DNS server will become easily flooded as users spam it with requests to use the internet. This is why internet users often see speed hiccups in their service from their ISPs. Sometimes, the servers just aren’t well-enough equipped to handle that much traffic.
A good DNS server not only has the resources to handle everyone’s web requests without impacting the performance of your downloads and uploads, but also includes security features to help keep you from stumbling upon websites that are known for fraud and stealing information.
Ideally, you want to find a DNS server that has a good mix of these two features – speed and security. Once you do, you can easily add it to your router’s DNS settings to take advantage of it every time you want to use the internet on any of your devices.
Google‘s Public DNS server is a tried and true, fast and reliable server, so if you want one that’s going to provide speed and reliability, it’s a good way to go. For that reason, this is the DNS server I will be adding in this tutorial. There are also other options such as OpenDNS, a free service as well.
How to change your router’s DNS settings
All routers are different in terms of how they’re configured, but what you’ll be looking for when you open your wireless router settings in a web browser, such as Safari, will be essentially the same, so please bear with us if your router settings don’t look exactly the same as ours.
For this tutorial, I’ll be demonstrating how to change your router’s DNS settings from a Verizon FiOS (now Frontier in my area) wireless router. Keep in mind that your user interface may vary slightly based on router manufacturer, but the settings should be mostly similar.
To change your router’s DNS, follow these steps:
1) Launch your web browser of choice and in the URL bar, type in 192.168.1.1 and press the return/enter key on your keyboard.
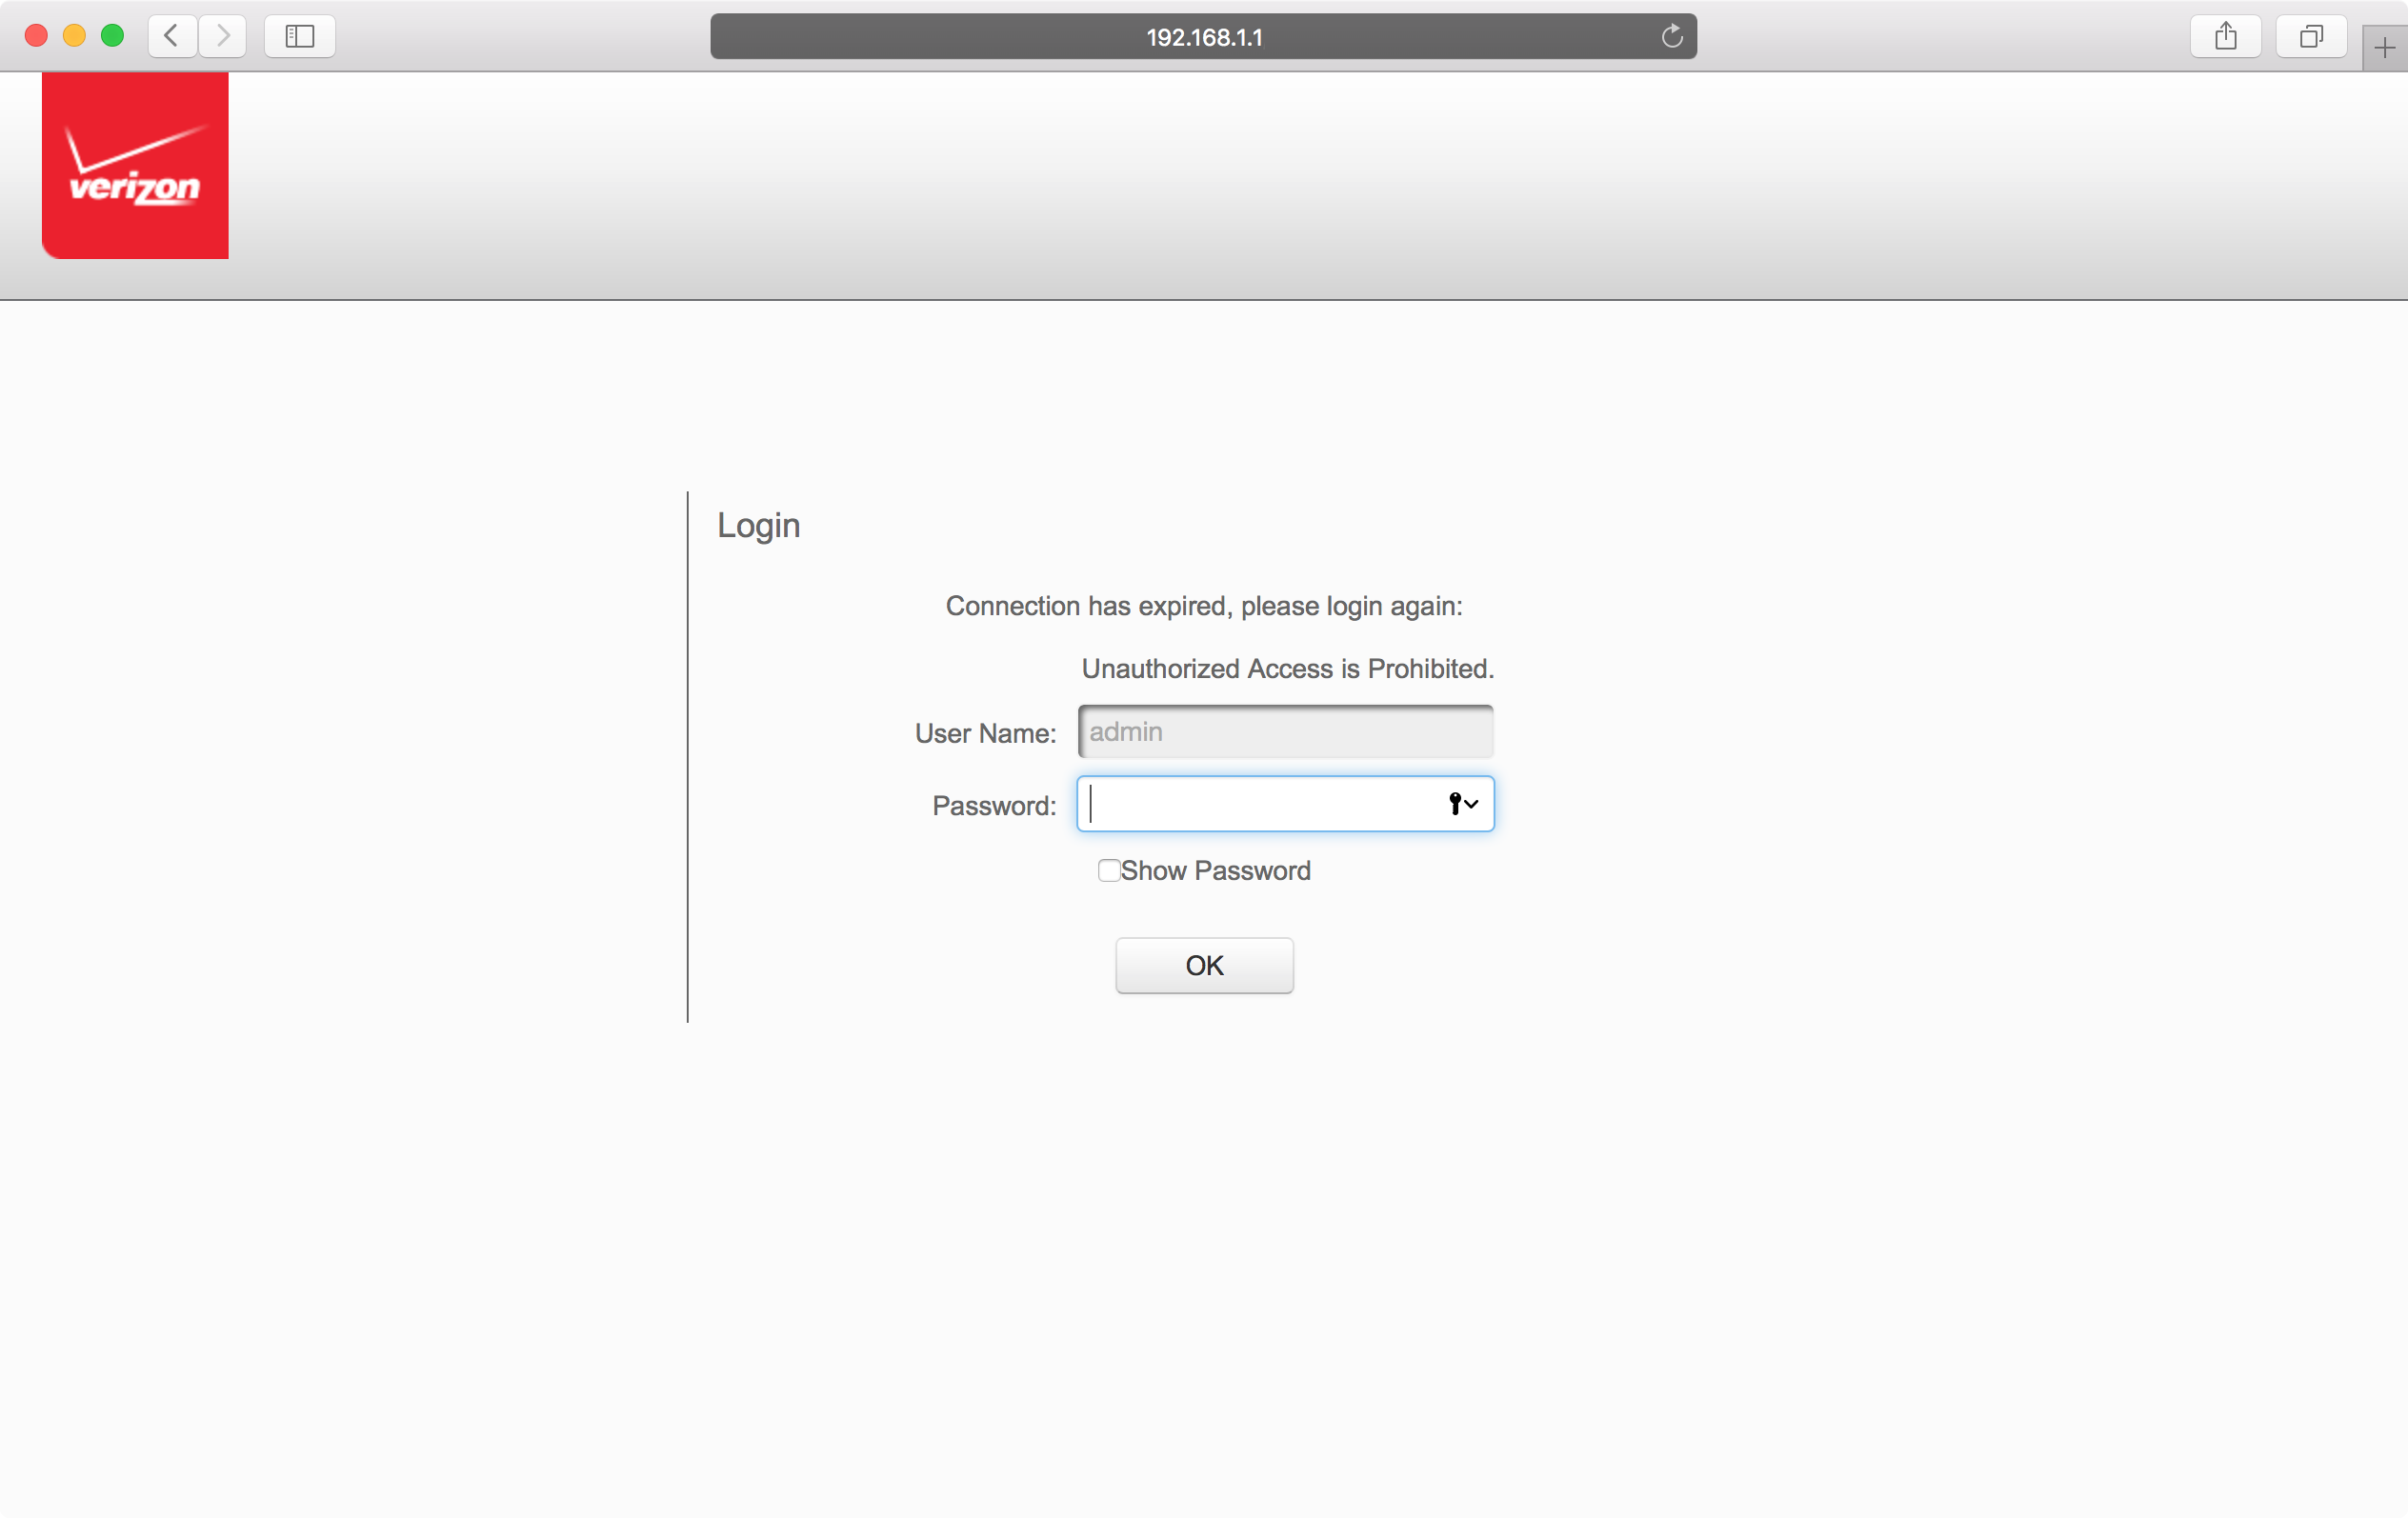
2) What you will see is a login screen where you can enter your username and password for your router – so now you will log in.
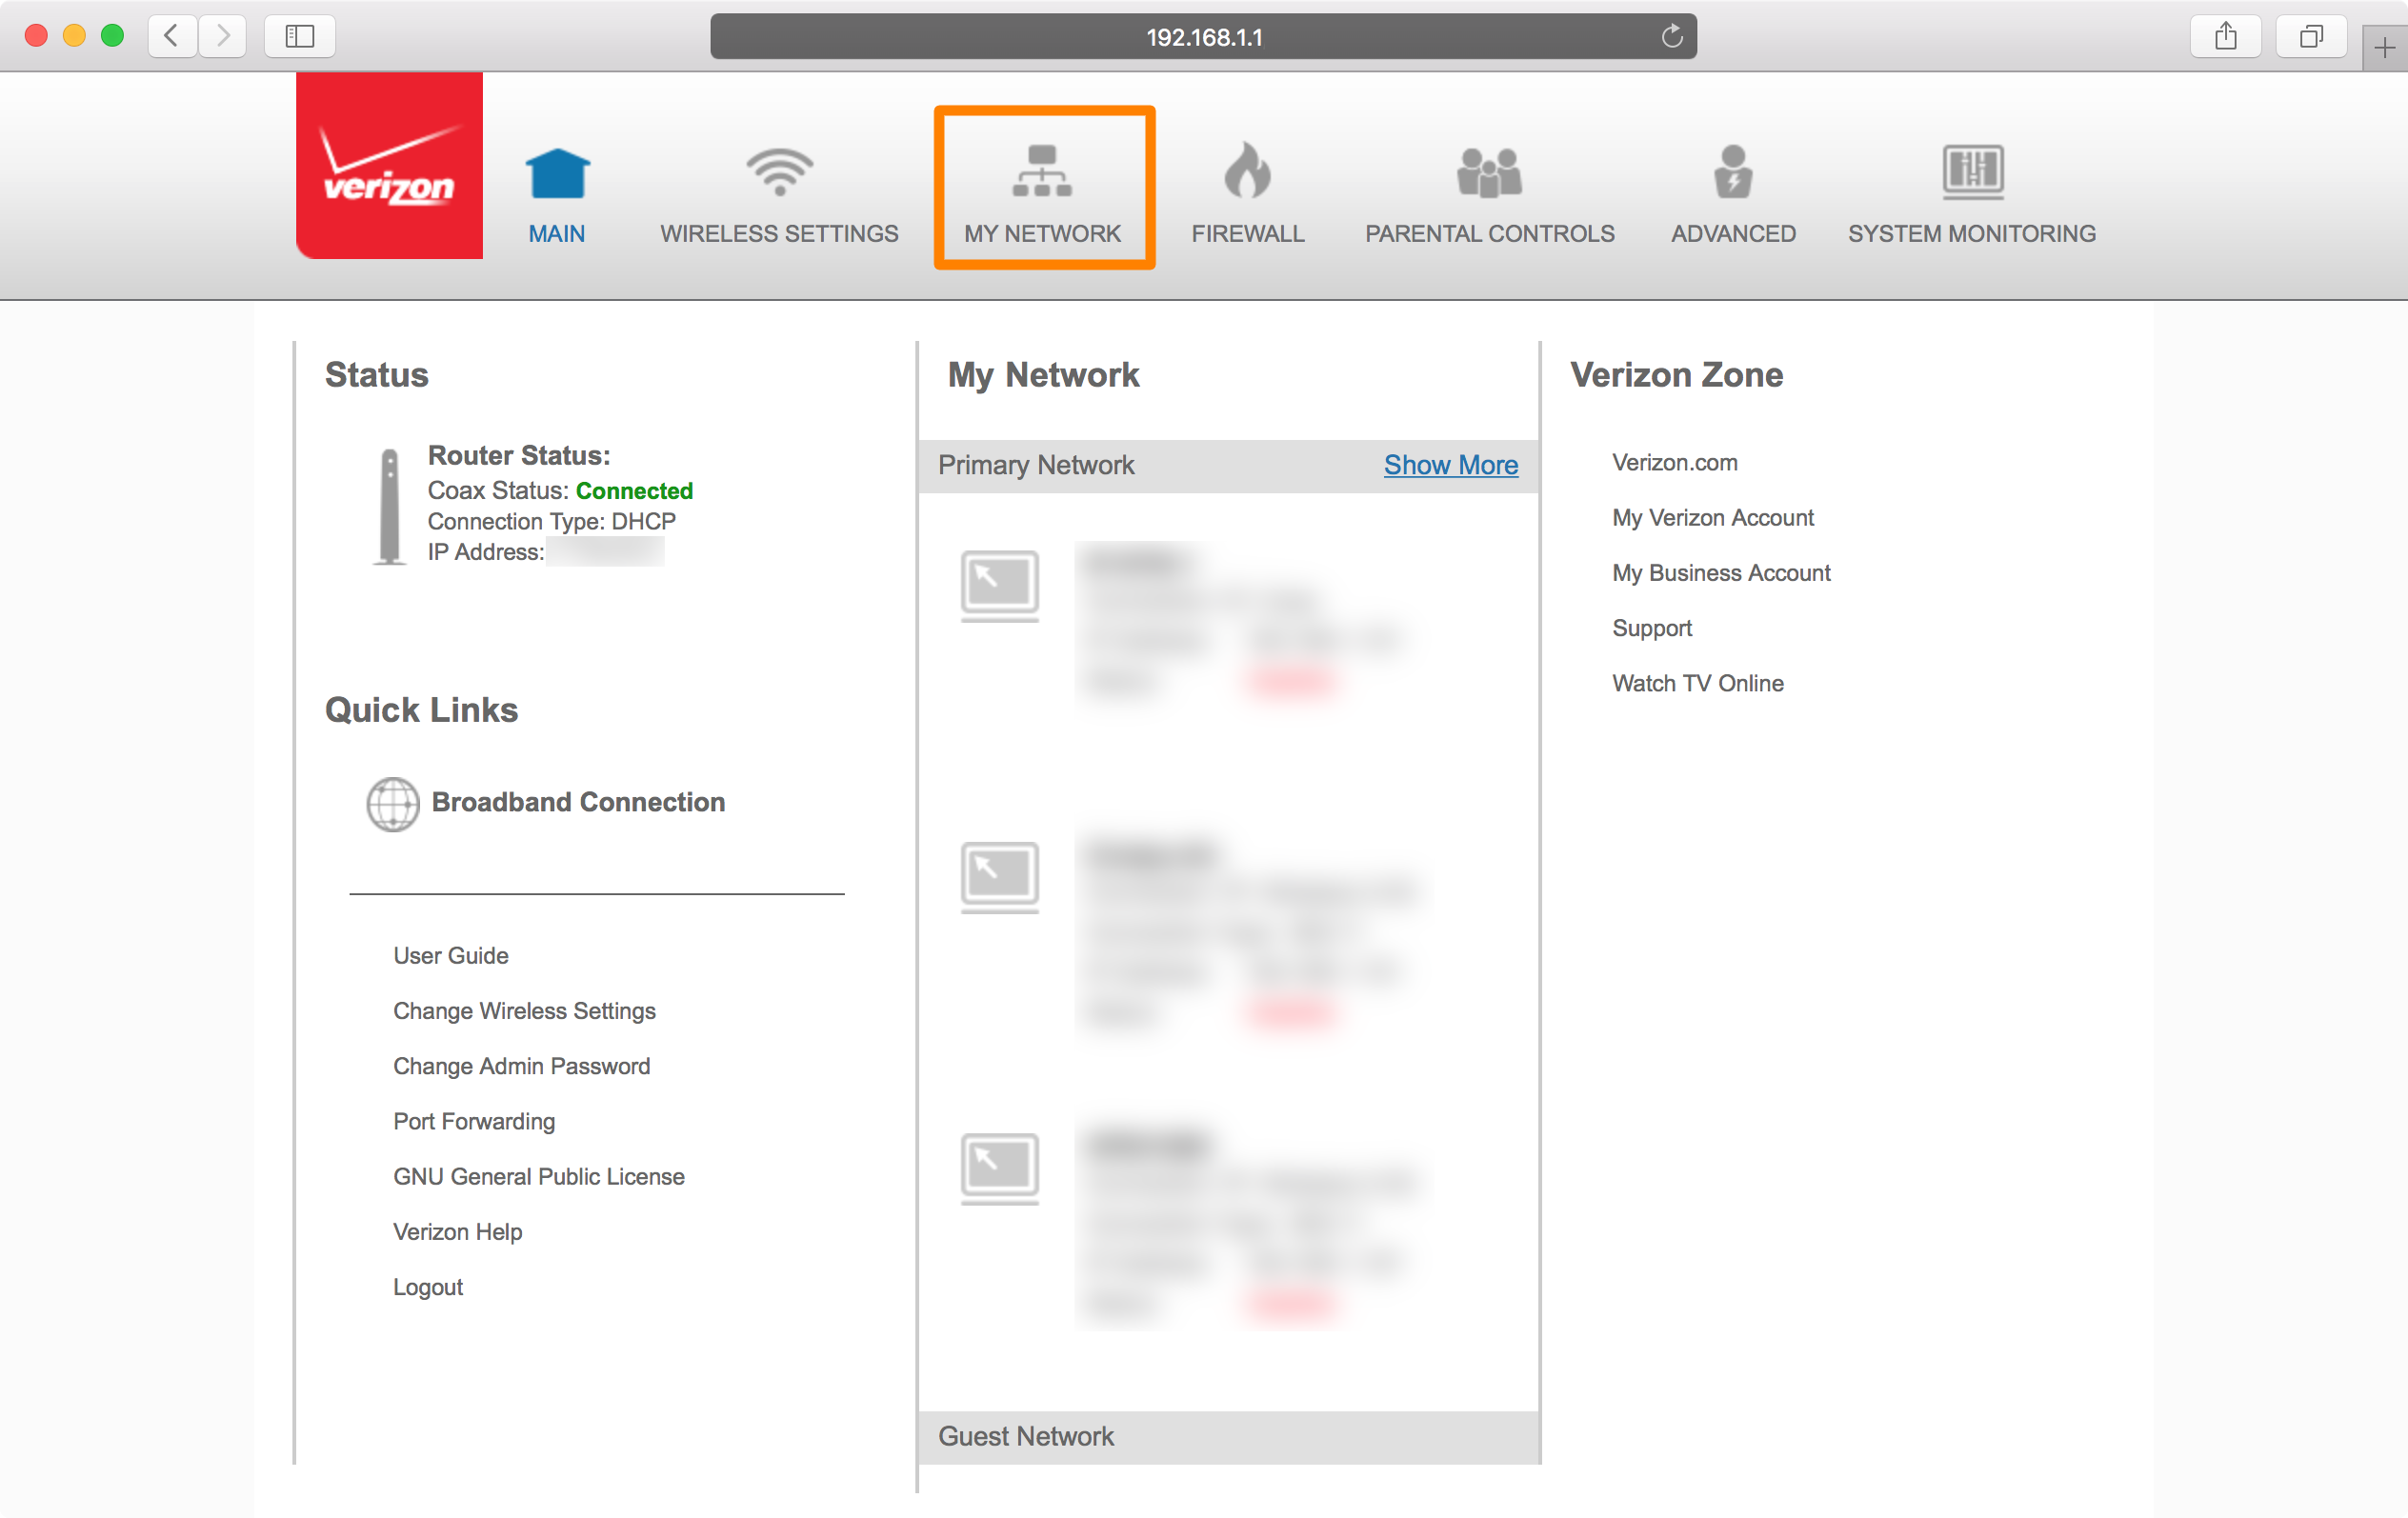
3) If your credentials were correct, you’ll be brought to the main configuration page for your router. Click on your router’s network settings button to configure your network in-depth. Mine is called My Network.
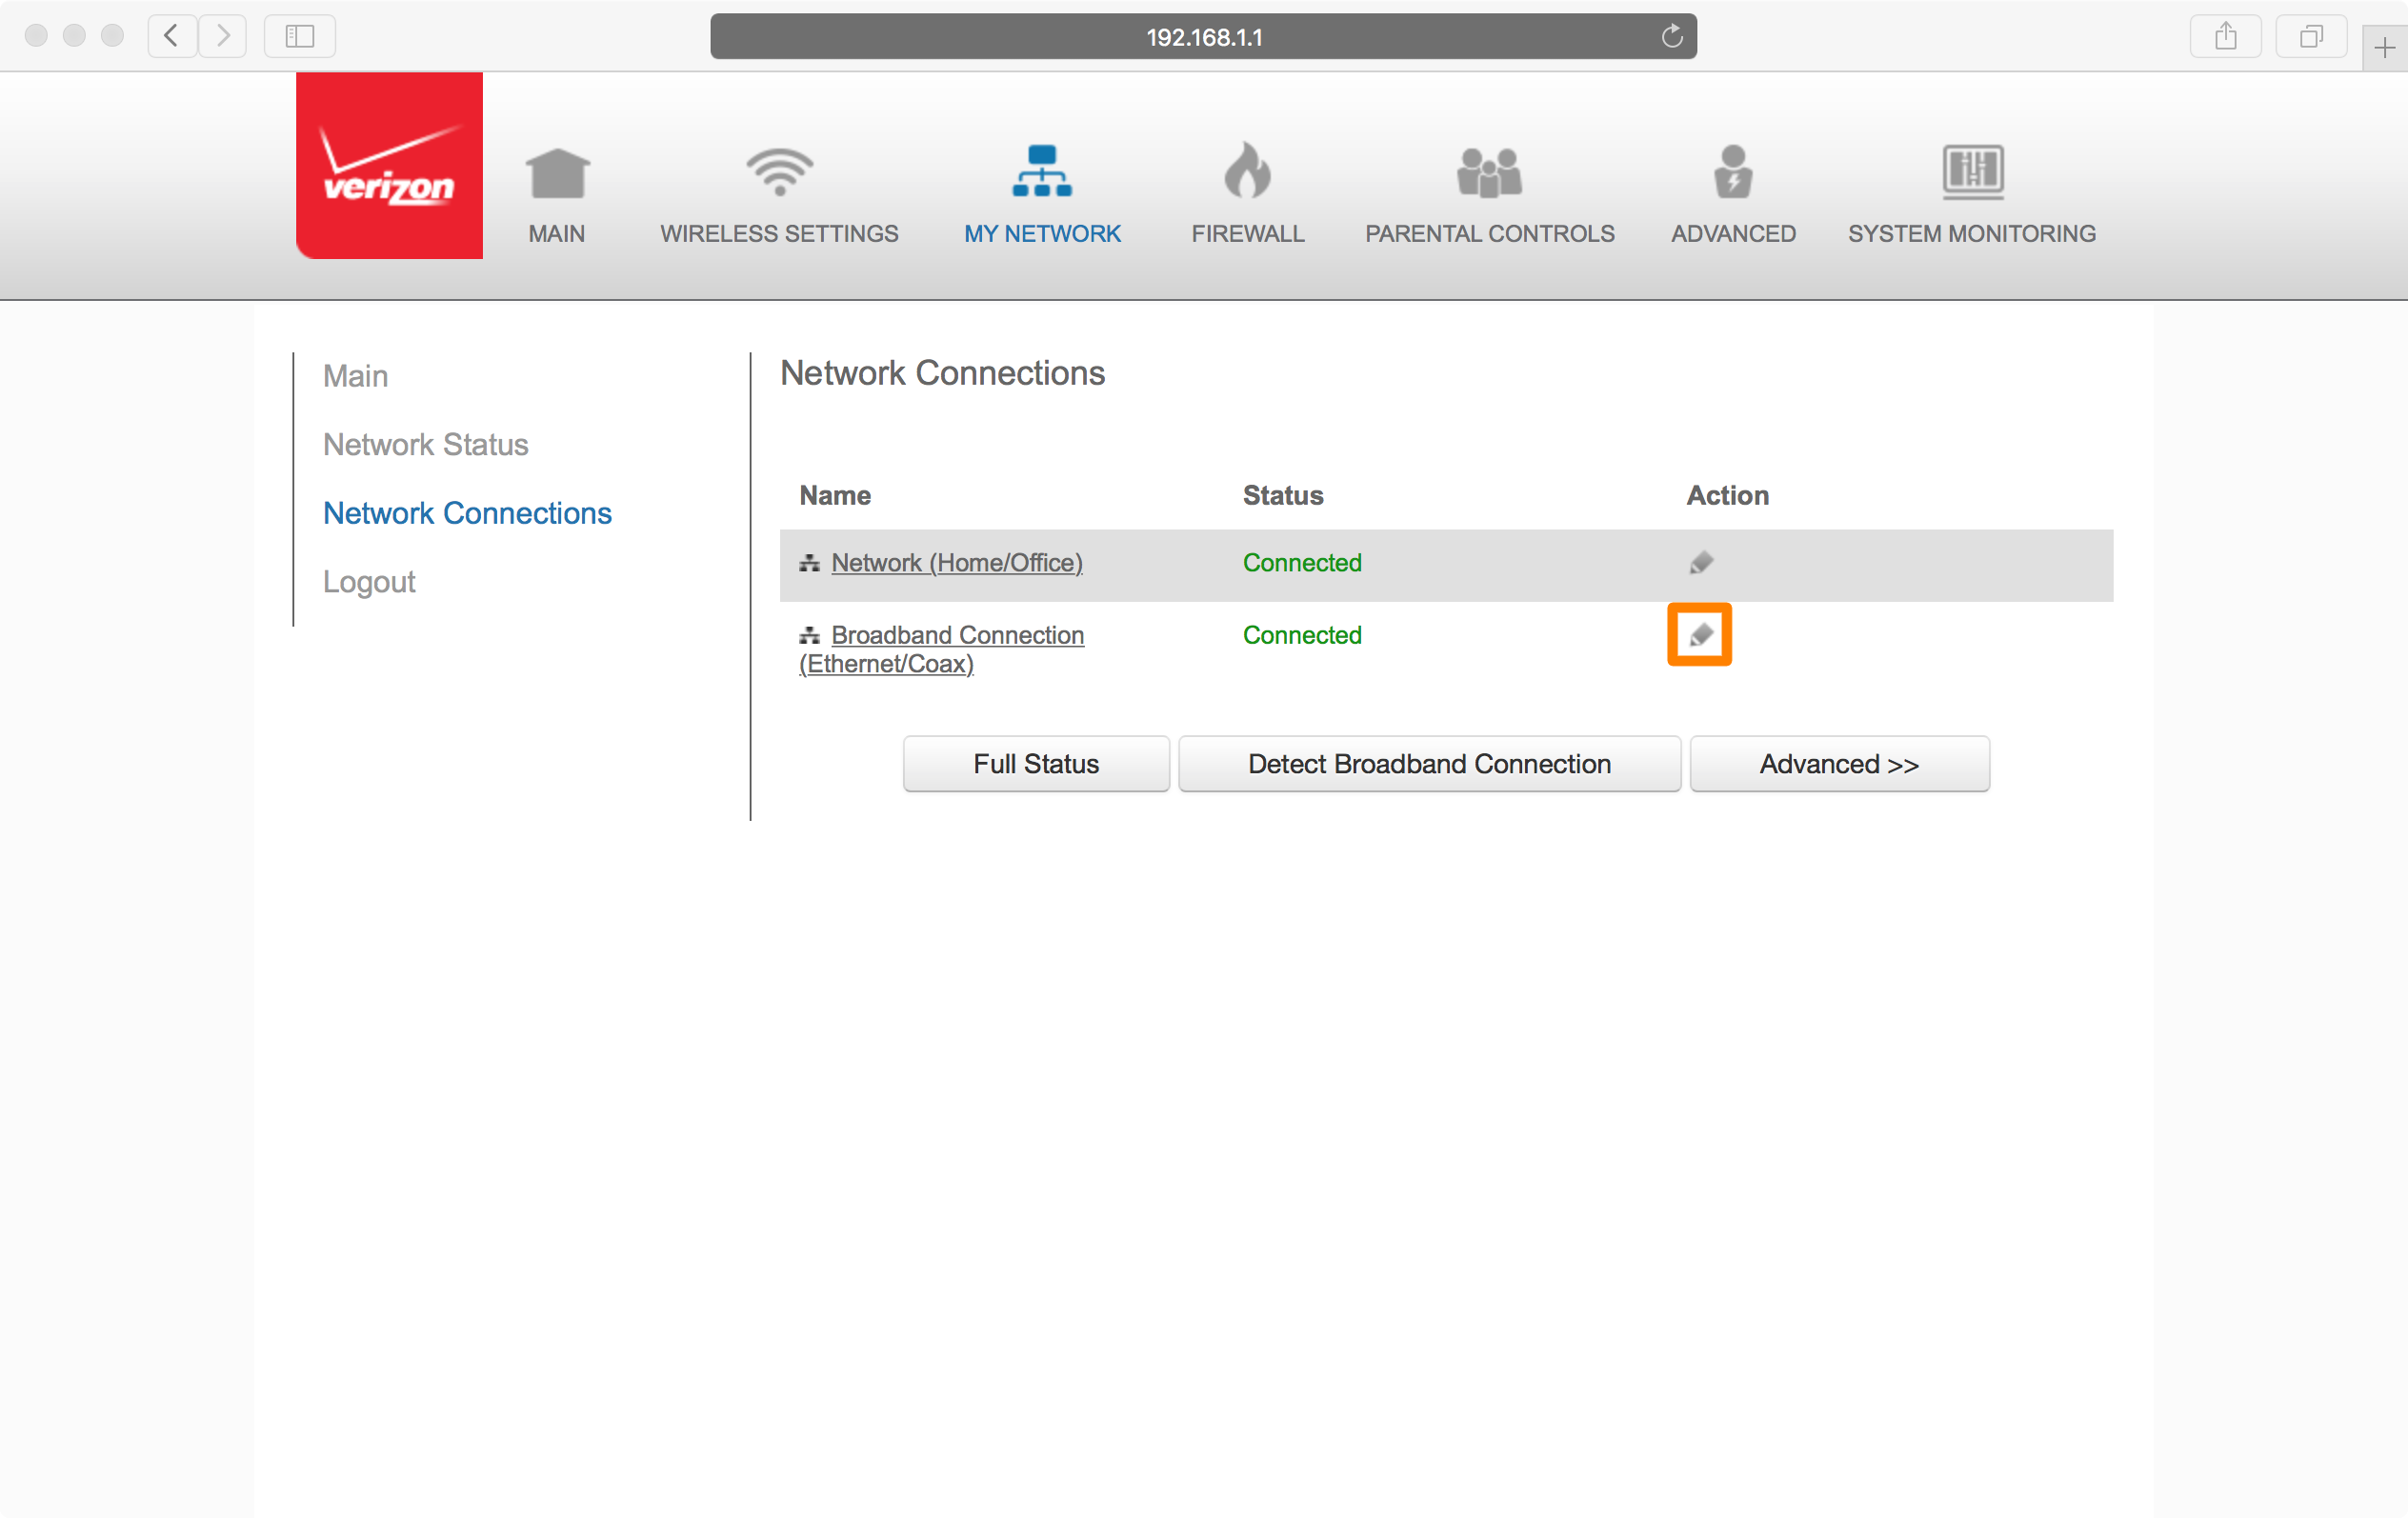
4) Once you load up your network, click on your editing button for the main source of your internet connection. Mine is going to be my Ethernet/Coaxial connection.
5) You may get a warning message that editing these settings could mess with your internet connection – go ahead and continue anyway if you’re prompted.
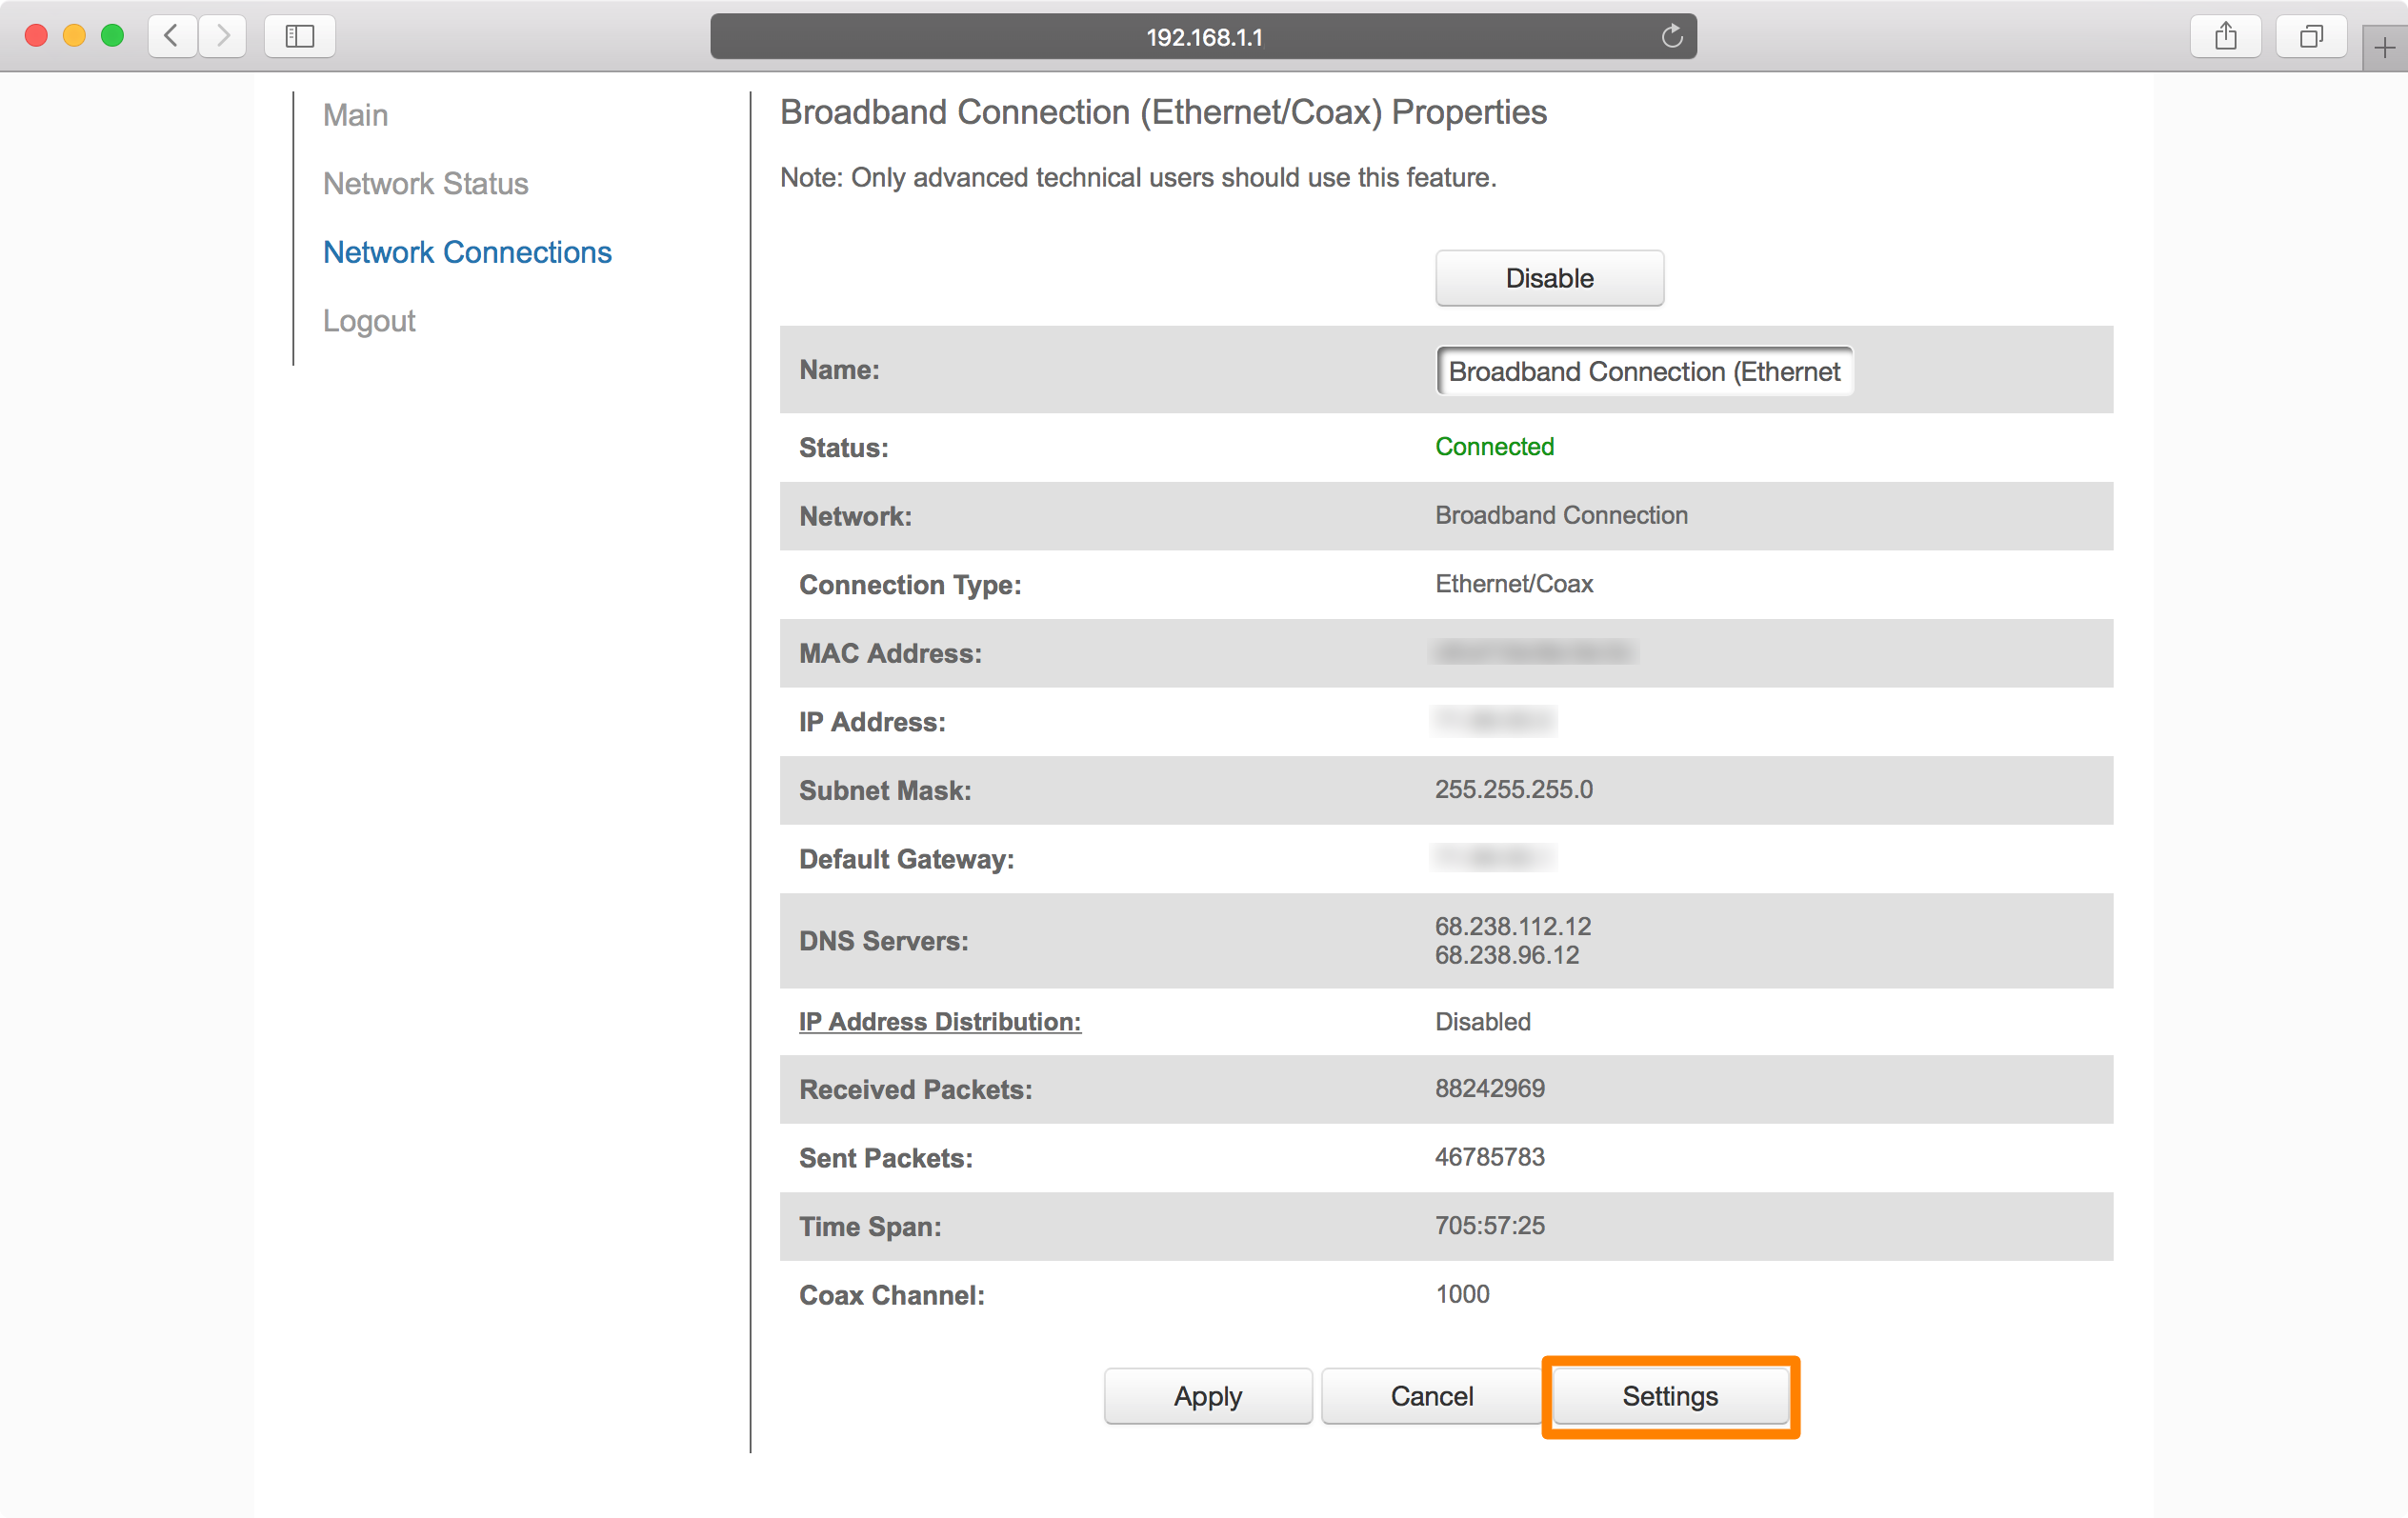
6) The next interface shows all the properties of your internet connection. Look for a settings or edit button – in my case it was settings.
7) Once in editing mode, look for a field related to the DNS settings. In some cases, you may need to change the setting to manual so it can be modified rather than automatically set.
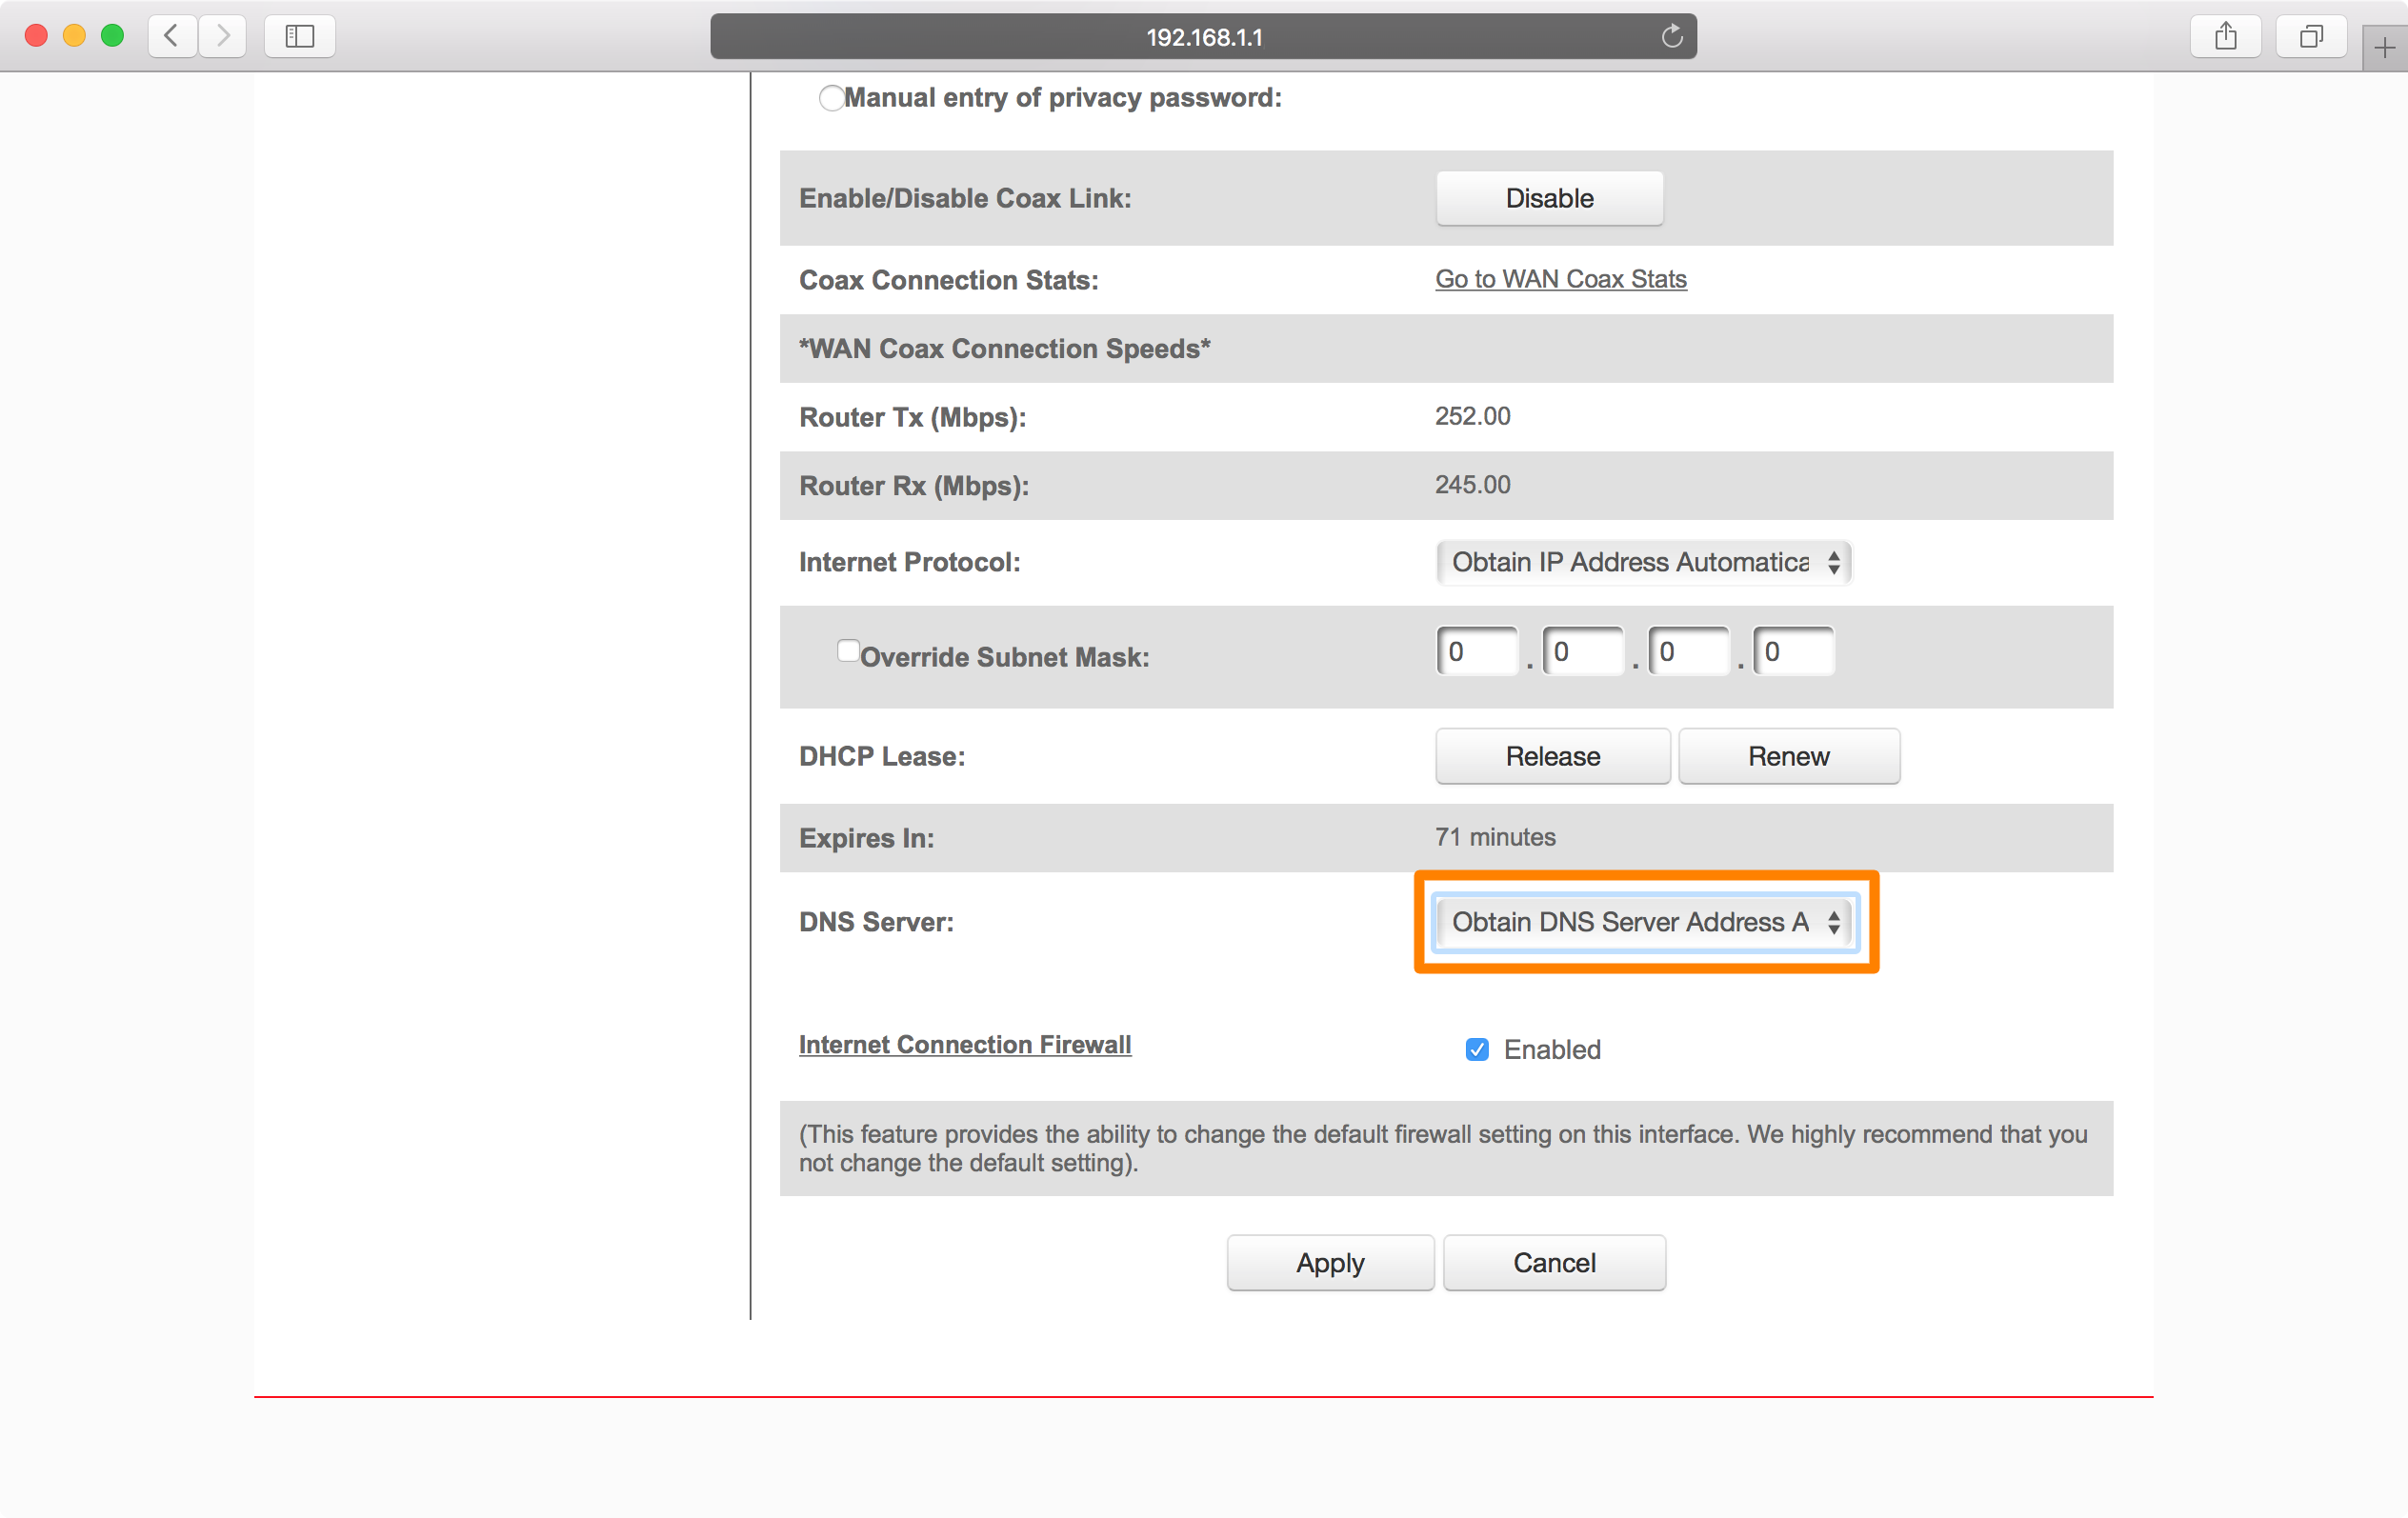
8) Choose a DNS server you wish to use, such as Google’s Public DNS server (8.8.8.8, or 8.8.4.4), and plug it into the primary and secondary DNS settings. Afterwards, click on the apply or save button at the bottom of the page.

9) After saving your changes, you will be forwarded to the same page you were at before, where you can verify your DNS change.
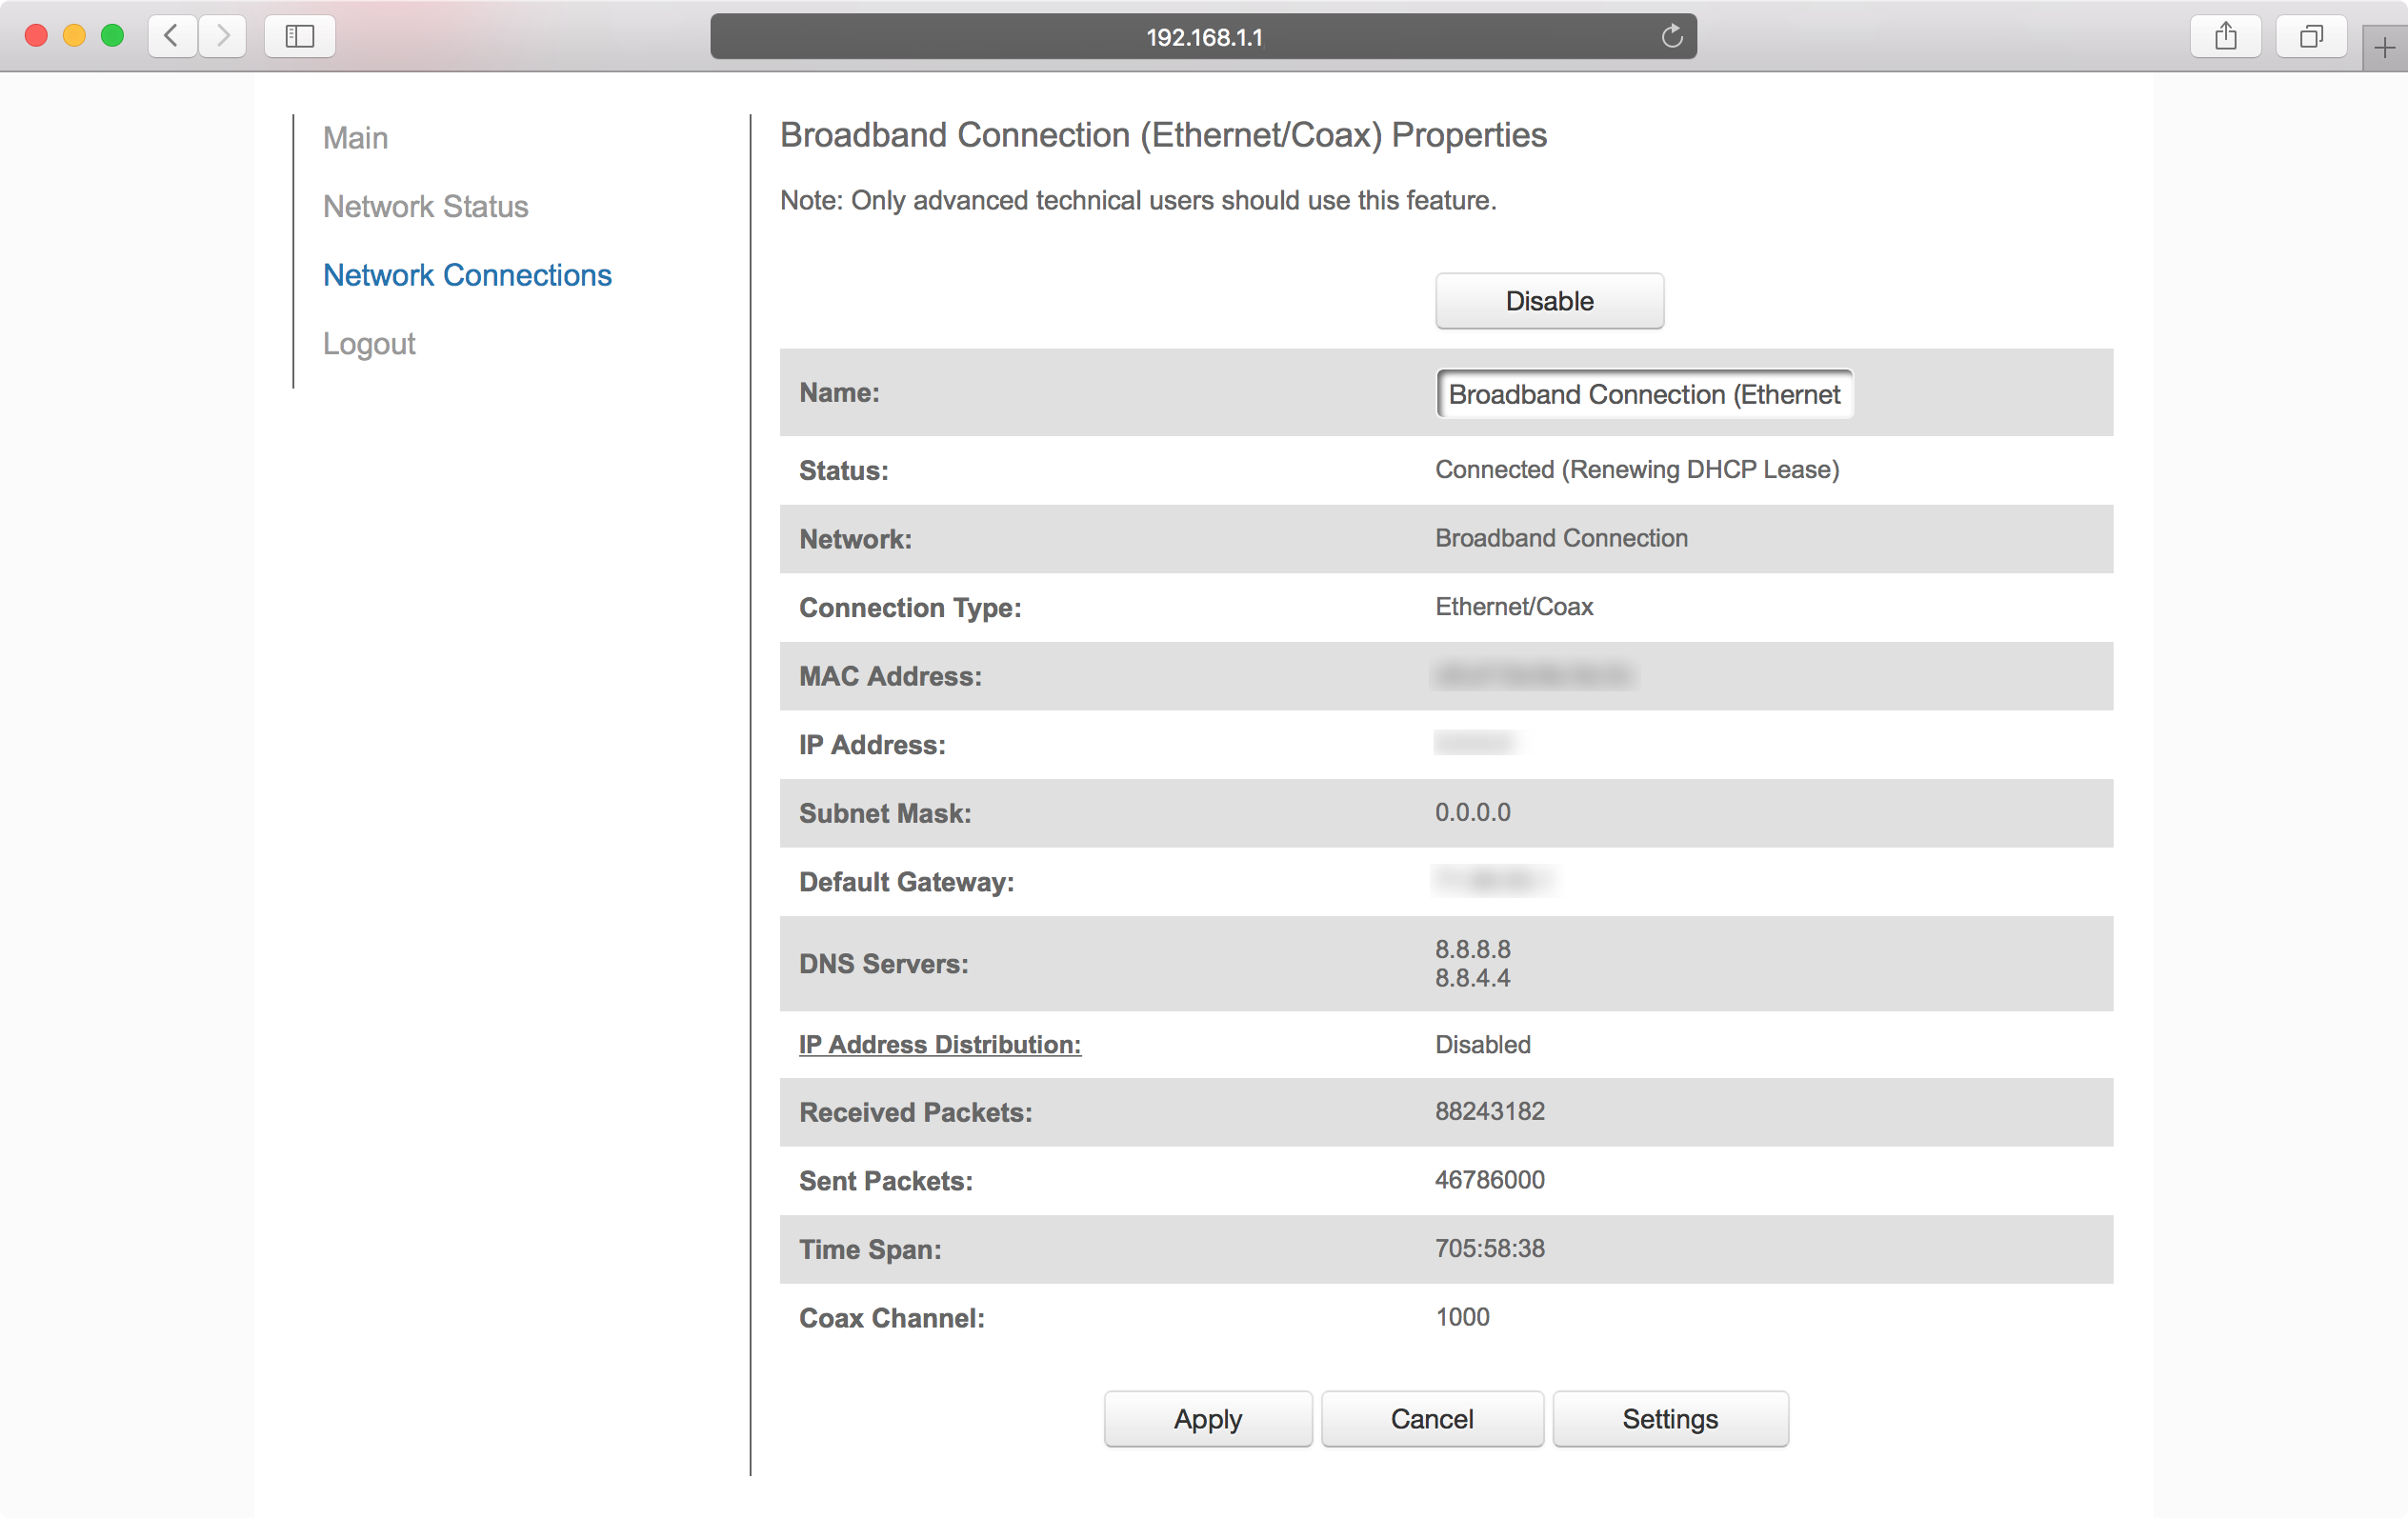
10) Your router may show an IP address of 0.0.0.0 for a few moments as it renews your DHCP lease and re-configures your network. Just give it about 30 seconds and your internet should be fully functional once again.
That’s all there is to it! You’ve changed your network’s DNS settings, and because you’ve done it from the router instead of the device itself, this change affects every machine on your network immediately.
Wrapping up
There are tons of DNS servers out there to choose from, including some that block ads from all websites, some that enhance your security, and some that just offer improvements to speed.
Keep in mind, internet speed increases are subjective. If you’re already using a fast DNS server, then you may not see a speed increase. The people that will see speed increases are those that are using slow DNS servers to start with.
Also read:
Did changing your router’s DNS server help your internet speeds at all? Share your experience in the comments below.