As expected, Apple rolled out Apple Pay to the masses today, courtesy of its iOS 8.1 update for eligible devices. Apple Pay, as you know, allows users to make in-app and online purchases using certain devices equipped with a Touch ID sensor, and in-store purchases using the NFC chips found in the recently released iPhone 6 and iPhone 6 Plus.
In this guide, we’ll walk you through the process of setting up Apple Pay, including adding eligible credit cards, along with making in-app, and in-store purchases.
Verify your device and update to iOS 8.1
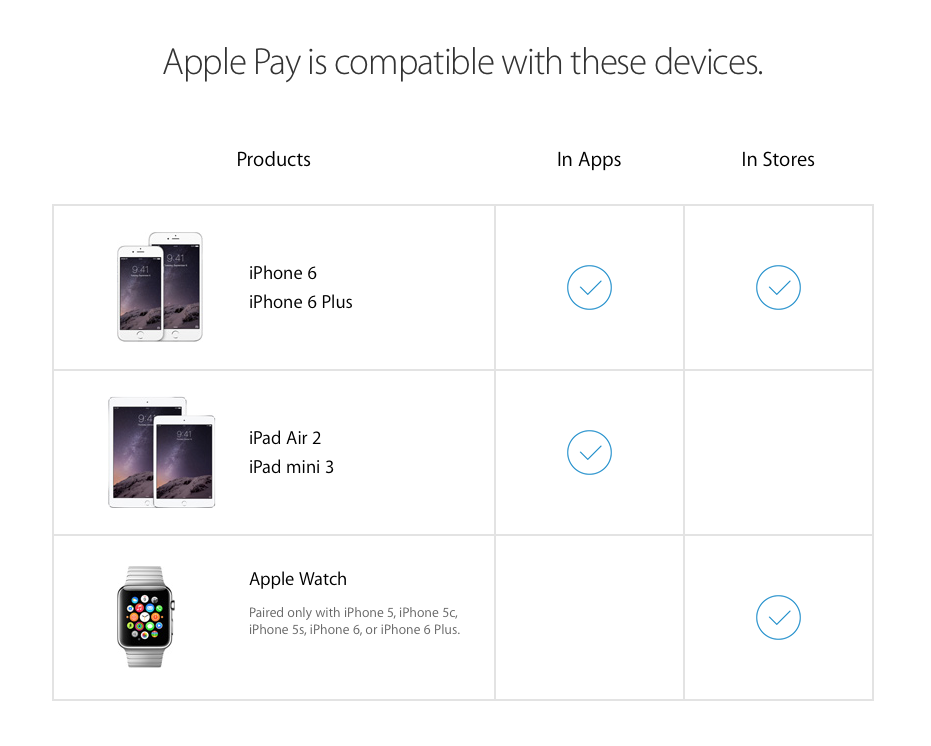
The first thing you’ll need to do is verify that you have an eligible device. Apple Pay will work with the following currently available iOS devices:
- iPhone 6 Plus (in-app, online, and in-store purchases)
- iPhone 6 (in-app, online, and in-store purchases)
- iPad Air 2 (in-app and online purchases only)
- iPad mini 3 (in-app and online purchases only)
Note: Users of lesser hardware, such as the iPhone 5, 5s, and 5c will be able to take advantage of Apple Pay by pairing their devices with an Apple Watch, once it releases early next year.
Once you’ve verified that you own an eligible device, you’ll next need to update to iOS 8.1. To do so, go to Settings → General → Software Update, and install the iOS 8.1 update. Once the update is finished, you’ll be able to set up Apple Pay on your device.
Adding a credit card to Passbook
Apple Pay eligible credit cards are added and managed via the Passbook app. If you have a valid credit card already added to your iTunes Account, you can easily add that card to Passbook by simply verifying the card using its 3 or 4-digit verification code.
Of course, you can add additional supported credit cards to Passbook for use with Apple Pay. You can do so by using your iPhone’s iSight camera to capture the card details, or you can type the card information in manually.
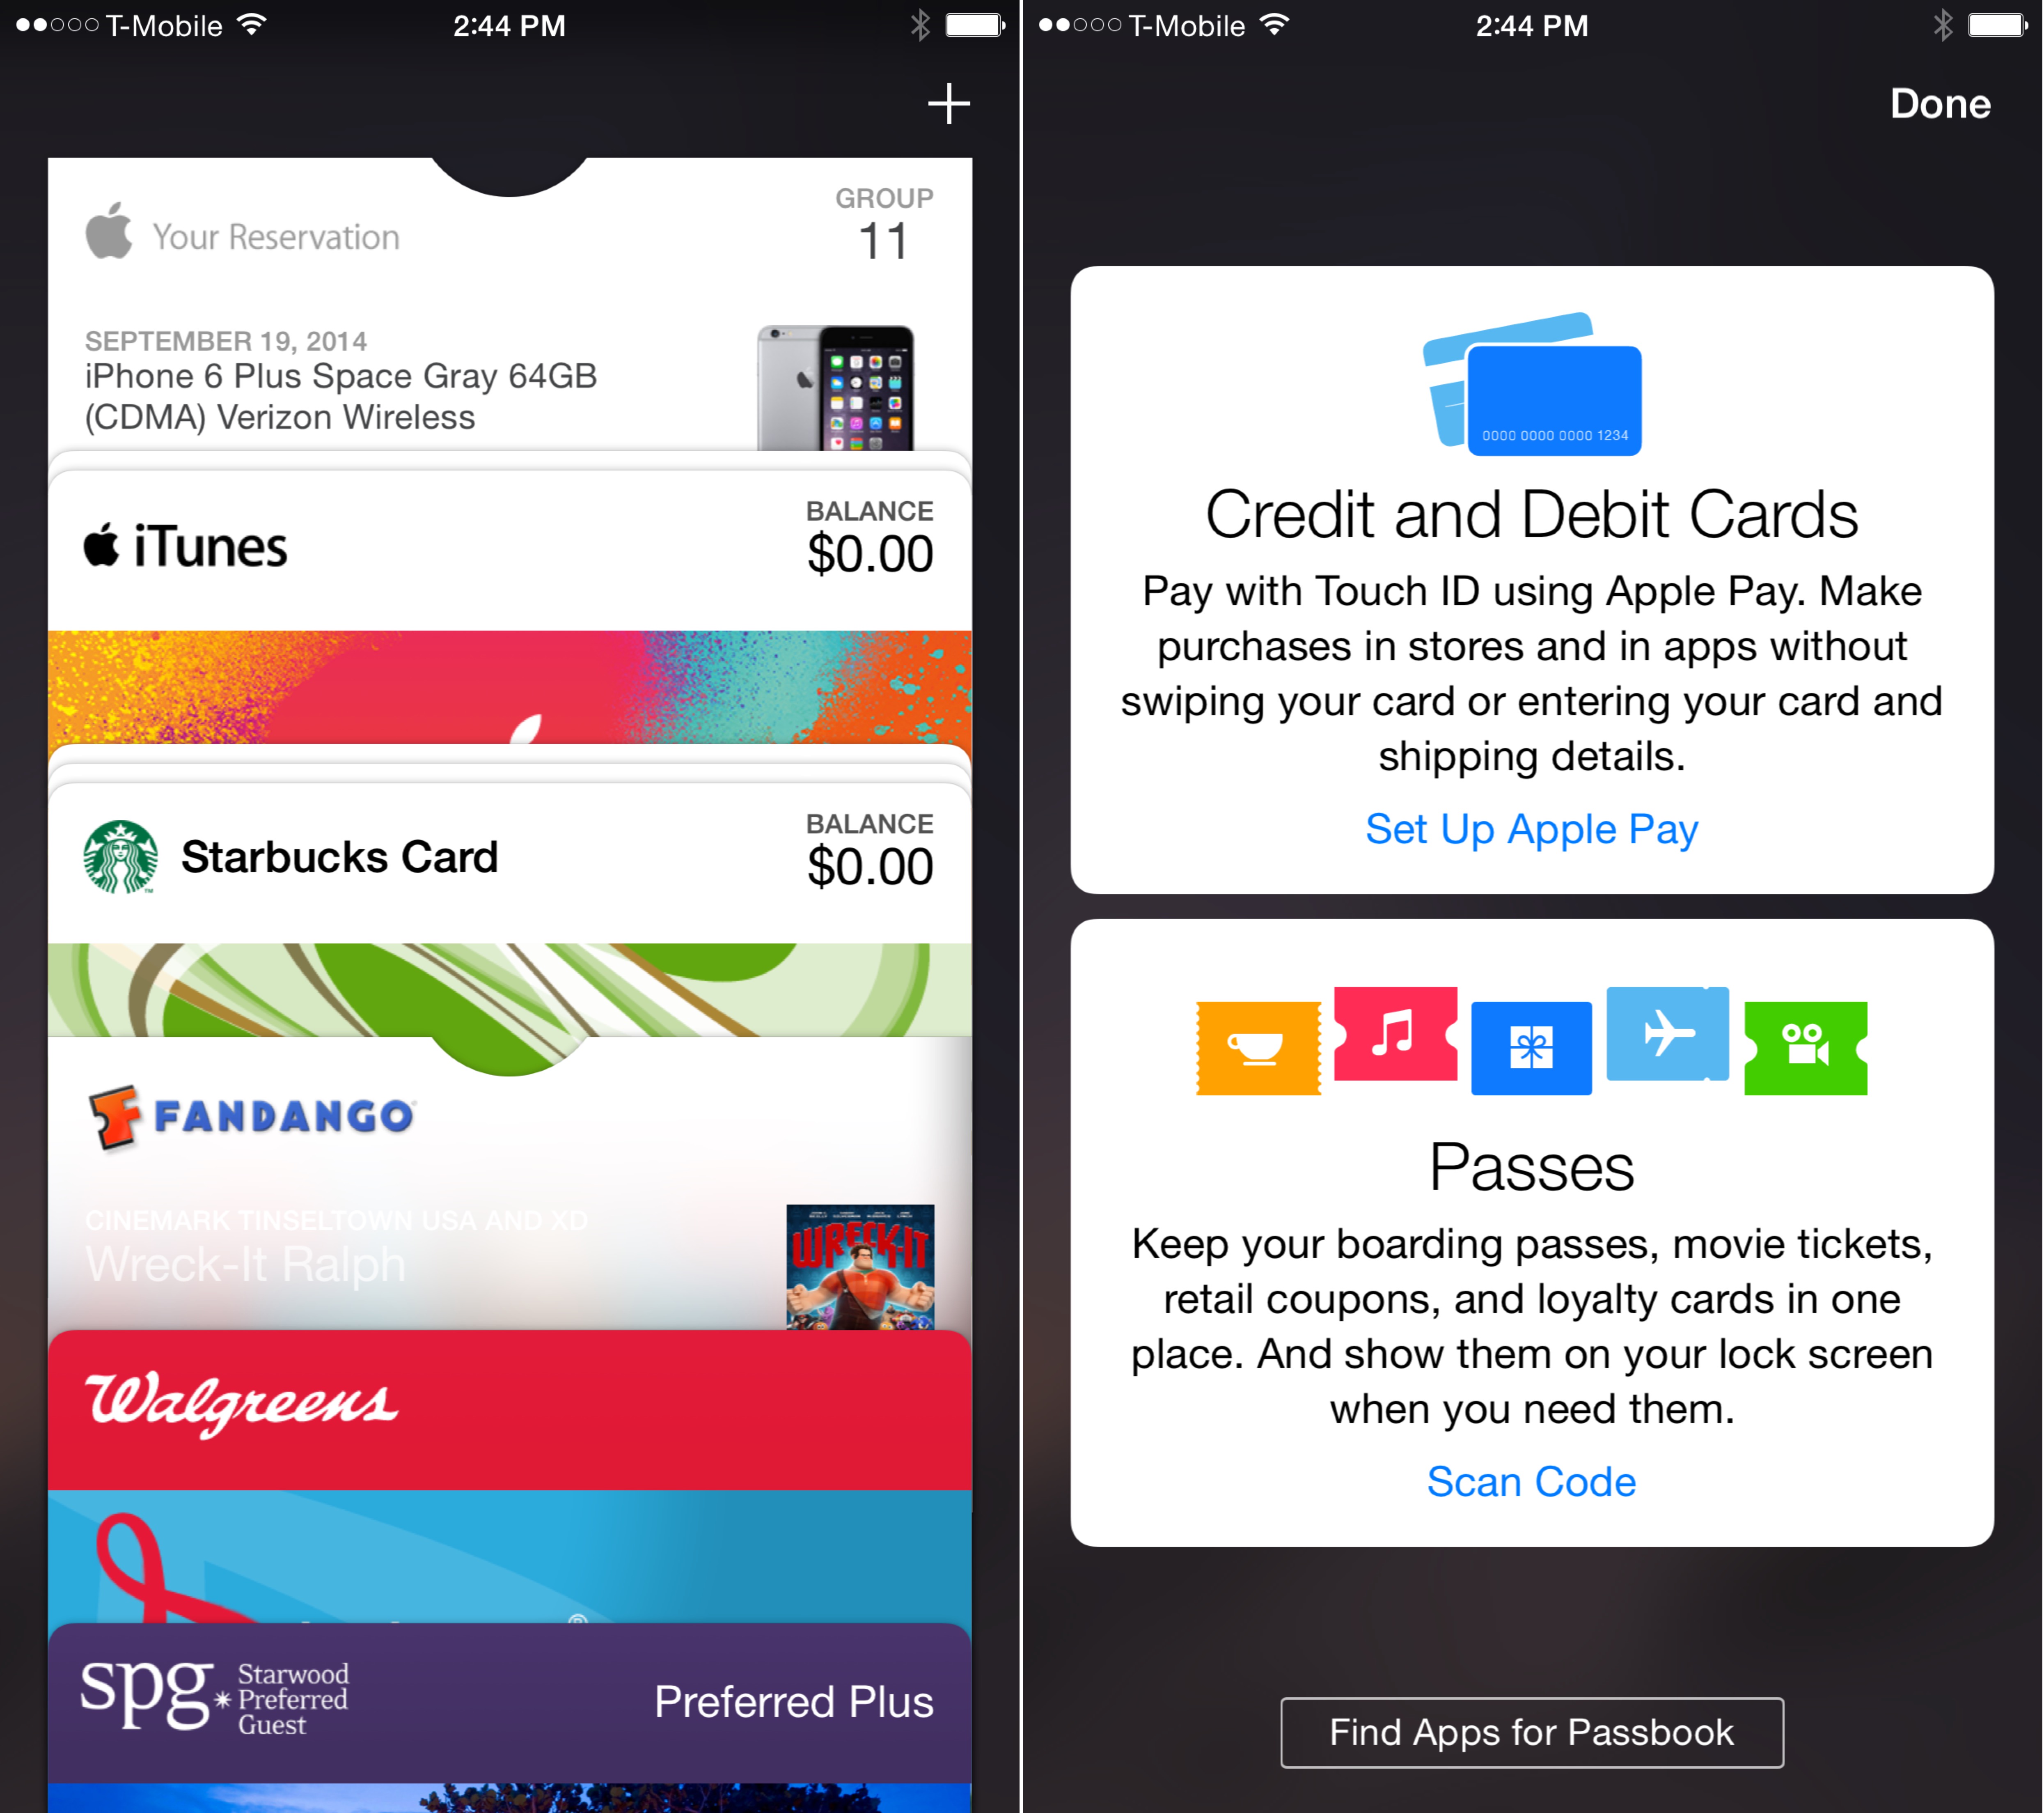
Launch Passbook, and click the ‘+’ button in the upper right-hand corner.
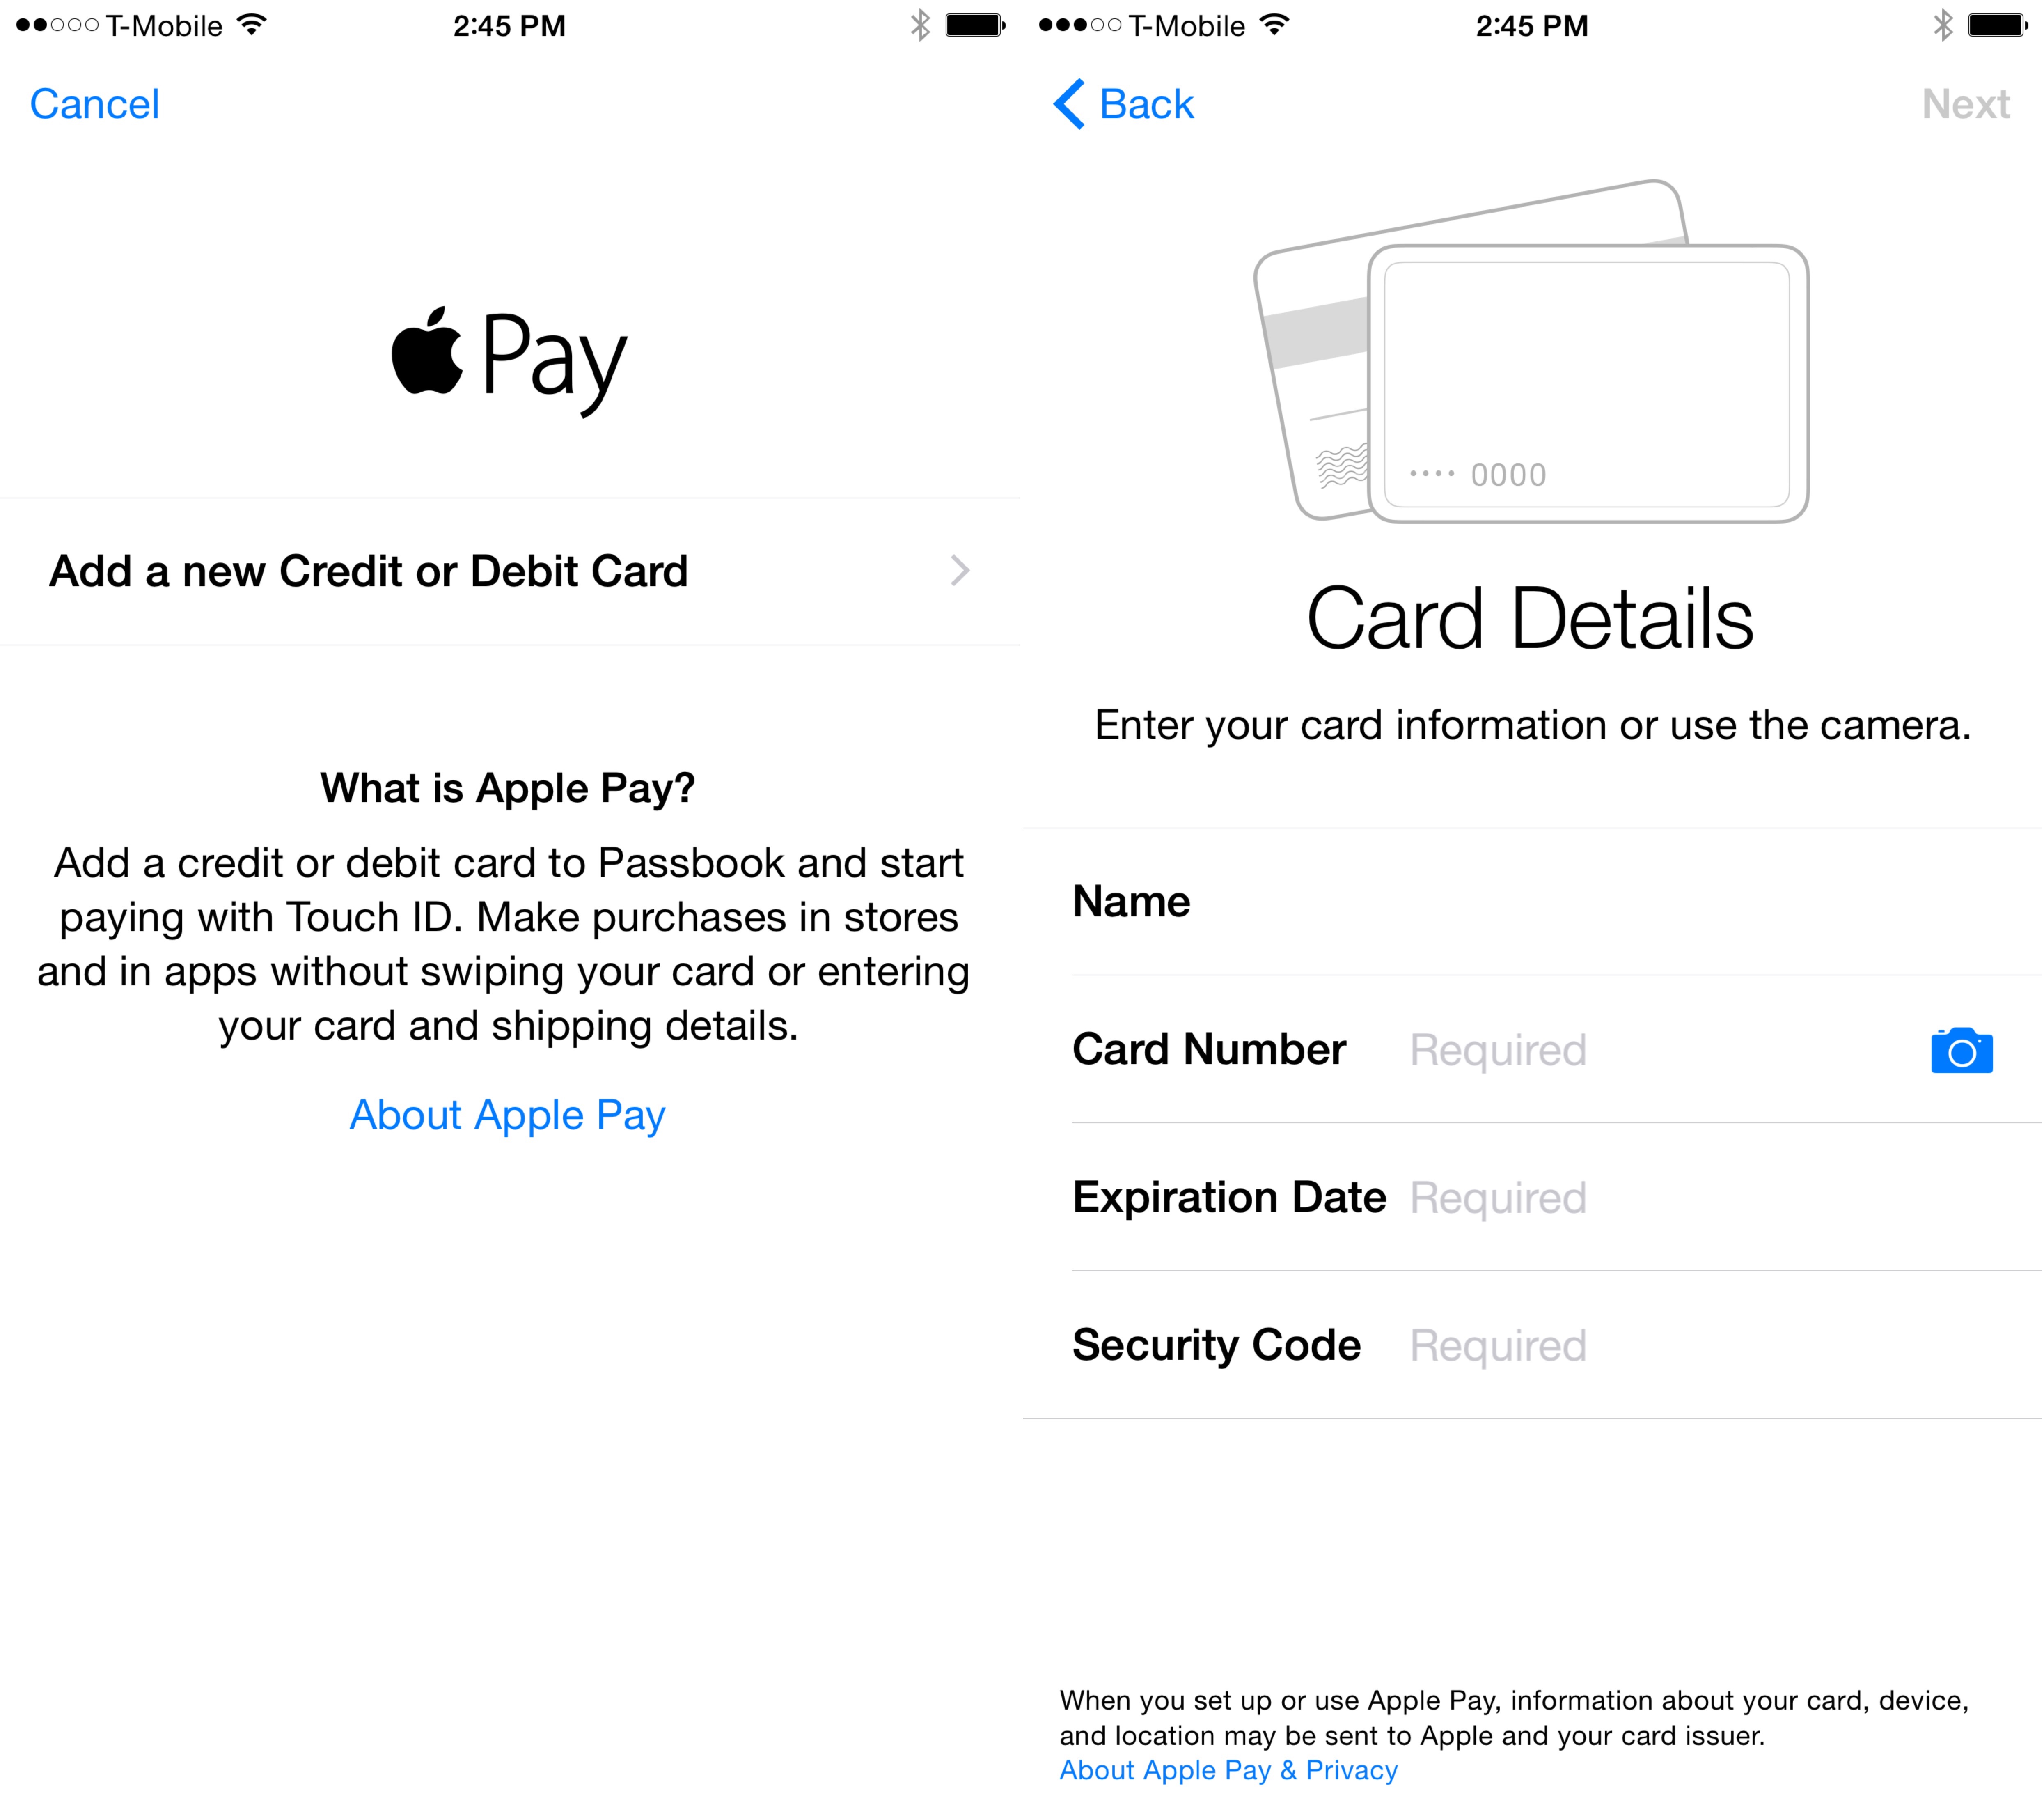
Click the Add a new Credit or Debit Card option. You can then type details manually or use your camera.
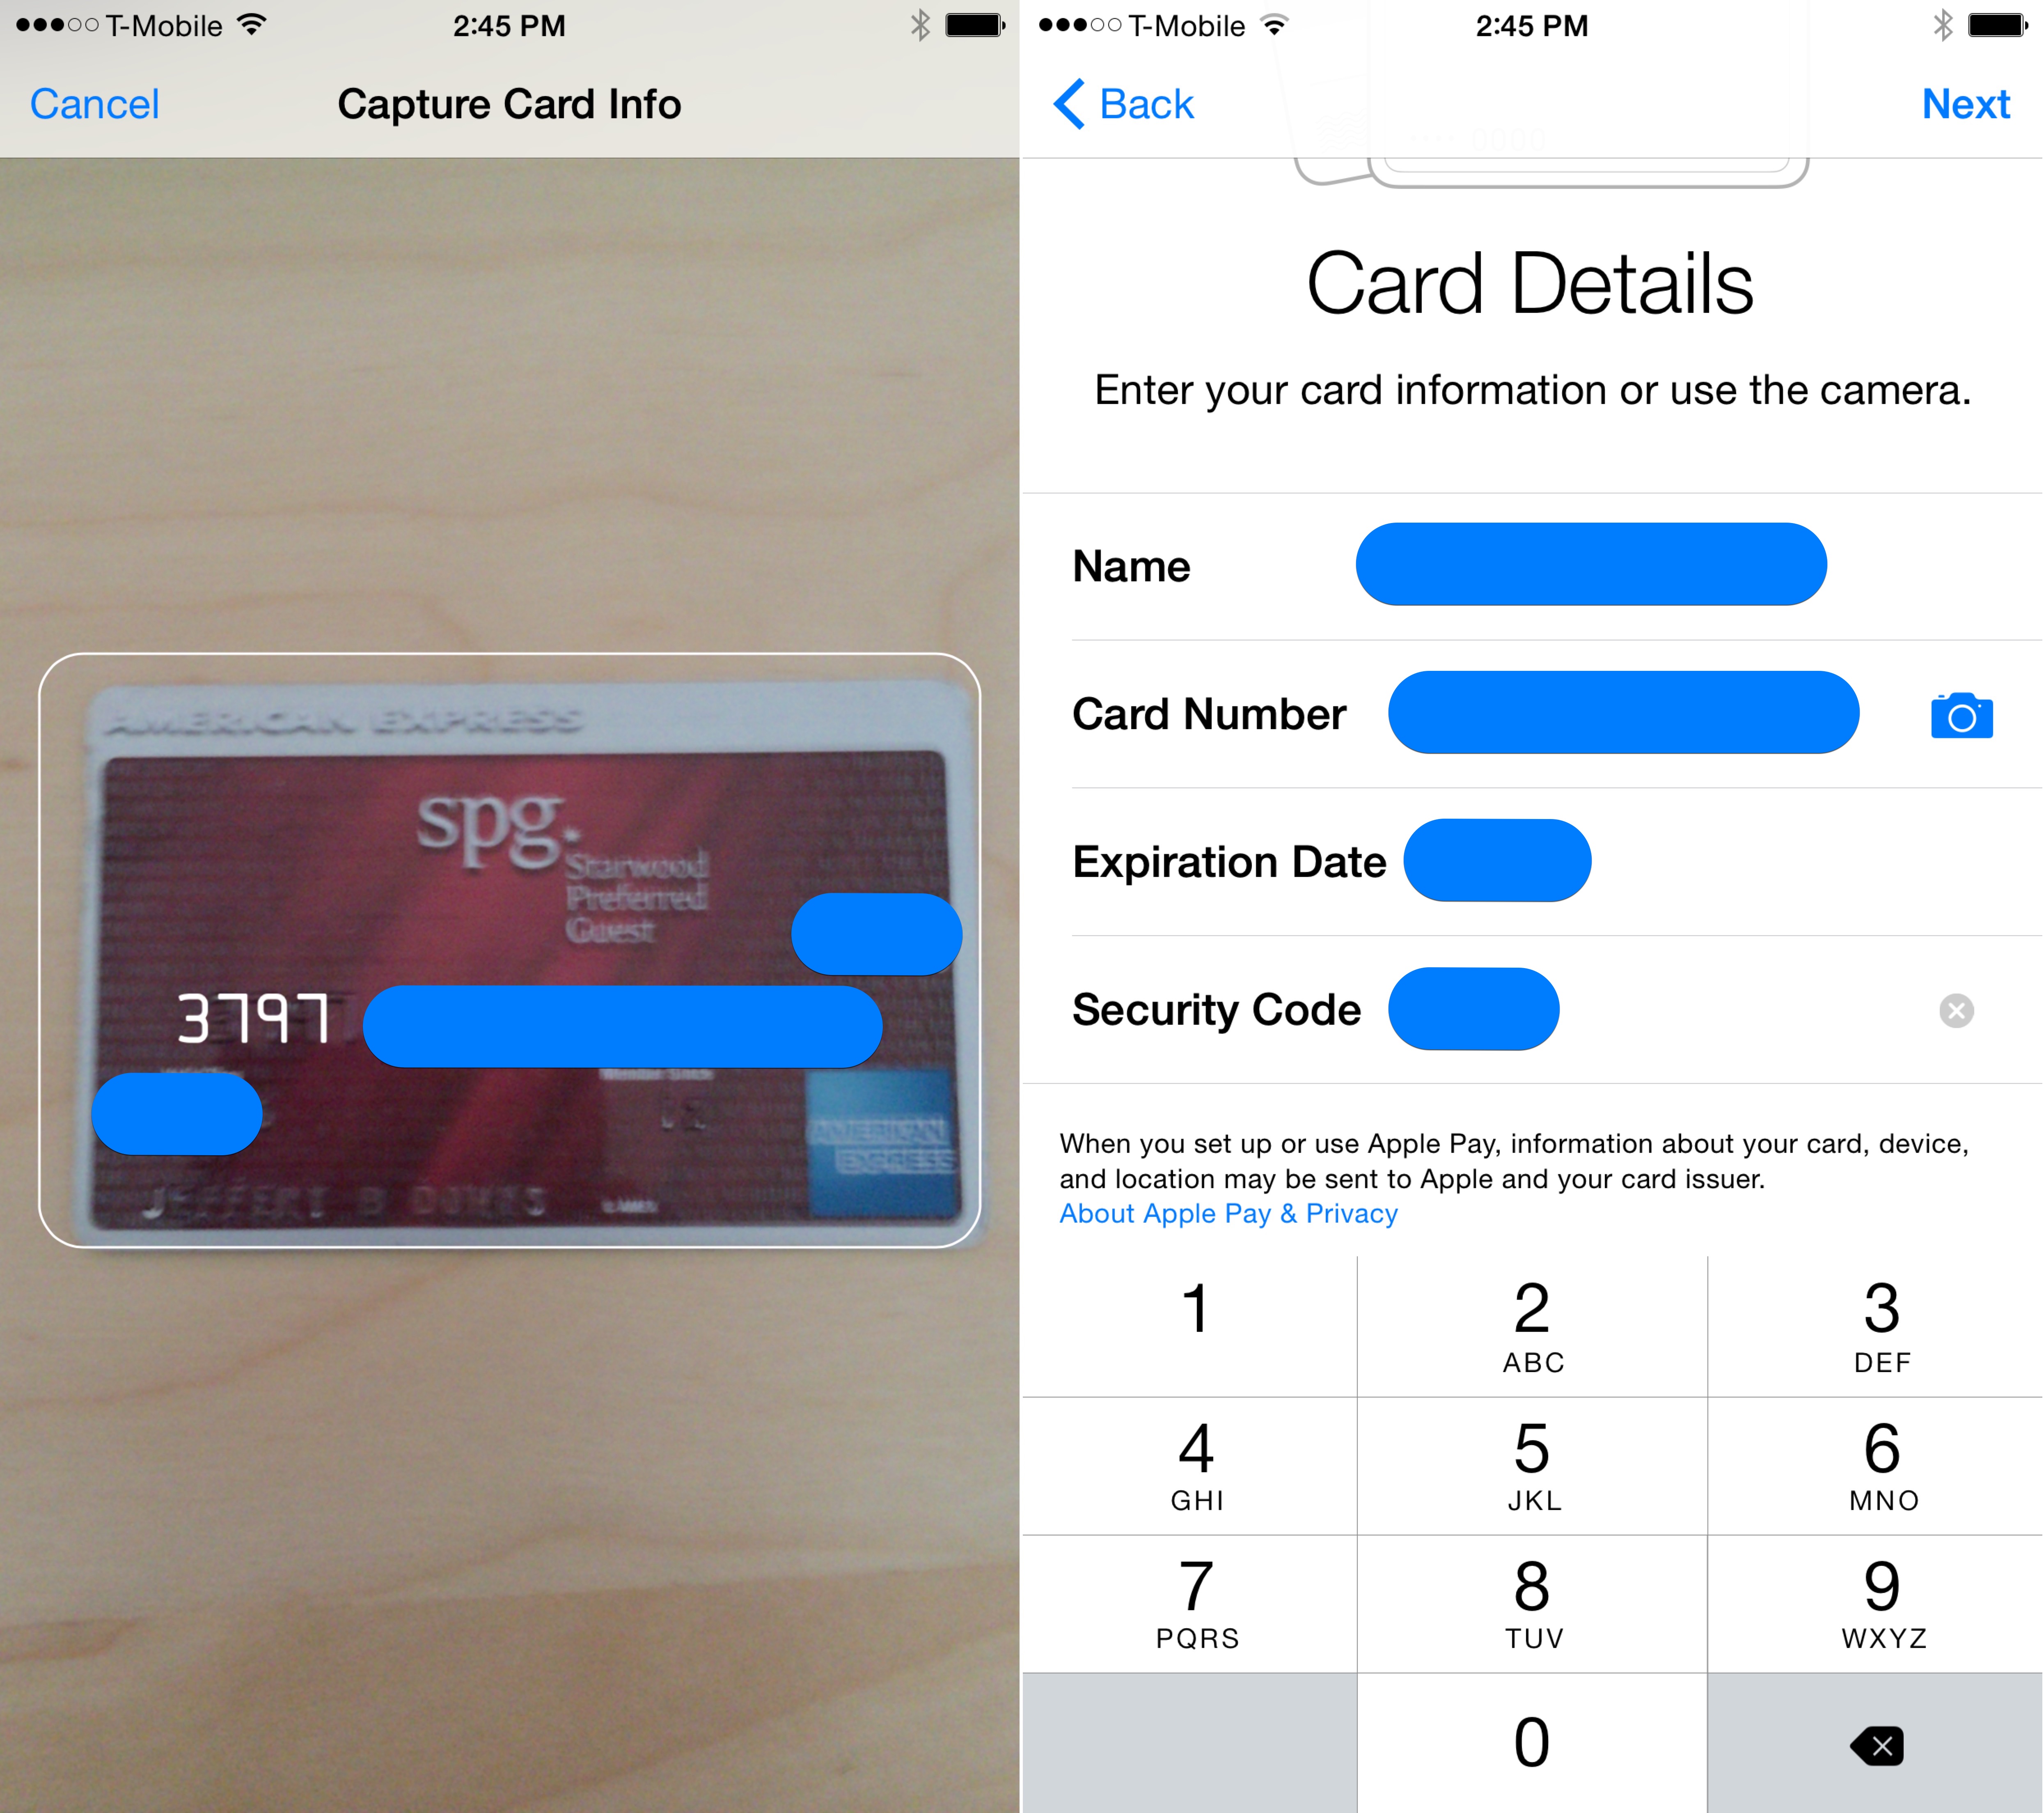
I use my camera in this example to populate some of the fields. You can always edit them as well.
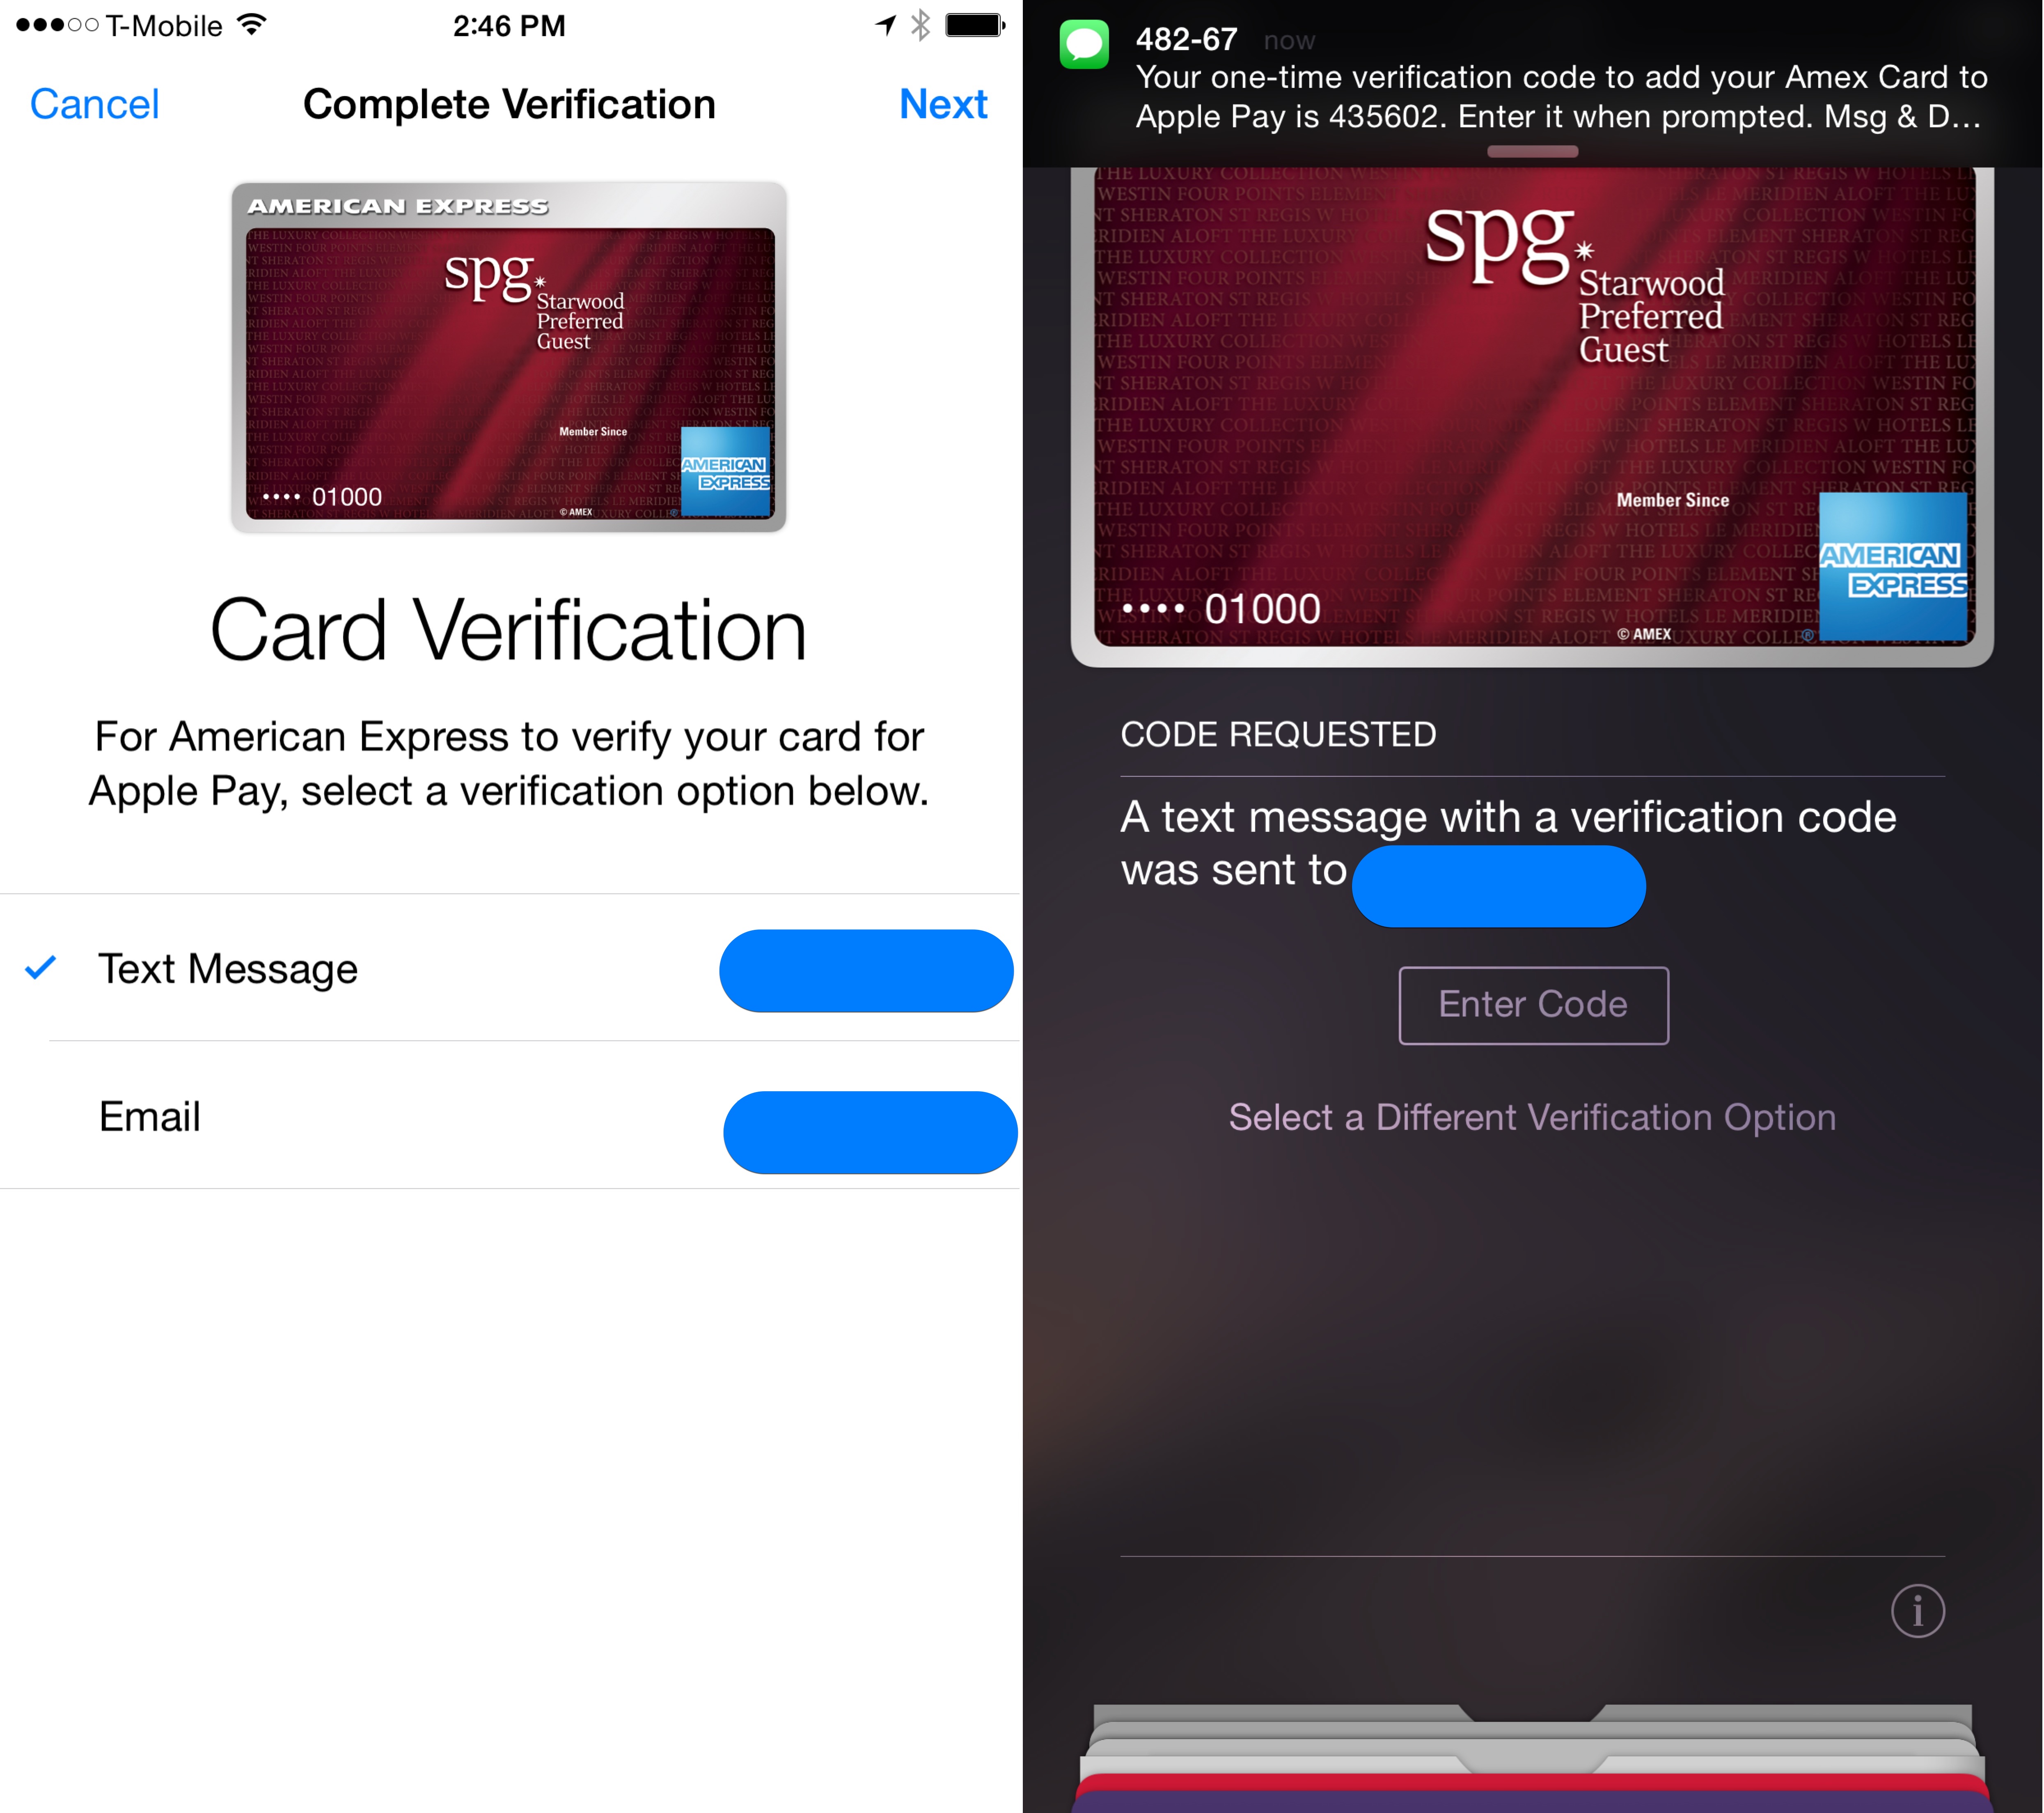
Amex can send a Text Message or Email message with a verification code to quickly get you up and going.
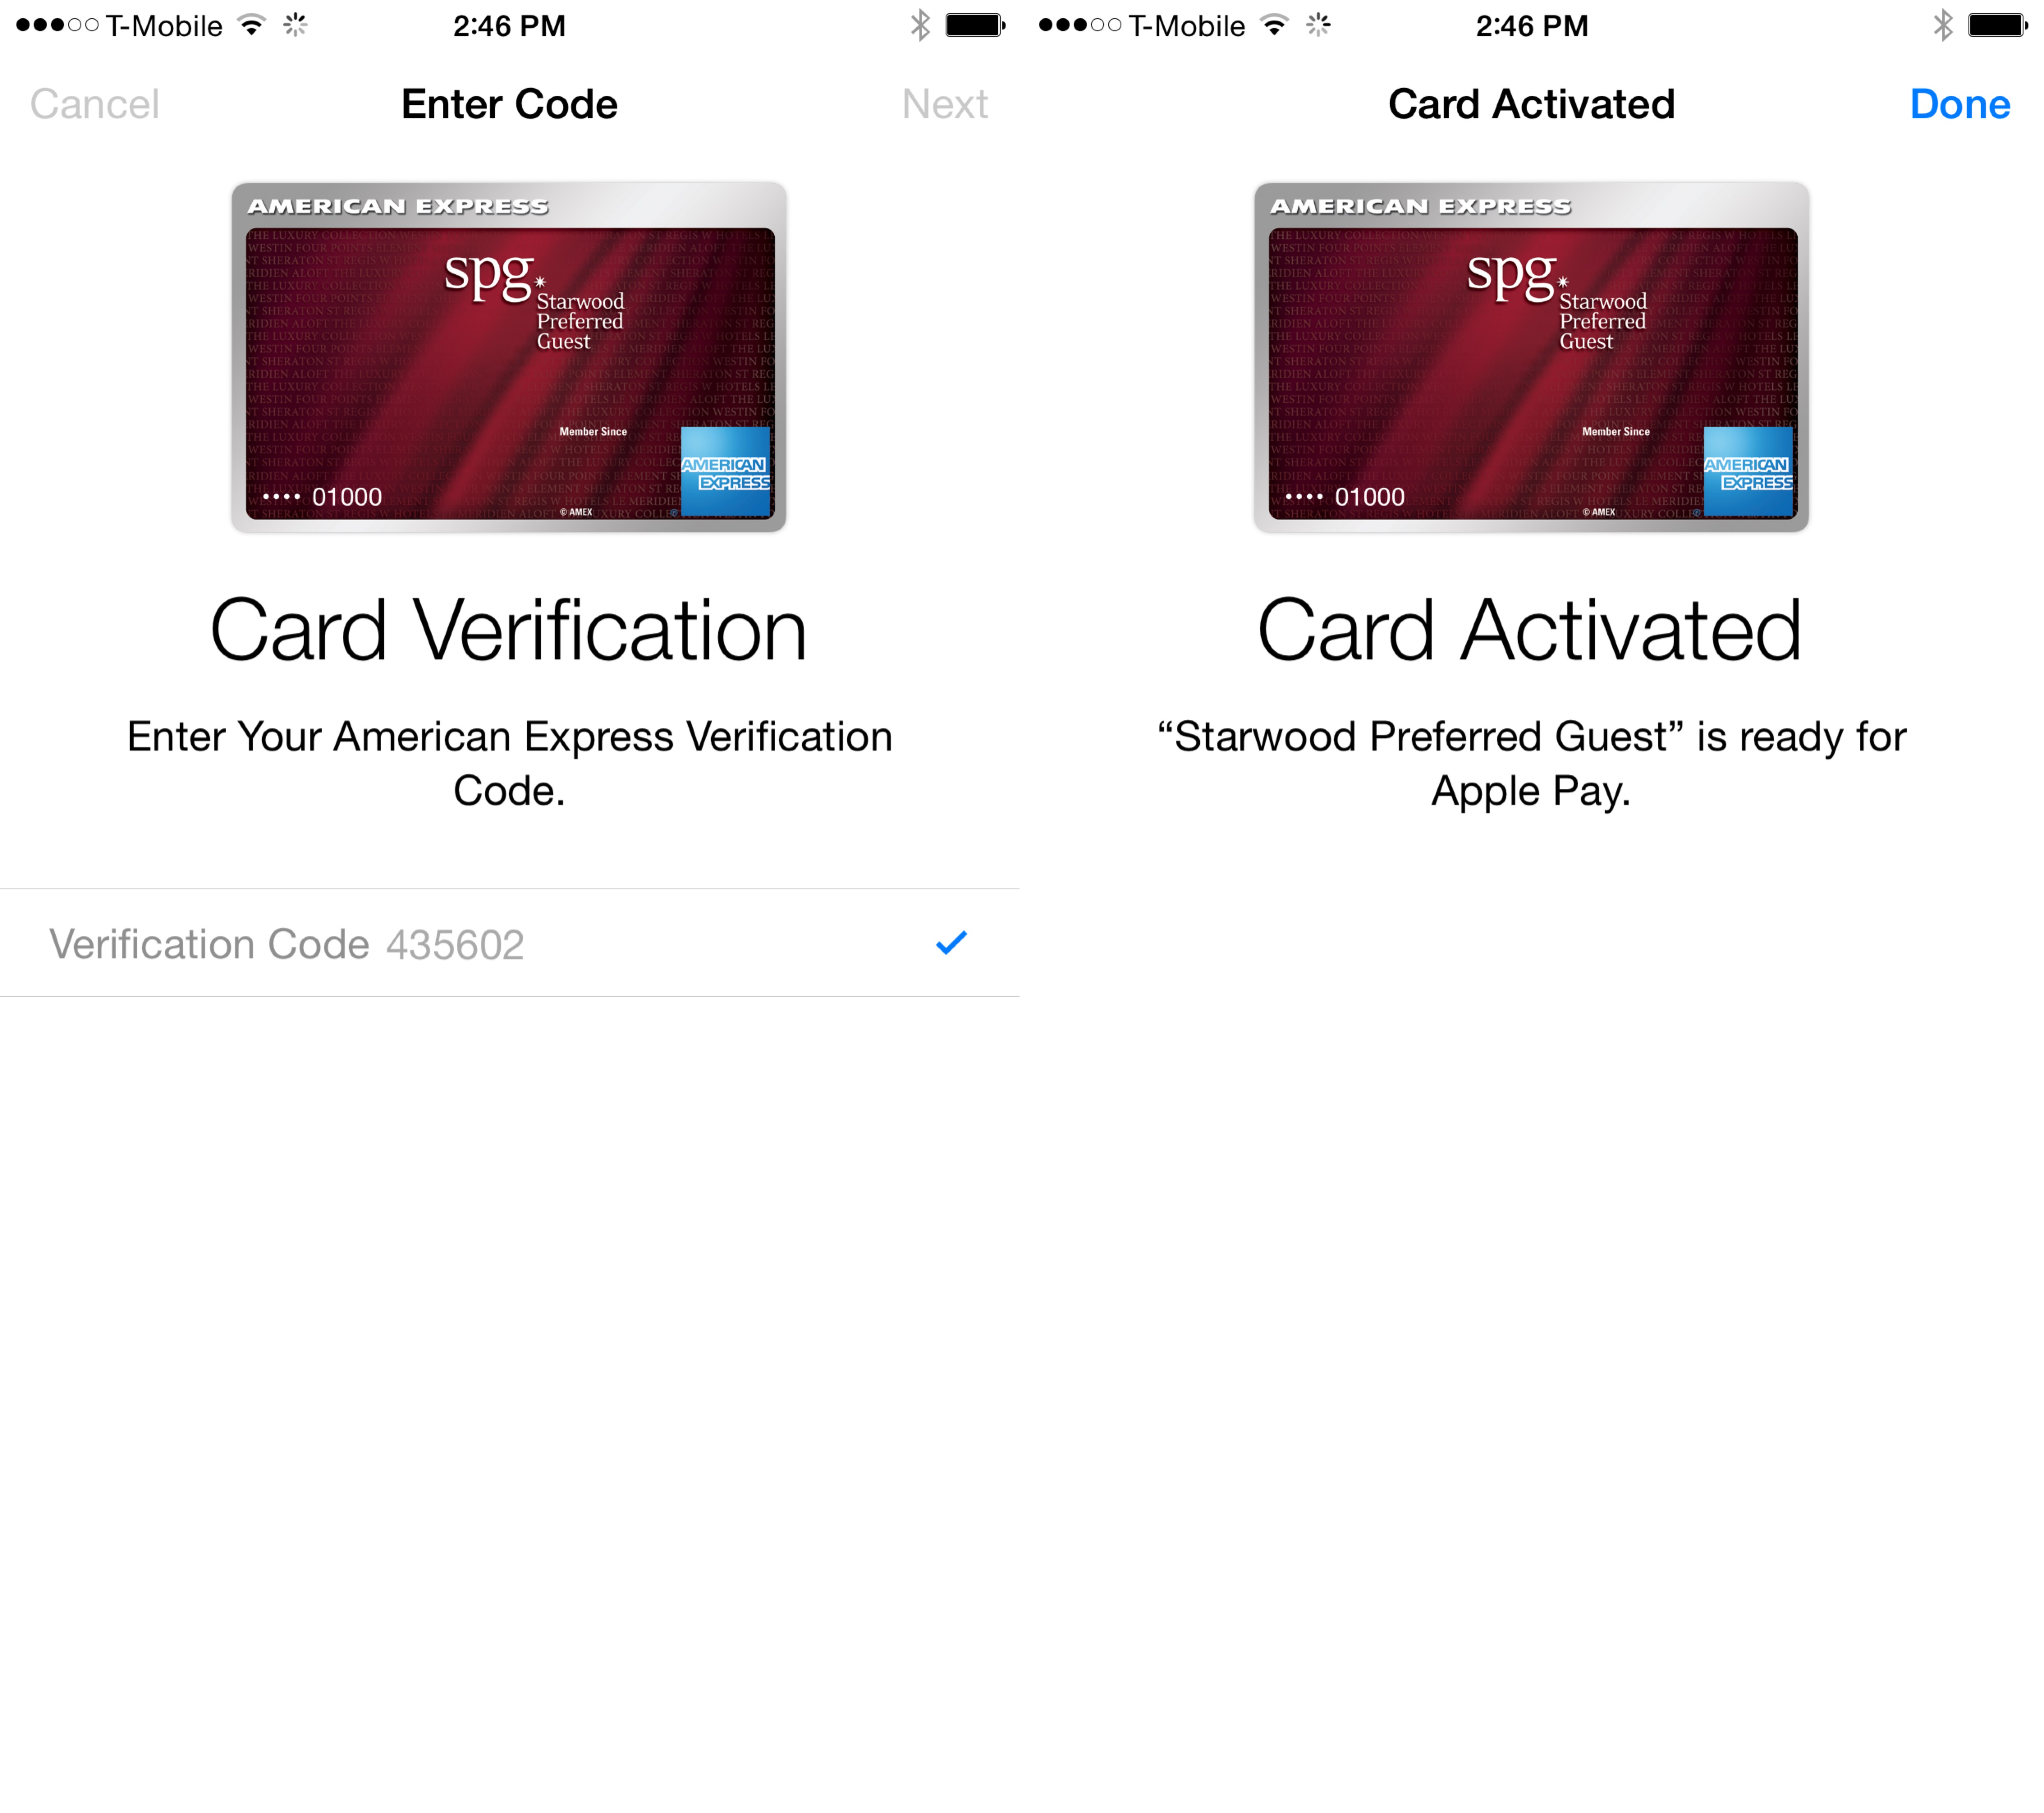
Type in the verification code and you’re well on your way.
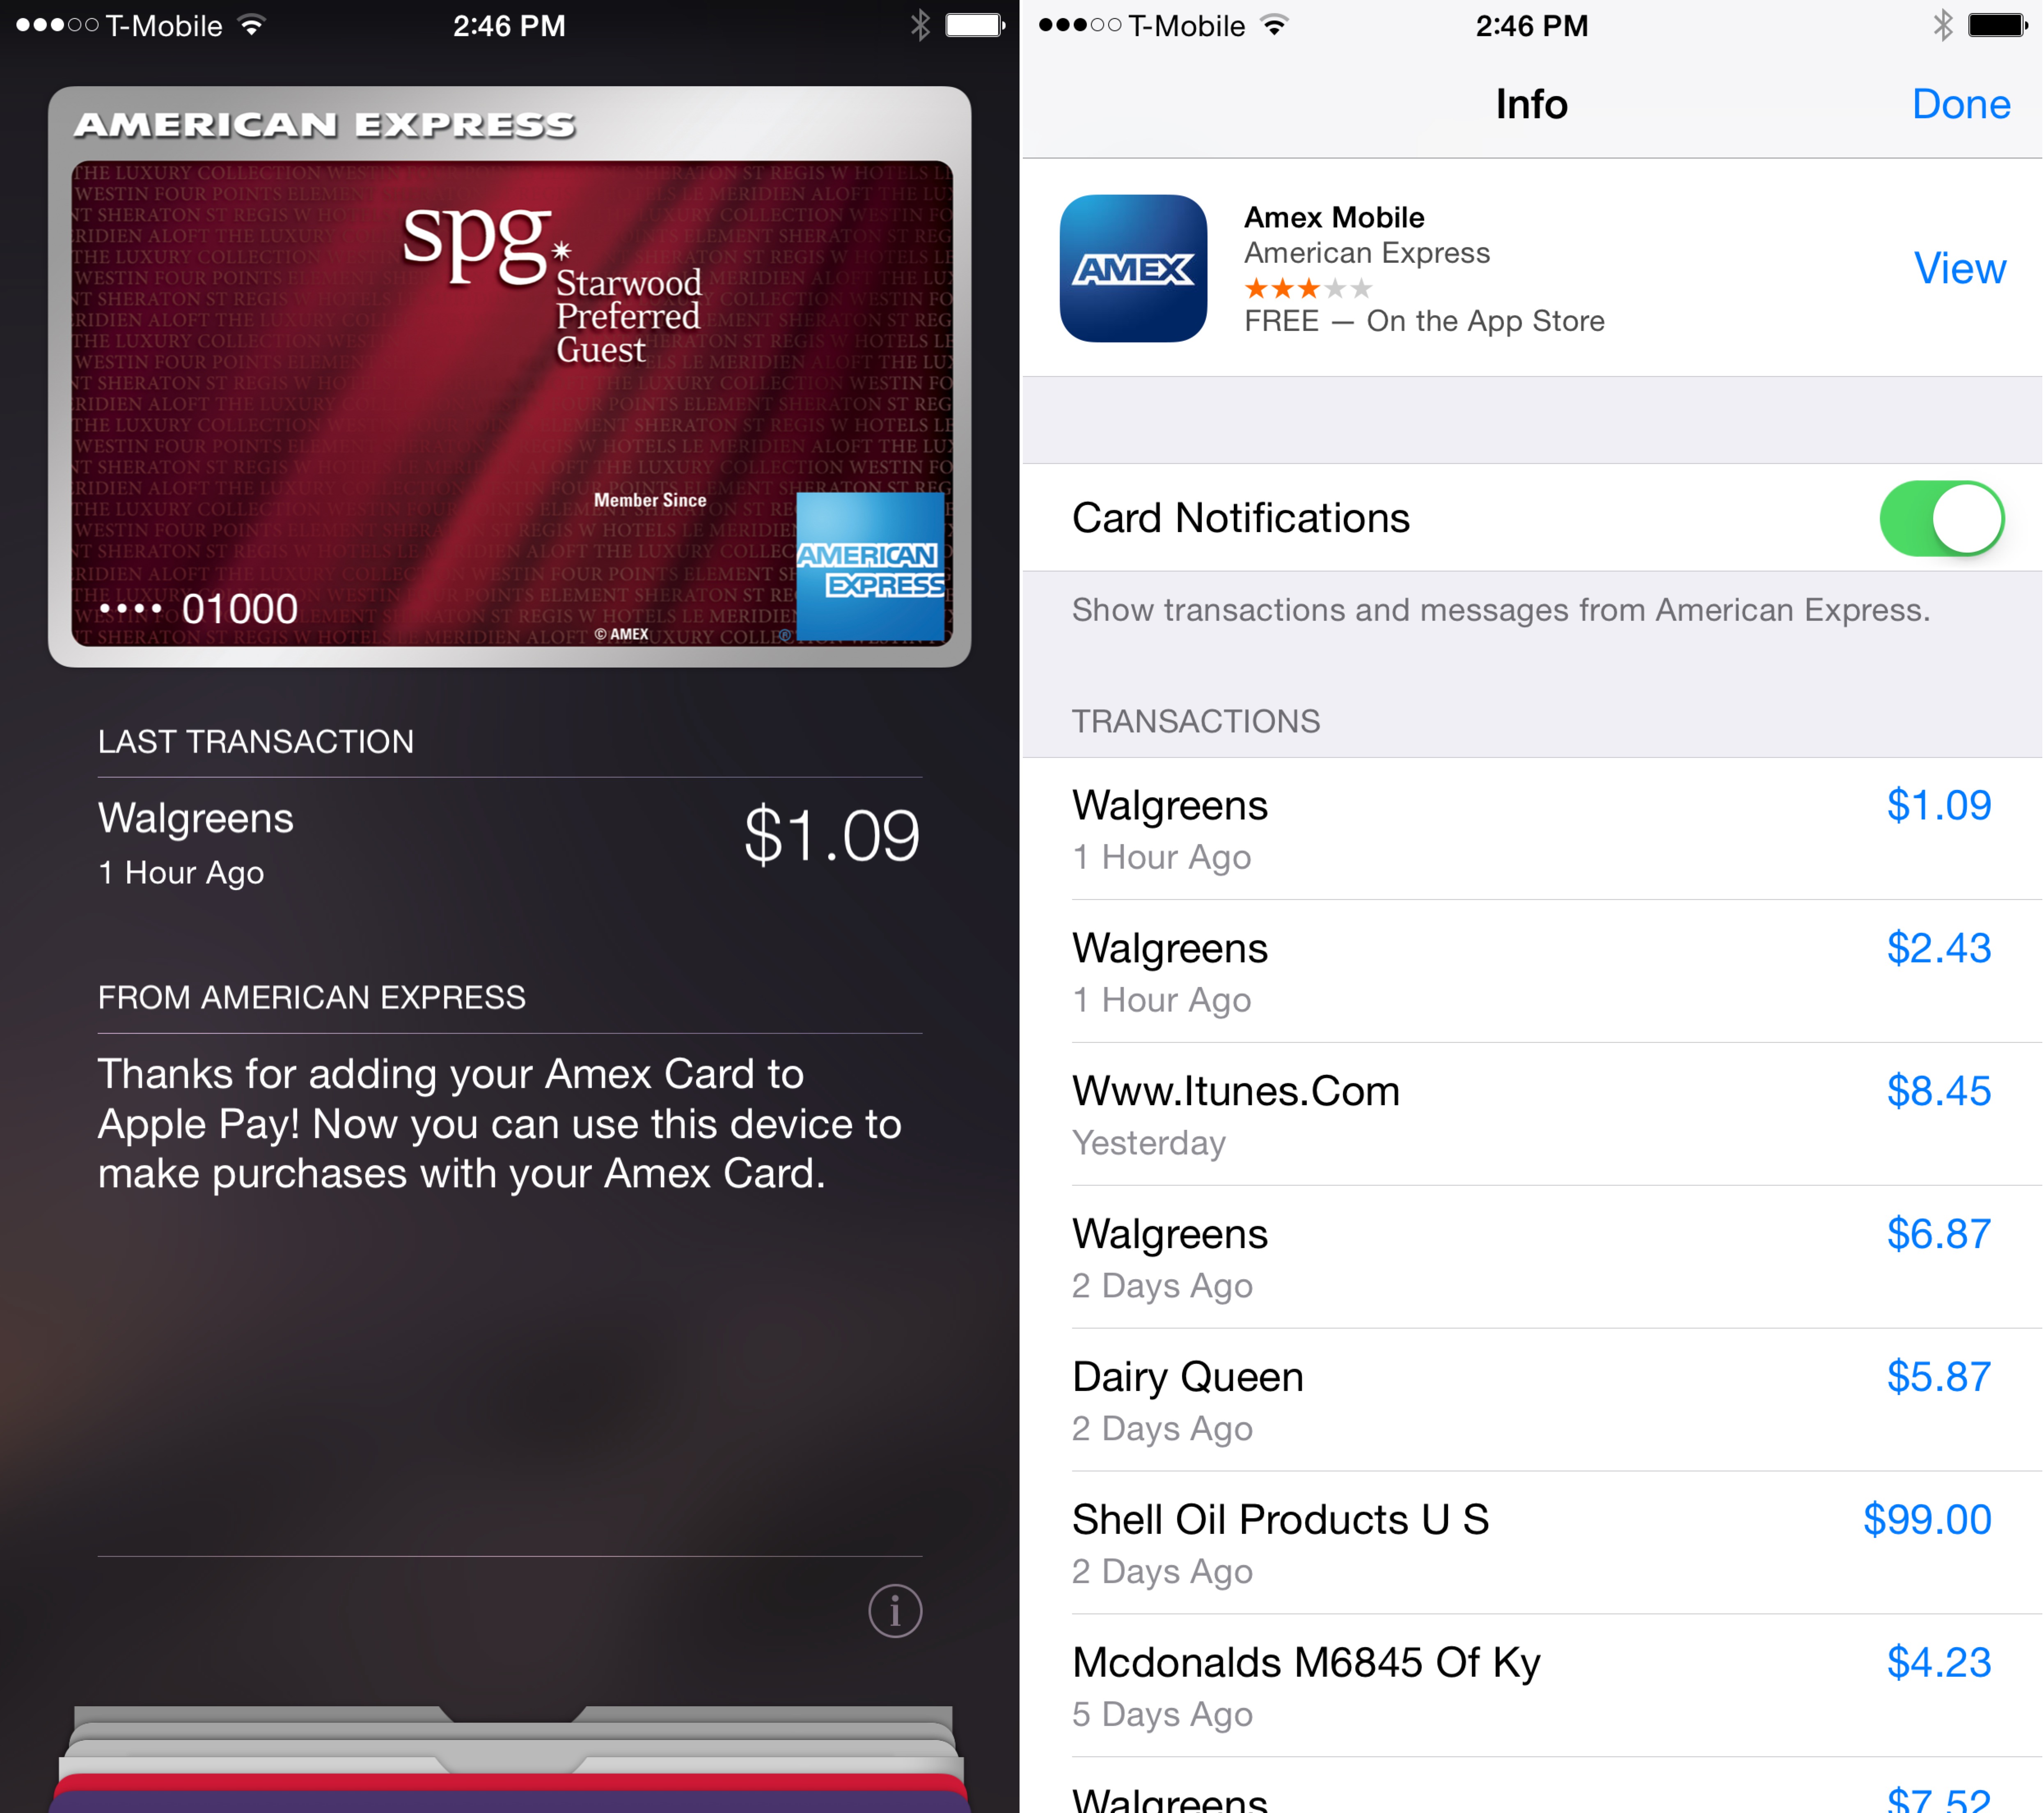
That’s all there is to it, Apple pay is now setup and ready to use.
At launch, the following cards and banks are supported for use with Apple Pay:
Credit Cards:
- Visa
- MasterCard
- American Express
Banks:
- American Express
- Bank of America
- Capital One
- Chase
- Citi
- Wells Fargo
What does this mean for users? It means that you’ll need to have a Visa, MasterCard, or Amex card, and they’ll need to be issued from one of the six listed banks above. You can verify if your card is eligible simply by looking at the card’s markings. It should display the credit card company and the bank issuer logo somewhere on the card. If you have a credit card issued by an obscure or local bank, or if your card is issued by a local credit union, you won’t be able to use Apple Pay with those cards at launch.
Fortunately, more banks are already being scheduled for roll out at a later date. These include the following:
- Barclays
- Navy Federal Credit Union
- PNC
- USAA
- US Bank
Making in-store payments with Apple Pay
Making an in-store payment with Apple Pay is as simple as holding your iPhone 6 or iPhone 6 plus near a participating store’s NFC-enabled terminal, while placing your verified finger on Touch-ID. Seconds later, the terminal will see your device, and the iPhone will authenticate you via Touch ID. Almost instantly, the payment is verified, and you’re on your way (watch the video above to see it in action). It’s extremely painless, seamless, and like the Apple mantra goes, it just works. I’m truly impressed by what Apple, the credit card companies, the banks, and the merchants have been able to pull off so easily.
Once your payment is completed, a receipt appears right on the Lock screen, and is later accessible via Passbook. Nothing is shared with Apple or transmitted iCloud, and everything is done without showing your name, credit card information, or security code to the store clerk.
We’ll have much more to discuss in this post regarding Apple Pay as the day progresses, so bookmark this post and keep it locked here on iDownloadBlog. Also, tune in later tonight as we discuss Apple Pay on Let’s Talk iOS.
Making online (in-app) purchases with Apple Pay
Apple Pay also allows you to make online in-app purchases via apps that are updated to support the feature. There are quite a few apps that support Apple Pay on day one, and one of them is the official Target app. In the video above, I show you how to use the Target app to make a purchase using Apple Pay. No logins were required, and no information was needed at all. I simply tapped the Apple Pay button, and was prompted to verify my purchase using Touch ID. It’s the very definition of seamless. It takes virtually all of the friction out of the online shopping experience. For a list of places where you can use Apple Pay, check out this post.
My overall thoughts
If your experience was anything like mine, then you’re absolutely giddy about the potential of Apple Pay. True, this was just a small test in the grand scheme of things, but the service works as easy, if not easier, than Apple touted when it revealed Apple Pay at the iPhone 6 event. This service truly does have the potential to be a game changer, and to be honest, I’m not sure which part of the service has left me most impressed—in store payments, or online in-app payments.
I look forward to using Apple Pay for many of my future payments, because going back to the old way of making payments now seems a bit antiquated. What has your experience been like? Sound off down below in the comments.