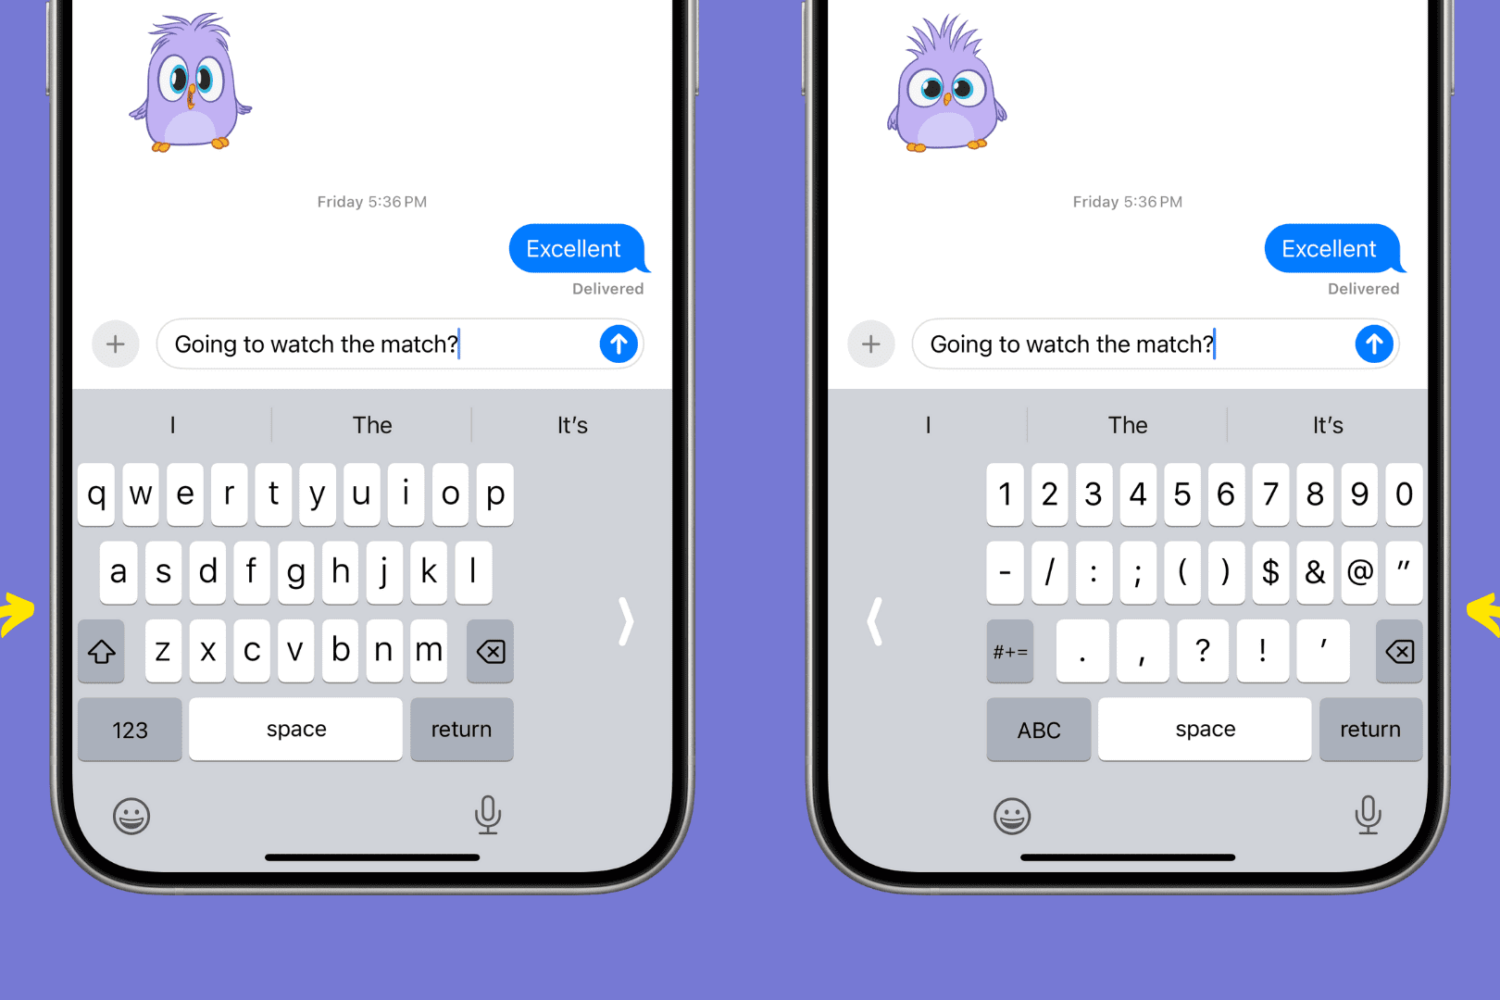
Learn about this quick tip that shrinks the iPhone keyboard onto the left or right side, making it easy to type while holding your phone with one hand.
How to use one-handed left or right keyboard on iPhone
Learn about this quick tip that shrinks the iPhone keyboard onto the left or right side, making it easy to type while holding your phone with one hand.
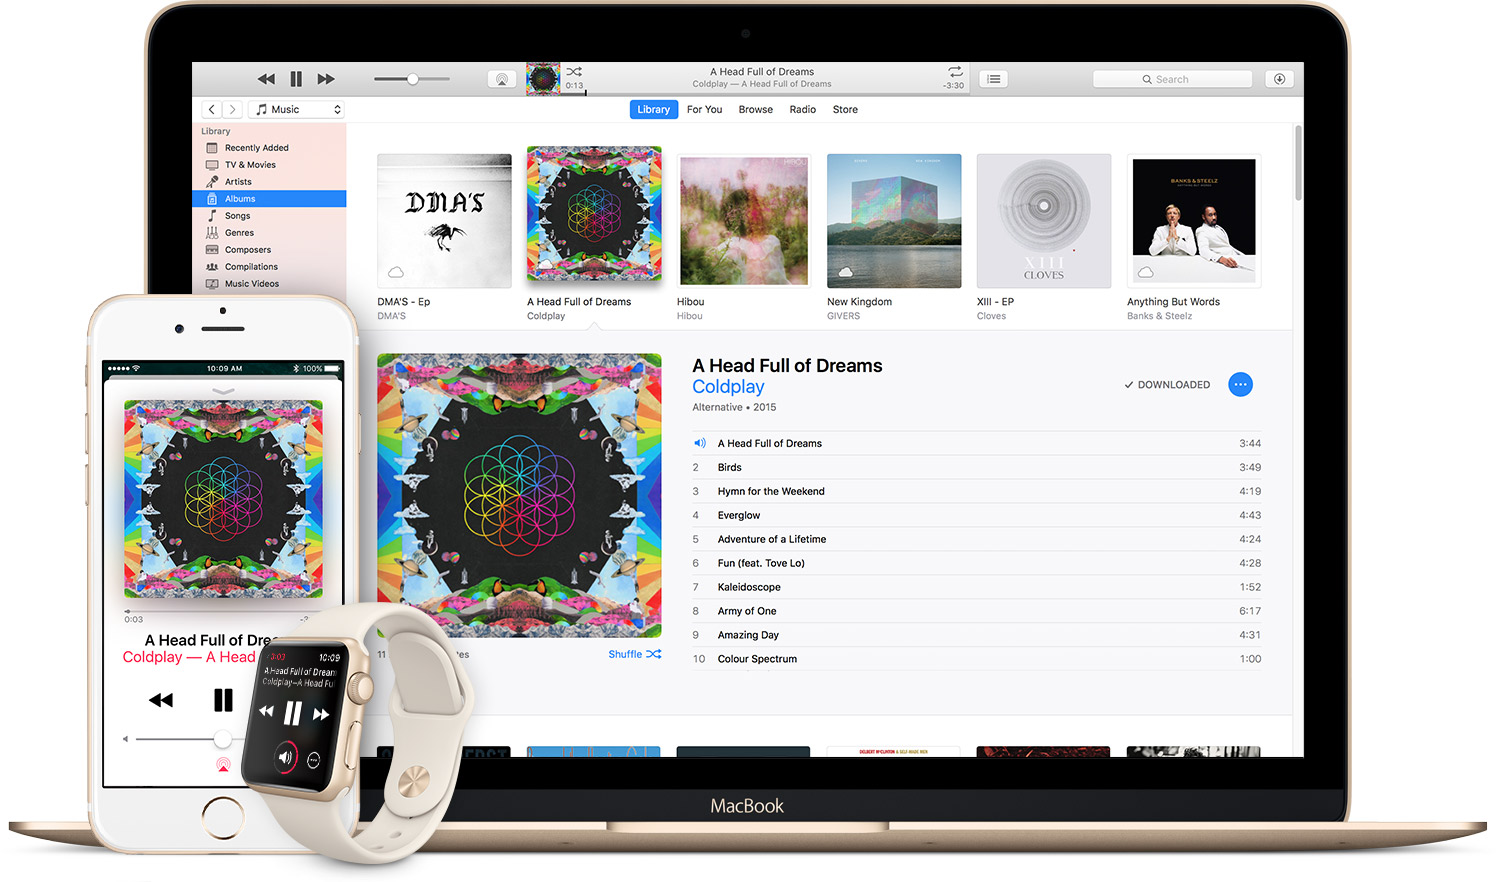
Do you use Apple Music on a regular basis and foresee continuing to do so? Are you paying your membership month-to-month? If so, how would you like to get full twelve months of uninterrupted Apple Music experience for the price of ten?

Carrying over the complete Health database from your old to a new iPhone used to require restoring the new phone from an iCloud backup or an encrypted backup created in iTunes.

Since iOS 7.1, Apple's mobile operating system has included a feature that allows you to manually adjust the display's white point to your liking. A white point, also known as reference white or target white, defines the color white in reproduction.
Lowering the white point makes bright colors on your iPhone, iPad or iPod touch's screen more intense. Conversely, increasing the white point reduces the intensity of bright colors, thereby helping extend the run time of your iPhone or iPad.
The ability to manually adjust the white point so that it matches a white surface in your room is particularly handy for owners of devices that lack Apple's True Tone display technology.
How to adjust the intensity of bright colors on iPhone and iPad1) Launch the Settings app on your device.
2) Tap Accessibility.
3) Tap Display & Text Size underneath the Vision heading.
4) Slide the button labeled Reduce White Point to the ON position.
5) Now drag the slider underneath the button to the right to make bright colors less intense or move it to the left to lower the white point, which will make bright colors more intense.
Reducing the intensity of the screen's battery-hogging backlight by increasing the white point is one of the nearly dozen proven ways to save battery life on iPhone and iPad.
TIP: To get to this feature faster, set it as a triple-click Home button action in Settings → General → Accessibility → Accessibility Shortcut.
Again, don't confuse Reduce White Point with the True Tone feature.
True Tone ≠ Reduce White PointWhat exactly is the difference between True Tone and Reduce White Point?
True Tone is Apple's display technology currently found on iPad Pro models which changes the white point of the display on the fly while simultaneously adjusting brightness in order to compensate for the lighting in the environment
The Reduce White Point option does not take advantage of the ambient light sensors in your device like True Tone does. As a result, you cannot tell your device to adjust the white point of its display dynamically to match the current lighting conditions in a room.
Put simply, should lighting conditions change you'll need to repeat these steps to manually recalibrate the intensity of bright colors for the current ambient lighting.
Have you ever wanted to set the screen brightness on your iOS device below the normal threshold? If so, the Low Light filter in your Zoom accessibility settings is your friend.
Need help? Ask iDB!If you like this how-to, pass it along to your support folks and leave a comment below.
Got stuck? Not sure how to do certain things on your Apple device? Let us know via help@iDownloadBlog.com and a future tutorial might provide a solution.
Submit your how-to suggestions via tips@iDownloadBlog.com.
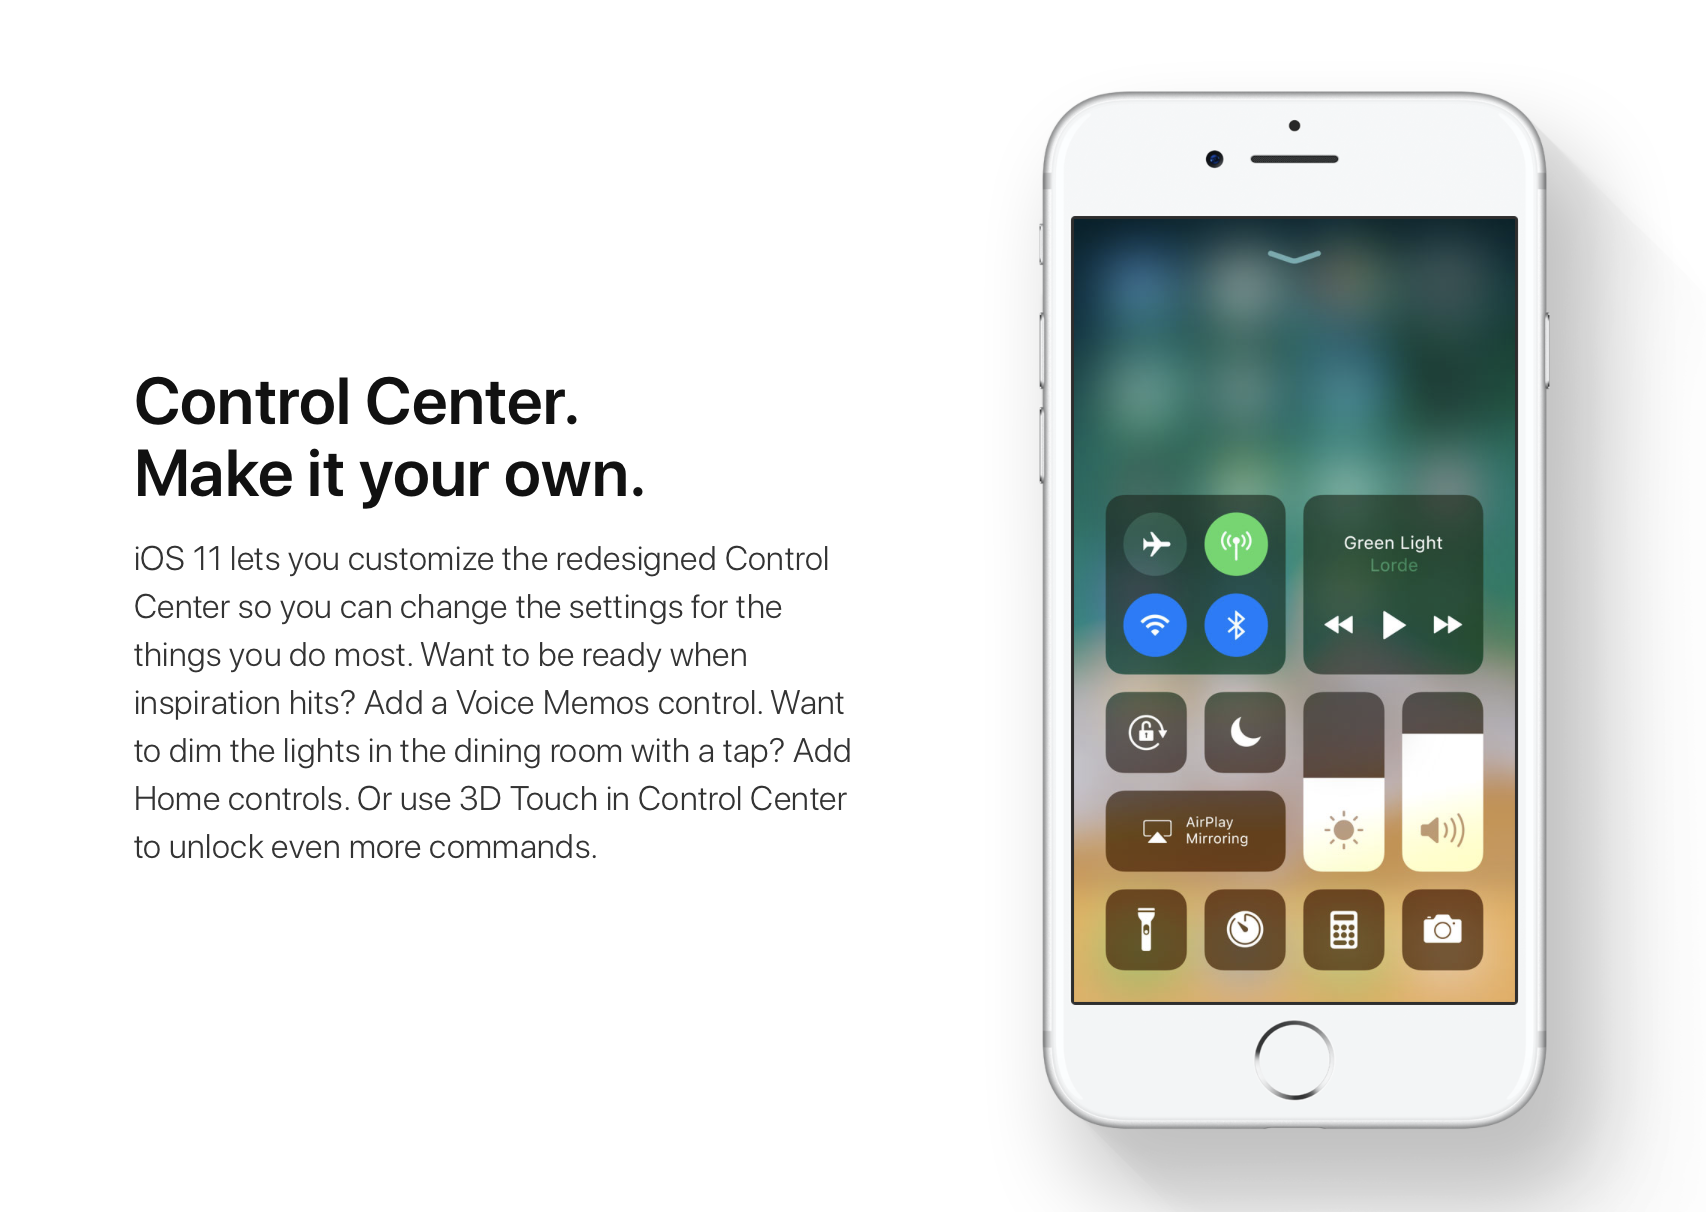
iOS 11 offers more customization for Control Center than ever, allowing you to make it your own by disabling toggles you rarely use. If puts frequently used controls all on one page, many of which can be expanded to reveal additional options when pressed with 3D Touch.
For instance, you can press the Home toggle lightly to bring up your HomeKit scenes, press the Now Playing toggle with 3D Touch to expand media controls, press the Apple TV Remote toggle to navigate your Apple TV or type some text into it, and much, much more.
So far, so great. But what if your device lacks 3D Touch?
Unlike prior iOS editions that didn't provide a fallback mechanism for 3D Touch interactions on non-3D Touch devices, iOS 11 allows you to use all of the features the redesigned Control Center has to offer without having to own a 3D Touch device.
Our resident video editor Andrew O'Hara details how iOS 11's Control Center works on devices that don't include 3D Touch features, like iPads and iPhone 6 and older models.
https://www.youtube.com/watch?v=cpSoo5_TqIQ
Subscribe to iDownloadBlog on YouTube.
Continue reading for step-by-step instructions on using Control Center without 3D Touch
How to use Control Center without 3D Touch1) Access Control Center by swiping up from the bottom of the screen
TIP: Enable Access Within Apps in Settings → Control Center to have your device respond to that gesture when you're using an app.
2) Tap and hold on the control to expand it.
In Andrew's example, he long-taps the Brightness toggle to access controls for turning Night Shift on or off. You can long-tap other Control Center items that are expandable. For example, long-tapping the Volume control enlarges the slider as if you pressed it with 3D Touch.
iPad lacks Taptic Engine so you won't feel haptic feedback when long-tapping.
That's it, boys and girls, now you know how to interact with Control Center on iOS 11 without actuating having to have a 3D Touch device. This tip should be especially useful for iPad owners as Apple's tablets lacks 3D Touch features.
TUTORIAL: How to force-quite iPad apps on iOS 11
Don't forget you can selectively enable or disable nearly two-dozen different toggles and change the order in which they appear in Control Center under Settings → Control Center → Customize Controls, including new system toggles and features like Screen Recording, Voice Memos, Low Power Mode, Apple TV Remote, Accessibility Shortcuts and more.
To lear more about iOS 11's Control Center, watch another walkthrough video below.
https://www.youtube.com/watch?v=UGWjmt6UXJI
Aside from drag and drop, iOS 11 brings five different types of tap gestures, including a longer tap to move multiple apps on the Home screen, a special half-long tap to pull up an extra Dock menu and a long-tap in the notifications overlay to access additional options.
Need help? Ask iDB!If you like this how-to, pass it along to your support folks and leave a comment below.
Got stuck? Not sure how to do certain things on your Apple device? Let us know via help@iDownloadBlog.com and a future tutorial might provide a solution.
Submit your how-to suggestions via tips@iDownloadBlog.com.
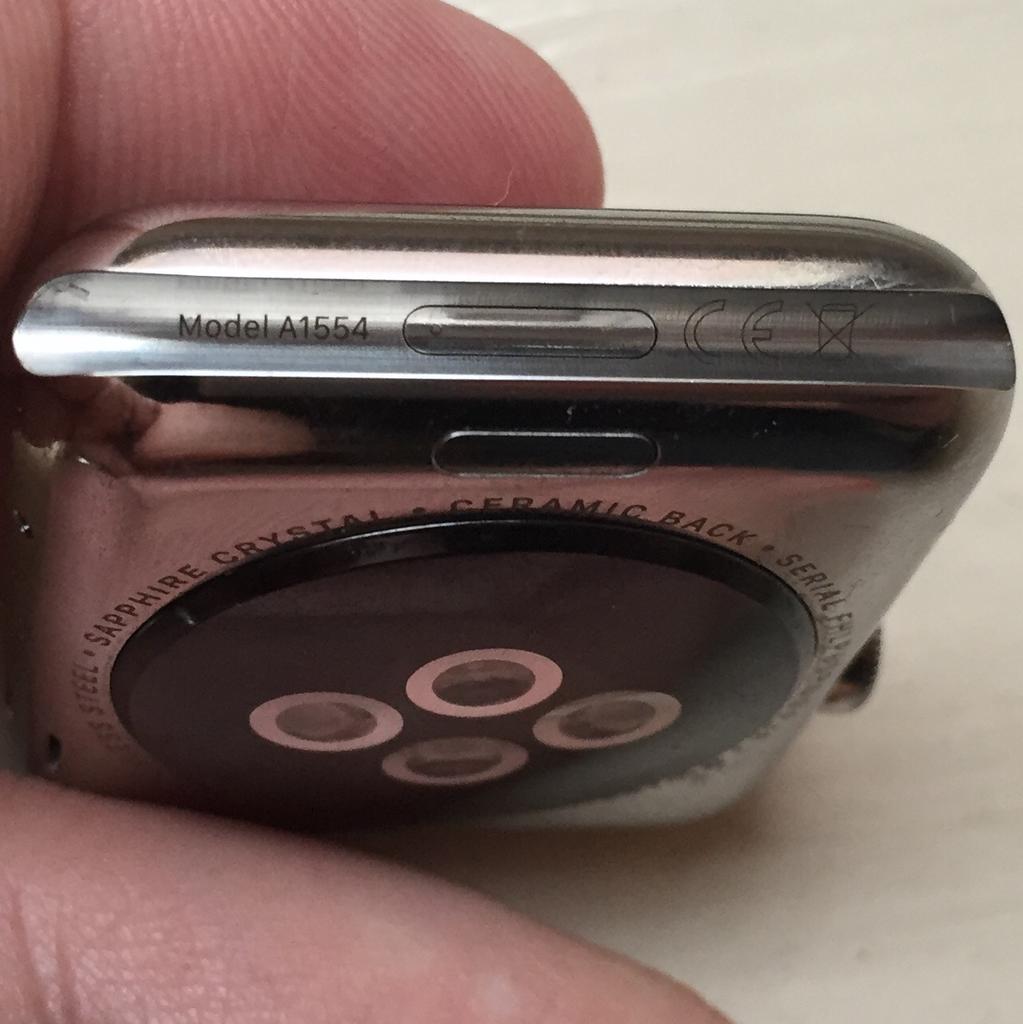
With the right dongle to connect your Apple Watch to iTunes through its diagnostics port, you can easily enter Apple Watch DFU mode.

iCloud Photo Library is an optional feature on iPhone, iPad, iPod touch and Mac that uploads every photo and video you take or import to iCloud and keeps everything synchronized across all your Apple gear. I've been using it for years and it really “just works”.
On iOS 10 and earlier, Photos syncs with iCloud each time your device connects to Wi-Fi and the battery is charged. On iOS 11 and later, Photos can also use your iPhone's cellular data connection to sync and update the image library.
Do you take many photos on the go? Are you on a metered rather than an unlimited plan? Then you don't need me to tell you that you must ensure you're not wasting huge amounts of cellular data to this feature.
Here's how to stop the Photos app from eating into your iPhone's cellular data plan.
Before we get to it, keep in mind the following:
iOS 10 and earlier—Your Photos library syncs with iCloud each time your device connects to Wi-Fi and the battery is charged. iOS 11 or later—You decide if Photos syncs with iCloud via cellular or Wi-Fi only.In other words, you should double-check that cellular updates for iCloud Photo Library are turned off only if you're on iOS 11 or later. Folks on older iOS editions needn't do that because Photos syncs with iCloud only when their iPhone is connected to power and Wi-Fi.
How to stop iCloud Photo Library on iPhone from using cellular data12-megapixel images and 4K videos captured on your iPhone take up quite a bit of storage space. For most people, there's no point allowing iOS to gobble up cellular data just to keep the image library synchronized with iCloud at all times.
Thankfully, you can prevent this from happening, and here's how:
1) Launch the Settings app on your iPhone or cellular iPad.
2) Tap Photos in the list.
3) Tap Cellular Data.
4) Slide the button labeled Cellular Data to the OFF position.
This device will no longer use your carrier's cellular data for updating the Photos library. Any changes to your image library will automatically upload to iCloud as soon as the device connects to power and Wi-Fi.
TIP: If you really need Photos to be in perfect sync with iCloud at all times, even on the go, via cellular and Wi-Fi, be sure to slide the toggle labeled Unlimited Updates to the ON position.
The feature's description says “unlimited updates may cause you to excess your quota“.
Need help? Ask iDB!If you like this how-to, pass it along to your support folks and leave a comment below.
Got stuck? Not sure how to do certain things on your Apple device? Let us know via help@iDownloadBlog.com and a future tutorial might provide a solution.
Submit your how-to suggestions via tips@iDownloadBlog.com.
Safari has a built-in Reading List feature for saving webpages you'd like to revisit later. It's like bookmarks, but with full offline support. That is, any webpage saved in your Reading List prompt Safari to download and cache its text, images, layout and other assets on your device so that it can be read at any time, even without an Internet connection.
And with iCloud syncing, a webpage added to Reading List on one device gets individually cached across all your other devices, too. Caching webpages isn't the smartest idea if you're on a metered cellular plan, especially if you frequently use Reading List on the go.
Thankfully, iOS lets you decide whether or not Reading List items should be downloaded when your iPhone is connected to the Internet through your carrier's cellular data network.
About Safari Reading ListReading List made its debut with the release of OS X Lion and iOS 5 in 2011.
The feature received offline support the following year in OS X Mountain Lion and iOS 6. Reading List is unavailable on a device unless Safari syncing is turned on in Settings → iCloud on iOS or in the iCloud preference pane in System Preferences on macOS.
Don't confuse Reading List with Safari's regular bookmarking feature, which simply stores a webpage URL rather than download and cache its full contents, like Reading List does.
Due to the fact that a vast majority of websites take advantage of high-resolution image assets, your offline Reading List cache can eat up a significant amount of on-device storage.
And because Safari syncs your Reading List, bookmarks and other data via iCloud, adding a webpage to Reading List on your iPad prompts your iPhone to download it, and vice versa.
Thankfully, you can revert this behavior with a few taps, here's how.
How to stop Reading List caching via cellularSafari on iPhone and iPad defaults to caching all Reading List items for offline access, whether you're connected to the network via Wi-Fi or through your carrier's cellular data network.
To tell Safari to cache your Reading List items for offline access only when your iPhone or cellular-enable iPad is connected to a Wi-Fi network, do the following:
1) Open Settings on your iPhone or cellular iPad.
2) Tap Safari.
3) Scroll to the bottom of the Safari settings screen, then slide the switch Use Cellular Data underneath the Reading List headline to the OFF position.
This will stop Reading List items from being downloaded through this device's cellular connection. You must do this on every iPhone and cellular iPad using the same Apple ID.
With cellular updates turned off, any webpages you add to your Reading List in the future will still show up in Safari's Reading List menu but they'll only get cached via Wi-Fi.
Deleting offline Reading List cacheTo free up storage space taken up by Safari's offline Reading List cache, go to Settings → General → iCloud & Storage Usage, then tap Manage Storage under the Storage headline.
Find and tap Safari in the list of apps, swipe left over Offline Reading List, then hit Delete.
Wiping the cache clean won’t remove any items from your Reading List in iCloud.
You will still be able to open any webpage from your Reading List like you normally would, but your device will need to be connected to the Internet to display a non-cached item.
And one last tip before we sign off—knowing your Reading List is archived automatically in iCloud, you are actually able to easily restore it from an earlier version at any time.
Need help? Ask iDB!If you like this how-to, pass it along to your support folks and leave a comment below.
Got stuck? Not sure how to do certain things on your Apple device? Let us know via help@iDownloadBlog.com and a future tutorial might provide a solution.
Submit your how-to suggestions via tips@iDownloadBlog.com.

Your iPhone can automatically answer any incoming phone call without you having to move a muscle, and this tutorial shows you how to set that up.

Learn how to change your Apple Watch's Home Screen from the honeycomb grid layout with app icons to list view that sorts your apps alphabetically.
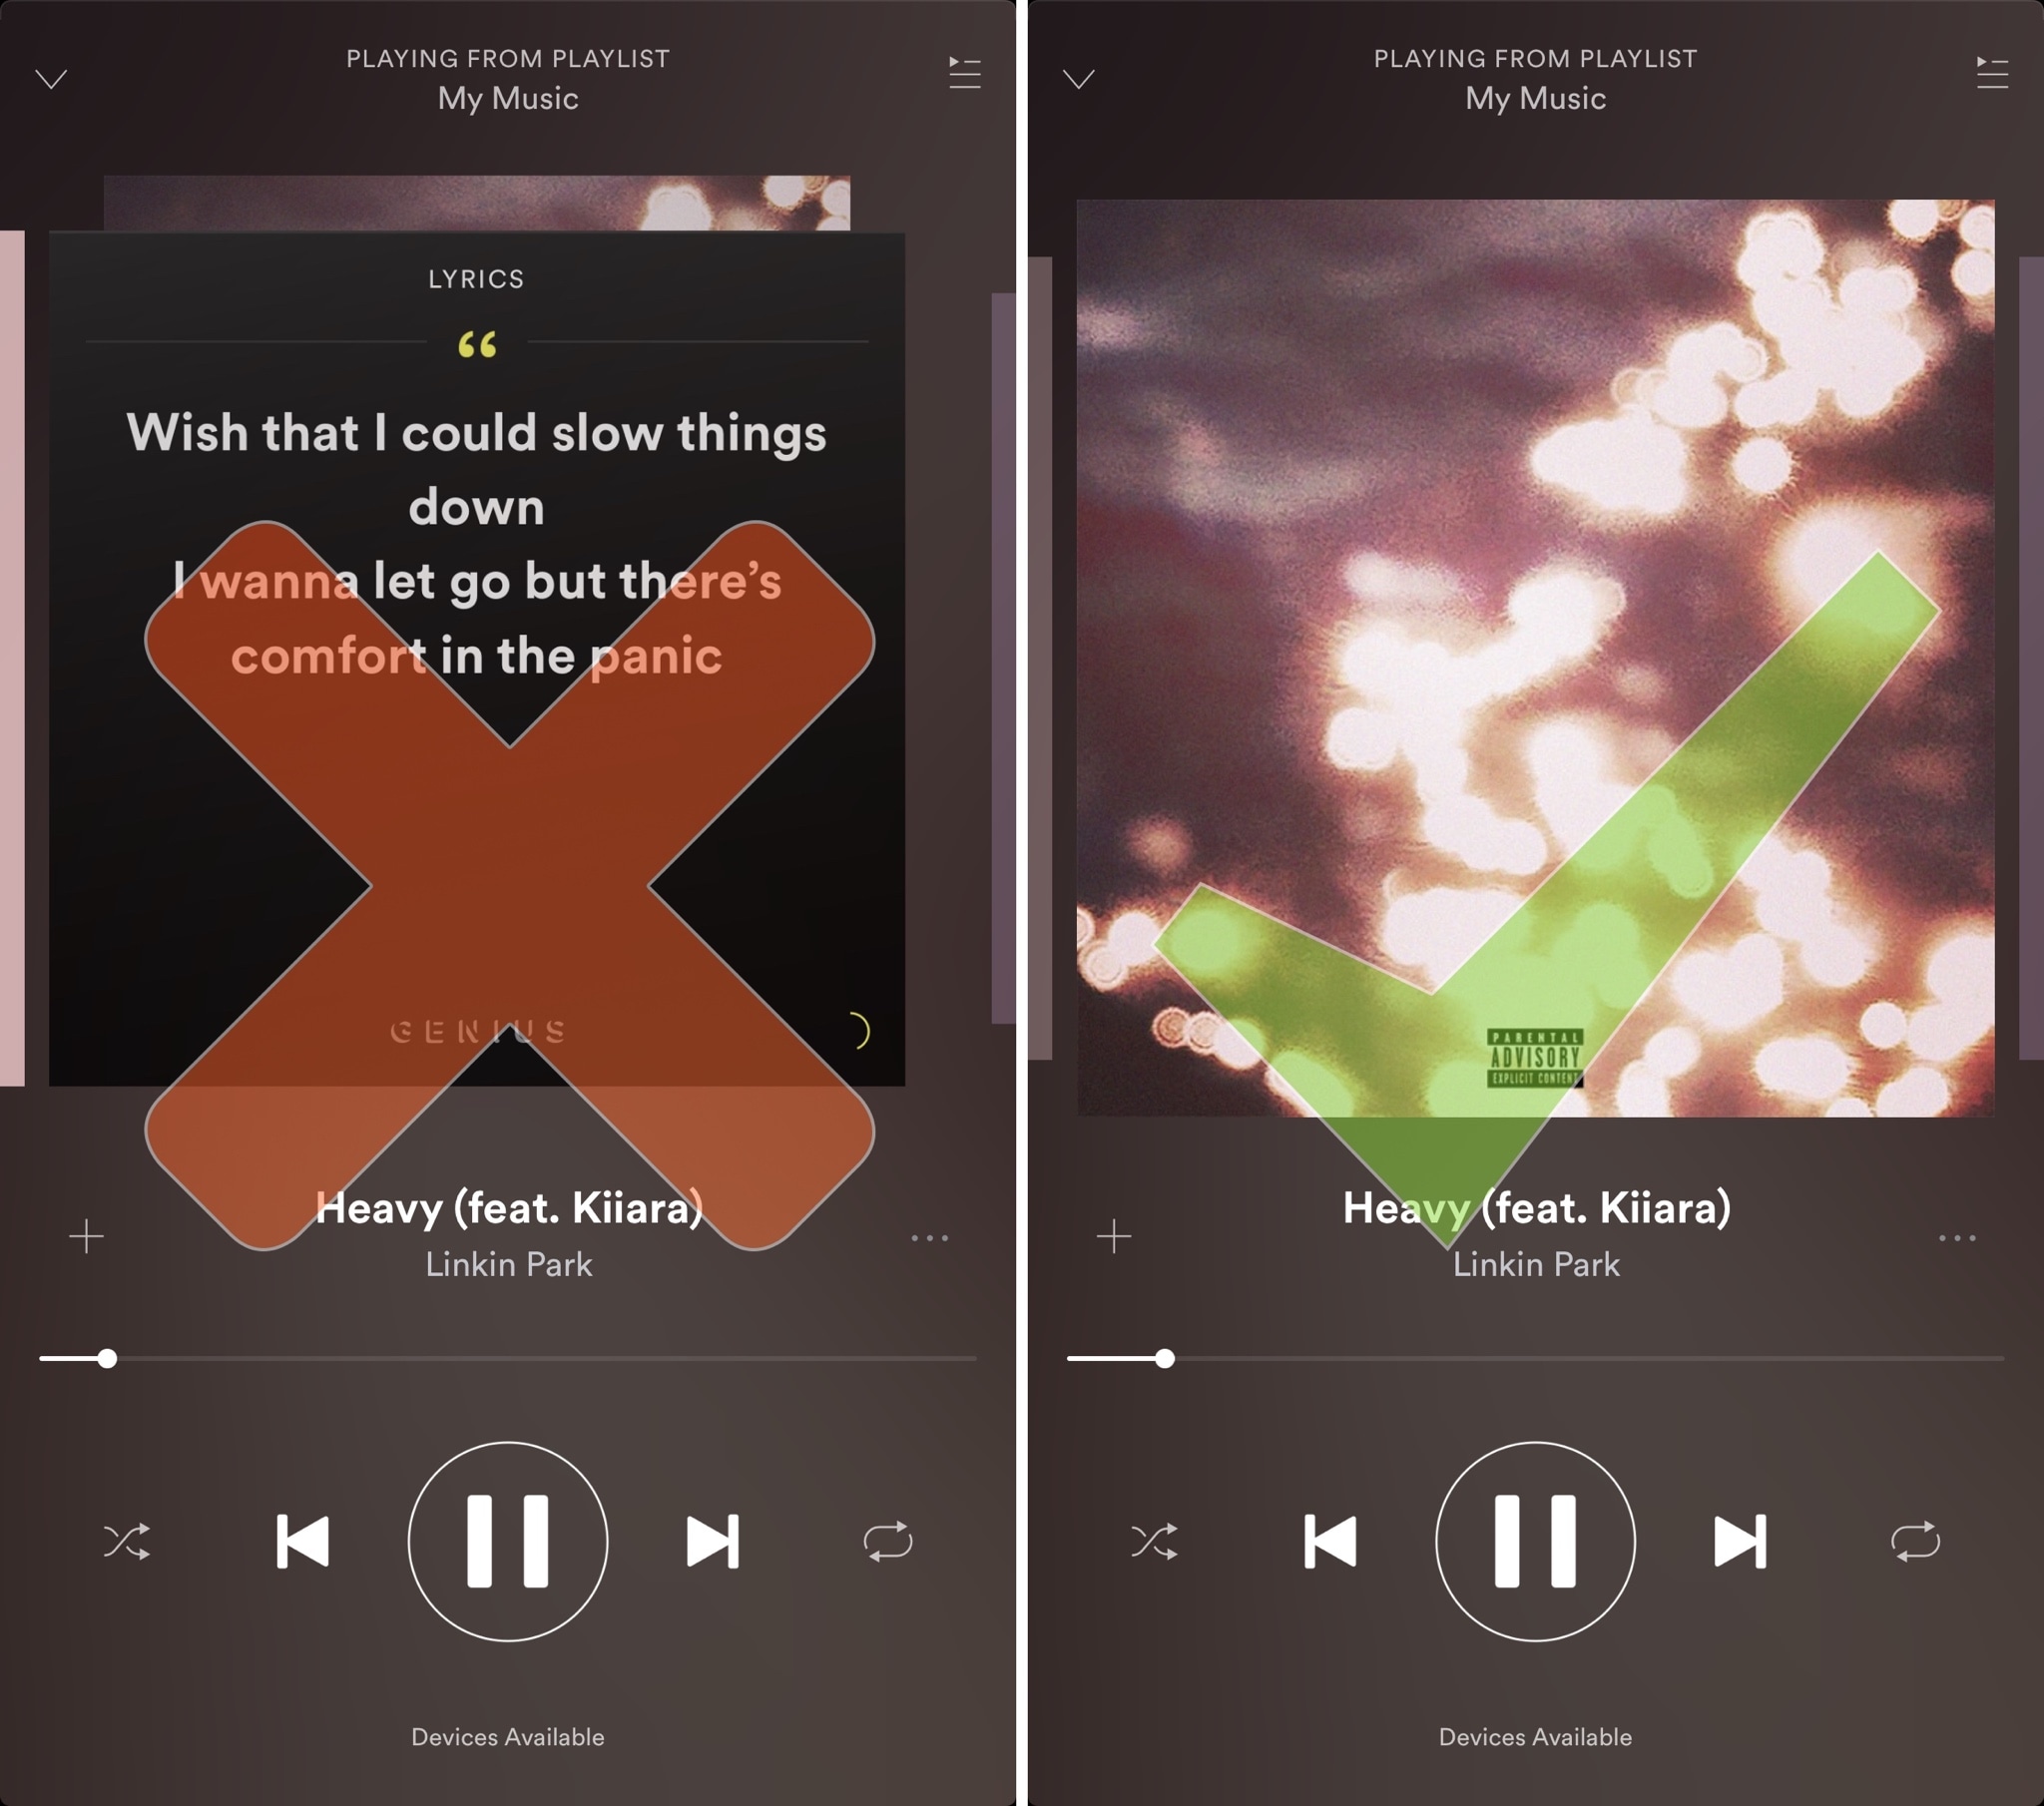
Spotify is perhaps one of the largest names in the music-streaming industry, and while Apple Music is indeed catching up, a large number of iPhone users are still using the third-party alternative.
Despite its popularity, many Spotify users aren’t fond of the persistent Behind the Lyrics feature that interrupts your view of the album artwork whenever music is playing.

One of the little things in iOS 11 includes the ability to set up the AirPods double-tap action to skip forwards and backwards between tracks, cancelling the need to invoke Siri to change songs. As iDownloadBlog reader Harshit Yadav has discovered and shared with us, you can also get this next/previous track control functionality to work on your iPhone, iPad or iPod touch with iOS 10, here's how.
First of all, your AirPods must be running the firmware version 3.7.2 or later, which enables you to customize double taps independently for both the earbuds. To find out your AirPods current firmware version, go to Settings → General → About → AirPods on your iPhone.
Your AirPods must be connected to your iPhone to appear there.
TUTORIAL: How to install software updates for your AirPods
To ensure your AirPods have the latest available firmware, put both the earbuds inside their charging case, then close the case and connect it to a charger or a USB port on your computer. Your iPhone must be paired with your AirPods and connected to Wi-Fi in order for the firmware to download and install.
With the 3.7.2 firmware installed on your AirPods, do the following:
1) Connect your AirPods to an iOS device running iOS 11. This is very important that your AirPods be connected to an iOS 11 device. If not, the option to customize Left and Right ear will not appear.
2) Go to Settings → Bluetooth on your iOS 11 device.
3) Tap the “i” next to your AirPods.
4) Tap Left underneath the Double Tap on AirPod heading, then choose Previous Track from the list of double-tap actions for your left earbud.
5) Tap Right underneath the Double Tap on AirPod heading, then choose Next Track from the list of double-tap actions for your right earbud.
6) Close out the Settings app and play some music to verify that double-tapping either AirPod takes you to the next or previous track.
7) You're done.
With your AirPods updated to the firmware version 3.7.2 and the double-tap action set to next/previous track, you can now pair them back to an iOS 10 device and they will continue to work.
It's important to note that attempting to change your AirPods settings on iOS 10 will overwrite any changes made on your iOS 11 device, meaning you'll loose the next/previous track functionality.
Let us know in the comment section below how it went for you.