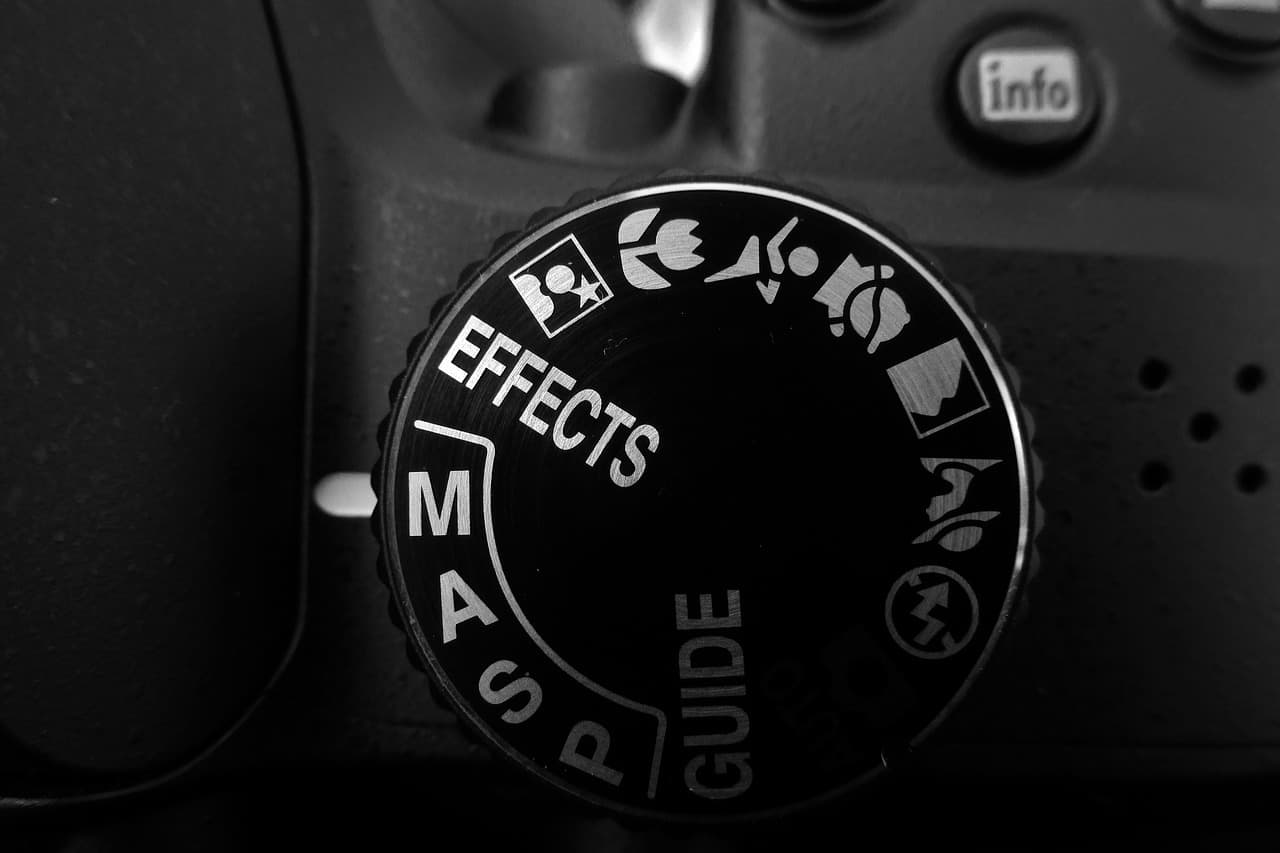
When using a digital camera, especially the likes of a modern DSLR or mirrorless body, you will generally find different settings on a rotating dial somewhere at the top of the unit. Depending on the manufacturer, the markings for those different settings may vary.
All these different settings tell the camera what exposure settings it should prioritize to help you compose the best photograph, and we’ll provide a bit more clarity regarding what these settings mean in today’s piece.
The different shooting modes
Some of the different shooting modes you might find on a digital camera are:
- Auto mode (generally green with an A or Auto indicator)
- Program mode (generally white with a P indicator)
- Aperture priority mode (generally white with an A or Av indicator)
- Shutter priority mode (generally white with an S or Tv indicator)
- Flexible priority mode (generally white with an Fv indicator)
- Manual mode (generally white with an M indicator)
As you might come to expect, each shooting mode provides benefits that may improve your photography experience in certain conditions. Understanding how these modes work and when you should use them is vital if you want your photographs to turn out the best they can.
And one more thing… don’t buy into the elitist fallacy that professional photographers only shoot in manual mode. That’s complete hogwash.
Below, we’ll walk you through how the different shooting modes outlined above differ from one another.
Explaining the differences
Auto mode
The first shooting mode you might feel inclined to use when you’re new to photography is auto mode, generally denoted by a green A or Auto on the camera’s shooting mode dial. After all, who doesn’t like the idea of letting your camera make all the best decisions for you so that you don’t have to worry about the guesswork involved with how to properly expose your photograph? Well… we’ll get to that…
Auto mode, as the name implies, automatically selects the best exposure settings for your camera to produce what it thinks will be the highest-quality image for your current surroundings. This means that it manages your aperture, shutter speed, and ISO without any input on your end to produce a properly exposed image.
Sounds great, right? Although auto mode takes the guesswork out of calibrating exposure settings yourself, you lose some of the granular control of creatively pumping up your shutter speed or fiddling with the aperture yourself. You’ll find that auto mode activates the camera’s built-in flash (if applicable) in low-light environments even when you may not want to use it, which can ruin certain photographs when you’re trying to use low light in creative ways.
Another con of auto mode is that there’s no way for you to override any of your camera’s exposure settings as long as you’re in this mode. That’s because the camera is in full control of your exposure; think of it as full autopilot.
This doesn’t mean you shouldn’t use auto mode at all. It’s obviously a starting point for beginner photographers, but it may also be useful for professional photographers when there isn’t enough time to calibrate a camera’s exposure settings before a photograph opportunity presents itself.
Auto mode works best in daylight situations since you typically don’t want to use your camera’s built-in flash. Furthermore, it works best in settings where your subject isn’t moving too quickly since the camera dials in exposure settings based on your surrounding light and not by the speed of objects you wish to photograph.
For the most part, you will get the best photographs from dialing your camera’s exposure settings in yourself, but knowing how to do this comes with experience and patience. There’s no shame in using auto mode if you aren’t sure how to use the other shooting modes yet, but hopefully today’s piece will give you more insight about those other modes and when you should use them.
Program mode
A camera’s program mode, often denoted by a P on the shooting mode dial, is like auto mode except for one major distinction: it’s possible to override the camera’s automatic exposure settings when using this mode.
Just like auto mode, program mode automatically selects what your camera thinks will be the best aperture, shutter speed, and ISO settings for composing your photograph. However, if you don’t like something about the exposure for any reason, you can freely and quickly change one or more of those elements on the fly. You can think of this mode as assisted autopilot instead of full autopilot.
Both amateur and professional photographers use program mode, but beginners are more likely to use this feature because it’s a more approachable way to tinker with a camera’s exposure settings when you aren’t used to doing it full-time.
Program mode is a great way for beginners to loosen their training wheels when weening themselves off auto mode, and in terms of professional photography, it lends a lot of convenience for opportunistic moments when there isn’t always enough time to dial exposure settings manually while still maintaining the flexibility of manual adjustments where and when necessary.
Aperture priority mode
Aperture priority mode is probably my favorite and most-used shooting mode, and it may be denoted as an A or Av on your camera’s shooting mode dial. Not to be confused with auto mode, which generally appears green on the dial, the A or Av for aperture priority mode is generally displayed on the dial in a white font color.
You can think of aperture priority mode as a hybrid auto and manual shooting mode. That’s because while aperture priority mode lets you set a preferred aperture setting manually, your camera then compensates for exposure by setting the shutter speed automatically to ensure a properly exposed photograph.
As for ISO, you can manually change the ISO setting in aperture priority mode too, and while your manual aperture setting will stay the same after changing the ISO, you will notice that your camera adjusts the shutter speed as you change the ISO setting just like it does when you change the aperture setting.
Lots of professional photographers use the aperture priority mode, and that’s because aperture is probably one of the single most important elements of the exposure triangle to so many people in their workflows. It’s a wonderful setting to use because it halves the amount of data entry you do before snapping a photograph, and yet the hybrid auto/manual experience is flexible enough that you continue to have a sense of control over your camera, not the other way around.
If you’re a beginner photographer and you’re ready to make the leap from full auto mode or program mode to something a bit more hands-on without going full manual, then aperture priority mode is a great place to start. You will get the opportunity to fully control at least two of the three elements of exposure, while the camera helps you choose the third automatically.
I find that aperture priority mode works great for almost every form of photography, and I probably use it 90% of the time. The only time I tend to switch out of aperture priority mode is when I need to manually adjust my shutter speed for a longer exposure shot, which we’ll discuss later.
Shutter priority mode
Shutter priority mode is another setting you will find on your camera, generally denoted as an S or Tv on the shooting mode dial. And we know what you’re thinking… why Tv? That’s because some camera manufactures call this shutter priority mode, and others call it time value mode. I’m used to calling this shutter priority mode, so that’s what I’ll refer to it as for the duration of this piece.
Just like the aperture priority mode discussed above, shutter priority mode is a hybrid auto and manual shooting mode. In this setting, you can manually set a camera’s shutter speed and it then compensates for exposure by automatically adjusting the aperture value to ensure a properly exposed photograph.
ISO can also be changed manually in shutter priority mode, and as you’d come to expect, doing this will affect the camera’s aperture selection. Changing the ISO while in shutter priority mode will not affect your shutter speed since you’re setting that manually as well.
Beginner photographers rarely, if ever, touch this mode, but it’s common to see professional photographers using it to capture longer exposure photographs. It can be used to get those beautiful silky-smooth photographs of waterfalls in nature or the amazing light streaks from passerby cars on a nighttime city street.
I don’t use shutter priority mode very often, but it has its uses. It’s generally ideal for adding discernible motion blur to photographs when it makes sense, such as in the use cases mentioned above.
Flexible priority mode
Flexible priority mode is a setting found only on Canon-branded cameras that will generally be denoted as Fv on the shooting mode dial. It’s a generally new setting introduced in just the past few years that allows users to tell the camera which exposure element they want to focus on the most, while having the flexibility to quickly change to a different element on the fly without switching shooting modes.
The best way we can describe flexible priority mode is by saying it’s aperture and shutter priority mode all in one shooting mode. In this scenario, it’s faster to choose which settings are right for you in any photography situation, which helps you be more ready for any photograph opportunity that may come your way.
Depending on which setting you choose to change manually while in flexible priority mode, the camera decides the remaining settings automatically. For example, if you tell the camera that you want to manually control the aperture, then it automatically sets the shutter speed, and vice-versa.
There’s not much else to say here…
Manual mode
And finally, we come to manual mode… the cream of the crop for professional photographers who like to be in full control of their camera’s settings… or so they say. Manual mode is generally denoted as an M on your camera’s shooting mode dial.
In manual mode, you can set all three of your camera’s individual exposure settings yourself without your camera doing any automatic value figuring. You’re effectively on your own with this mode, which means you can think of it like a car without cruise control; there’s no autopilot to speak of here.
When you decide to make the jump to manual mode, you can change the aperture, shutter speed, and ISO values all independently of one another and then take a photograph. This is one of the best ways to get creative since your camera isn’t figuring exposure automatically, and this means you can purposely (or accidentally) over or under-expose photographs.
I rarely shoot in full manual mode myself, but I dabble with it from time to time. It’s a learning curve when you’re accustomed to letting your camera choose settings for you, but that’s precisely the reason why you should strive to try it out. Manual mode helps teach you how to make the best of your camera’s manual settings, and in doing so, you learn more about how they work and can make better photography decisions.
Manual mode works great in all kinds of situations, but it really lags behind if you’re in a fast-paced shooting environment and don’t have the time to dial in manual settings. With that in mind, even some professional photographers don’t bother with manual mode most of the time, and it’s easy to understand why. Photo opportunities don’t last forever… blink and you might miss it.
Wrapping up
That just about concludes our piece explaining some of the most popular shooting modes on modern DSLR and mirrorless camera bodies. As we discussed, some of the modes are full auto, some are semi-auto, and others are flat-out manual. Additionally, ever mode has its use depending on the situation, so don’t discount one setting over another just because some snobby ‘pro’ photographer belittled you into using manual mode.
Did this piece help you better understand the different shooting modes on a dedicated camera body? Let us know in the comments section down below.