
Now that the final GM version of OS X El Capitan is released, it’s time to revisit how to create a USB install disk. Chances are high this GM seed will be the same version of OS X that ships later this month on September 30th.
Not only is the OS X 10.11 GM available to registered Apple developers, but it’s also available via Apple’s public beta program. With this in mind, you may now deem it the appropriate time to take the plunge, if you already haven’t thus far.
In this post, we’ll show you how incredibly simple it is to create an OS X El Capitan USB install disk from scratch. All you need is a USB disk with at least 8GB of storage space.
Some things to keep in mind
Following thus tutorial will completely erase the contents of the USB flash drive, so make sure you are okay with this, or at least backup the contents of the drive somewhere else before proceeding.
The process also takes quite a while once it’s initiated. We’re talking nearly 25 minutes to complete the process.
While we show you how to make an install disk using the OS X El Capitan GM seed, this tutorial will also work on the final version of El Capitan that’s released on the Mac App Store.
How to create an El Capitan USB install disk
Step 1: Download El Capitan from the Mac App Store. If you’re a developer, you can redeem a download code to use via the Apple developer center. If you’re a part of Apple’s public beta program, you can likewise redeem a code for the El Capitan GM via Apple’s beta website. Once El Capitan is released on the Mac App Store, you can download it there for free without needing any special redemption codes.
Step 2: Open Finder → Applications and right-click on Install OS X El Capitan GM Candidate.app and select Show Package Contents. From there, go to Contents → Resources.
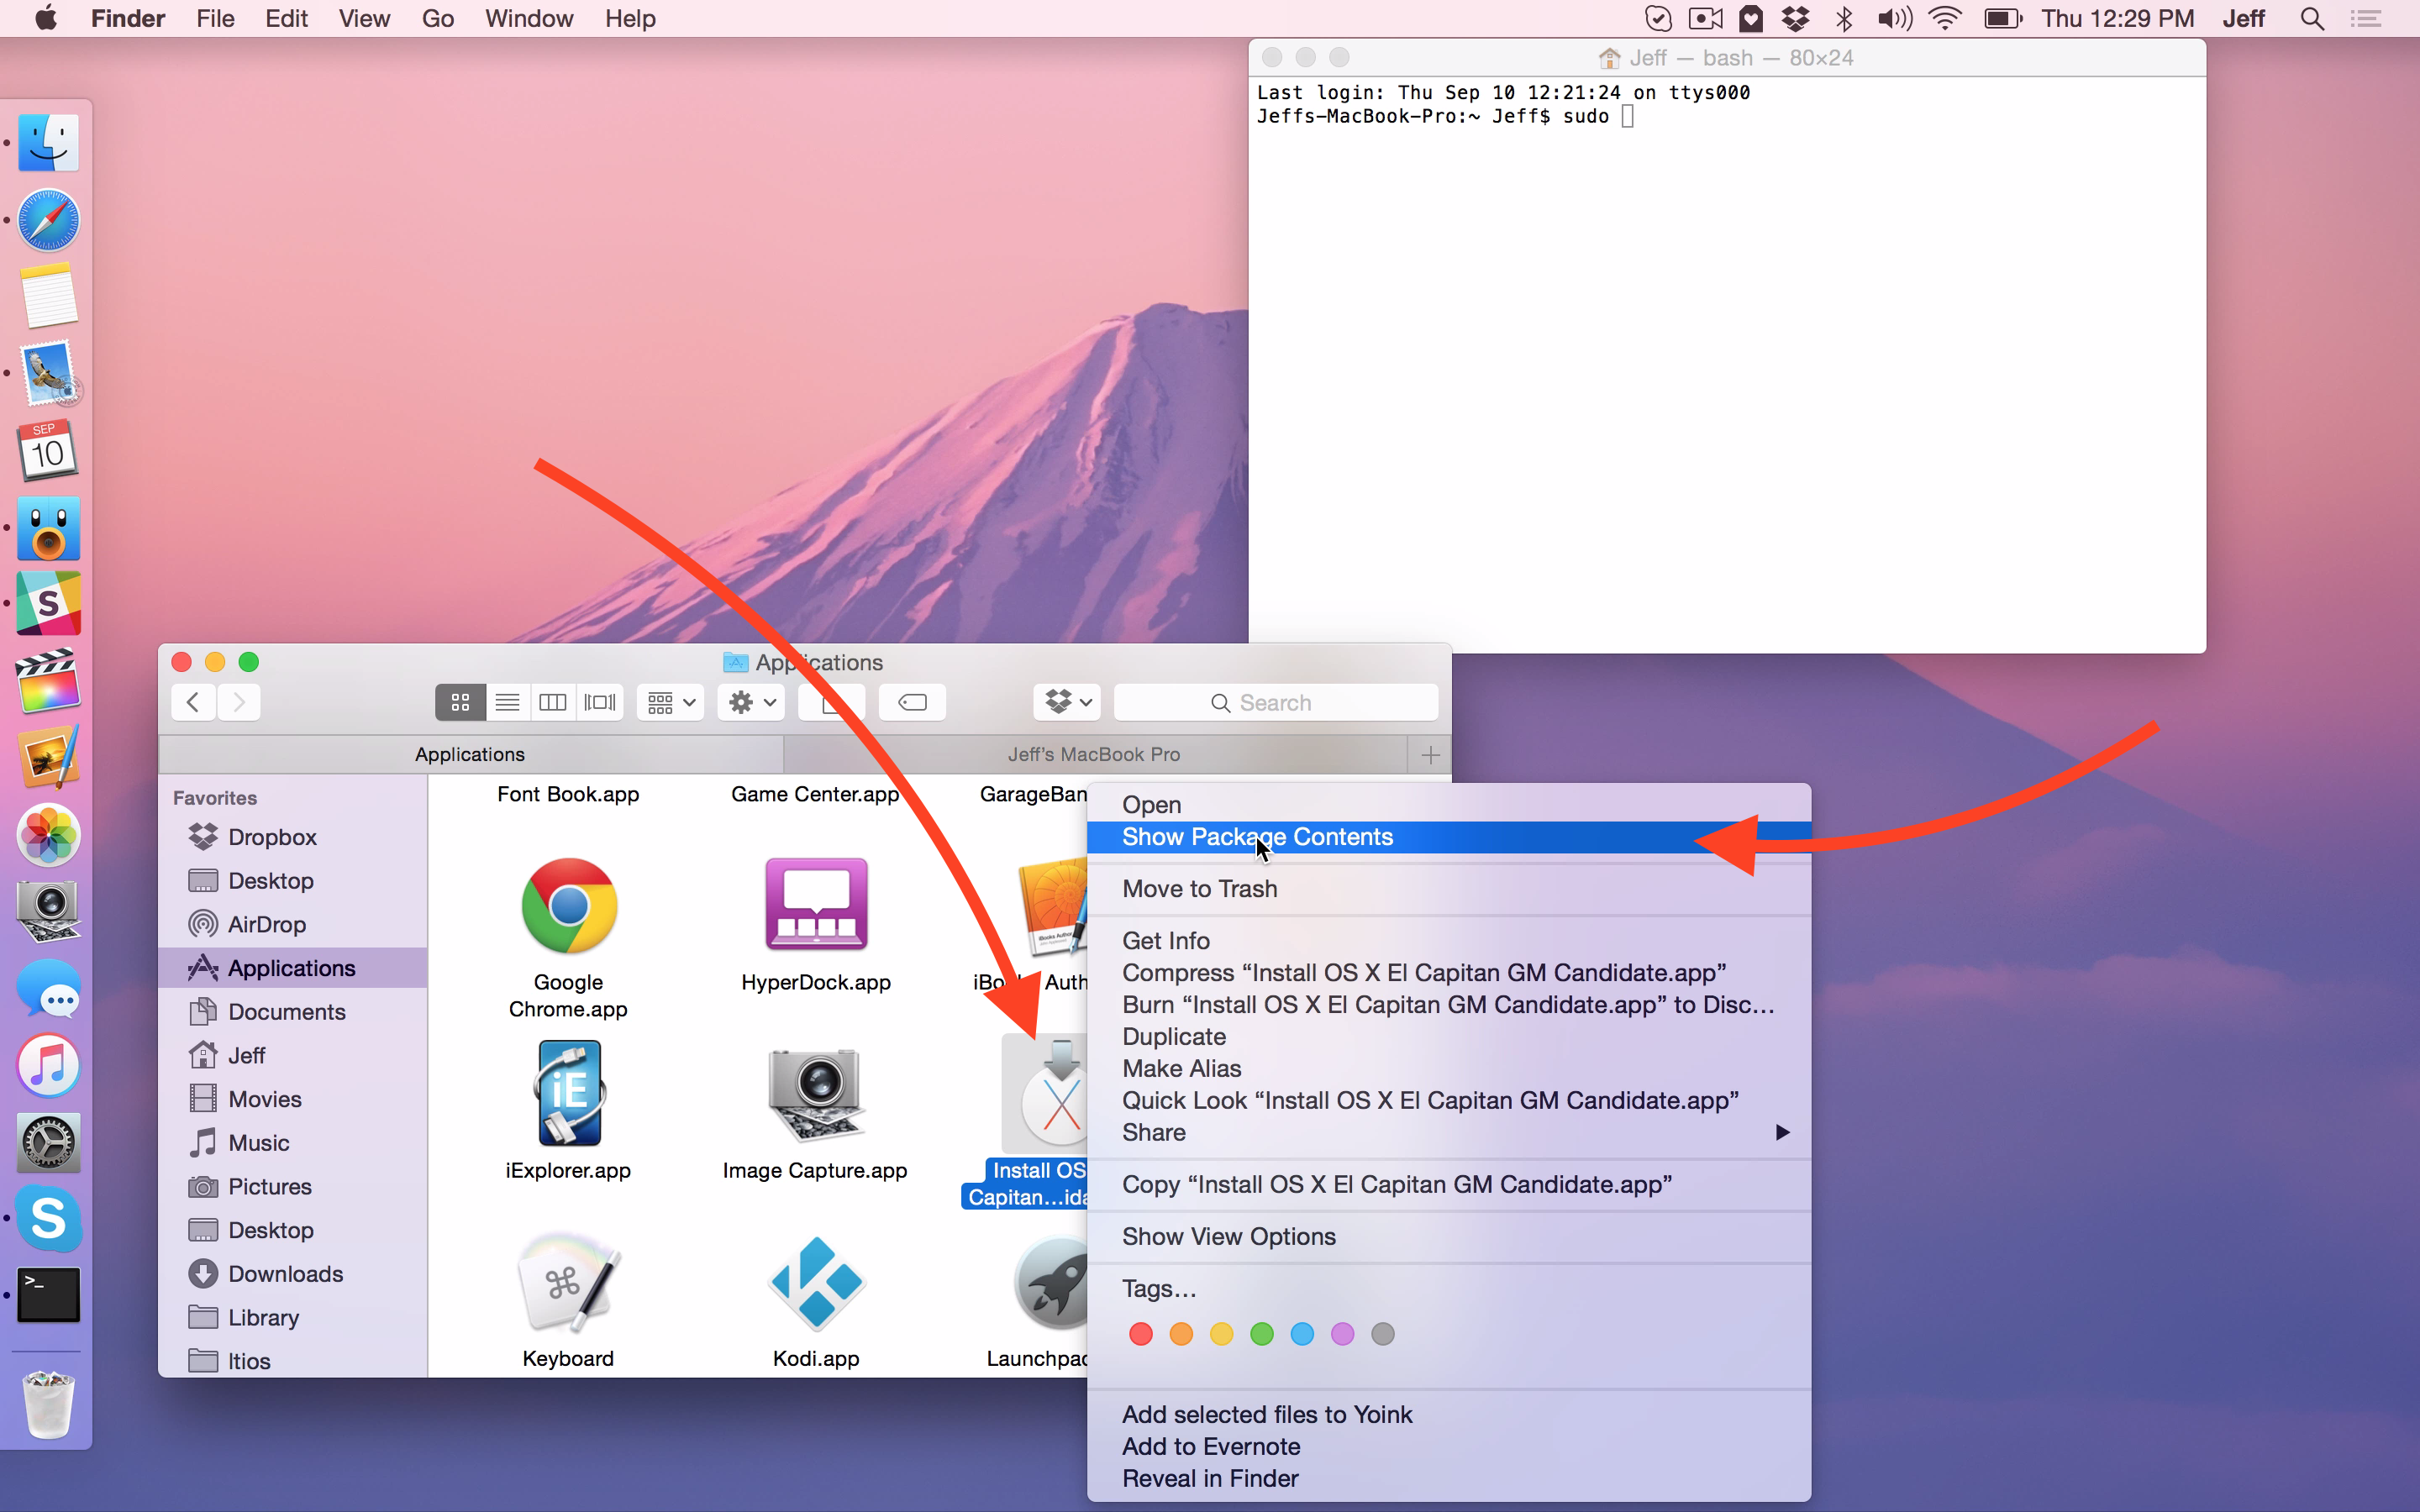
Step 3: Open a Terminal window and type sudo followed by a space.
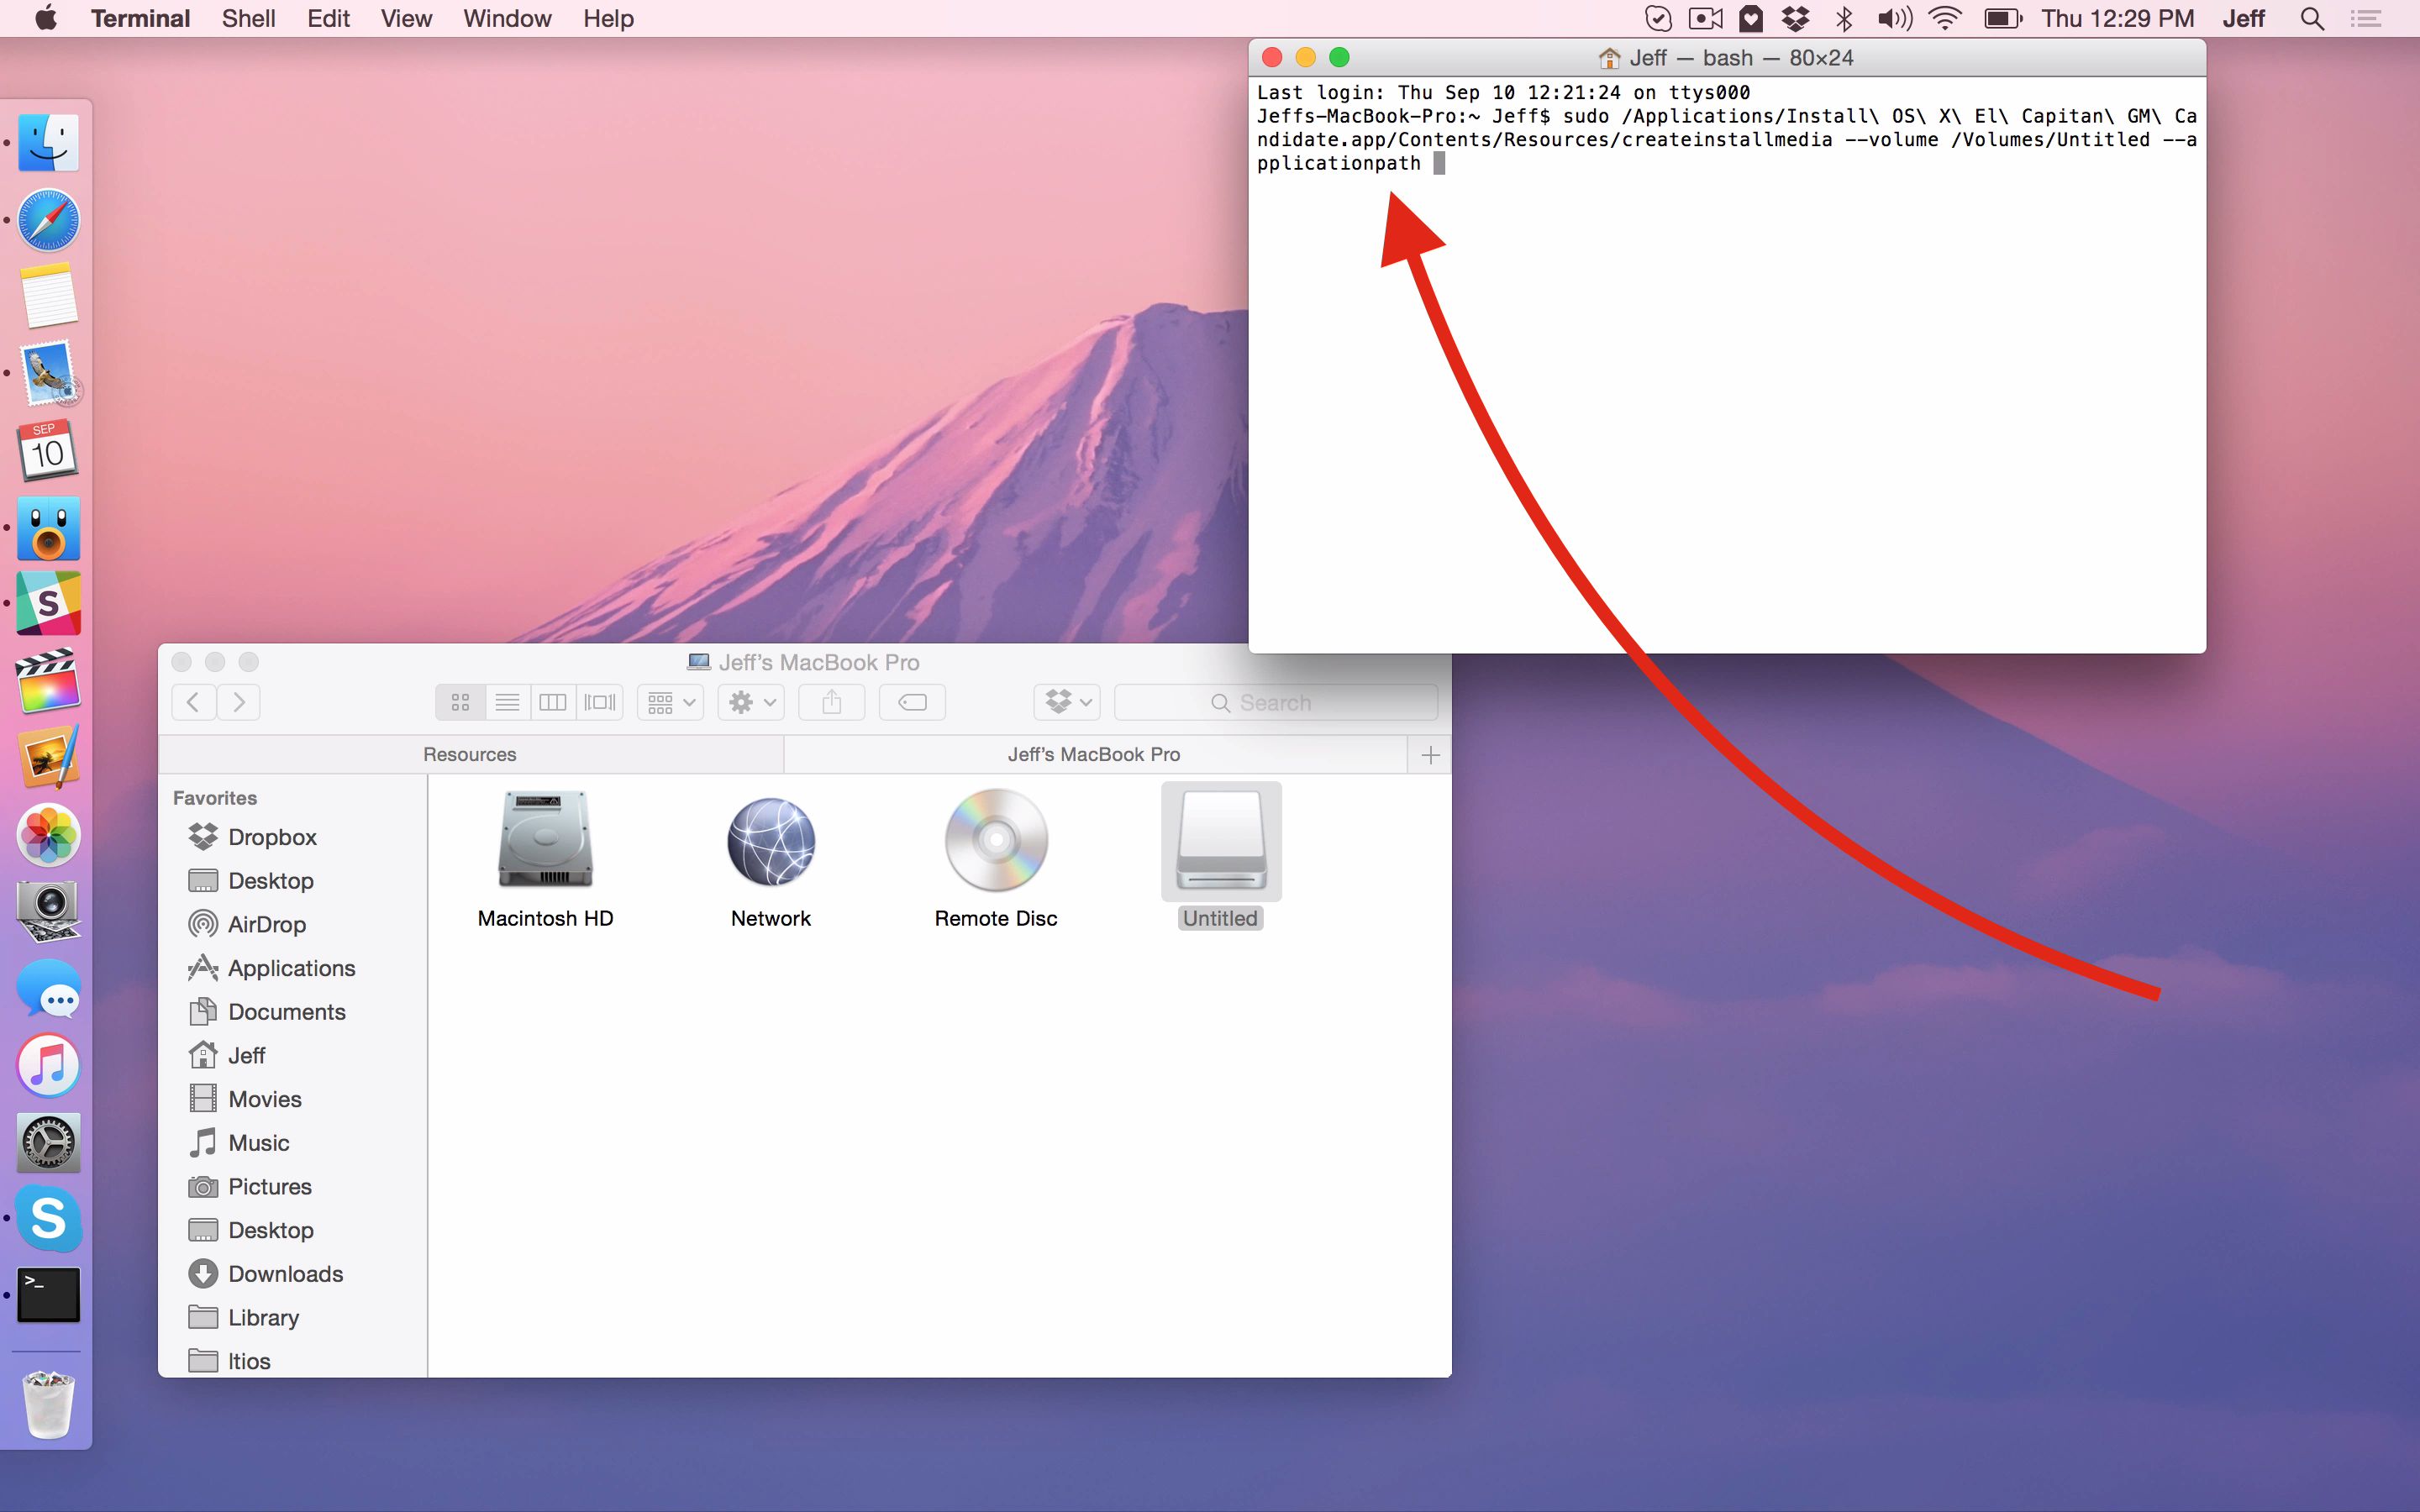
Step 4: Drag and drop createinstallmedia from the Finder into the Terminal window.

Step 5: Type --volume in the Terminal followed by a space.
Step 6: Open Finder and click Go → Computer in the menu bar.
Step 7: Drag and drop the USB disk into the Terminal window.
Step 8: Type --applicationpath in the Terminal followed by a space.
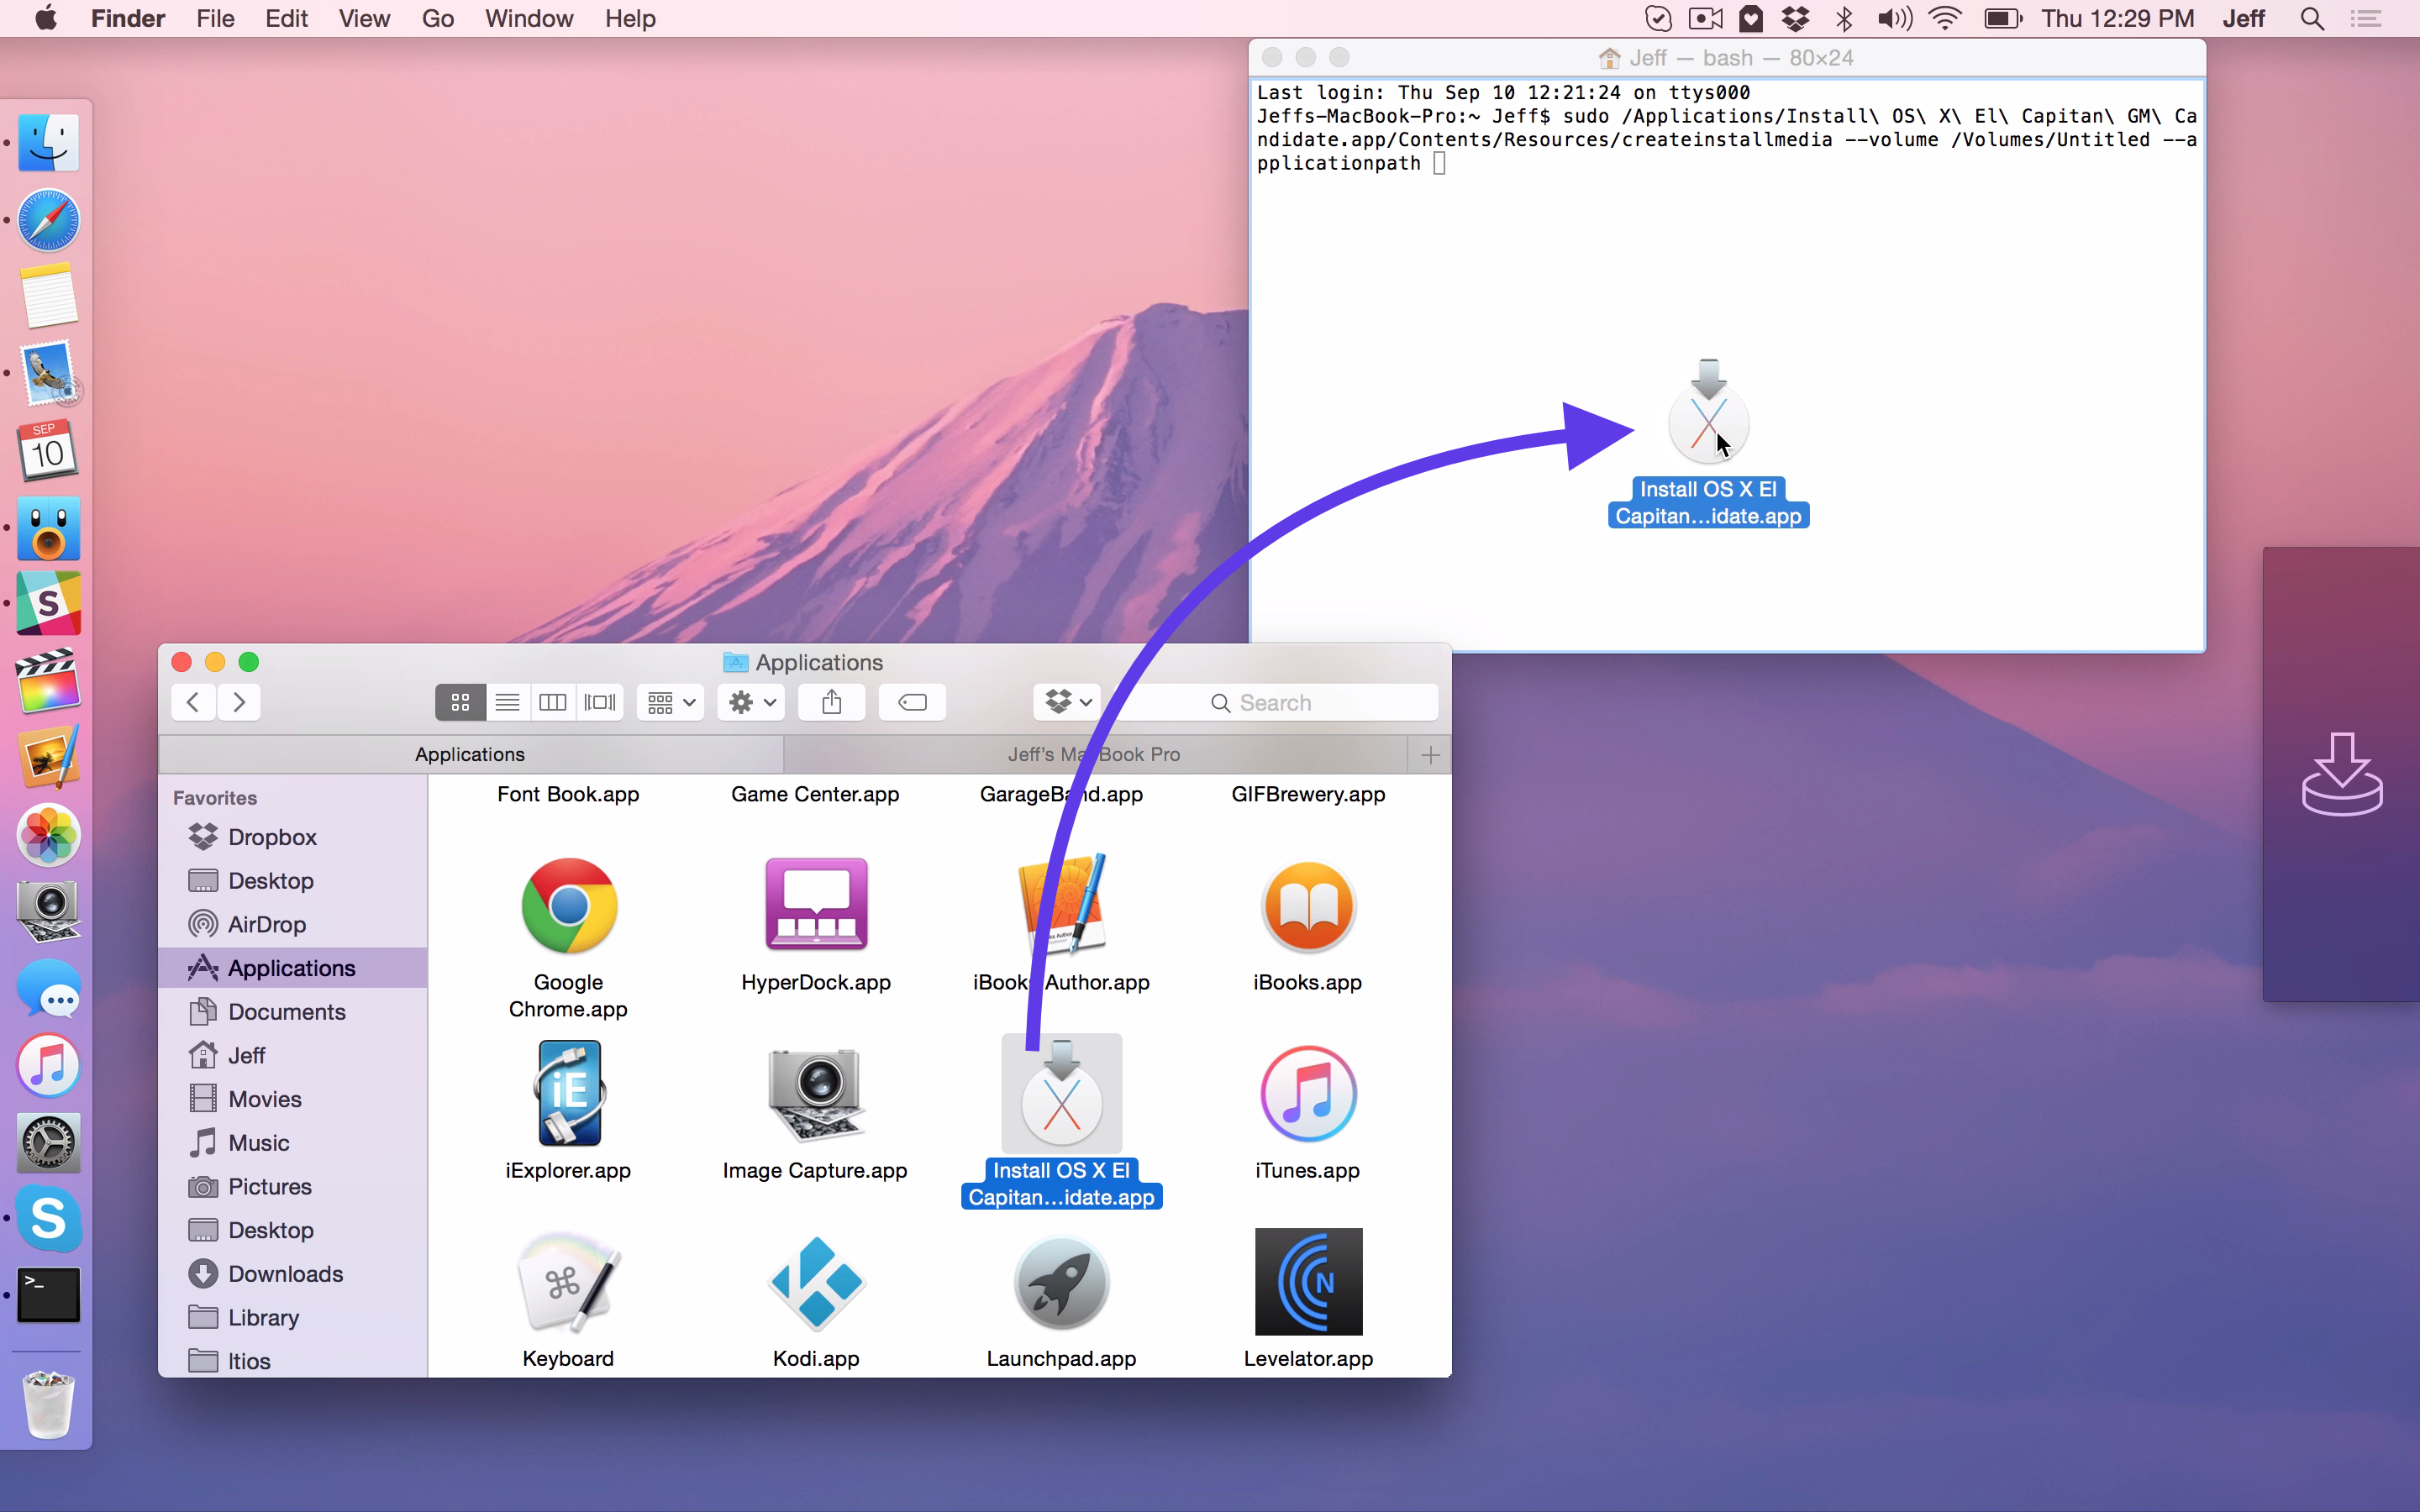
Step 9: Open Finder → Applications and drag and drop the Install OS X El Capitan GM Candidate.app to the Terminal.
Step 10: Press Return on your keyboard while inside the Terminal.
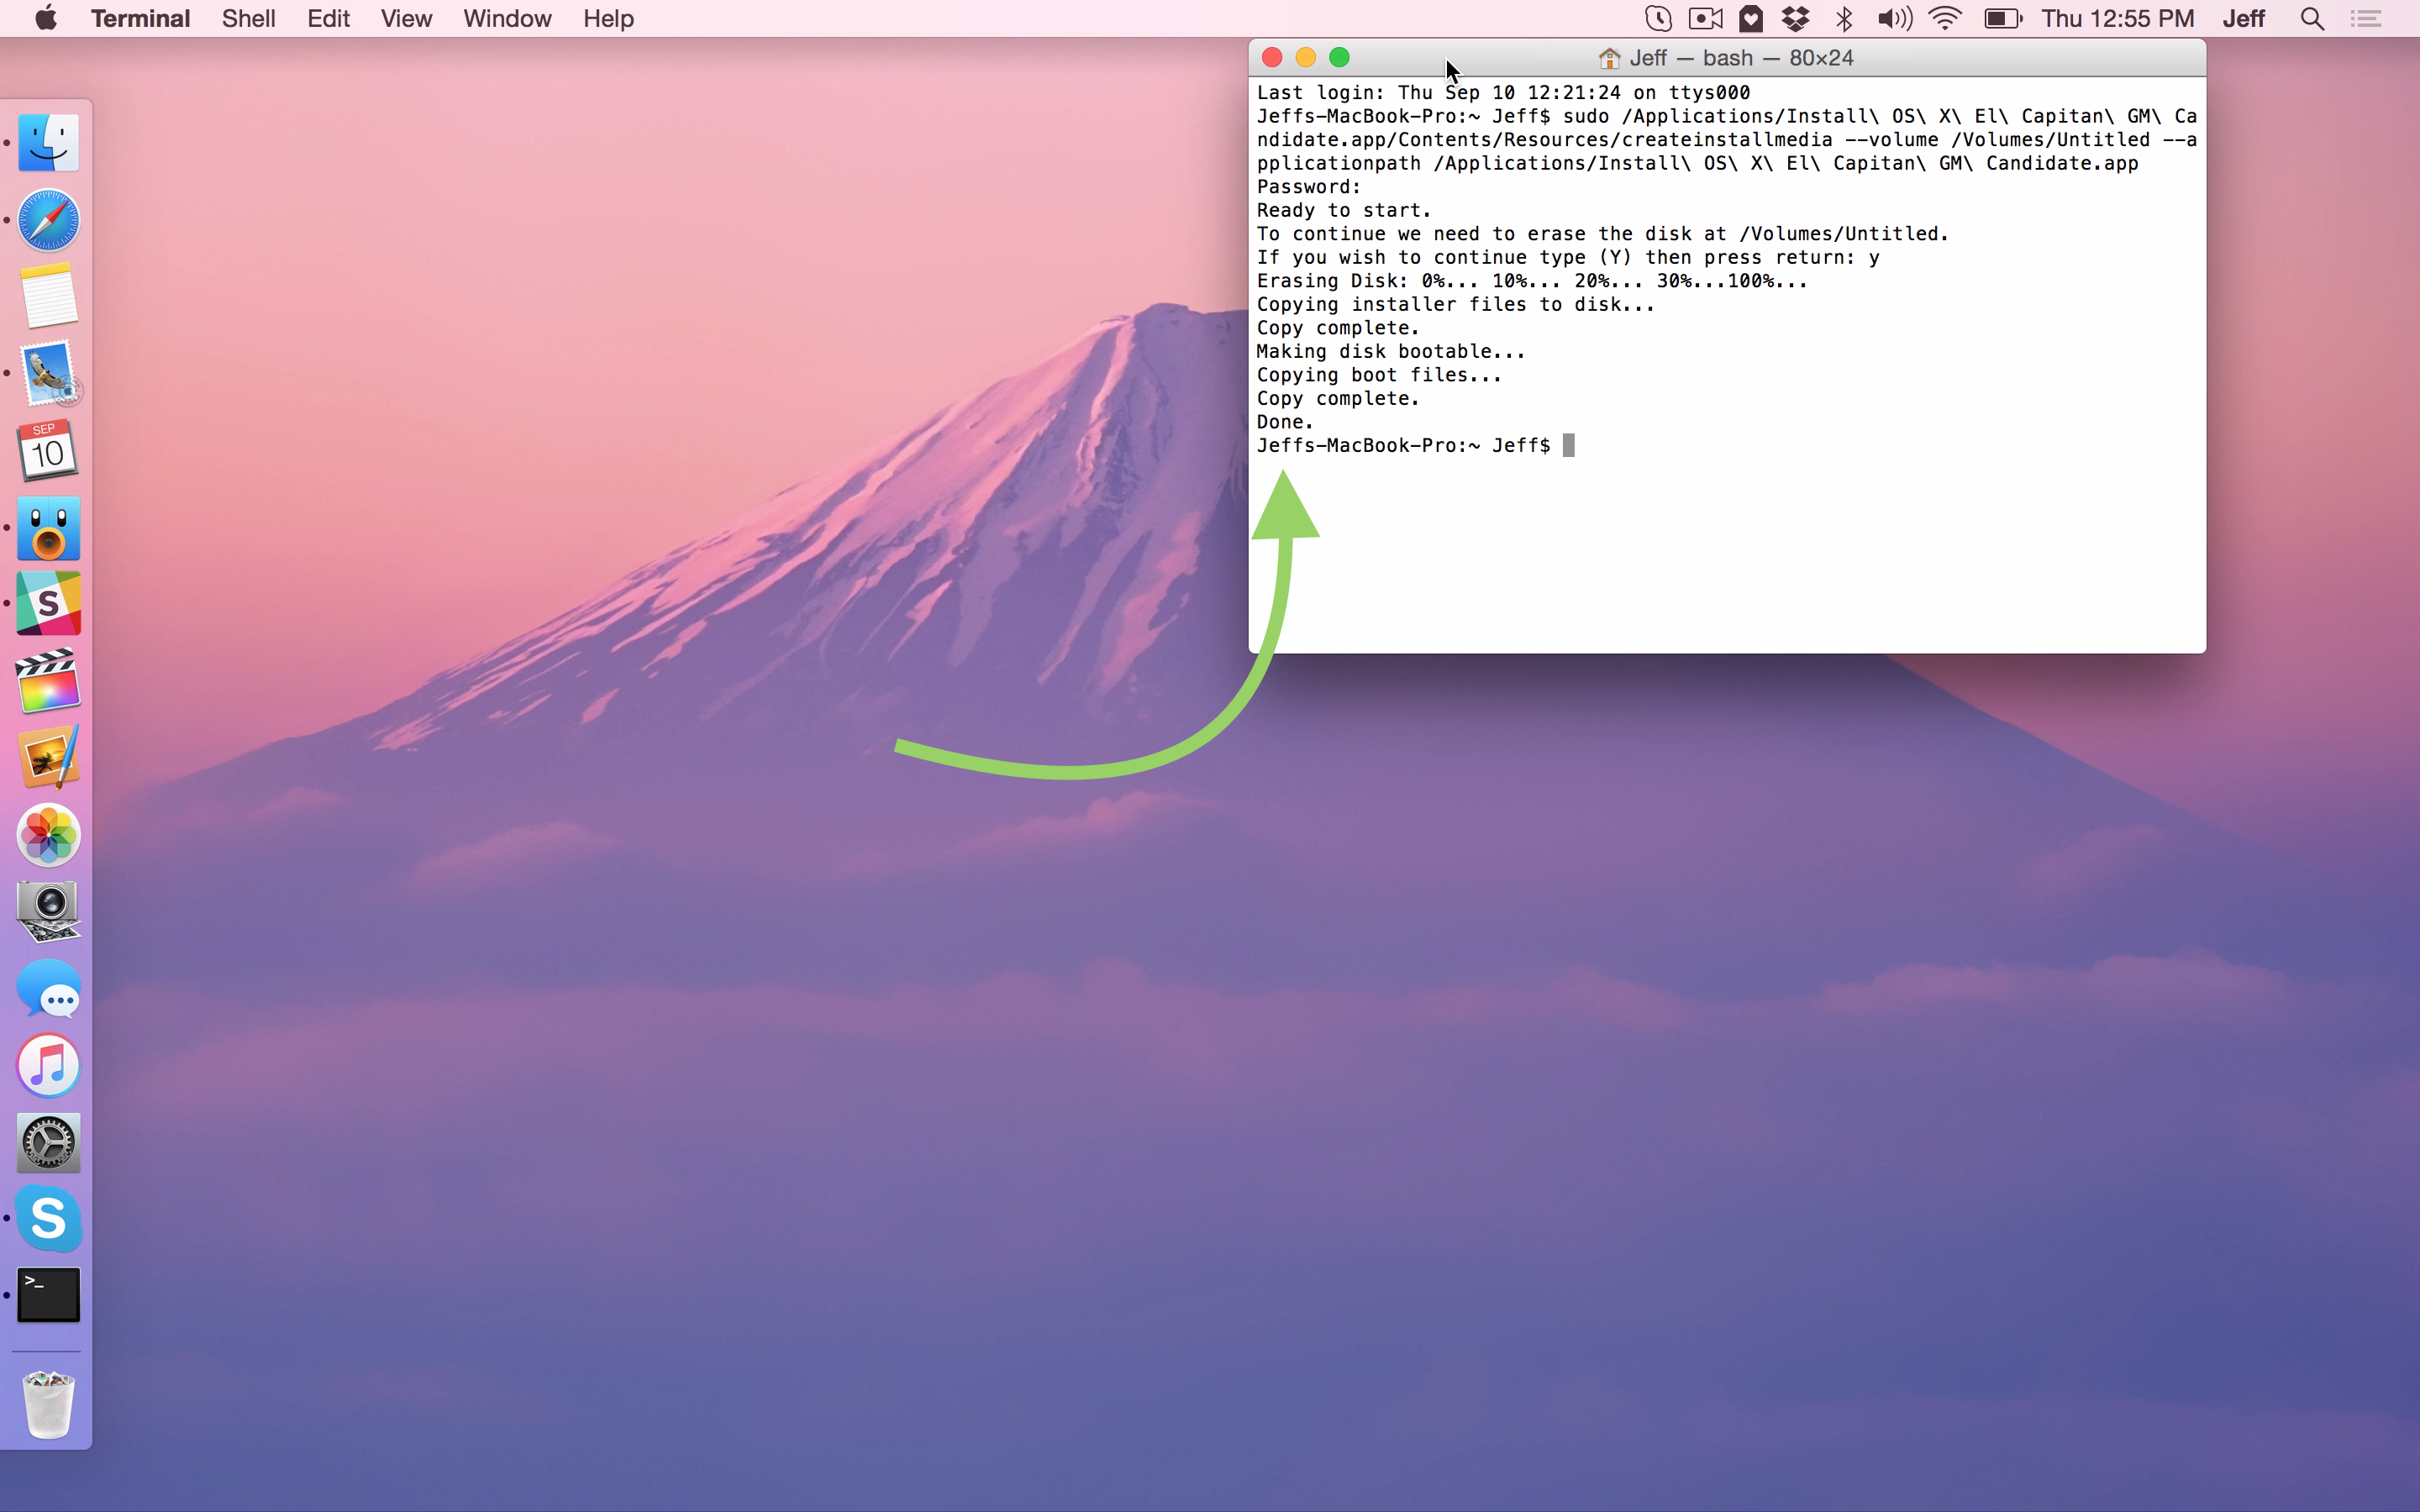
Step 11: Type a ‘Y’ to continue when prompted and press Return on your keyboard.
Step 12: The process will begin by erasing the contents of your disk and copying the installer files to disk. As I stated at the outset, this process takes about 25 minutes or so, give or take a few minutes.
After creating your El Capitan install disk
Once your disk is created, you can simply eject the disk and save it for when you need it. If you’d like to use it to install OS X, we’ll show you how to do just that in an upcoming tutorial.
Have you downloaded the GM yet? Are you planning on creating a USB installation disk?