Guide

Tutorial: How to Jailbreak your iPhone with LimeRa1n

Geohot's LimeRa1n jailbreak has been released, and even though it comes with its fair share of downsides, it does work for some people. Thanks to iDB reader Whammy who send me screenshots of LimeRa1n in action, we're now able to get a tutorial for you.

This step by step guide and tutorial will show you how to use LimeRa1n to jailbreak your iPhone iOS 4.1. LimeRa1n will jailbreak the iPhone 3GS, and iPhone 4. It will also jailbreak the iPod Touch 3G and iPod Touch 4G. As usual, proceed at your own risks.

This tutorial was done with a PC but LimeRa1n will also work if you have a Mac, and the steps will the exactly the same.

How to Jailbreak iPhone 3G iOS 4.1 with RedSn0w

Up until now, RedSn0w 0.9.6 beta 1 only worked on Mac, but the Dev Team just updated the infamous RedSn0w jailbreak which is now compatible with Windows. This step by step guide and tutorial will show you how to jailbreak your iPhone 3G 4.1 using RedSn0w for Windows.

It's important to note that if you've already updated to iOS 4.1 you will not be able to unlock your iPhone. If you do need to unlock and if you're not on iOS 4.1 yet, I suggest you wait for the release of PwnageTool, which will allow you to update to 4.1 while preserving the baseband, thus enabling you to use UltraSn0w to unlock.

This tutorial is for the iPhone 3G only. If you have an iPhone 3GS 4.1 that you want to jailbreak, you're going to have to wait from Comex's next jailbreak. If you have an iPhone 4 on 4.1, you will have to wait until Sunday for the release of GreenPois0n.

The Mac version of this tutorial can be found here. This being said, here is how to jailbreak your iPhone 3G 4.1 with RedSn0w...

How to Downgrade iPad 3.2.2

This step by step guide and tutorial will show you how to downgrade your iPad iOS 3.2.2 to a previous iOS version. In order to downgrade your iPad from 3.2.2 to 3.2.1, you will have to have your SHSH blobs on file on Saurik's servers. If you do not have these SHSH blobs on file, you will not be able to downgrade.

Downgrading iPad iOS 3.2.2 

How to Downgrade iPhone iOS 4.1

iOS 4.1 is now available for download, and I'm pretty sure some of you will "accidentally" update to 4.1 and will want to downgrade back to iOS 4.0.1, which is the latest jailbreakable and unlockable iOS (at least at the time I'm writing this).

This simple guide and tutorial will show you how to downgrade your iPhone iOS 4.1 to iOS 4.0.2, or 4.0.1, or iOS 4, or any earlier version. The steps are the same no matter what iOS you want to downgrade to.

How to Install Android on Your iPhone 2G or 3G with iPhoDroid

Android on the iPhone is more of a "project" than anything else. It's buggy, unstable, and doesn't even bring all the features needed to fully use the iPhone. So why in the hell would you install Android on your iPhone? Just for the heck of it, of course! Thanks to Sergio McFly, this is now easily possible.

iPhoDroid 1shot is probably the easiest way to install Android on your iPhone 2G or iPhone 3G. It doesn't require any file editing or anything that might scared the least technically advanced of us. Without further ado, here are the instructions to set up Android on your iPhone. As usual, proceed at your own risks...

Step 1: Make sure your iPhone is jailbroken and Cydia is up to date. If it's not jailbroken, do so by using JailbreakMe.

Step 2: Download the latest version of iPhoDroid 1 shot from here. The download link is at the very bottom left of the page.

Step 3: Make sure your iPhone is connected to your computer via the USB cable. Launch iPhoDroid and click "shoot".

Step 4: iPhoDroid will extract the touch driver and transfer the cache/system/data folders to your iPhone.

Step 5: iPhoDroid will now place your iPhone in recovery mode.

Step 6: After that, you will get the OpeniBoot splash page with different options (Apple, Android, Install, Uninstall). Use the volume buttons to highlight the "Install" option, then tap the Home button to select it.

Step 7: Some code will then be running on your screen. Once done, your iPhone will reboot in the Android OS.

Done! You can now enjoy your crippled iPhone running Android.

If you're one of the few courageous men out there to try this hack, please let us know how it's working for you by leaving a comment below.

[iClarified]

How to Downgrade iPhone 4.0.2 to 4.0.1

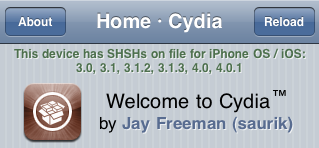
This step by step guide will show you how to downgrade your iPhone iOS 4.0.2 to iOS 4.0.1. These steps are pretty simple but there is one major requirement: you must have your SHSH files saved on Saurik's server. There is absolutely no way around it. If you don't have your SHSH, you won't be able to downgrade your iPhone.

In this tutorial, we will see how to downgrade the iPhone from 4.0.2 to 4.0.1 but the steps are the same if you want to downgrade to iOS 4 or even 3.1.3.

There are several methods used to downgrade the iPhone. We will learn the method that uses TinyUmbrella. No file editing will be necessary.

How to Downgrade from iOS 4.0.2 to 4.0.1

Step 1: Let's download your SHSH blobs from Saurik's server to your computer. To do so, download TinyUmbrella and plug your iPhone in. Select the "Advanced Options" box. Also select the firmware version to which you wish to downgrade. Finally, select "Cydia" under "Request From". Then hit "Save My SHSH". This will grab your SHSH files from Saurik's servers and save them on your computer.

Step 2: Download the firmware to which you wish to downgrade to from our iPhone downloads section. Save it to your desktop.

Step 3: Put your iPhone in DFU Mode. To do so, launch iTunes and plug your iPhone in. Press and hold the Home and Power button together for 10 seconds. After 10 seconds, release the Power button while still holding the Home button until iTunes pops up and says it has found an iPhone in recovery Mode.

Step 4: Run TinyUmbrellaand click the "Display SHSHs" button to make sure your SHSH blobs were downloaded to your computer. Once done, click "Start TSS Server".

Step 5: Now we're going to restore to the firmware you want. To do so, launch iTunes and plug your iPhone in. Hold to SHIFT key (Windows only) or ALT/Option key (Mac only) while clicking on Restore. Make sure you hold the key while clicking Restore. A window will open. Simply select the firmware you downloaded in step 2.

Step 6: Your iPhone will start the restore process. You will most likely get several errors (error 1011, 1013, and 1015) but that's ok, don't worry about those.

Step 7: Finally, we need to get your iPhone out of recovery mode. To do so, simply click "Kick Device Out of Recovery" in TinyUmbrella.

Done!

You should now be back on a previous iOS, giving you the ability to jailbreak and unlock.
Jailbreak & Unlock iOS 4.0.2 on iPhone 3G

Those of you who own an iPhone 3G or an iPod Touch 2G (non-MC model) can jailbreak/unlock iOS 4.0.2. To jailbreak your iPhone 3G 4.0.2, you will have to use RedSn0w 0.9.5b5-5.

How to Jailbreak iPhone 3G iOS 4.0.2

Step 1: Make sure you have the latest version of iTunes installed (iTunes 9.2).

Step 2: Download iOS 4 (not iOS 4.0.2) for iPhone 3G to your desktop from our iPhone downloads section.

Step 3: Update your iPhone to iOS 4.0.2 via iTunes.

Step 4: Download the latest version of RedSn0w from here.

Step 5: Point RedSn0w to the iOS 4 (not 4.0.2) you downloaded in step 2.

Step 6: Select “Install Cydia”.

Step 7: Follow the onscreen instructions.

Step 8: Let RedSn0w do the hard work for you. Once jailbroken, your iPhone will reboot.

How to Unlock iPhone 3G iOS 4.0.2

Since iOS 4.0.2 didn't update the iPhone baseband, you can still use UltraSn0w to unlock your iPhone.

Step 1: Jailbreak your iPhone using the method described above.

Step 2: Go to Cydia and search for UltraSn0w. If it’s not there, you might have to add the following repo: repo666.ultrasn0w.com

Step 3: Install UltraSn0w.

Step 4: Reboot your iPhone.

Tell us how it goes for you by leaving a comment below.

[Thanks Bruce for the tip]

How to Jailbreak Your iPad iOS 3.2.1 with JailbreakMe

There's a new jailbreak in town and its name is JailbreakMe. Jailbreak me will jailbreak your iPad running iOS 3.2.1 or lower in less time than it takes to say it.

JailbreakMe is what we call a browser-based userland jailbreak. It can be done directly from your iPad and doesn't require a restore or anything like that. This tutorial will show you how to jailbreak your iPad 3.1.2 using JailbreakMe.

Step 1: Make sure that you have backed up your iPad in iTunes. If something goes wrong, you can always restore.

Step 2: On your iPad, go to www.JailbreakMe.com.

Step 3: Slide the "Slide to Jailbreak" thinggy and let JailbreakMe work its magic.

Step 4: After a minute or so, you will get a pop up saying that Cydia was installed on your iPad.

Step 5: Reboot. Done!

Wasn't that easy?

iPhone 4 User Guide

Just got a new iPhone 4 and you're not sure how to use it? That's why Apple created an iPhone 4 user guide. From setting up your email to adding contacts, this 244 page PDF will walk you through every single step of the iPhone set up.

Obviously this iPhone 4 user guide was not designed for people who already own an iPhone but I'm sure it will help first-time iPhone owners.

You can download the iPhone 4 user guide in PDF from here, or just go to help.apple.com/iphone/ from your iPhone.

If you have a specific question about the use of your iPhone, please DO NOT ask it here. Instead, go to our forums where other users will be able to help you.

The Ultimate Guides to iOS 4

iOS 4 was released yesterday and comes with over 100 new features. If you haven't updated your iPhone yet, you may want to consider it so you can take advantage of all these new features.

I started writing a guide of all these new features, shortcuts and settings but I quickly realized that many other blogs before me had already created such comprehensive guides. Instead of trying to reinvent the wheel, I figured it'd be easier to direct you to these guides.

So I found two good guides that I want to recommend you to check out:

Gizmodo's complete guide to using iOS 4 LifeHacker's new iOS 4 shortcuts, features and settings your need to know

These 2 websites will show you the most exciting features of iOS 4.

iPhone User Guide

The other day as I was trying to figure out how to add songs being played on the iPod to my on-the-go playlist, I landed on Apple's website.

As I was already bitching at Apple for not even bothering creating a mobile version of their website, I was positively surprised to see that they actually had an iPhone User Guide formatted for the iPhone.

I wasn't aware of this iPhone User Guide and even though it didn't solve my problem, I found it pretty interesting to browse for a while (I actually learned a new trick).

You can access the mobile version of the user guide by going to http://help.apple.com/iphone/.

I might be a little late on that one but if you haven't been there yet, it might be worth to go check it out. Now that I think about it, doesn't this iPhone User Guide comes with the stock Safari bookmarks of the iPhone?

How to Unlock iPhone 3.1.3

This guide and tutorial will show you how to unlock iPhone 3.1.3 using UltraSn0w or BlackSn0w, depending on your iPhone baseband.

The first step is to jailbreak your iPhone 3.1.3, either with RedSn0w or with PwnageTool. Note that PwnageTool is the preferred method as it helps preserve the baseband.

You can use UltraSn0w to unlock these basebands:

04.26.08 05.11.07 05.12.01 05.13.04

To find out what your baseband is, go to Settings > General > About > Modem Firmware.

How to unlock iPhone 3.1.3 with UltraSn0w Launch Cydia. Add the following source to Cydia repo666.ultrasn0w.com (note there is a “0″ in sn0w, not an “o”). After installing this source in Cydia, search for “ultraSn0w”. Install UltraSn0w and reboot your iPhone. How to unlock iPhone 3.1.3 with BlackSn0w Launch Cydia. Add the following source: http://blackra1n.com. After installing this source in Cydia, search for "BlackSn0w". Install BlackSn0w and reboot your iPhone.

Your iPhone should now be unlocked. If you have questions or comments on how to unlock iPhone firmware 3.1.3, please leave a comment.

UPDATE: This post is outdated. Check out our unlock section for the latest information about iPhone unlocking.