Tutorials

Make Your iPhone Icons Smaller With Shrink

Shrink is a new application available in Cydia that lets you size down your iPhone icons in order to fit more on the screen. Well, at least that's what it says in the description as I was not able to fit more than 4 icons per row, but I might be missing something.

After installing Shrink from Cydia, simply go to your Settings.app. From there, you can reduce the size of your iPhone icons to up to 25% of the actual size (see screenshot).

The good thing is that Shrink is fully compatible with WinterBoard and InfiniDock. The downside is that it also shrinks your badges, making it almost impossible to see how many unread emails you have, for example.

All in all, I think Shrink does a pretty good job at reducing the size your icons, if that's what you're looking for. If not, then save yourself $0.99, which is the price to download Shrink in Cydia.

Have you tried Shrink? What do you think about it?

How to Recover Pictures Deleted by Spirit

Although Spirit is probably the easiest and fastest jailbreak ever, it does come with its share of problems. After jailbreaking their iDevice with Spirit, many people reported the loss of their pictures. This issue was fixed by Comex when he released an update to Spirit, but what happens to those of you who lost their pictures before the update?

I spotted an article that explains how to recover those missing pictures after jailbreaking your iPhone or iPad with Spirit. The process is pretty simple and it shouldn't take more than a couple of minutes.

For this to work, you will have had to backup your iPhone or iPad before jailbreaking. If you did not backup your device before jailbreaking with Spirit, then this will not work for you.

How to recover deleted photos from your iPhone or iPad after jailbreaking with Spirit

Step 1: If you haven't already, install OpenSSH from Cydia.

Step2: Download iPhone Backup Extractor (for Windows 32 bit or 64 bit - for Mac OS X).

Step 3: Launch iPhone Backup Extractor. It will automatically find backups available on your machine. Select the right one.

Step 4: Navigate to Media/Media/DCIM and select this folder. Click next to save it on your computer.

Step 5: Using CyberDuck for Mac of WinSCP for Windows, SSH into your device.

To find your IP address, on your device, go to Settings > Wifi > Tap on the blue arrow of the network you're on. Username is root. Password is alpine

Step 6: Navigate to User/Media and replace the existing DCIM folder by the one you downloaded to your computer in step 4.

Step 7: Reboot your device.

Done! All your lost pictures after using Spirit should be recovered.

How to Mount An External Hard Drive on the iPad

Yes, you read it right, you can mount an external hard drive on your iPad. This hack isn't the easiest one to perform but it's not very complicated either. If you know your way around Terminal, SSH and the likes, you should be fine.

Maxwell Shay wrote a very good tutorial on how to mount an external hard drive to a jailbroken iPad. I haven't tried it myself but I wanted to share the info with you as I think it's a pretty nice accomplishment. You can read the full tutorial here.

If you try to add an external hard drive to your lovely iPad, let us know how it went by leaving a comment.

Official iPhone Unlock the Easy (But Expensive) Way

You may have heard that in certain countries, carriers offer their customers the possibility to buy unlocked iPhones. These iPhones don't differ from yours. They have exactly the same hardware and exactly the same software.

How does this official unlock work?

The difference between a locked iPhone and an officially unlocked one is due to the IMEI number, a number unique to every phone (it's like a fingerprint if you want). When officially unlocked, your IMEI is added to an Apple database which authorizes the device for unlocking.

Fine, but how to add your IMEI to the database? Well, turns out there are some people out there who seem to have the right connections at the right companies. After doing some research, I found one of these companies. According to their website, they know people at T-Mobile Germany (which offers officially unlocked iPhones). You can just pay them a hefty $190 and they will submit your IMEI to T-Mobile, who will add you to the official iPhone unlock database.

Apparently, it takes somewhere from 4 to 25 days to get this done. Once the addition to the database is processed, you can simply connect your iPhone to iTunes, follow the prompts to install a new carrier settings update, and you should be good to go.

I contacted this company about a month ago to get more information but they never replied to me, which is why I don't bother mentioning their name in this article.

Two days ago I talked to one of my friends who owns a mobile store in France. He's in the process of being approved by Apple to resell the iPhone so I asked him if he would be able to provide this official unlocking service to his future Apple customers. He told me he wouldn't take the risk but he said that he knows a few store around town that can do it for you for about $100.

It sure is expensive but the main benefit is that this iPhone unlock is permanent. Unlike some of the software unlocks such as UltraSn0w or BlackSn0w, you’ll be able to update your iPhone firmware without losing your unlock.

Would you be willing to pay nearly between $100 and $200 for an official unlock?

How to Set Up A Bookmarks Bar on Safari for iPad

A bookmarks bar allows you to quickly access your favorite sites. Since the iPad has a pretty big screen, it's now possible to show a bookmark bar in Safari.

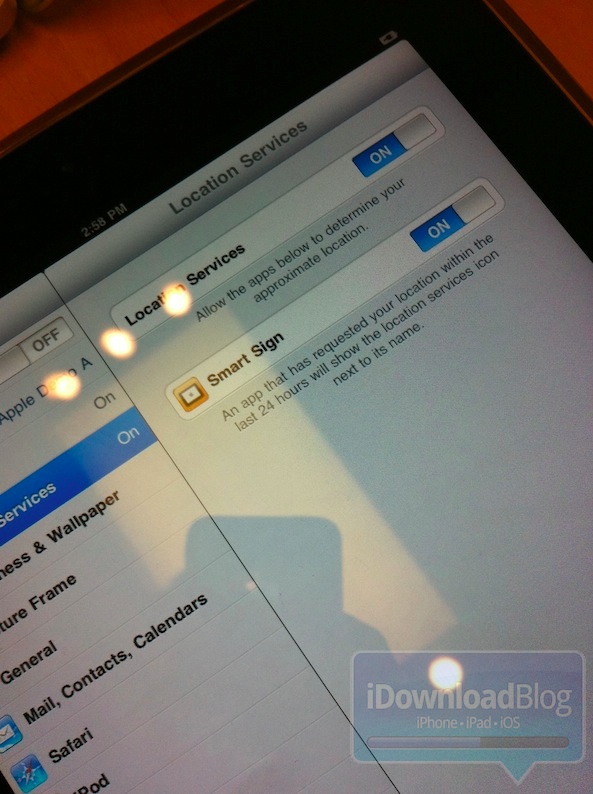
By default, the bookmark bar in Safari for iPad is hidden but you can easily activate it by going to Settings > Safari > Always show bookmarks bar.

To add bookmarks in the bar, you will have to save new bookmarks in the "bookmarks bar" folder.

That's a simple tip that can come in very handy if like me you like to optimize the amount of clicks (or taps).

iPhone Tethering: How to Tether iPhone 3.1.3

With Internet tethering on your iPhone, you don’t need wifi to surf the web from your computer. Tethering your iPhone allows you to share the 3G or Edge connection on your iPhone with your laptop and connect to the Internet anywhere.

A while ago, I wrote about tethering iPhone 3.1.2. Today, I'd like to show you how to tether iPhone 3.1.3.

UPDATE: This post is outdated. Please check out this page for the latest information about iPhone tethering.

Tethering iPhone 3.1.3

You have 2 options to set up internet tethering on your iPhone 3.1.3.

Option 1: If your iPhone is jailbroken

If your iPhone is jailbroken, you can simply install the MyWi app from Cydia ($10). Not only MyWi allows you to tether your iPhone, but it can also turn your iPhone into a wifi hotspot. If your iPhone is not jailbroken and you want to jailbreak it, read our Spirit jailbreak tutorial.

Option 2: If your iPhone is not jailbroken

UPDATE: I have tried this option on an iPhone 3G and it works fine. Many of you reported in the comments that it does not work. Proceed at your own risk...

If for some obscure reasons you do not want to jailbreak your iPhone but still want to tether it, there is another solution:

From your iPhone, navigate to Help.BenM.at Tap on "Tethering" Choose your country Choose your carrier Tap "Download" Tap "Install" Reboot your iPhone

After rebooting your iPhone, you should see a new option under Settings > General > Network > Internet Tethering. By turning Internet Tethering on, you will be able to share your iPhone internet connection with your laptop.

Note that for this to work, your SIM card should NOT be locked with a PIN. If so, simply deactivate the PIN lock in the settings.

That's this simple. You should now be able to tether your iPhone 3.1.3.

Fix For “Spirit Requires iTunes 9 to Function”

The Spirit jailbreak tool is probably the easiest jailbreak ever, however, like every piece of software, it is not perfect. Even though Spirit was updated yesterday, a few users still face issues.

One of the most common one is the error saying that "Spirit Requires iTunes 9 to function. Please install a correct version of iTunes and run Spirit again."

In this case, Spirit believes you are not running the correct version of iTunes, even though you are.

There is a simple fix for this:

Step 1: Download Spirit Fixer by Kirma (mirror link)

Step 2: Extract the downloaded file then run Spirit.Fixer.By.Kirma.v1.01.exe

Step 3: Run Spirit.exe

It should work.

[via Tech Petals]

How to Make Your iPhone Apps Run in Full Screen Mode On Your iPad

iPhone applications that have not been optimized for iPad yet don't look so good on the iPad. Sure you have the option to blow up the iPhone apps by hitting the "2x" button, but the pexilization is so bad that it makes this feature almost useless.

For those of you who jailbroke your iPad with the newly released Spirit (see Spirit jailbreak tutorial), there is a solution that will allow you to blow up your apps to fit the full screen, without having the dirty pixelization.

I initially saw this on Remond Pie but the instructions didn't work at all for me. So I dug a bit more and I found something on ModMyI that perfectly worked for me.

Step 1: Download iPhoneBrowser and launch it. In Cydia, download Afc2Add and reboot your iPhone.

Step 2: Plug your iPad in and navigate to /var/mobile/Applications.

Step 3: Find the application you want to hack and search for the info.plist file in the app's main folder.

Step 4: Copy the info.plist file to your desktop.

Step 5: With a text editor such as TextWrangular (for Mac) or Plist Editor (for Windows), edit the info.plist file to add the following:

<key>UIDeviceFamily</key> <array> <integer>1</integer> <integer>2</integer> </array>

Step 6: Save the file and drop it back in its location in the app's main folder.

Step 7: Reboot your iPad.

I tried the following hack on several apps. I didn't work for many of them but it did work for a few like Tweetie, and I know it works for Facebook as well. I think it completely depends on how the app is designed. Graphic heavy apps don't seem to do well, whereas text oriented apps such as Tweetie do well.

How to Jailbreak Your iPhone or iPad With Spirit

Spirit has to be the easiest and quickest jailbreak ever. JailbreakMe was fast, but Spirit takes it to a whole new level. I'm not really sure a Spirit tutorial or guide is necessary because it is so simple...

Before thinking about jailbreaking your iDevice with Spirit, there are a few requirements that you need to know about. Please head over to this post I wrote earlier to read the "fine prints" and make sure you know exactly what you're doing.

I wrote this guide by jailbreaking my iPad using Spirit but the steps are exactly identical for the iPod Touch and iPhone. Steps are also identical whether you're on a Mac or PC.

Note that Spirit is a jailbreak for every device. It will NOT unlock your iPhone.

How to jailbreak your iPhone, iPod Touch, or iPad with Spirit

Step 1: Download Spirit from our download page.

Step 2: Make sure you have at least version 9 of iTunes.

Step 3: Back up your iPhone, iTouch or iPad in iTunes, just in case something goes wrong.

Step 4: Launch Spirit.

Step 5: Click "Jailbreak".

Step 6: Wait just a few seconds until you see this image:

Step 7: Your iPhone will reboot and you should have the Cydia icon on your springboard.

Congrats, you just jailbroke your iPhone / iPod Touch / iPad using Spirit.

Errors & Troubleshooting

Windows Vista or Windows 7 users may get the error c0000005.

To avoid this error, you have to run Spirit.exe in compatibility mode. To do so:

Right click on Spirit.exe and select Properties Select the compatibility tab Check the “Run this program in compatibility mode for” box and select Windows 98 / Windows ME

How to Save Your SHSH Blobs with AutoSHSH

With the upcoming release of the Spirit jailbreak, there are a few things you need to do in order to be on the safe side should something go wrong in the future. One of these things is to prepare your iPhone, iPod Touch, or iPad by saving the SHSH blobs.

In this tutorial, I will show you how to save your SHSH blobs on a Windows machine, using AutoSHSH. This guide was written for an iPad, but  the steps are identical for the iPhone and iPod Touch.

Step 1: Open iTunes and plug your iDevice. Back it up. When done, close iTunes and unplug your device.

Step 2: Download AutoSHSH.

Step 3: Put your iDevice in recovery mode. To do so, turn it off, hold the home button while plugging your device to the USB cable. Keep holding the home button until you see a "connect to iTunes" logo. If iTunes launches, close it.

Step 4: Launch AutoSHSH. Make sure you are connected to the Internet and that you have Java Runtime installed. If not, download and install it. Also make sure your device is in recovery mode and connected to your computer.

Step 5: Click "grab my SHSH blobs automatically". AutoSHSH will start to work its magic.

Step 6: AutoSHSH will finally ask you where you want to save the file on your computer. Select a convenient location (ie. desktop).

Step 7: Reboot your device.

Done! Your SHSH blobs are now saved locally and on Saurik's server. In the event that something goes wrong, you are covered!

How to Prepare Your iPhone or iPad for the Spirit Jailbreak

Even though Comex delayed the release of Spirit, we know that we're just a few days away from the official release date. Spirit will sure be able to jailbreak your iPhone, iPod Touch and iPad, but the exploit used will most likely be patched in a matter of days by Apple.

To protect yourself in the event of an "accidental upgrade" to a newer firmware which would make you lose your jailbreak, you will have to save your SHSH blobs.

What is SHSH and why save them?

Taimur gave us a pretty good description of what SHSH are and why they are important:

"So first up, what exactly is SHSH blob or ECID SHSH? Well, it is basically is a unique signature which is checked against Apple servers whenever you decide to restore the firmware on any of your iDevice (iPhone, iPad and iPod touch). Once a new firmware is released, Apple stops signing the older firmware, hence making it impossible to restore back to the older firmware from iTunes.

Now to “why is it important to save SHSH blob”: The creator of Cydia has setup a new server which basically mimics Apple’s verification server and can save your older signature (SHSH blob) so that you can downgrade or restore back to the older firmware. This is important because if you don’t have your SHSH blob saved, and accidentally update to new firmware, you’ll loose your jailbreak and furthermore, you wont be able to downgrade back to older firmware to re-jailbreak your device."

The Dev Team warned us yesterday about the consequences and gave us simple directions on how to save our SHSH. There are 3 ways to do that:

If your iPhone is already jailbroken, you can save your SHSH on Saurik's server. If you're not jailbroken yet (ie. you have an iPad), you can use Firmware Umbrella to create a local copy of your SHSH blobs As an alternative to Firmware Umbrella, you can use autoSHSH

Note that saving or backing up your SHSH blobs is not vital or mandatory. It's just a safety step that will allow you to restore or downgrade should something go wrong in the future.

How to Remove Cydia Ads

Sure ads in Cydia are the bread and butter of underground developers, but sometimes ads can just be a little too intrusive or overwhelming. Worse, it can alter the whole user experience by slowing down the performances of Cydia.

Our buddy over at FSM found a nice way to get rid of the ads in Cydia. If you want to increase Cydia's performance, this simple hack is for you.

SSH into your iDevice and browse to /Applications/Cydia/ and create two copies of package.js computer ( one is your backup and you will edit the other one ) . Inside that file search for var depiction = package.depiction .

Edit that line so that  depiction = package.depiction will become depiction = null .

Now save the file and copy it back to /Applications/Cydia/ , overwriting the original one. That’s it. Now restart Cydia and enjoy.

Pretty simple, isn't it? If you like this hack, make sure to thank @MurdaFSM on Twitter.